In this tutorial I will explain how to build a Docker server with Zabbix using agent 2.
Zabbix agent2 allows you to monitor Docker without needing to add a template or plugin to the agent because it does it natively.
Here is the official page : Docker monitoring and integration with Zabbix.
My environment:
- A Zabbix server installed.
- An Ubuntu server with Docker and agent2 already installed, the server is already under supervision in Zabbix.
Configuring the host in Zabbix to monitor Docker
We’re gone, we’ll start by configuring the host in Zabbix.
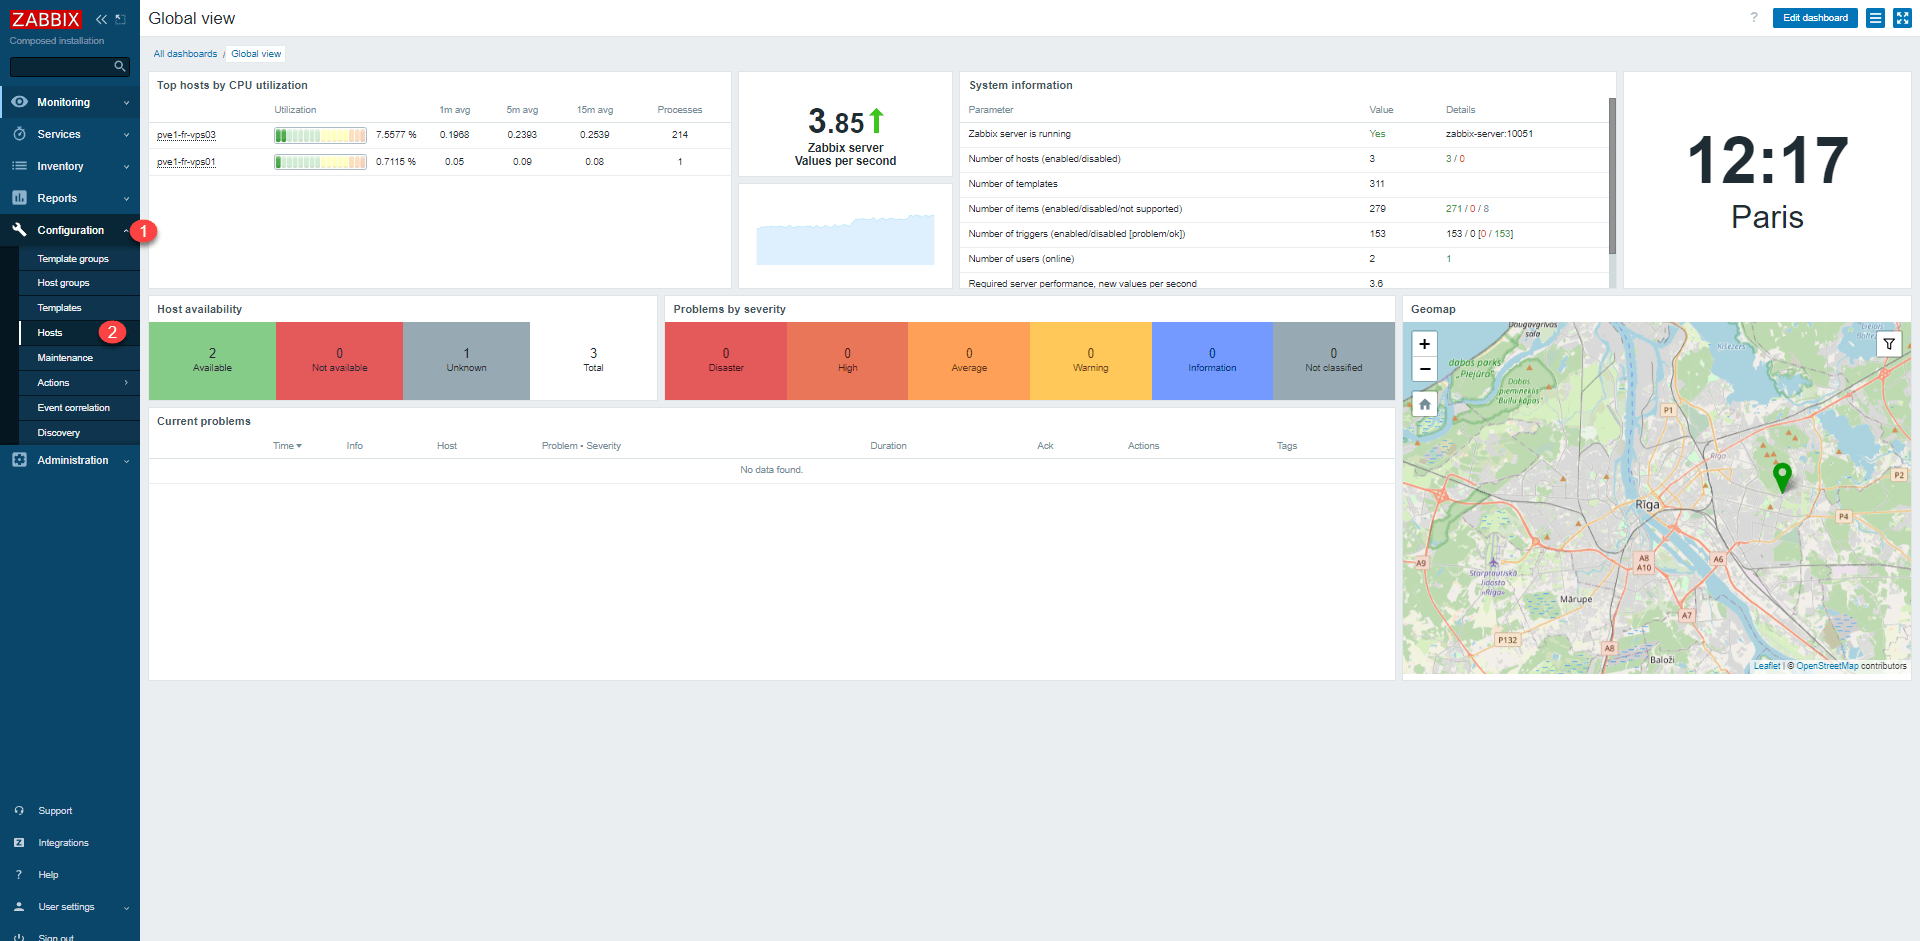
Go to the list of hosts, from the Configuration menu 1 then click on Hosts 2.
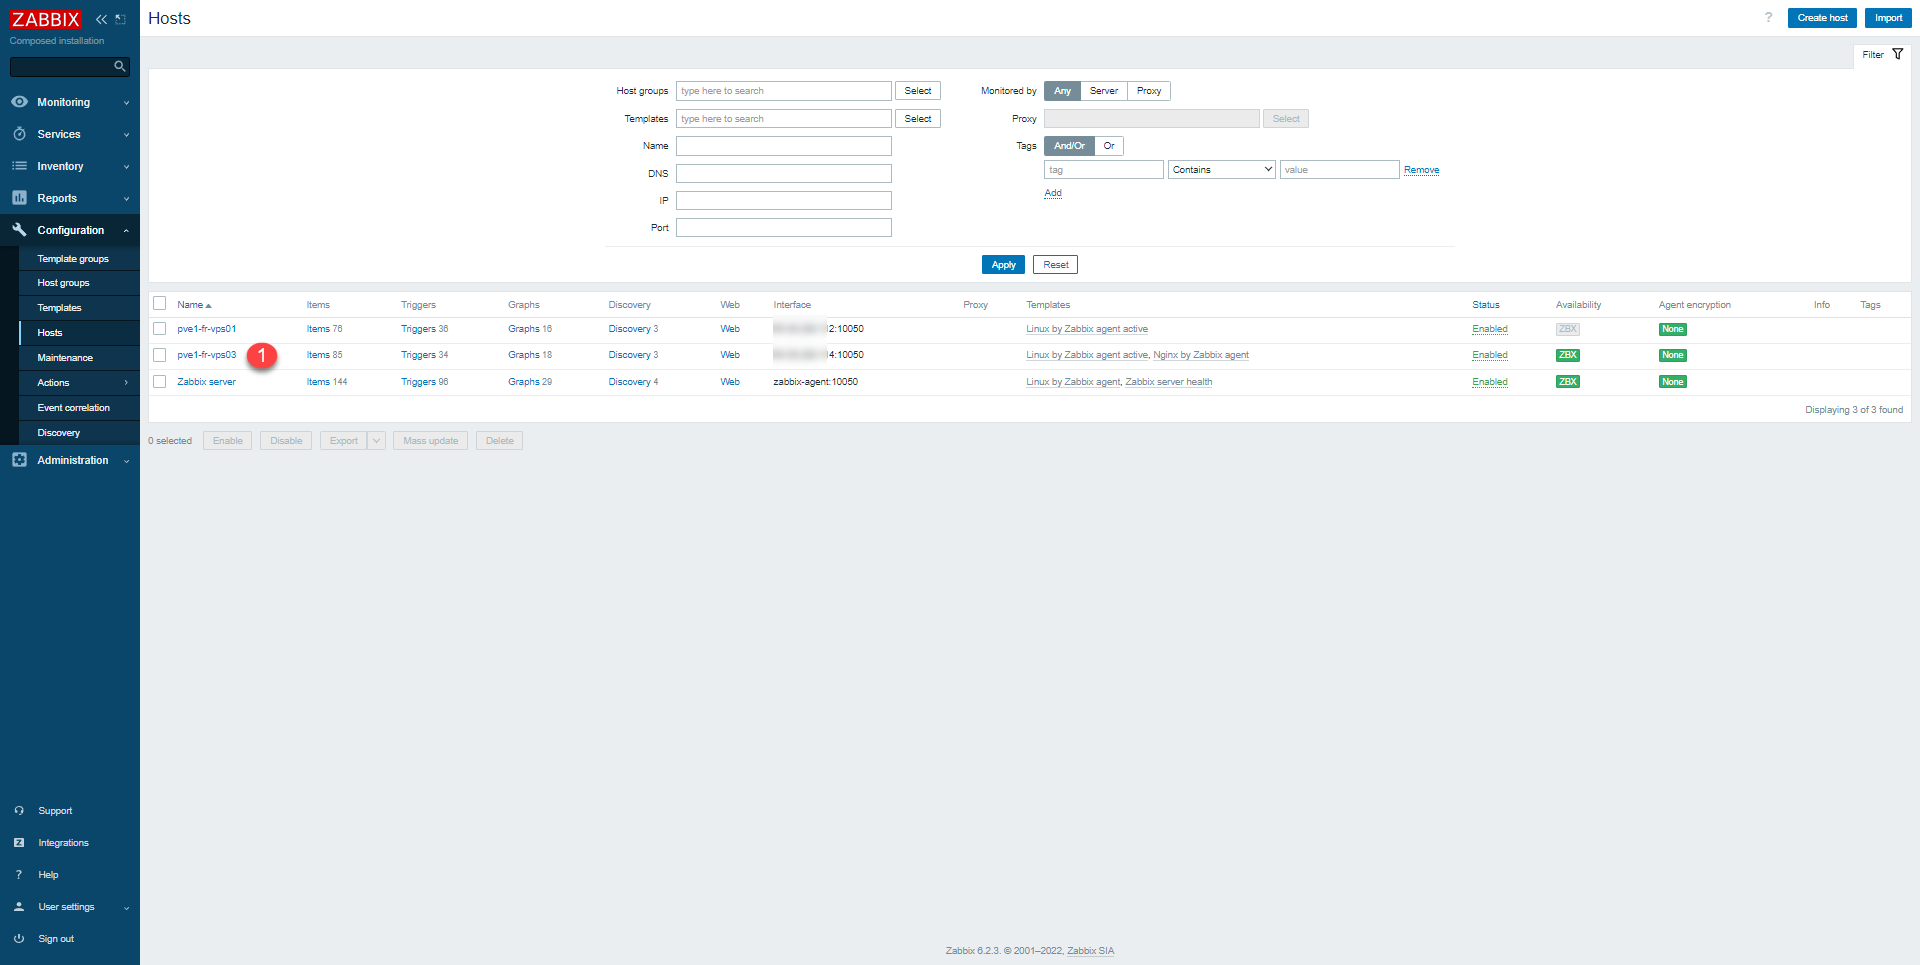
Click on the name of the ‘host 1 that you wish to modify.
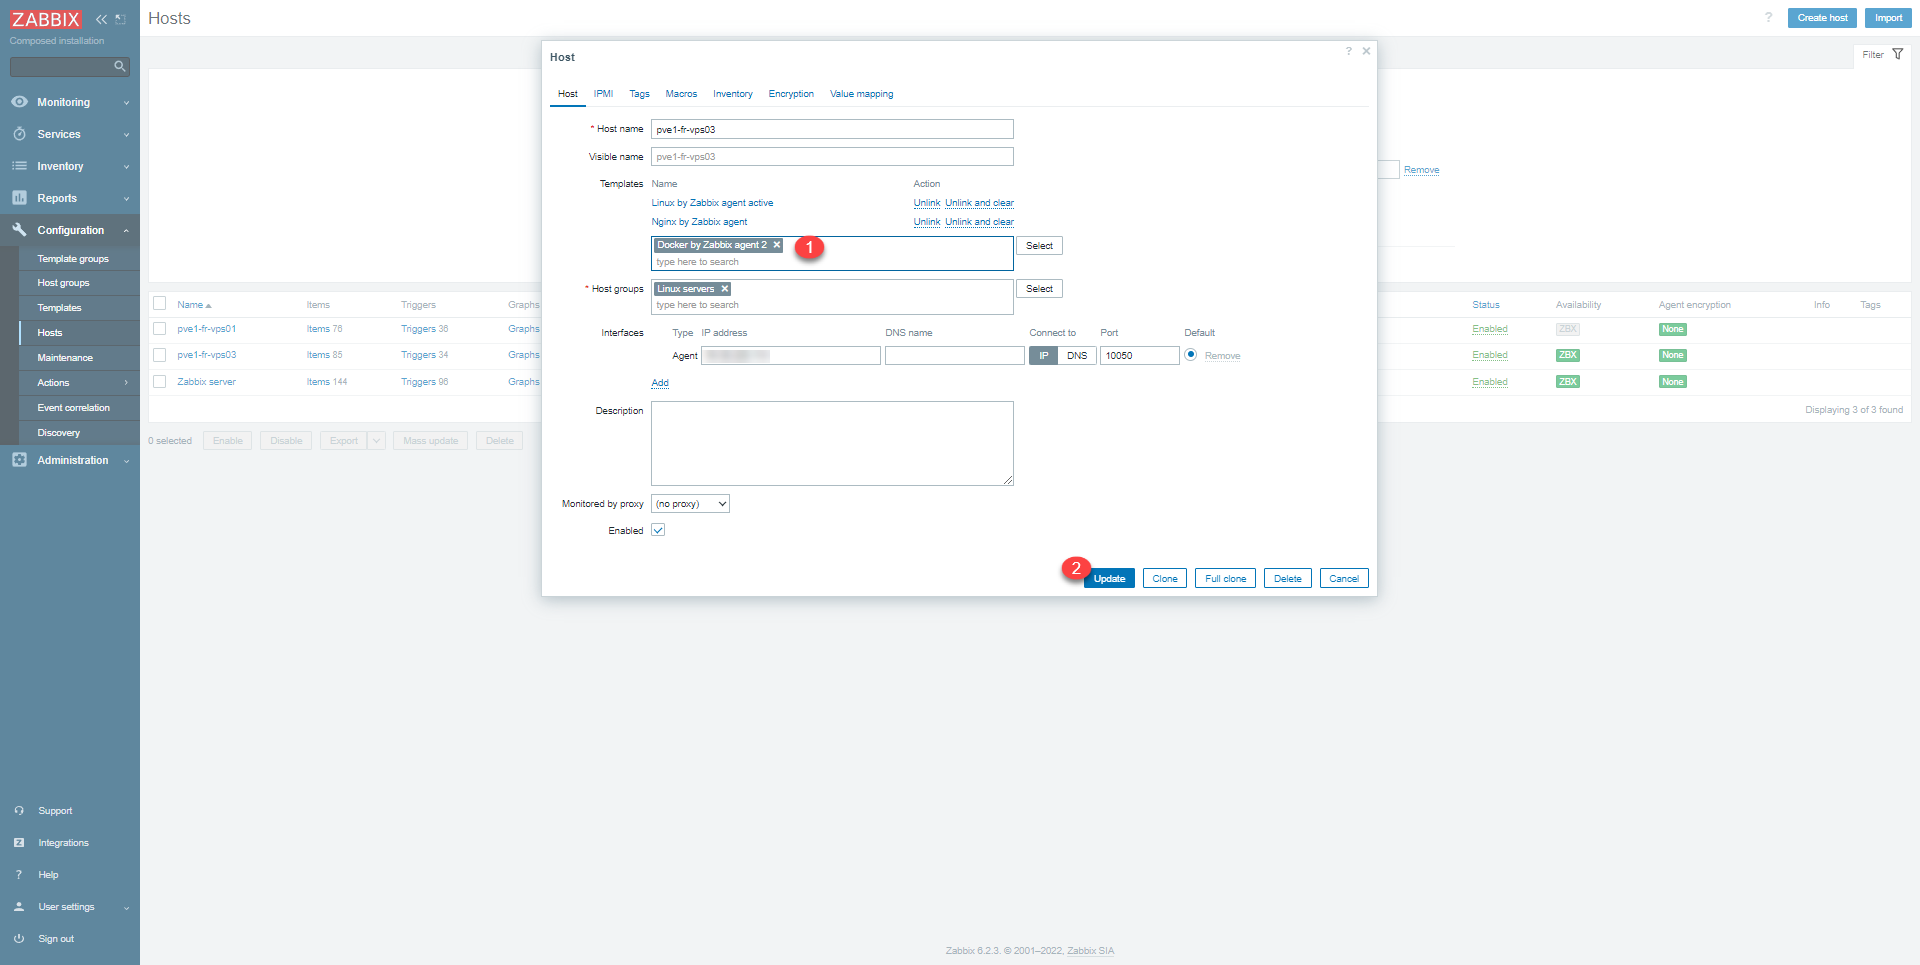
In the list of templates, search for Docker 1 and select Docker by Zabbix agent 2 2.

The Docker by Zabbix agent 2 1 template is selected, click on the Update 2 button to save.
We can see that the model has been added to the server.

Here is an overview of the elements that will be supervised and the findings:


Configuration on Docker server
The Docker server, a small manipulation must be done so that the Zabbix agent can collect data at the Docker service level. You must add the Zabbix user which is used by the agent, in the Docker group of the server.
To do this, enter the following command:
sudo usermod -aG docker zabbixThen restart the Zabbix agent service to take it into account:
sudo systemctl restart zabbix-agent2Analyze Docker monitoring data on the Zabbix web interface
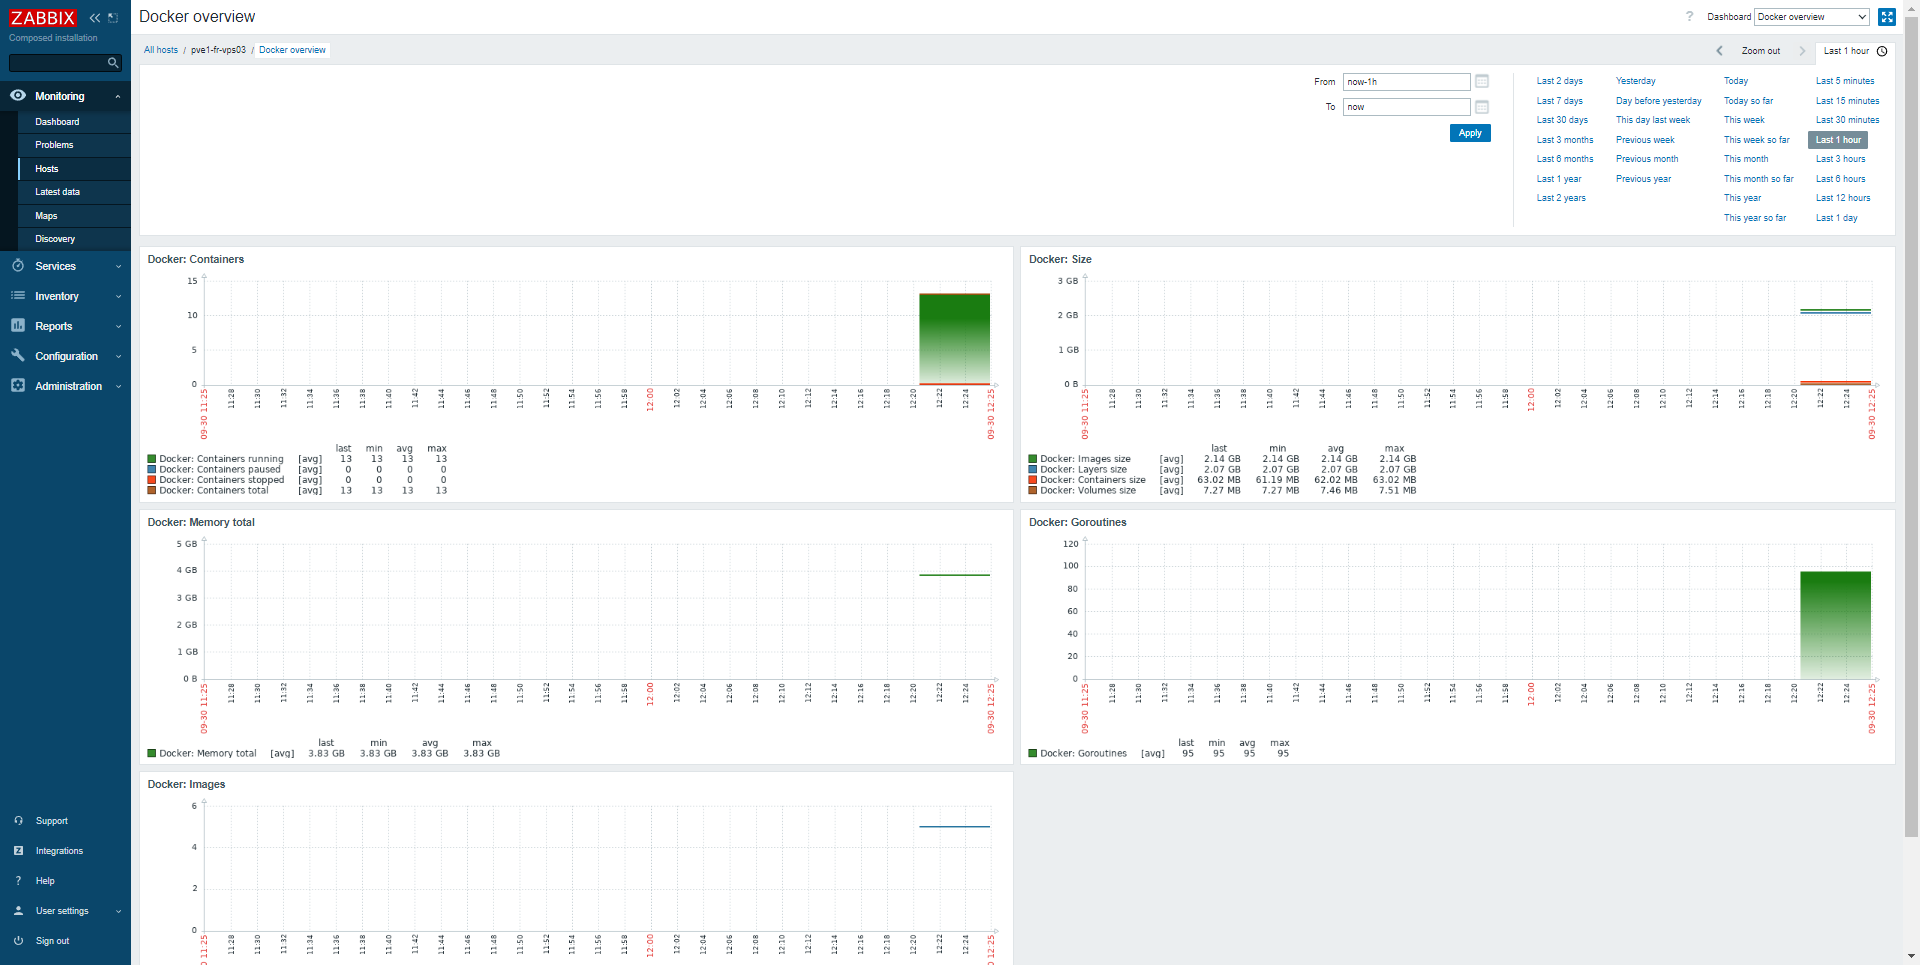
In terms of data reporting, you will have a dashboard, which will give statistics at the Docker level such as:
- the number of containers
- occupied disk space
- le nombre d’image s
- …
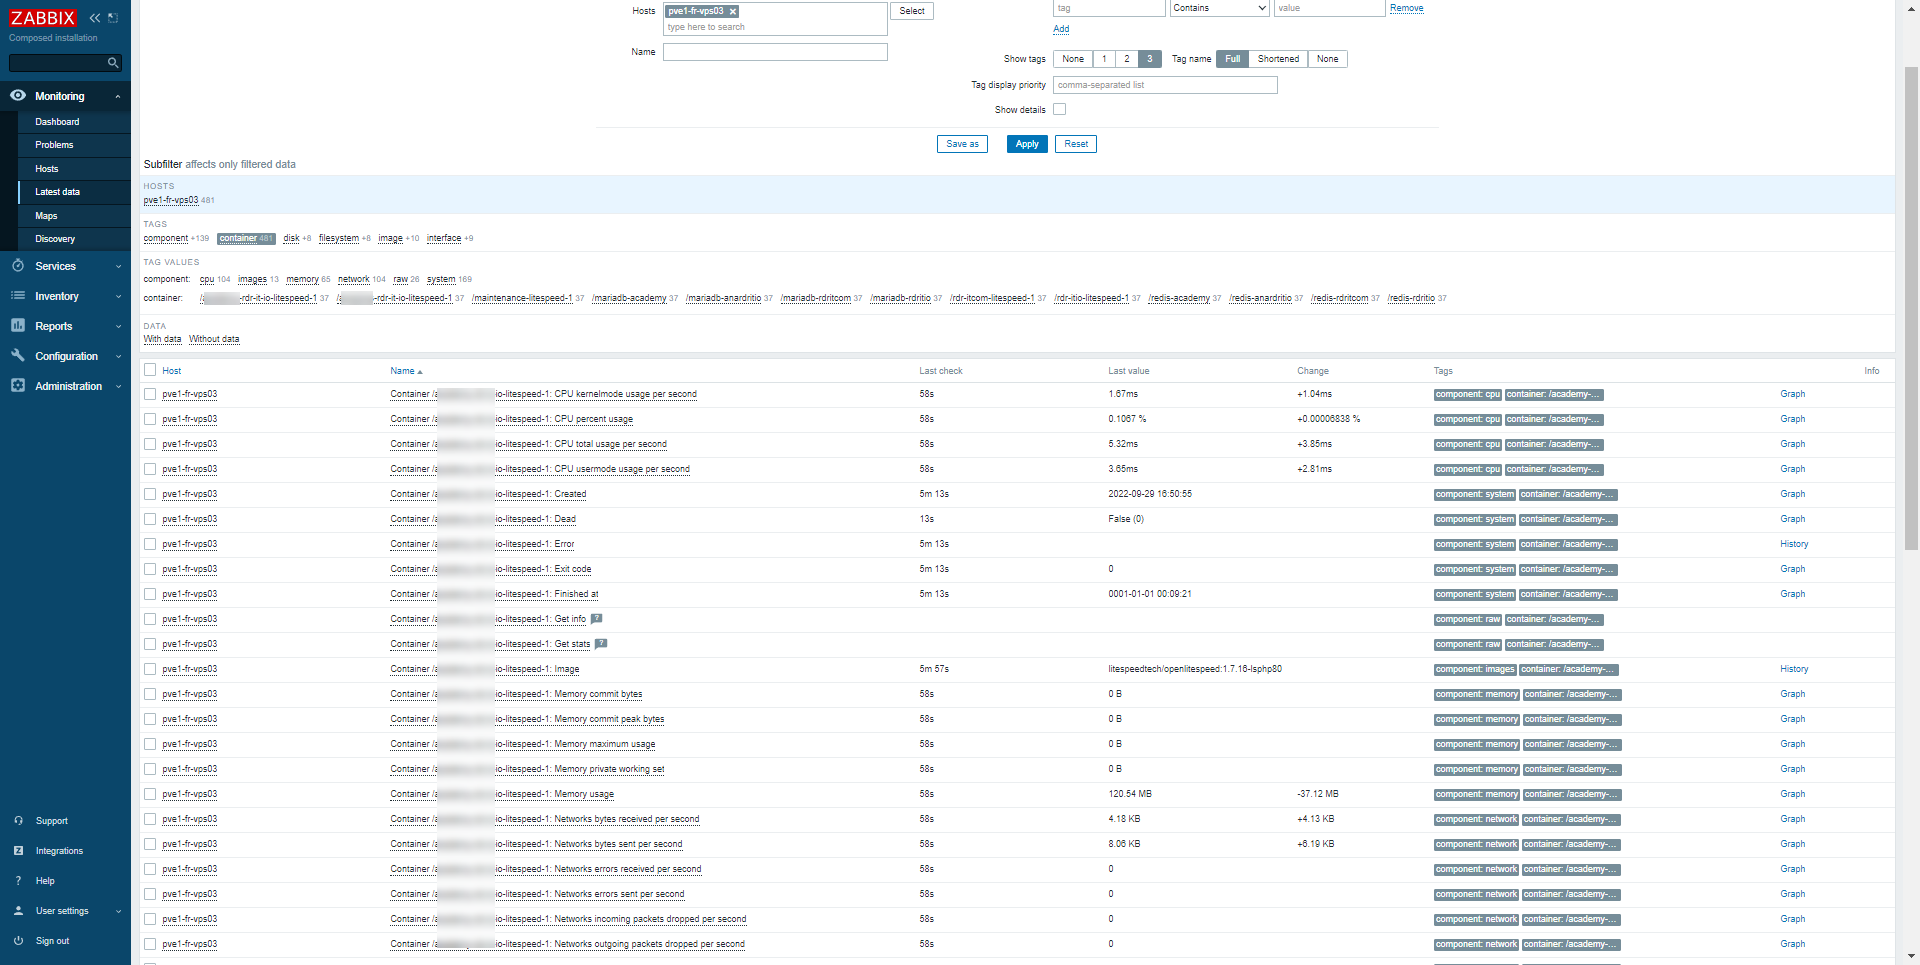
In the elements part (latest data), for each container, we find container performance metrics:
- CPU
- Ram
- Network traffic
- …
You now know how to monitor your Docker containers with Zabbix using Zabbix Agent2.