

In this “how to” tutorial, I will show you how to disable automatic updates on Windows Server 2016 and 2019.
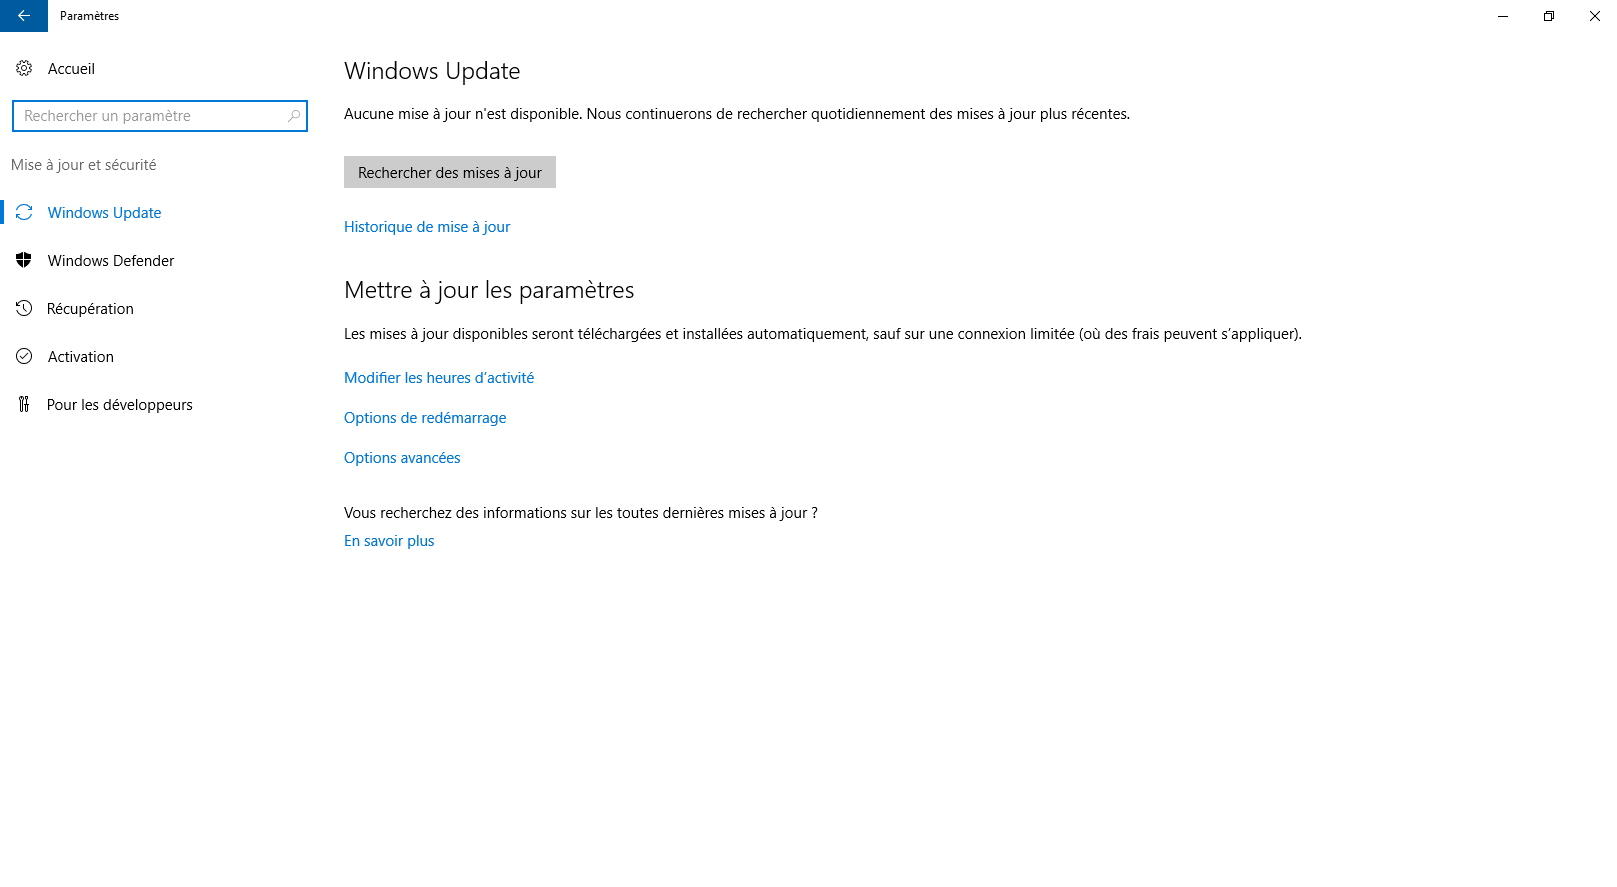
If we look in the Windows Update options in Windows settings, there is no option to disable or at least control the operation of updates.
However, there is a simple way on Windows Server to configure the behavior of Windows update without going through group or local policies, which I will explain to you now using the sconfig utility.
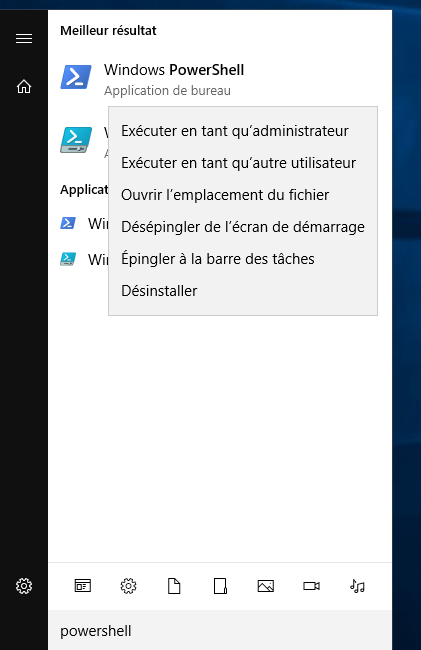
Open a PowerShell window as administrator
On the server, open a Windows PowerShell window as administrator.
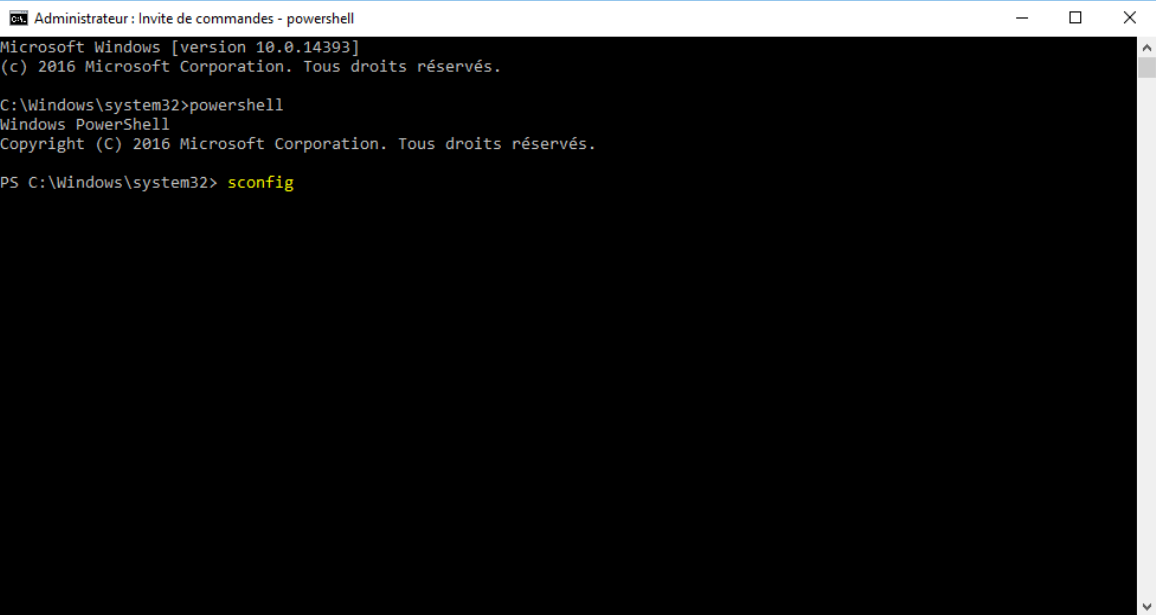
Open the sconfig utility
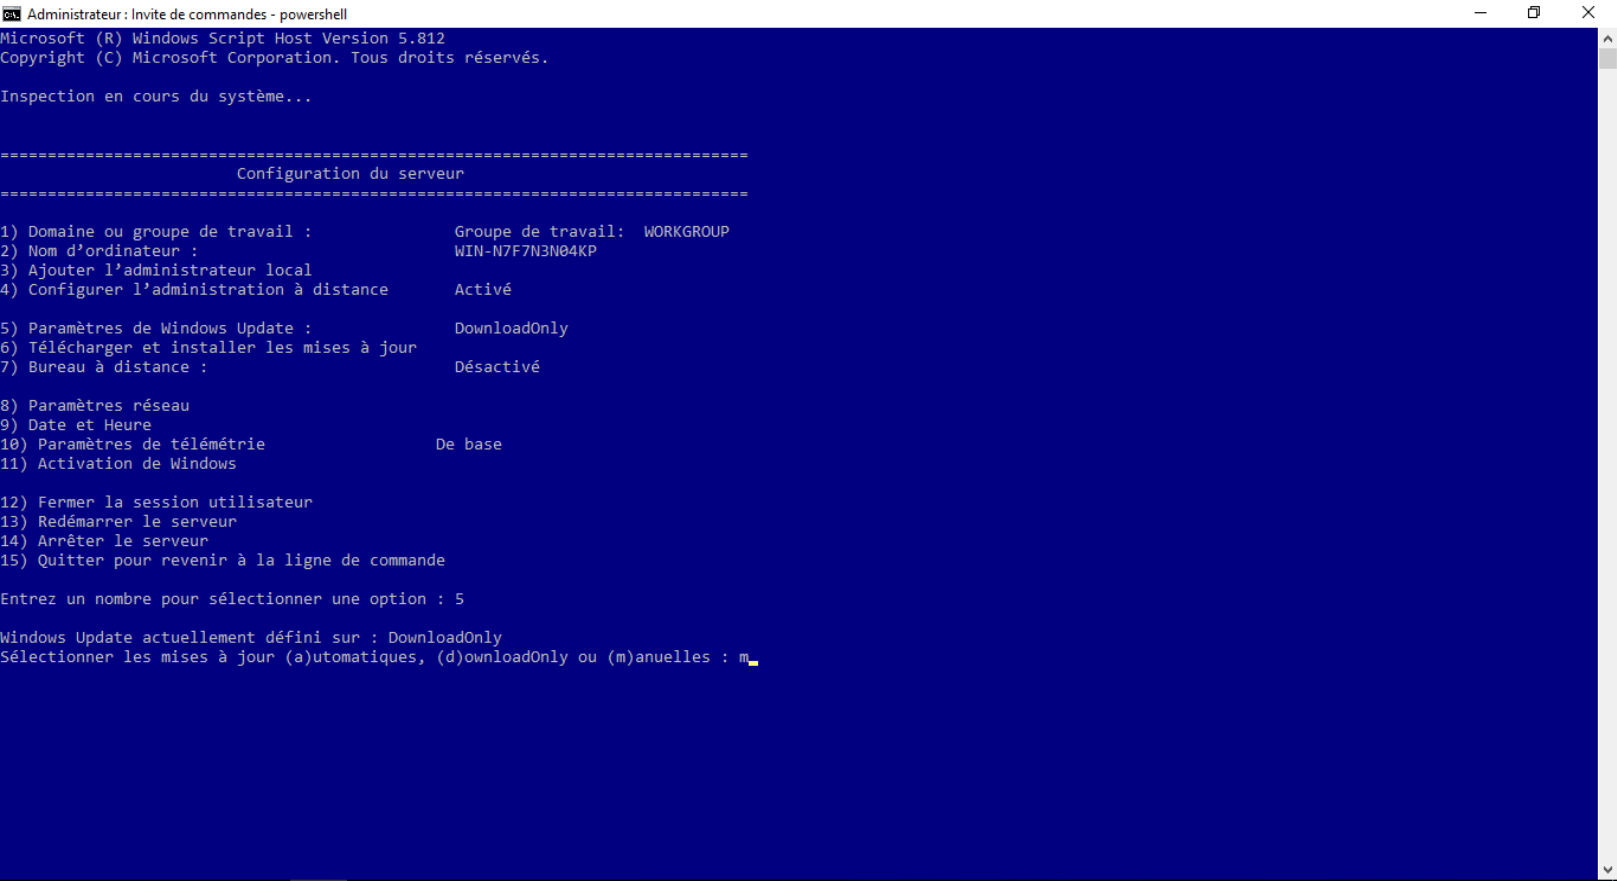
In the command prompt enter sconfig (server configuration) to launch the Windows server configuration utility.
Access the Windows Update configuration
To change the Windows Update configuration, enter option 5.
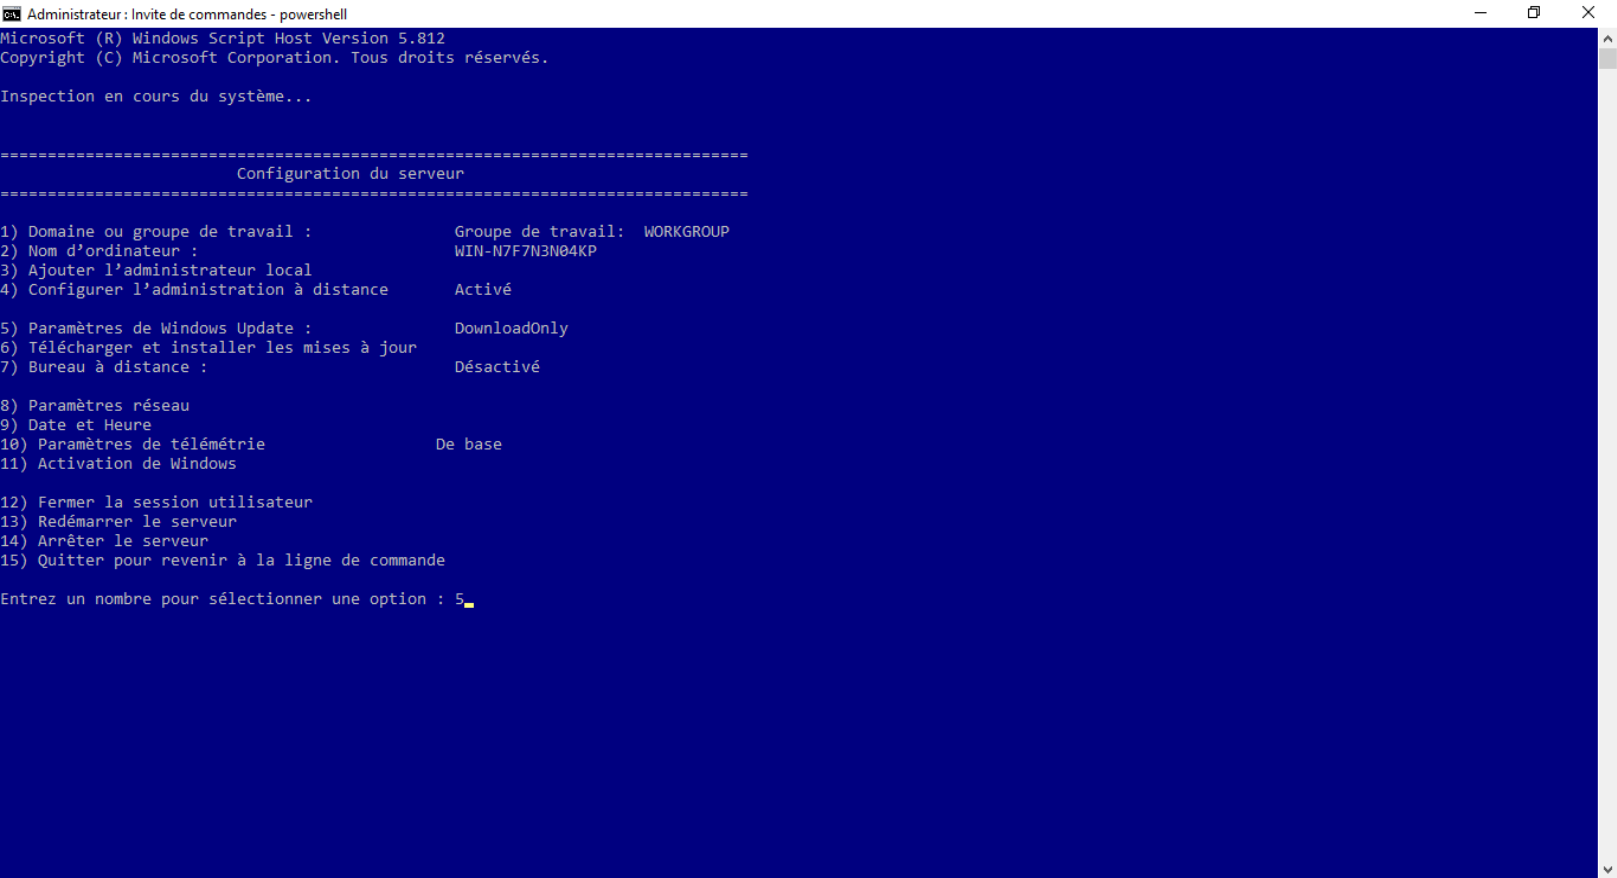
Configure automatic updates manually
Enter the letter m to configure the execution of the updates manually.
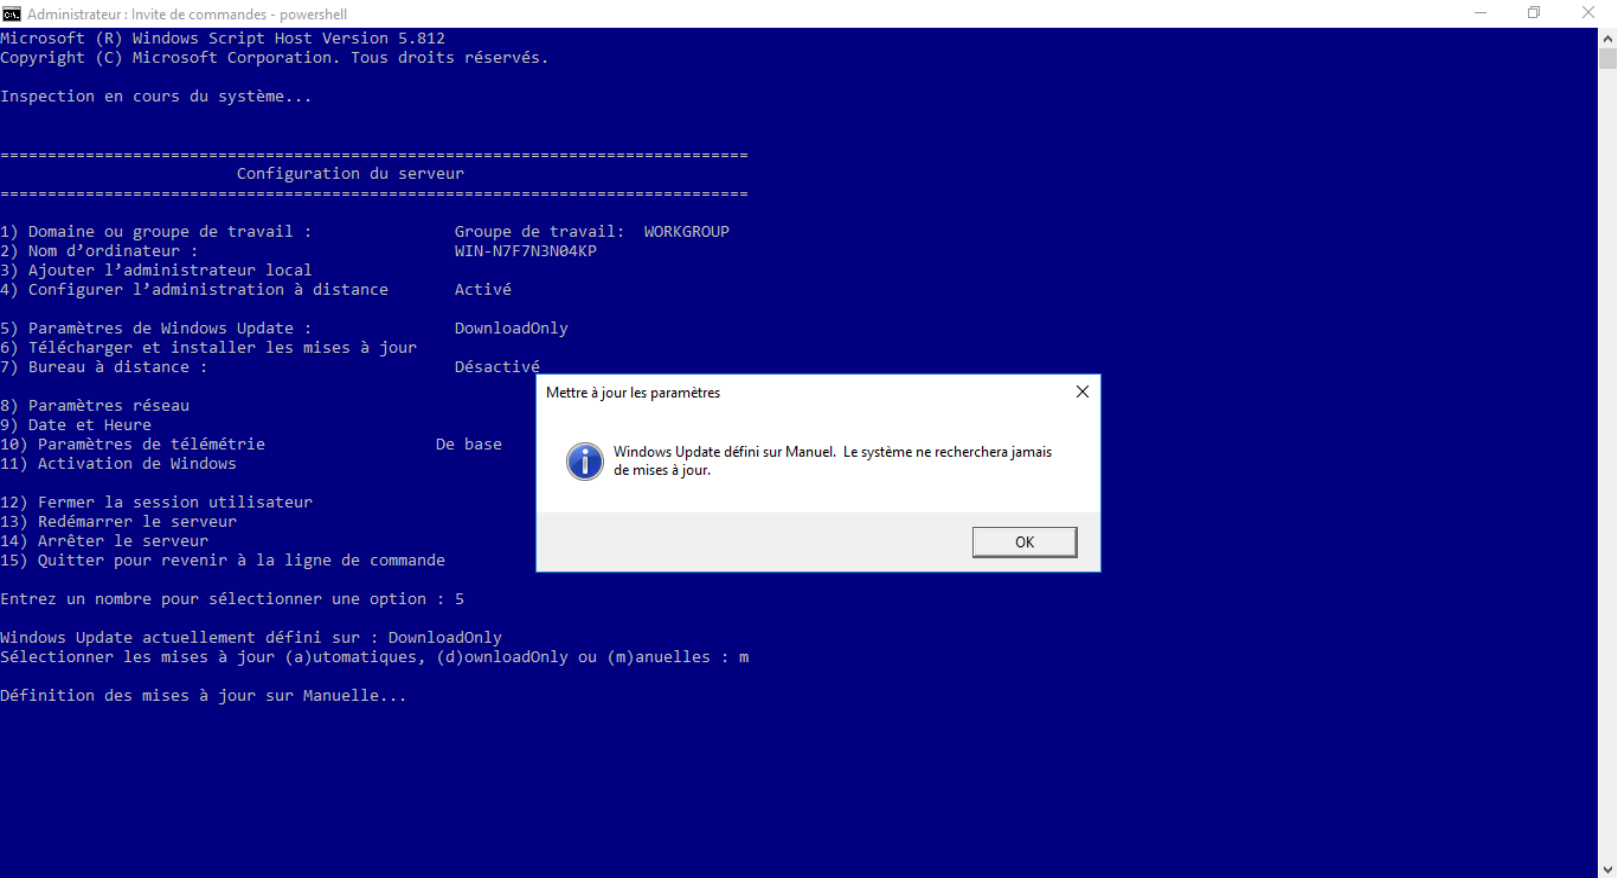
Automatic update disabled
A message is displayed indicating that Windows Update is set to manual mode. Click on OK to close the message.
You now know how to disable updates on Windows Server 2016 and 2019 with the sconfig utility.
In an Active Directory environment, if a group policy is applied, it will override the settings configured in sconfig.