In this tutorial, I will explain how to select the graphics card that will be used on software on Windows 10.
This manipulation is to be done mainly on laptops which are equipped with several graphics cards.
On mid-range and high-end laptops, they are often equipped with 2 graphics cards:
- Low consumption with limited performance
- A high performance graphics card that consumes more power.
By default, Windows 10 automatically manages graphics card management, depending on the power profile and battery level.
In this tutorial, I will explain how to assign an application to a graphics card.
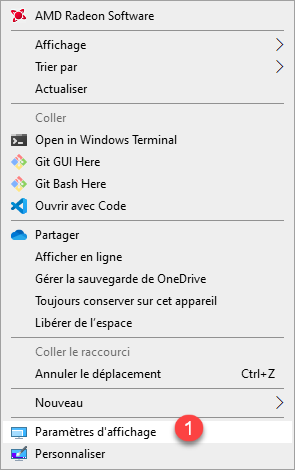
1. On the desktop, right-click and click on Display settings 1.
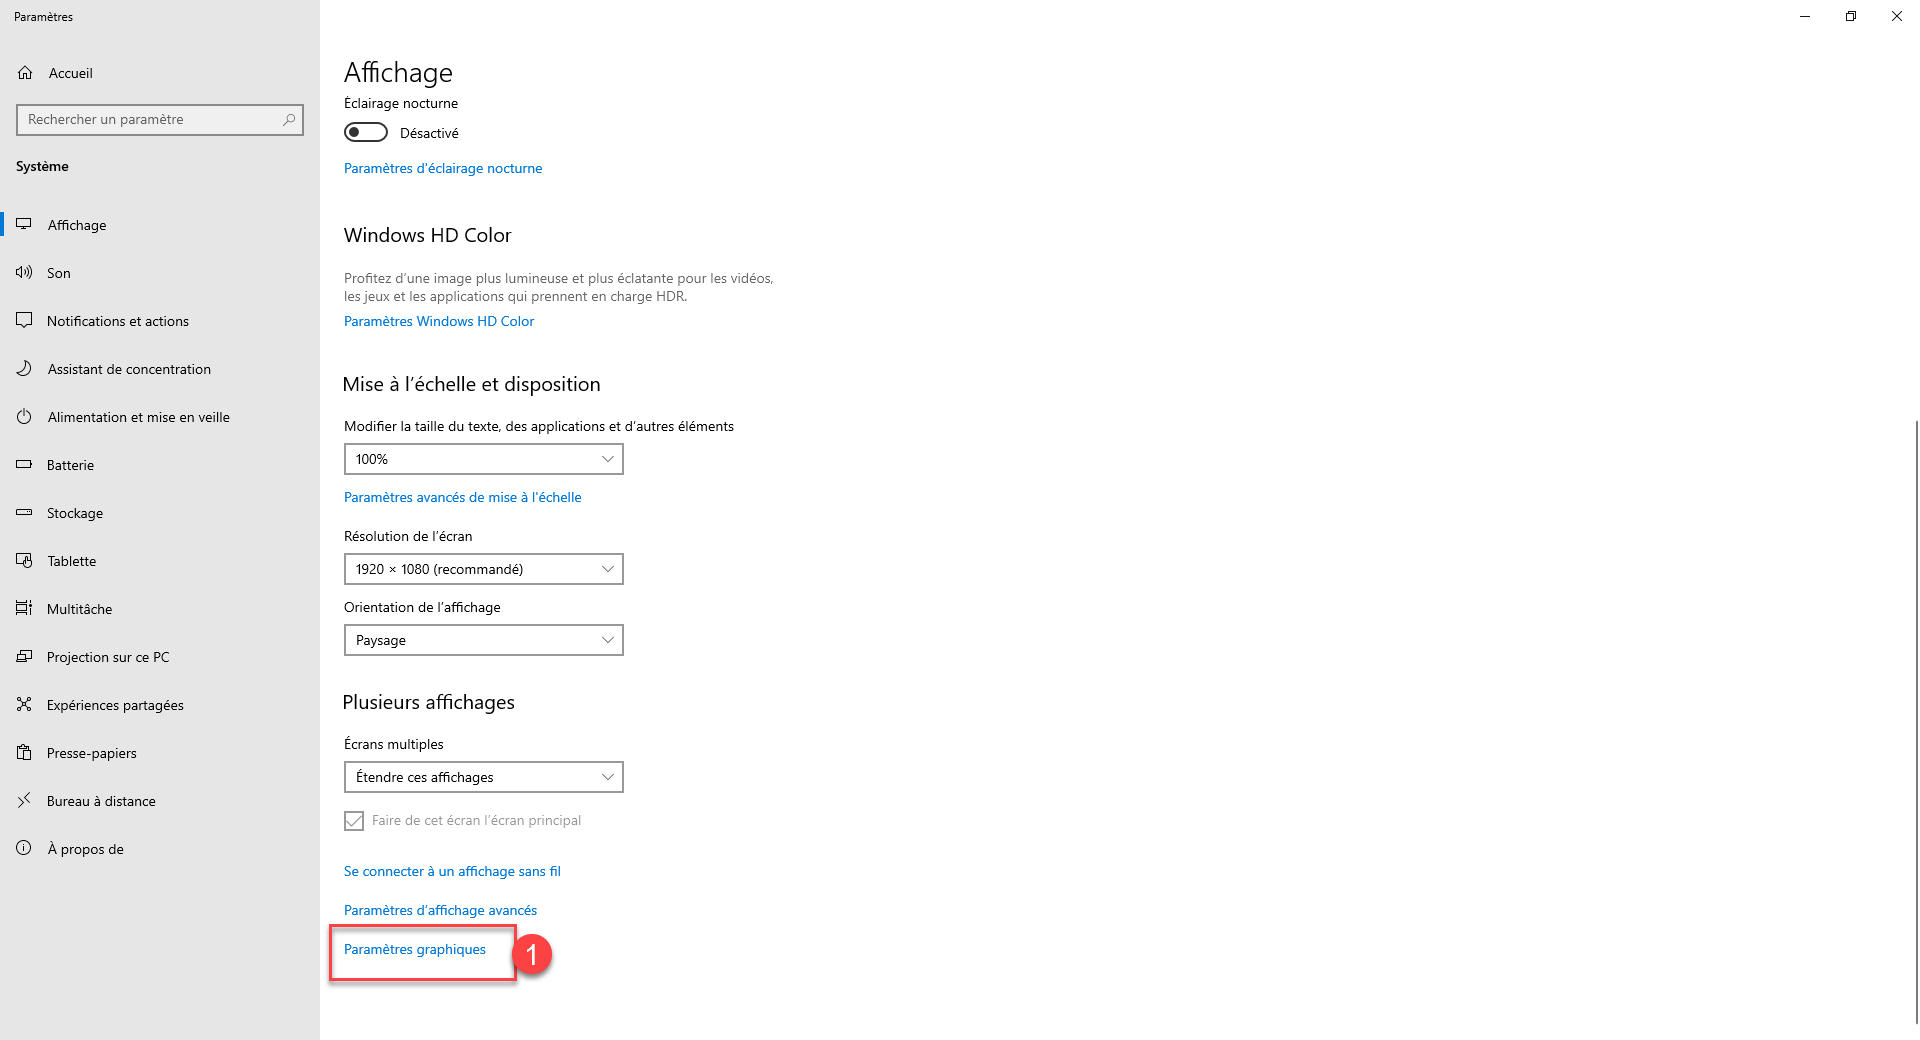
2. From the display settings, click on Graphics settings 1 which is at the bottom.
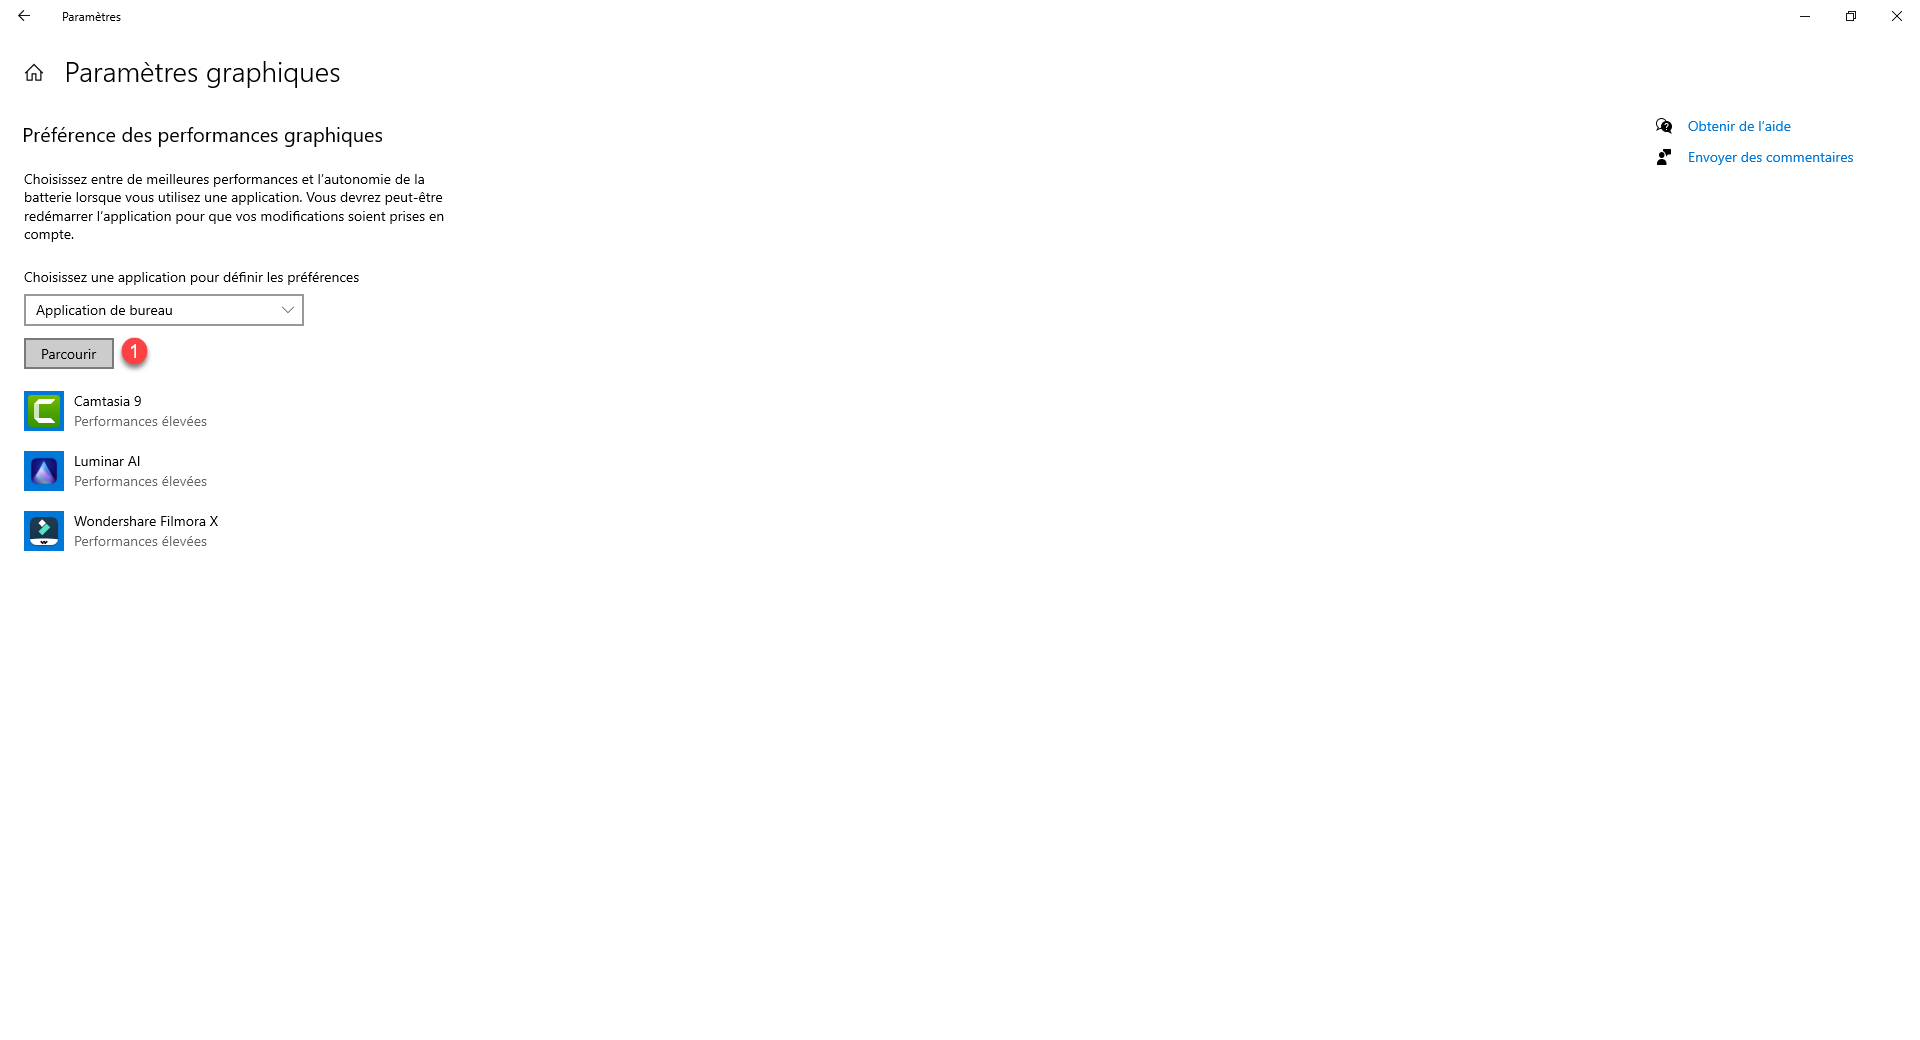
3. Here it is possible to configure which applications should use which graphics cards. On the screenshot below, we can see that applications are already configured. To add a new one, click on Browse 1.
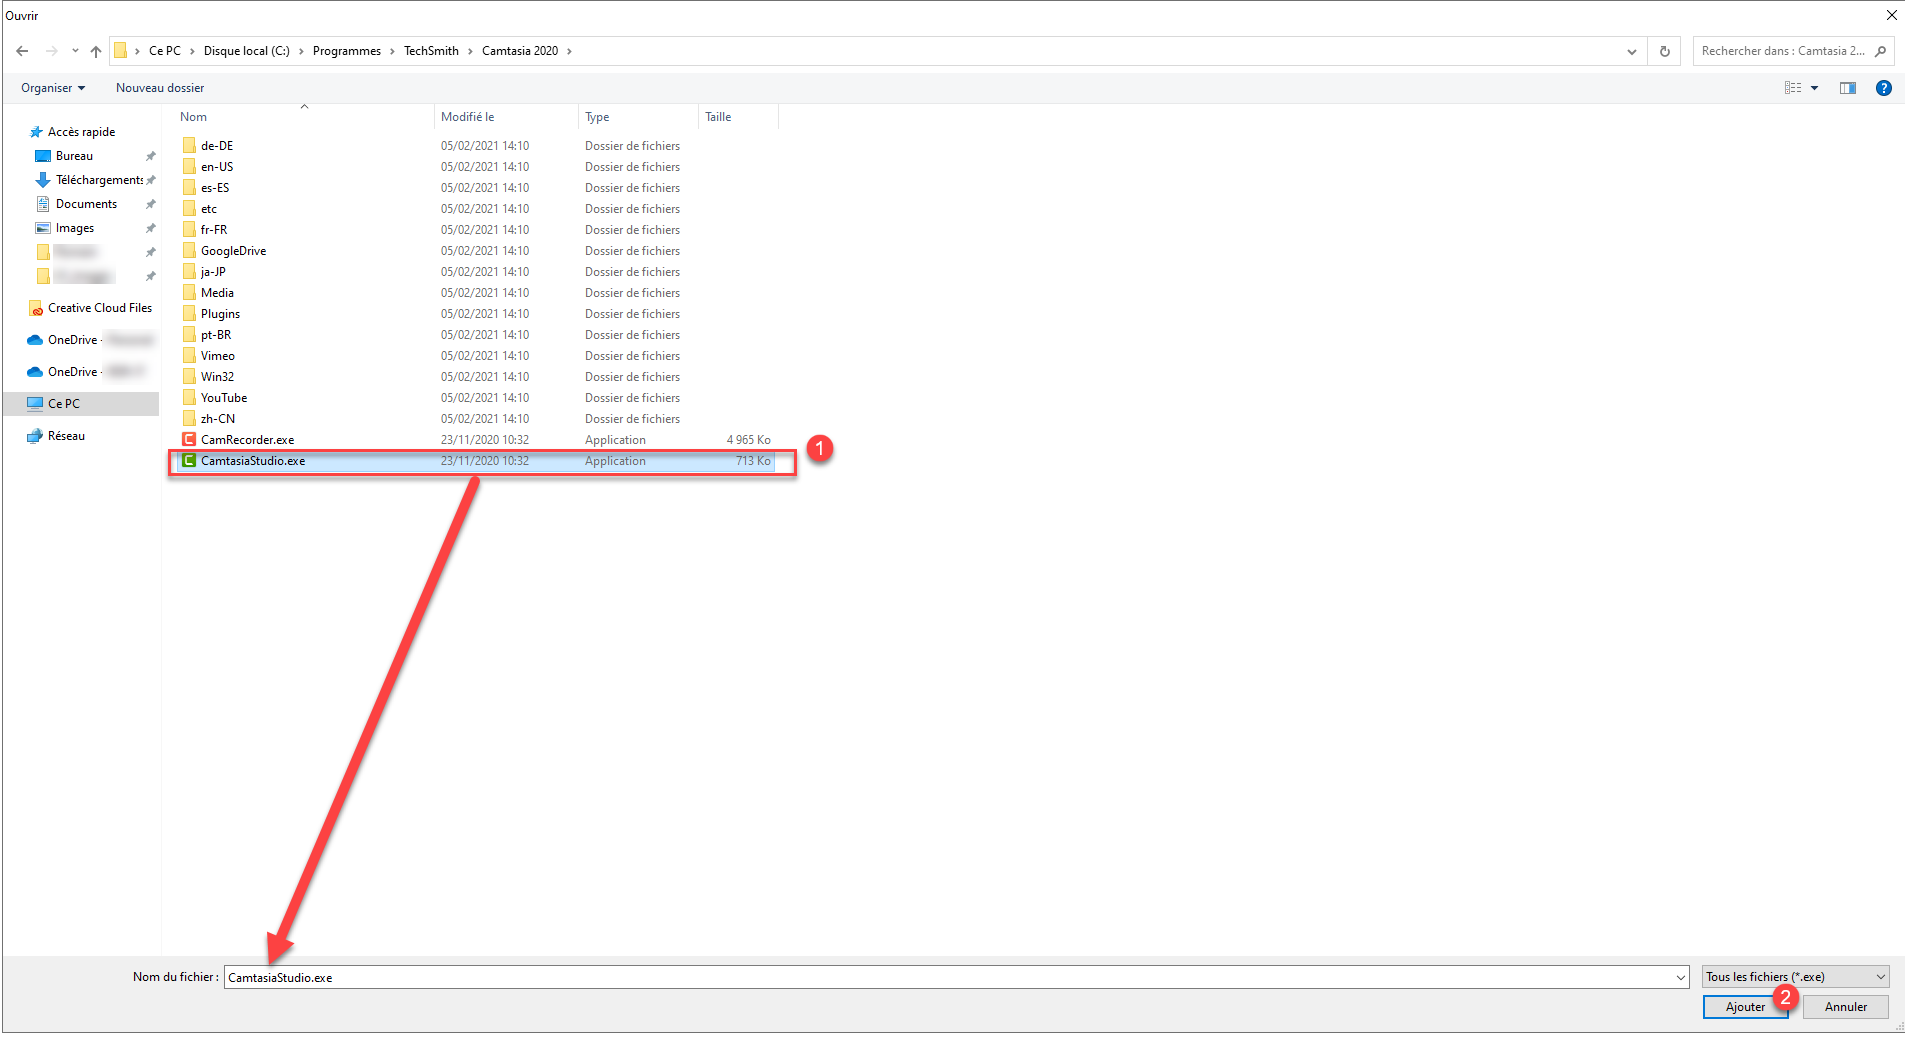
4. Find the executable of the application or game 1 and click on Add 2.
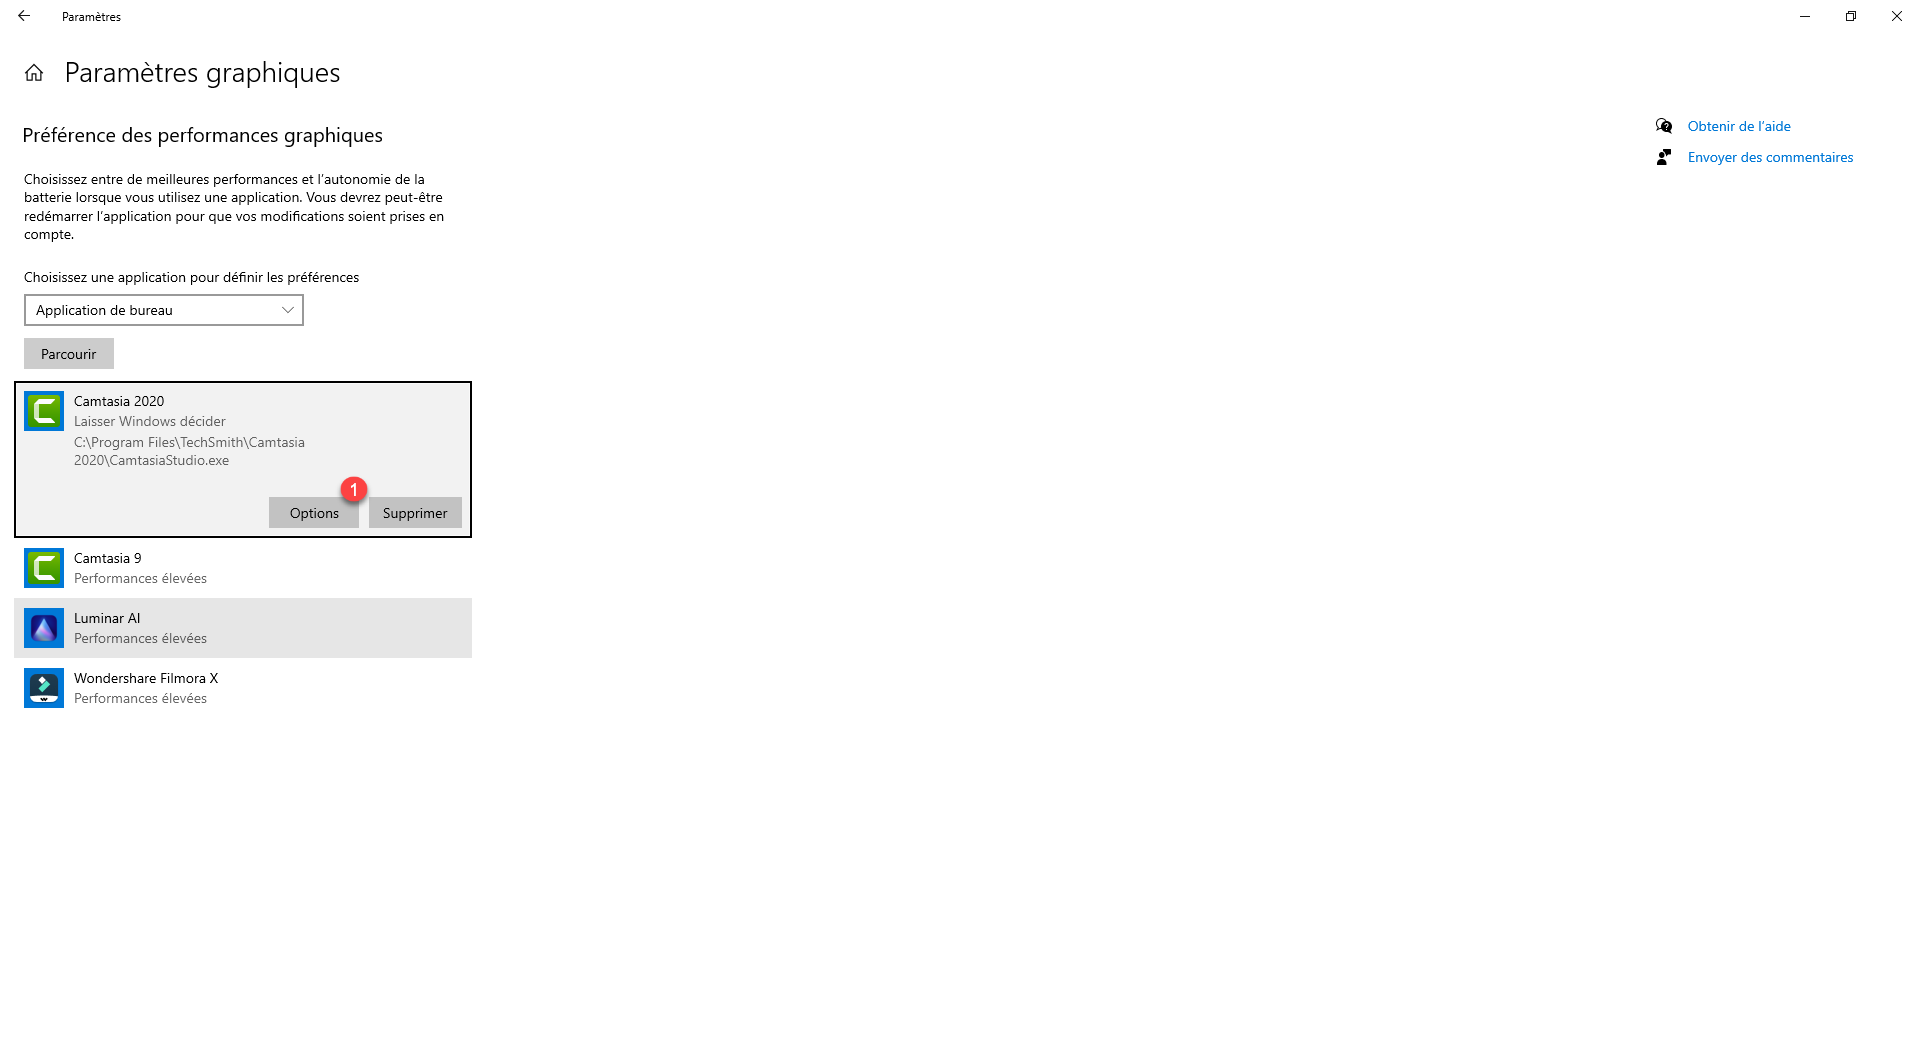
5. The app is now added. You must now configure the graphics card, click on the Options button 1.
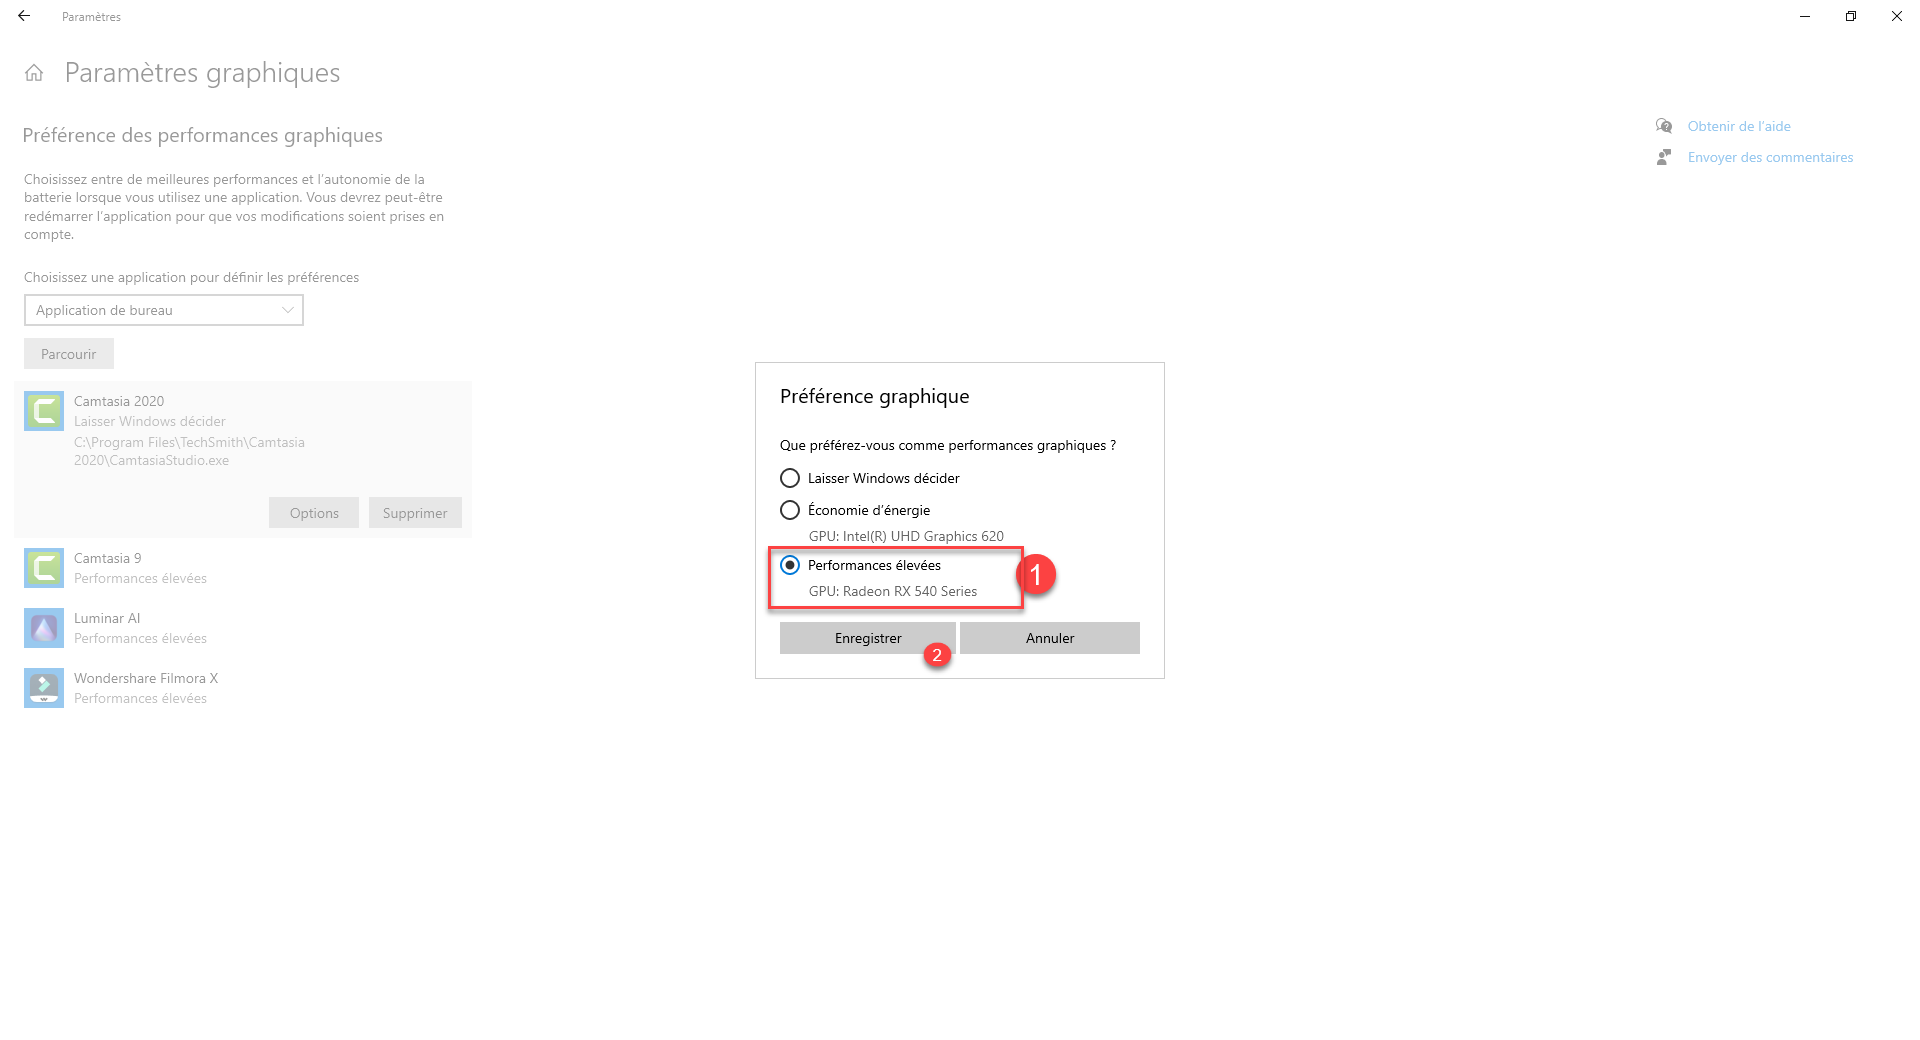
6. Select the graphics card 1 that you want to assign to the application and click on the Save 2 button.
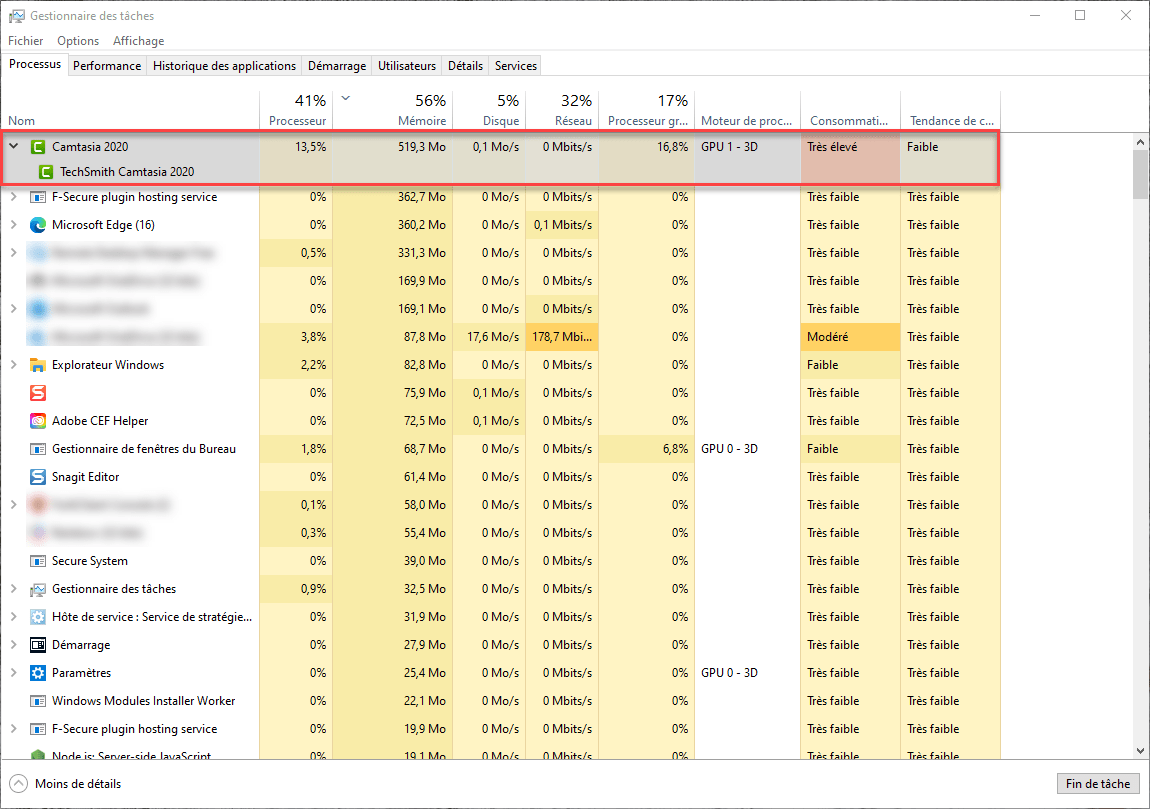
Now the app will use the GPU configured in Windows 10 display settings.
On the screenshot below, we can see that Camtasia is using GPU1 which is the one configured.
Now you know how to assign a graphics card (GPU) to an application with Windows 10.
This “trick” can also be used with cards of the same level with “greedy” graphics software to distribute the workload between the GPUs.