In this tutorial, I will explain how to set up a VPN server on Windows Server with the role of remote access and configure access with NPS.
When setting up a VPN server with Windows, 3 types of VPN service are installed:
- PPTP
- L2TP
- SSTP
In this tutorial we will see how to use PPTP and SSTP. When configuring the VPN client on Windows it is configured automatically and will test the connections on different ports to find the type of VPN service.
In order to limit the right of connection to the VPN, the policy will be configured to allow users belonging to the Active Directory group GRP_SRV_VPN_ALLOW.
The IP addresses will be distributed by a DHCP server.
When configuring the VPN client on Windows, the type of VPN is configured automatically, when connecting it will test the different types to establish the connection. There are several methods to force a type:
- Configuration on the VPN client.
- Port configuration at the firewalls level.
- Configuration on NPS in the policy.
Installing the Remote Access role
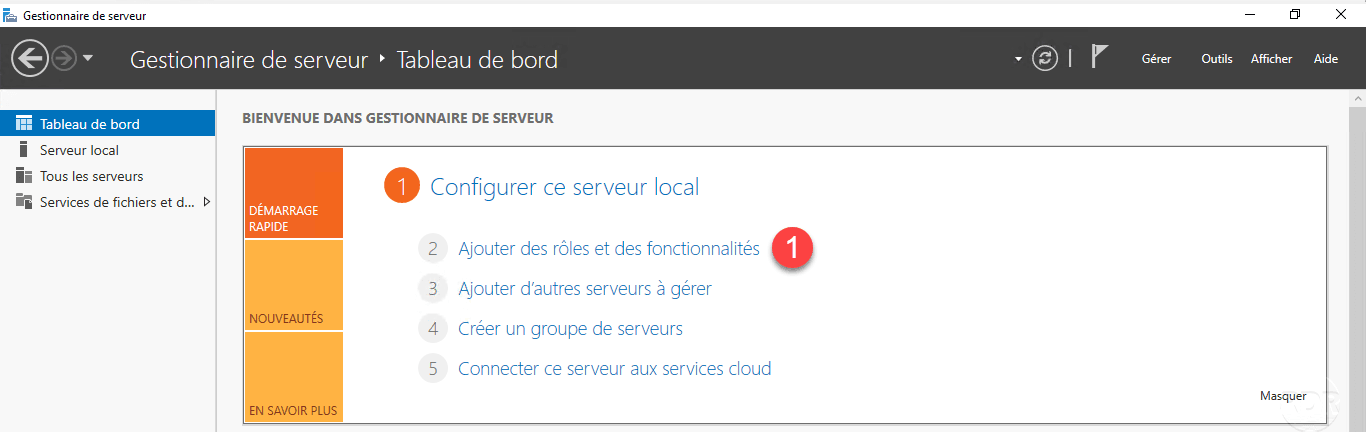
From the server manager, click Add Roles and Features 1 .
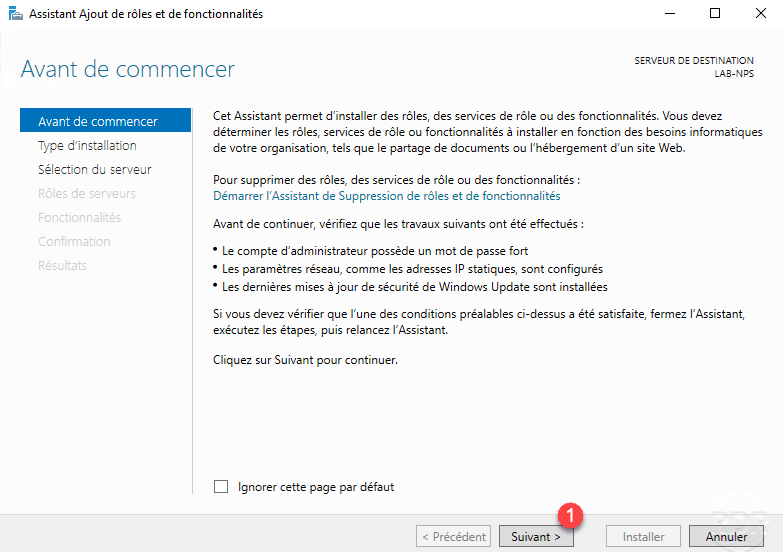
When launching the wizard, click Next 1 .
Choose role-based installation or 1 feature and click Next 2 .

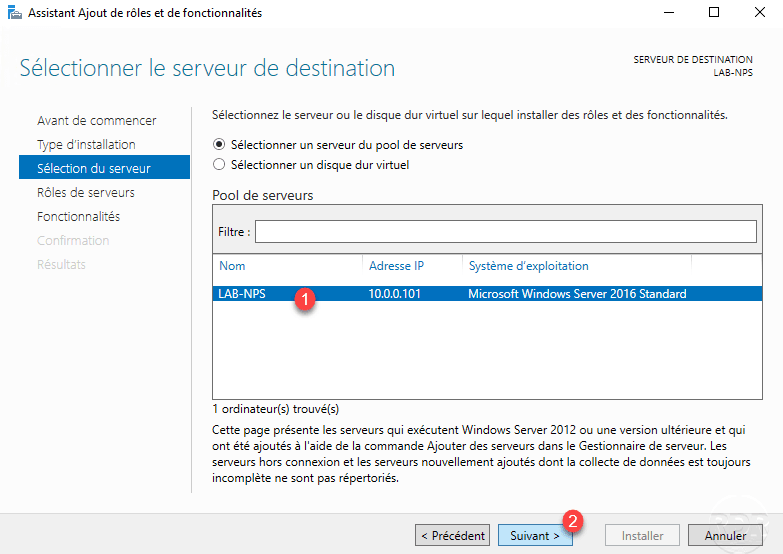
Select server 1 and click Next 2 .
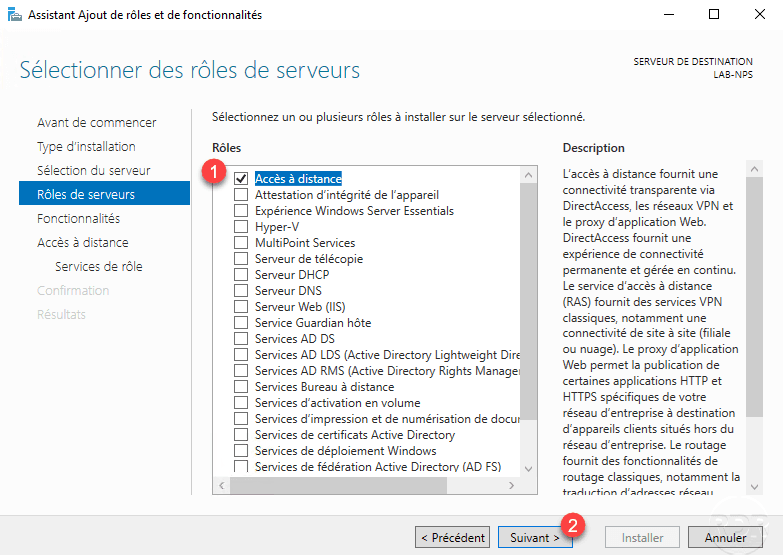
Check the Remote Access role cache 1 and click Next 2 .
Skip the list of features by clicking Next 1 .
A Remote Access role summary explaining the different services available such as Direct Access, VPN Server, WAF, Routing …. Click Next 1 to move to service selection.
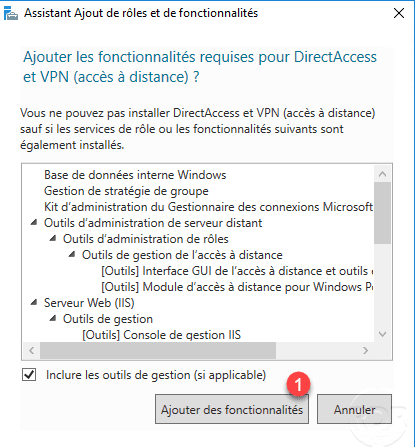
Check DirectAccess and VPN (remote access) 1 which is the service that allows the setting up of a VPN server.
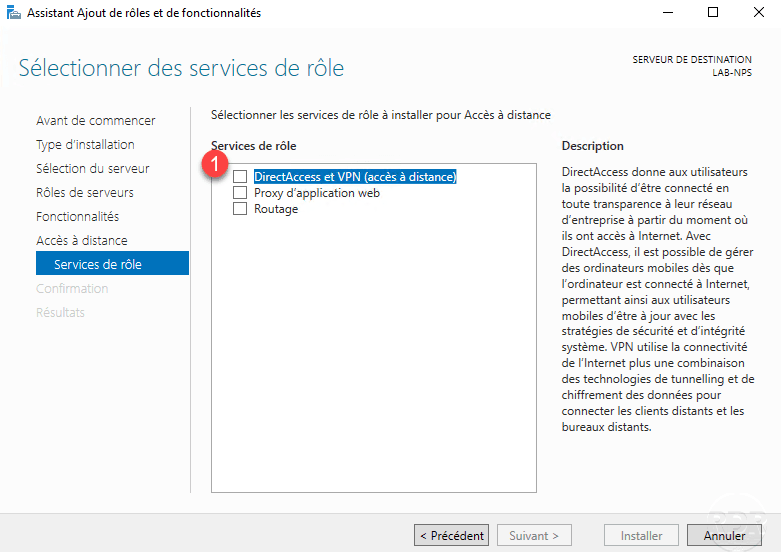
Click the Add Features 1 button to install the management consoles and dependent roles.
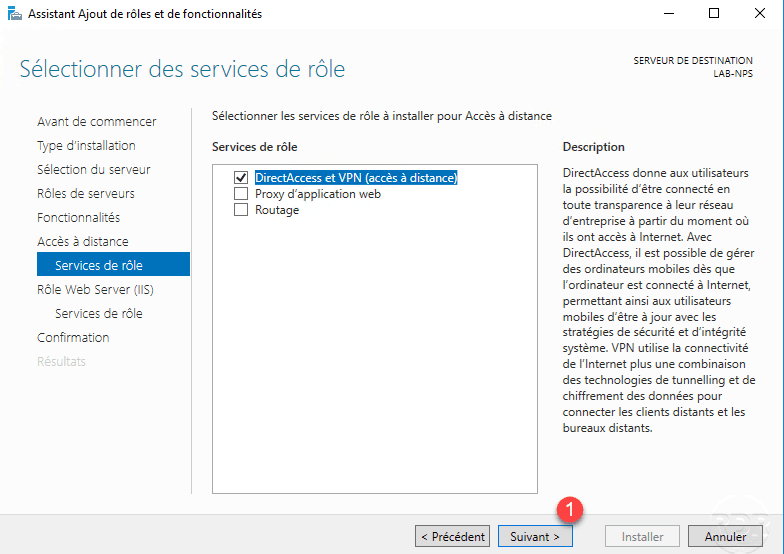
The DirectAcces and VPN service is selected, click Next 1 .
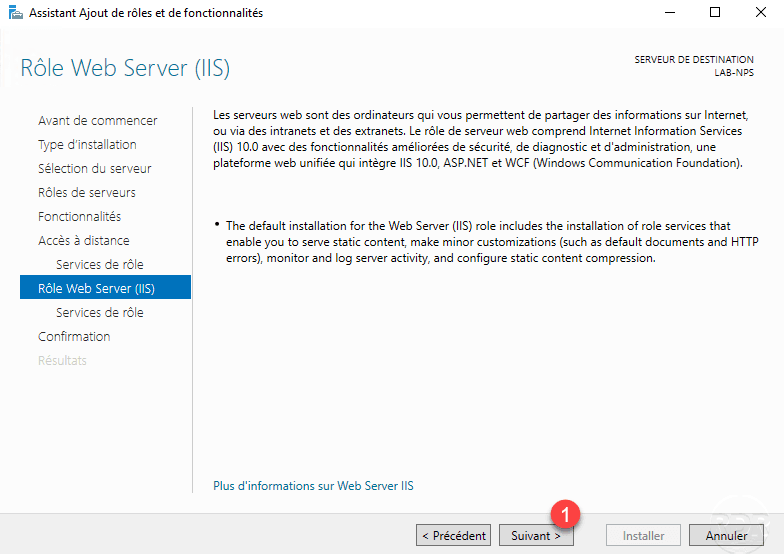
The IIS role must be installed, a summary of it is displayed, click Next 1 .
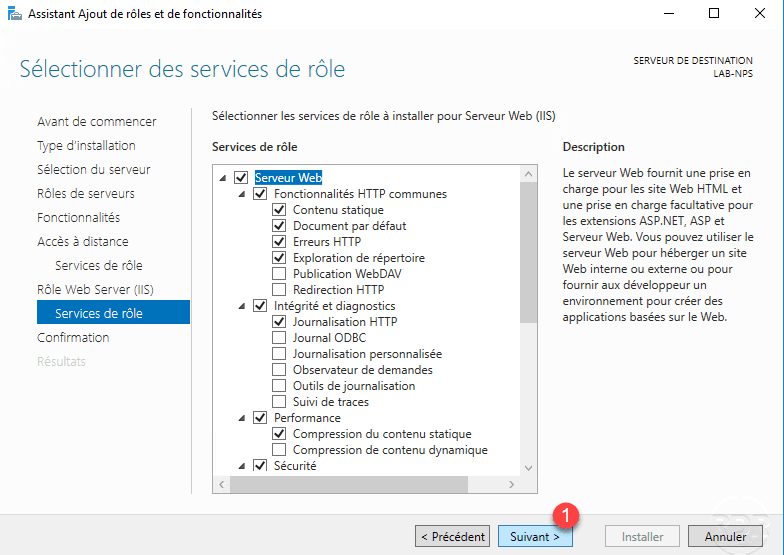
Leave IIS services default, click Next 1 .
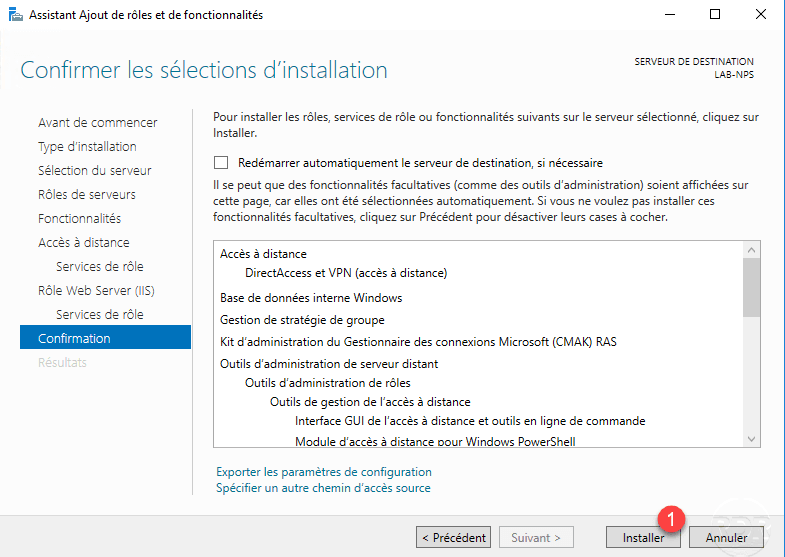
A summary of the installation is displayed, confirm by clicking Install 1 .
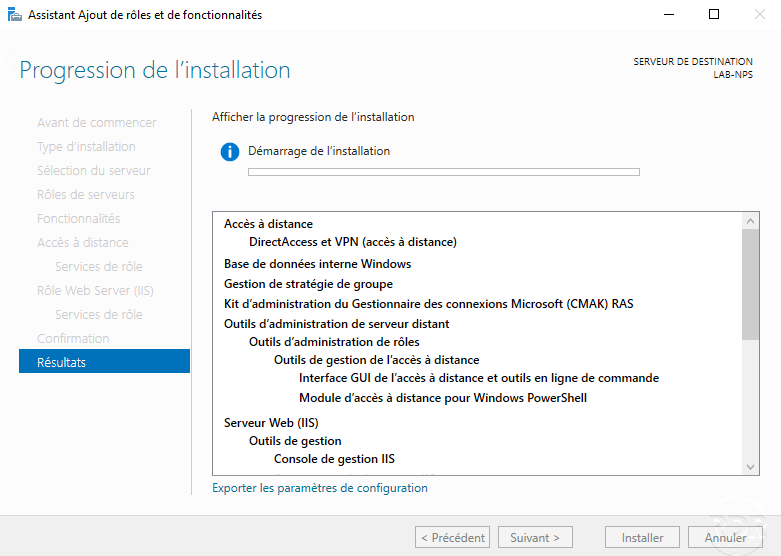
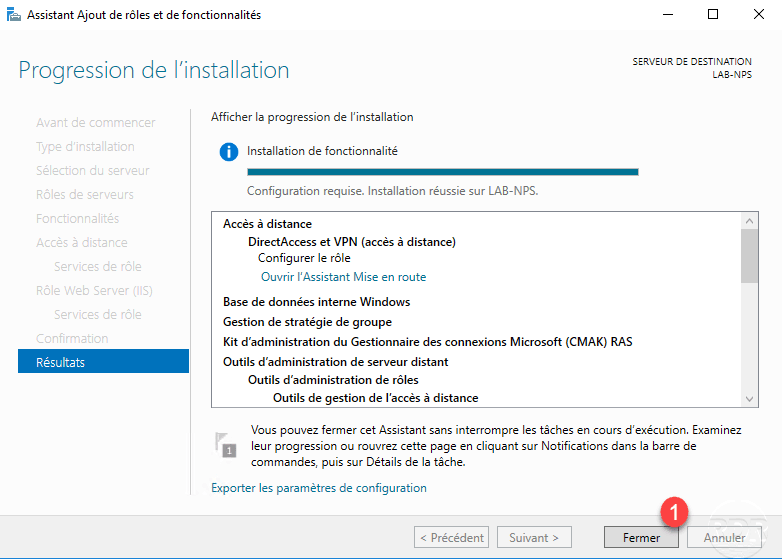
Wait during the installation of the roles necessary to set up the VPN server …
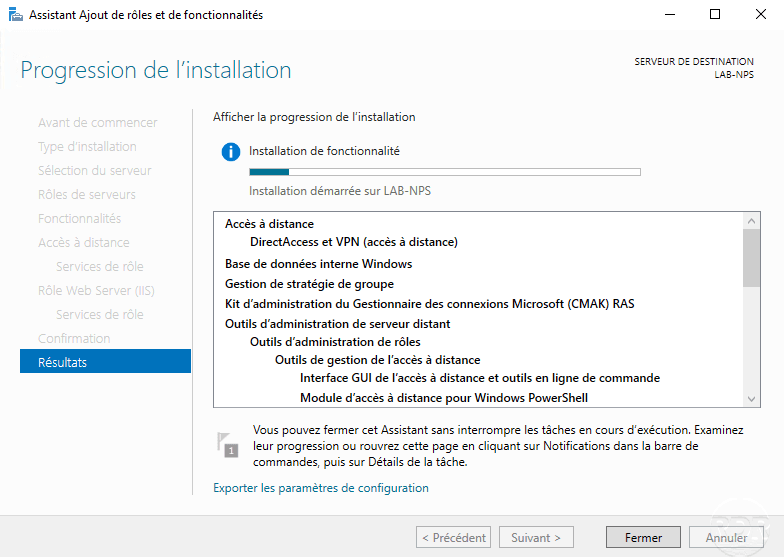
When the installation is complete, click Close 1 to exit the wizard.
Now that the features necessary to install a VPN server are installed, we will go to the configuration.
VPN Server Configuration
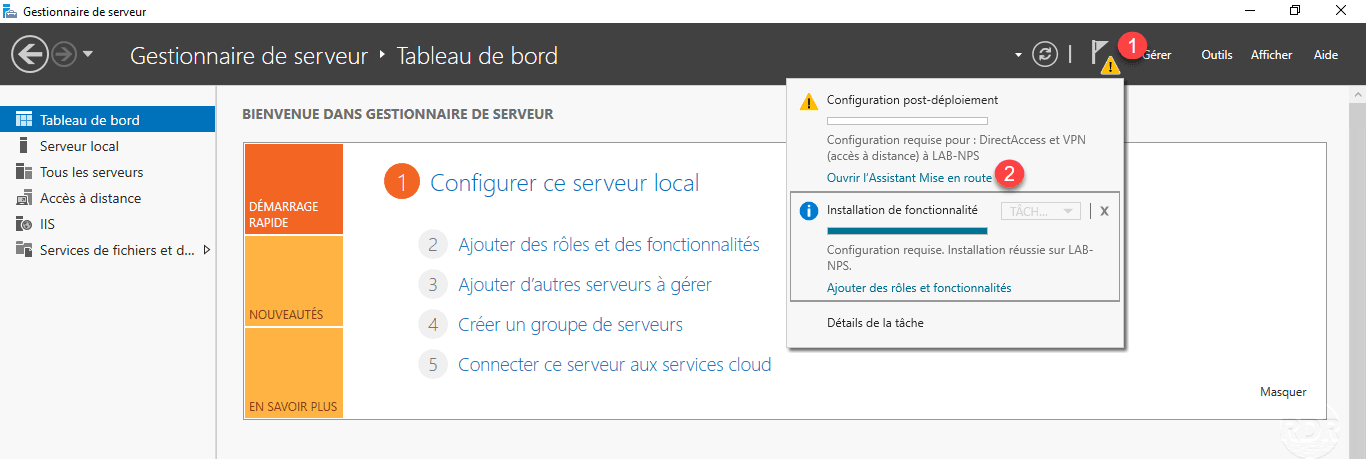
From the server manager, click the notification icon 1 and then click Open Startup Assistant 2 .
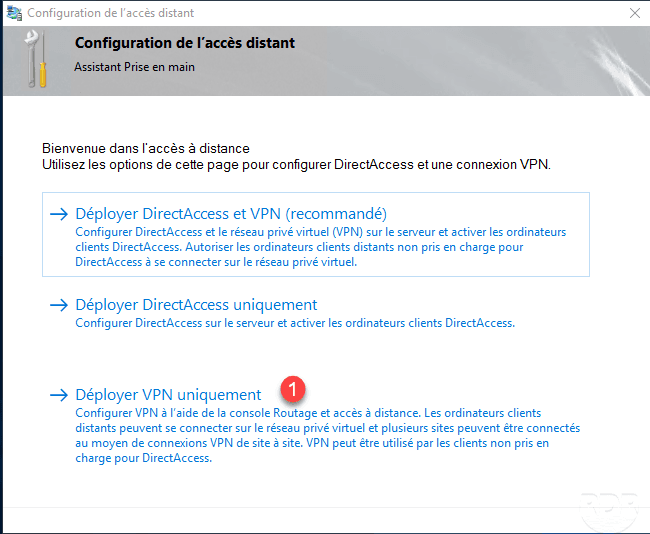
Click Deploy VPN only 1 , this action will open the Routing and Remote Access console.
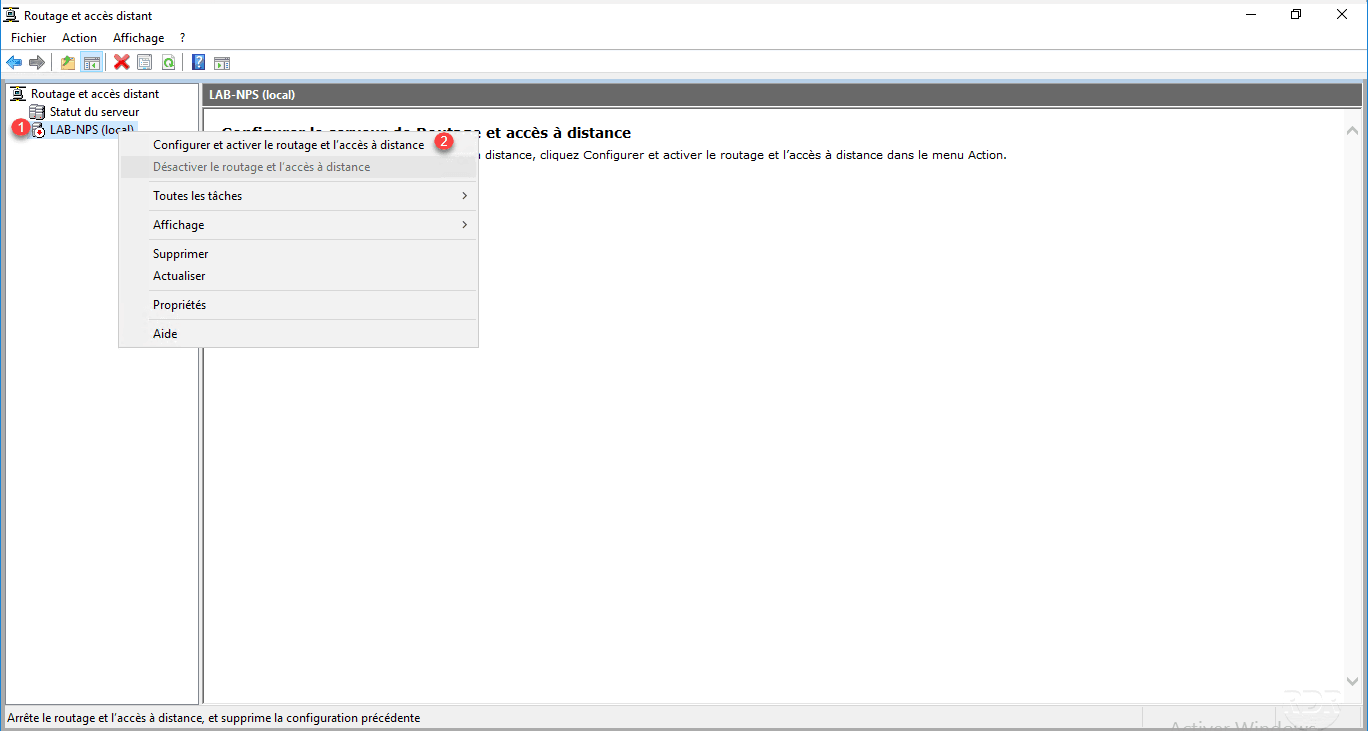
Once the console is open, right click on server 1 and click Configure and enable routing and remote access 2 .
A new assistant will launch, click Next 1 .

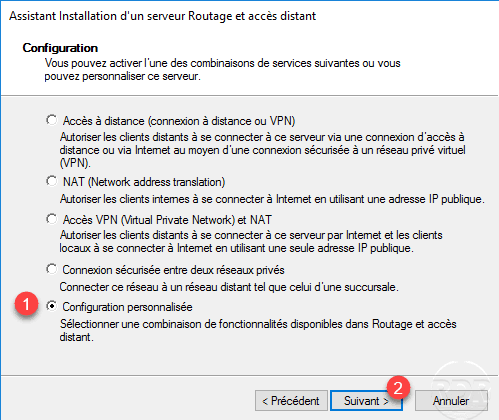
Select Custom Configuration 1 then click Next 2 .
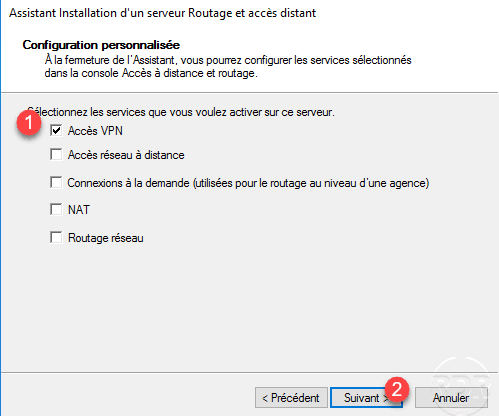
Select the VPN Access 1 service to configure the VPN server and click Next 2 .
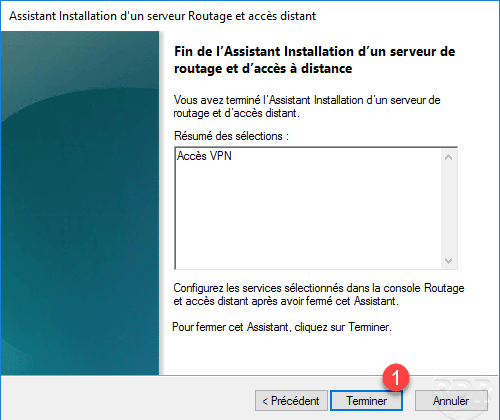
Click Finish 1 .
Click on Start Service 1 .

The VPN server is now operational, by default access to the VPN service is granted through the user’s properties in the Active Directory at the Remote Access tab. In a large environment this way of working quickly becomes heavy to administrator, we will now use the Network Policy Server (NPS) features to give the connection rights to an Active Directory group.
Launch the NPS Server Console on the server.

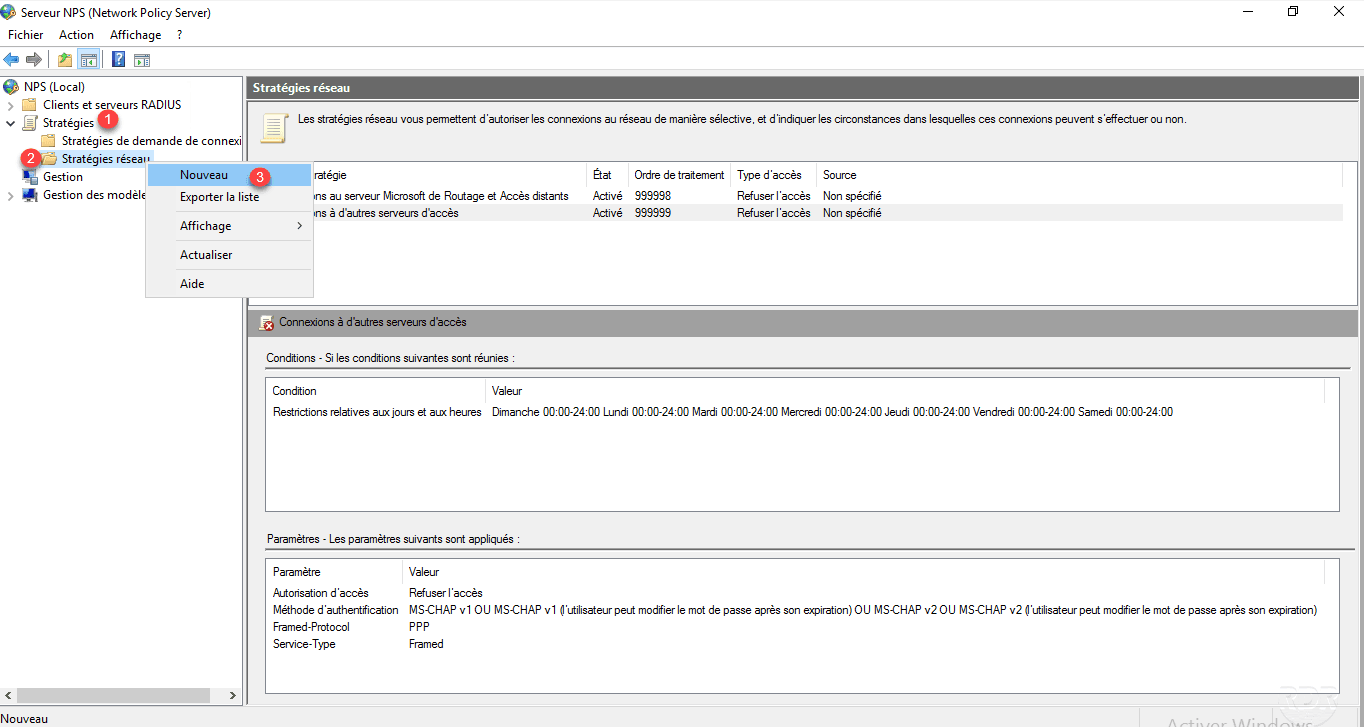
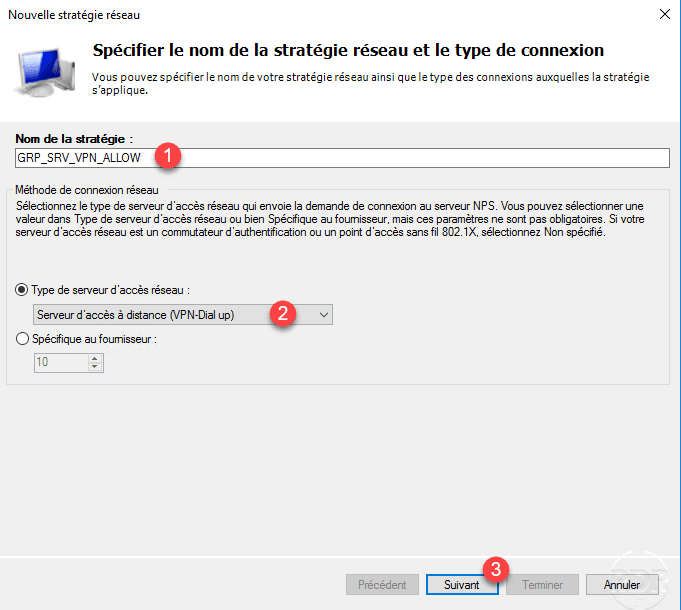
Unroll Strategies node 1 then right click on Network Strategies 2 and click on New 3 .
Name the strategy 1 and choose the type Remote Access Server (VPN-Dial-up) 2 then click Next 3 .
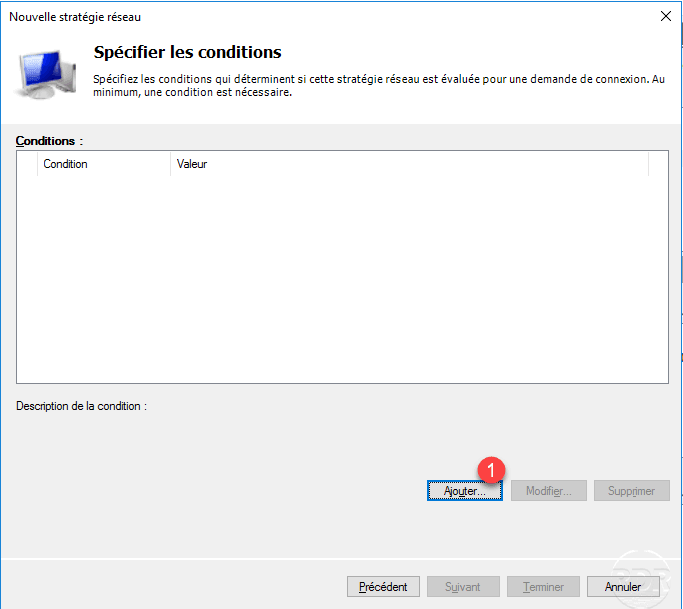
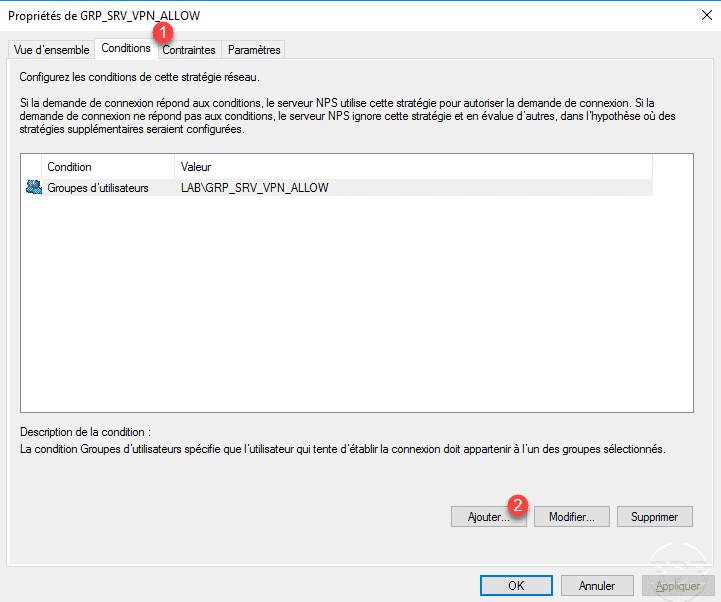
It is here that we will configure the conditions of access to the service, it is possible to add several conditions including access hours. Click the Add button 1 .
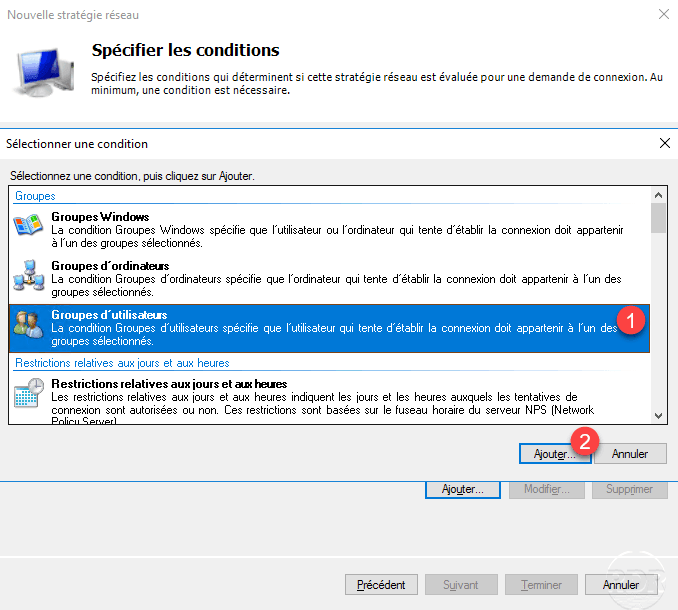
Choose User Groups 1 and click Add 2 .
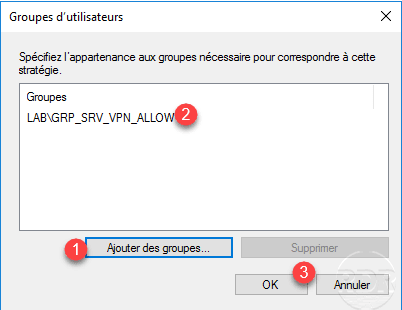
A new window opens, click on Add 1 to choose the group, once this 2 select click OK 3 .
Once conditions are added, click on Next 1 .

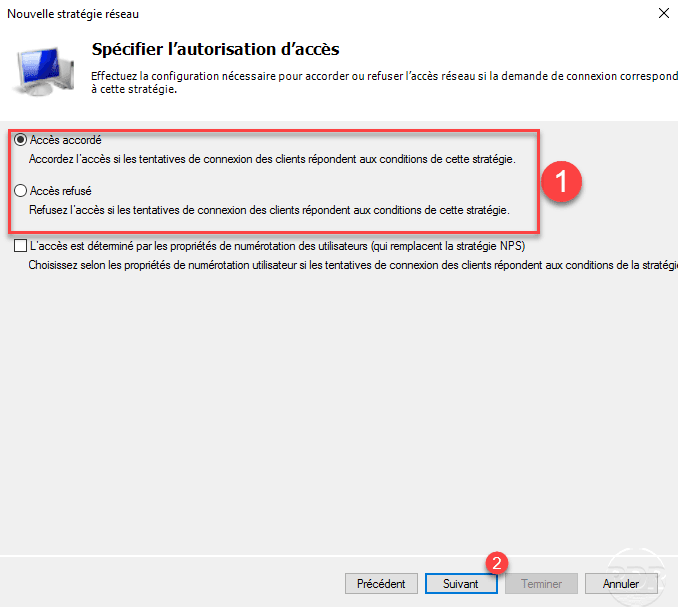
Configure authorization to see if the policy is a 1 granted access policy or denied and click Next 2 to validate.
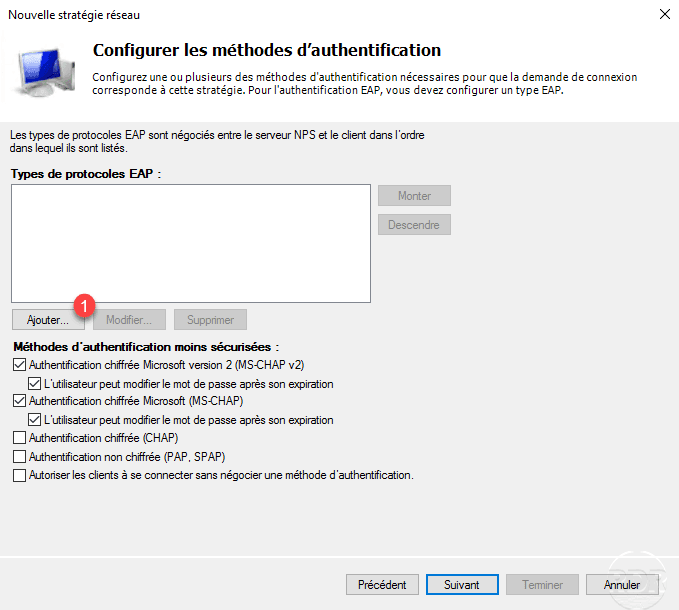
This part of the configuration is important for the future, including the configuration of the VPN client and the security level. The addition of an EAP protocol type is not mandatory but strongly recommended, click on the button Add 1 .
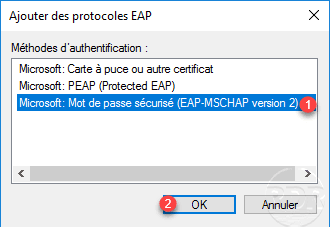
Select Microsoft: Secure Password (EAP-MSCHAP Version 2) 1 and click OK 2 .
Once you have selected the authentication types and methods, click Next 1 .
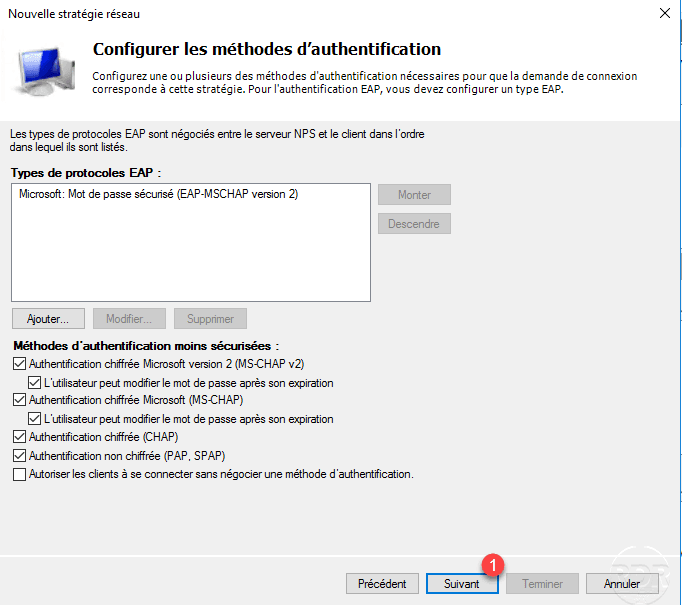
If a message appears about the authentication methods, click No to not open help.
In the strategy, no opposite will be configured, but it is possible to add as hours of access or force a type of VPN (NAS). Click Next 1 .

A summary of the strategy is displayed, click Finish 1 to confirm the creation.
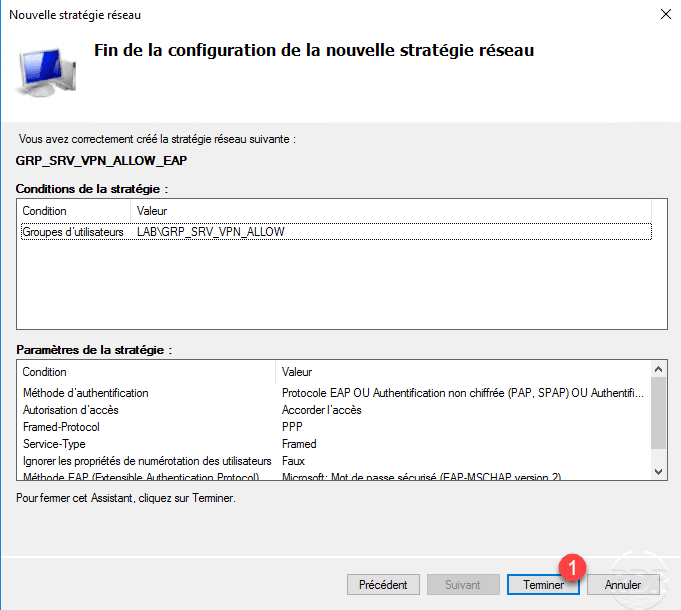
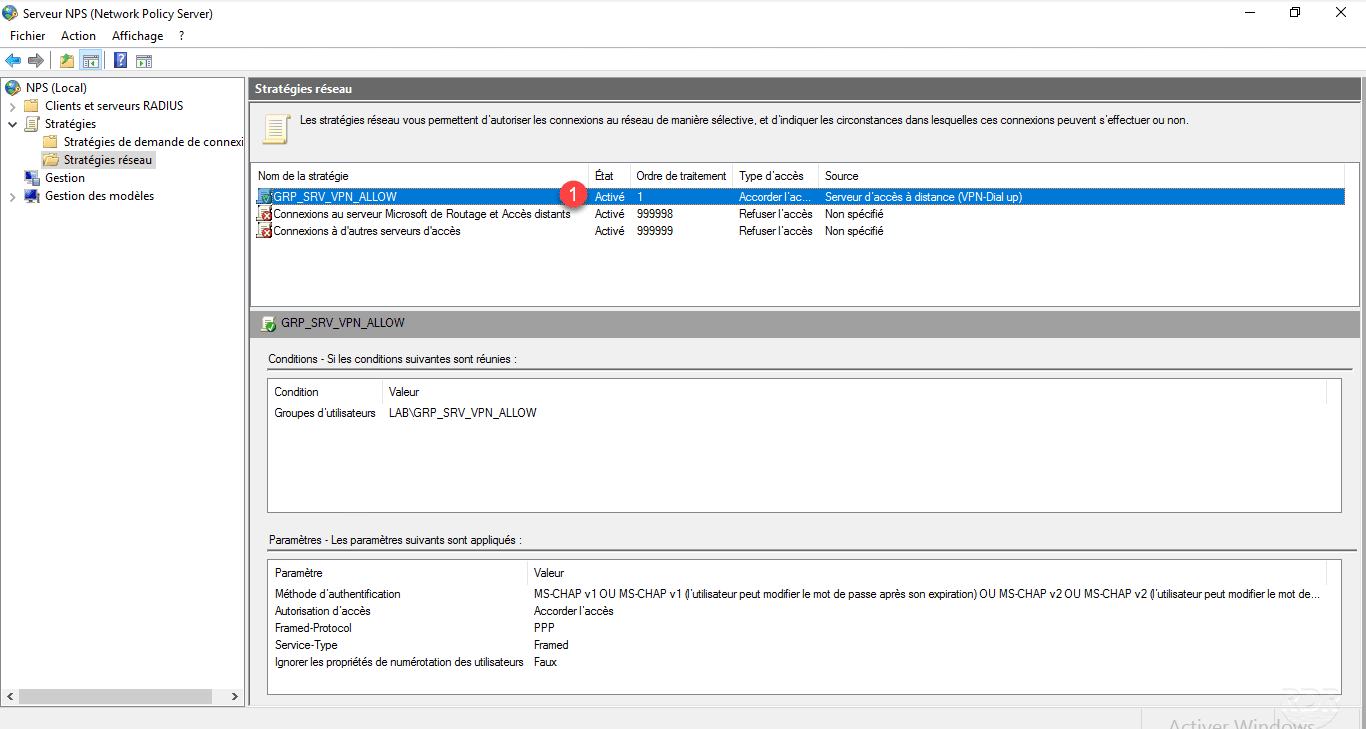
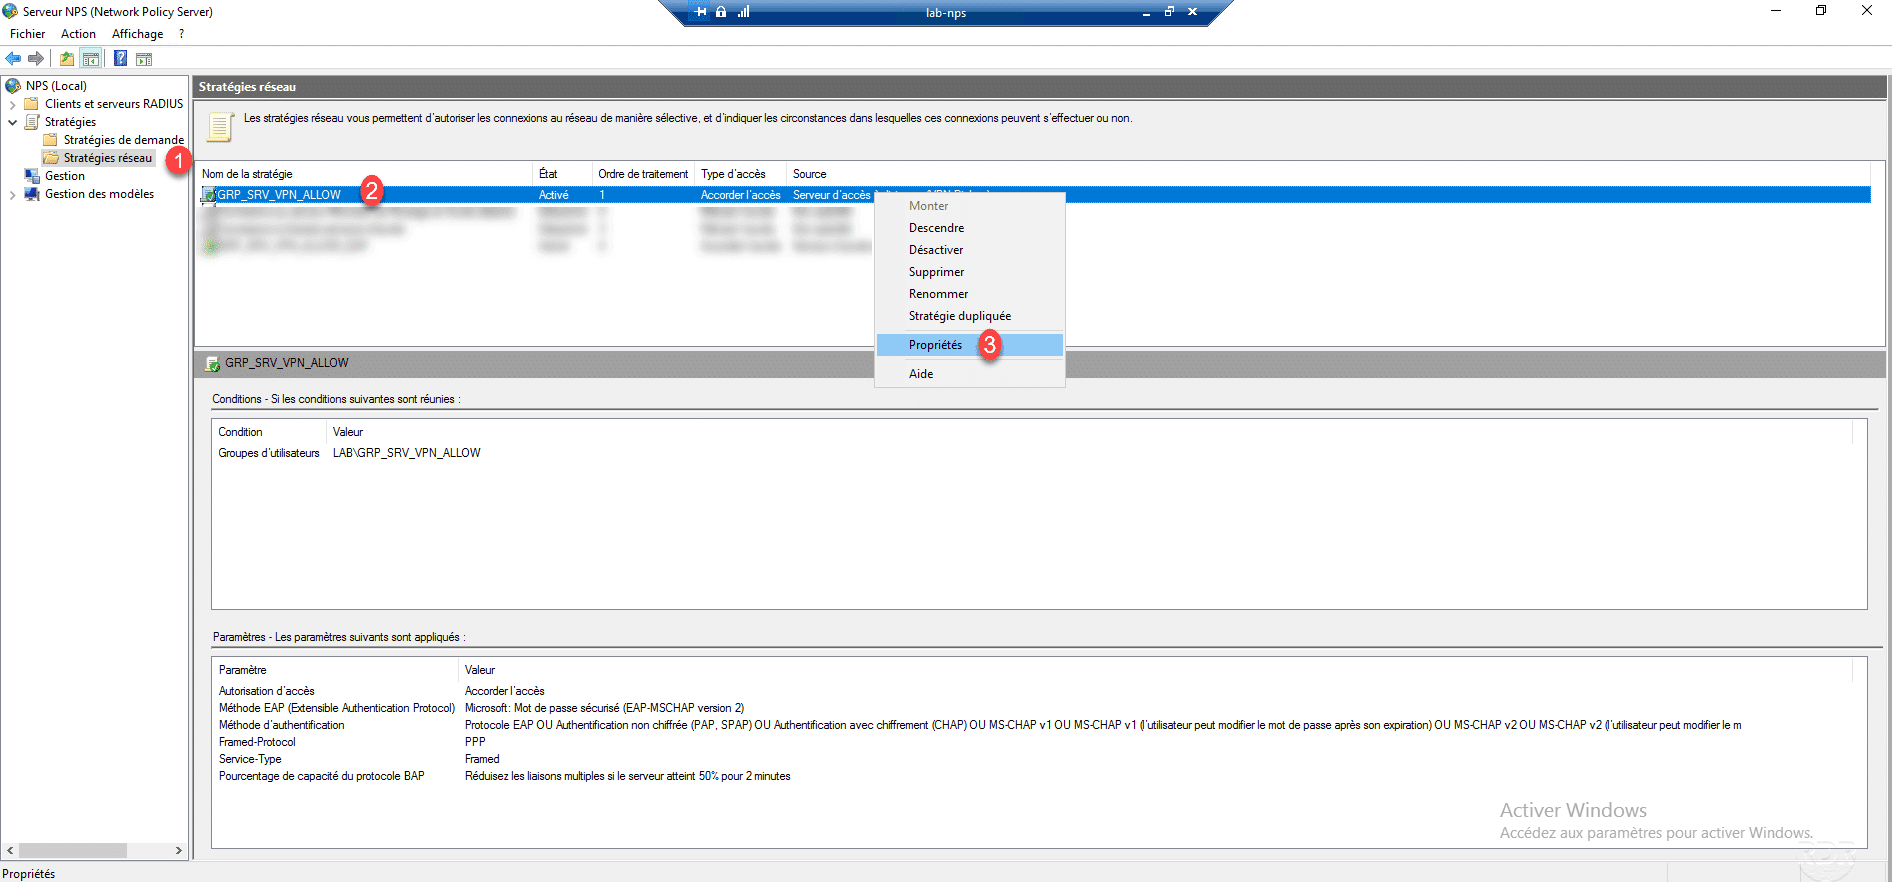
The strategy has been added 1 . They are treated as on a firewall, they are read from top to bottom. If you have multiple policies, one of which does not apply, check that the traffic does not go into a strategy above.
Before you can use the VPN server, you must register the NPS server in the Active Directory for access permissions to be processed by it, right-click on NPS (Local) 1 and click Register a server in Active Directory 2 .
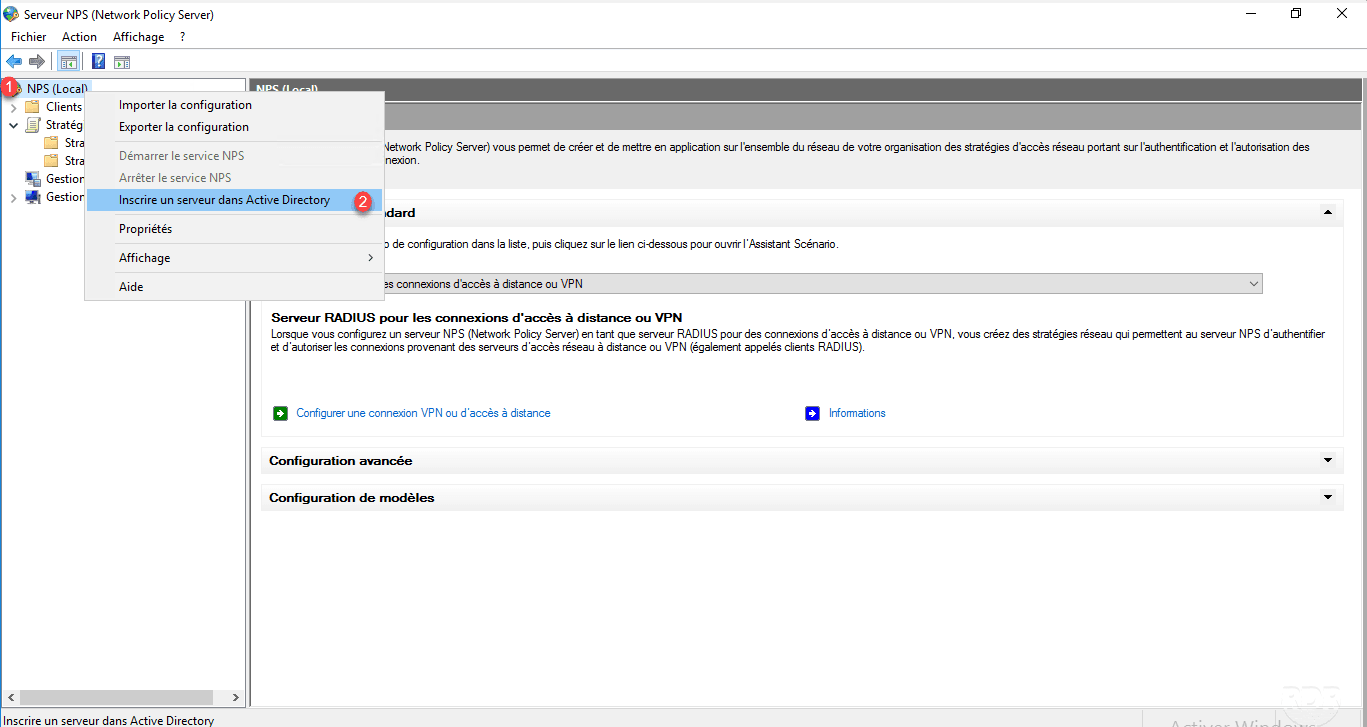
Click OK on the two confirmation messages that appear.
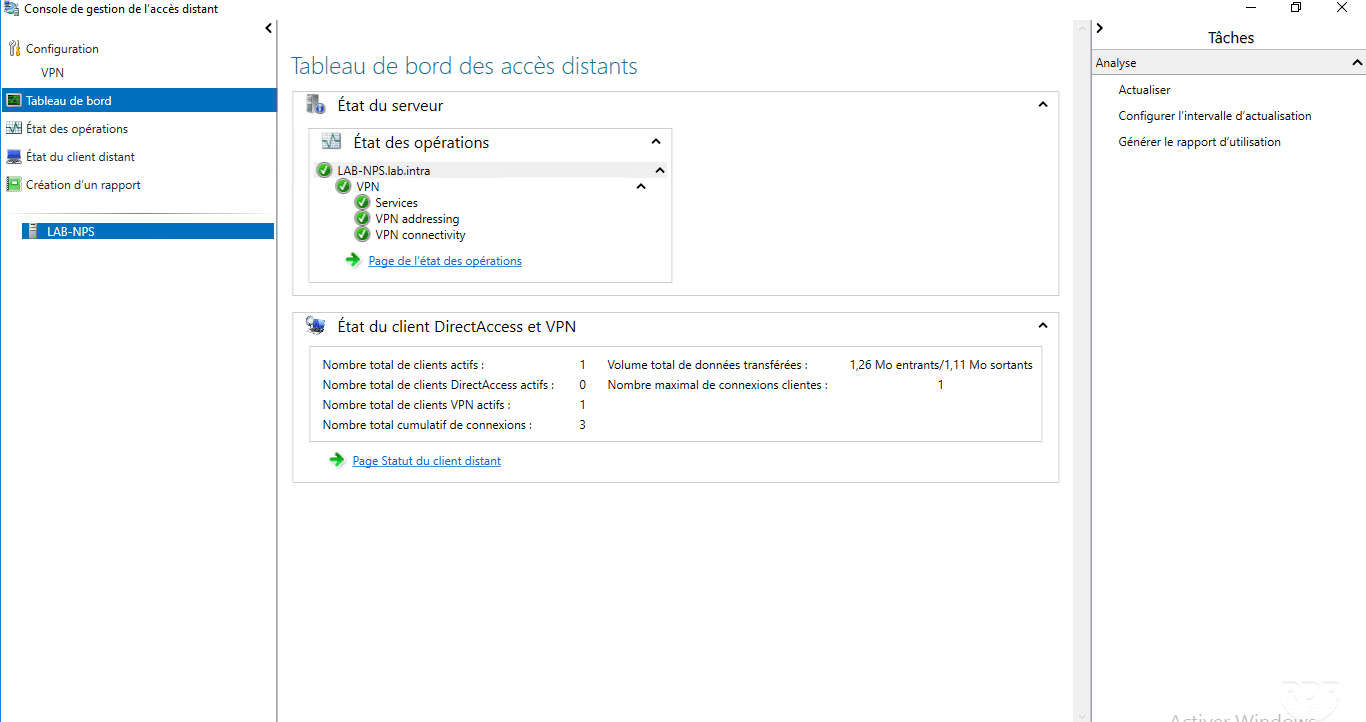
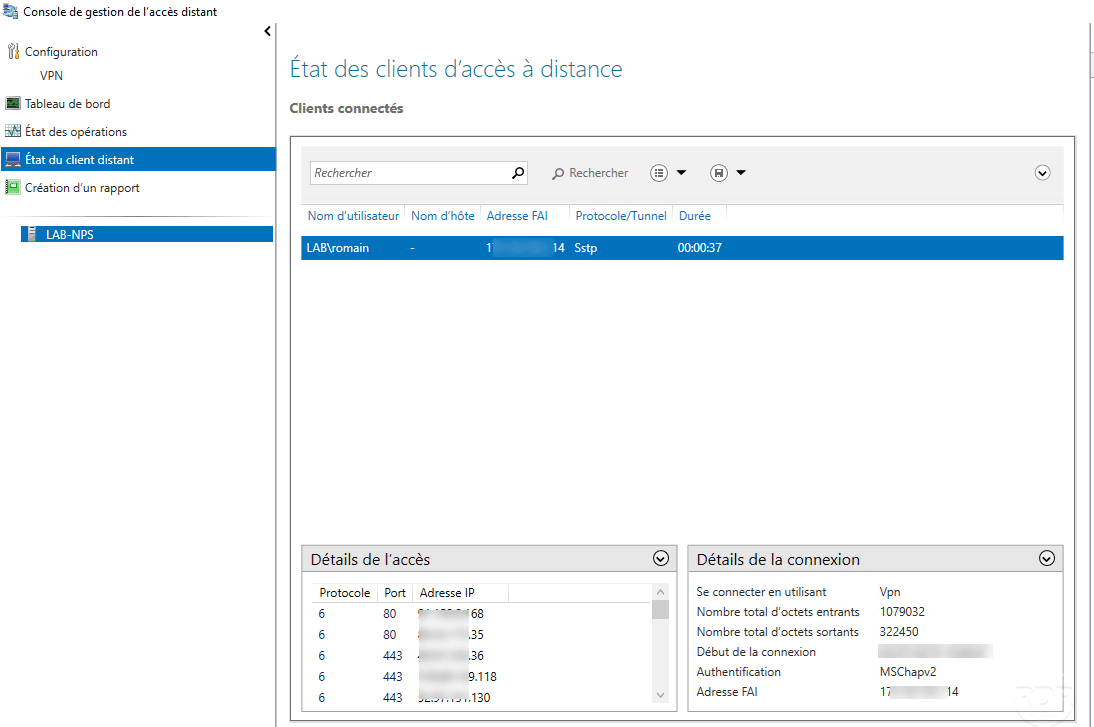
Before you proceed with the client configuration, look in the Remote Access Management console tools and click on it to open it. This console allows you to view the status of VPN server services and view connections in progress …

Configure the VPN connection on Windows 10
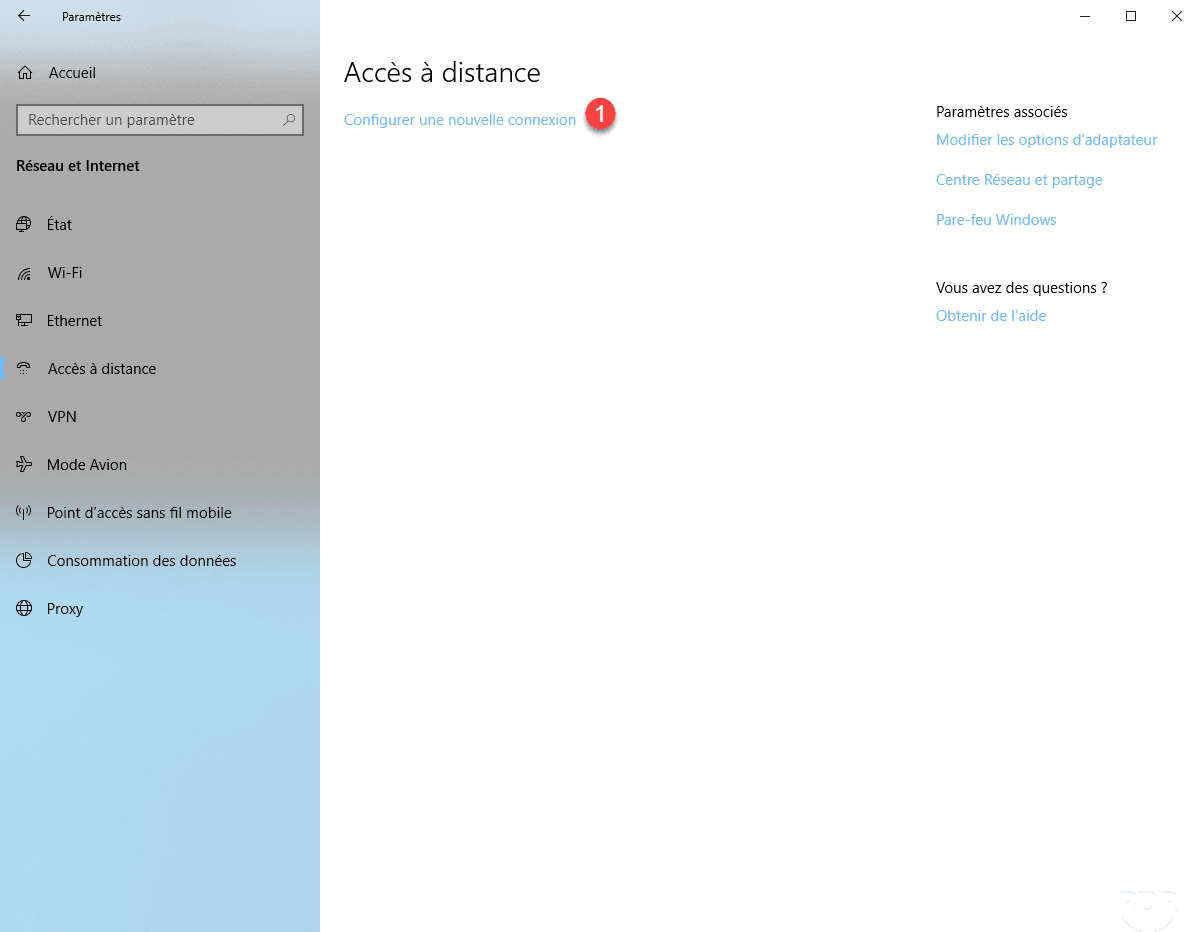
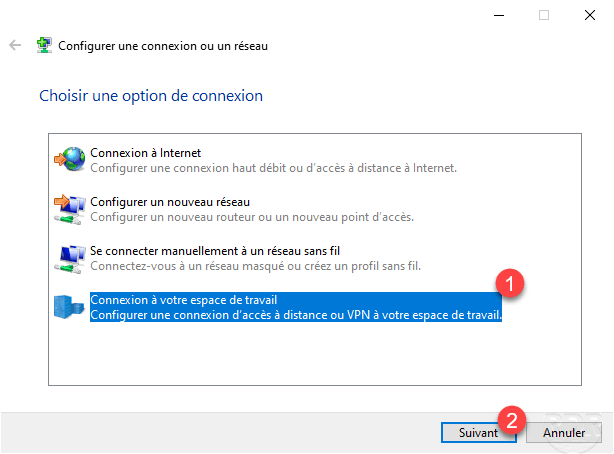
The VPN server is configured and accessible from the Internet, to configure the VPN on Windows 10, open the settings and go to Network and Internet. Click on Configure a new connection 1 .
Choose the connection option: Connect to your workspace 1 and click Next 2 .
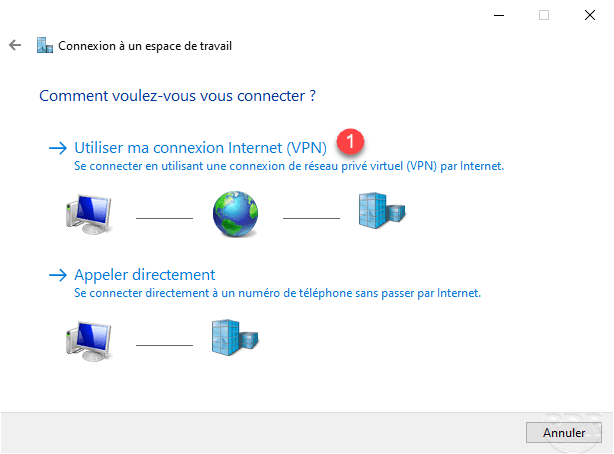
Click on Use my Internet Connection (VPN) 1 .
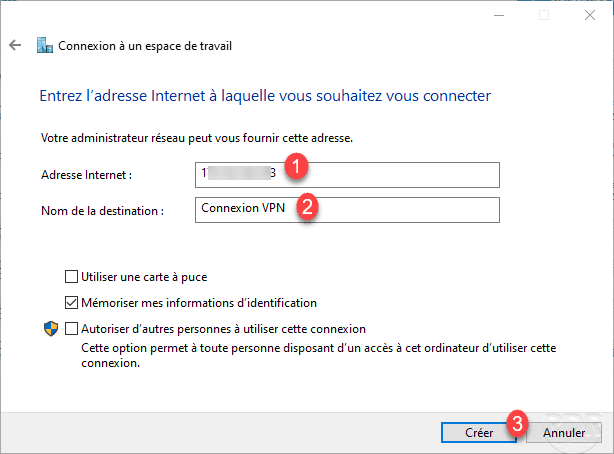
Enter the IP address or DNS name 1 for the VPN connection, name the connection 2 and click Create 3 .
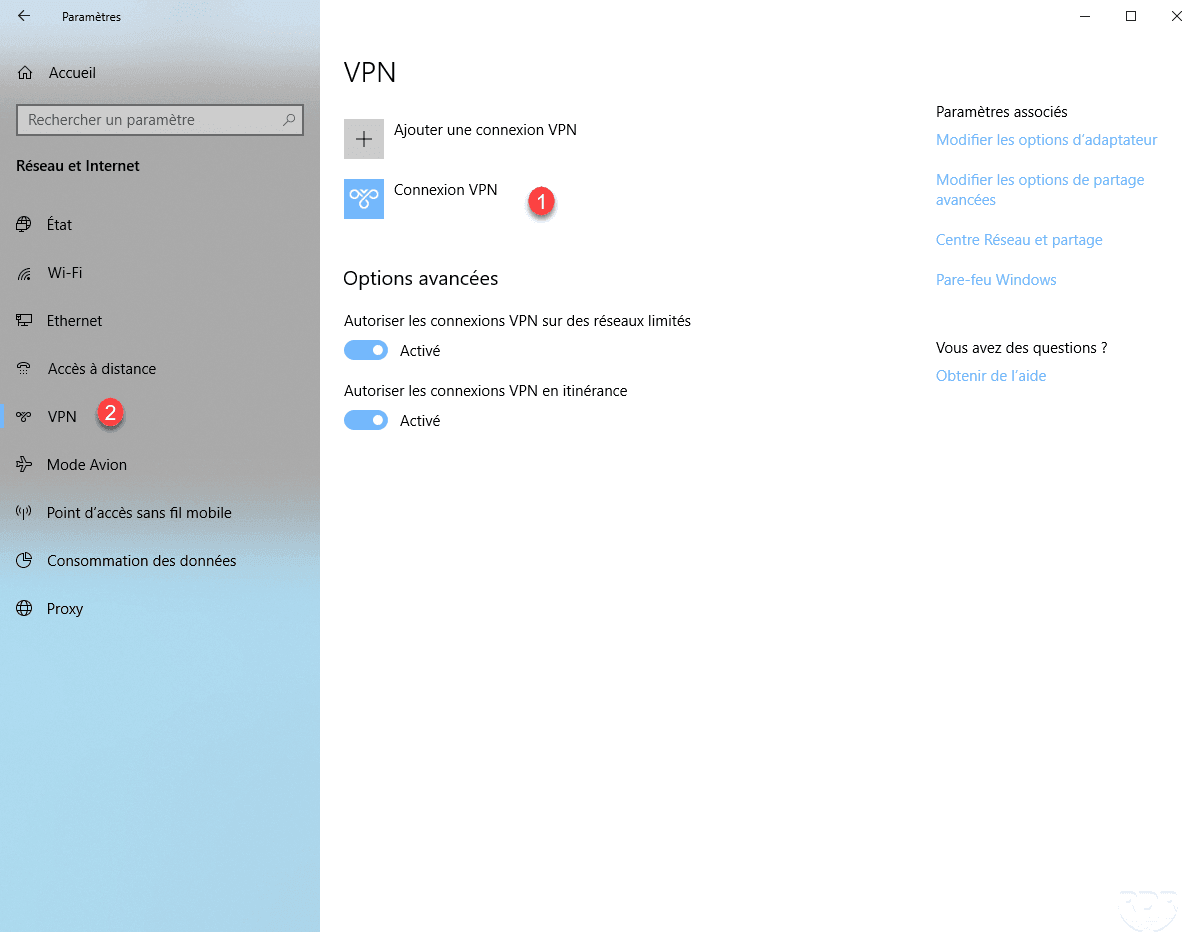
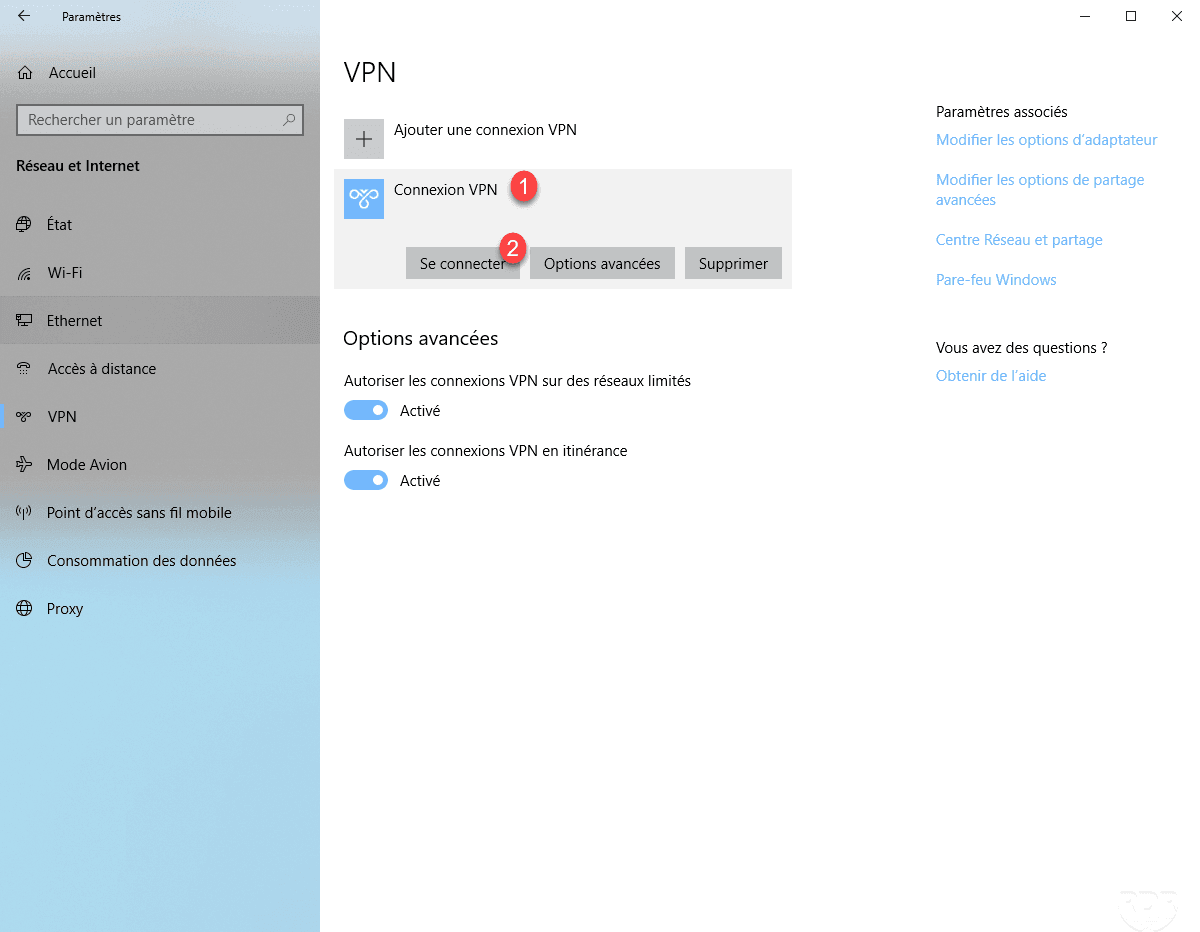
The connection is added 1 in the VPN part 2 .
Click on the connection 1 and click on Connect 2 .
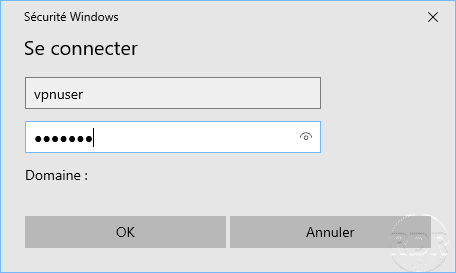
Enter the credentials of a member account of the group configured in the policy.
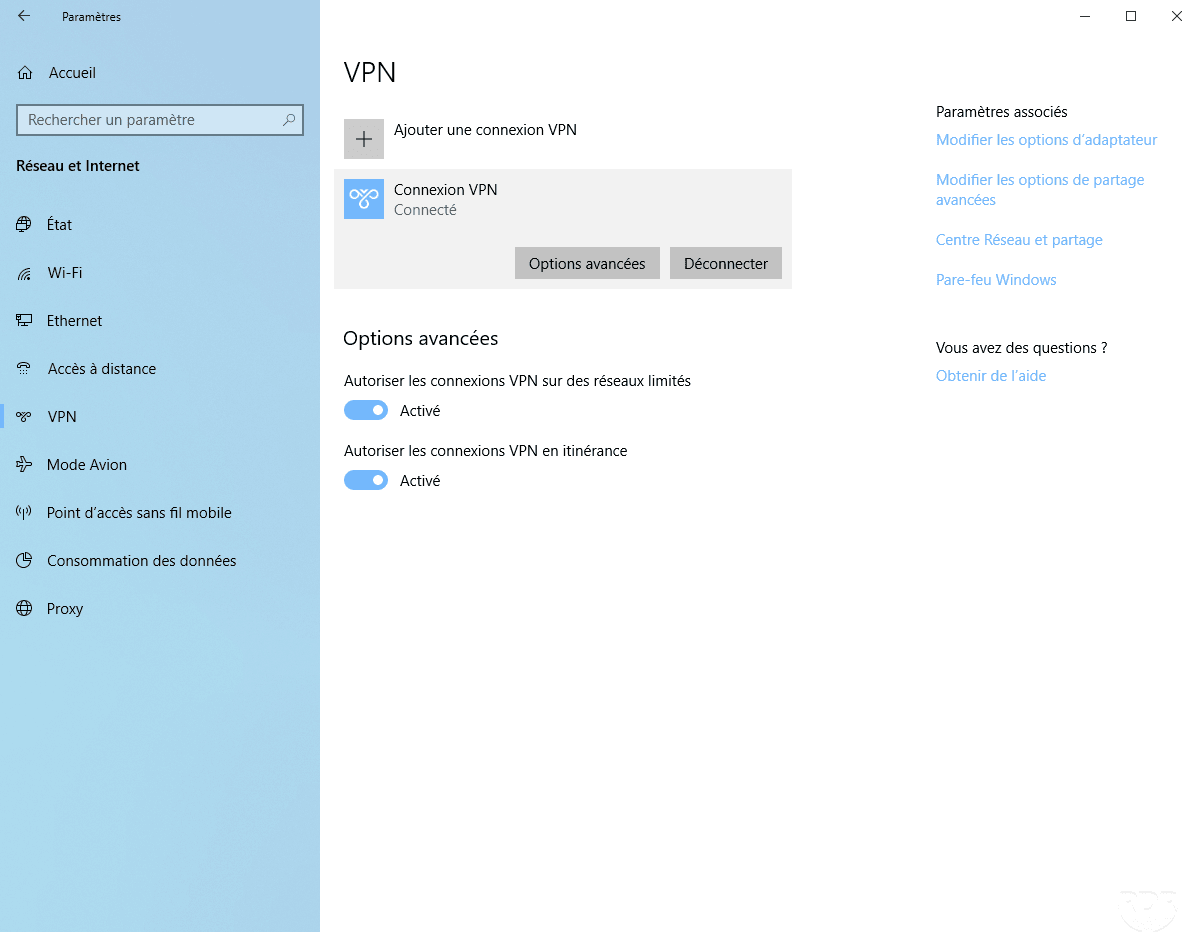
The connection is established.
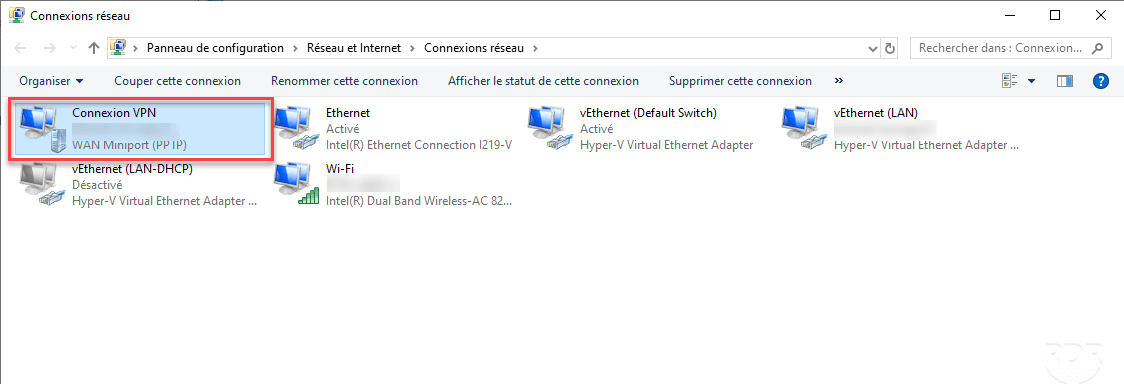
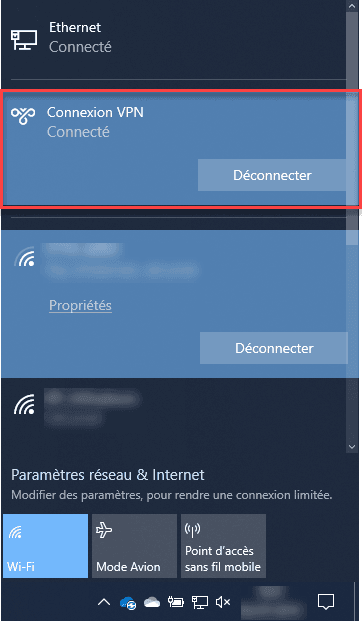
The VPN connection is also available at the network card level in Windows.
Quick access is also available through the notification area by clicking on the network icon.
On the remote access management console, it is possible to track the connected clients.
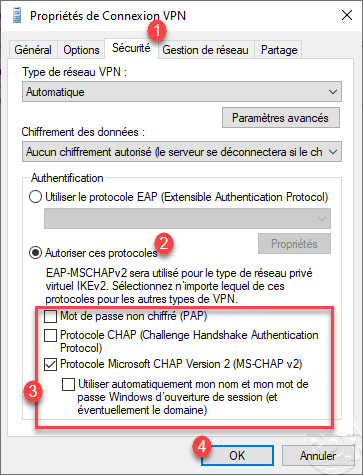
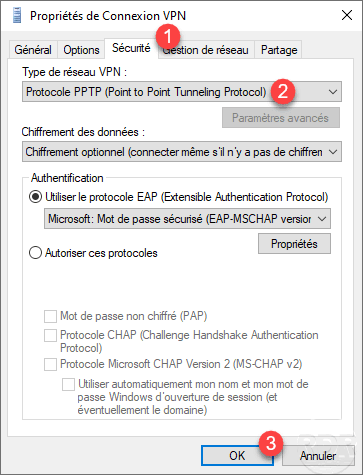
If you have not configured an EAP protocol, you must change the properties of the VPN connection through the Control Panel / Network Center and share / Change the card settings, right-click on the VPN network card and go to the Properties. Go to the 1 Security tab, choose Allow these 2 protocols and check the 3 authentication protocol (s) to be used then validate by clicking on OK 4 .
On the capture, we see that the type of VPN is automatic, when connecting it will test all known types.
VPN in PPTP
In this part, we will see how to force the PPTP VPN in the client configuration and on the NPS console to force this type of tunnel.
VPN client
VPN client…
NPS
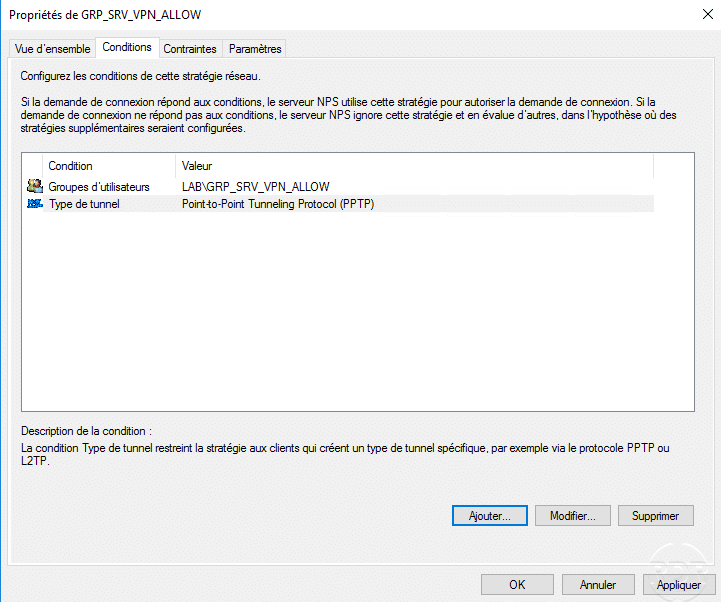
On the NPS console, go to the Network Policy node 1 , right click on the VPN Access Policy 2 and click Properties 3 .
Go to the 1 Conditions tab and click on Add 2 .
Select Tunnel Type 1 and click Add 2 .
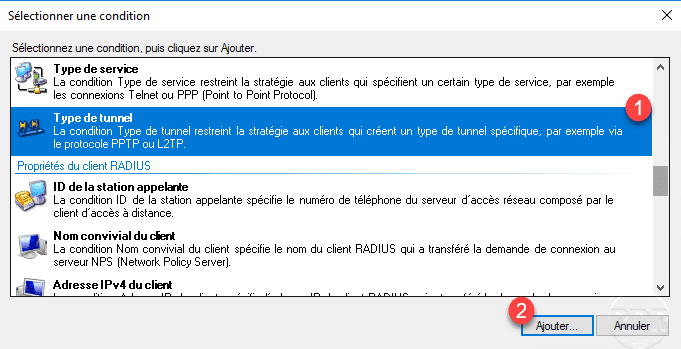
Check the Point-to-Point Tunneling Protocol (PPTP) 1 and click OK 2 .
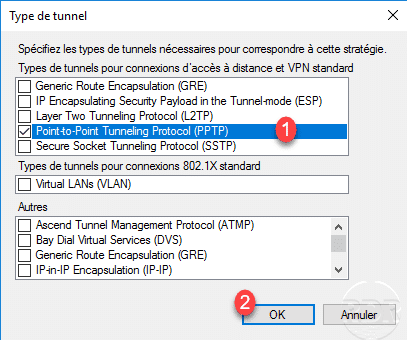
The condition of the PPTP tunnel type has been added.
VPN in SSTP
The SSTP tunnel is based on port 443 (HTTPS) which can be used in most WIFI connections.
Setting up the VPN SSTP requires configuring the certificate used for the connection. This must be installed in the personal store of the computer.
To work, the certificate authority must be known to the clients.
It is possible to use a self-signed certificate on the server, in which case the certificate must be installed on the clients in the Trusted Root Certification Authority store. If you are using a standalone or enterprise CA, you just need to deploy the authority certificate.
VPN Service Configuration – Routing and Remote Access
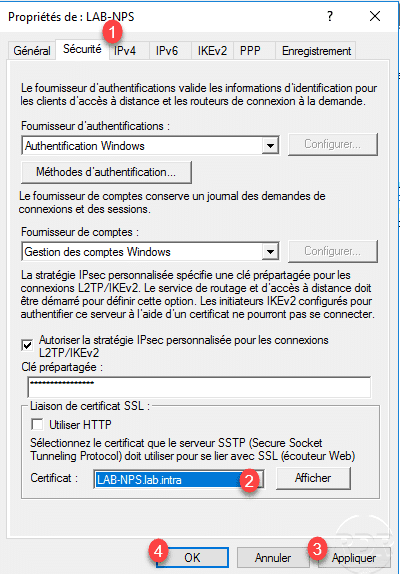
On the VPN server from the Routing and Remote Access console, open the server properties, on the Security tab 1 in the SSL certificate link section, choose the certificate 2 and validate by clicking Apply. 3 and OK 4 .
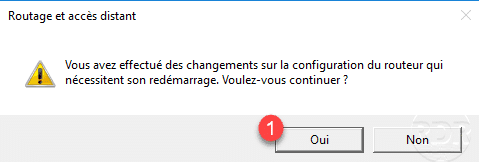
The changes require a restart of the service, confirm by clicking Yes 1 .
Customer configuration
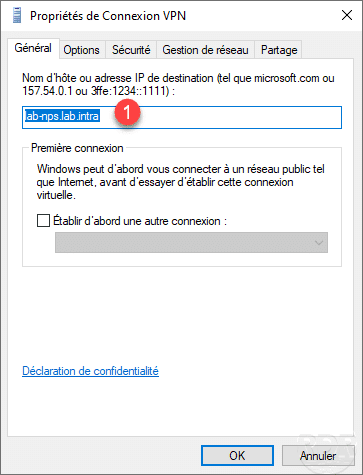
The login host name in the General tab must be a DNS name 1 present in the certificate.
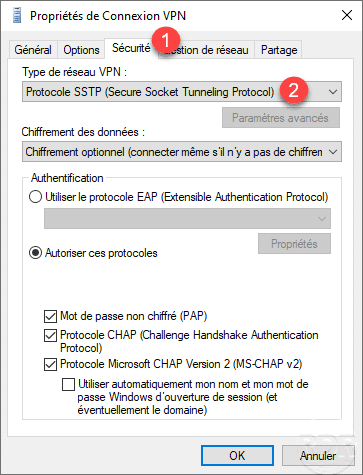
As for the PPTP VPN tunnel, it is possible to force the type in the Security tab 1 by selecting SSTP 2 .
NPS
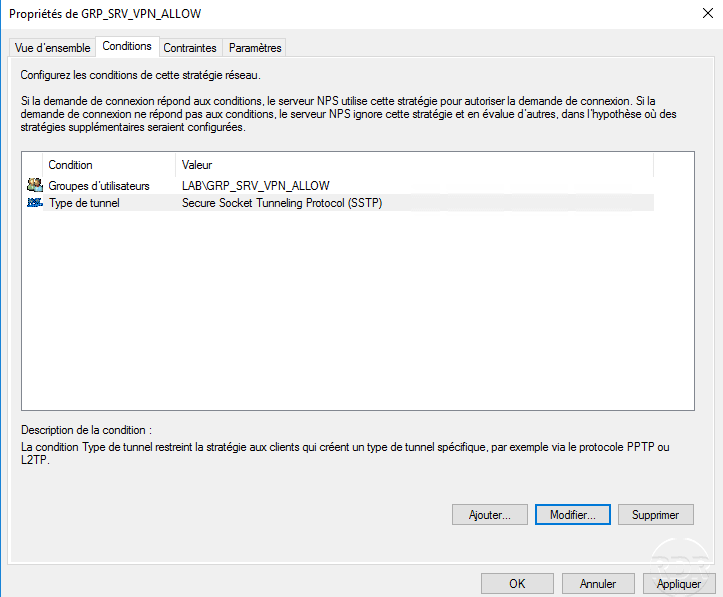
As for the PPTP tunnel, it is possible to force the SSTP tunnel into the network strategy.
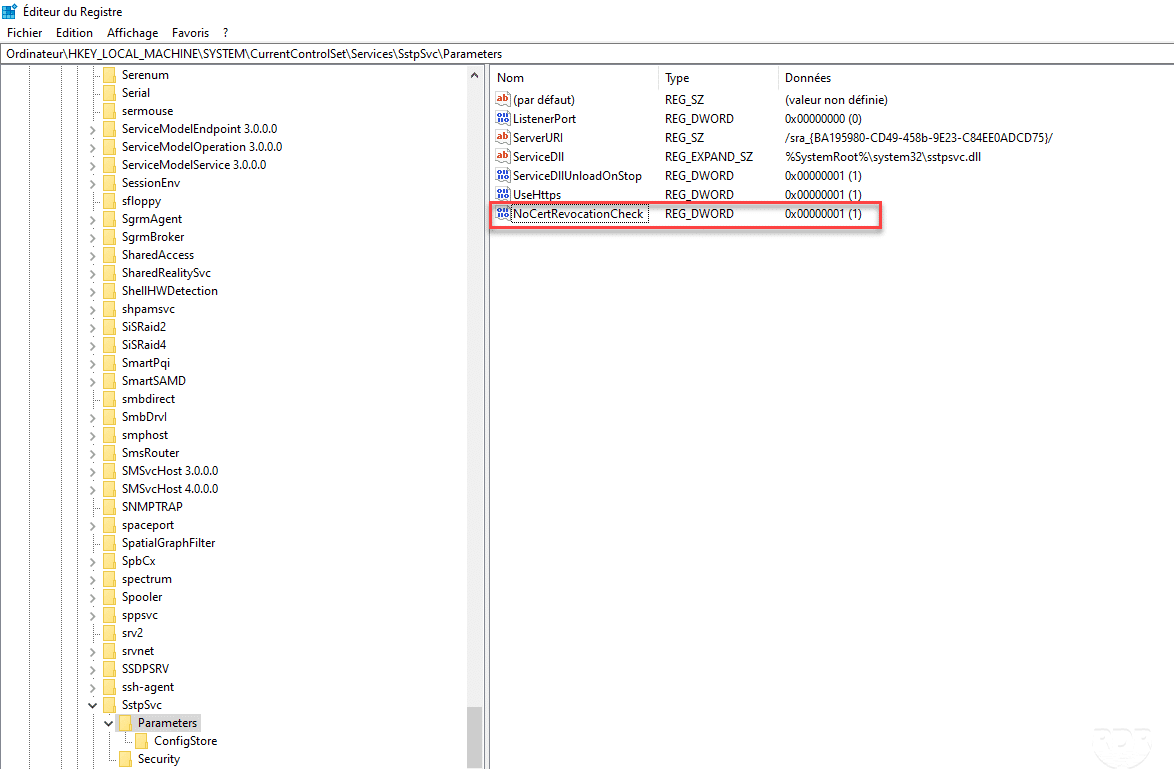
Error: The revocation function could not verify the revocation because the revocation server was disconnected
If you are using a self-signed certificate or from a private CA that does not publish the revocation list on the Internet, you must add a registry key to the client to bypass this verification.
Open the registry editor and go to the location : HLM\SYSTEM\CurrentControlSet\Services\SstpSvc\Parameters and add the key (DWORD) NoCertRevocationCheck by assigning it the value 1.