In this tutorial, I will explain how to add an additional disk to an Ubuntu machine and create a new LMV volume for this disk.
To explain this tutorial, I will start from a concrete case, I have a virtual machine on Hyper-V where Ubuntu 22.04 is installed. There is a first disk which is present where the operating system is installed.
The software publisher “wants or requires” in the prerequisites, a second “hard disk” for storing the application data which will have the bridging point /data, in the prerequisites, he also wants a volume (LVM) to take advantage of the advantages such as hot resizing.
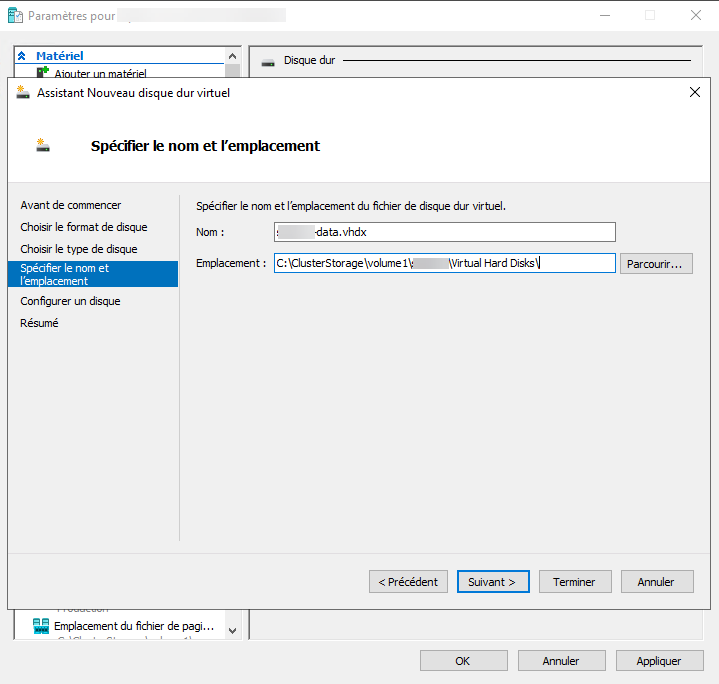
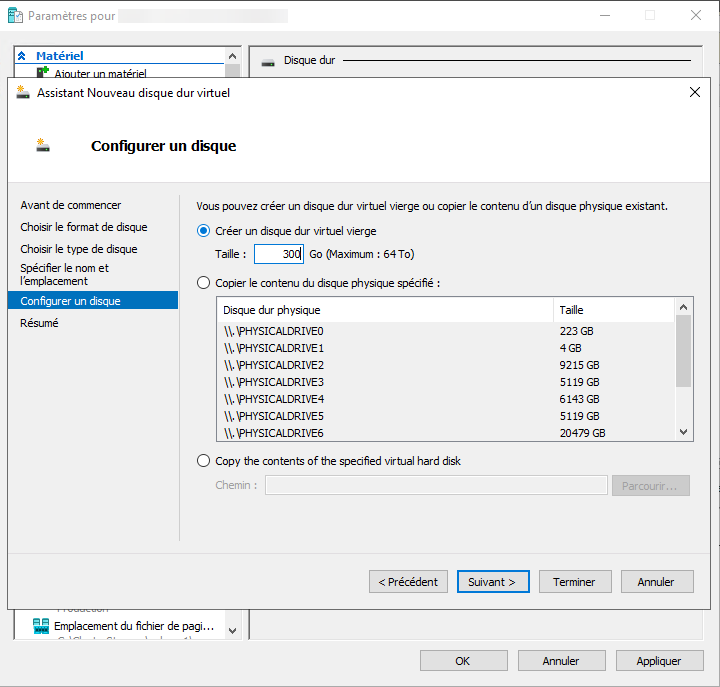
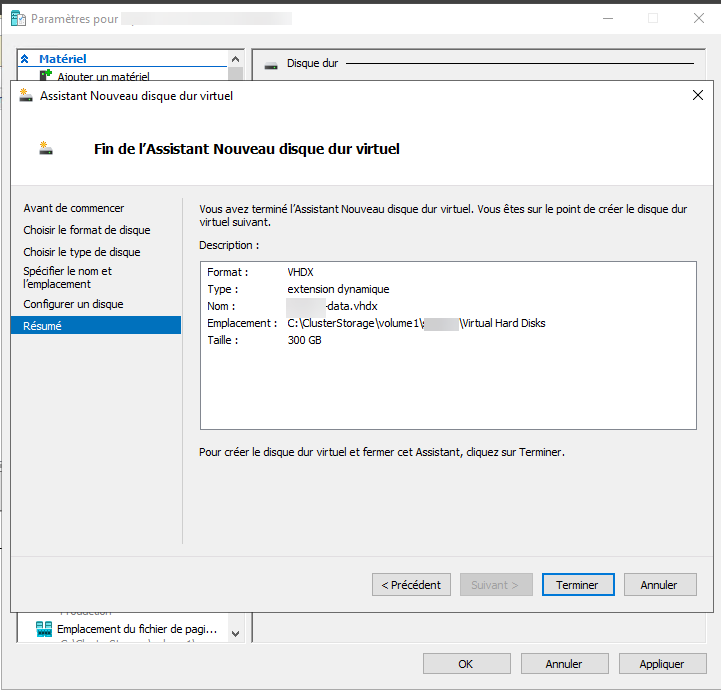
I’m going to start by adding a disk to my virtual computer, it is turned off.

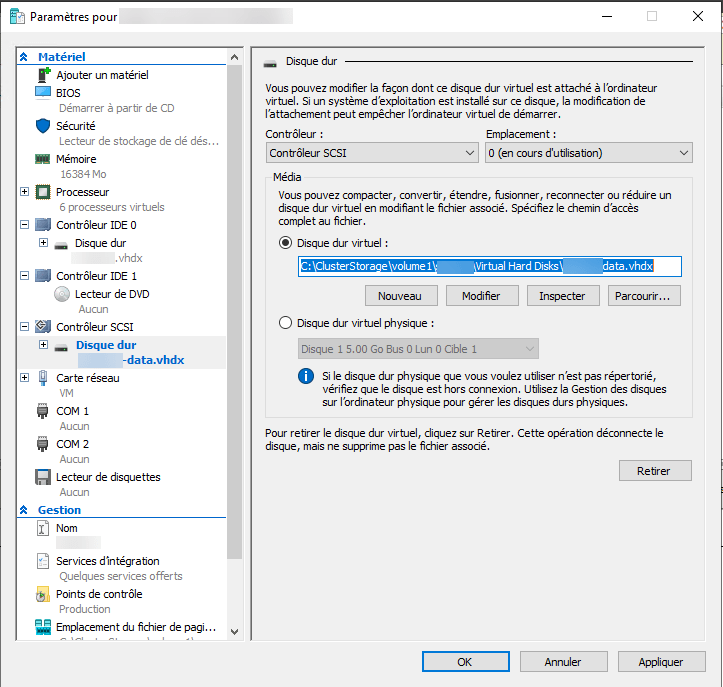
In the virtual computer settings, I add a new 300GB SCSI disk.

Now that the disk is added, we start the virtual computer to add the disk to the system.
I’m going to take it step by step, so you can see each step.
To begin, I will enter the command df -h which allows you to see the available disk space.
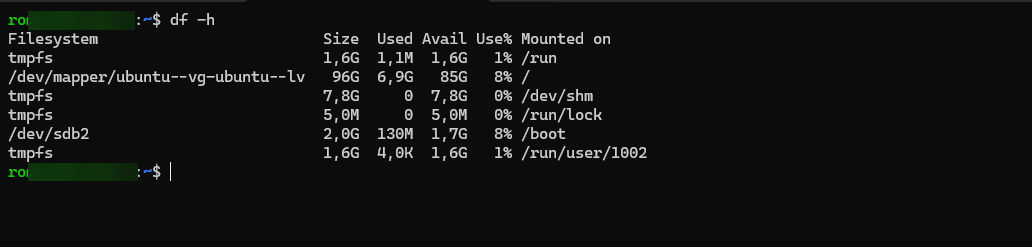
For the moment, we cannot see our new 300GB disk, which is normal
On the other hand, if we enter the sudo lsblk command which displays the physical disks, we can clearly see our 300 GB disk which has the name (NAME) sda.

Depending on your environment, the name of the disk may be different, note the name in the back of your mind, we will need it right after.
The first step will be to initialize the disk, for this we will use the pvcreate (Physical Volume) command.
sudo pvcreate /dev/sda
Now, we will tackle the volume group, a volume group is made up of one or more physical disks, here we will have a single disk in our group.
Before creating the volume group (vg), we will display the groups present.
sudo vgdisplay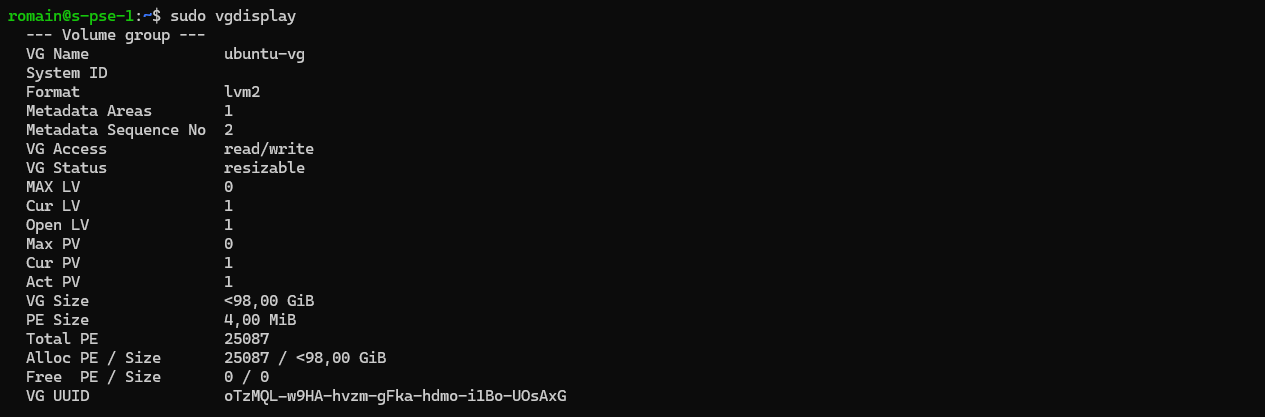
How can we see it, I already have a volume group, it is the one that is created during the installation
To create a volume group, we will use the vgcreate command, indicating the name of the volume and the physical disks that will be in this group.
sudo vgcreate ****-g-data /dev/sda
If we wanted to put several discs :
sudo vgcreate ****-g-data /dev/sda /dev/sdc
If we display the volume groups again with the vgdisplay command, we can see the group we have just created.

Now, we will create a logical volume which is part of the group.
To display the logical volumes present:
sudo lvdisplay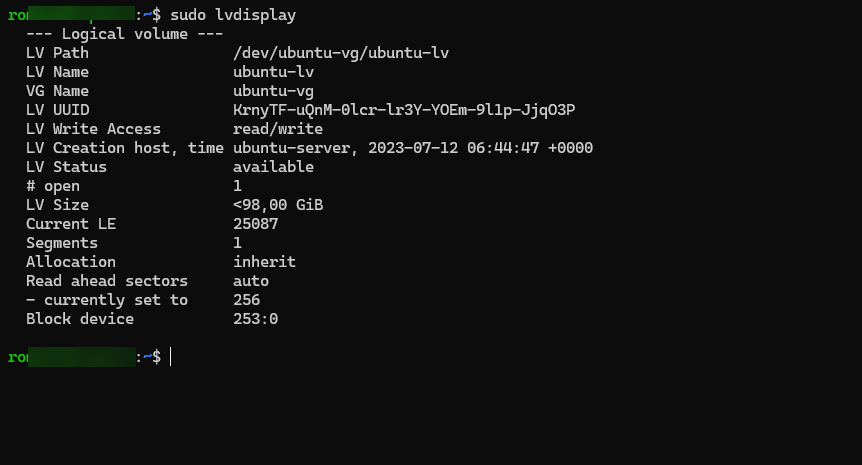
To create the logical volume, we will use the lvcreate command, indicating the volume name (-n), size (-L) and group.
sudo lvcreate -n *****-lv-data -L 250G *****-g-data
Here, I have created a logical volume of 250GB which is in the group that we created previously.
If we display the volumes again with lvdisplay, we can see our volume.
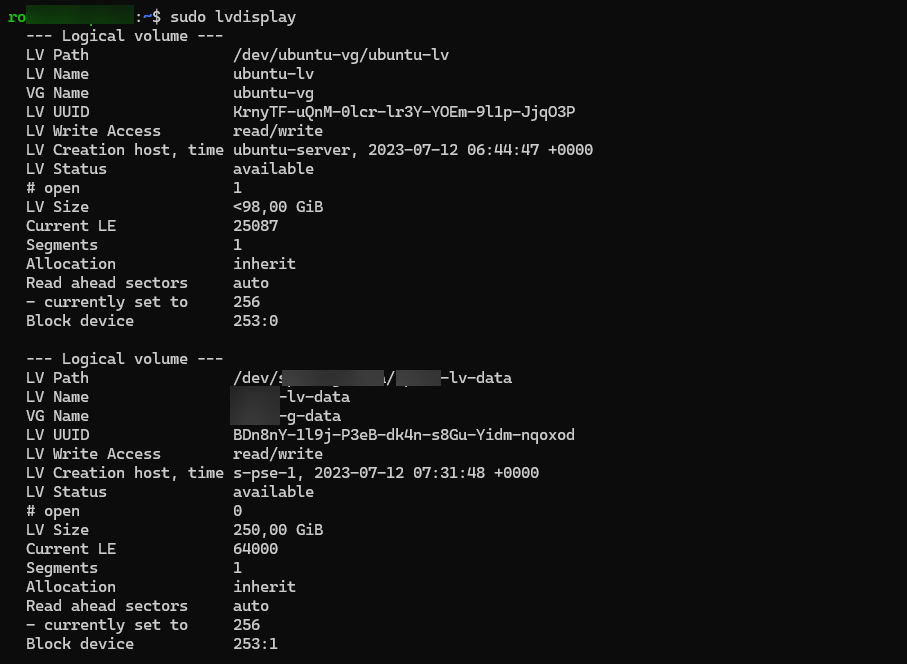
If we look at LV Path, we can see that the logical volume is located in the /dev folder and in a subfolder called group.
Now we will format the volume with mkfs.
sudo mkfs -t ext4 /dev/***-g-data/****-lv-data
If we enter the lsblk command again, this time we will see our disk and the associated volume.

We will move on to the last step, which will be to increase this volume for usable space.
How to explain at the beginning of this tutorial, I want to mount this volume in the /data directory.
I start by creating the folder:
sudo mkdir /dataTo increase the volume:
sudo mount /dev/****-g-data/*****-lv-data /dataThe volume is mounted in the folder /data.
The problem with the mount command is that when you restart the computer, you have to do the mounting again; for a startup mount, you will add a line to the file /etc/fstab.
Before editing the /etc/fstab file, we will get the disk ID.
Go to folder /dev/disk/by-id
cd /dev/disk/by-idShow list of items
ll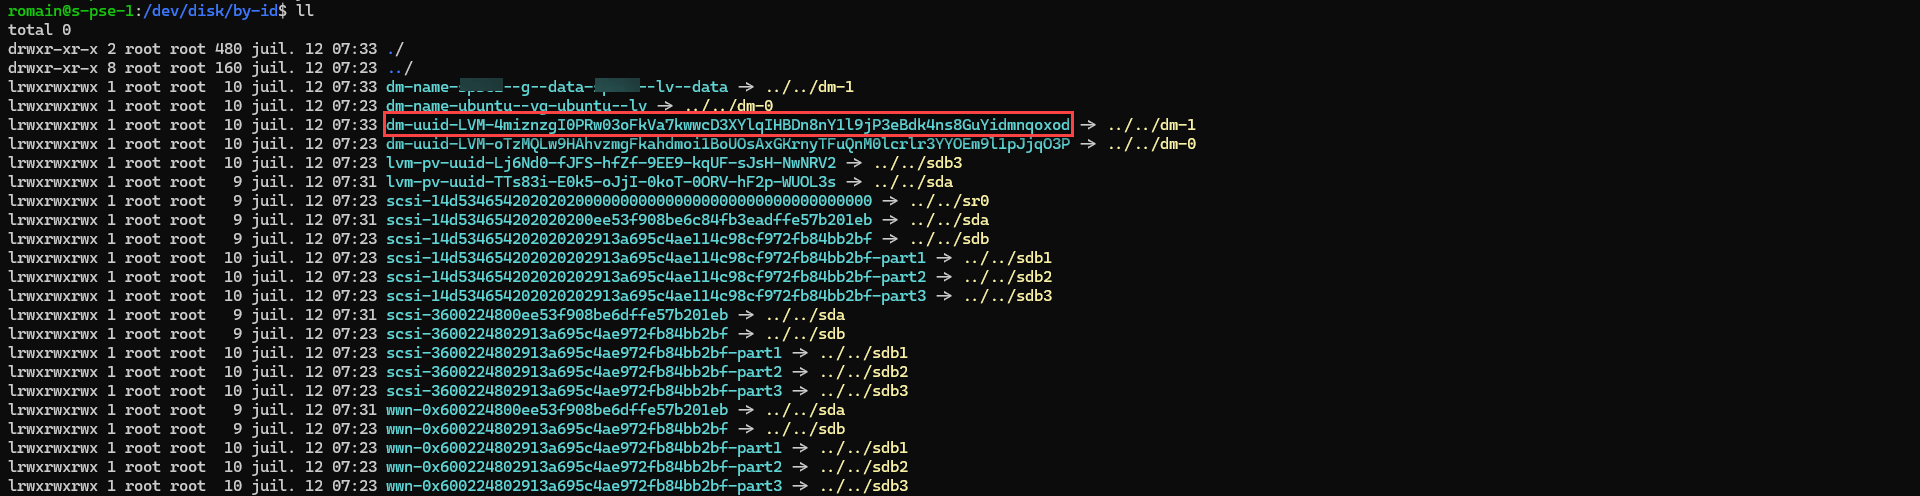
Locate the volume previously which begins with
dm-name-***-****-**and look at his name at the end of the line, here../../dm-1.Copy the line that starts with
dm-uuid-LMV-xxxxxxxxxxxxxxxxxxxxxxxwhich corresponds to the volume.
Open file /etc/fstab
sudo nano /etc/fstabAt the end, we add a line to automate the mounting of the volume
/dev/disk/by-id/dm-uuid-LMV-********** /point-de-montage ext4 defaults 0 0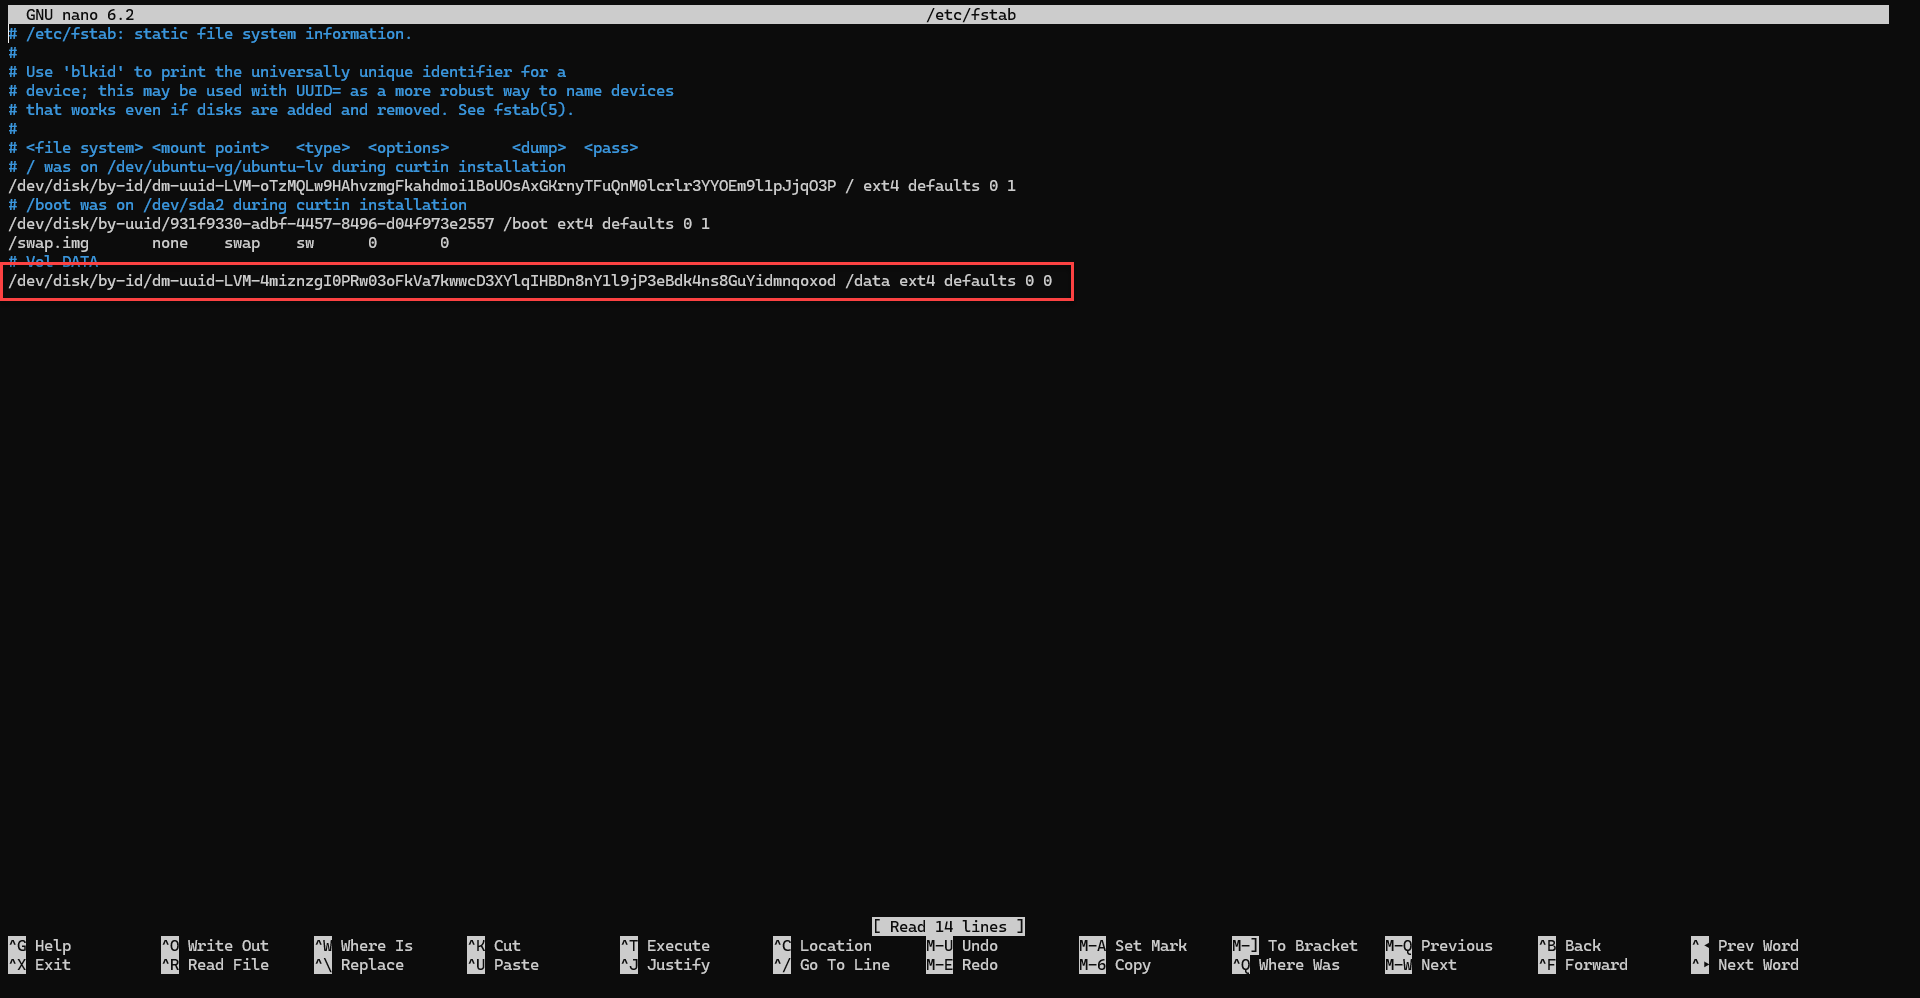
Save changes.
Now the volume will be automatically mounted. To test, restart the computer.
Now you know how to add a hard drive and create a new LVM volume and create its automount.