

Presentation
In this tutorial, we will see a common task on a server, which is the folder share.
There are several solutions to share a folder, in this tutorial we will see two possibilities:
- By the file explorer
- By the server manager
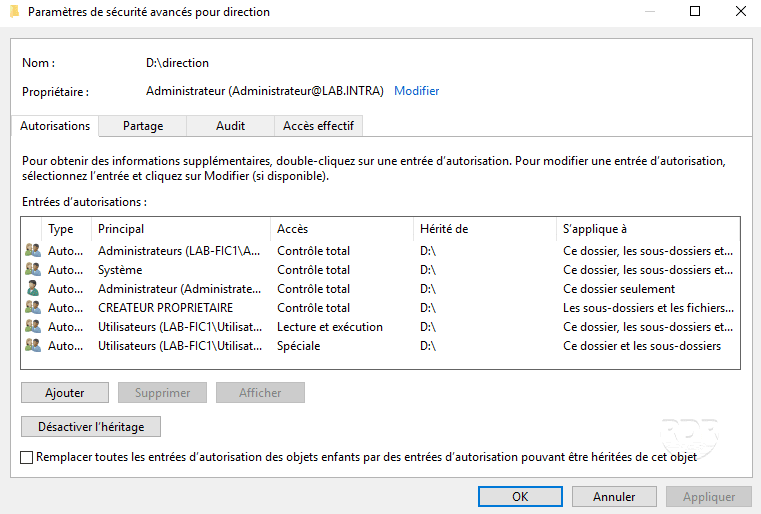
Before starting to share a folder, we will make a point on the operation of rights SMB and NTFS.
NTFS rights apply to local access folders directly from the server and also to the folder if it is shared.
SMB rights applies only to the shared folder and allows access to this folder. NTFS rights then take over for access to folders and files.
We share the folder Direction with SMB rights for Everyone, at the NTFS level only the GRP_Direction group has rights on it, if a user who is not part of the group tries to open the folder, it will not have access on.
Share a folder with the file explorer
This solution is often used and works for all versions of Windows server and desktop.
Open the explorer and go to the location of the file to share.
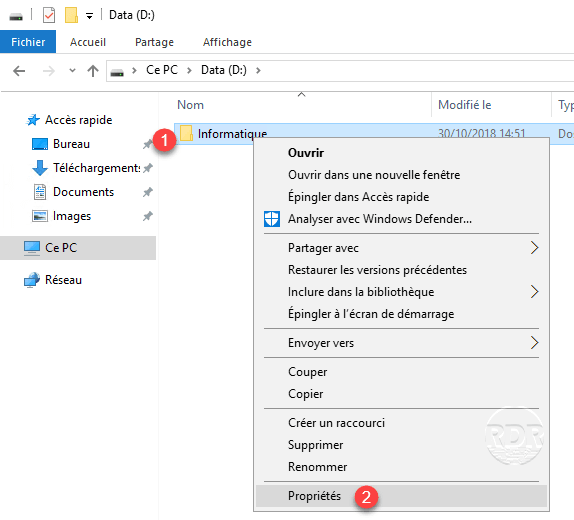
Right click on the folder 1 and click on Properties 1 .
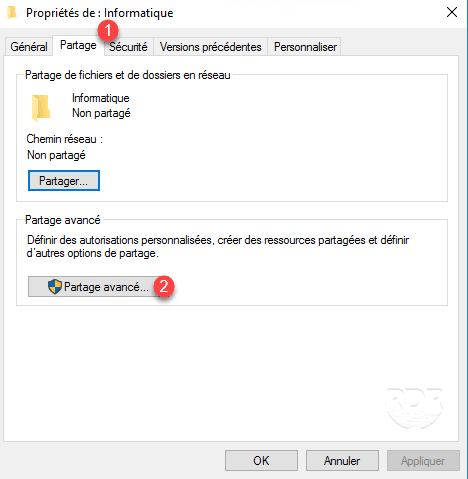
Go to the Sharing tab 1 and click on Advanced Sharing 2 .
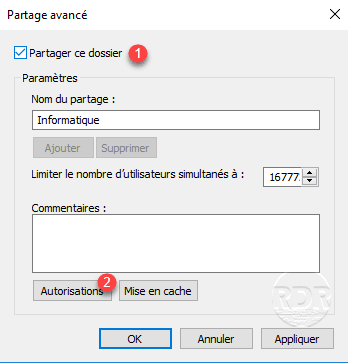
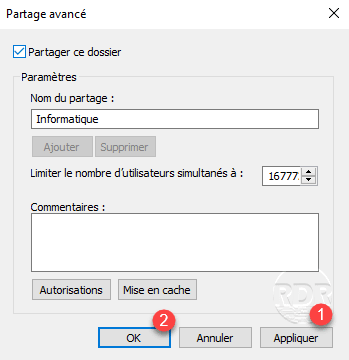
Check the box Share this folder 1 and click on Permissions 2 .
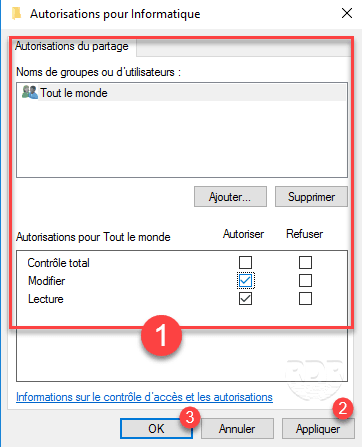
Configure sharing permissions as needed 1 then click Apply 2 and OK 3 .
Click Apply 1 and OK 2 again to close the Advanced Sharing window.
The folder is shared and the path 1 visible in the properties.
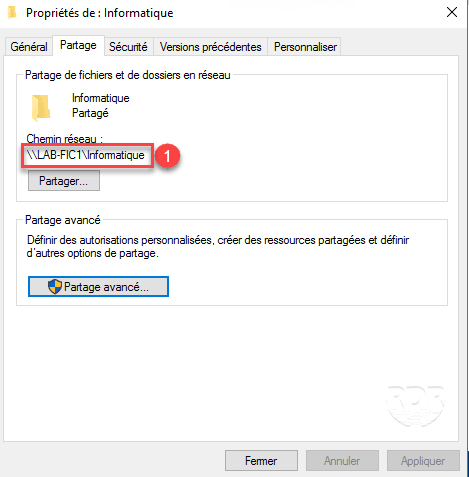
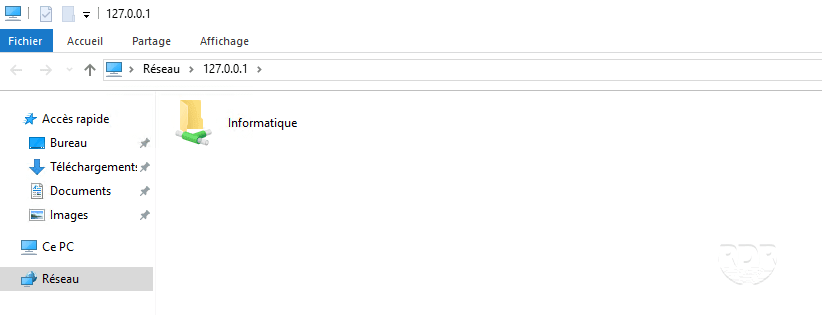
Test the share directly from the server entering the above address in Windows Explorer.
Share a folder by the Server Manager
Since Windows Server 2012, shared folder management is done directly from the new server manager.
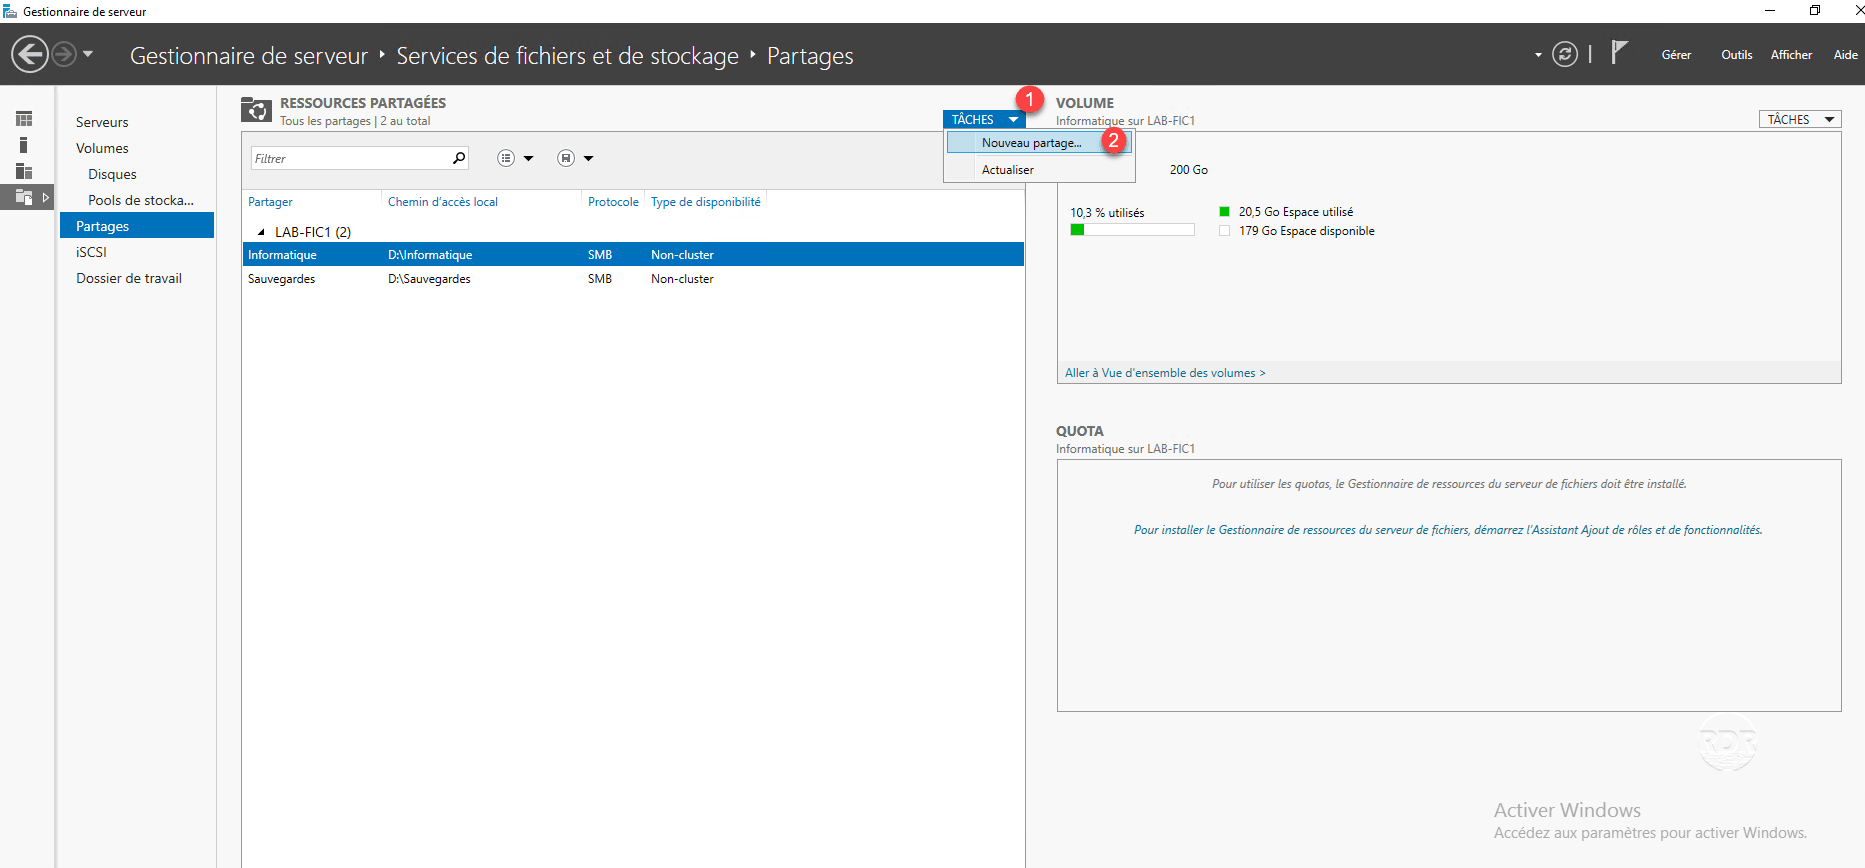
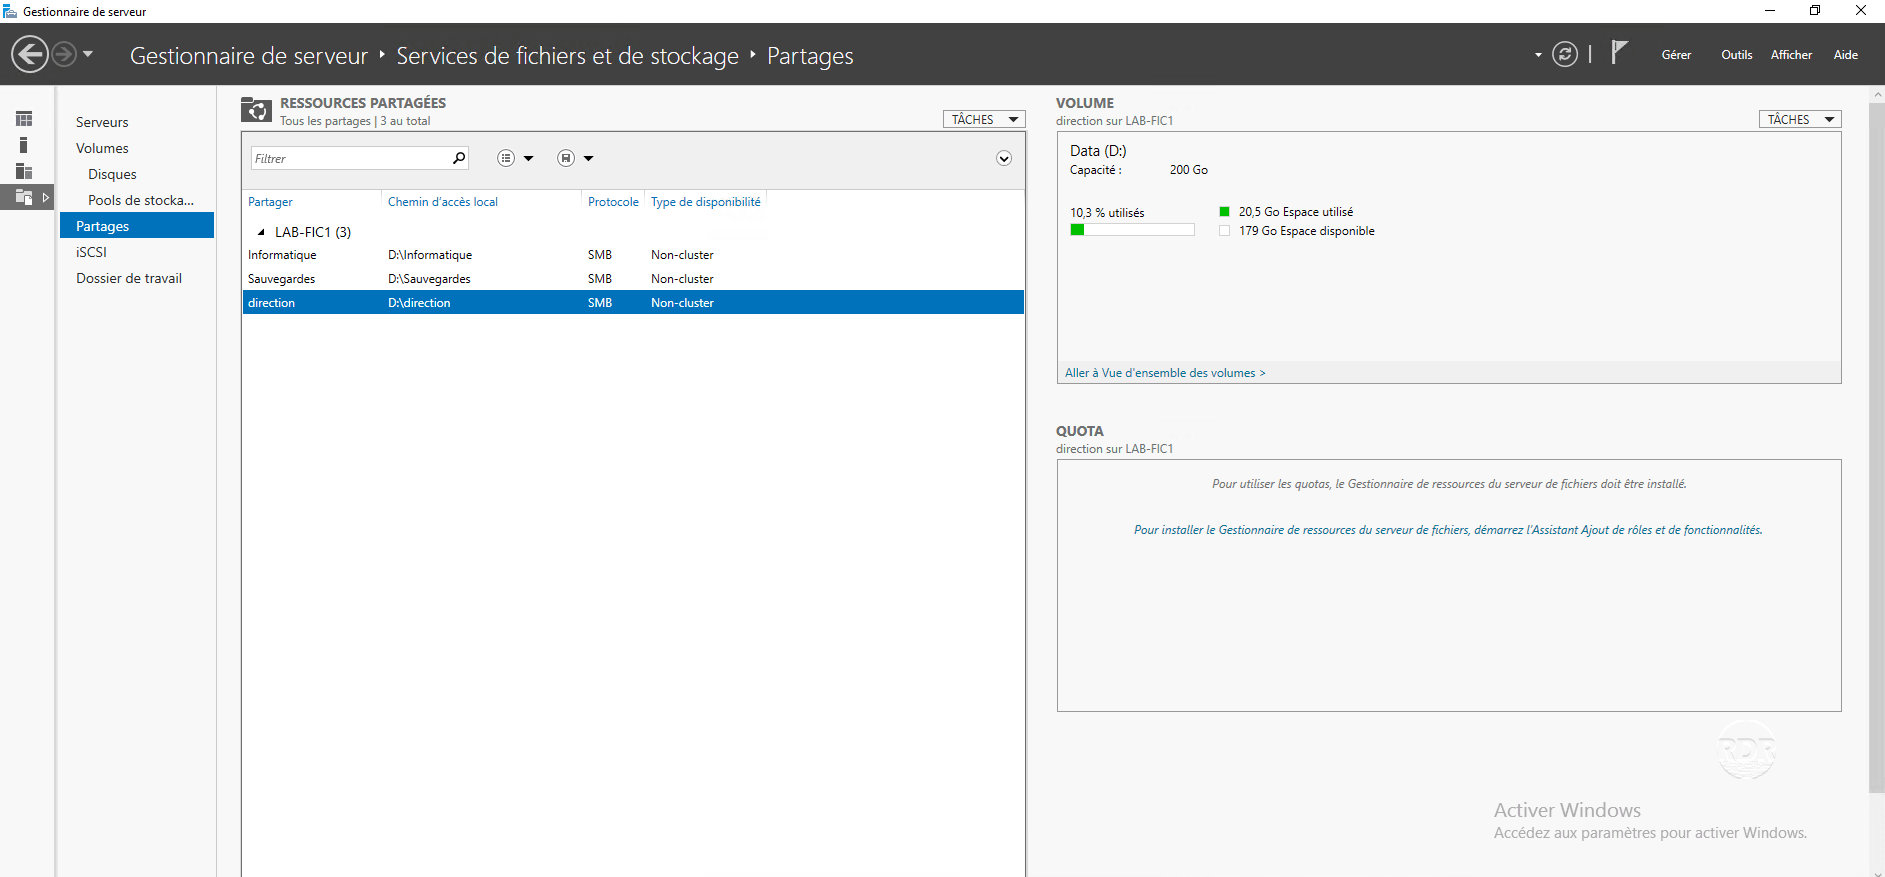
Open Server Manager and go to Sharing Management located in File and Storage Services.
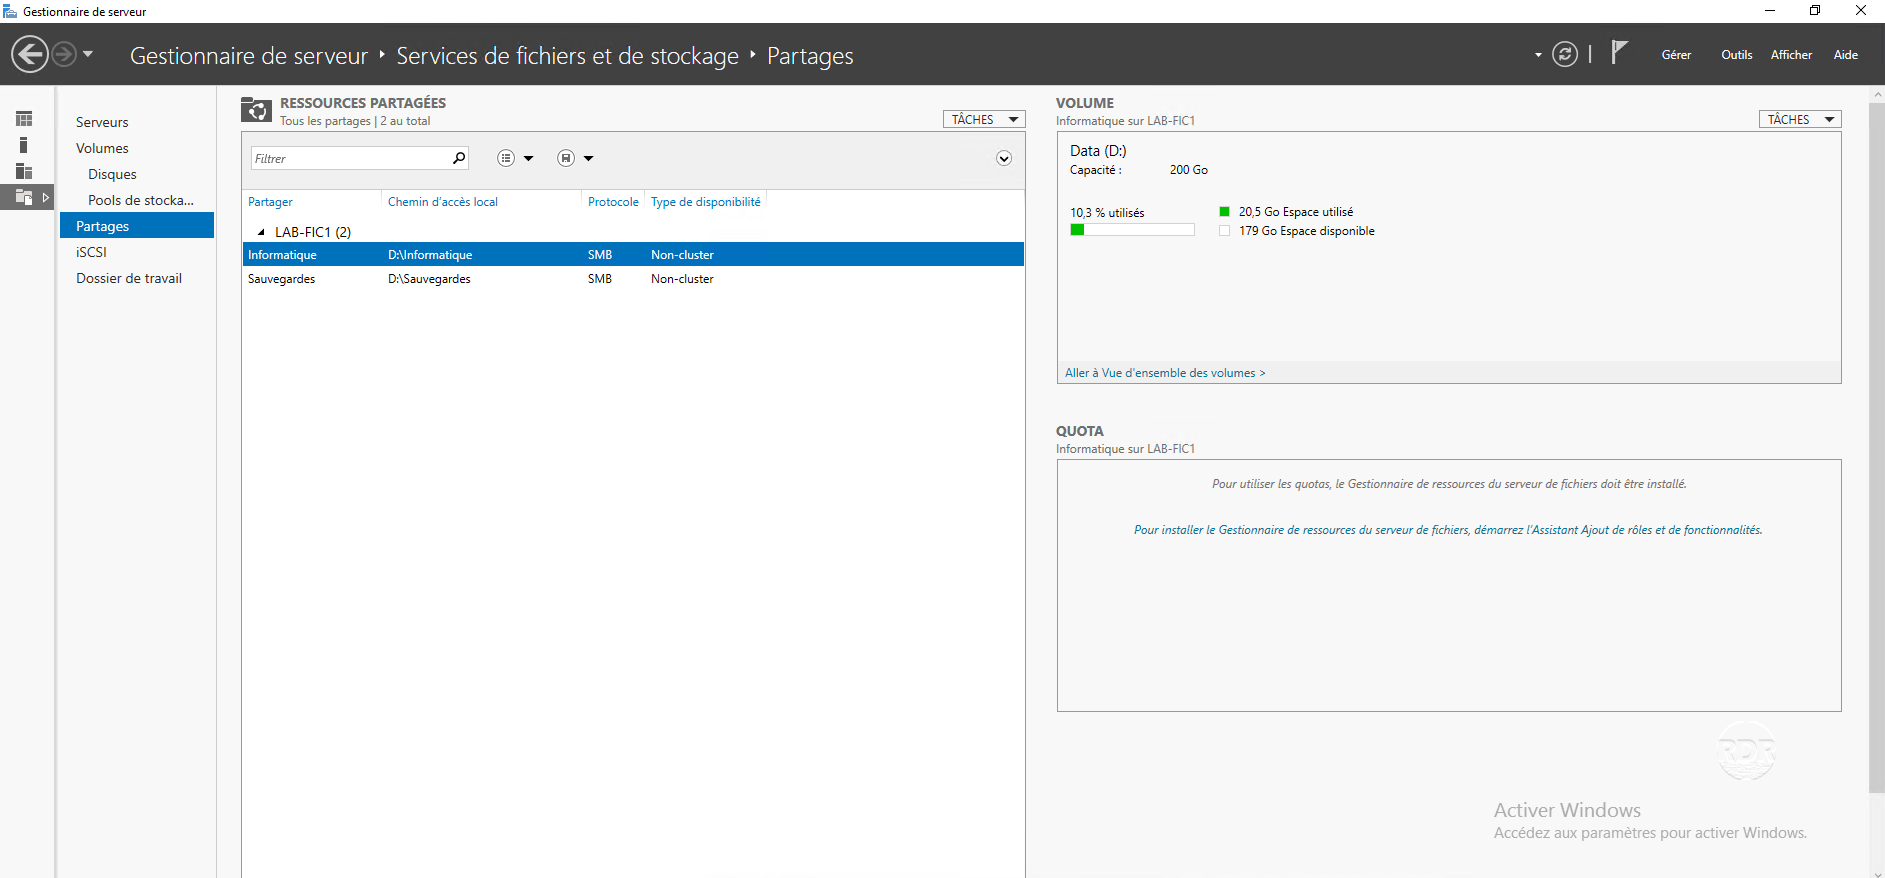
The folders shared by the explorer are administrable in the Server Manager.
Click on TASKS 1 then on New sharing 2 to launch the wizard.
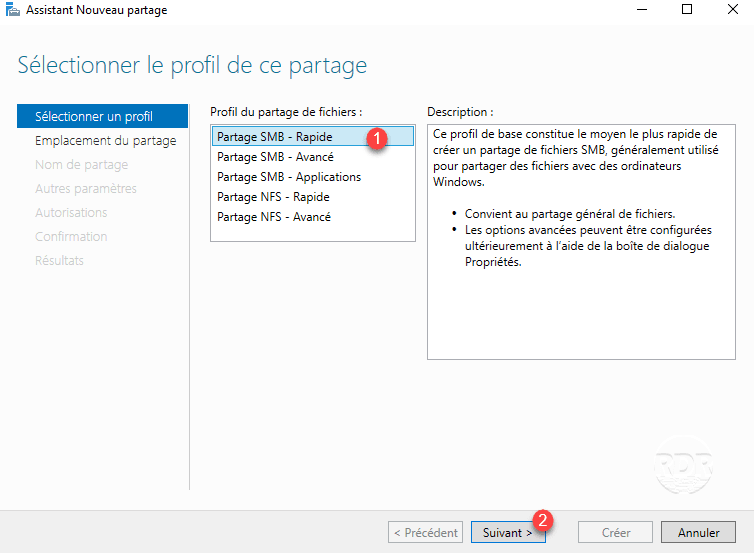
Select Profile SMB Share – Fast 1 and click Next 2 .
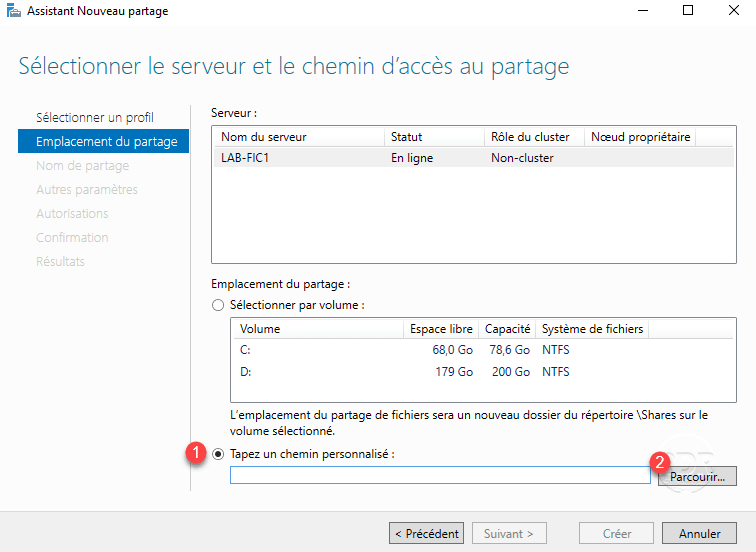
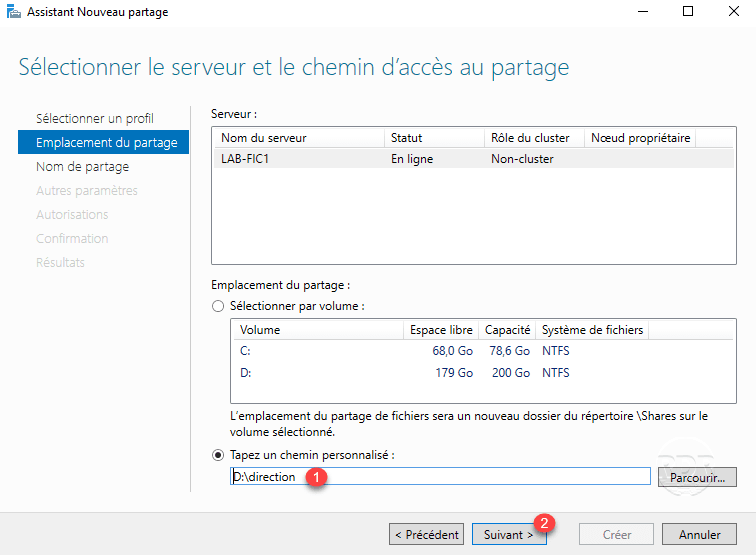
Select Type a custom path 1 and click Browse 2 .
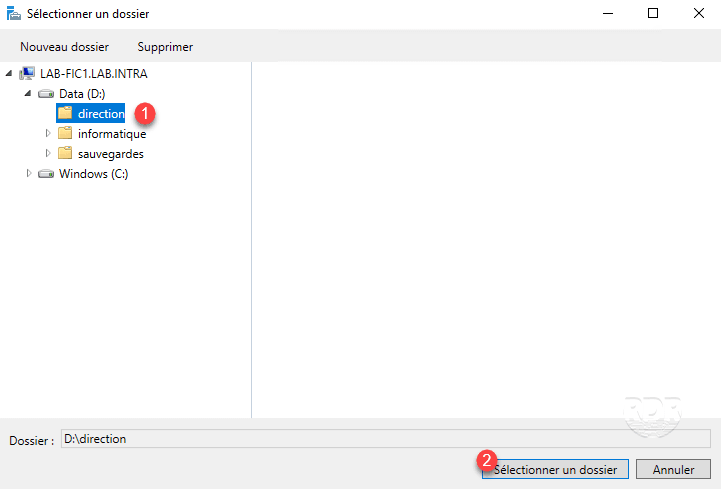
Search for the file to share 1 then click on Select this folder 2 .
The folder path is set to 1 , click Next 2 .
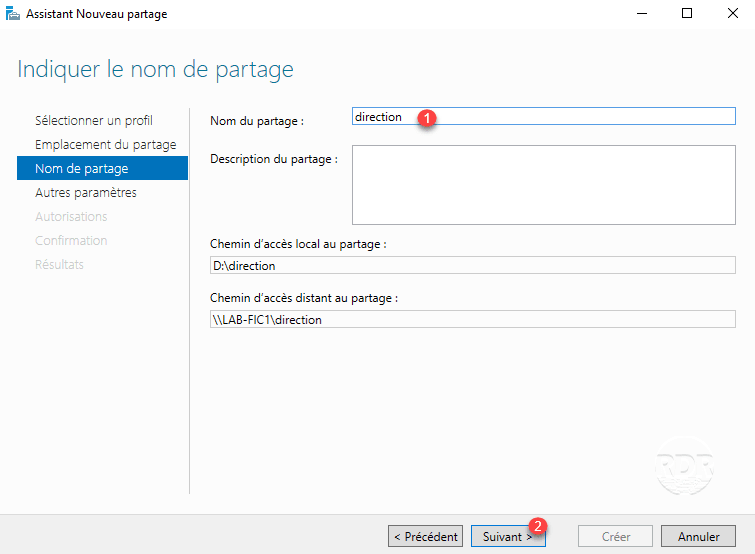
If necessary change the share name 1 then click on Next 2 .
Change the additional options for sharing 1 and click Next 2 .
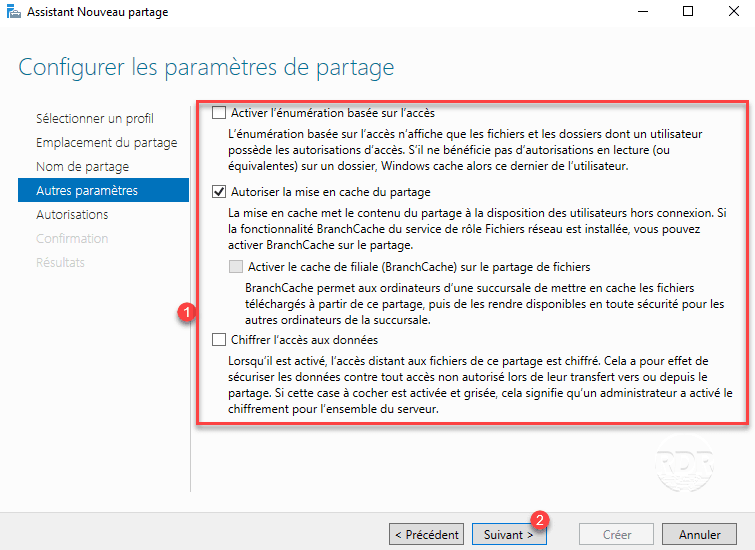
In the case of confidential file, I advise you to disable caching. Deactivating the cache also increases the security of the share, because the users having the folder locally, when they return to the corporate network the content is synchronized, if the user is encrypted the file, this will send the files to the server.
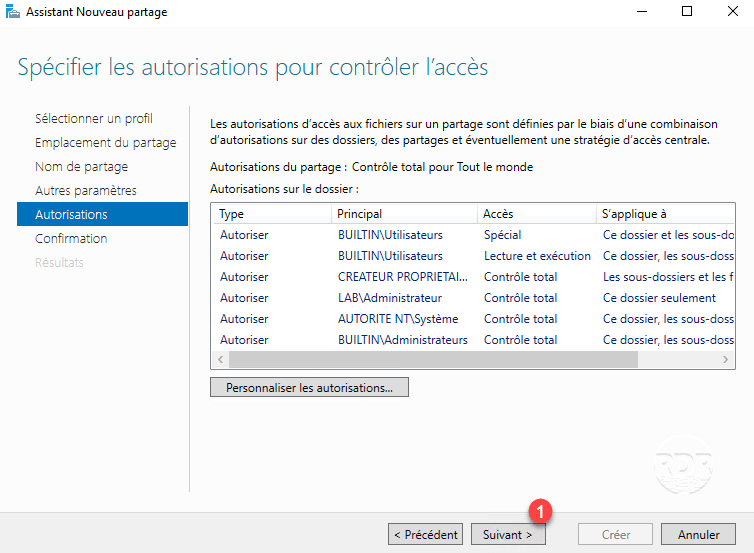
Click Customize Permissions 1 .
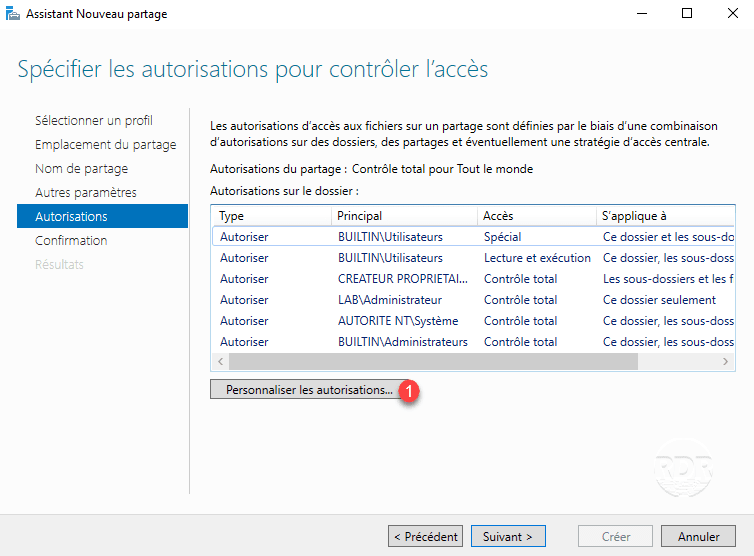
As needed change the NTFS and SMB Permissions and close the window.
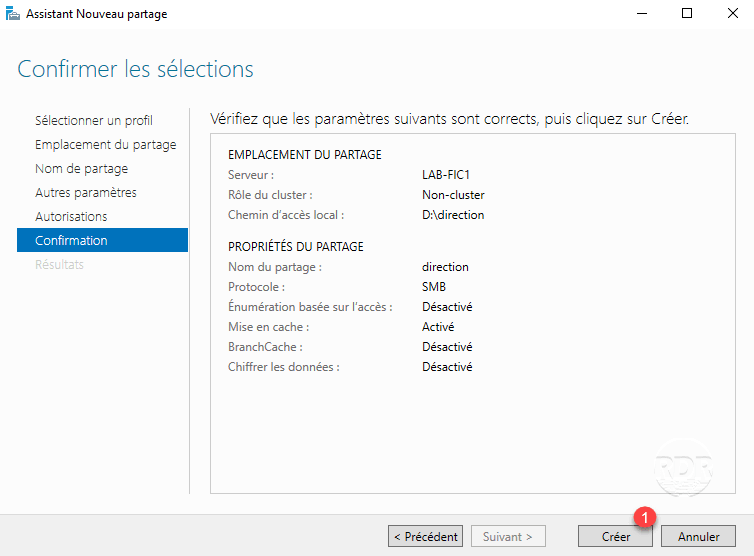
Configured permissions, click Next 1 .
Start creating the share by clicking on Create 1 .
When done, exit the wizard by clicking Close 1 .
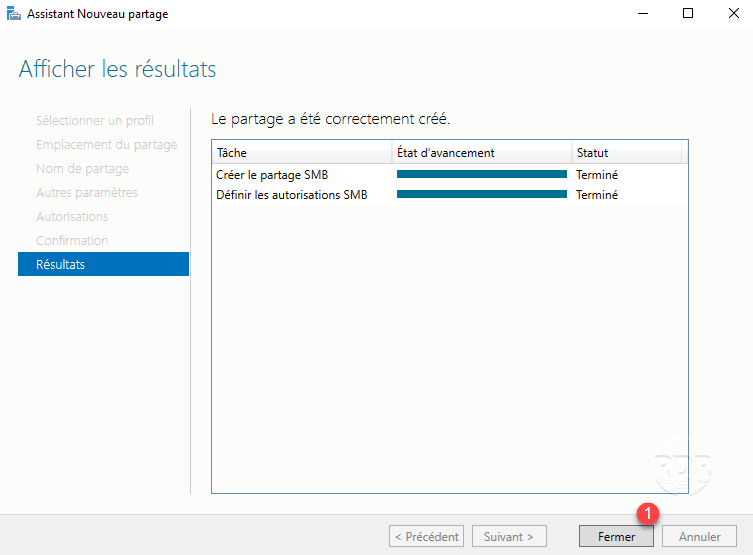
Folder sharing is created.
Conclusion
Folder sharing is not a difficult operation to do on Windows Server, but you have to be careful about the rights you have on sharing if it is to remain confidential.
All you need to do is set up GPO so that users automatically access the folder through a network drive.
As part of a file server, I recommend the installation of the resource manager that will allow better management of files and the use report edition.