In this tutorial, I will explain to you how to monitor a Proxmox server with Zabbix.
Supervision of Proxmox with Zabbix is done through the Proxmox API, which also makes it possible to report information on the VMs and CT which operates on the Hypervisor.
Supervision is done by importing a model into Zabbix; it is not necessary to install the Zabbix agent on the Proxmox servers.
Import the template into Zabbix
To begin, we will import the template into Zabbix, it is available here : www.zabbix.com/fr/integrations/proxmox
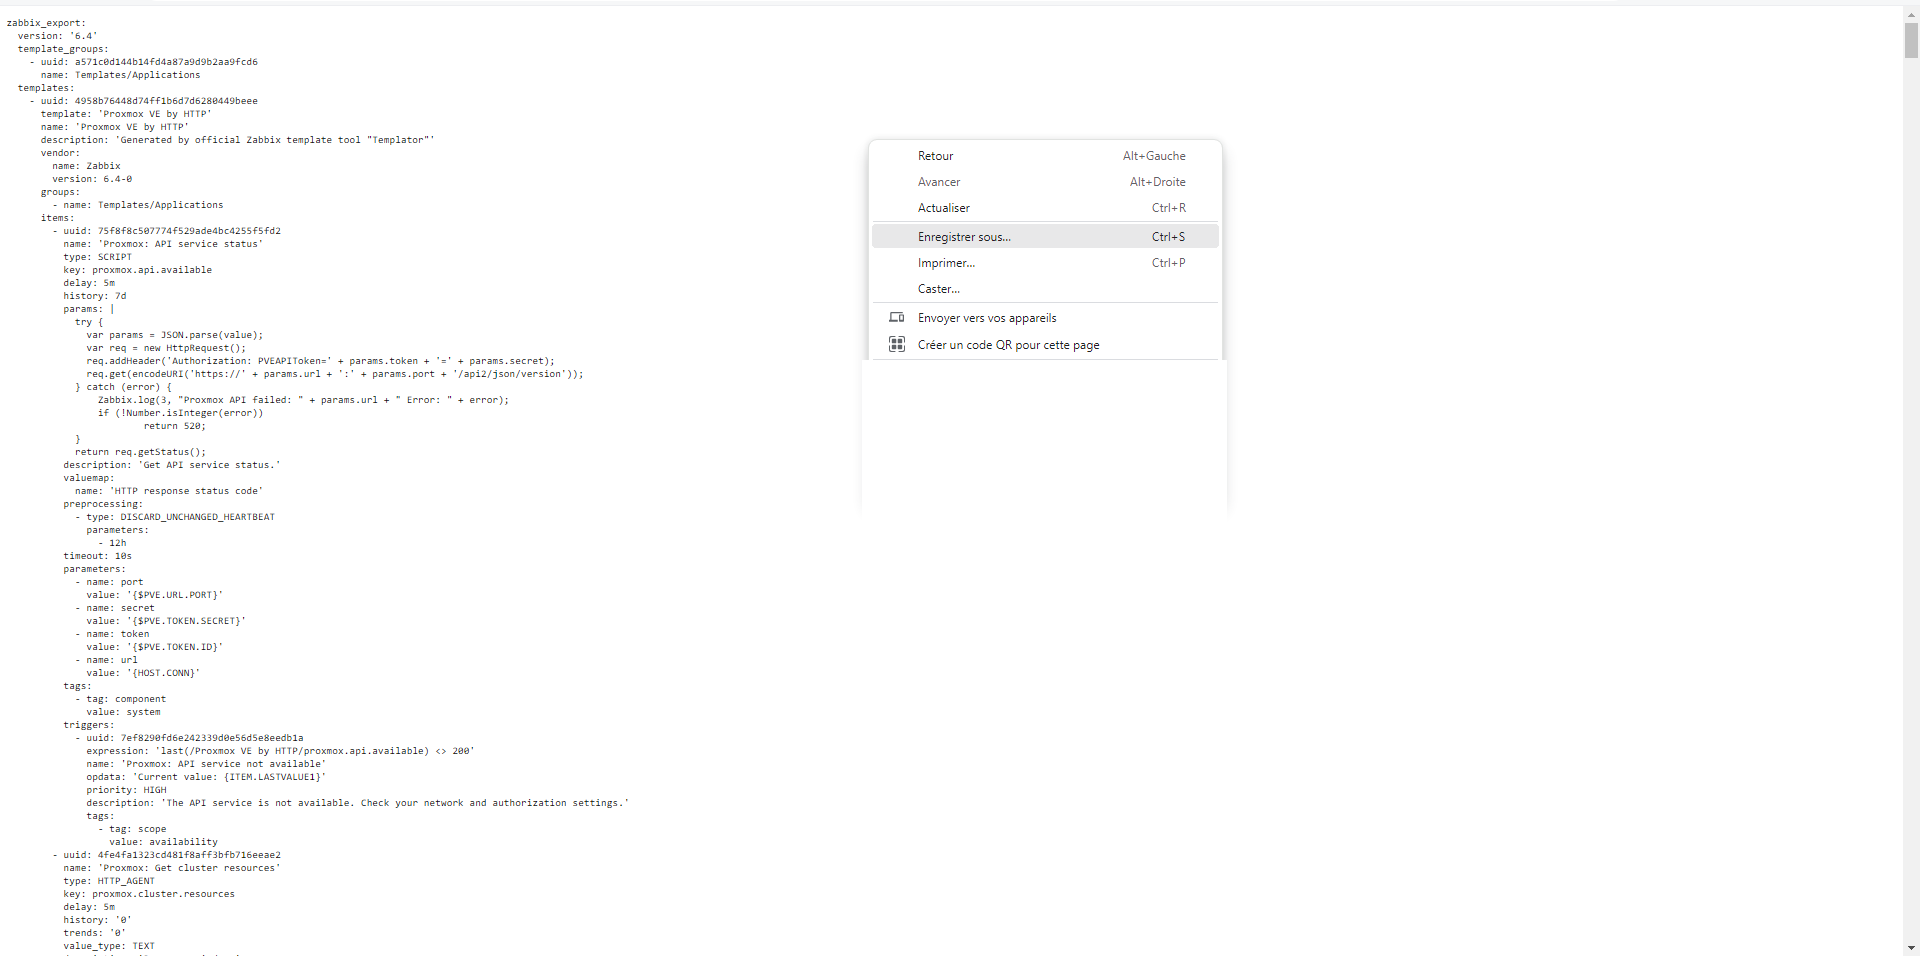
On the repository page, click on the template_app_proxmox.xml file to get the source of the file and click on the Raw file button.

On the new page, right-click and click Save As and save the file under the name template_app_proxmox.xml.
From Zabbix, go to Data collection 1 / Models 2, click on the Import 3 button.

Find the previously downloaded file1 and click on the Import 2 button.
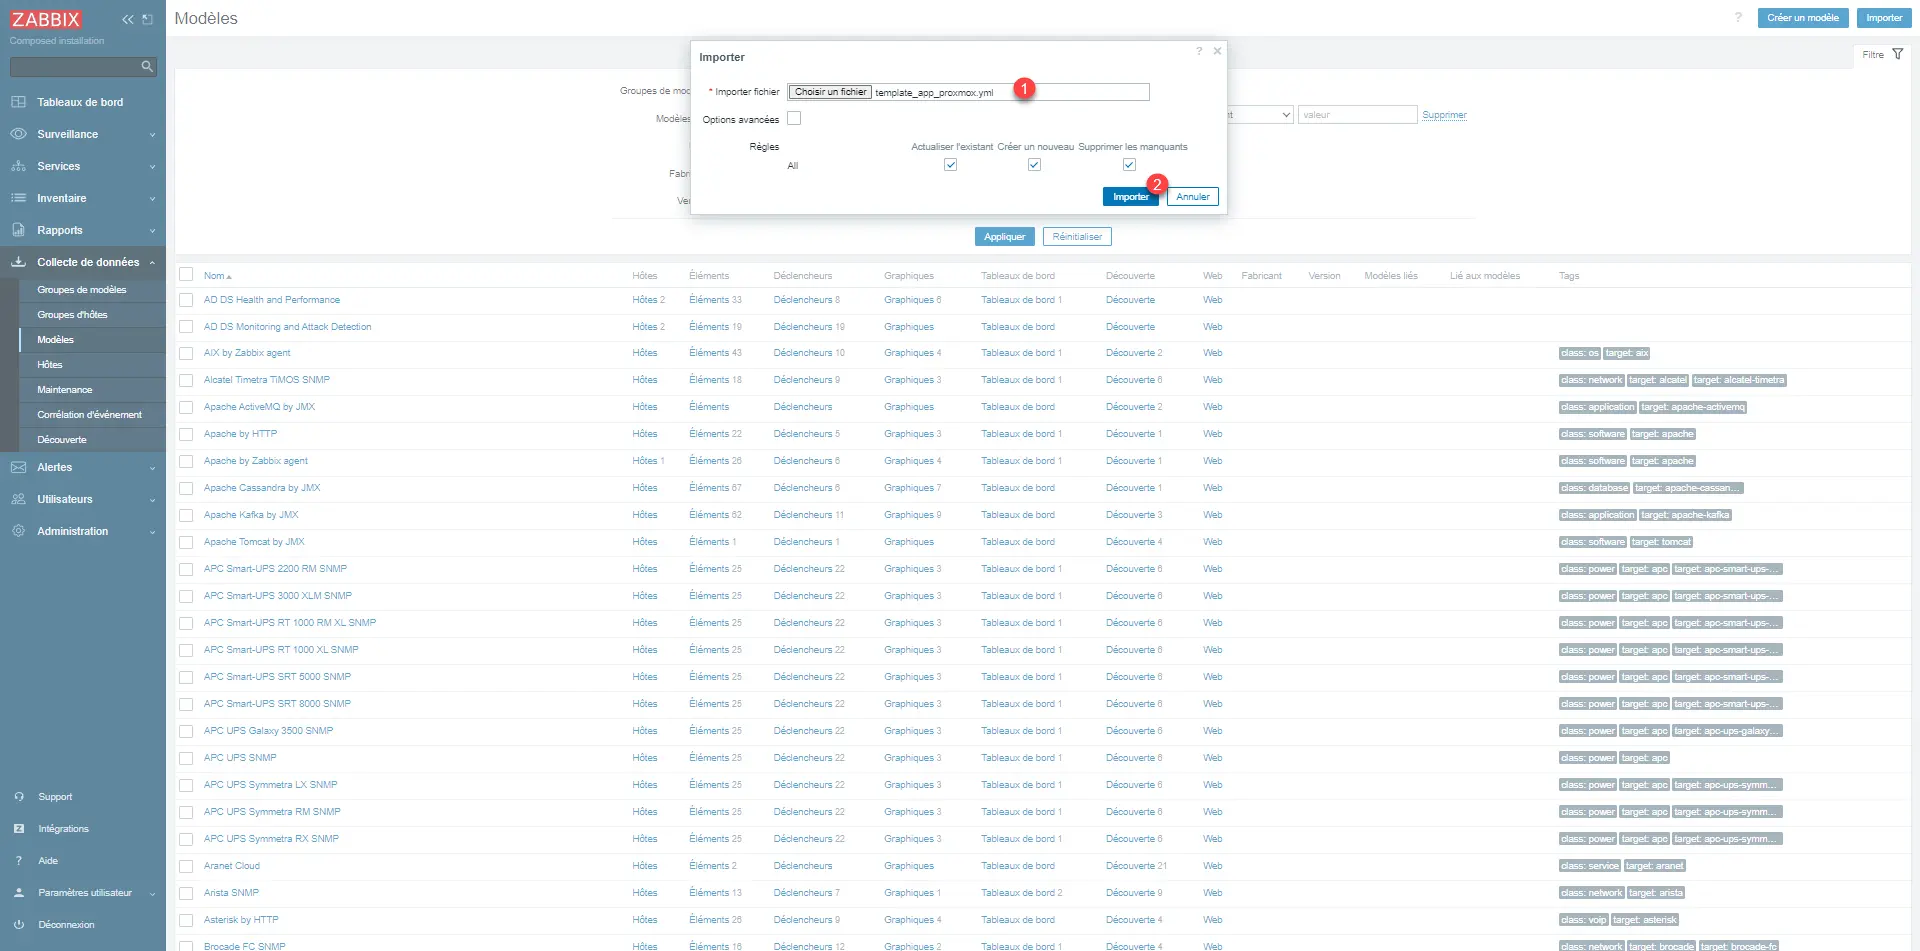
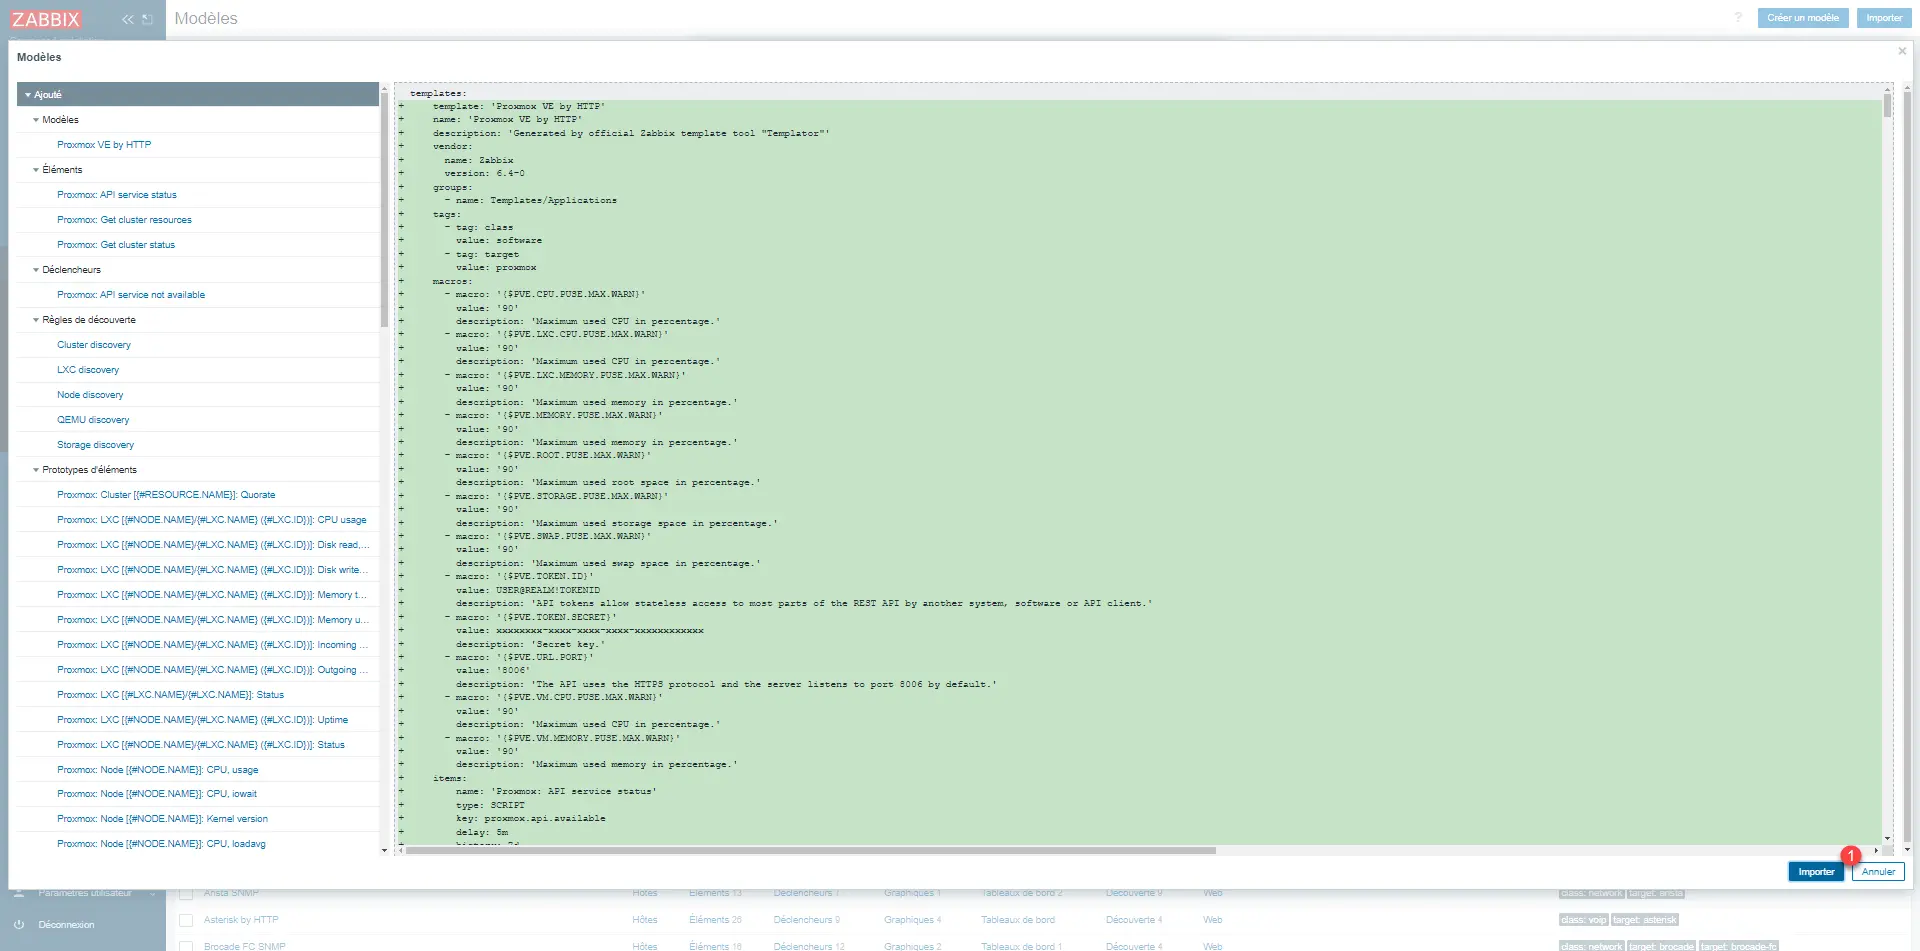
The model is displayed, click on the Import 1 button.
A new window opens, click on OK 1.

Once the import is complete, we find the Proxmox VE by HTTP model in Zabbix.

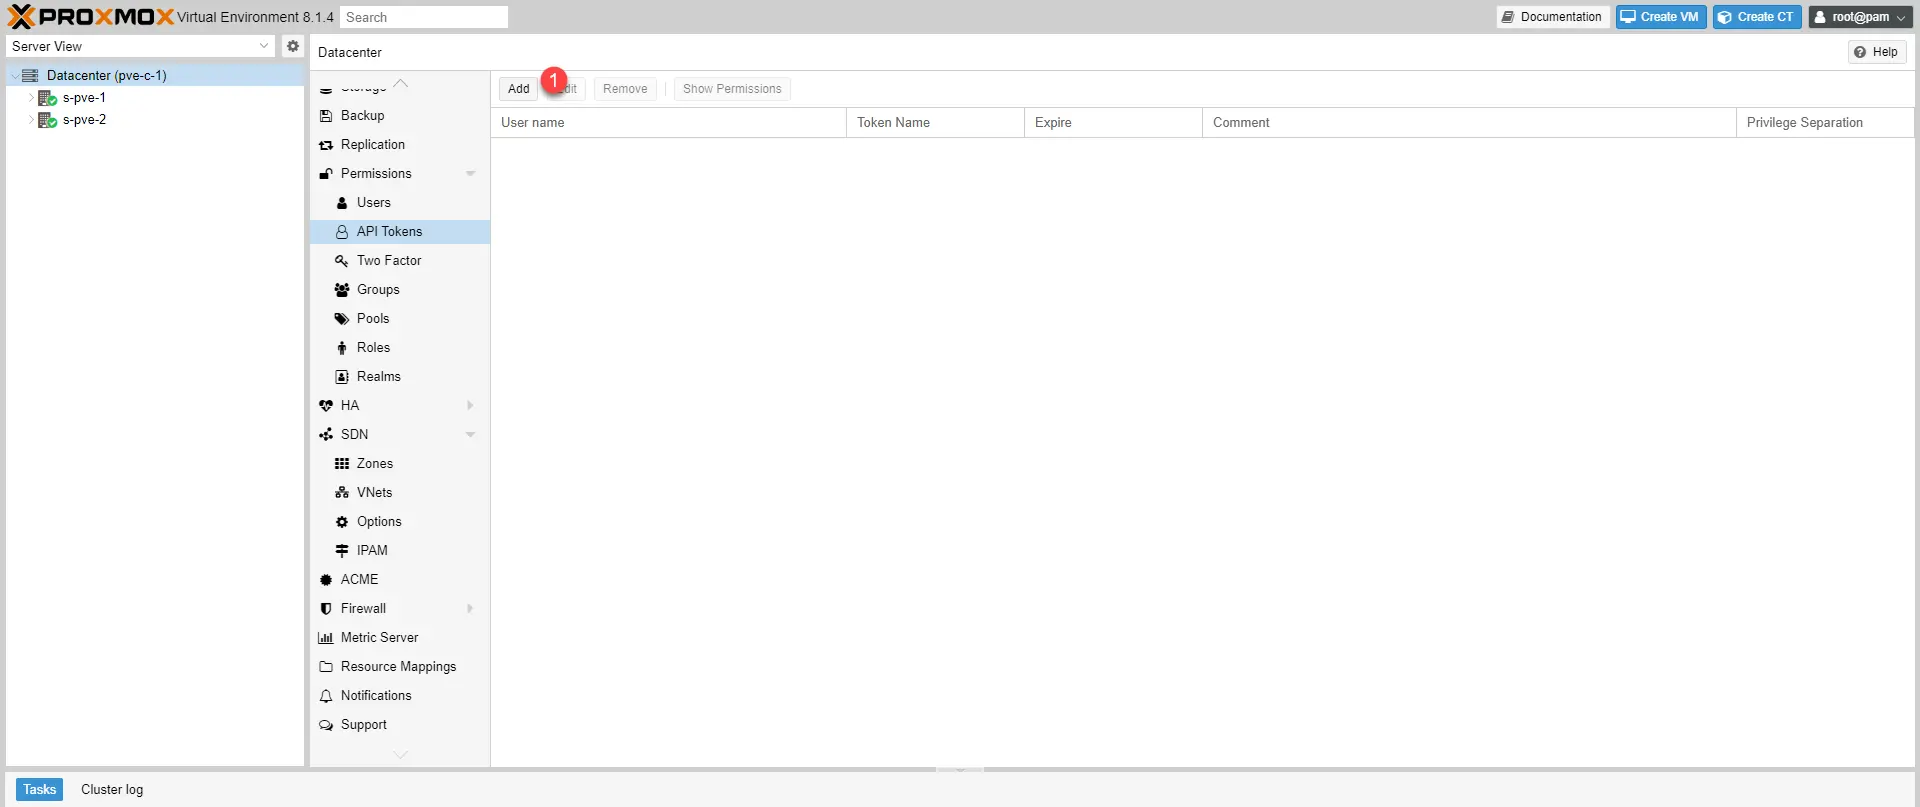
Creating an API token in Proxmox
From the Proxmox interface, go to Datacenter / Permission / API Tokens and click on the Add 1 button.
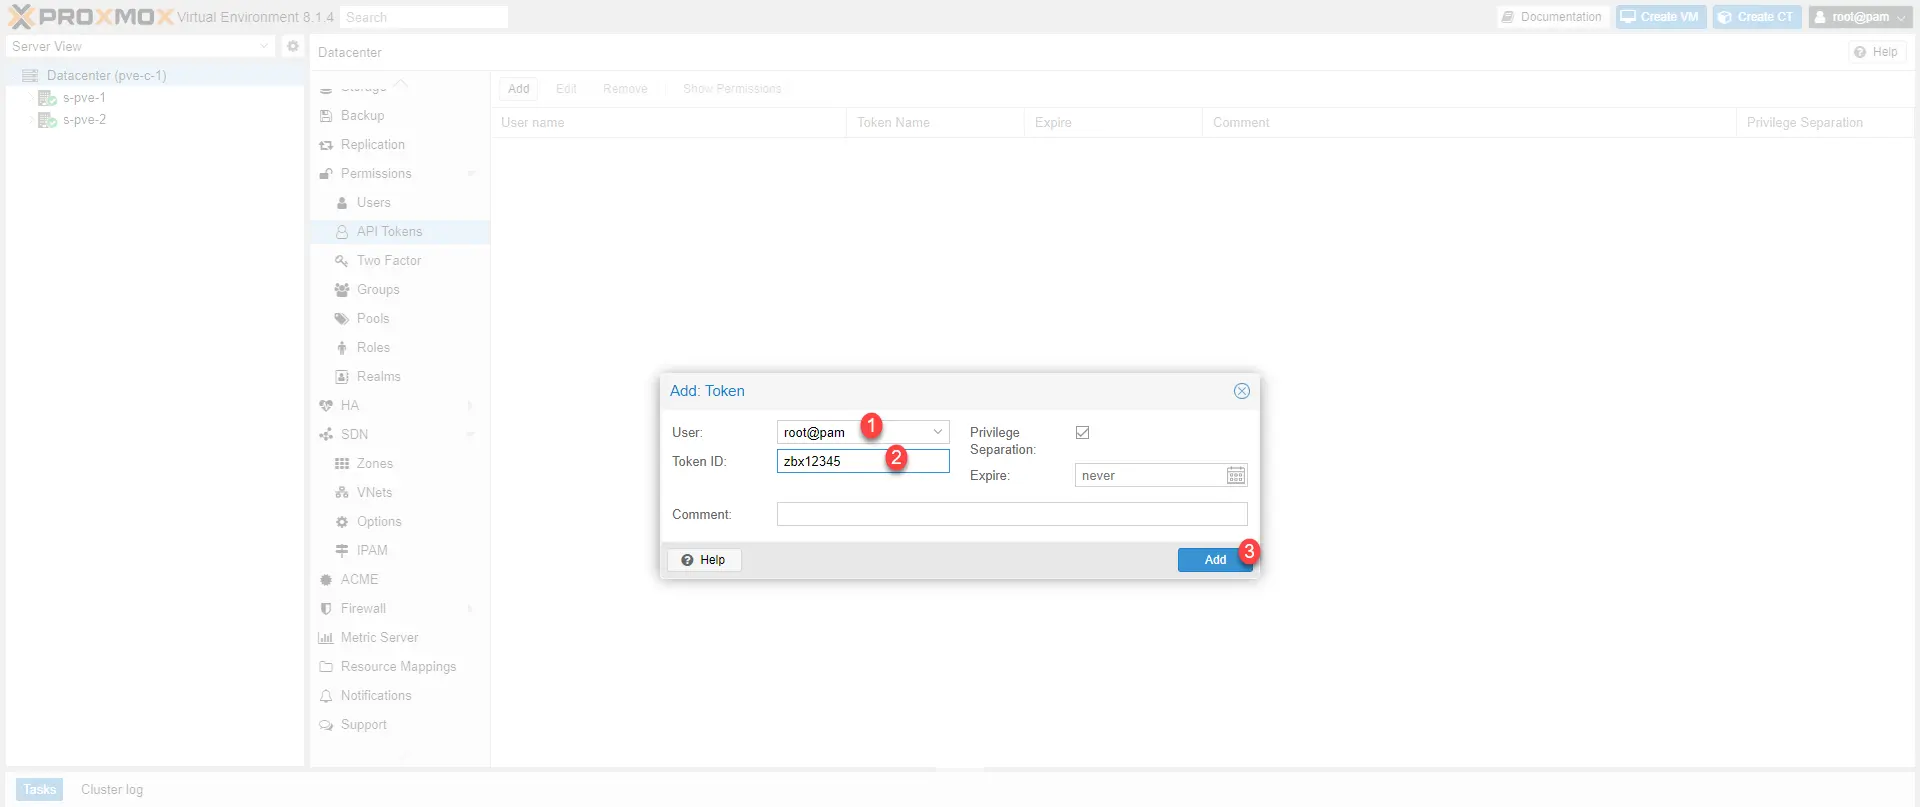
Sélectionner l’utilisateur 1, entrer l’ID du Token 2 et cliquer sur Add 3.
Copy the Token ID and Secret and close the window.
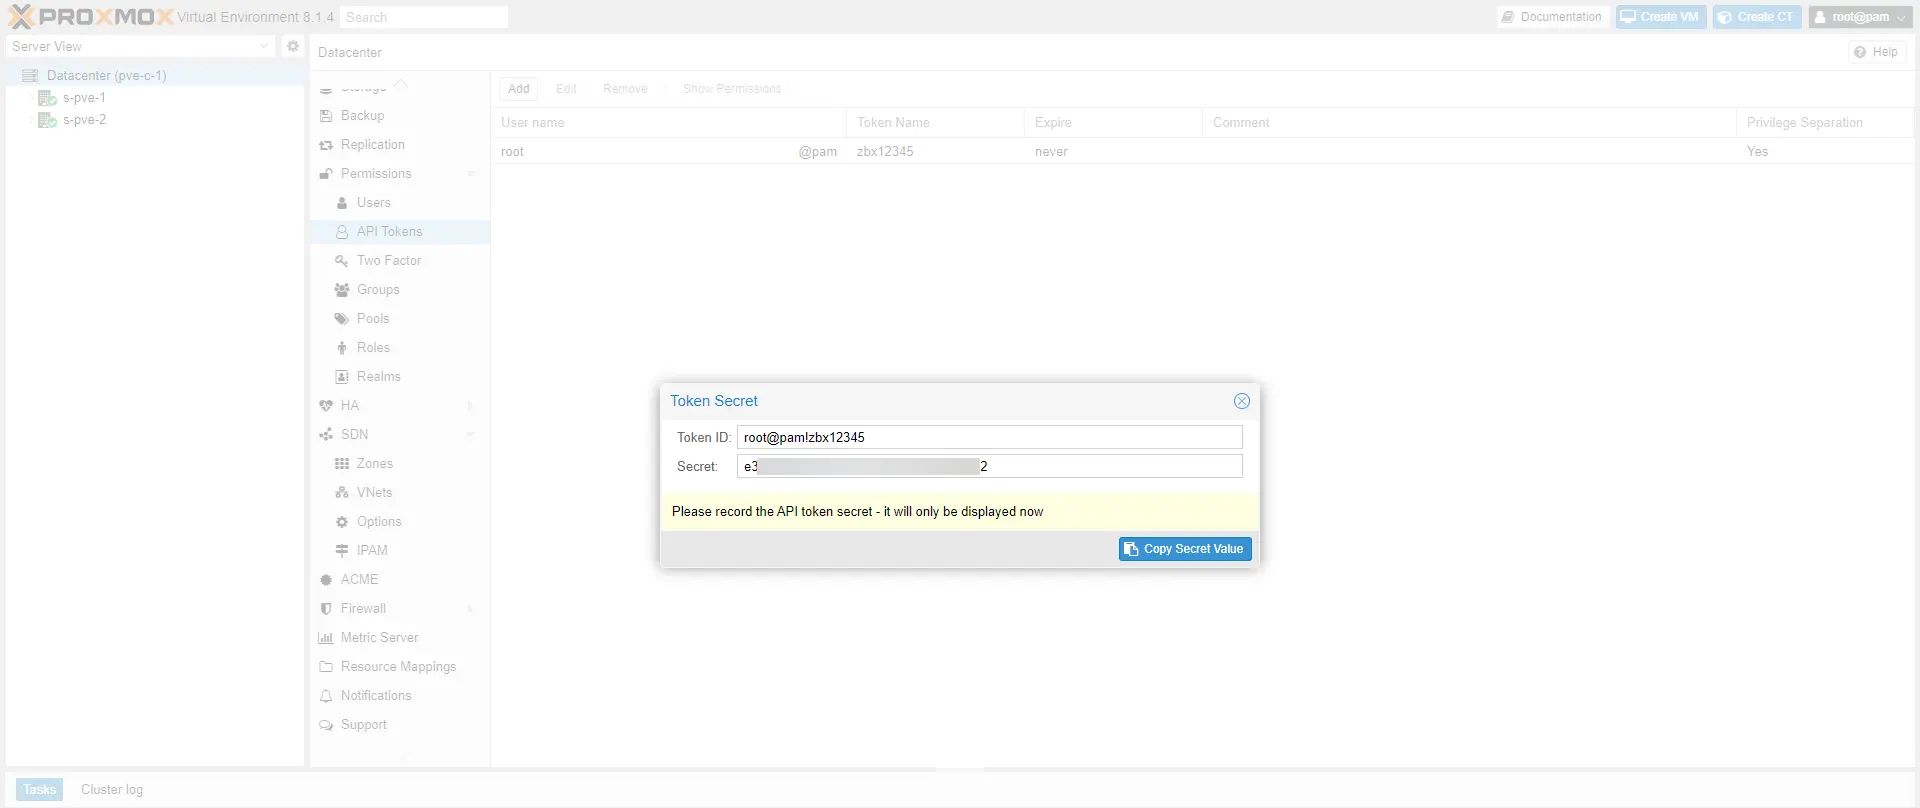
The secret cannot be displayed a second time.
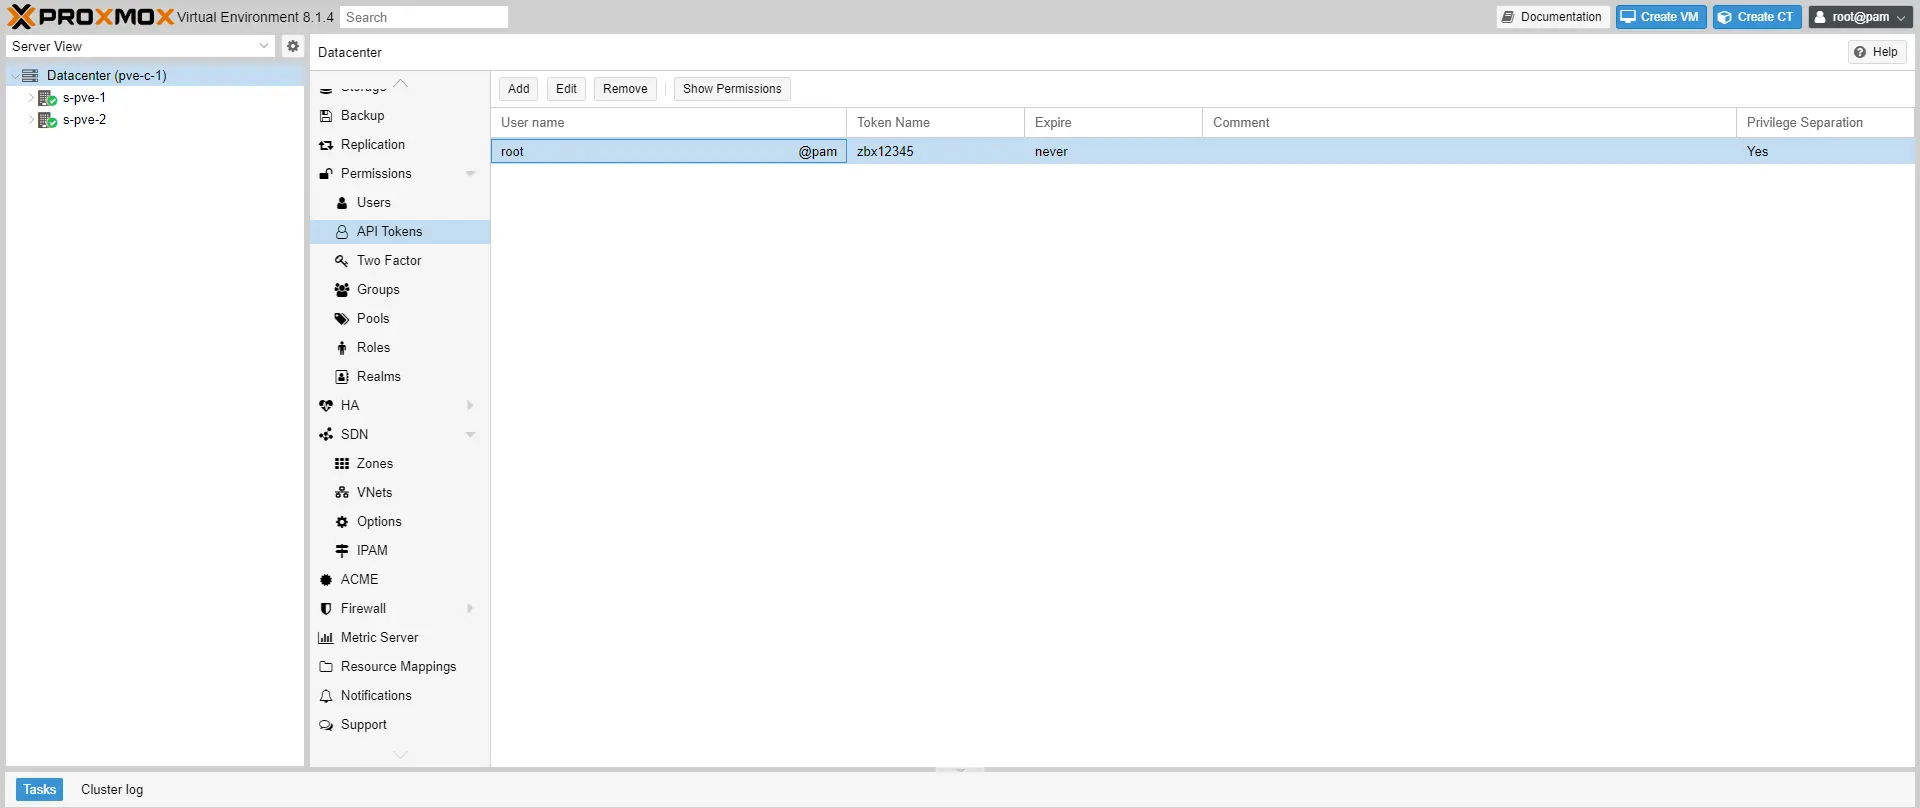
The API token is created in Proxmox.
We will now configure the permissions so that Zabbix can retrieve the information for monitoring.
Go to Permissions 1 and click on the Add 2 button then on API Token Permission 3.
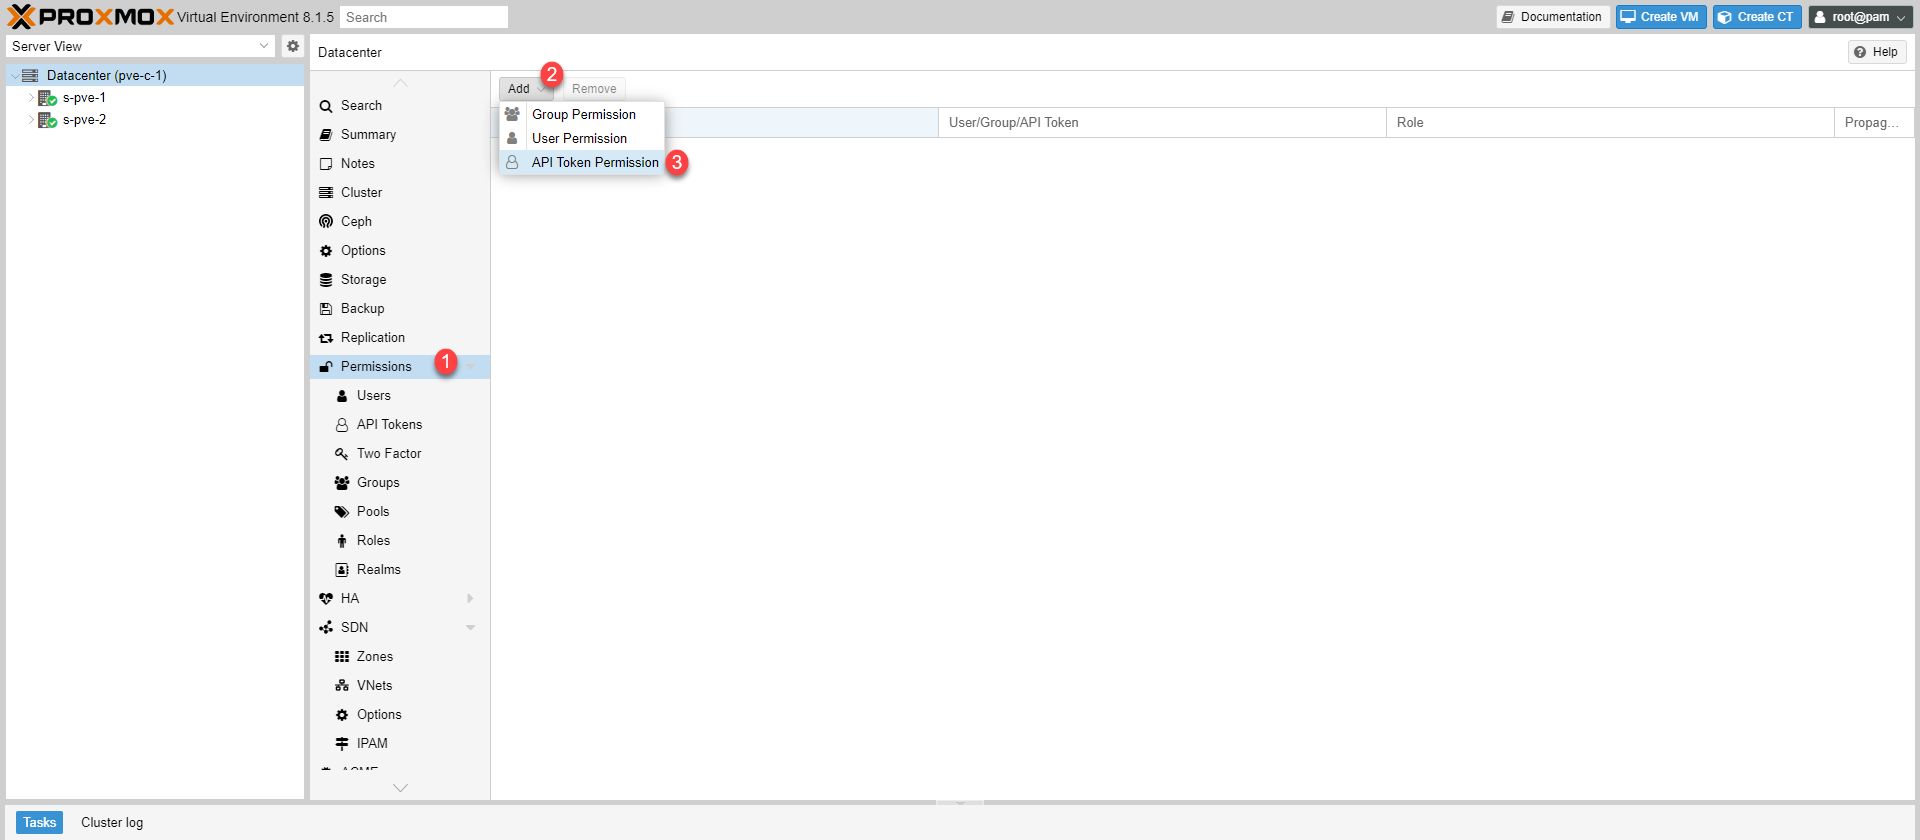
Select the root / 1, select the API token 2 that we have just created, choose the PVEAudior Role 3 and click on the Add 4 button.

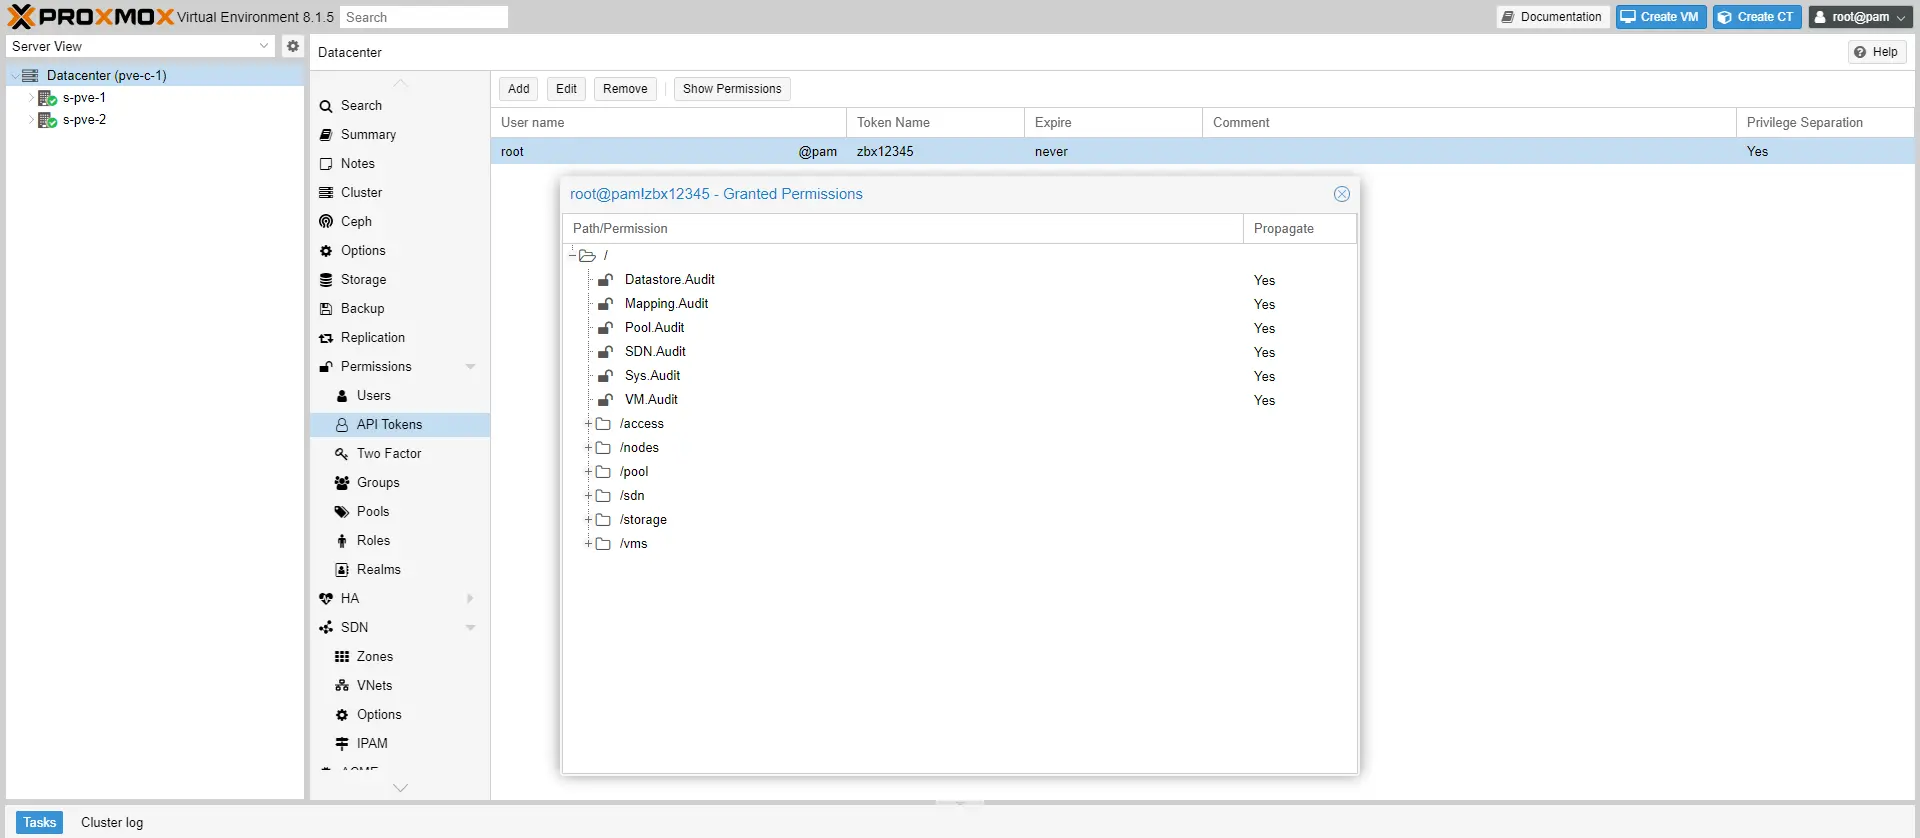
Permissions have been added for the API token.

It is possible to see the permissions, by going to API Token, selecting the token and clicking on Show Permissions.
Add the Proxmox server in Zabbix
Back on Zabbix, in Data collection / Hosts, click on the Create a host 1 button.

Configure the host by adding its name 1, select the Proxmox VE by HTTP model 2, add a host group 3 and add an interface 4 and go to the Macros 5 tab.

Here the interface type does not matter because it will not be used, just the IP address will be used.
Click on Legacy and Host Macros 1, search for {$PVE.TOKEN_ID} then click on Change 2.
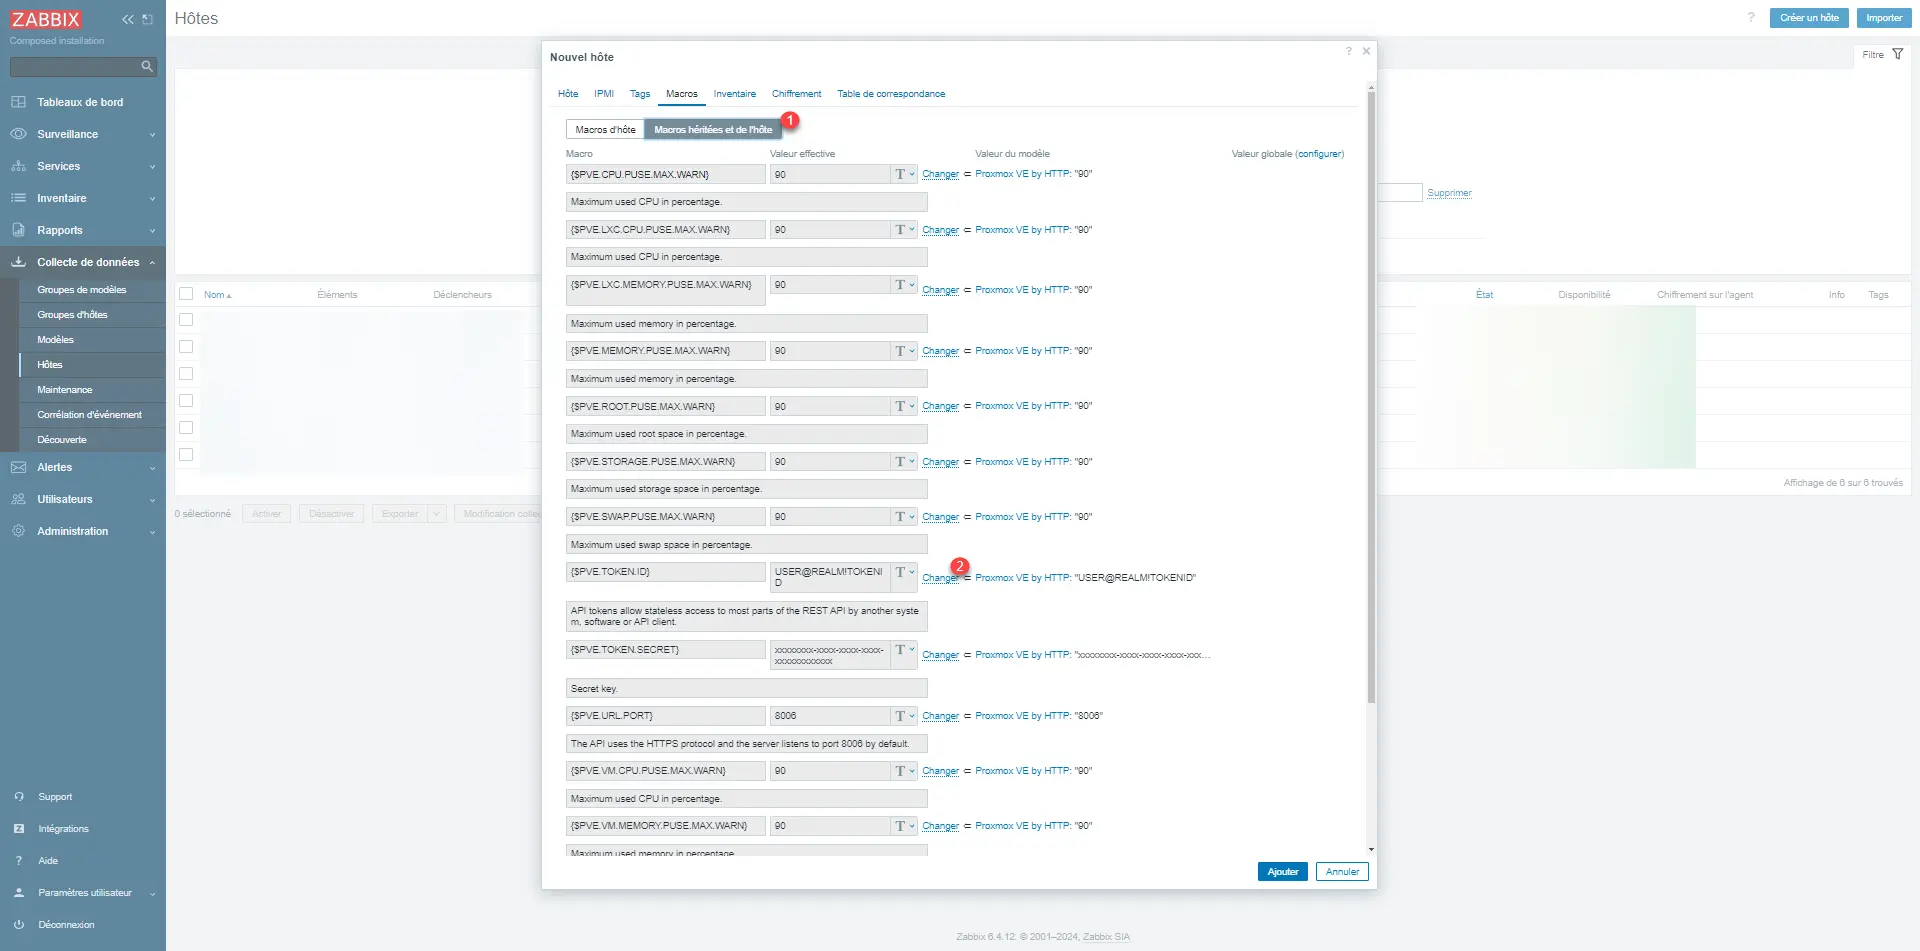
Enter API token ID 1.

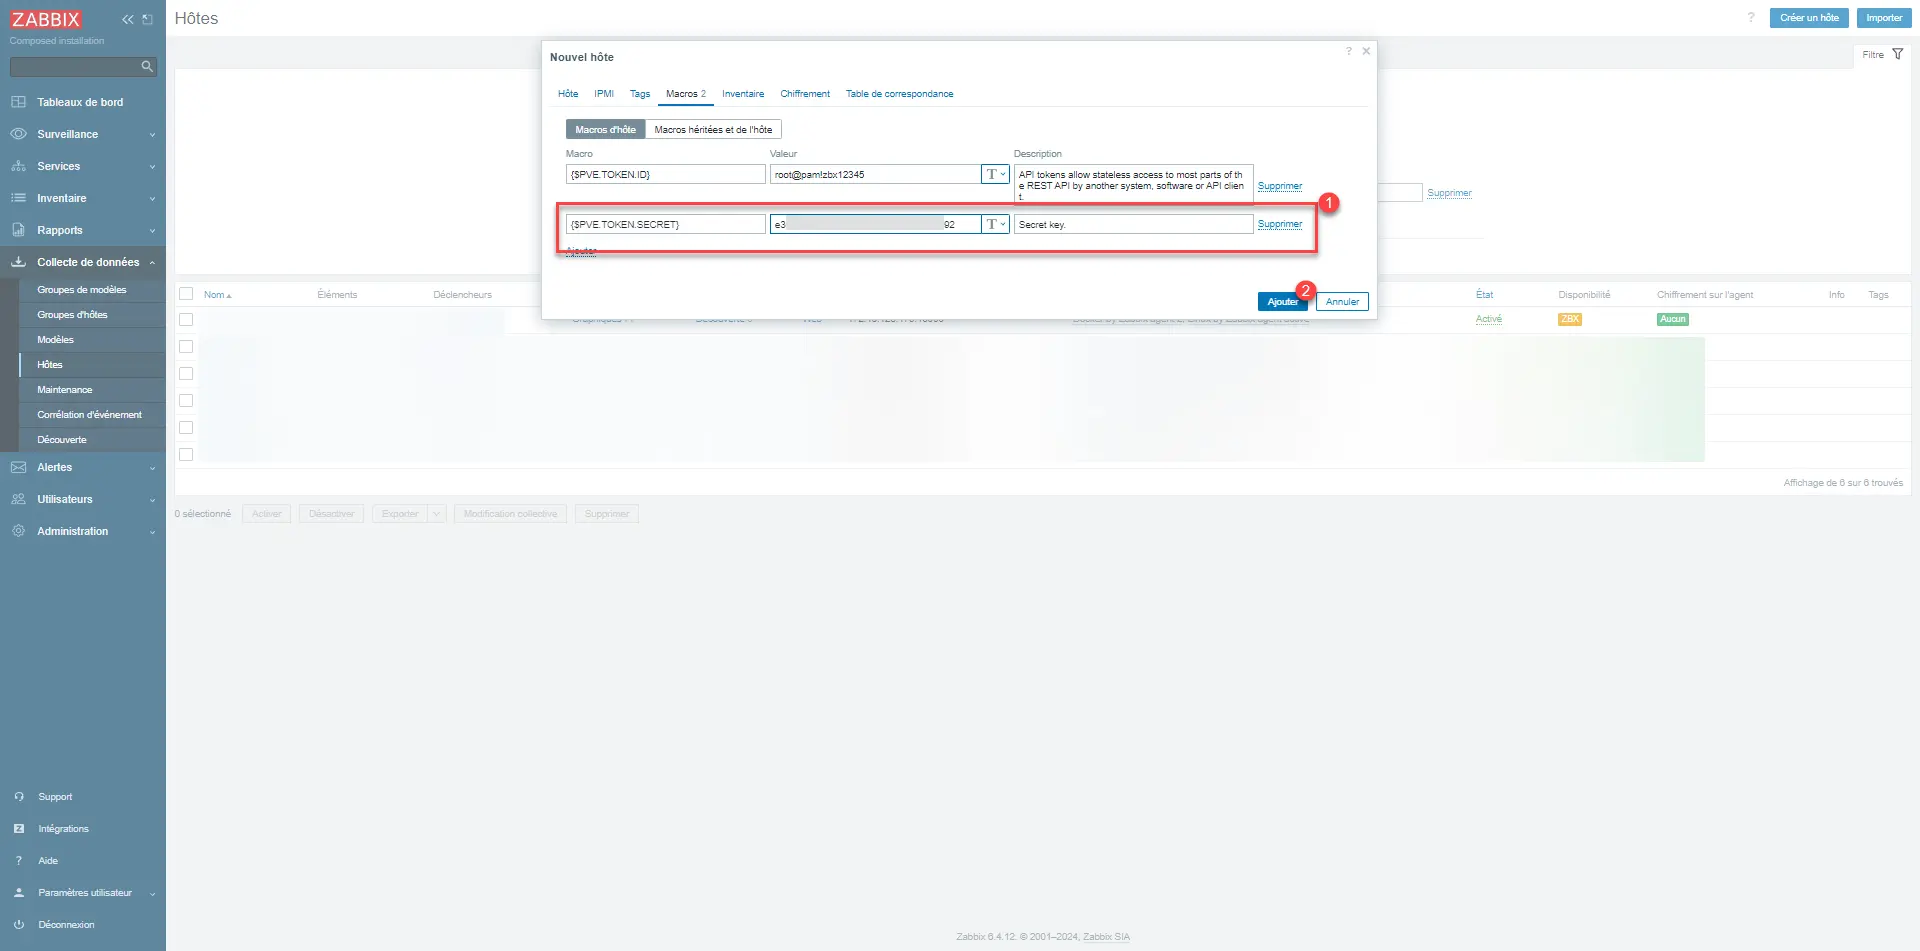
Start again with {$PVE.TOKEN_SECRET} 1 then click Add 2.
The Proxmox server is added in Zabbix.
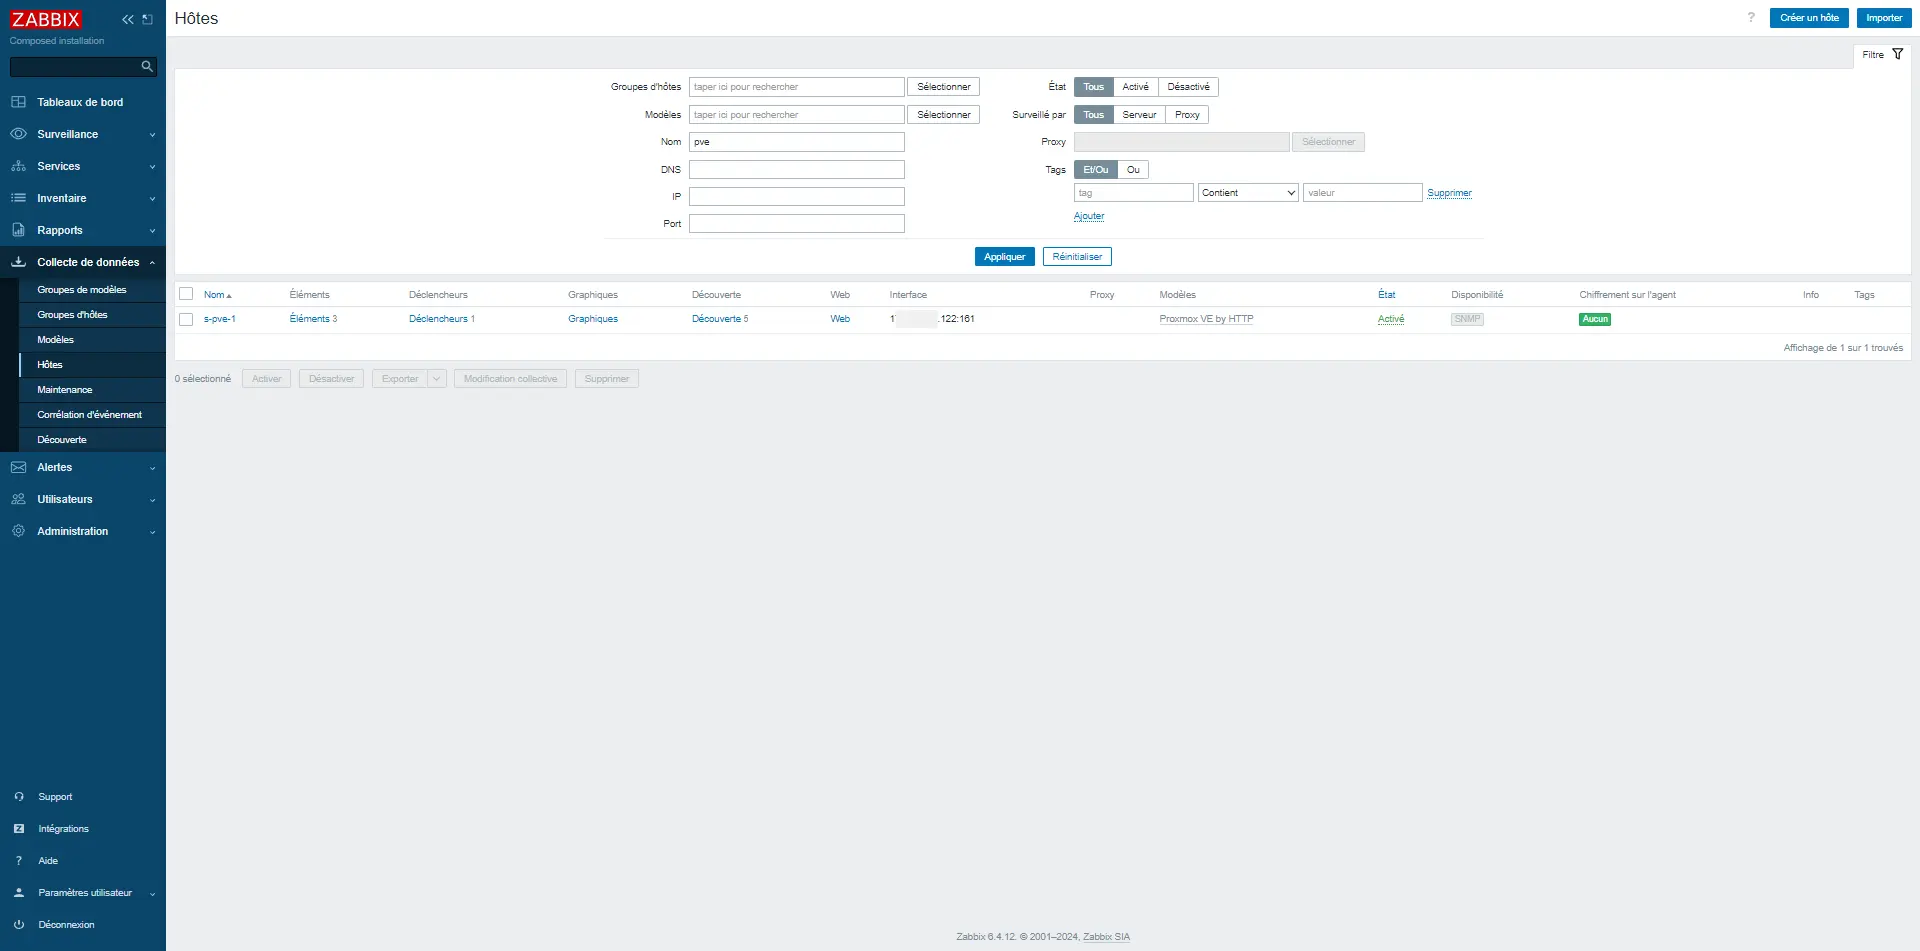
Wait while discovering the elements…
After a few minutes, the number of elements increased.
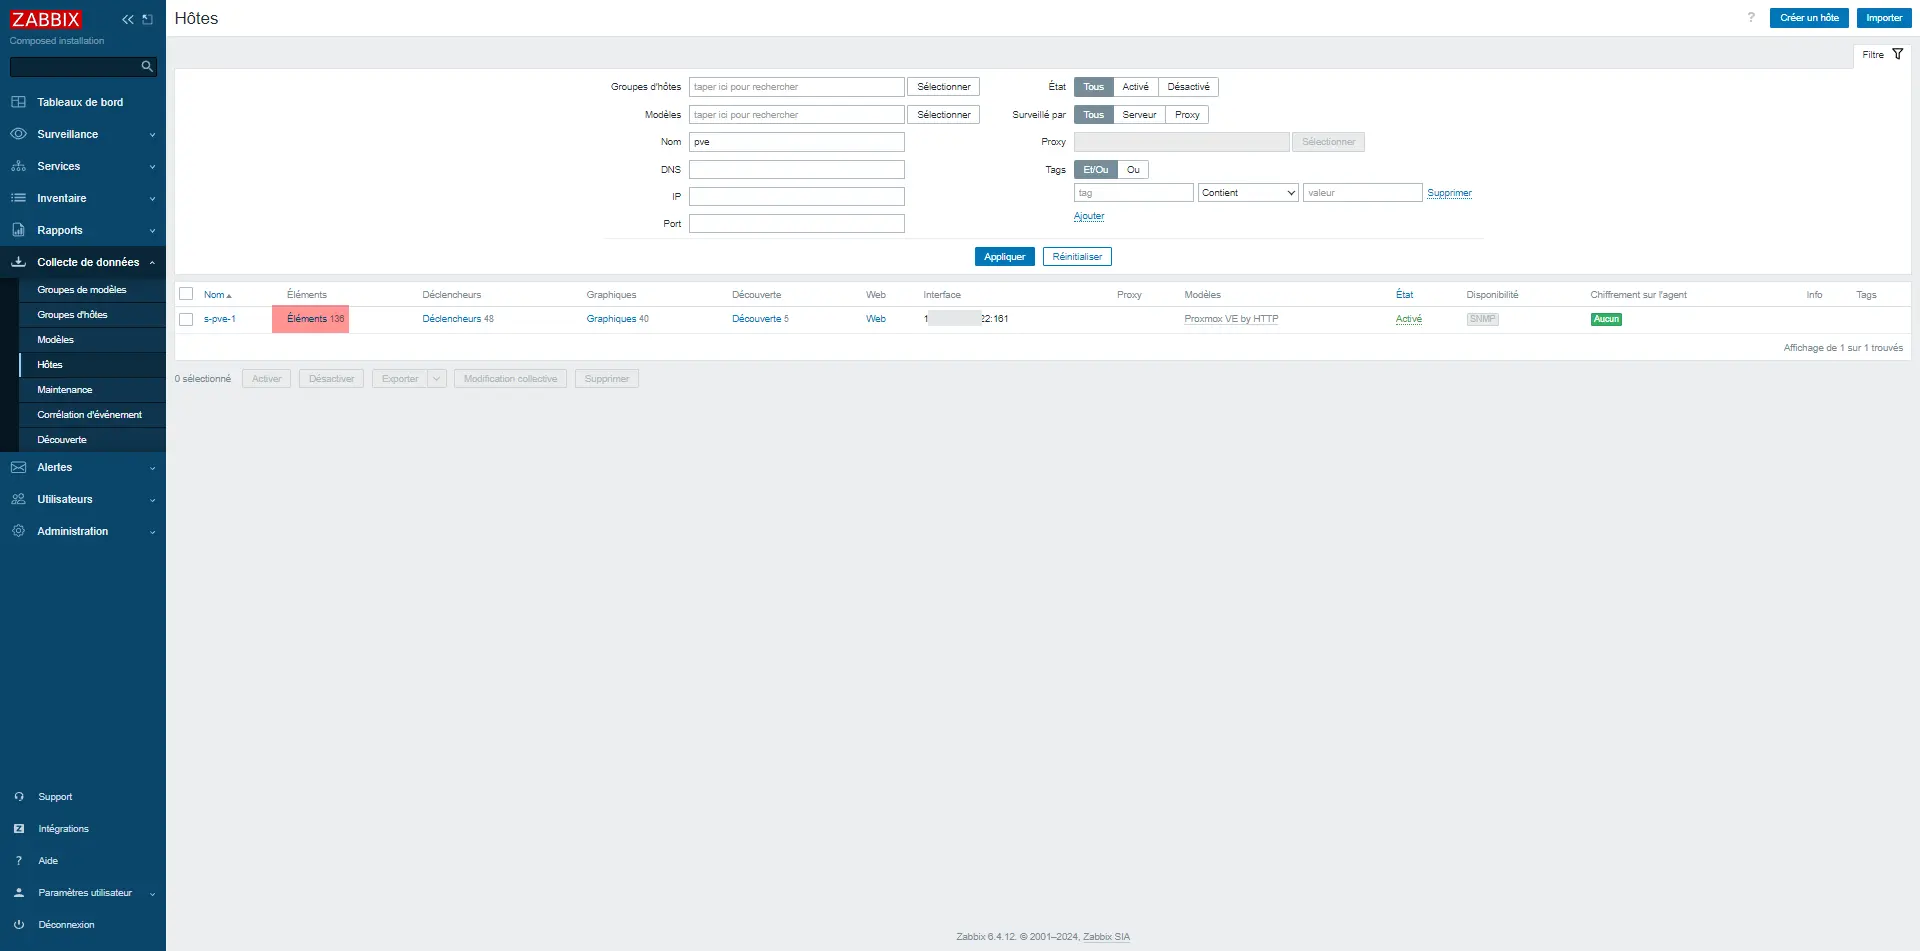
We can see that the VMs and CT were discovered and added in Zabbix.

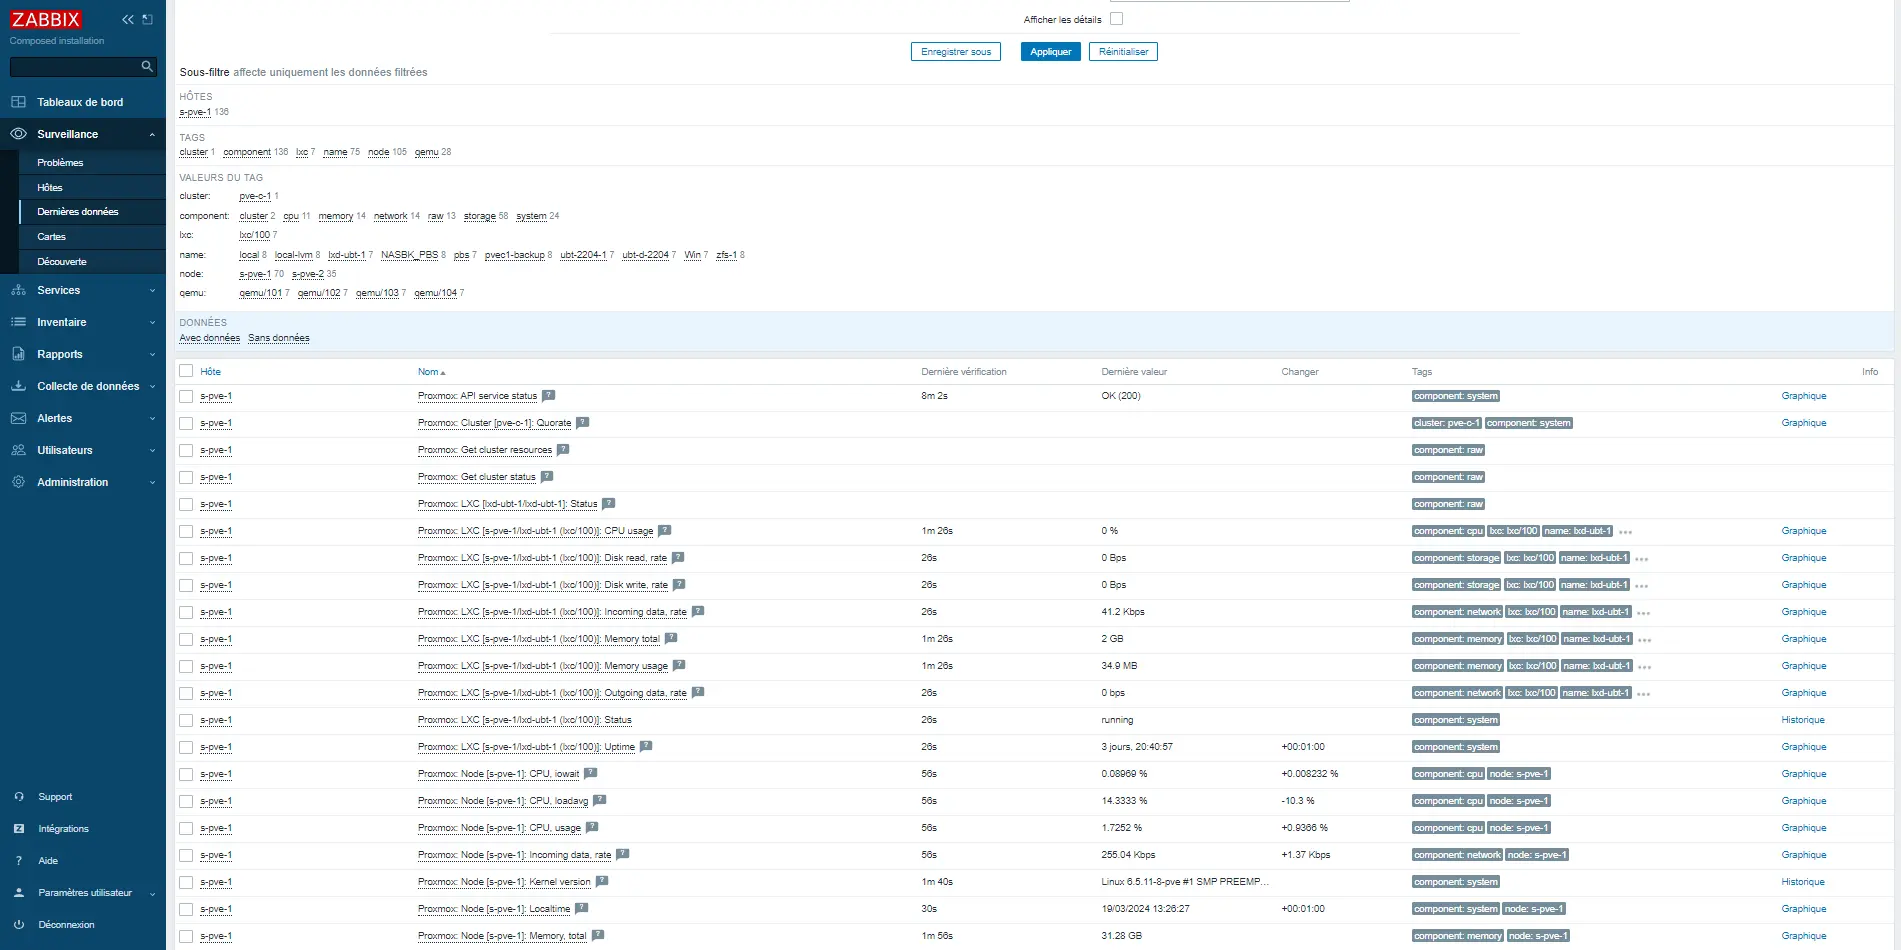
Here is an example of a metric provided by Zabbix from Proxmox.
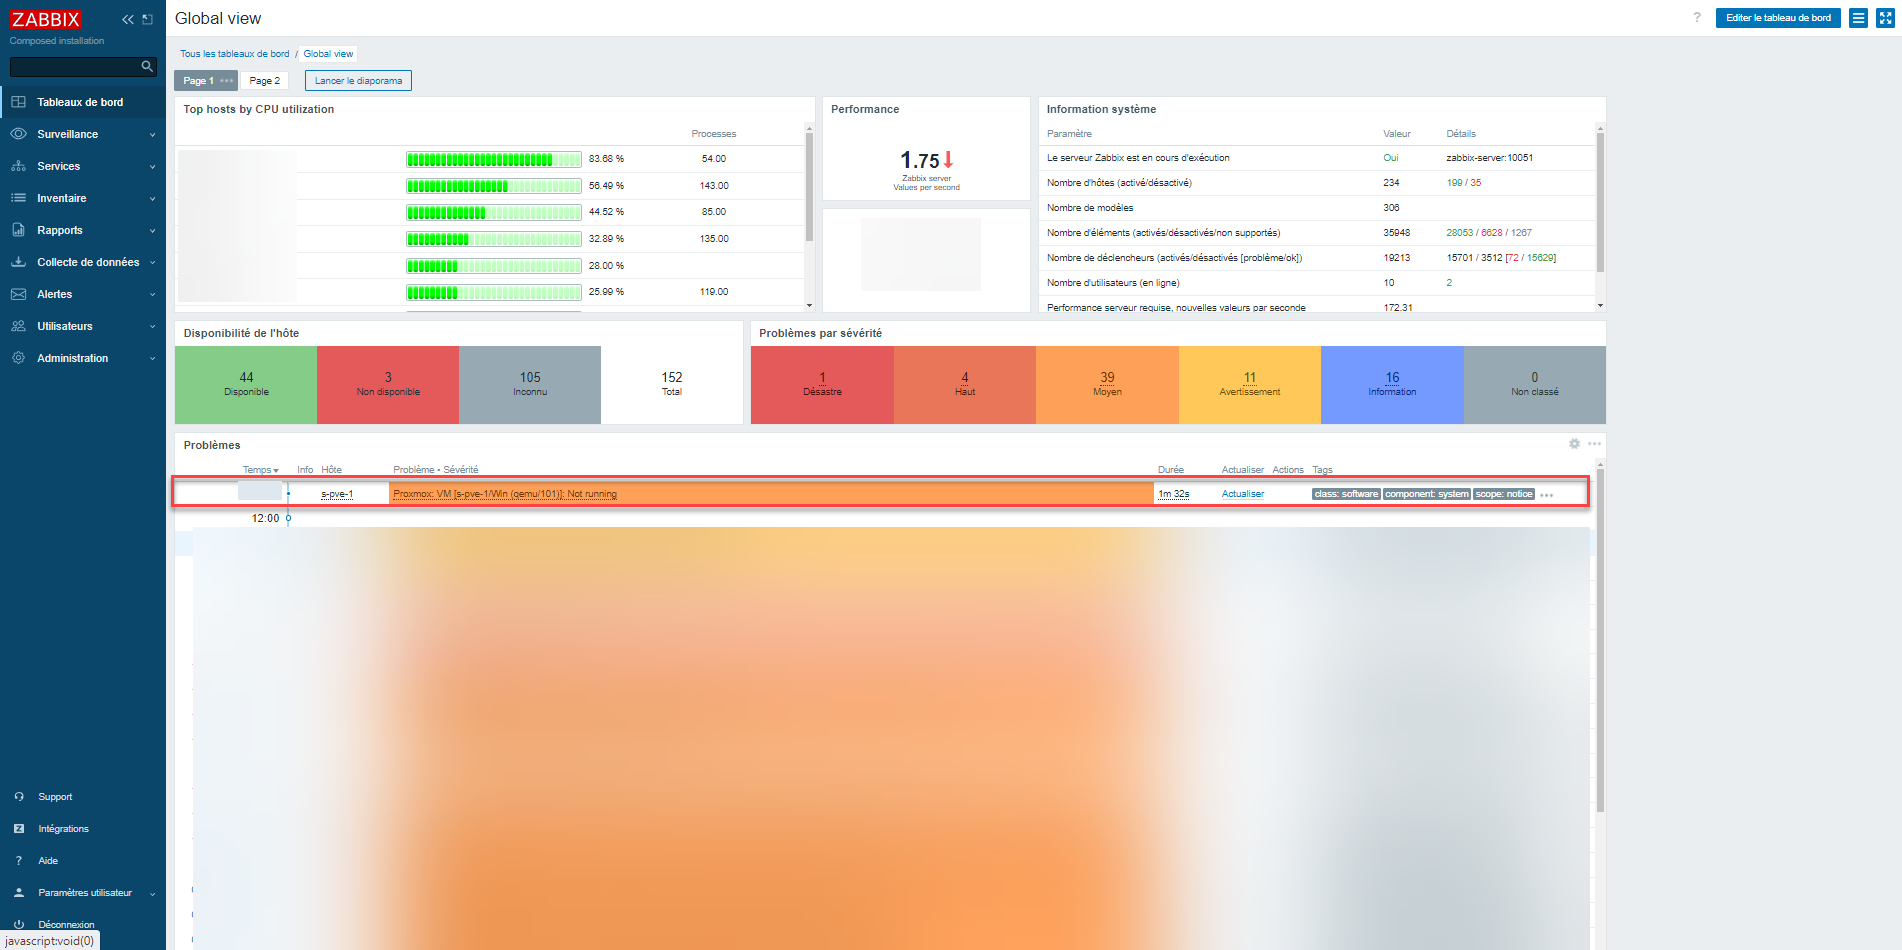
On the dashboard I also have an alert because a VM is powered off.
Through this tutorial, we saw how to supervise Proxmox in Zabbix but also how to create an API token and assign permissions to it.