In this tutorial, I will explain how to configure multipath on Proxmox.
Generally, multipath is necessary when using a two-tier architecture for hypervisors with servers and SAN type storage (FC/iSCSI/… disk array).
To ensure high storage availability, servers generally have several connections to the disk bay, what is called multipath in IT.
On Proxmox when we present a LUN from the storage bay, we can see that the disk appears several times, as many paths as available.
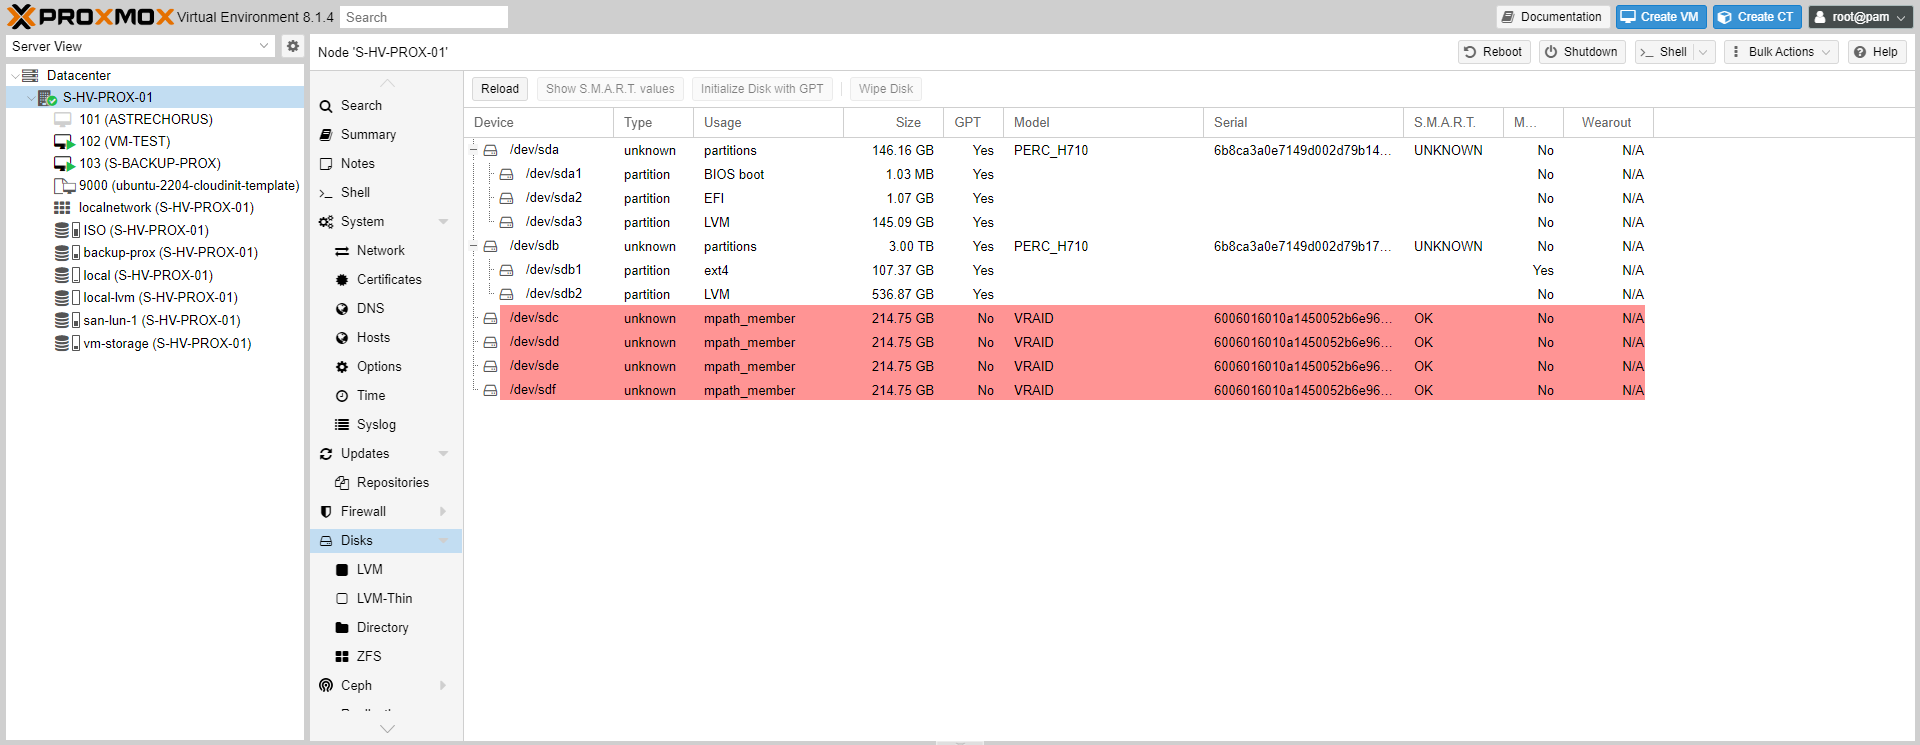
Here, we can see that the disk is presented 4 times, because there are 4 possible paths to access the disk.
In order to be able to use this disk in Proxmox, it is necessary to configure the multipath.
Configuring multipath in Proxmox
This configuration is done on the command line.
To begin, you must install the tools that manage multipath
sudo apt-get install multipath-tools -yThe first step will be to retrieve the wid (World Wide Name IDentifier) which is the unique identifier of the volume in a SAN network (FC / SCSI / …)
To do this, enter the following command:
/lib/udev/scsi_id -g -u -d /dev/sdXReplace X with the letter that corresponds to the disk.
We will now be able to start configuring the multipath on Proxmox. This configuration is done in the /etc/multipath.conf file which is not created by default.
You can access the file’s documentation with the following command:
man multipath.confWe will now create the configuration file and fill it:
nano /etc/multipath.confHere is an example configuration:
In the block default {...}, we find the global configuration of the multipath.
In the block blacklist {...}, we indicate the disks which are not affected by the multipath configuration, by default we exclude all the disks.
In the block blacklist_execeptions{...}, we will indicate the wwid of the disk(s) which must apply the multipath configuration. Here you must indicate the wwid of the disks, one per line.
Now, you need to add the wwid of the volume to the /etc/multipath/wwids file, to do this by entering the following command:
multipath -a 36006016010YYYYYYYXXXXXXZZZZZZZZRestart the multipath-tools service for it to take effect:
systemctl restart multipath-tools.serviceCheck the application configuration with the following command:
multipath -ll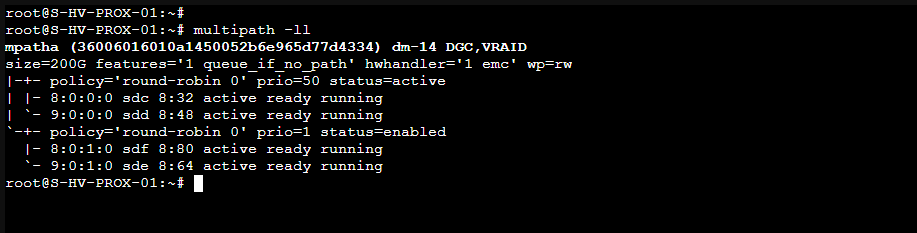
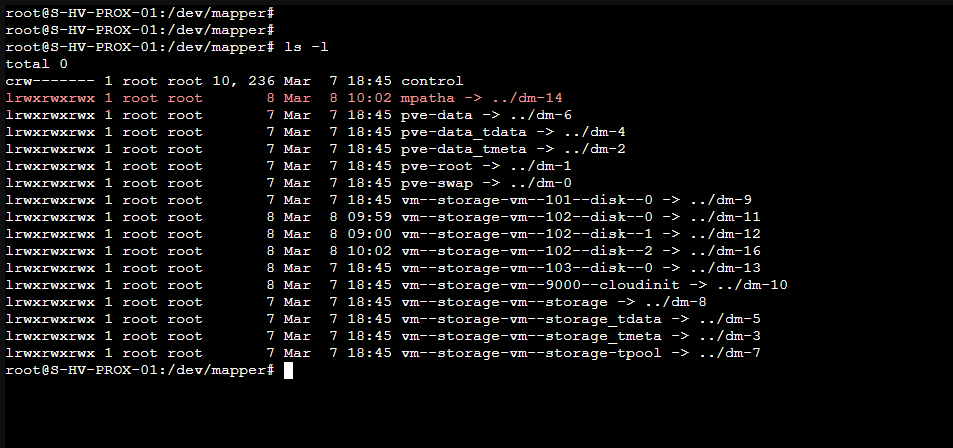
We can see that the disk is mapped to mpatha which is visible in the /dev/mapper/ folder.
The multipath configuration is complete.
Configuring storage to make it available in Proxmox
Now we will configure the mpatha disk so that we can use it in Proxmox. This configuration is also done on the command line.
We will start by completely erasing the disks, this step is optional:
dd if=/dev/zero of=/dev/sdX bs=512 count=1 conv=notruncTo be done on each disk presented by SAN storage
We do the same thing on the volume created by the multipath
dd if=/dev/zero of=/dev/mapper/mpatha bs=512 count=1 conv=notruncNow, we create the LVM disk, starting with the physical volume:
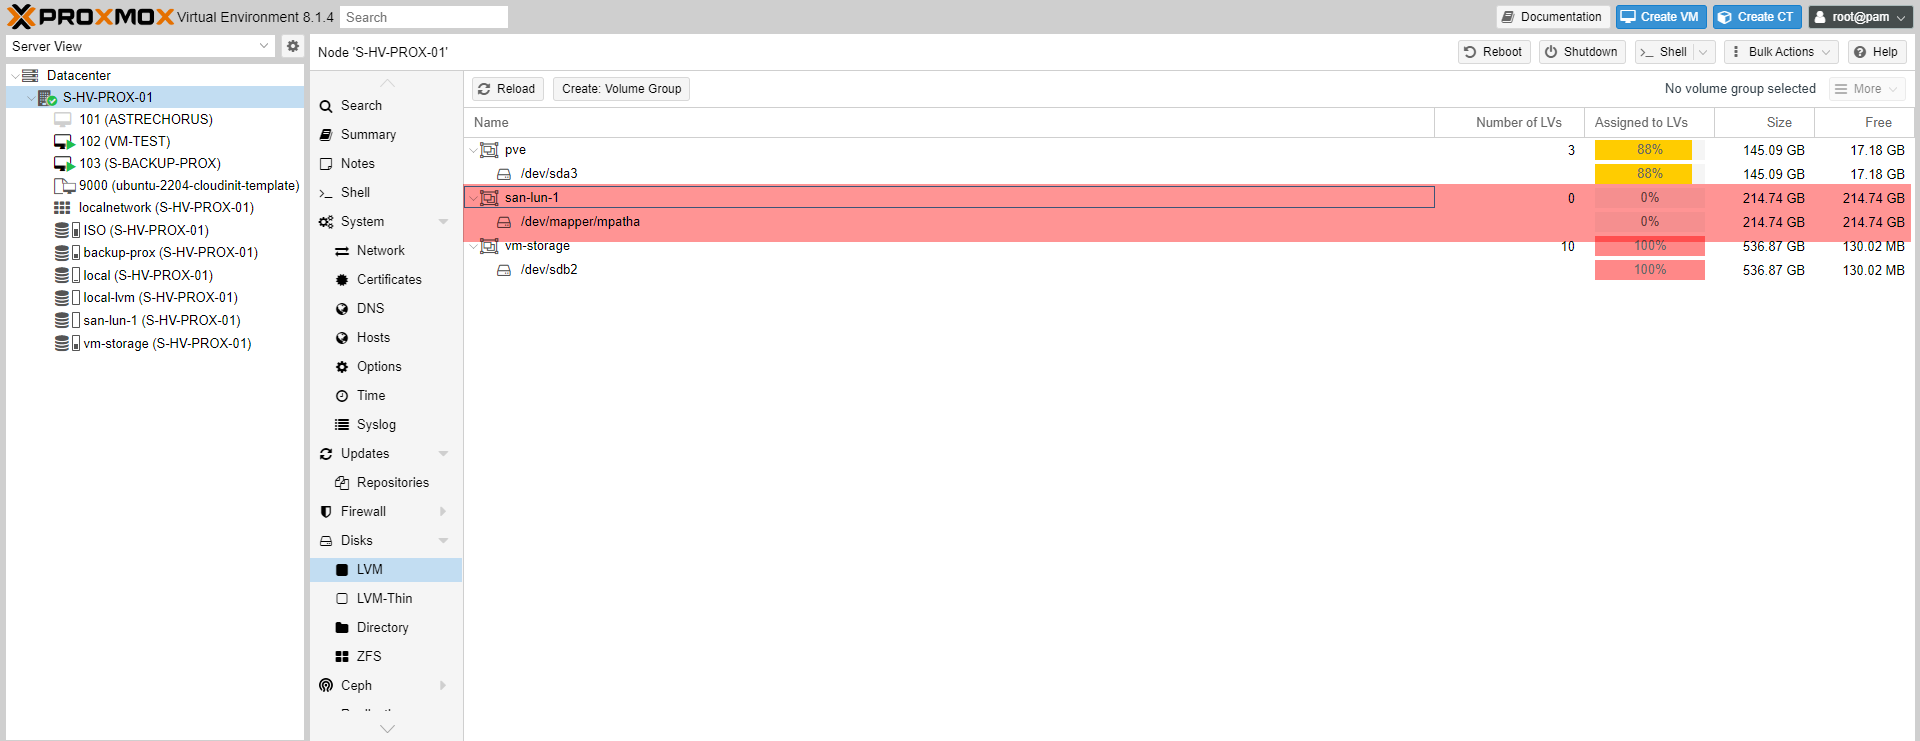
pvcreate /dev/mapper/mpathaThen we create the volume group which we will name san-lun-1:
vgcreate san-lun-1 /dev/mapper/mpathaFinally, you must edit the Proxmox storage configuration file to declare the volume.
Open the following file:
nano /etc/pve/storage.cfgIn the file, we start by indicating the type (lmv) and the name of the storage, in the second line, we specify the vg that we created previously. Line 3 indicates what the storage will be used for, line 4 specifies the Proxmox servers which can use the storage if several nodes (Node1, Node2,…) and the last line indicates that it is shared between several Proxmox servers.
The configuration is complete, the storage should be visible in Proxmox.
You now know how to configure multipath in Proxmox and create a volume to use it.