In this tutorial, I will explain how to configure a cluster with Proxmox in order to ensure high availability and storage management will be with Ceph in order to have a Hyperconverged virtualization environment.
Presentation
Before launching into the tutorial, I will cover a few points for newbies.
Let’s start with hyperconvergence, traditionally the Clustering of Hypervisors was done with a 2-tier system. On the one hand, we had the computing power (CPU + RAM), the servers and the bay storage in a SAN (Storage Area Network) type architecture. With Hyperconvergence, there is no longer a SAN, we use local server storage to store virtual machines.
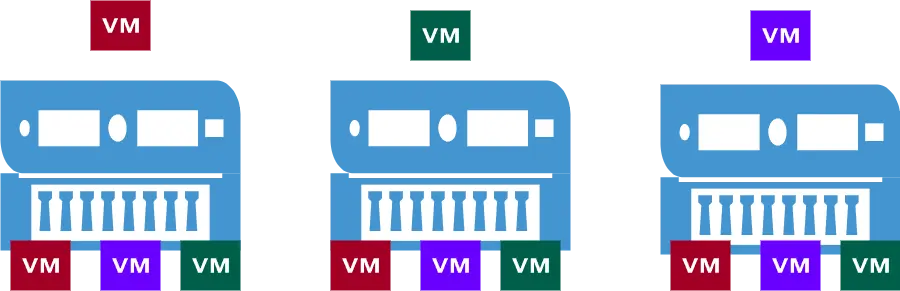
To make it easier to understand, here are two diagrams:
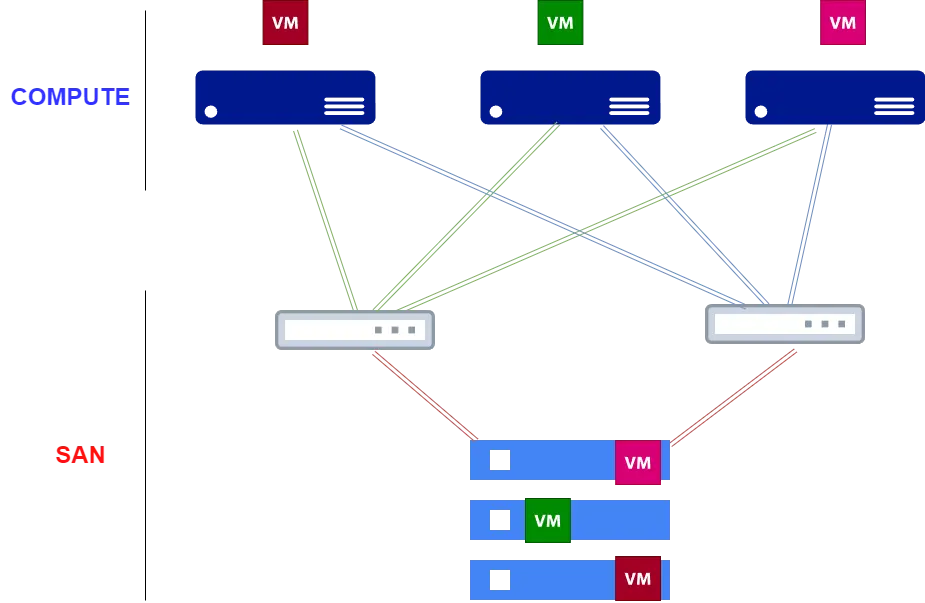
I am not going to enter into a debate on which architecture is best, with a hyperconverged architecture, we contact that the virtual machines are stored on several servers in order to ensure high availability in the event of loss of a physical server.
Le schéma est assez simpliste, si on avait un 4 ème serveurs sur la partie Hyperconvergé, il n’y aura pas forcement une 4eme copie des machines virtuelles.
From experience, both types of architectures have their advantages and disadvantages, for me they are complementary and not in opposition.
On paper, hyperconvergence offers high performance because it is often used on high-end servers which is a prerequisite, with full flash storage such as Nvme or SSD, it is ideal for creating applications and databases that requires a lot of power and high availability.
It would be totally counterproductive to run, for example, file servers of several Teras or Exchange servers, for example, which store a large volume of cold data.
Let’s take the example of a file server which would have a volume of 10TB, on a hyperconverged architecture, the machine would use 30TB of storage on flash disks.
To operate a hyperconverged architecture, it is necessary to have at least 3 identical nodes (servers), which is a prerequisite for all solutions on the market.
Coming back to this tutorial dedicated to Proxmox, we will have how to set up a Cluster in Proxmox then the configuration of Ceph which will manage the storage between the servers.
Information
Not having 3 identical physical servers at my disposal, I carried out this tutorial with 2 servers.
For production, it is imperative to have 3 servers, otherwise high availability will not be functional.
Creation of the cluster in Proxmox and addition of servers
The first step of this tutorial will be the creation of the Cluster in Proxmox then the addition of the other servers.
Before launching into the creation of the Cluster, I will provide a little precession for people who are used to Hyper-V.
Often when we talk about Cluster, we immediately think of high availability, in Proxmox the Cluster configuration will initially allow the Proxmox servers to be added in the same Datacenter and to be able to manage all the Promox servers in the same Web interface and to be able, for example, to move machines from one server to another (Migrate) without them being in high availability.
For high availability to be possible, you need shared storage (SAN / Ceph), create an HA group and configure the virtual machines in this group.
Another element to take into account with Proxmox for correct operation of high availability, Proxmox requires 3 servers.
Create a cluster in Proxmox
The creation of the Cluster can be carried out on any server that will be a member.
We will create the cluster from the s-pve-1 server.
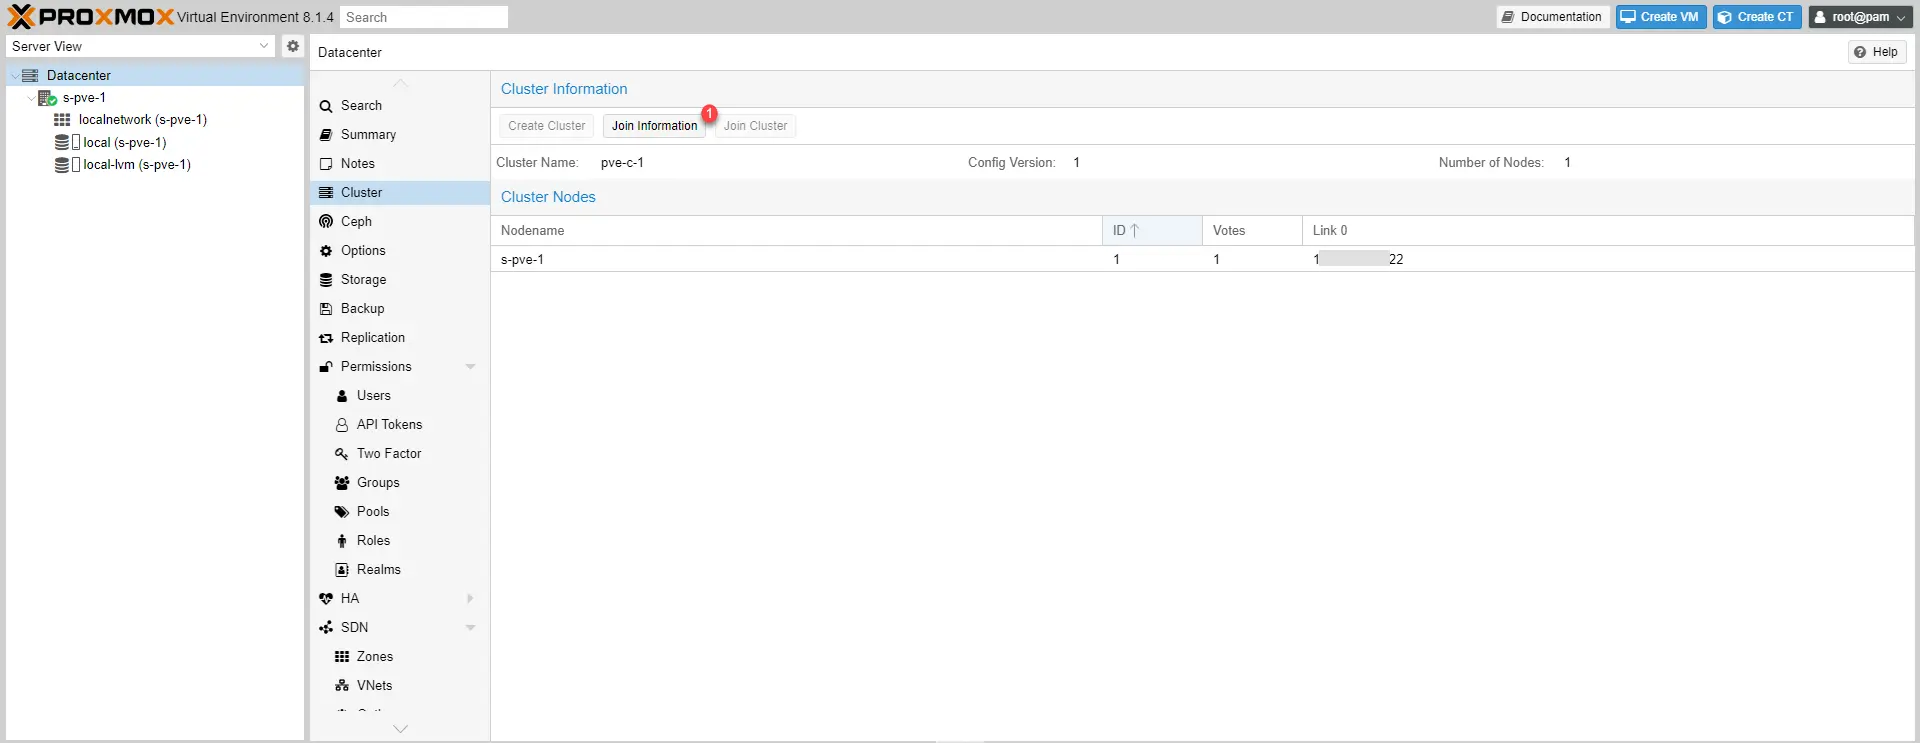
Go to Datacenter 1, Cluster 2 then click on the Create Cluster 1 button.
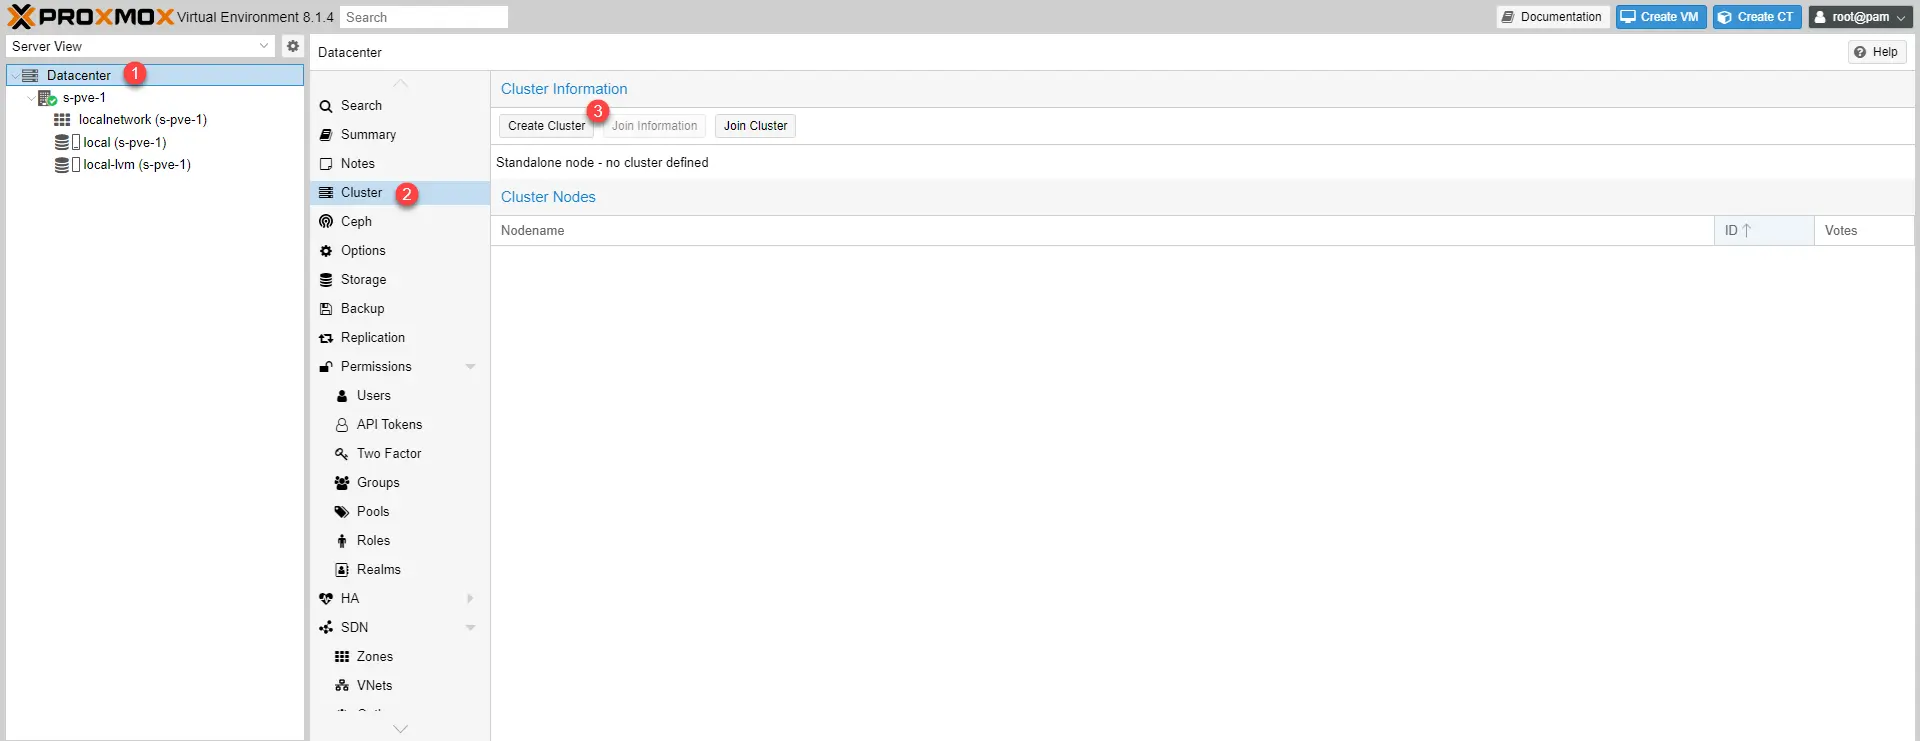
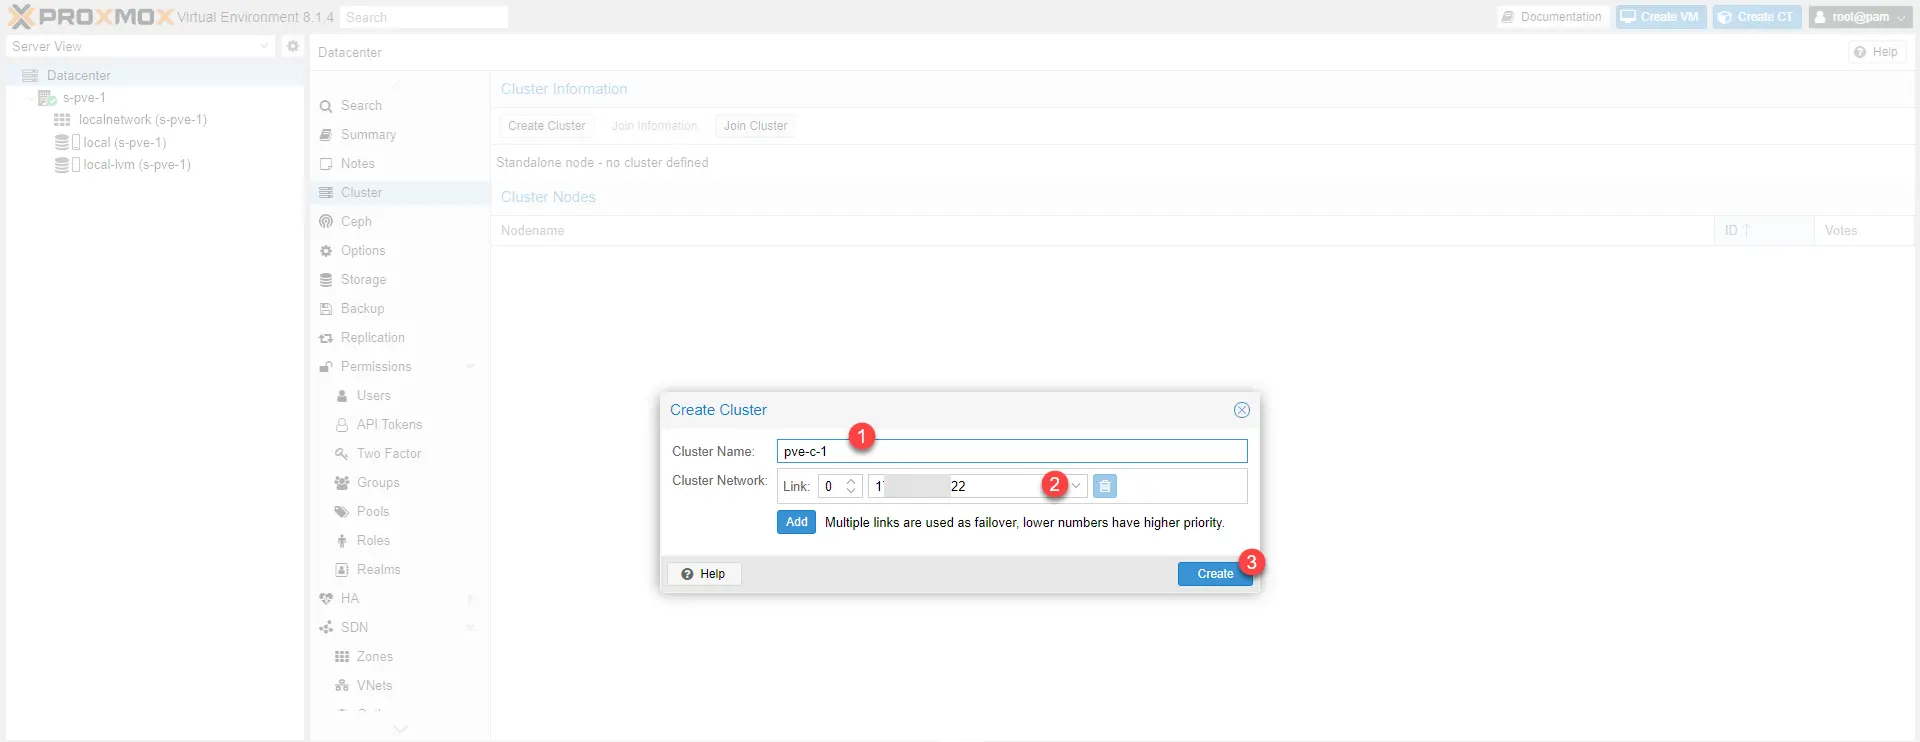
Name the cluster 1, configure the network of cluster 2 then click on Create 3.
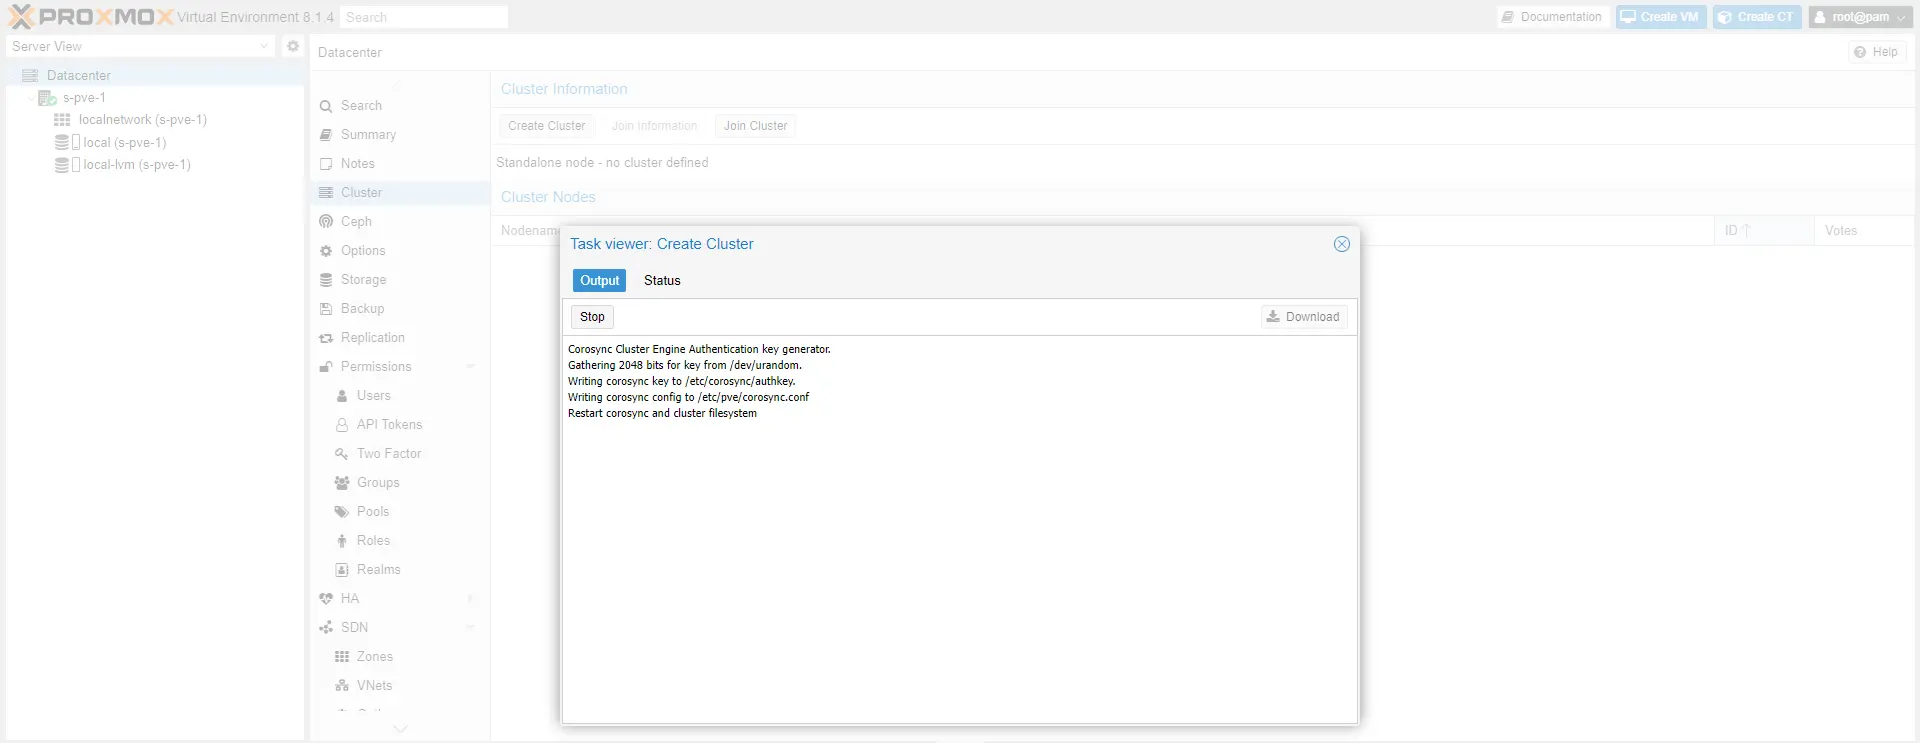
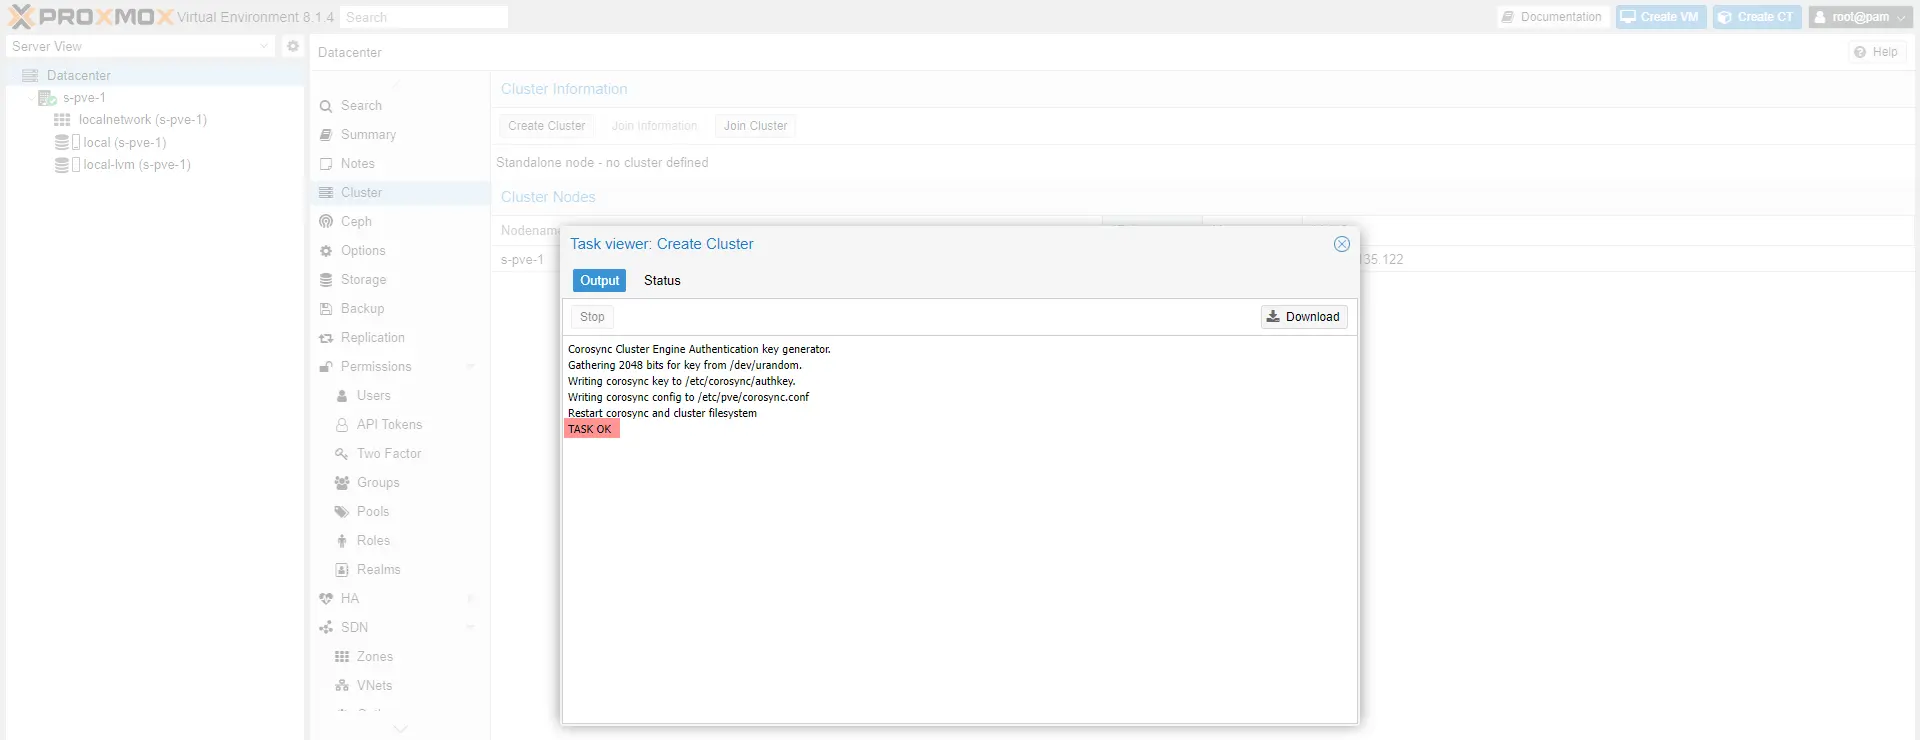
Wait while the Cluster is created…
The cluster is created, close the window.
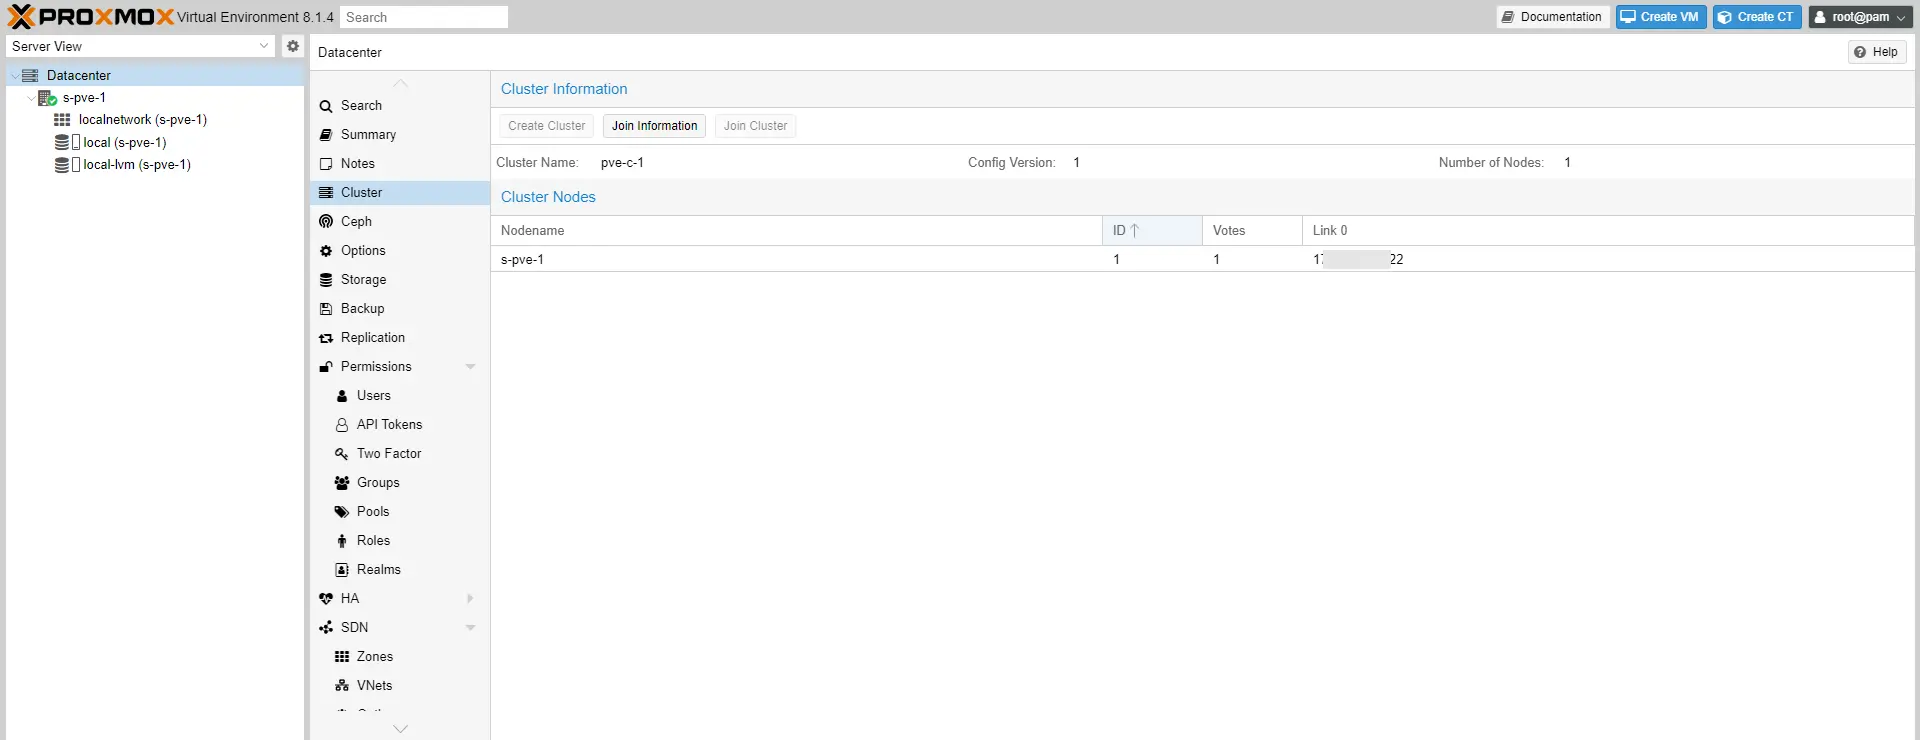
The cluster is visible in the web interface and we can see that the server we used to create the cluster is a member.
Ajouter un serveur Proxmox dans un Cluster
We will add the s-pve-2 server to the cluster.
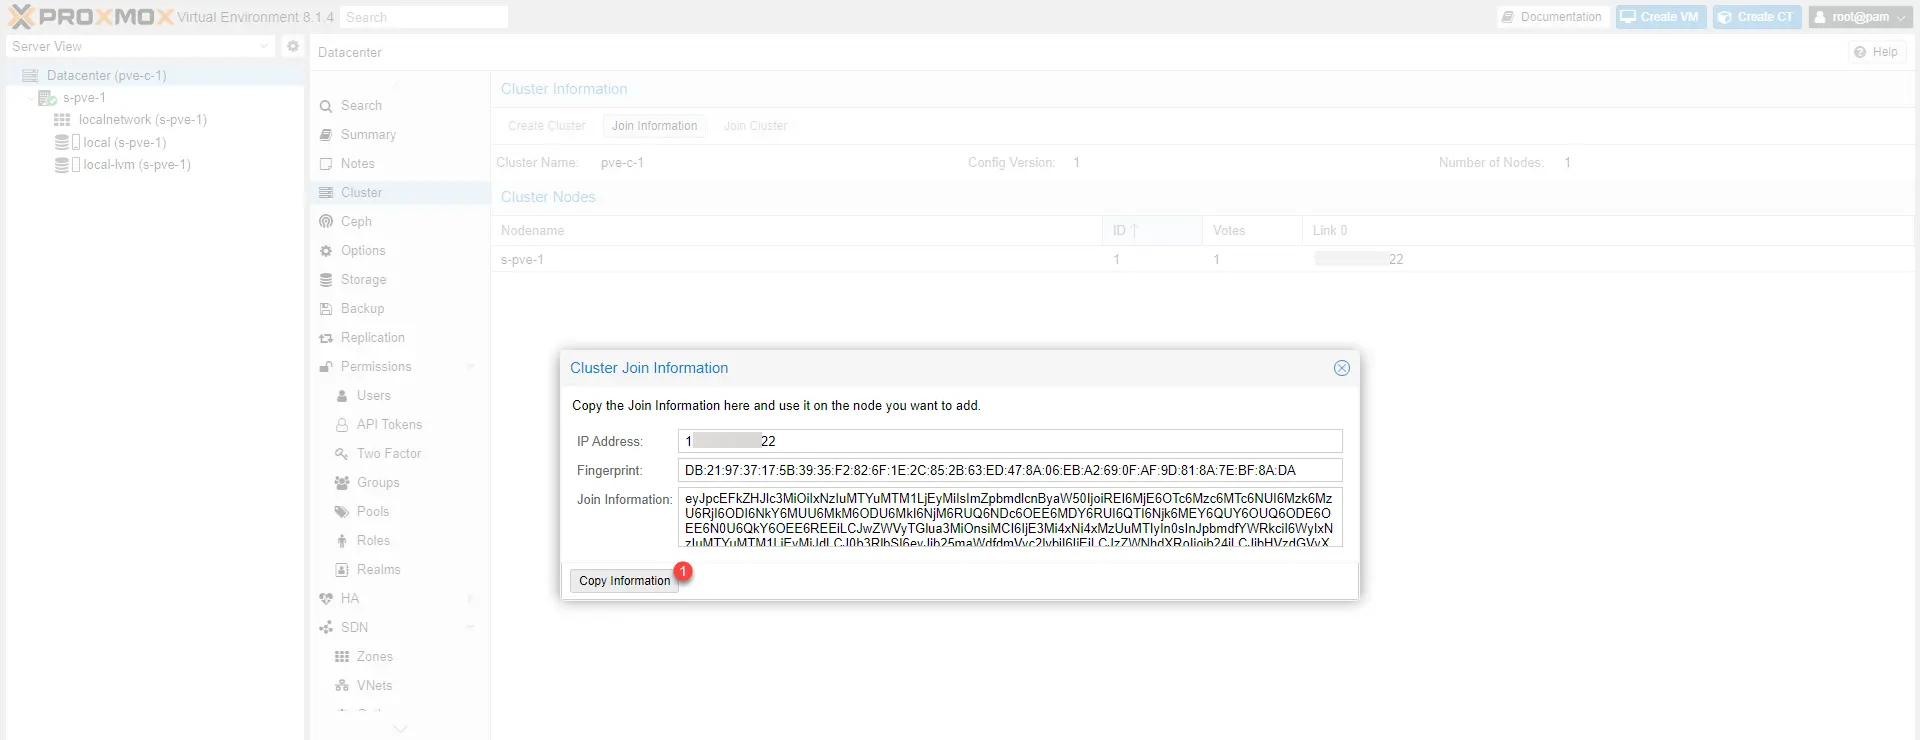
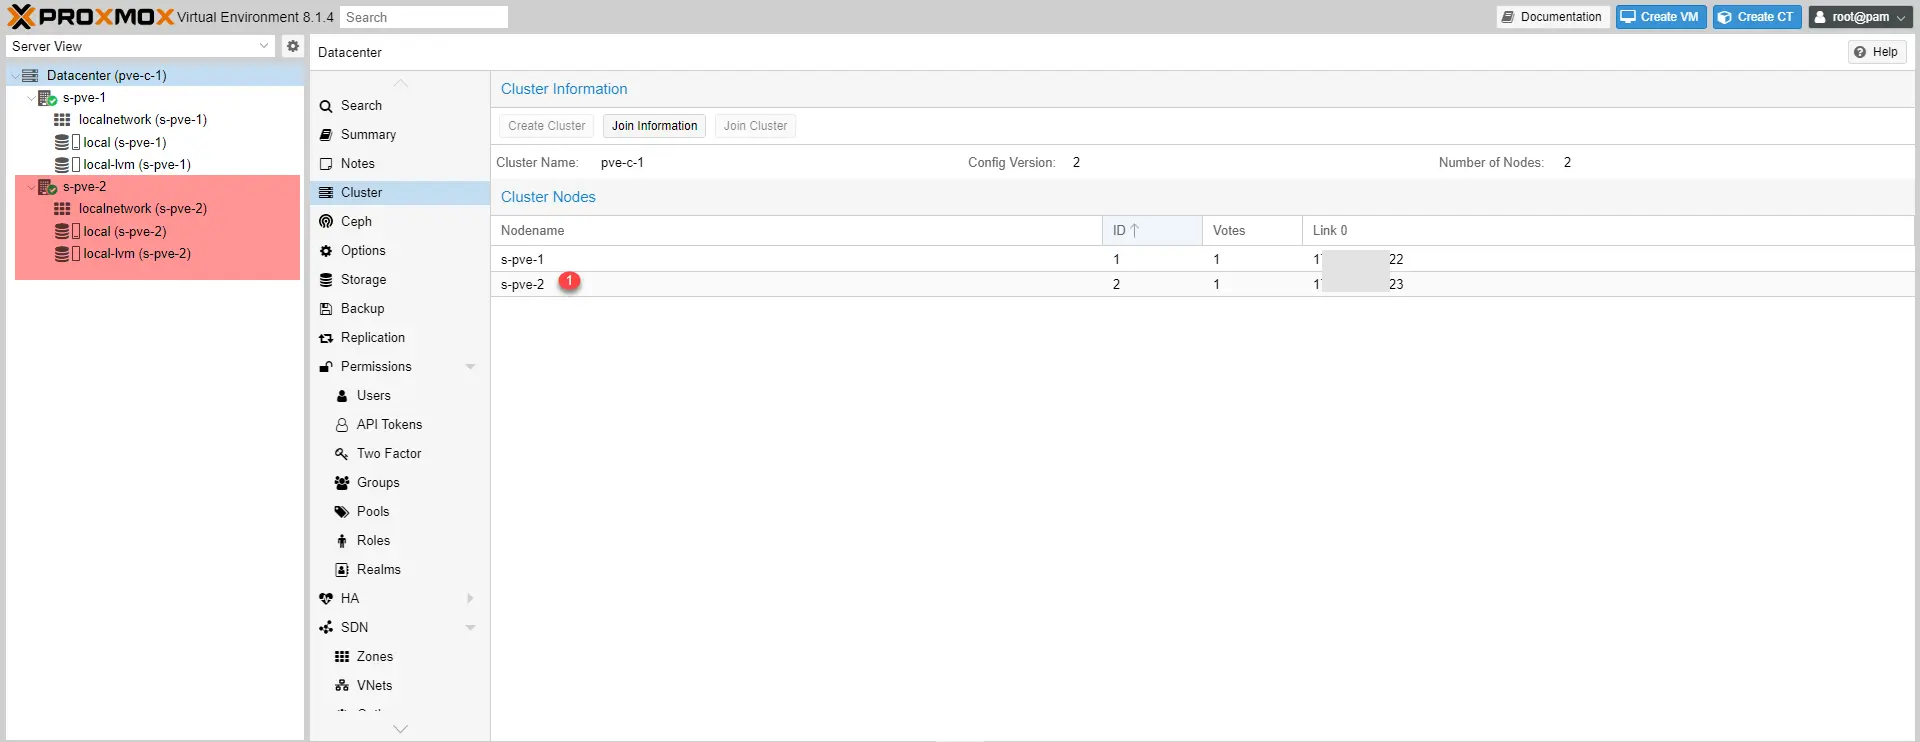
On the s-pve-1 server, from the Cluter settings, click on Join Information 1.
Click on the Copy Information 1 button.
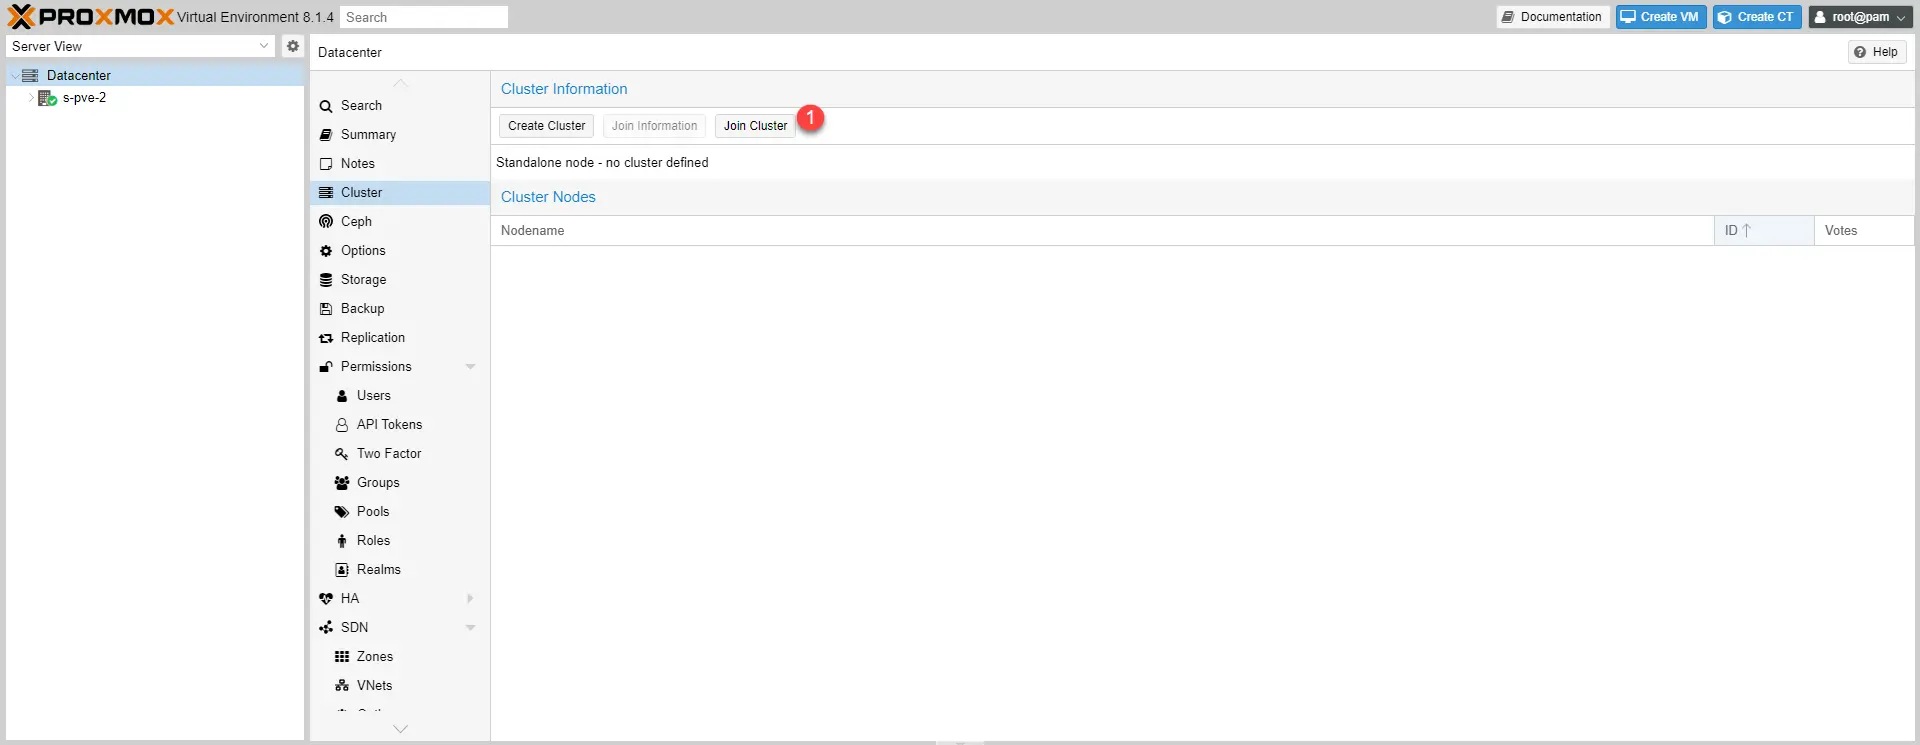
From the server administration web interface go to the cluster configuration: Datacenter / Cluster and click on the Join Cluster 1 button.
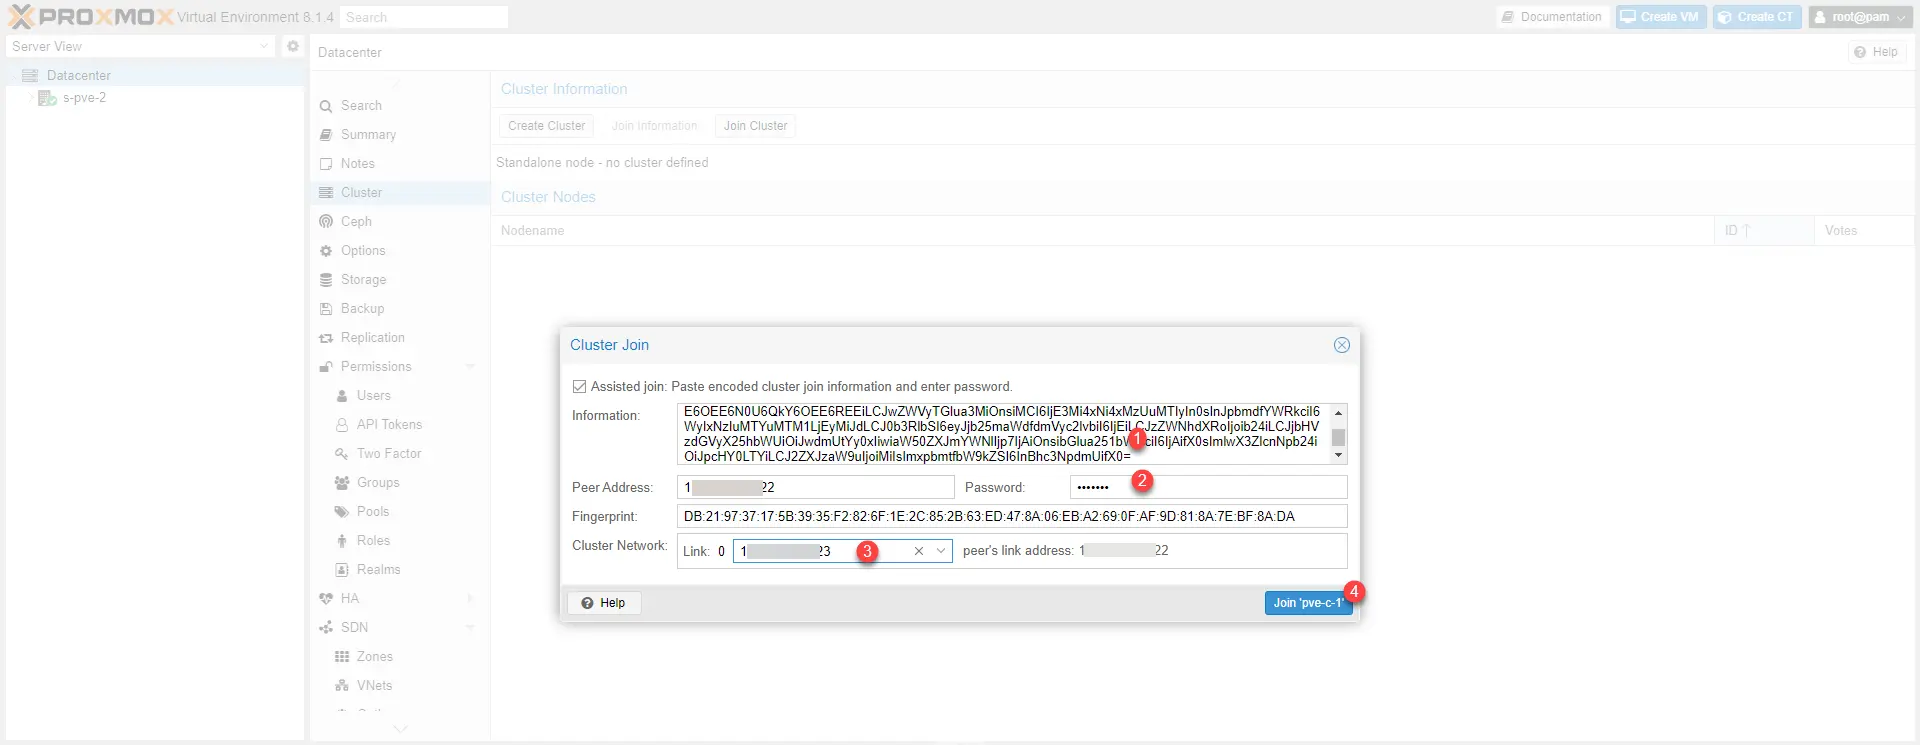
Paste the 1 cluster join information, enter the 2 root password of the cluster member server, select the 3 network card for cluster communications and click the Join button ‘Cluster-name’ 4.
Wait while joining the cluster…

While joining the cluster, you will be disconnected from the web interface, so you cannot see when the join is complete.
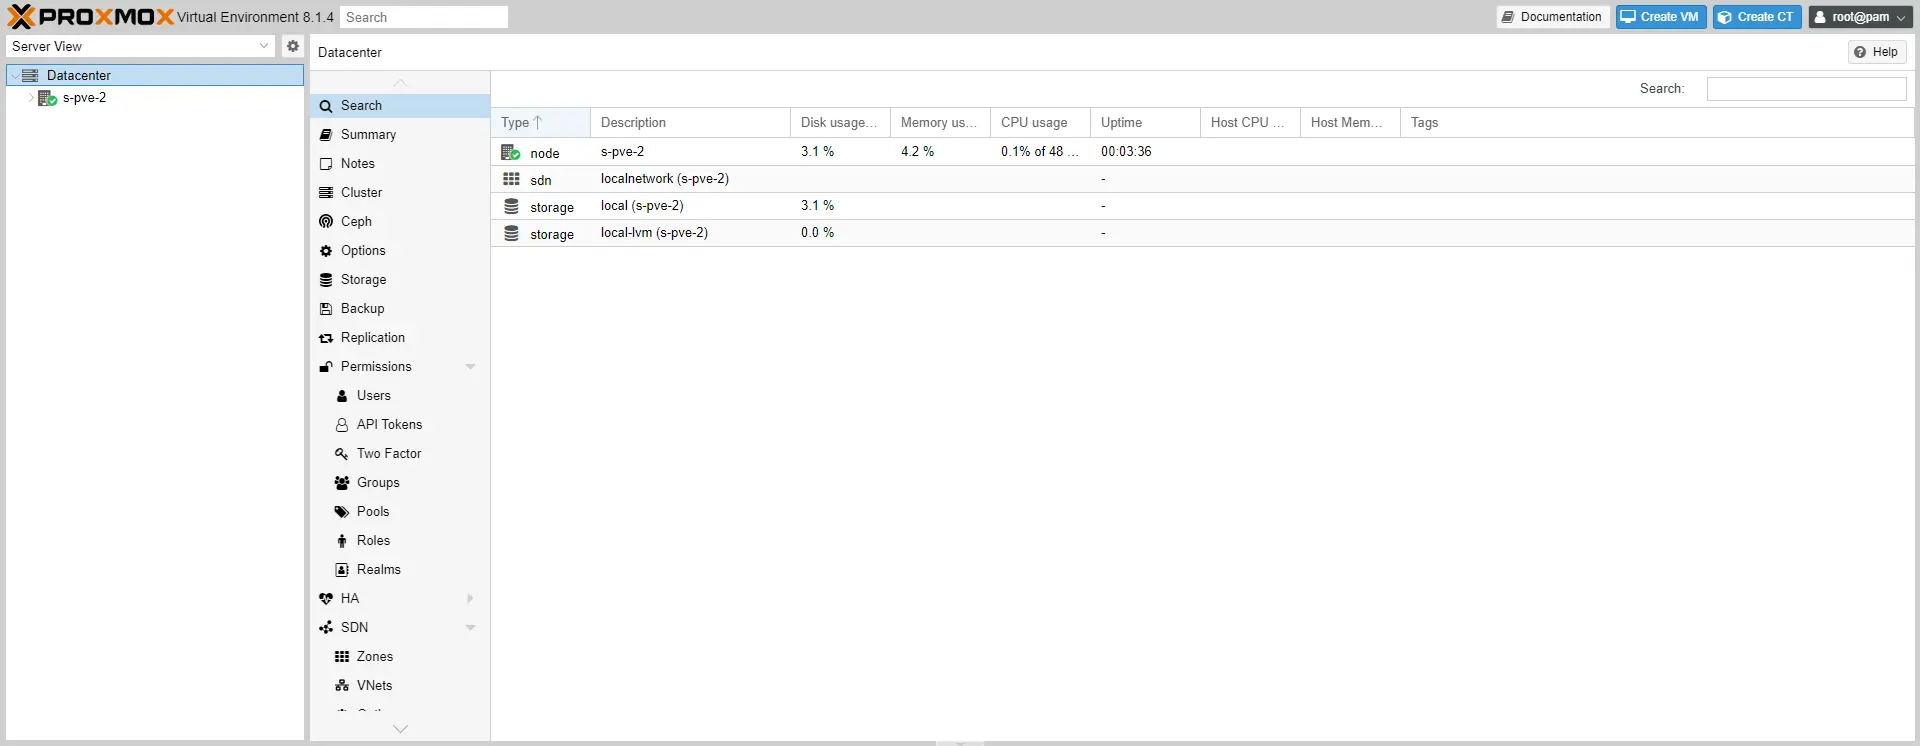
On the s-pve-1 server, check in the web interface that the server is added to cluster 1 and that it is visible in the administration interface.
Repeat the operation for the other servers that must be added to the cluster.
Setting up Ceph storage
Install Ceph on Proxmox servers
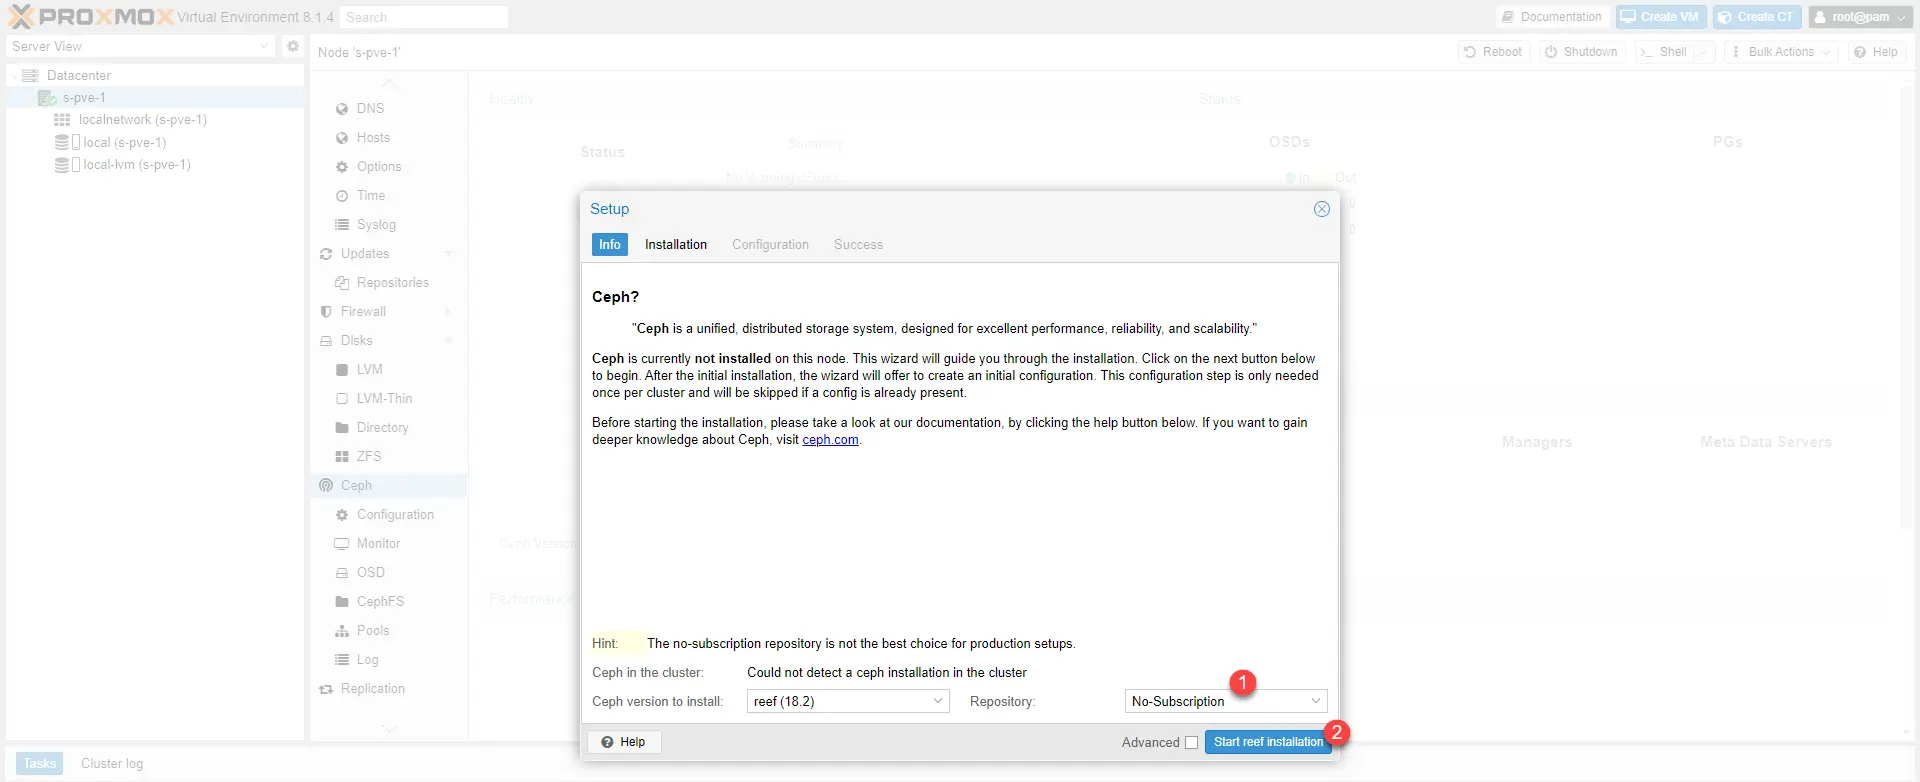
By default Ceph is not installed on Proxmox servers, by selecting the server, go to Ceph and click on the Install Ceph 1 button.

Not having a license, I selected the No-Subscription Repository 1, click on Start reef installation 2.
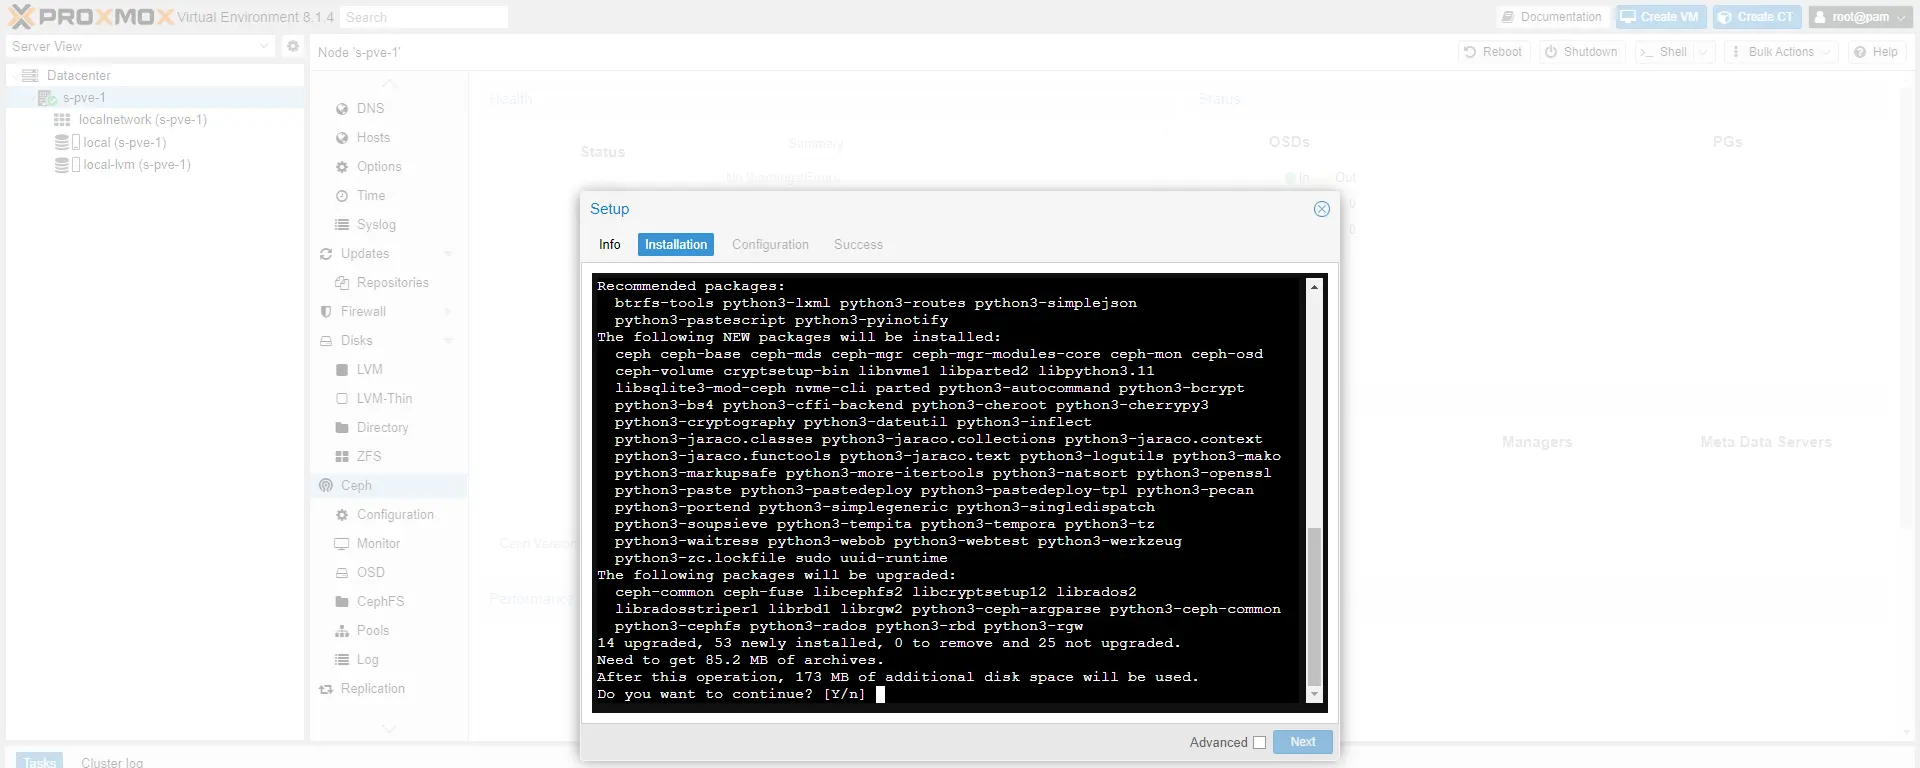
Validate the installation of additional packages…
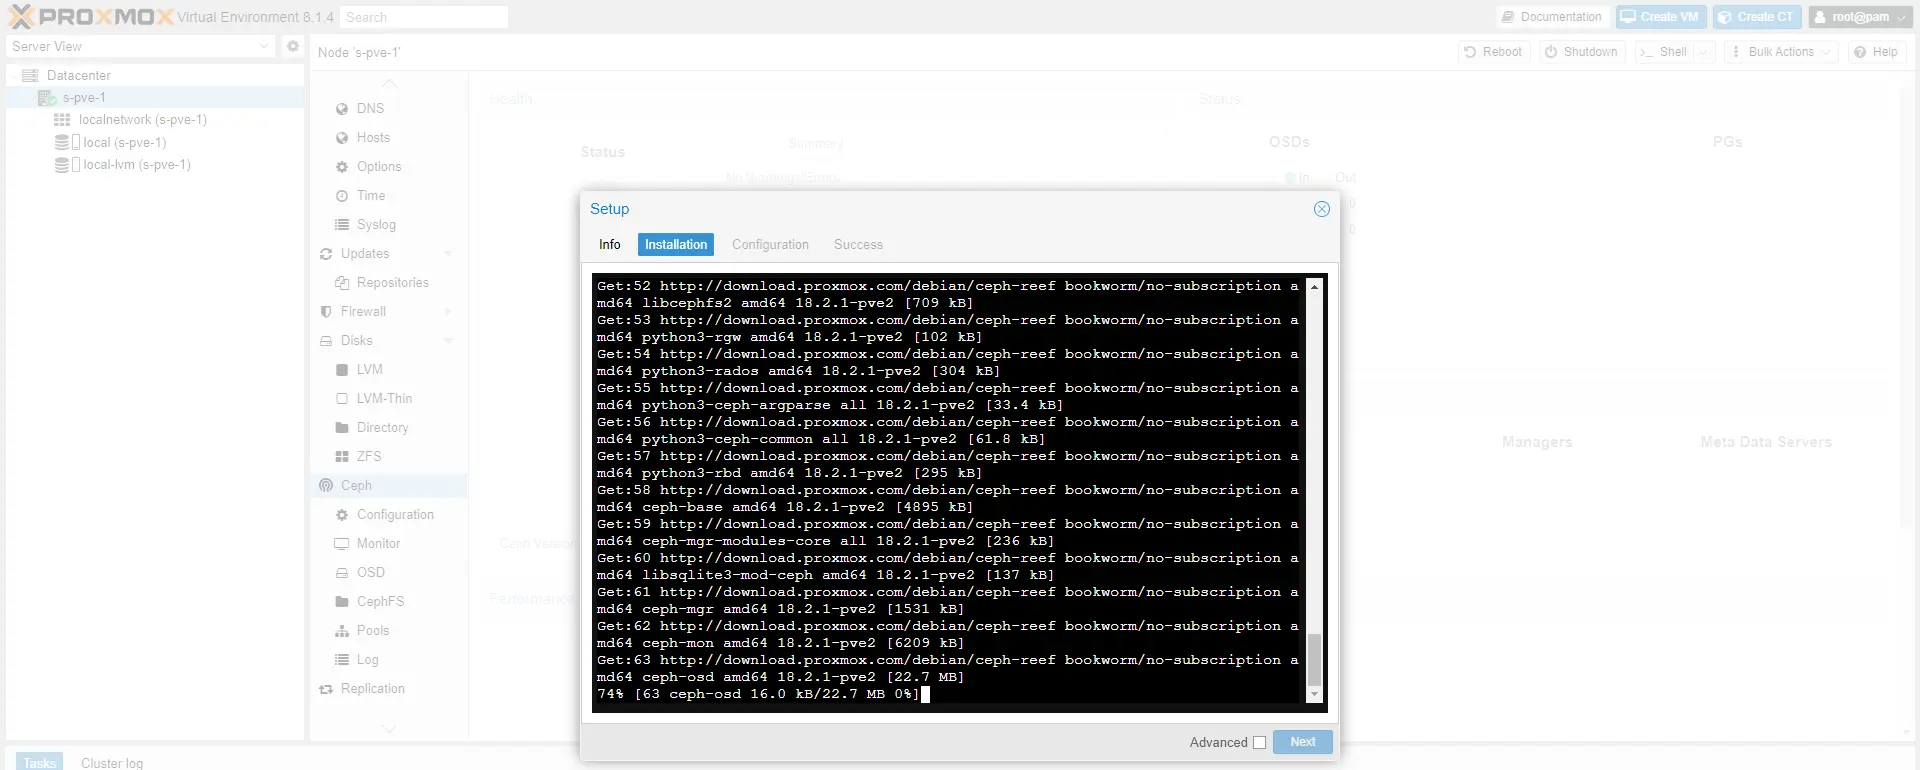
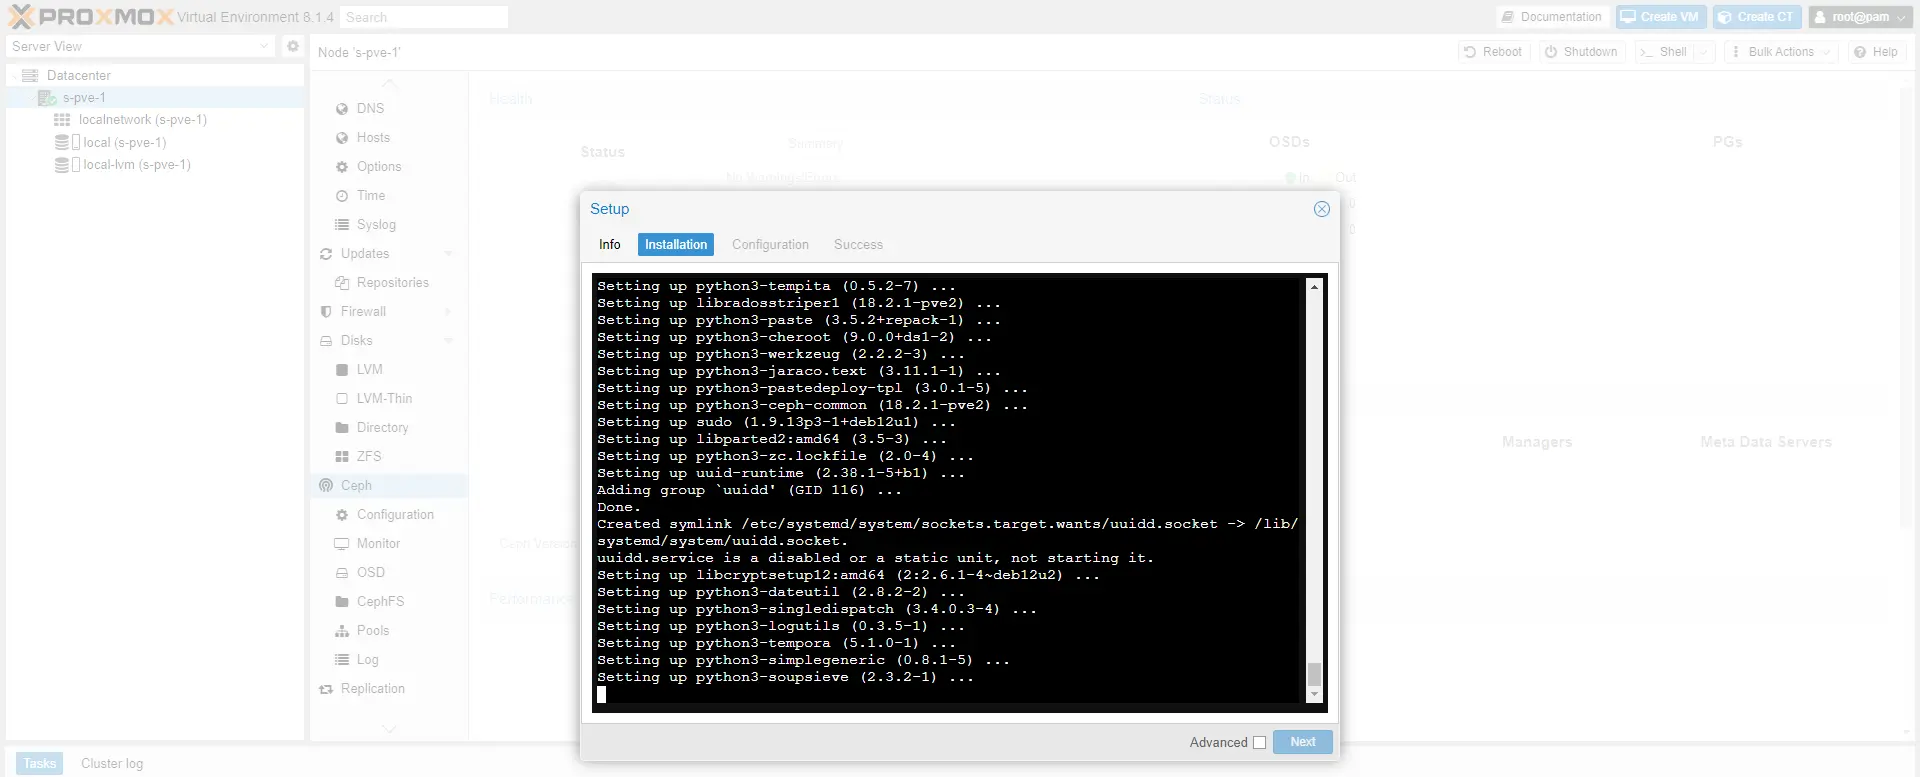
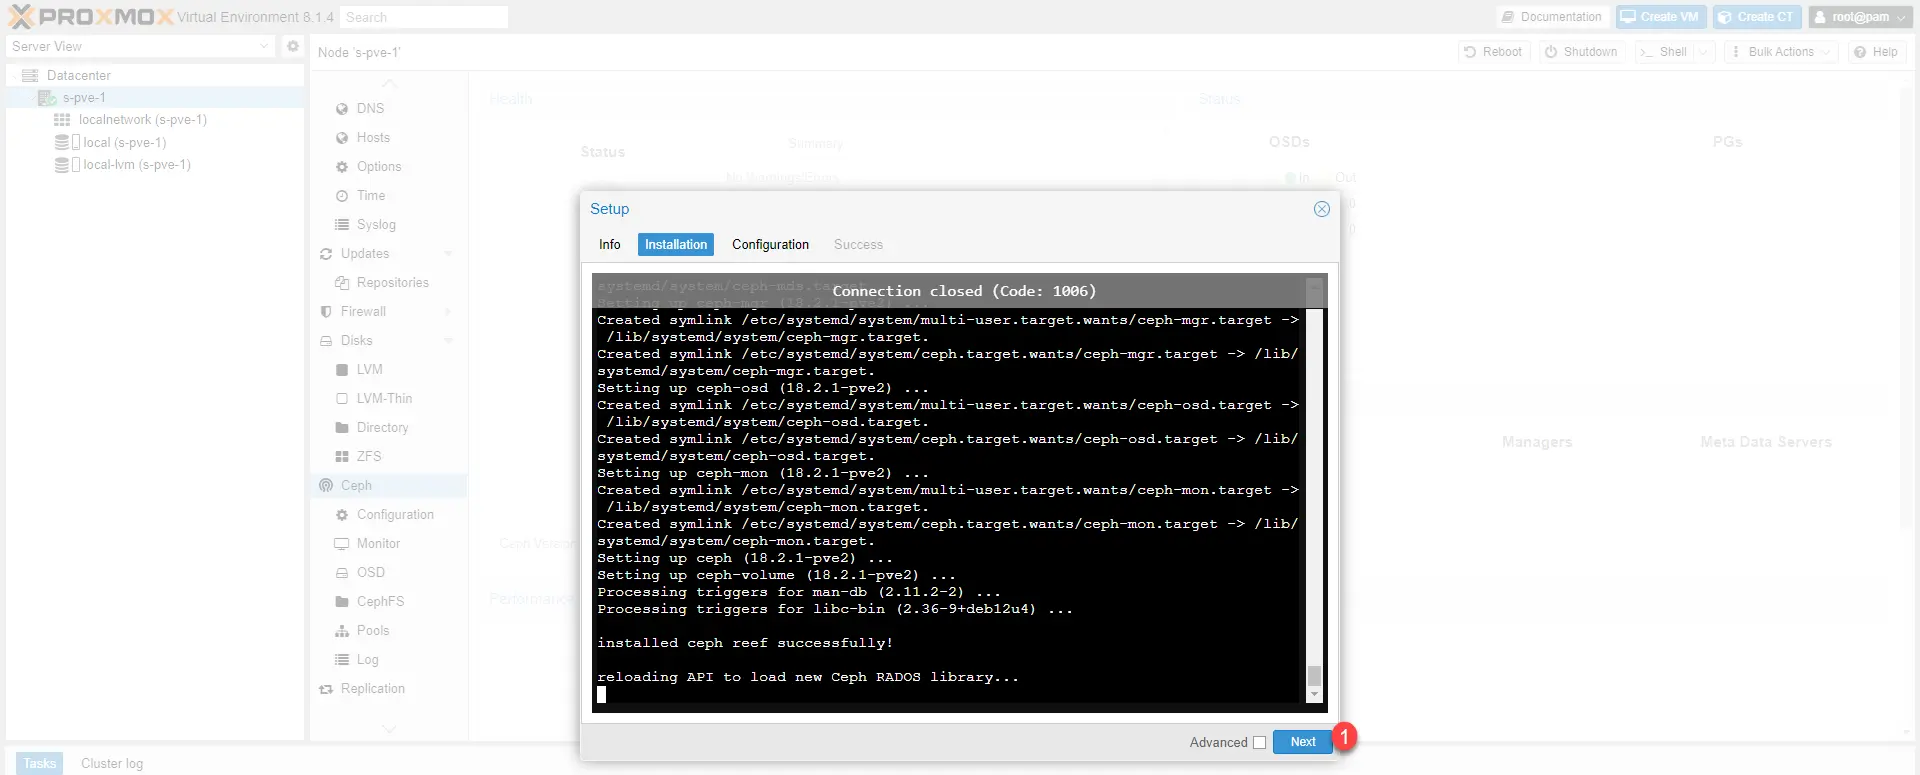
Wait while installing…
Once installation is complete, click Next 1 to proceed to configuration.
Choose the network address 1 which will be used for the Ceph cluster and click on Next 2.

The installation is complete, click on Finish 1 to close the wizard.

The installation of Ceph is completed on the first server, repeat this operation on the other servers in the cluster.
Configuring Ceph
We will now move on to the configuration of Ceph.
I am not going to go into technical detail in the tutorial, I invite you to read the documentation found here for more information.
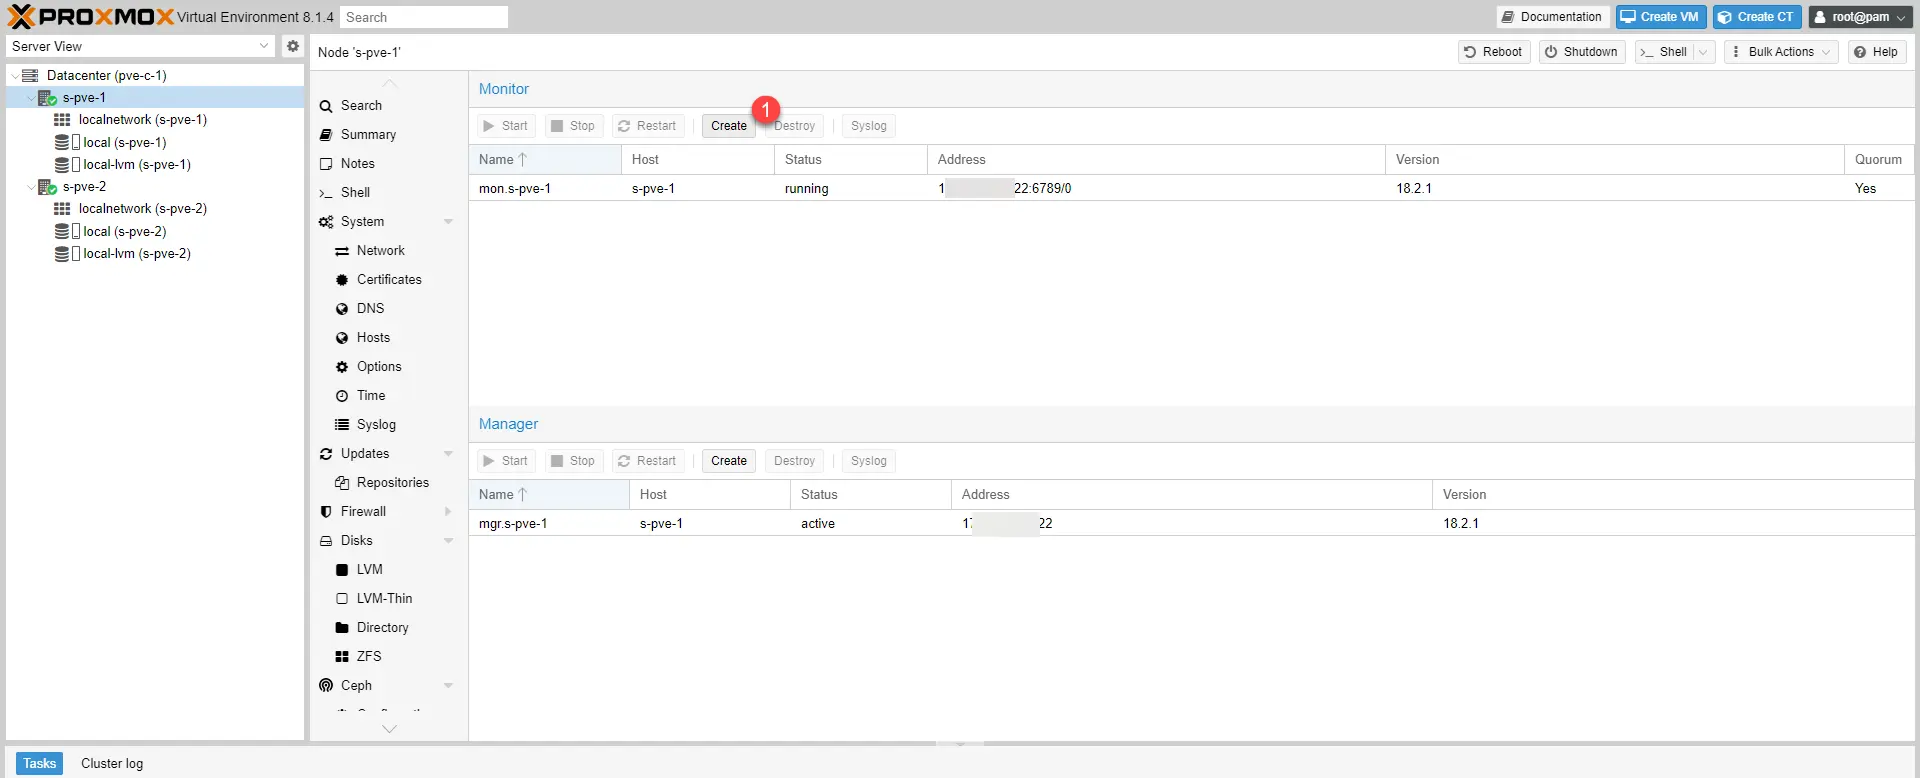
Configure Monitor and Manager
We will add each node as Minotor and Manager of the Ceph cluster
From one of the cluster nodes, go to Ceph 1 then Monitor 2.
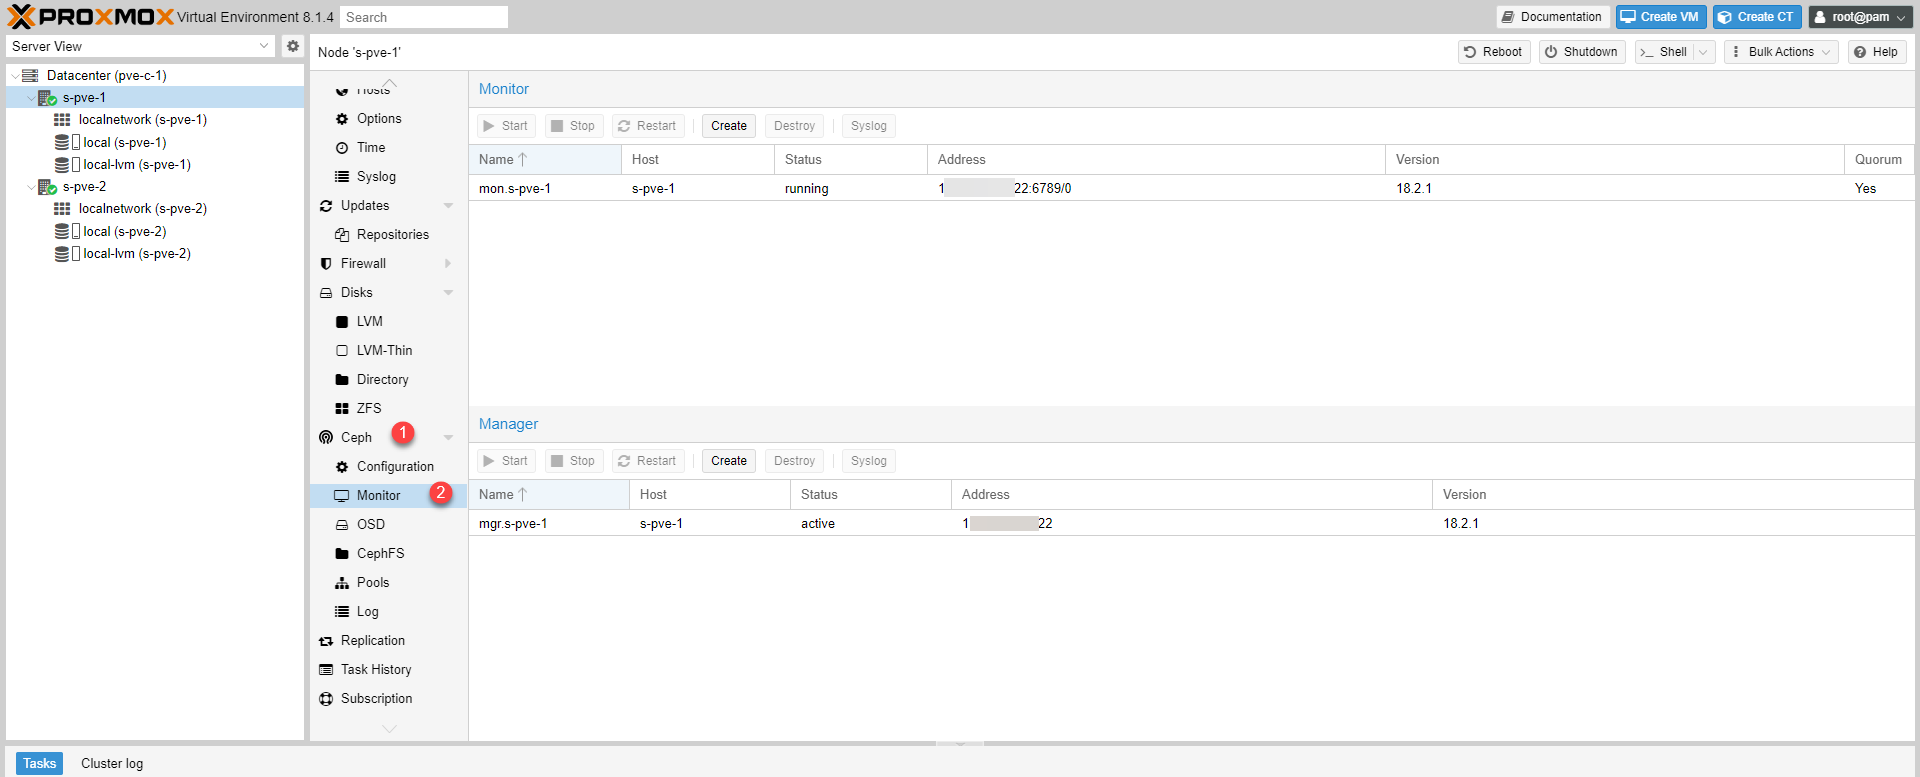
We will start with the Monitors, click on the Create 1 button.
Select server added 1.
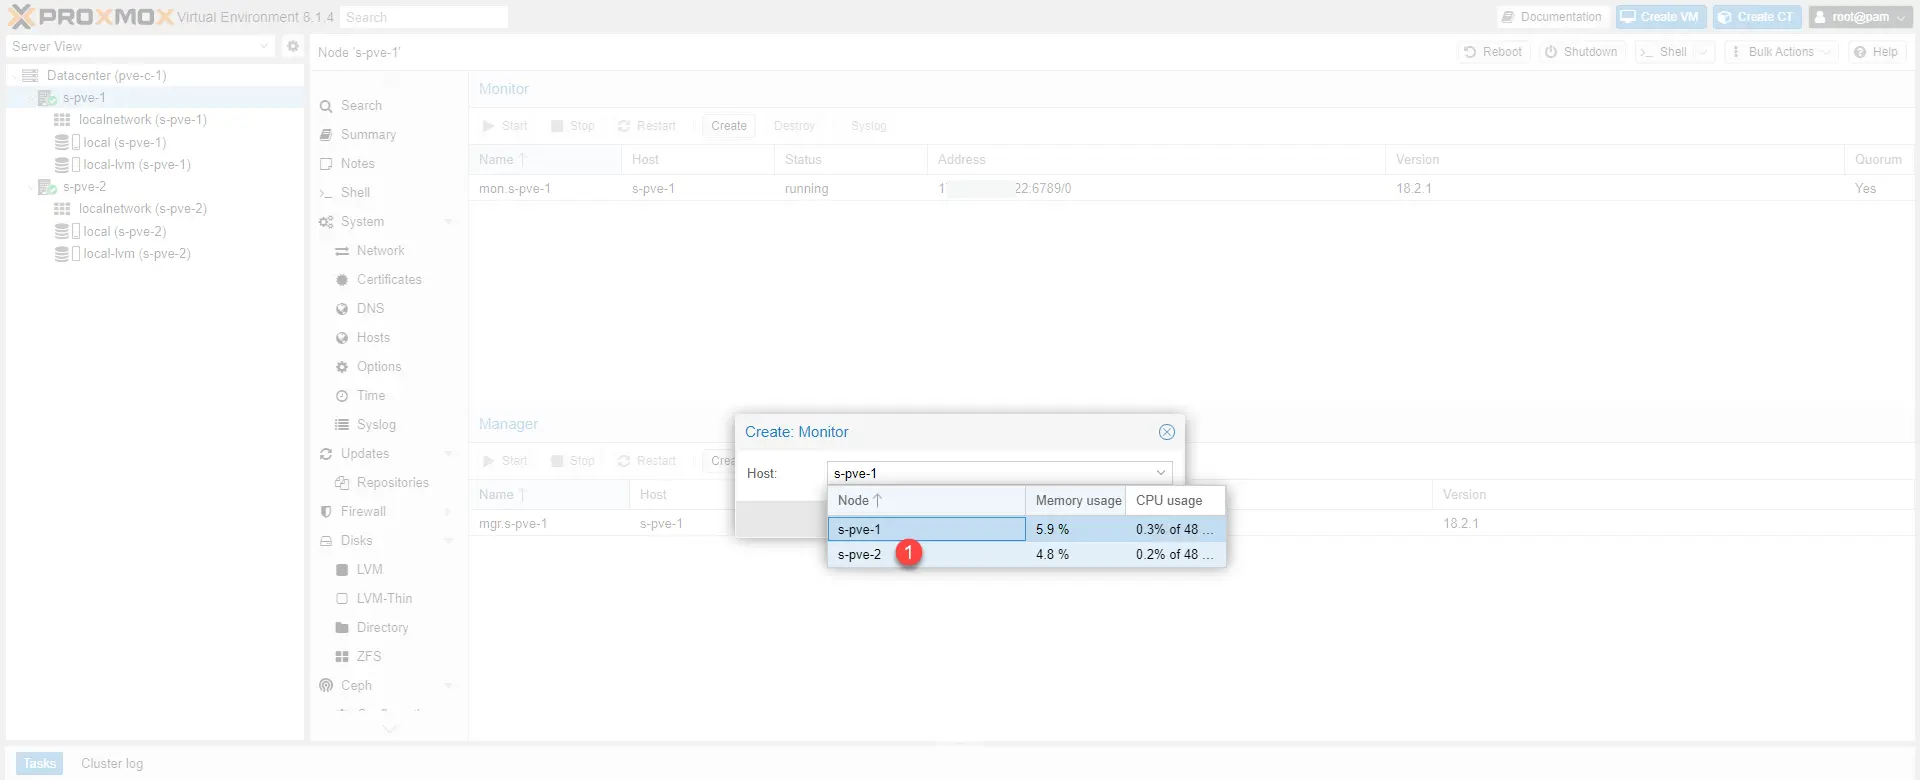
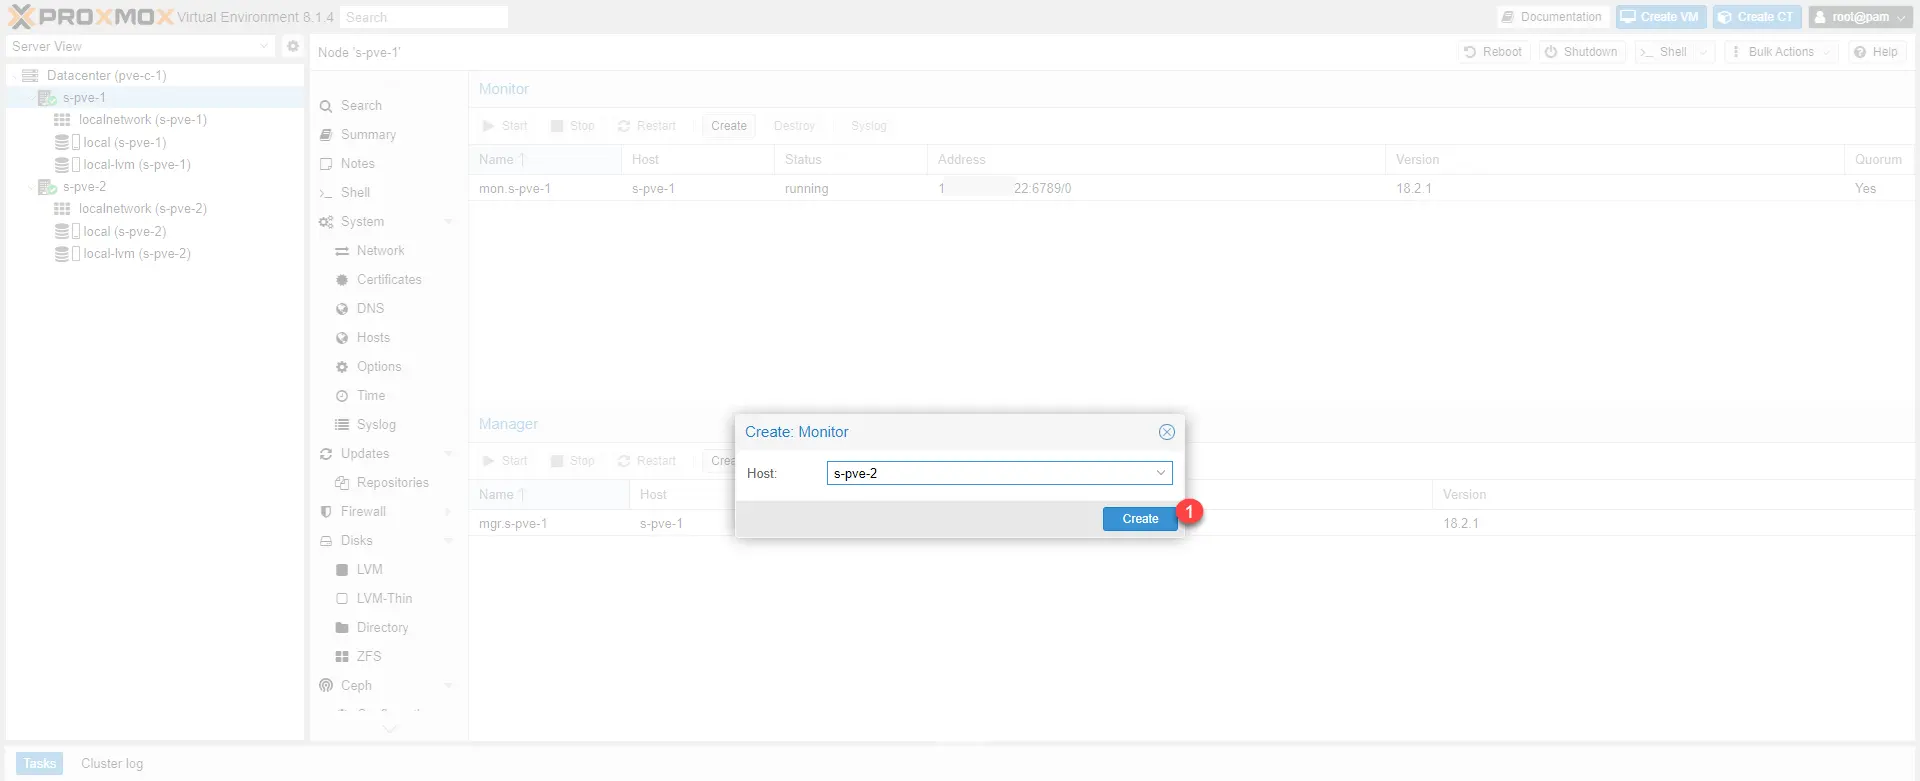
With the server selected, click on the Create 1 button.
The second server is added.
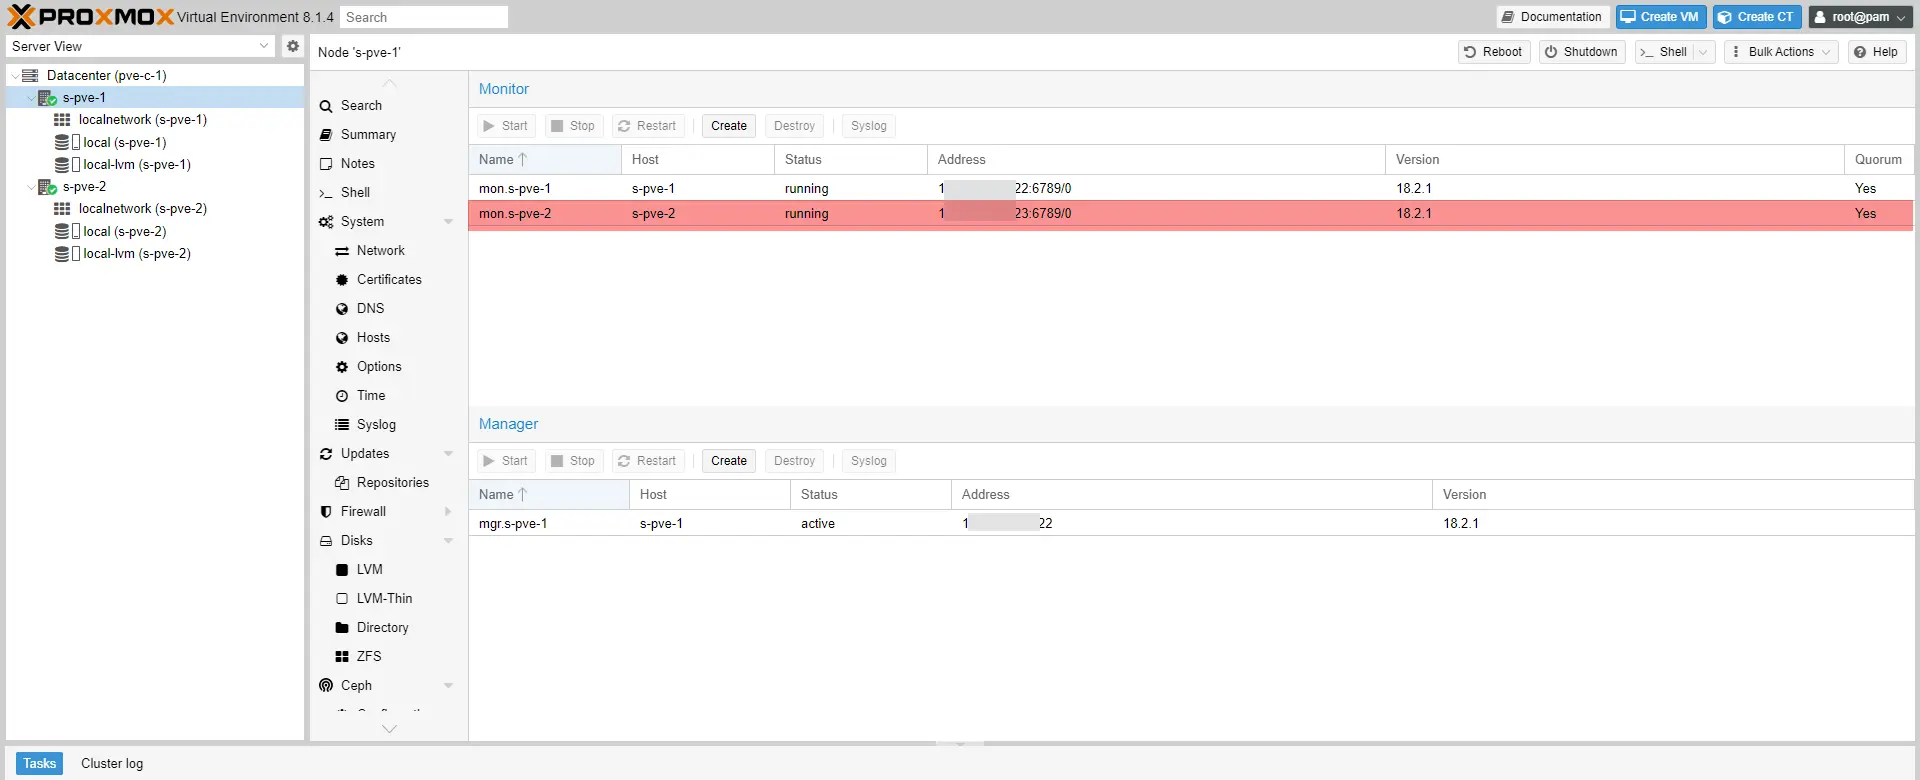
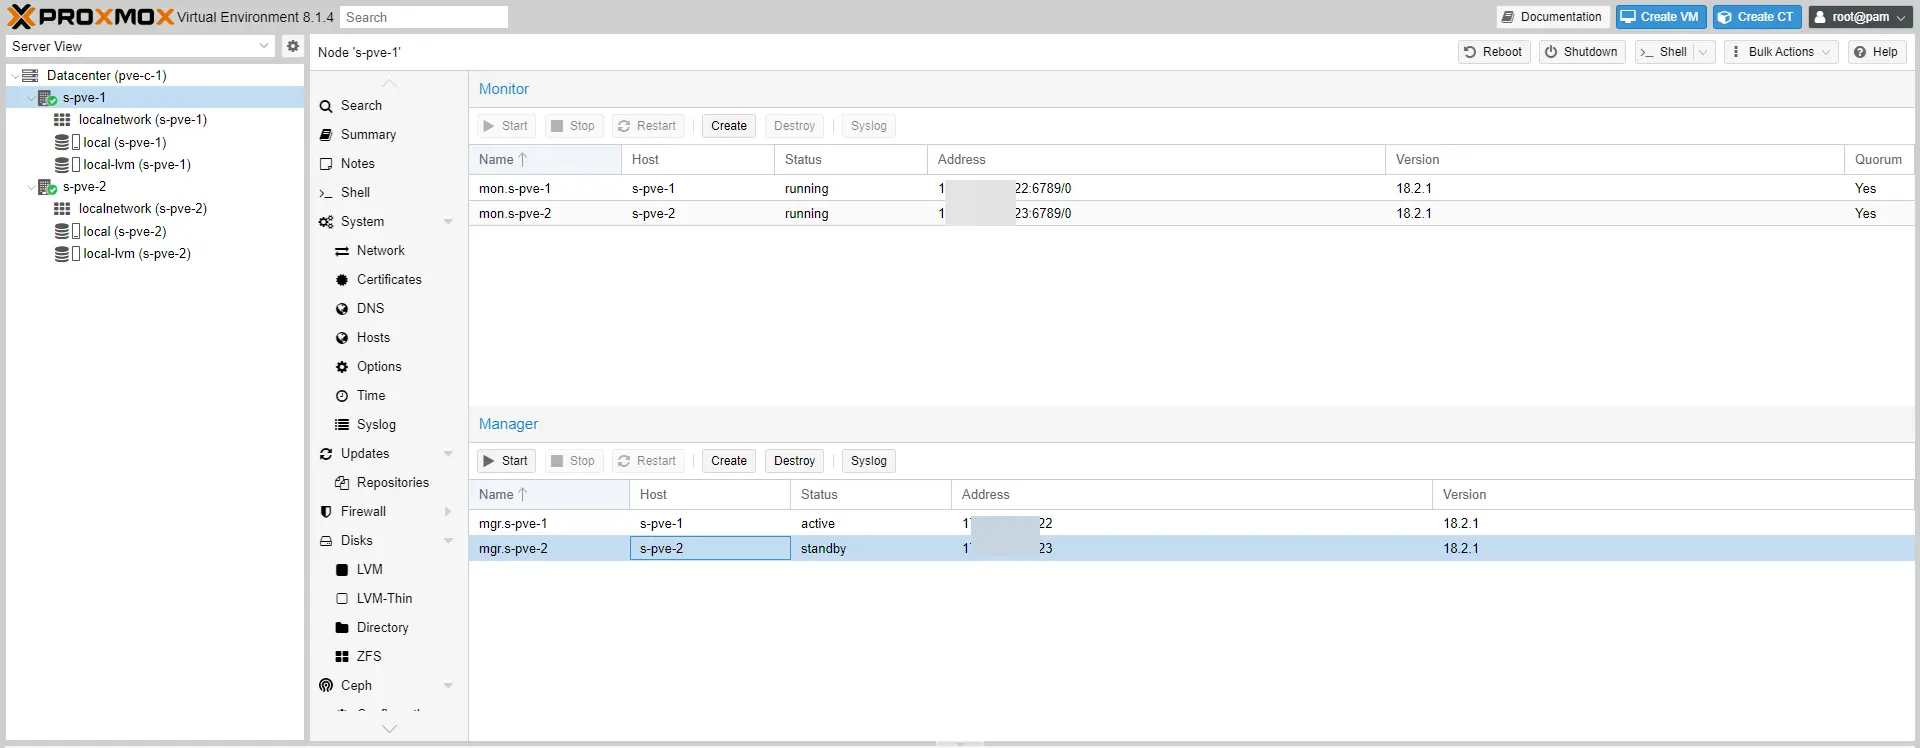
Add the other servers and do the same for the Manager.
Add OSD: physical disk
Maintenant on va ajouter à Ceph les disques physiques appelé OSD.
Below are the physical disks that I will be able to add for each server:
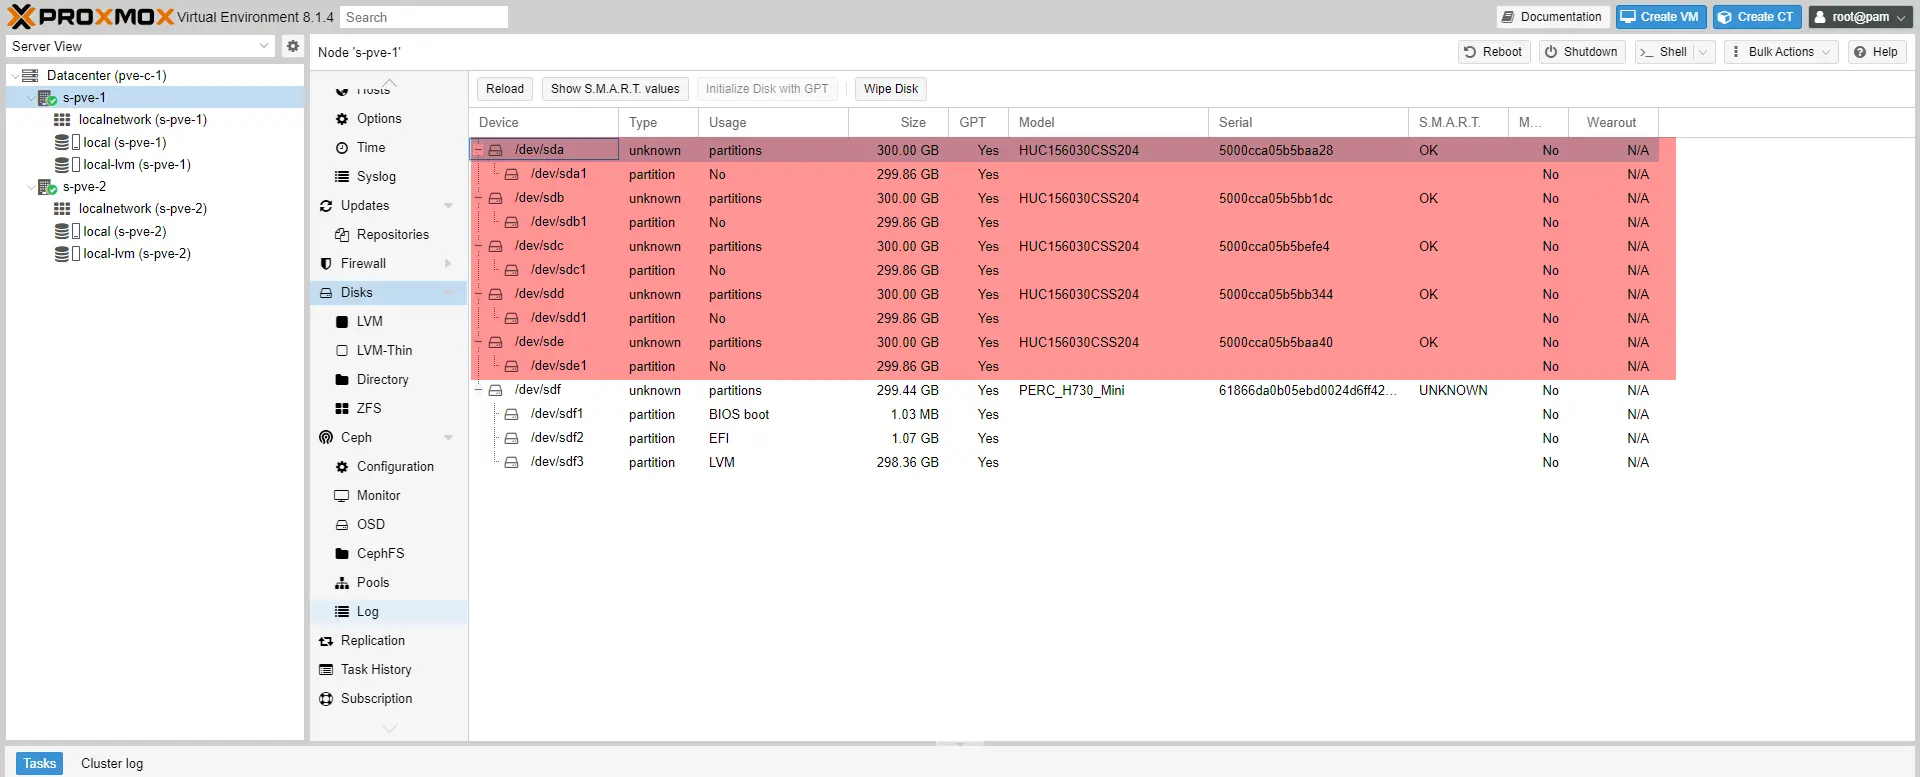
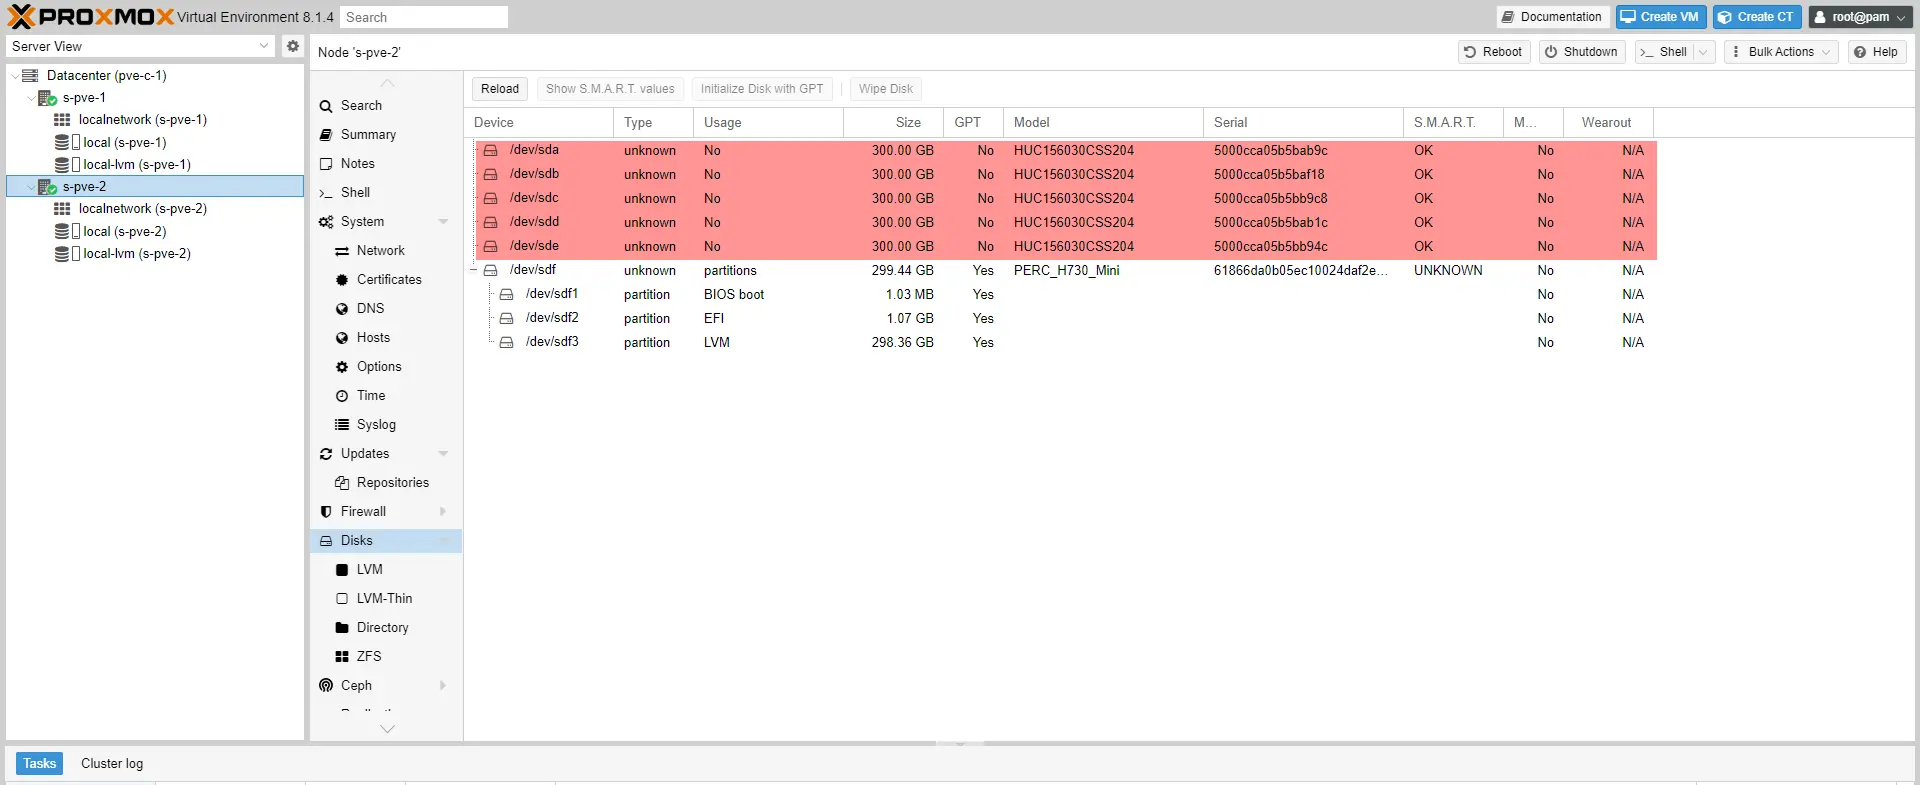
For correct operation, you must add the same number of disks for each server.
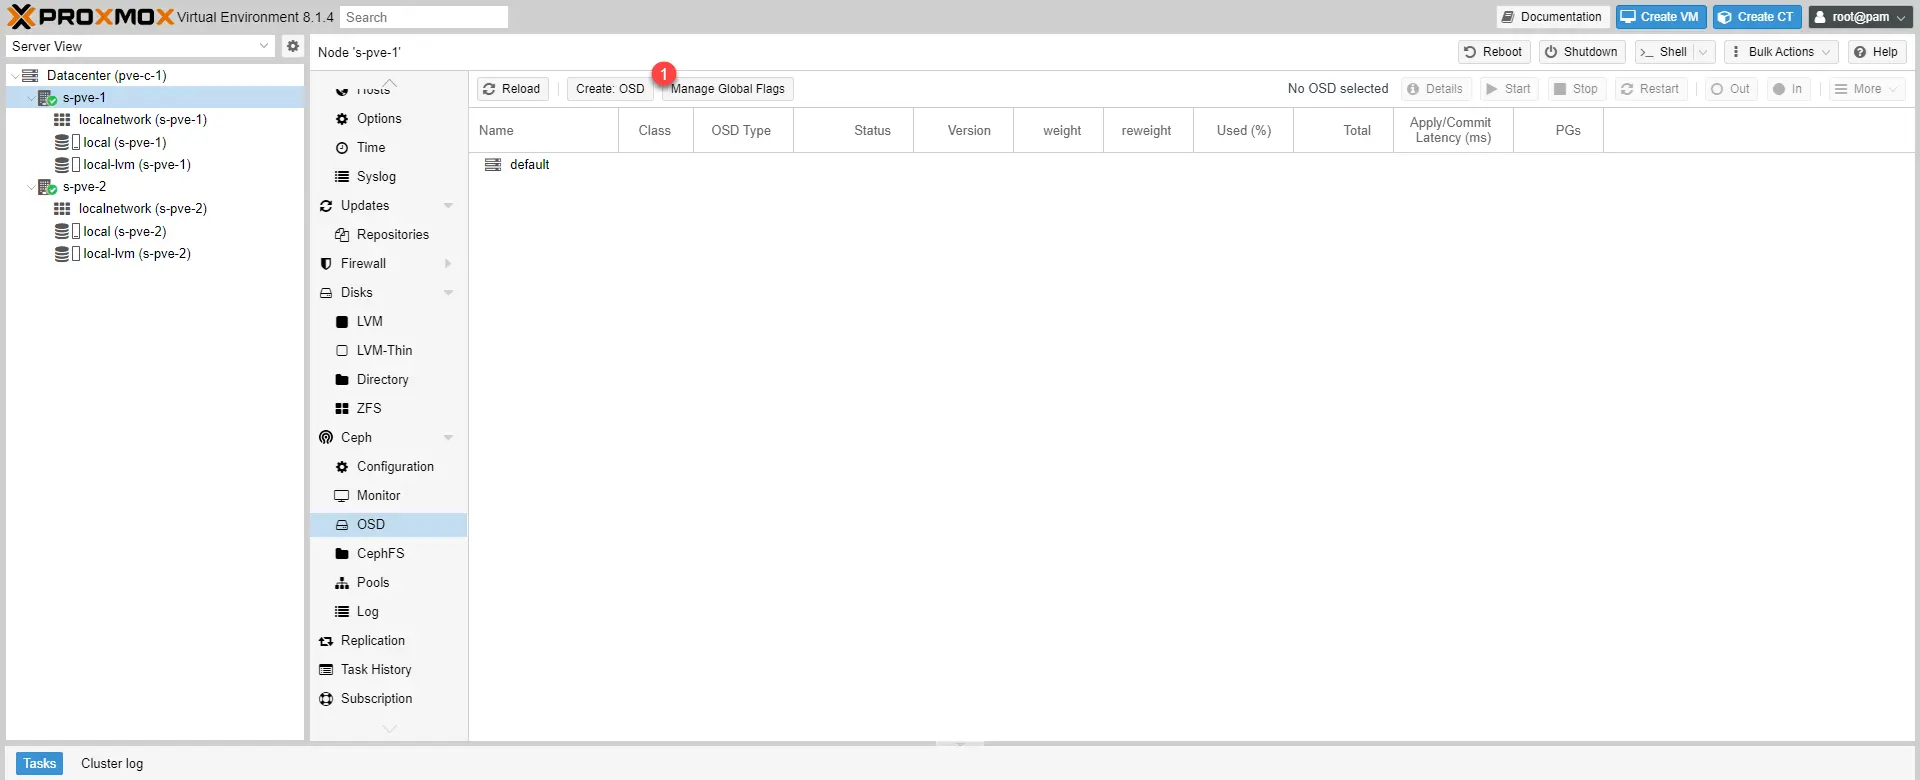
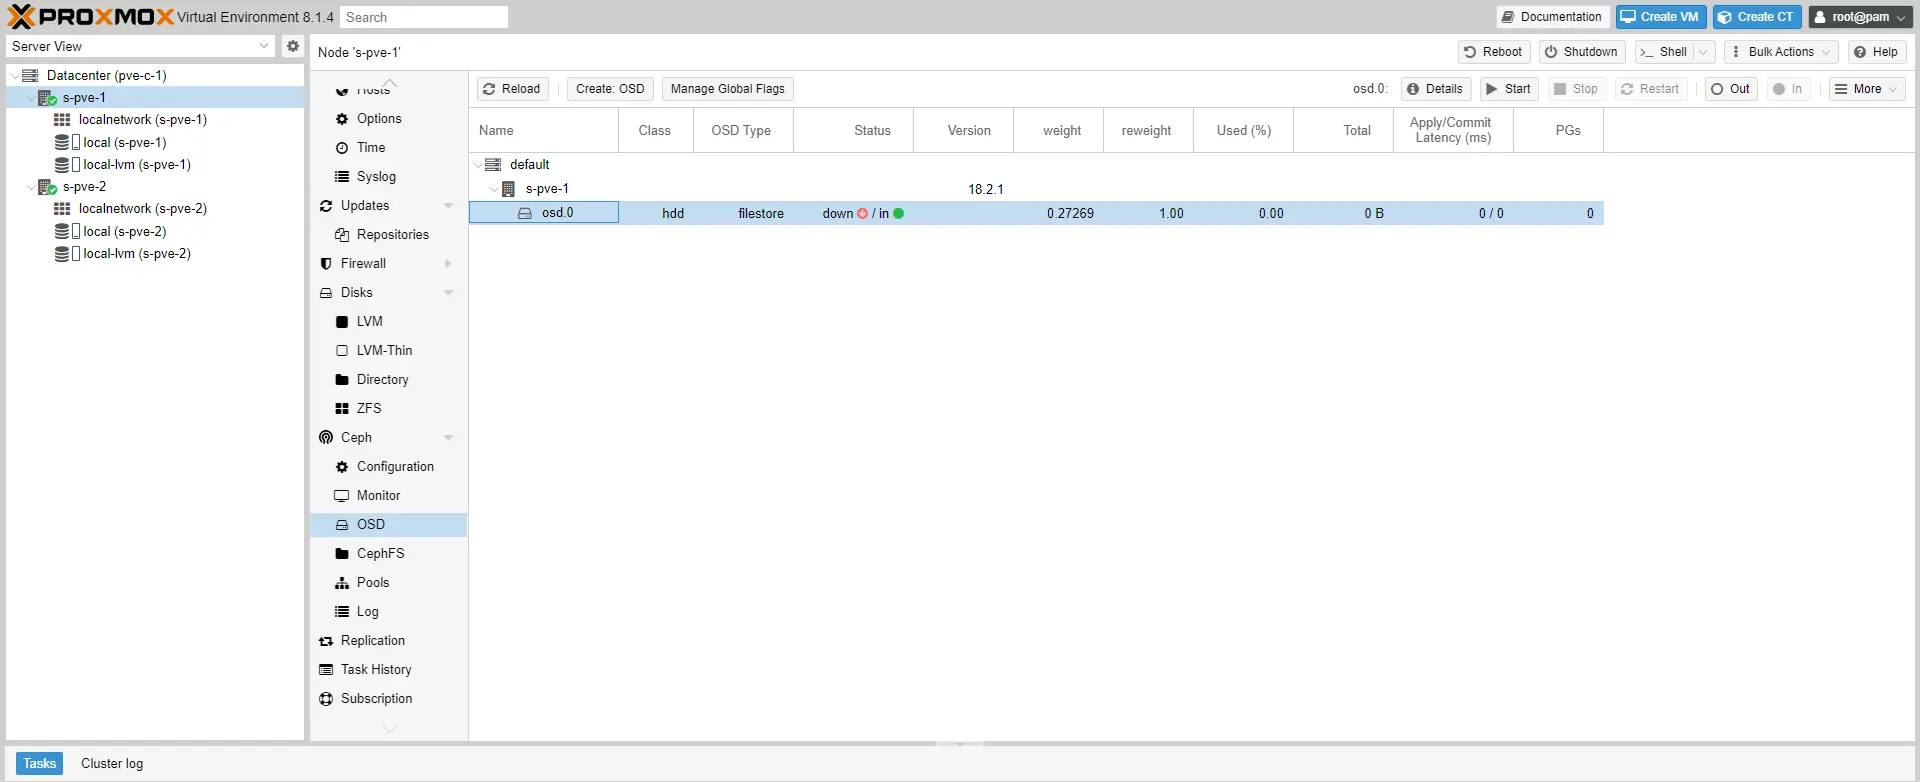
Select a server, then go to Ceph / OSD and click on the Create button: OSD 1.
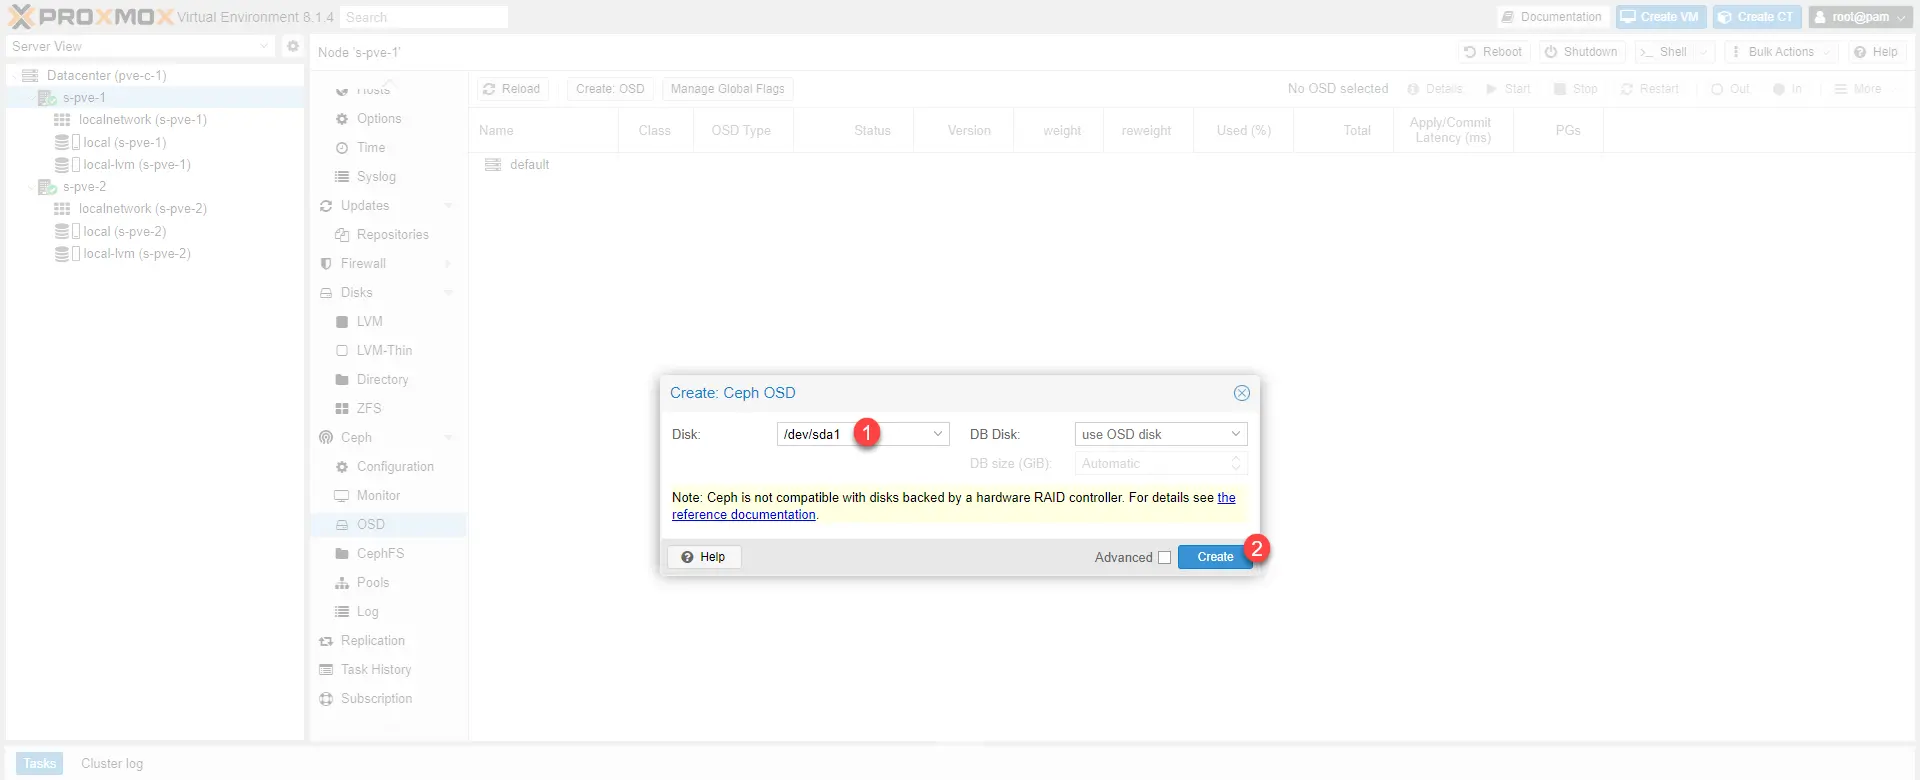
Select disk 1 and click Create 2.
The disk is added for server s-pve-1.
Add more server disks if necessary and repeat for each server in the Ceph cluster.
Disks have been added for both servers.
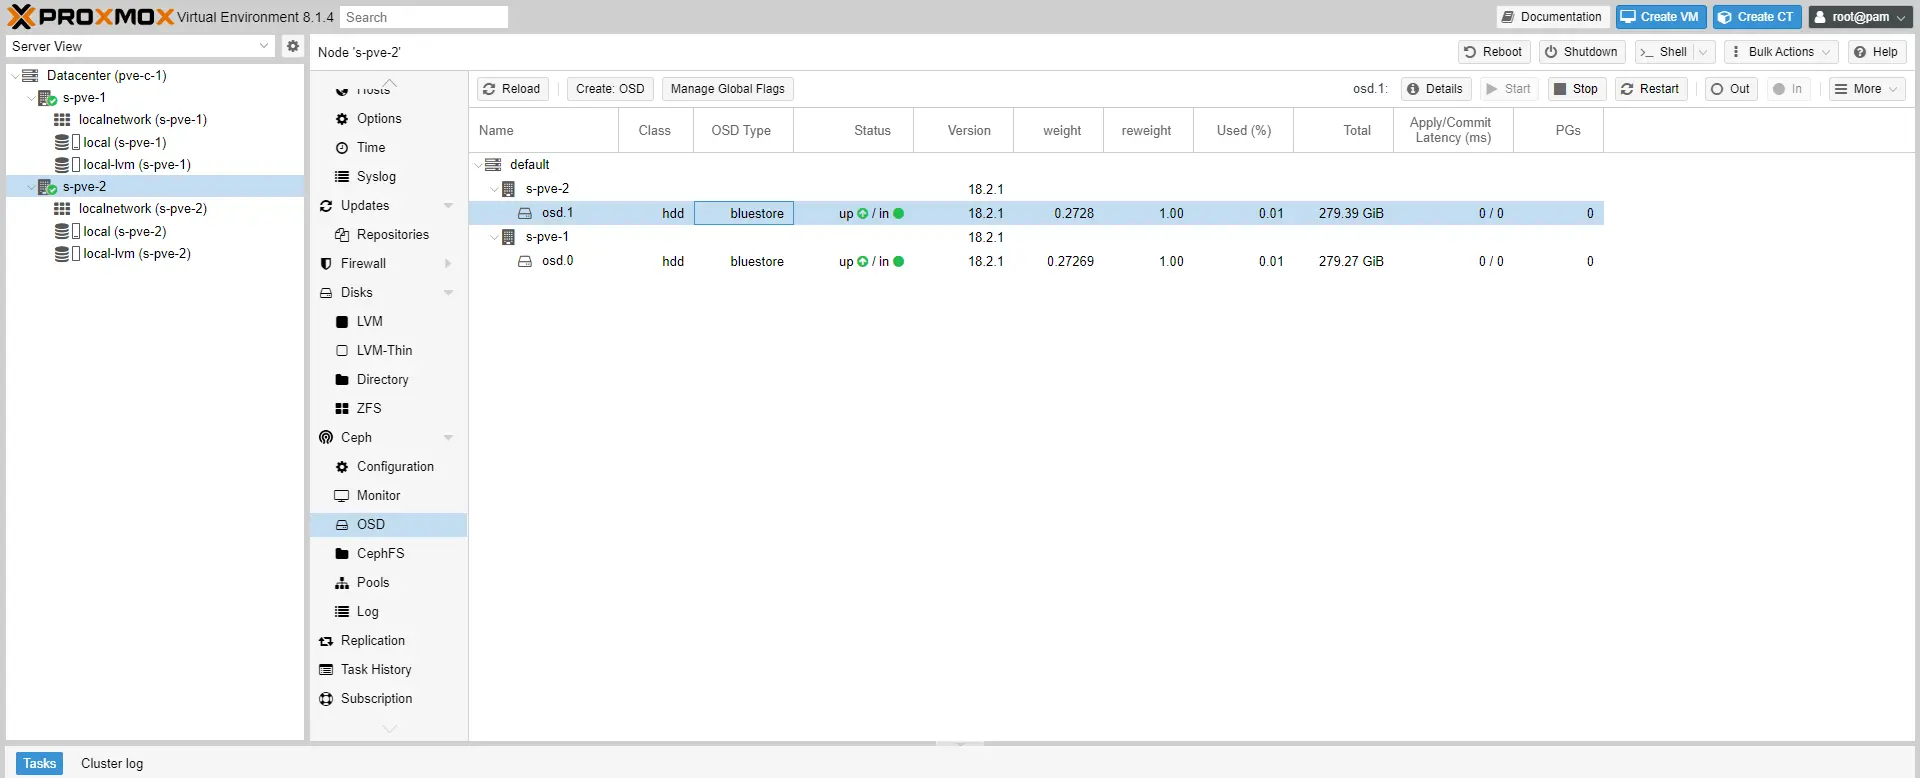
You can add OSDs at any time, you just need to add one OSD per server each time.
Creating a Pool
A pool is storage that can be used in Proxmox for storing virtual machines.
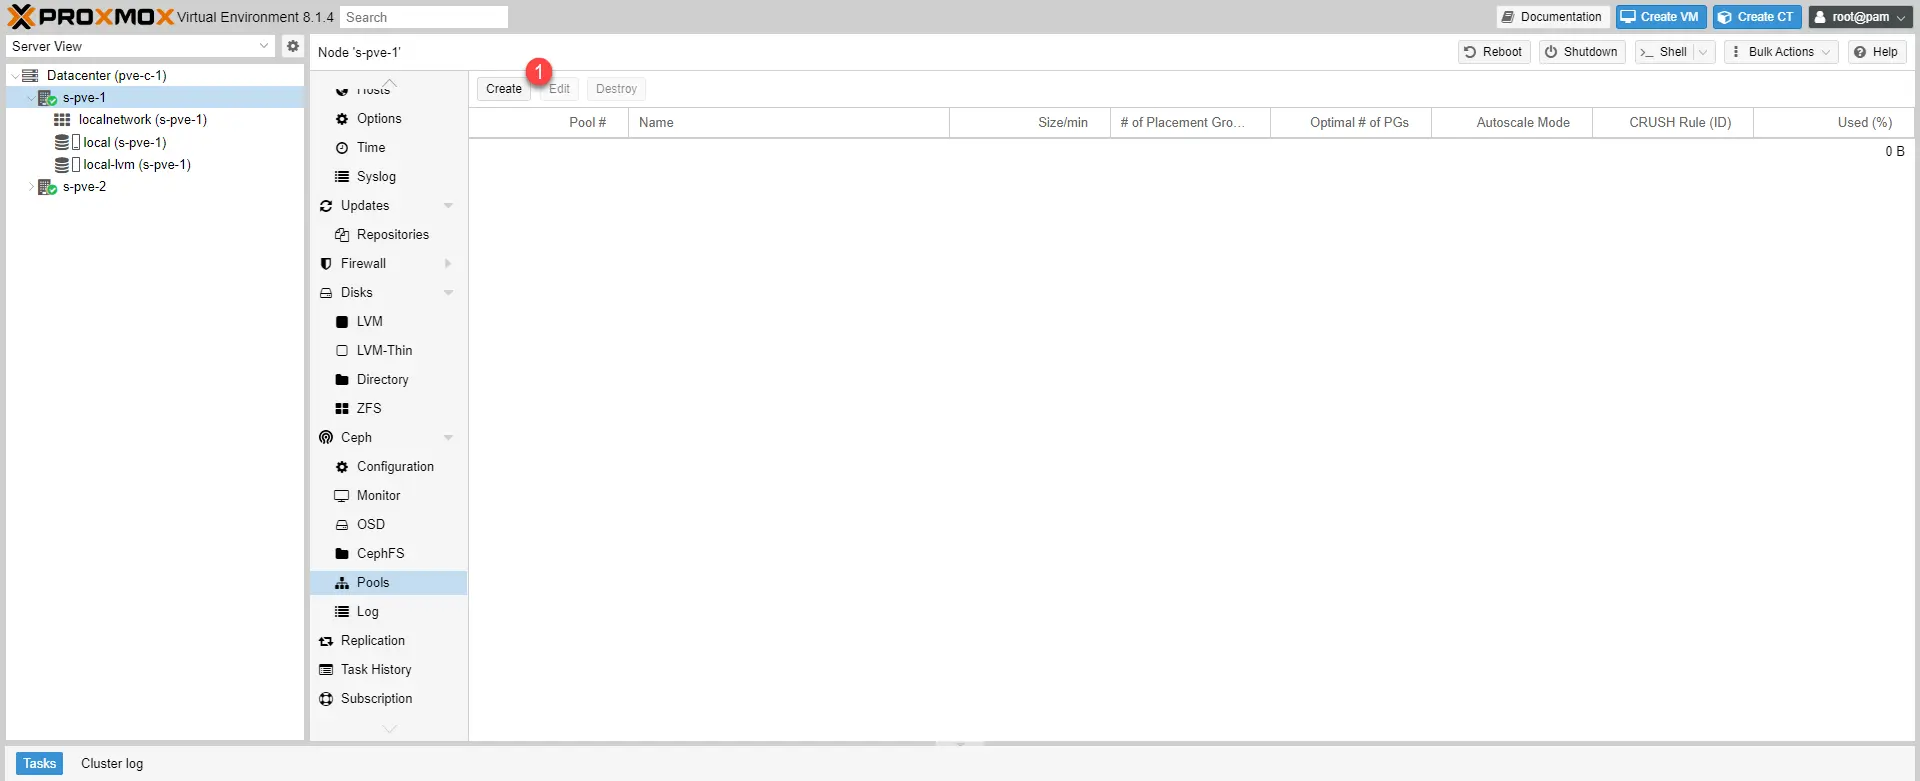
Go to Cepth / Pools and click on the Create 1 button.
I deliberately activated the advanced display, normally, you only have to name the Pool 1 and click on Create 2.
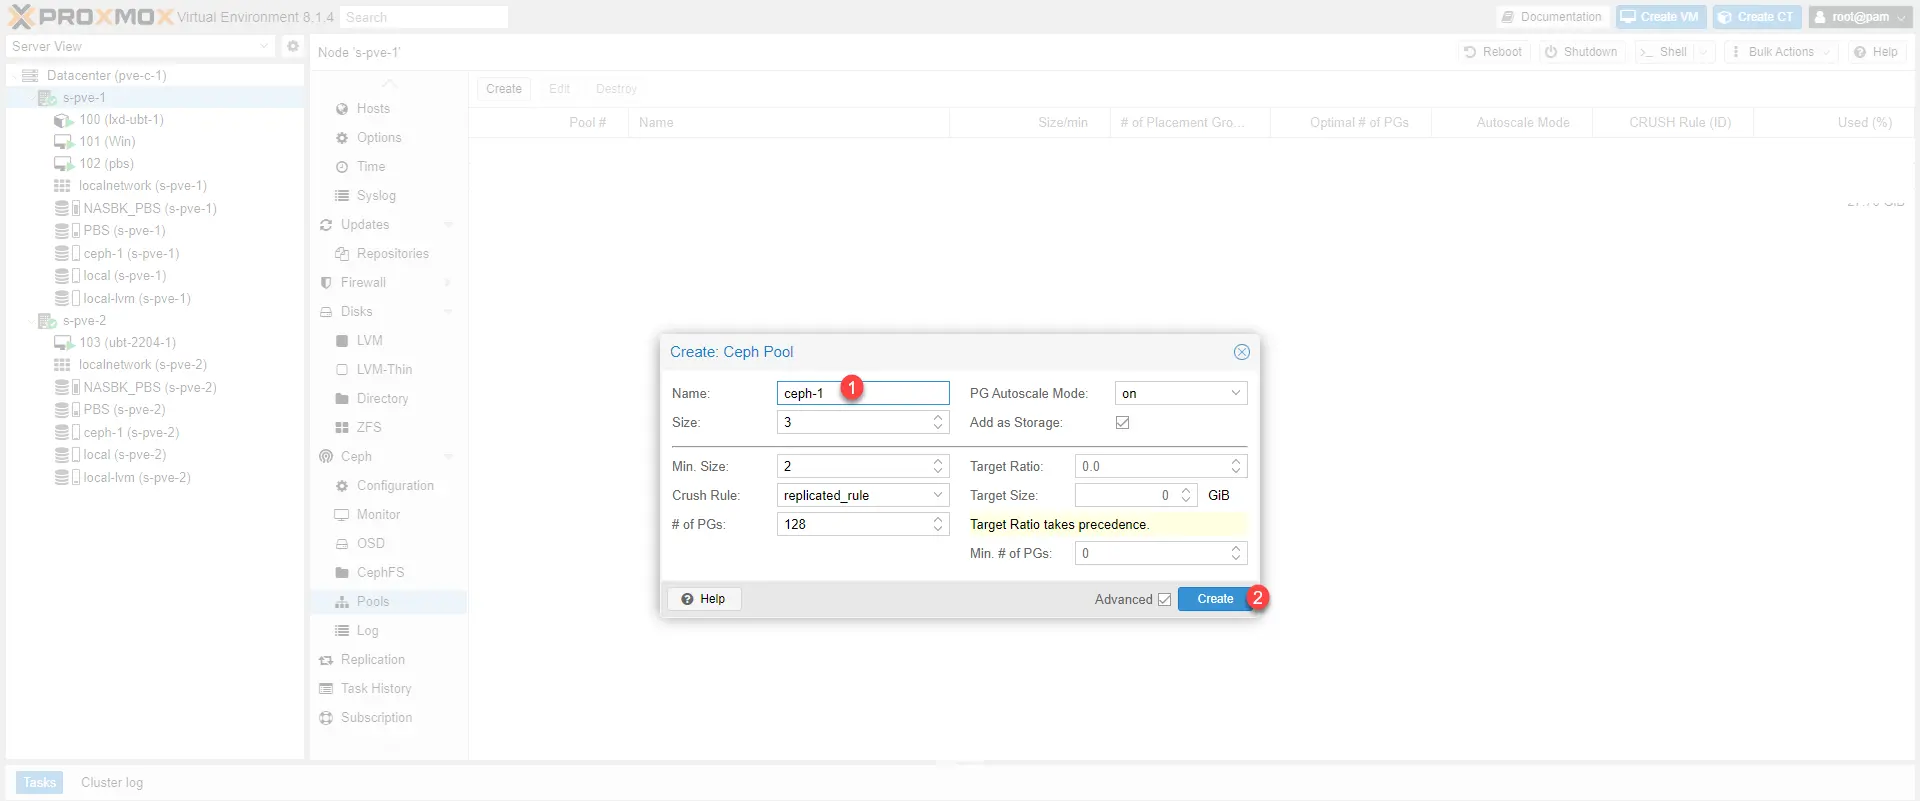
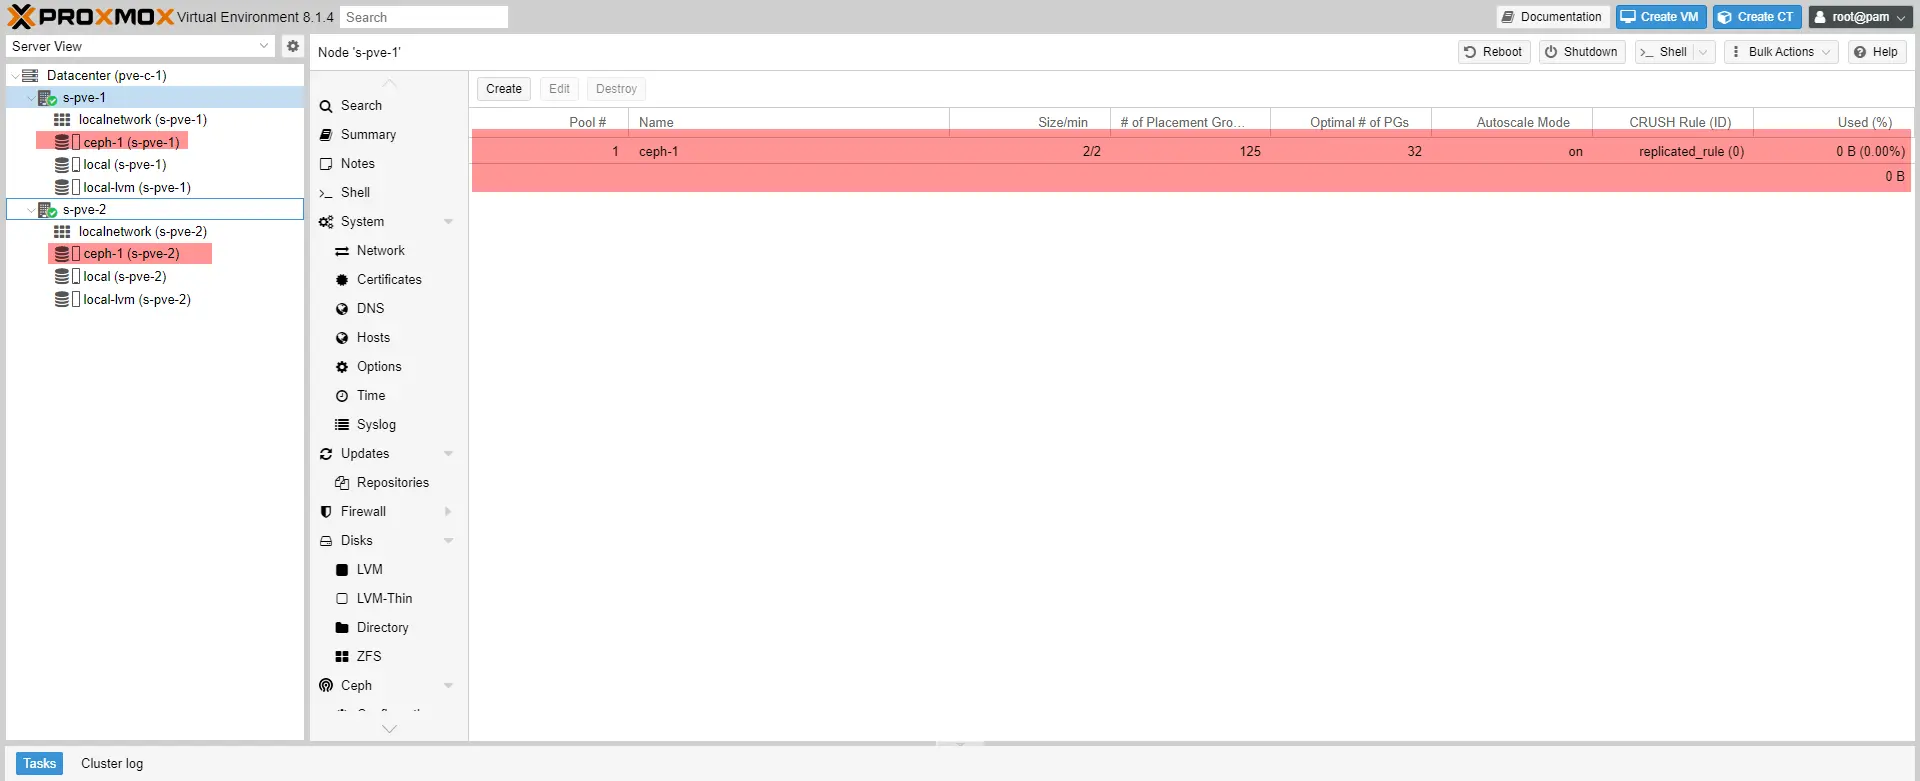
Some explanations, the Size value will correspond to the number of copies of the data on the Ceph cluster, by default this value is 3 and it cannot be greater than the number of nodes in the Ceph cluster. The Min. value Size corresponds to the minimum number of nodes that must be online, by default 2, if we go below this limit, access to the Pool is blocked.
The Pool is added and we can see the ceph-1 storage available on both servers.
Using the Ceph Storage Pool
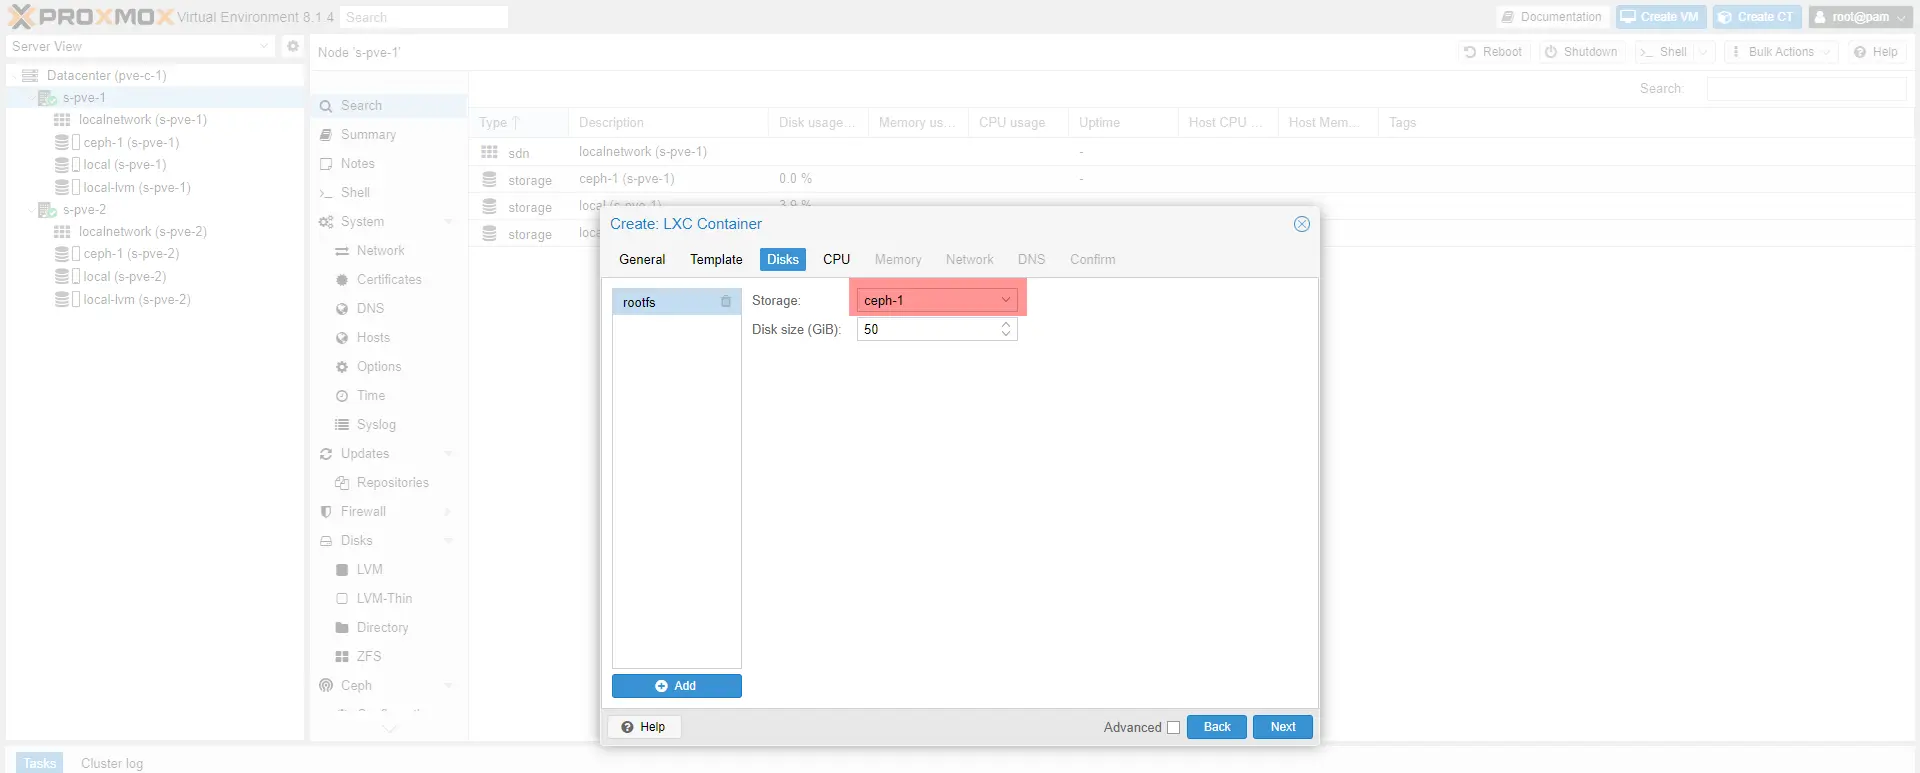
When creating a virtual machine or container, choose ceph-1 storage.
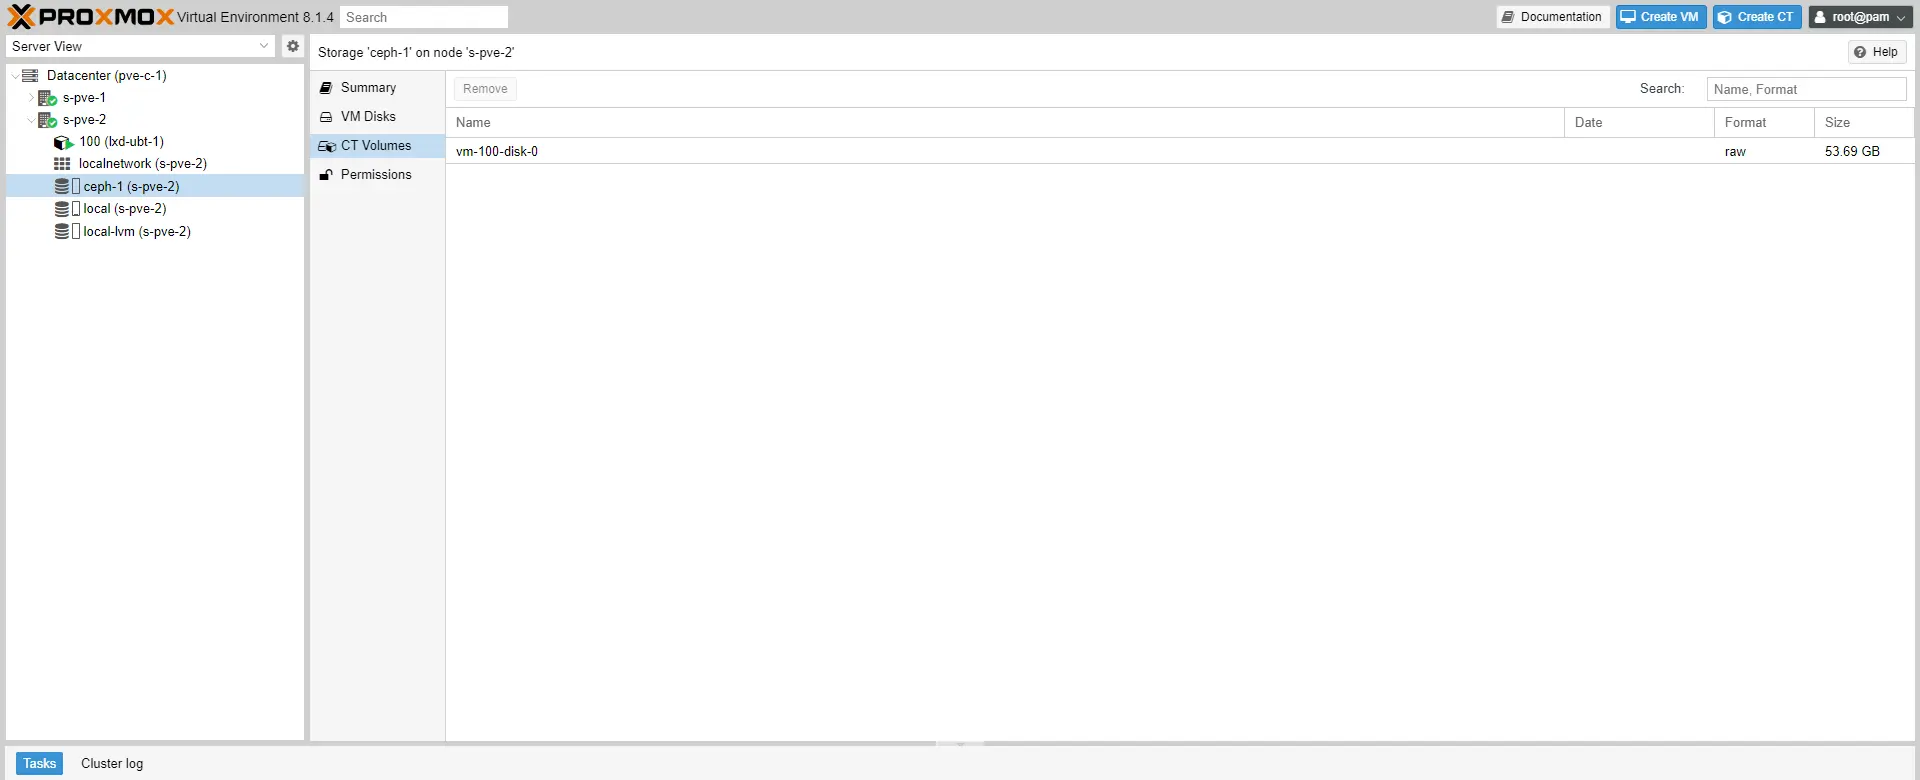
We can see that the virtual machine disk is on ceph-1 storage.
Configuring HA high availability on a Proxmox cluster
We will now see how to configure the HA in Proxmox, to work the storage of the virtual machines must be on shared storage between the servers of the HA group.
High availability in Proxmox is managed with high availability groups of which the servers are members, which allows for example to have different types of servers that are members of a cluster and to group servers of the same type in a group.
This configuration provides great flexibility and allows, for example, within the same Datacenter to be able to manage servers that would be on a 2-tier architecture and hypercongeance servers.
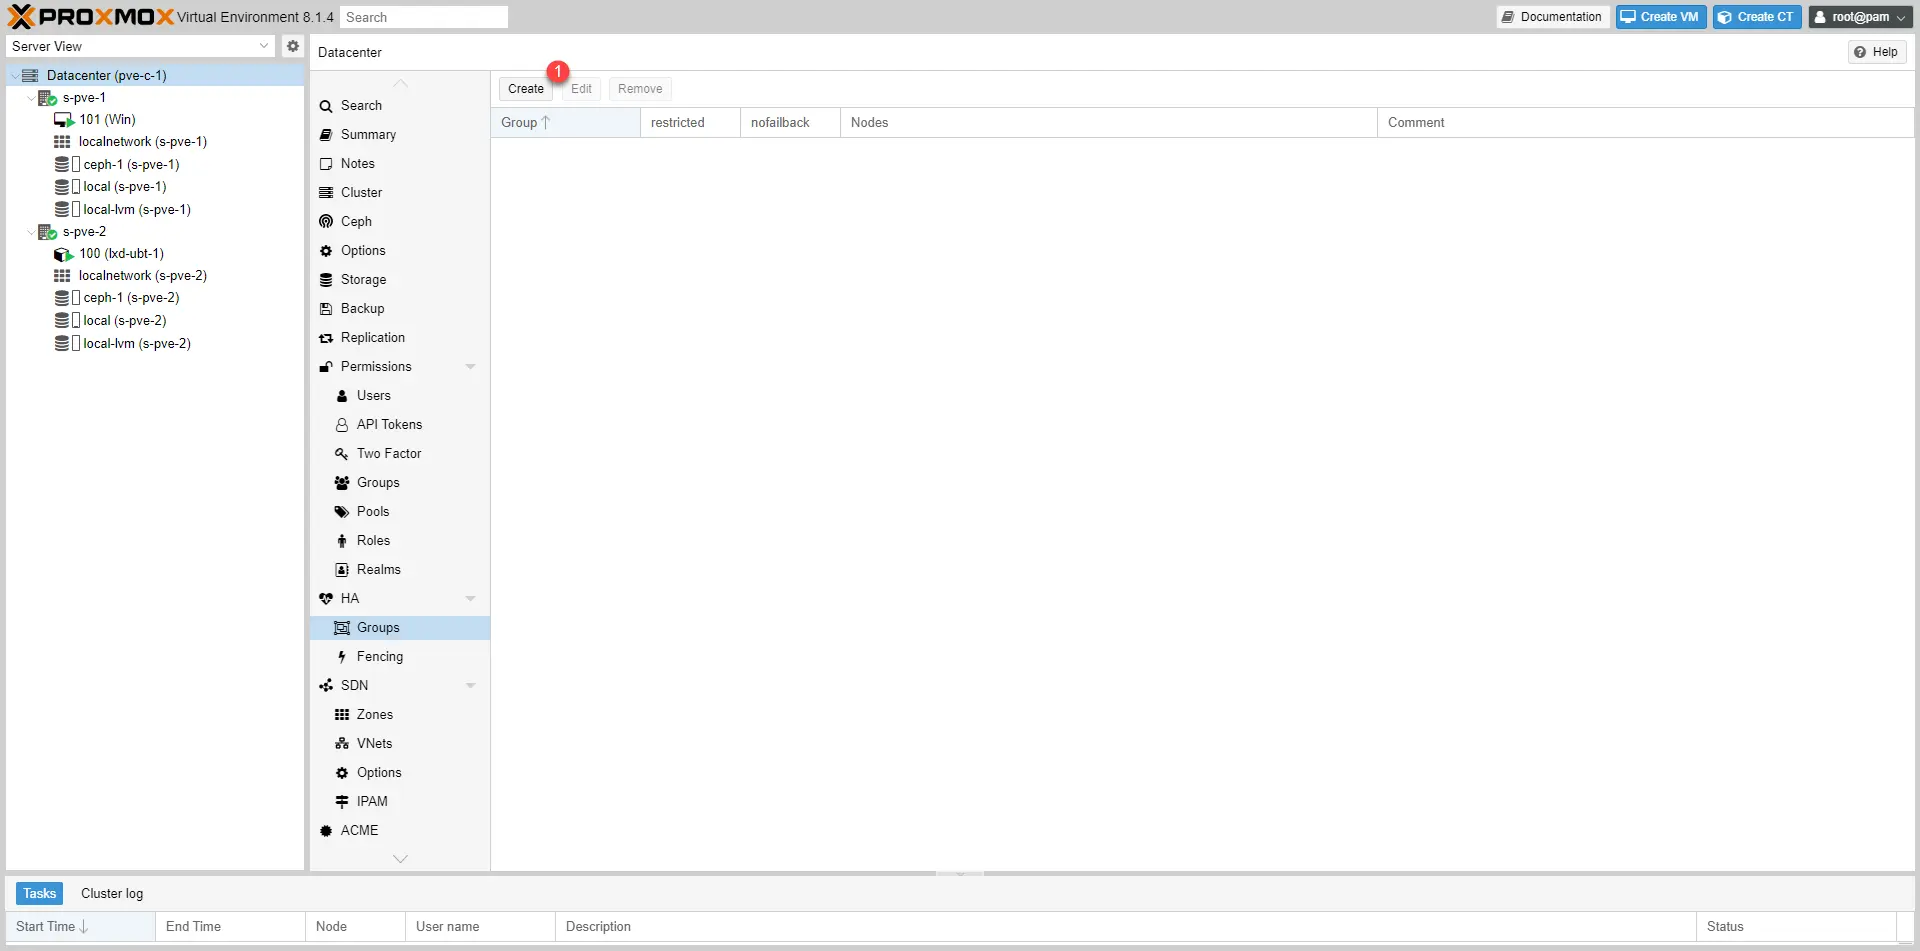
To create a group, go to Datacenter / HA / Groups and click on the Create 1 button.
Name the group 1, select the member servers 2 then click on the Create 3 button.
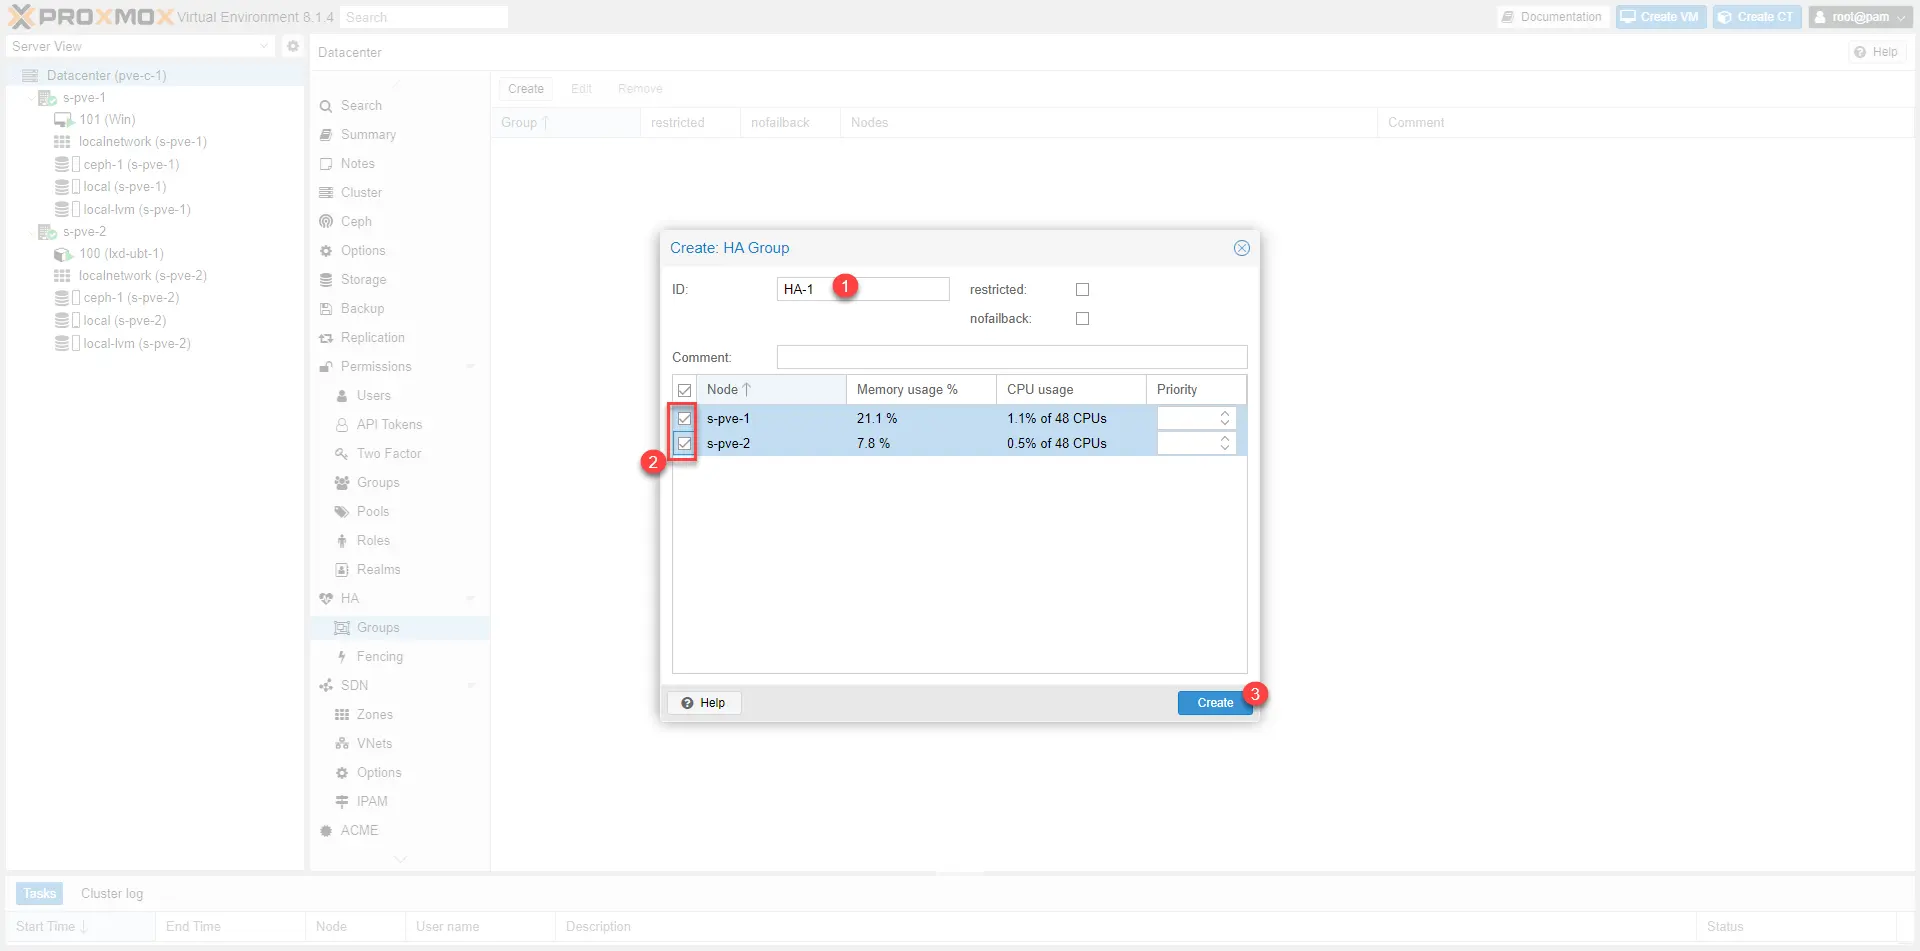
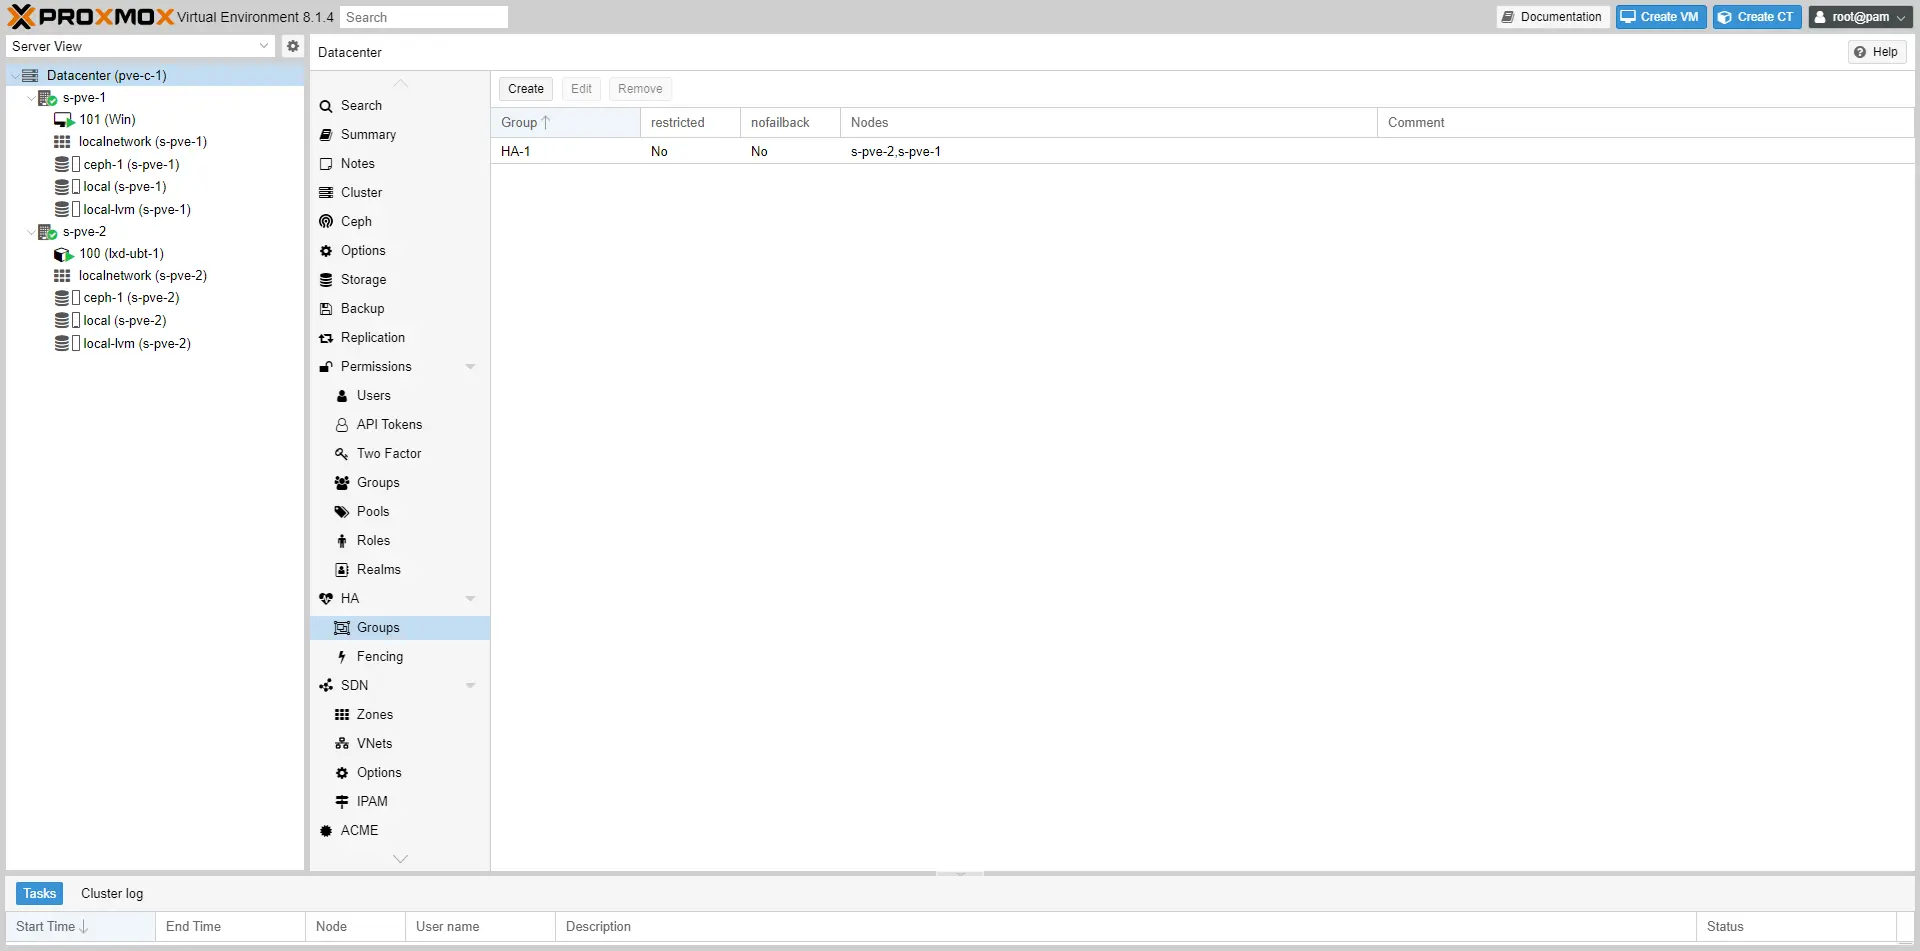
The group is created.
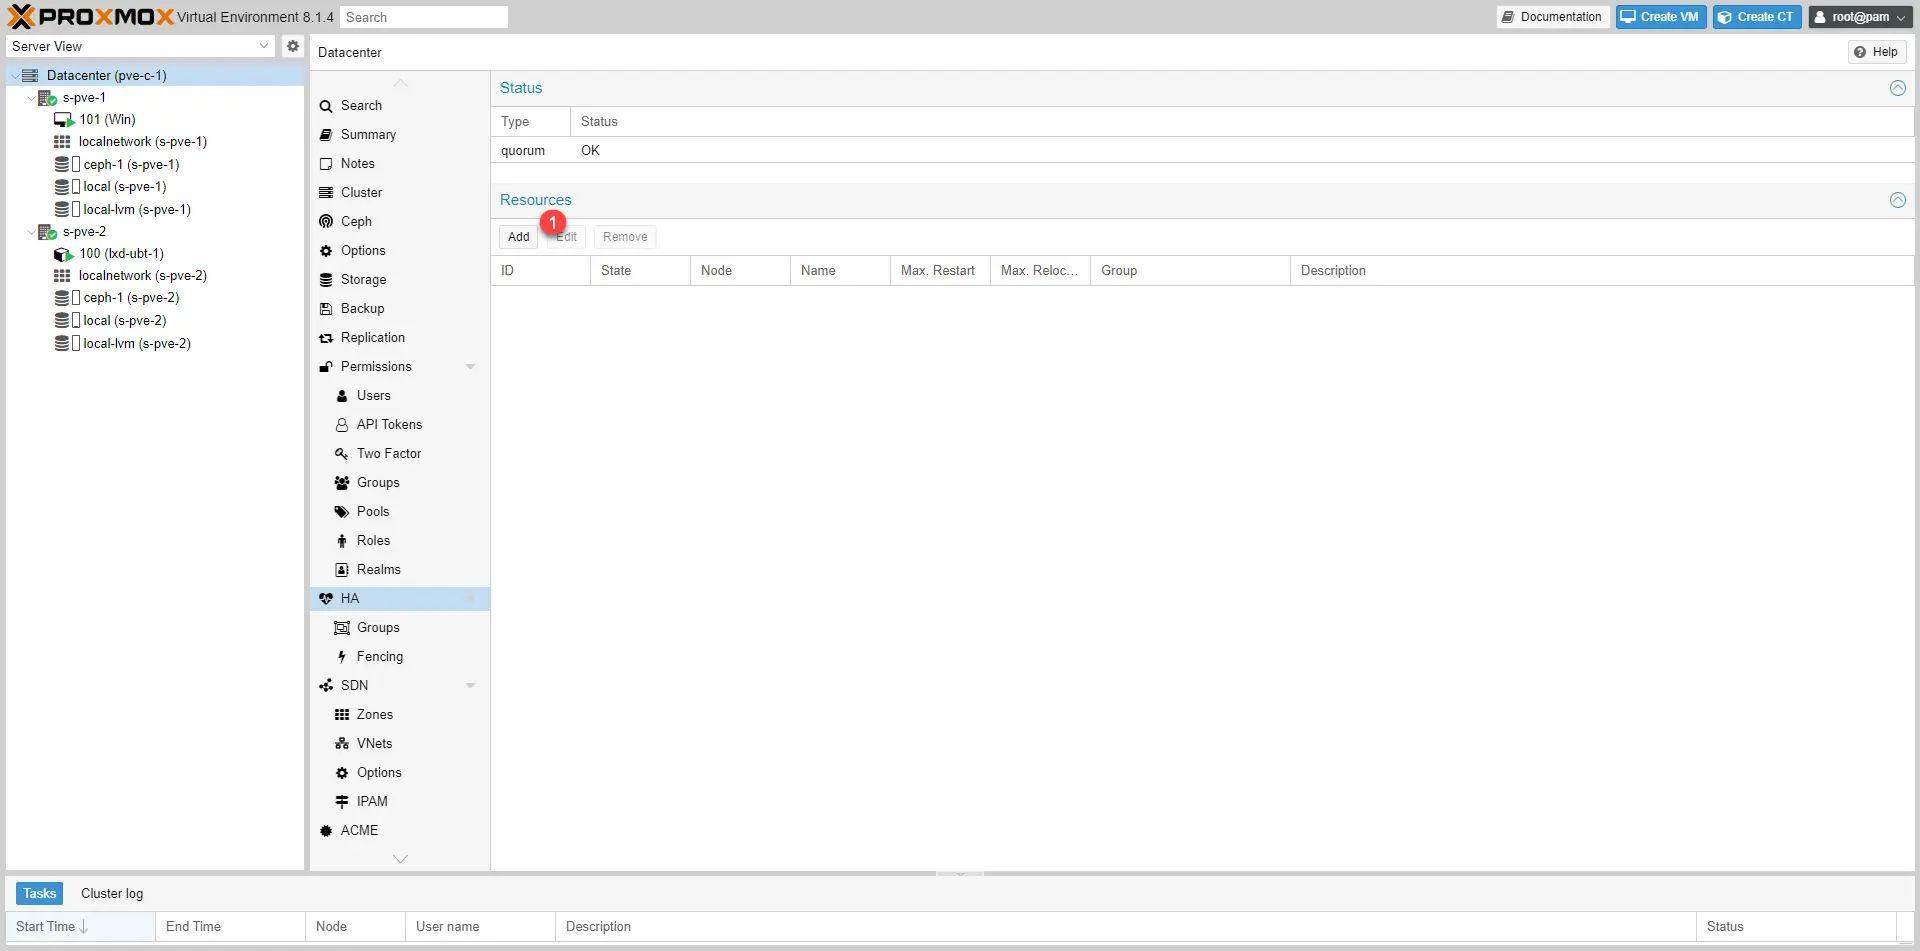
Now, we must add the resources (VM and CT) which will be in the HA group.
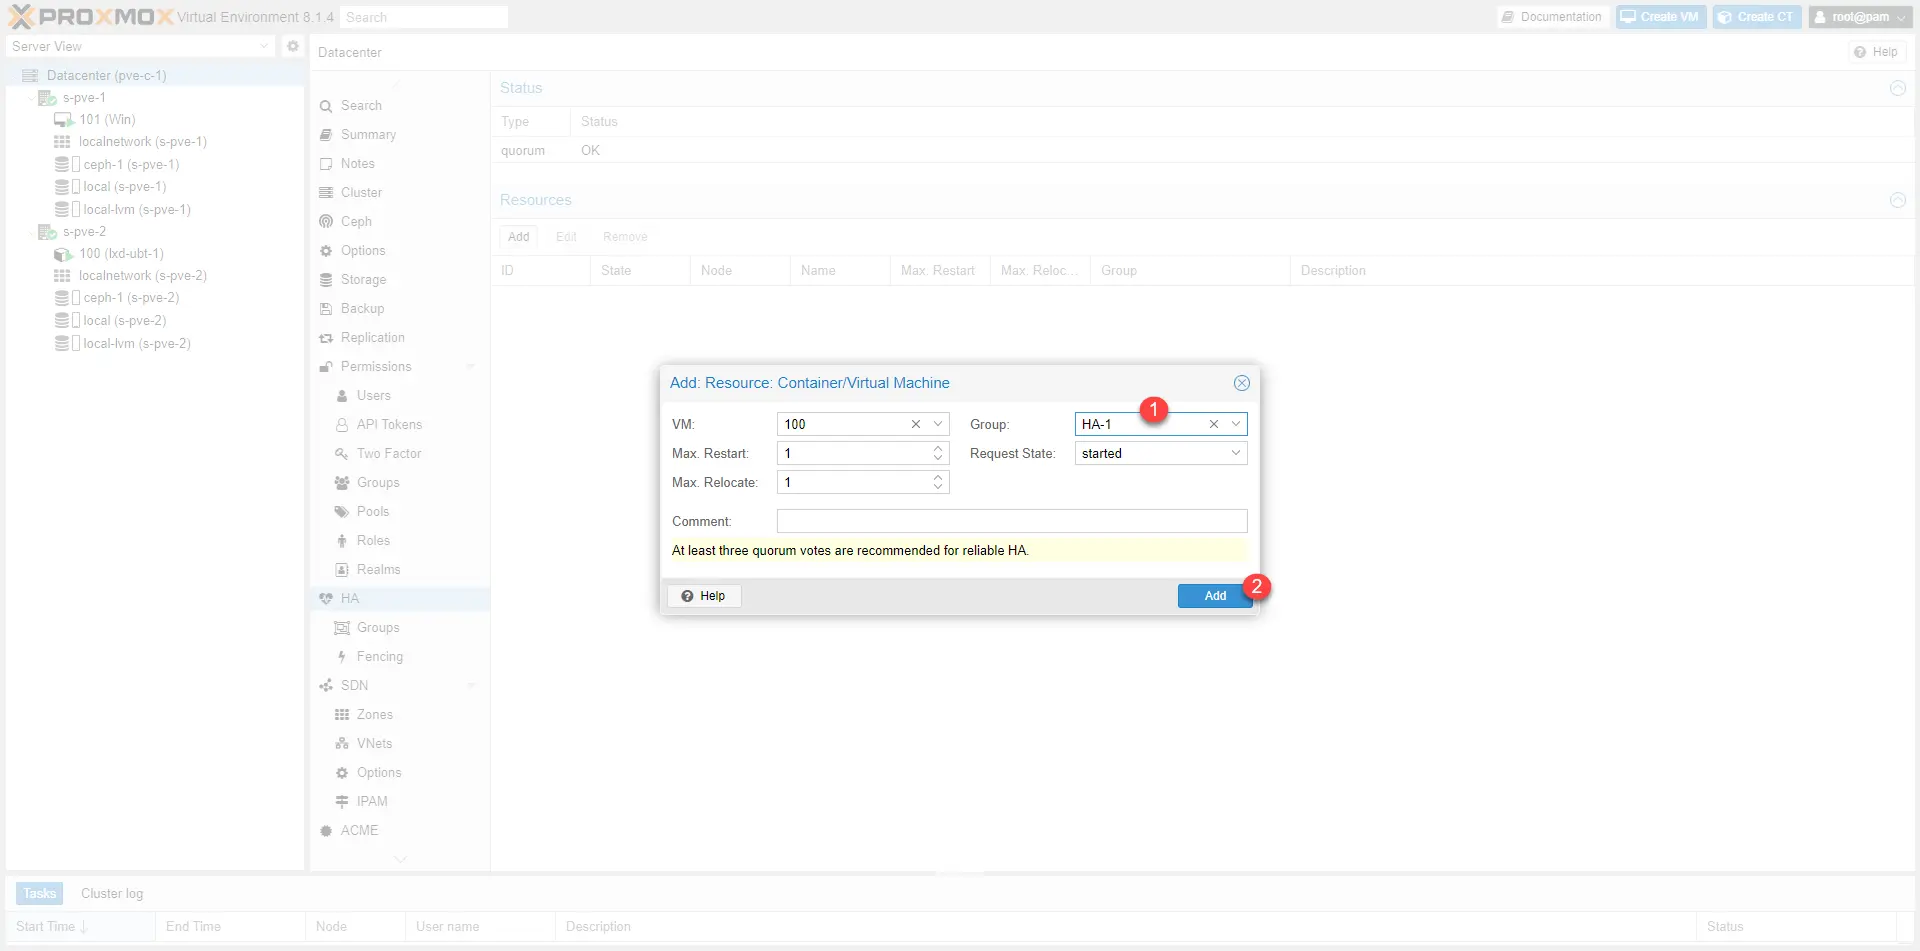
Go to Datacenter / HA click on the Add 1 button.
Select VM 1.
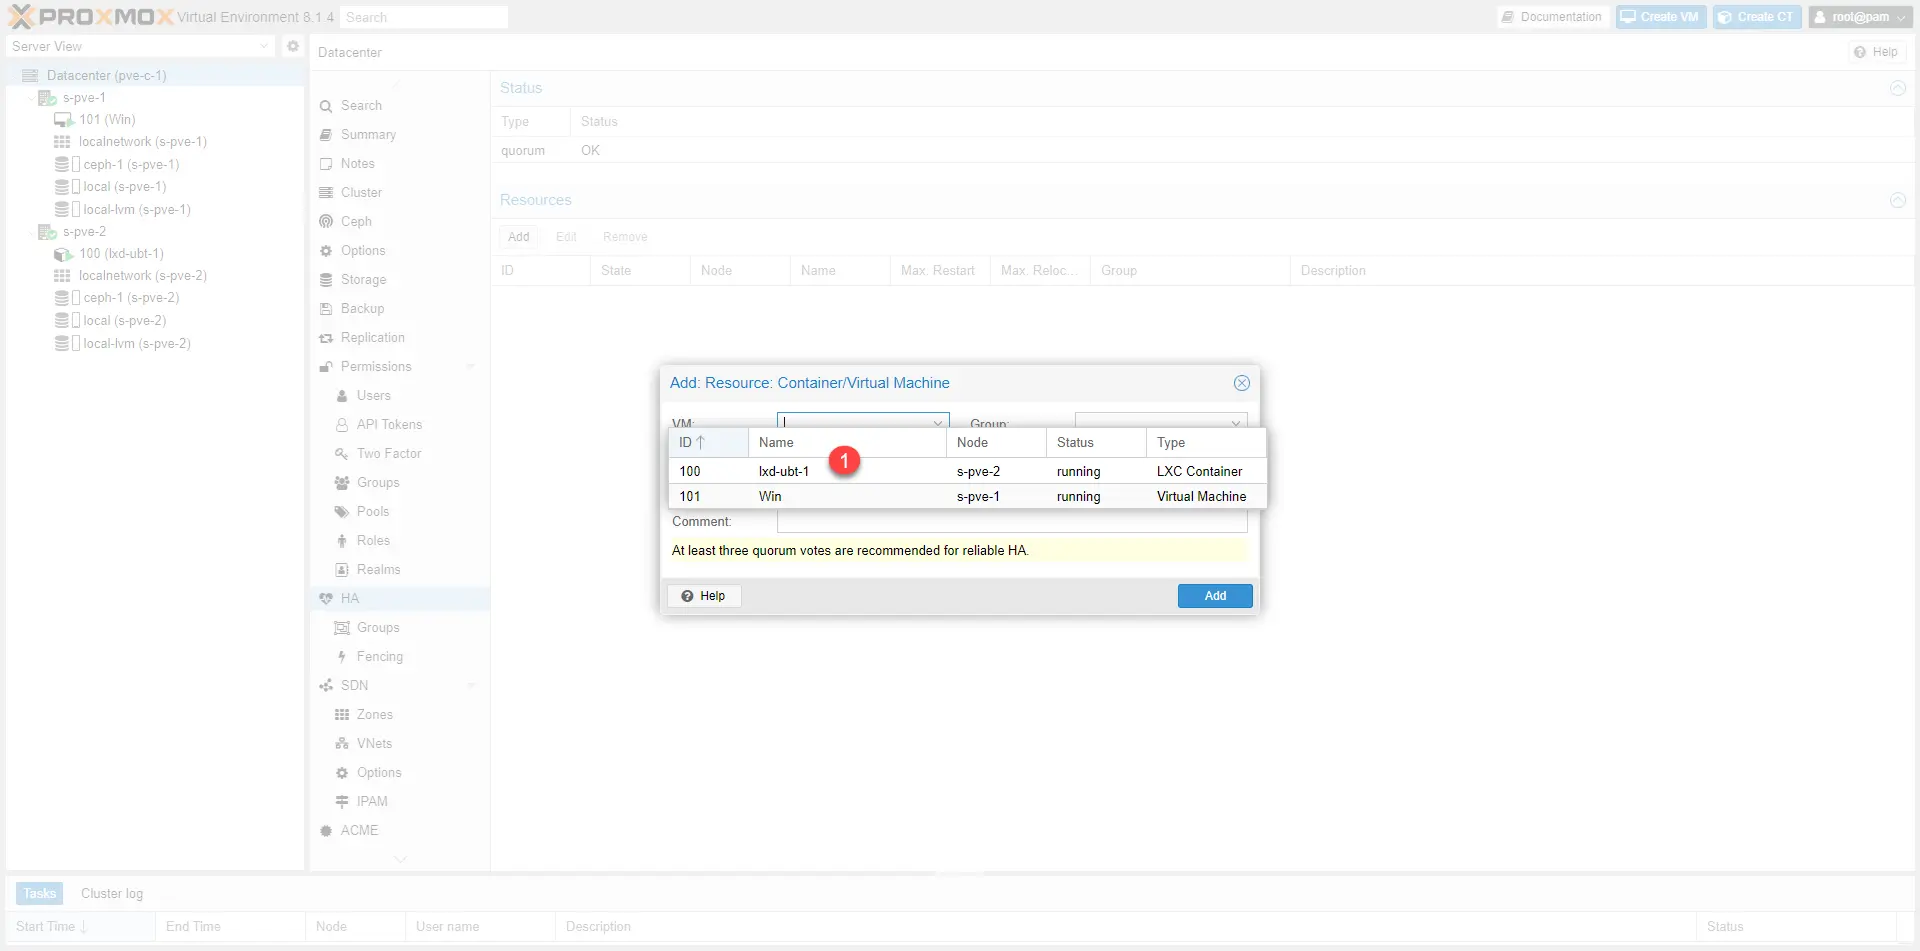
Select group 1 and click Add 2.
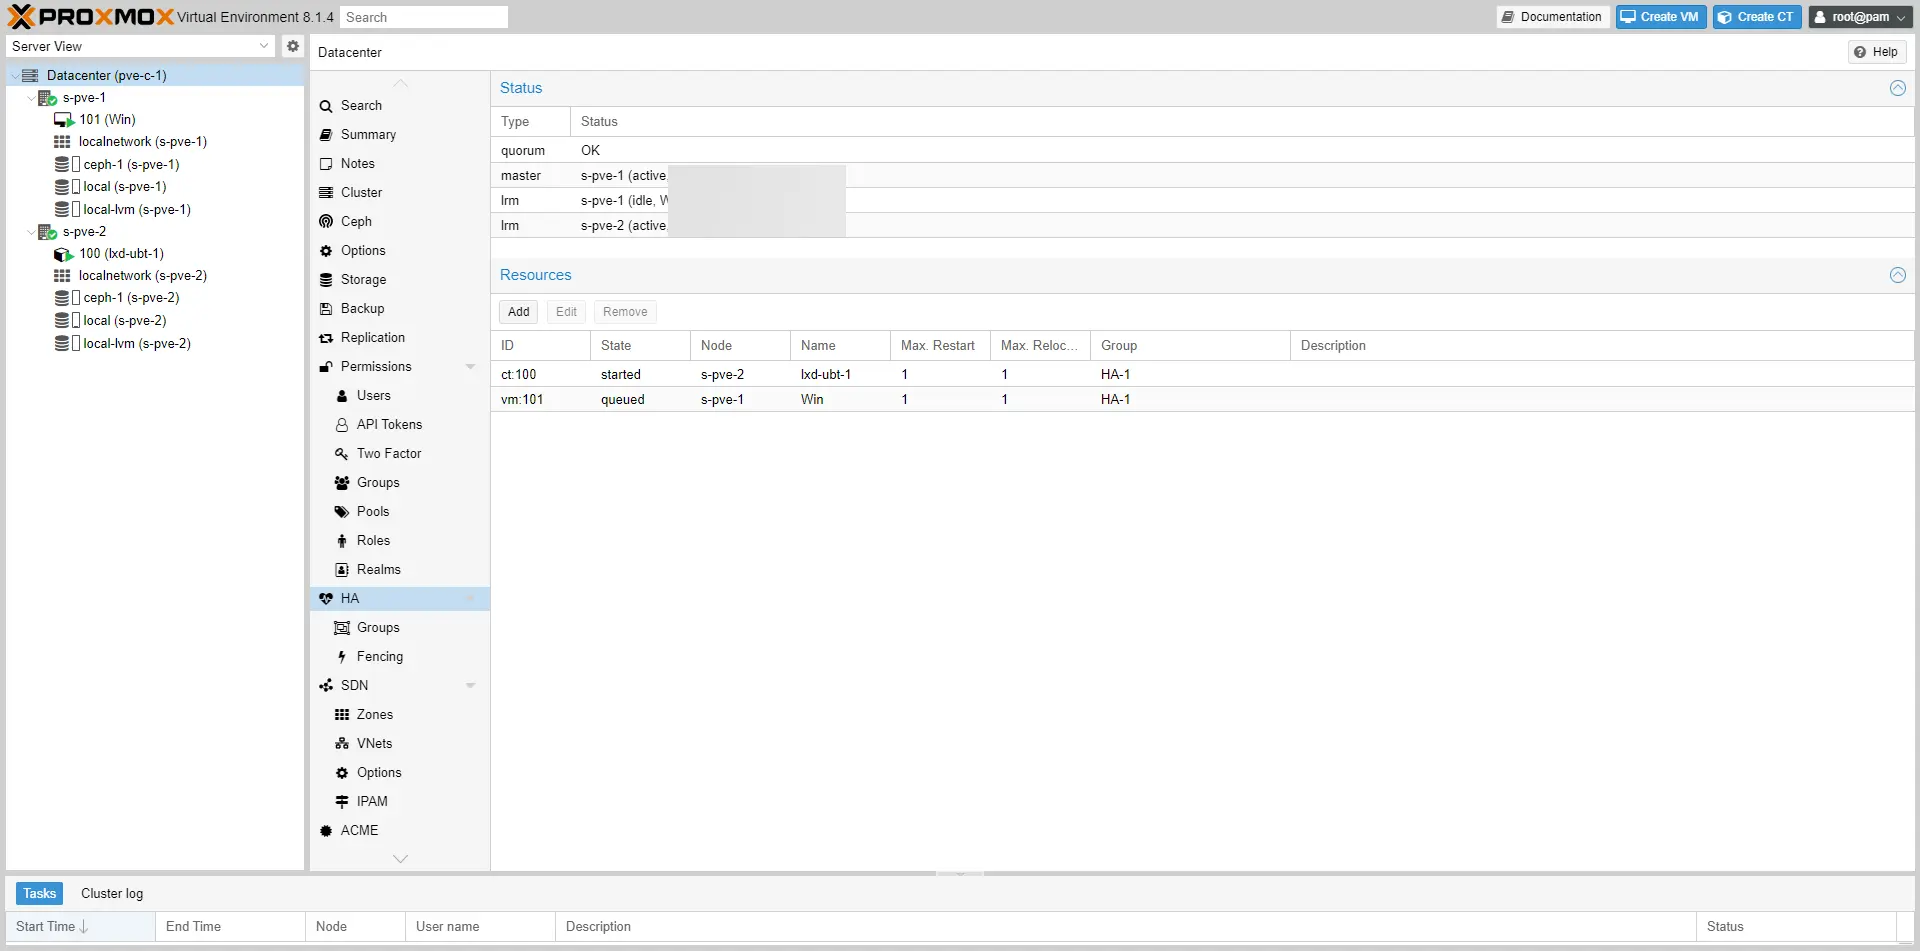
The resources are configured to be in high availability.
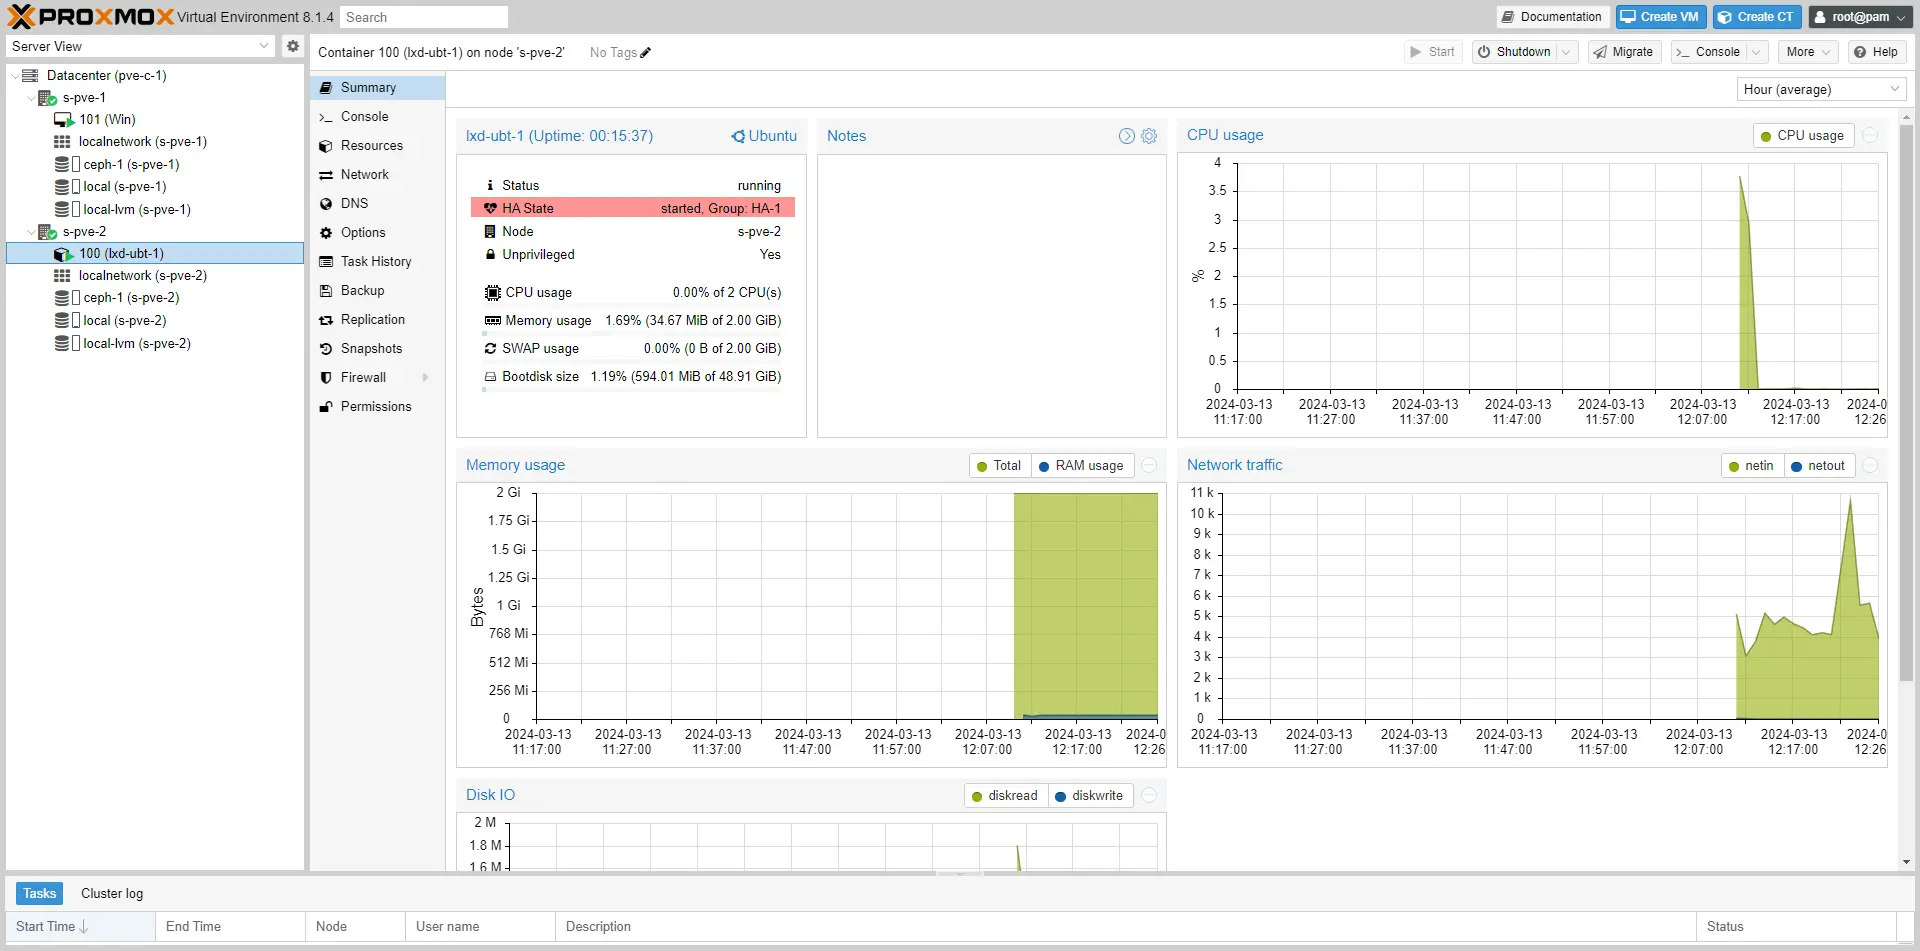
From the virtual machine preview, we can see the HA status.
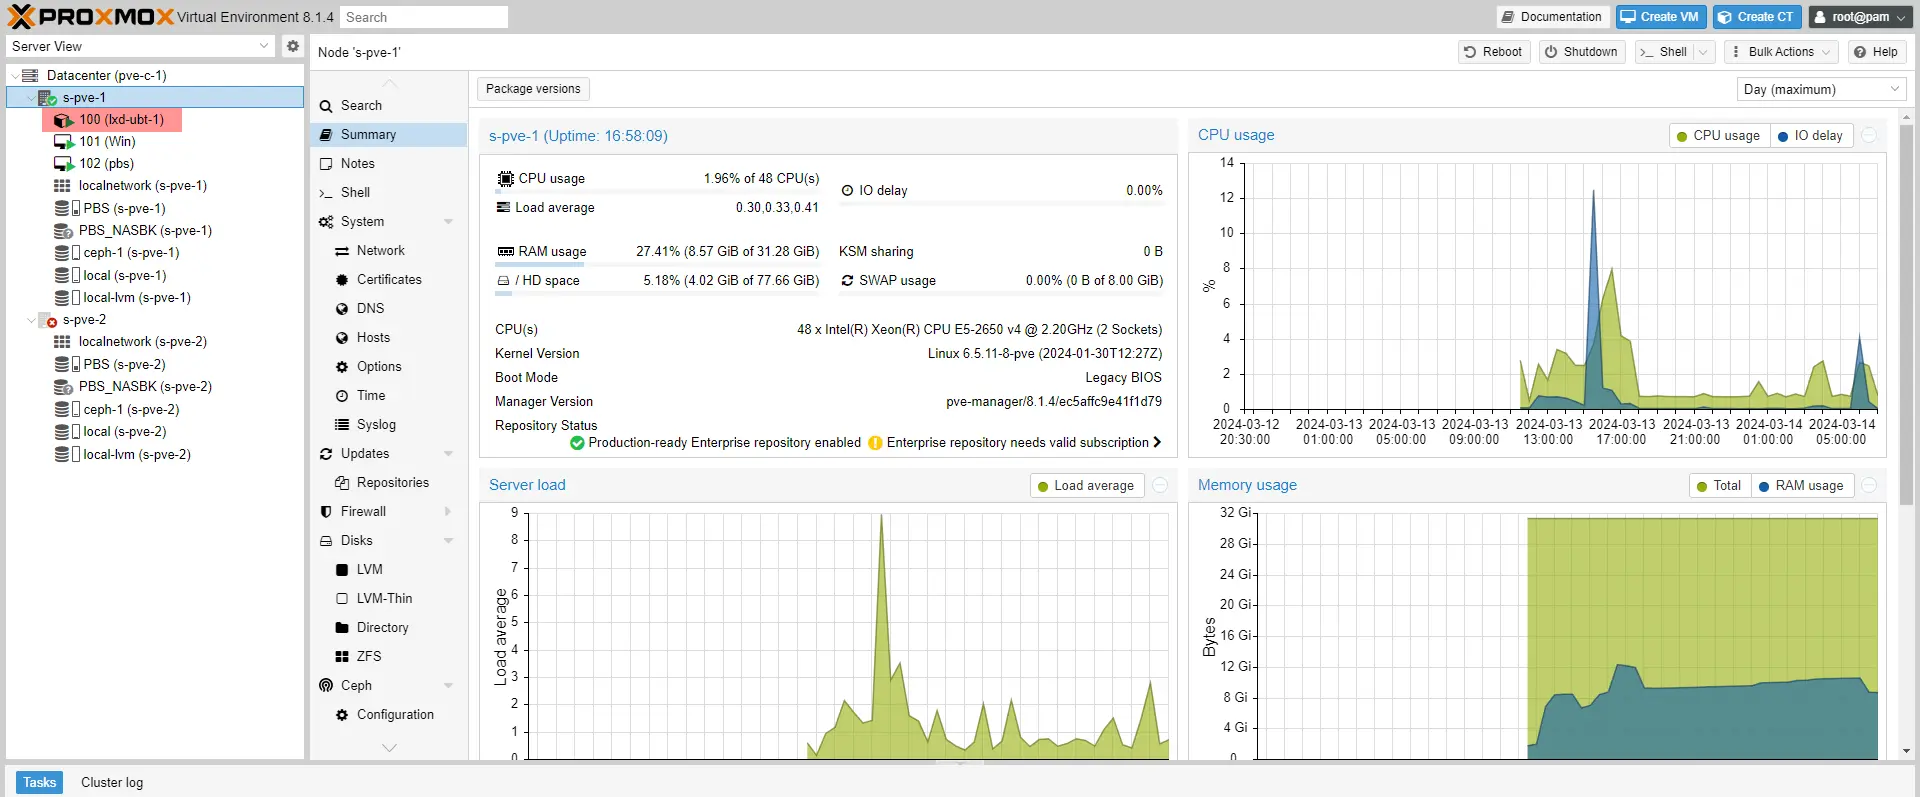
Failover test
To test the failover of VM 100 which is located on s-pve-2, I will shut down the server.
From the Shell, I initiate a server shutdown.

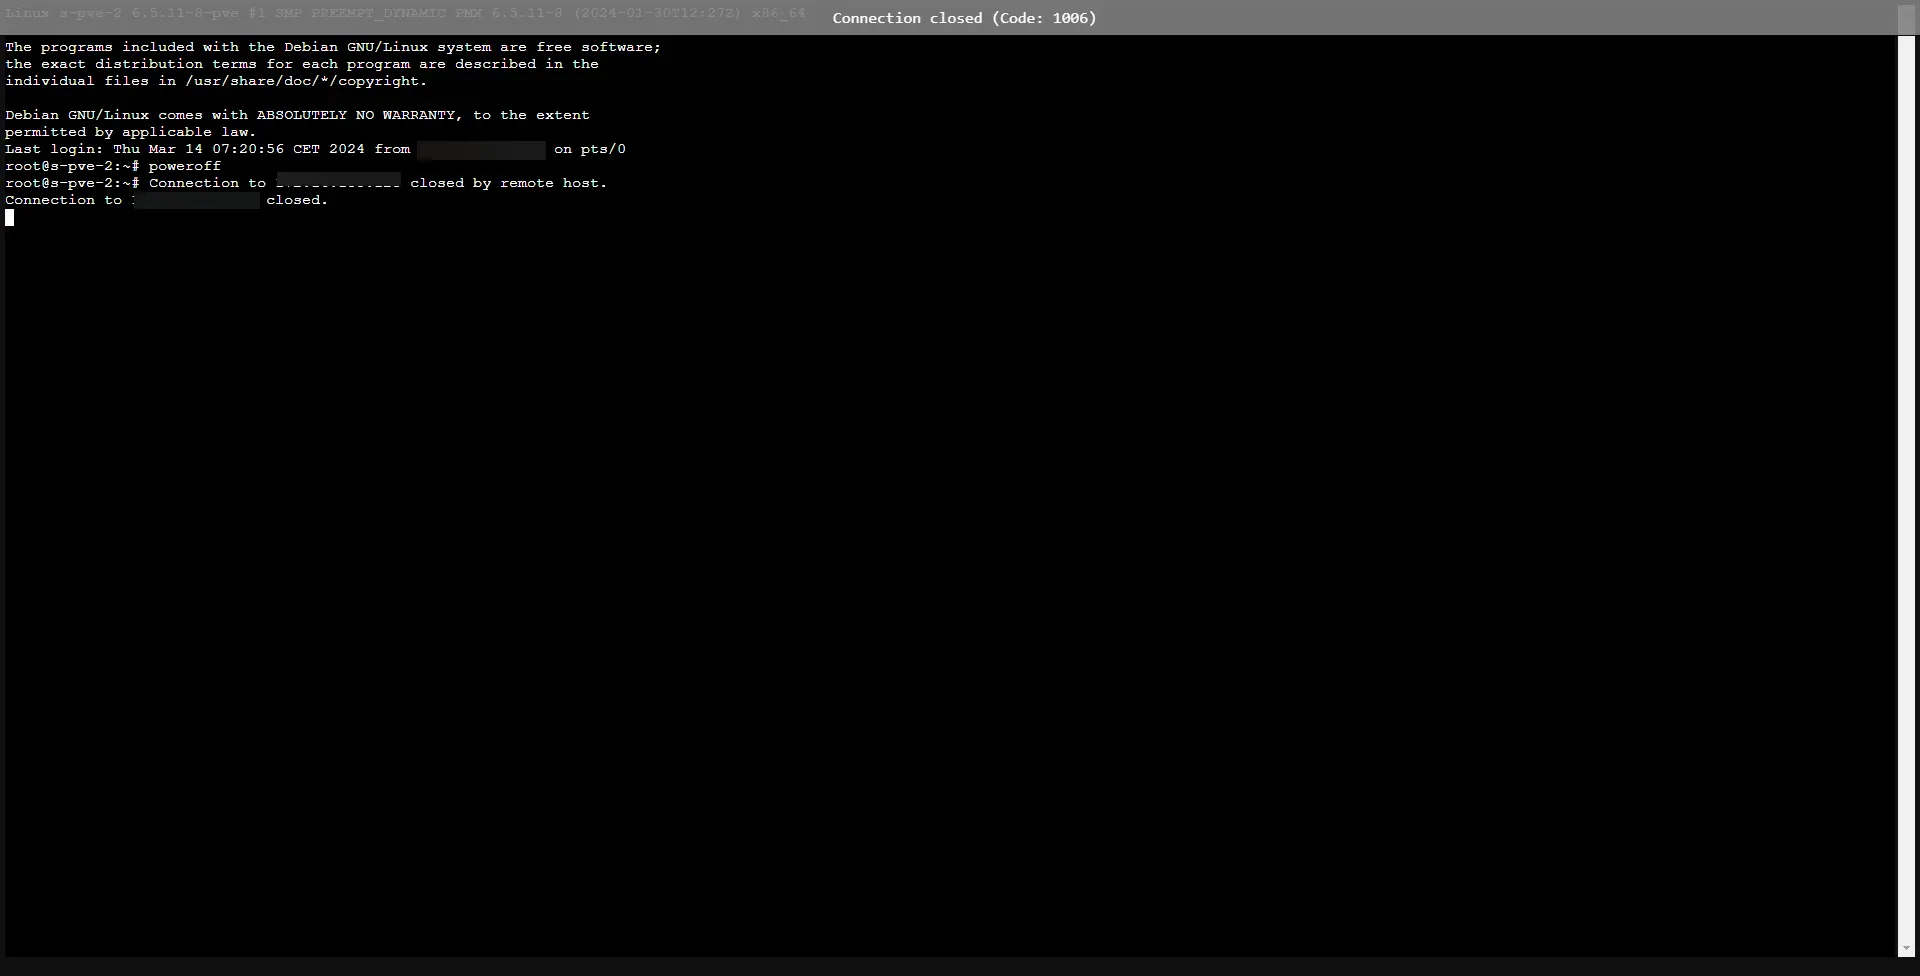
The server is offline.
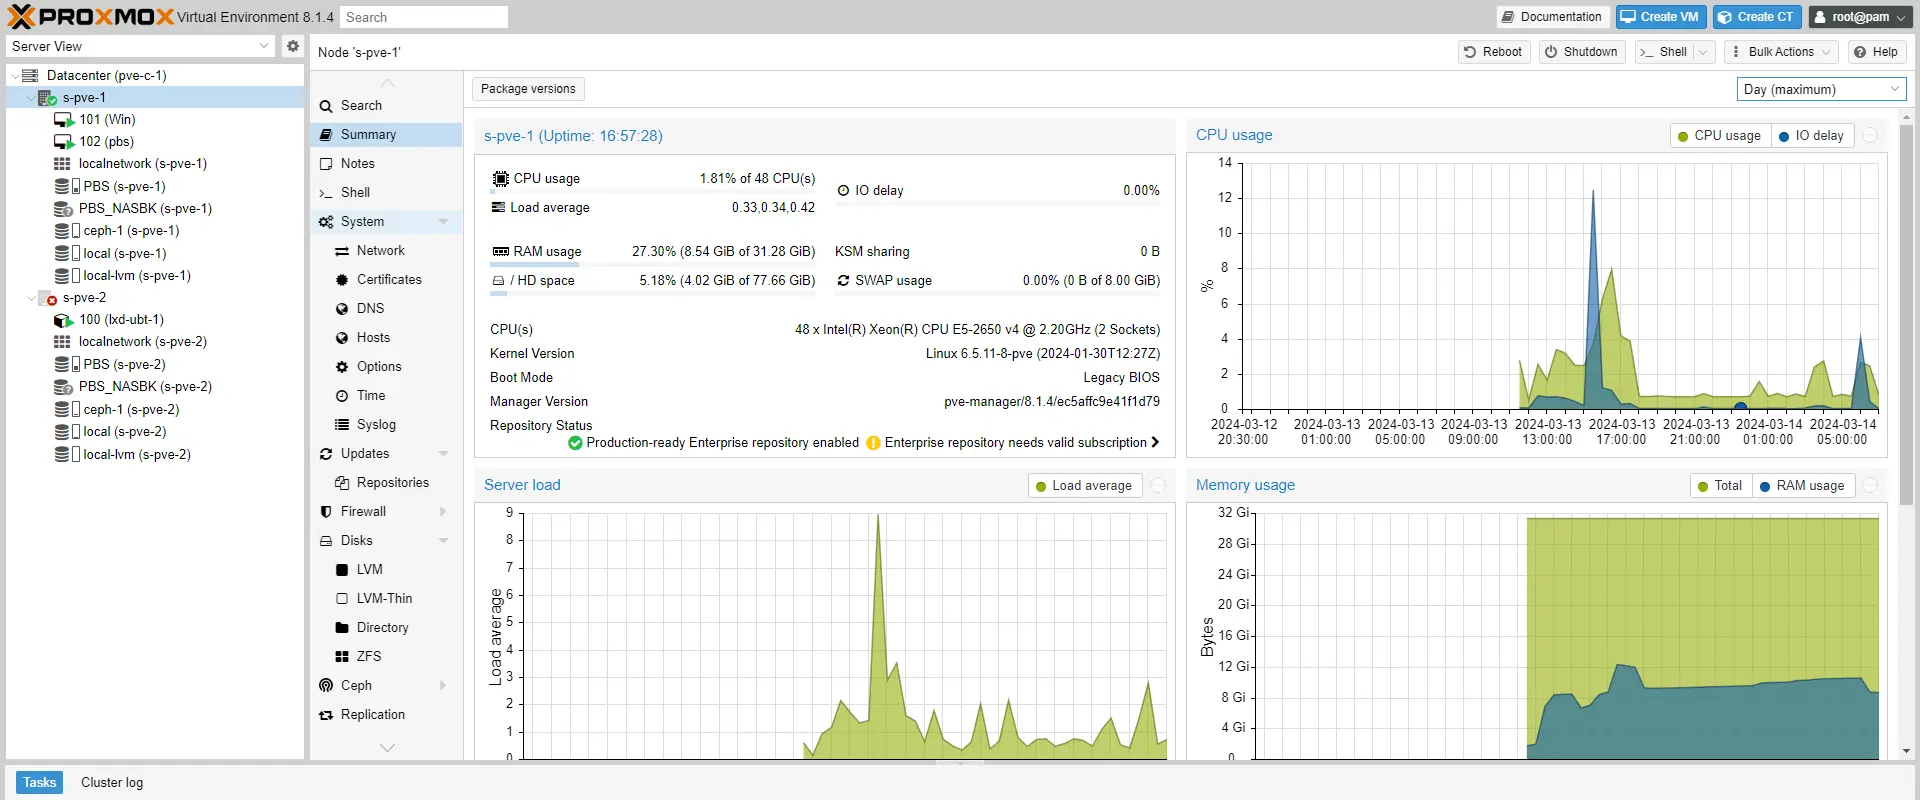
The VM with ID 100 is switched to s-pve-1 and started.
You now know how to configure a high availability environment with Proxmox and Ceph.