

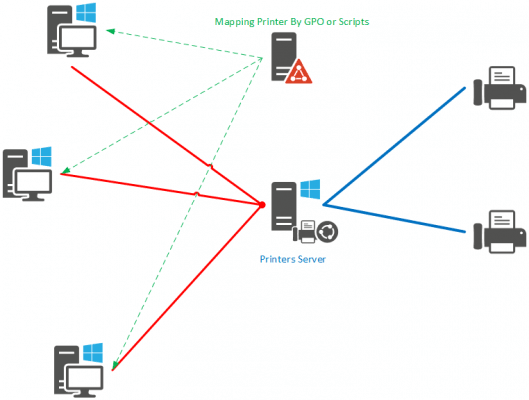
When setting up an Active Directory, one of the things you want to set up automatically is the mapping of printers to users.
Prerequisite:
- Have a server with the Print Service role (optional). It is possible to share a printer from the control panel.
- Have one or more shared printers.
As for the mapping of network drives, I will present two ways to do it, the first using Group Policy (GPO) and using a vbs script which must run at logon. .

Map a printer by GPO
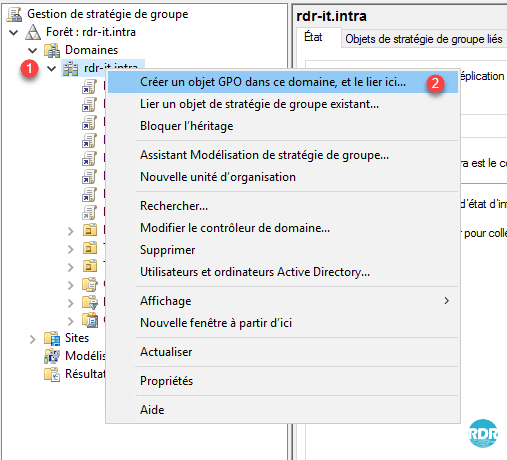
Open the Group Policy Editor on a domain controller.

Create a new strategy, right-click on the domain name 1 or on an organizational unit and click on Create a GPO in this domain, and link here 2.
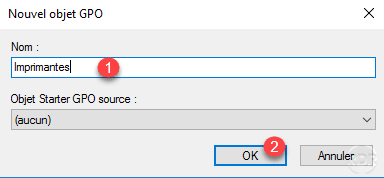
Name the strategy 1 and click OK 2.
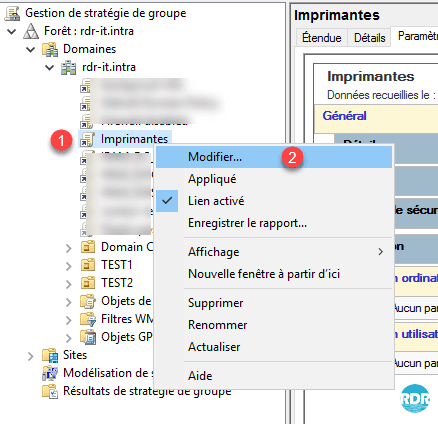
Modify the strategy, select the 1, right click on it and click on Modify … 2.
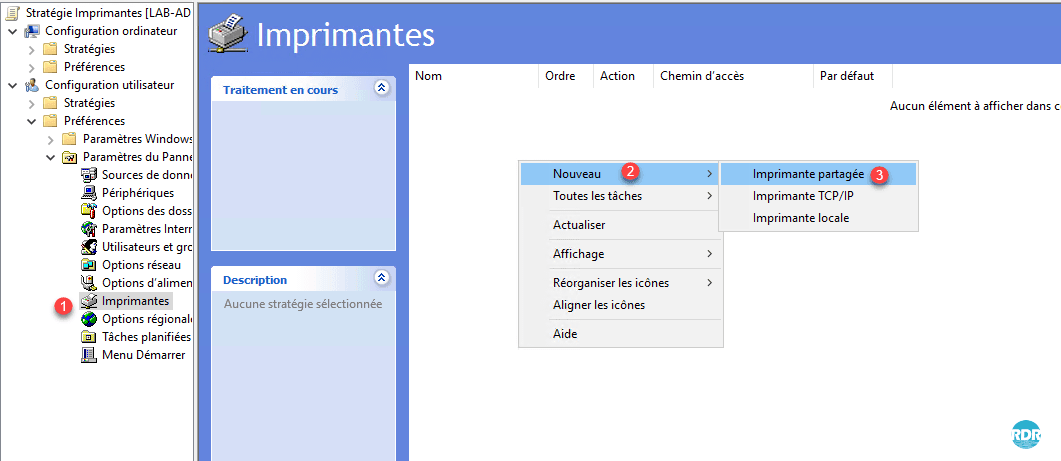
Go to User Configuration> Preferences> Windows Settings> Printers 1 and right click New 2> Shared printer 3.
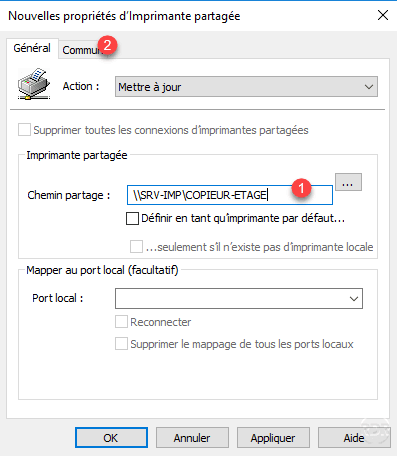
Enter the share path 1 in the form \ SERVEUR \ NOM_DU_PARTAGE_DE_L_IMPRIMANTE. Go to the Common tab 2.
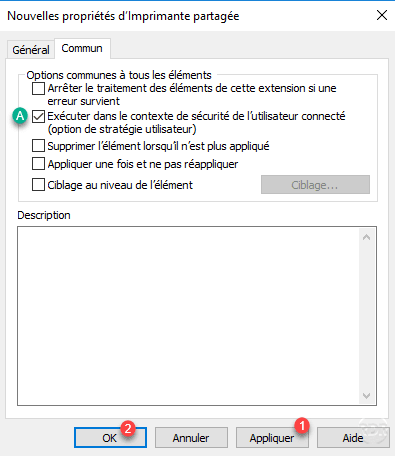
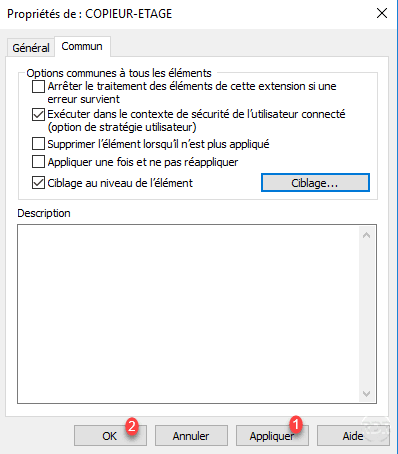
Optional: check the Execute in the security context of the logged in user A>> check box. Press the Apply button 1 then OK 2.
Printer 1 is added to the policy.
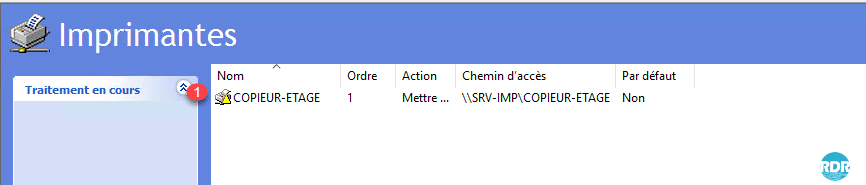
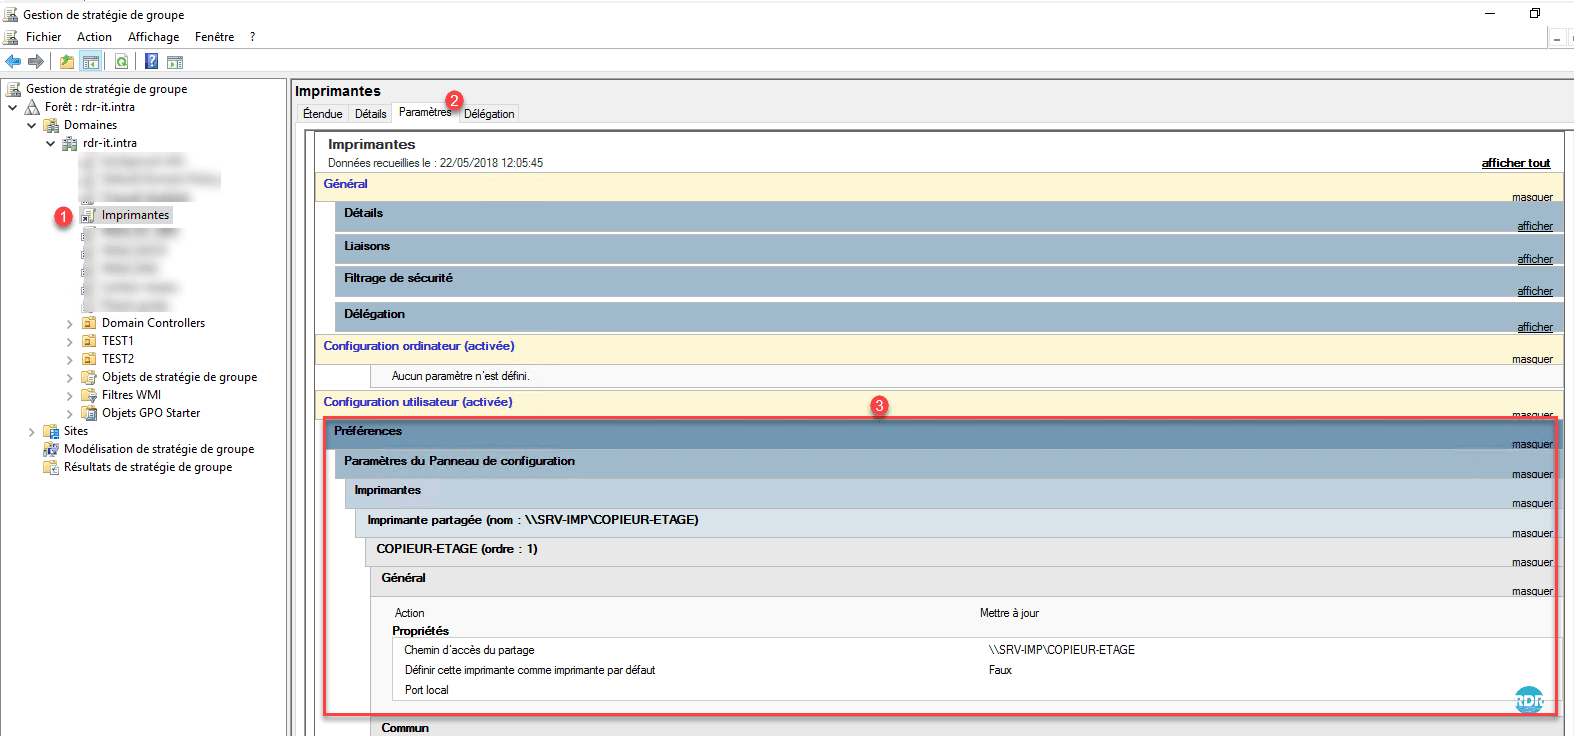
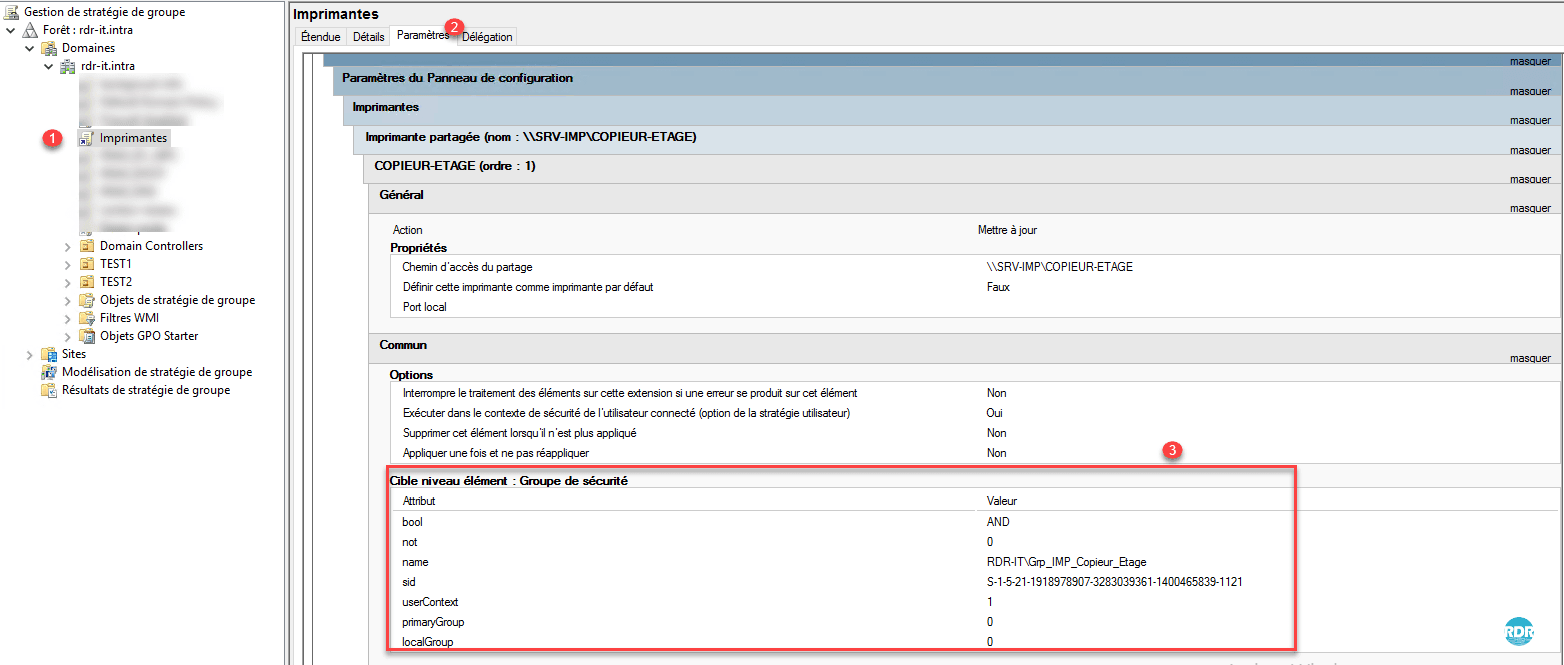
Return to the strategy console, select the strategy 1, go to the Parameters 2 tab, the details should be visible 3.
Limit printer mapping to a group
In this part we will see how to limit the mapping of a printer to a user group using Element Level Targeting.
This restriction does not change the printing rights, it will still be possible to mount the printer using Windows Explorer.
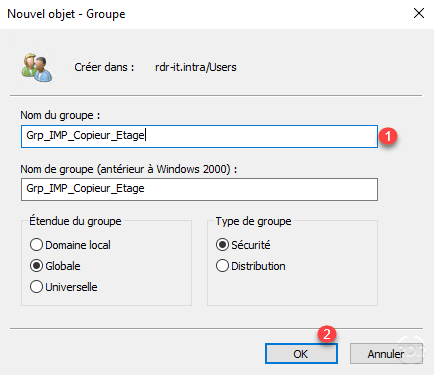
In the Active Directory Users and Computers console, add a group if you have not already done so. Give an explicit name to the group 1 and click OK 2. Then add the users in it.
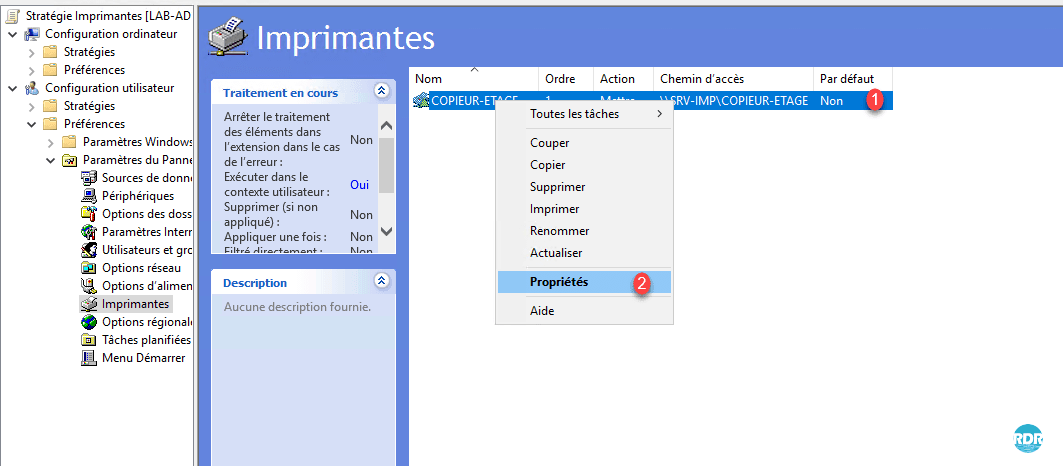
Return to the strategy of your printer 1 at the declaration level, right click on it and go to Properties 2.
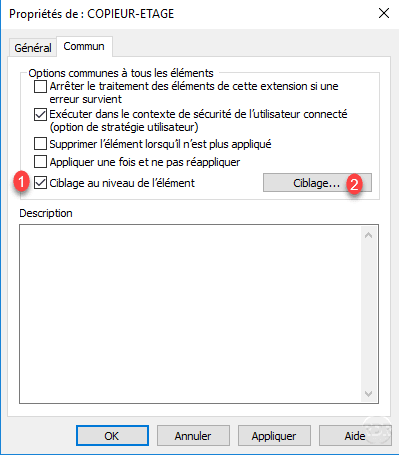
Go to the Common tab, check the Targeting box at the 1 element and press the Targeting … 2 button.
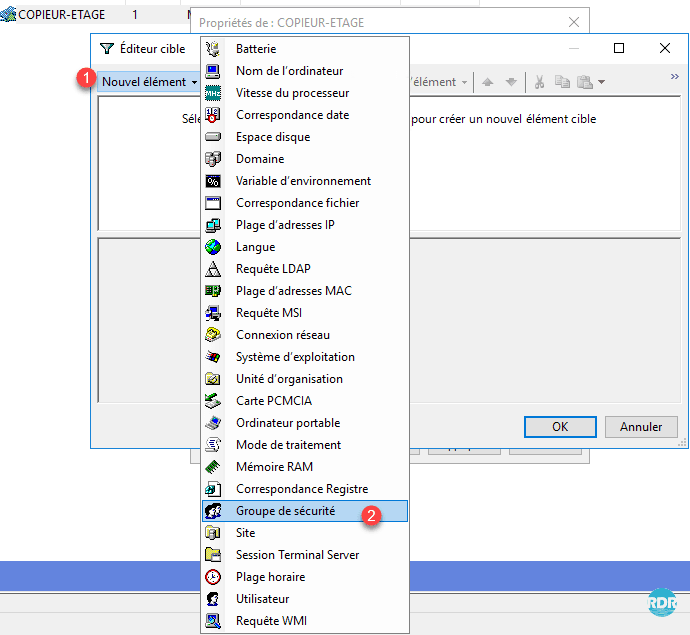
Click on New element 1 then Security group 2.
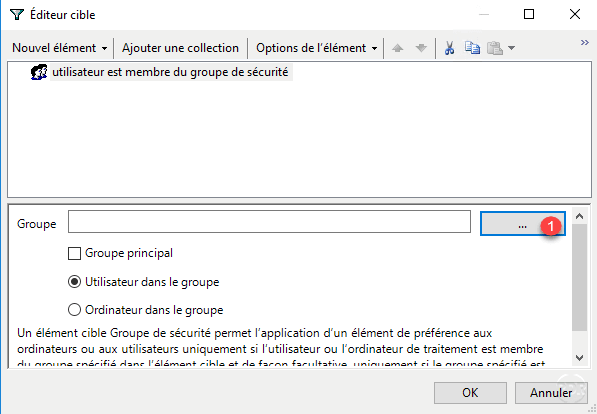
Click on the … 1 button.
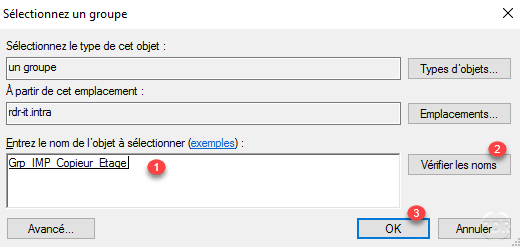
Enter the name of the group 1, click on Check names 2 to confirm the entry, then click OK 3.
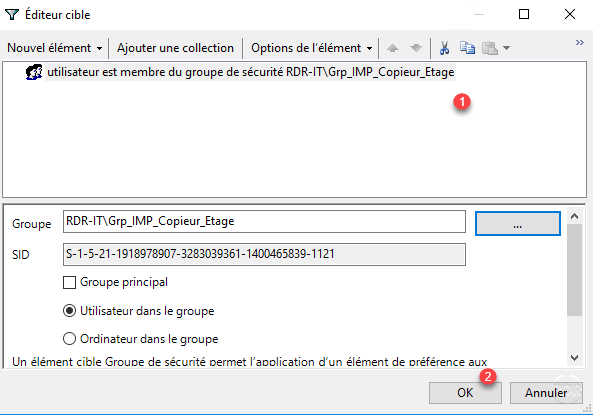
Check that the 1 group has been taken into account and click OK 2.
Click on Apply 1 and on OK 2.
Return to the Group Policy console, select the GPO 1, go to the Parameters tab 2 and check that the targeting parameters are present 3.
If the parameters are not up to date, right click in the zone and refresh.
Printer mapping by script
Create a new text file with vbs.
Edit the file (Notepad ++, notepad…) and add the codes below:
Add the script to the logon to map the printer.
Limit printer mapping to an Active Directory group
As for the GPO, we will now modify the script to limit the mapping of the printer to the Grp_IMP_Copieur_Etage group.
Edit the file with the following code:
As we can see, two functions have been added at the end of the code, which allow the verification of the group membership of the connected user. The printer mapping is now subject to condition (if).
Troubleshooting
If the printers do not reassemble correctly this can be due to several reasons.
The main one is related to a security risk, you must deactivate the Pointer Restrictions parameter and print or configure the authorized server (s) for printing and installing the drivers.
If there are 32-bit stations, you must also install the drivers in this version.
As part of an RDS server, non-administrators are not authorized to install drivers.
Deactivate Point and Print Restriction
The parameter is found in Computer configuration and User configuration, depending on the application context, it must be deactivated in one or more places.
If you checked the “Execute in the security context of the logged on user” box, the GPO is applied in the user context. Logon scripts are also run in the user context.
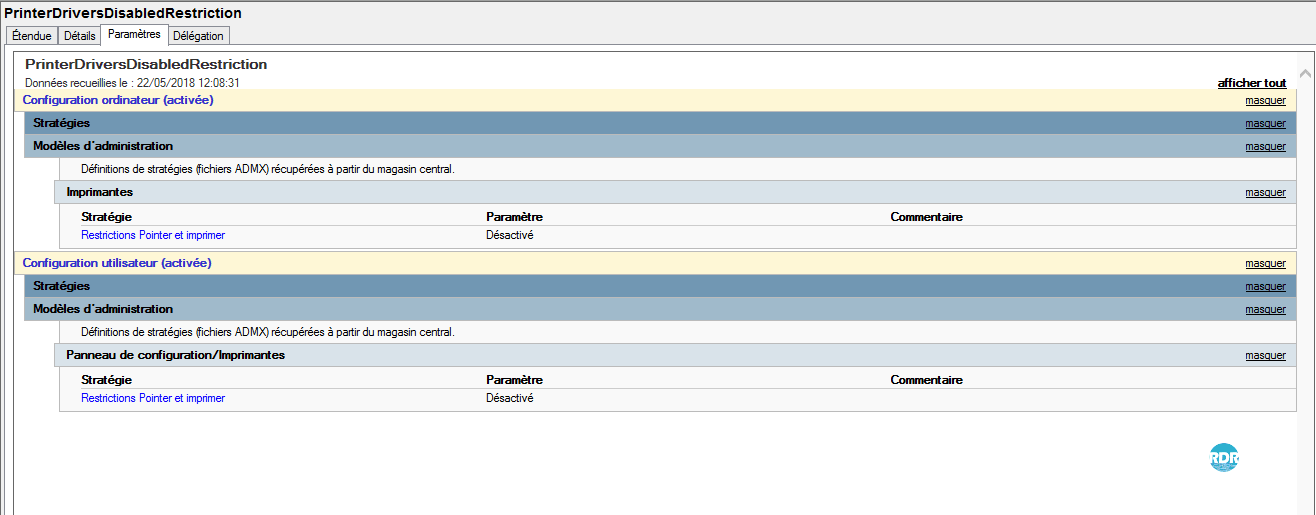
- Computer context: Computer Configuration> Policy> Administrative Templates> Printer> Point and Print Restriction.
- User Context: User Configuration> Policy> Administrative Templates> Control Panel> Printers> Printer> Point and Print Restriction.
1. Créer une nouvelle GPO.
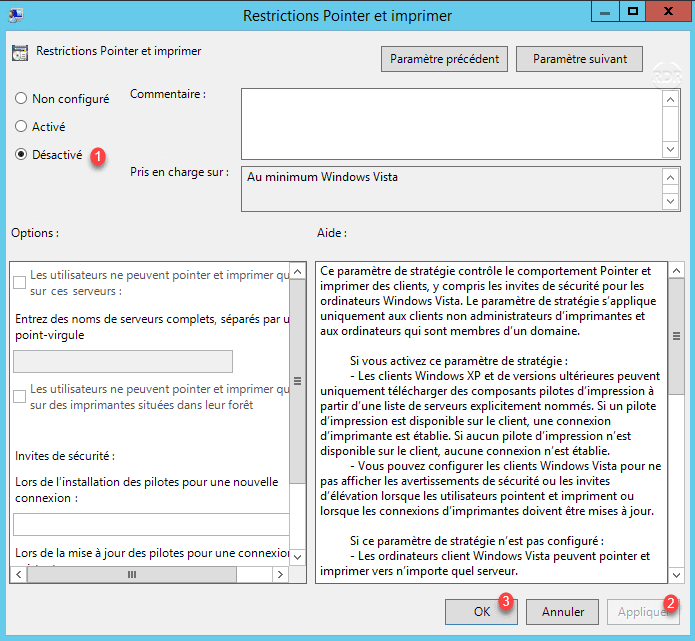
Go to the computer or user configuration at the Restriction parameter level Point and print and double click on it.
Check Disable 1, then Apply 2 and click OK 3.
Go to the GPO Settings tab.
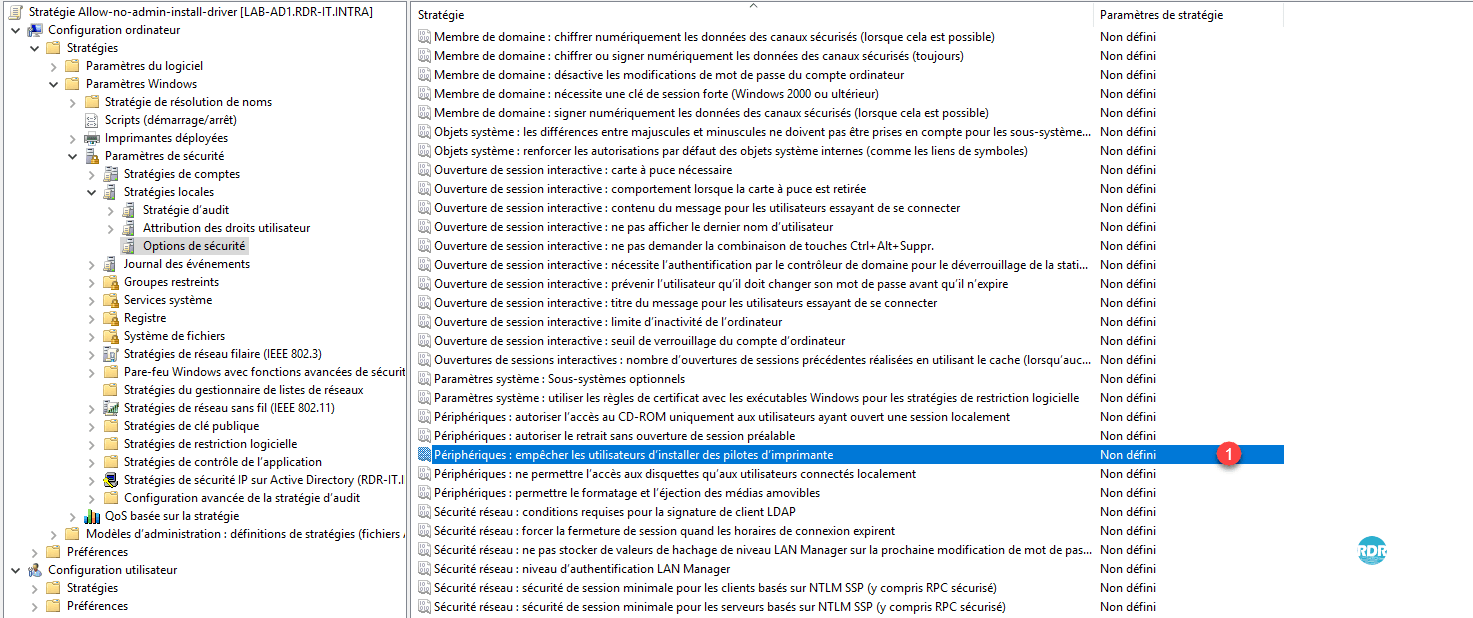
Allow non-administrators to install drivers
Create a new GPO.
Go to the Devices setting to prevent users from installing printer drivers 1 found in: Computer configuration> Policies> Windows settings> Local policies> Security option.
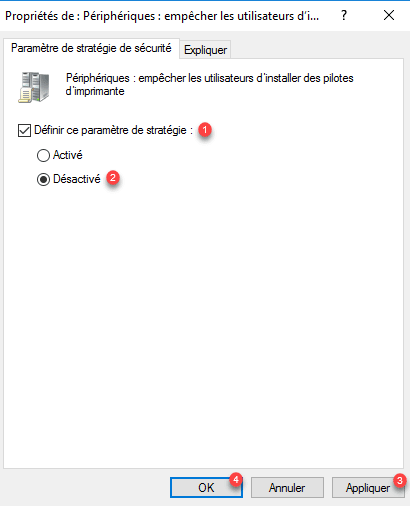
Check Define this policy setting 1, select Deactivate 2 then apply 3 and click OK 4.
Go to the GPO Settings tab.
