In this tutorial, I will explain how to sign your scripts. Before going into the subject, we will see why signing the scripts, the main reason is security. If your environment (computers + servers) is configured to run only signed scripts and a PowerShell script is launched in a malicious file, it will be neutralized because it will not be signed.
Quite a lot of Ransomware deployed by PowerShell scripts that were called by macros.
This will also make it possible to limit the execution of scripts by attackers if your IS is compromised, because to execute scripts on your machines, they will also have to be signed.
To sign the scripts, we will use a certificate dedicated to code signing that we will obtain from a certification authority. You will therefore have understood that you have an internal certification authority.
I specify it in case, we are of course in an Active Directory environment.
For the realization of this tutorial, I used 3 computers:
- A domain controller server that also hosts the certification authority
- A Windows 10 client computer that I use for scripting
- A server joined to the domain to test running scripts.
Generate code signing certificate on CA
The first step in order to be able to sign scripts will be to generate a code signing certificate, this certificate will be used to sign the scripts but also allow customers to validate the signature.
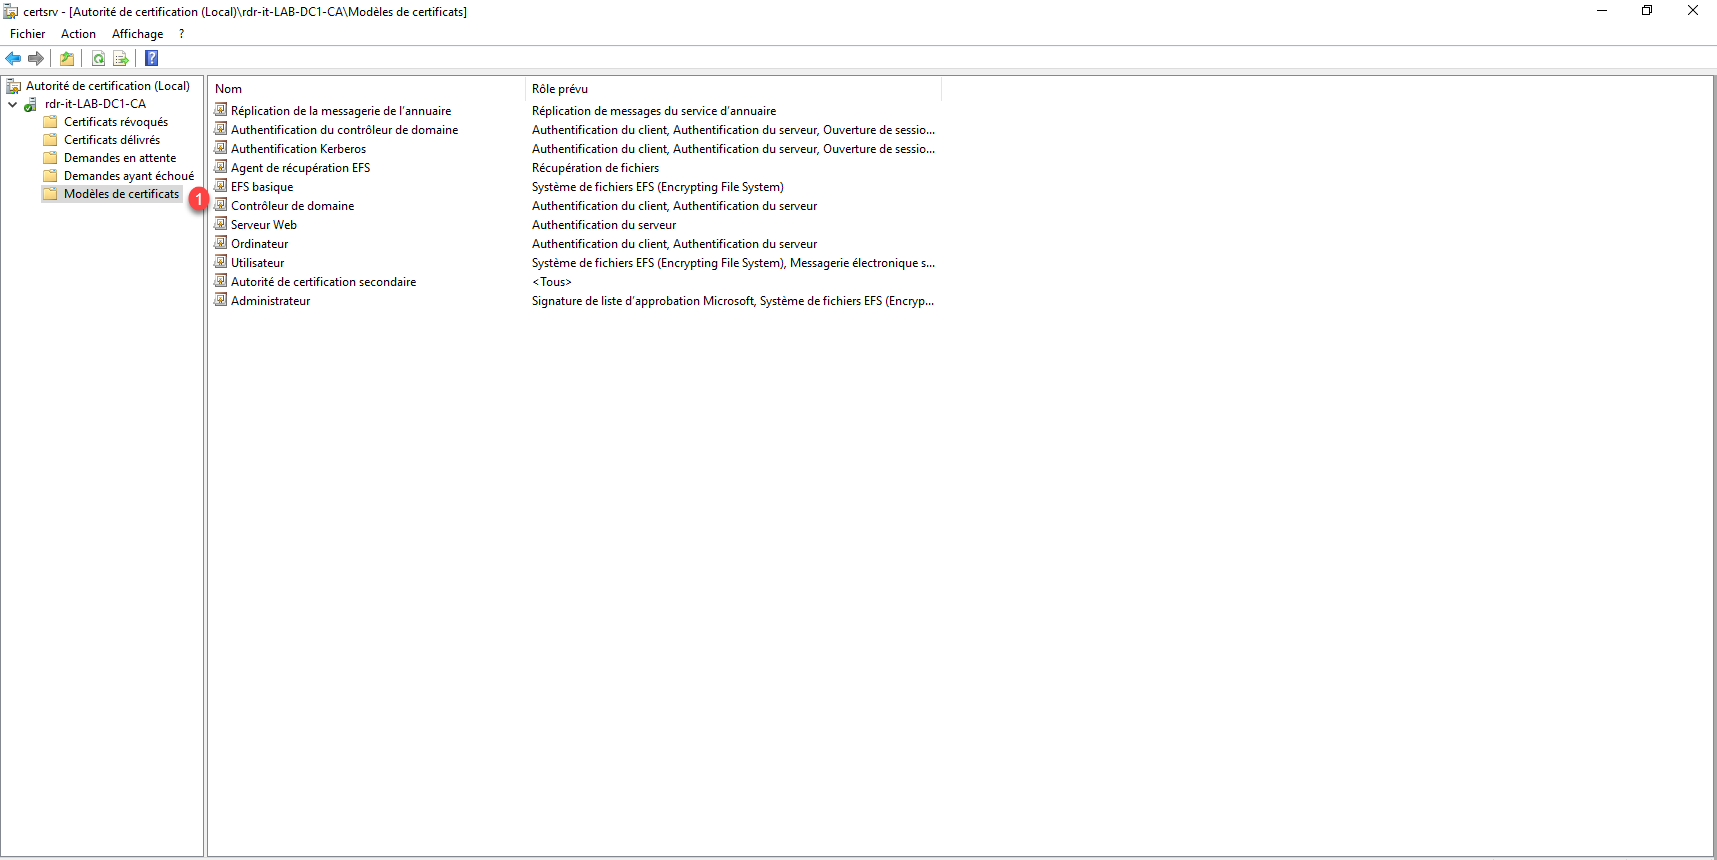
By default, the certificate template is not available, open the certification authority console.
Expand the elements to display the different “folders” and go to Certificate Templates 1. On the capture, we can see that the model is not present.
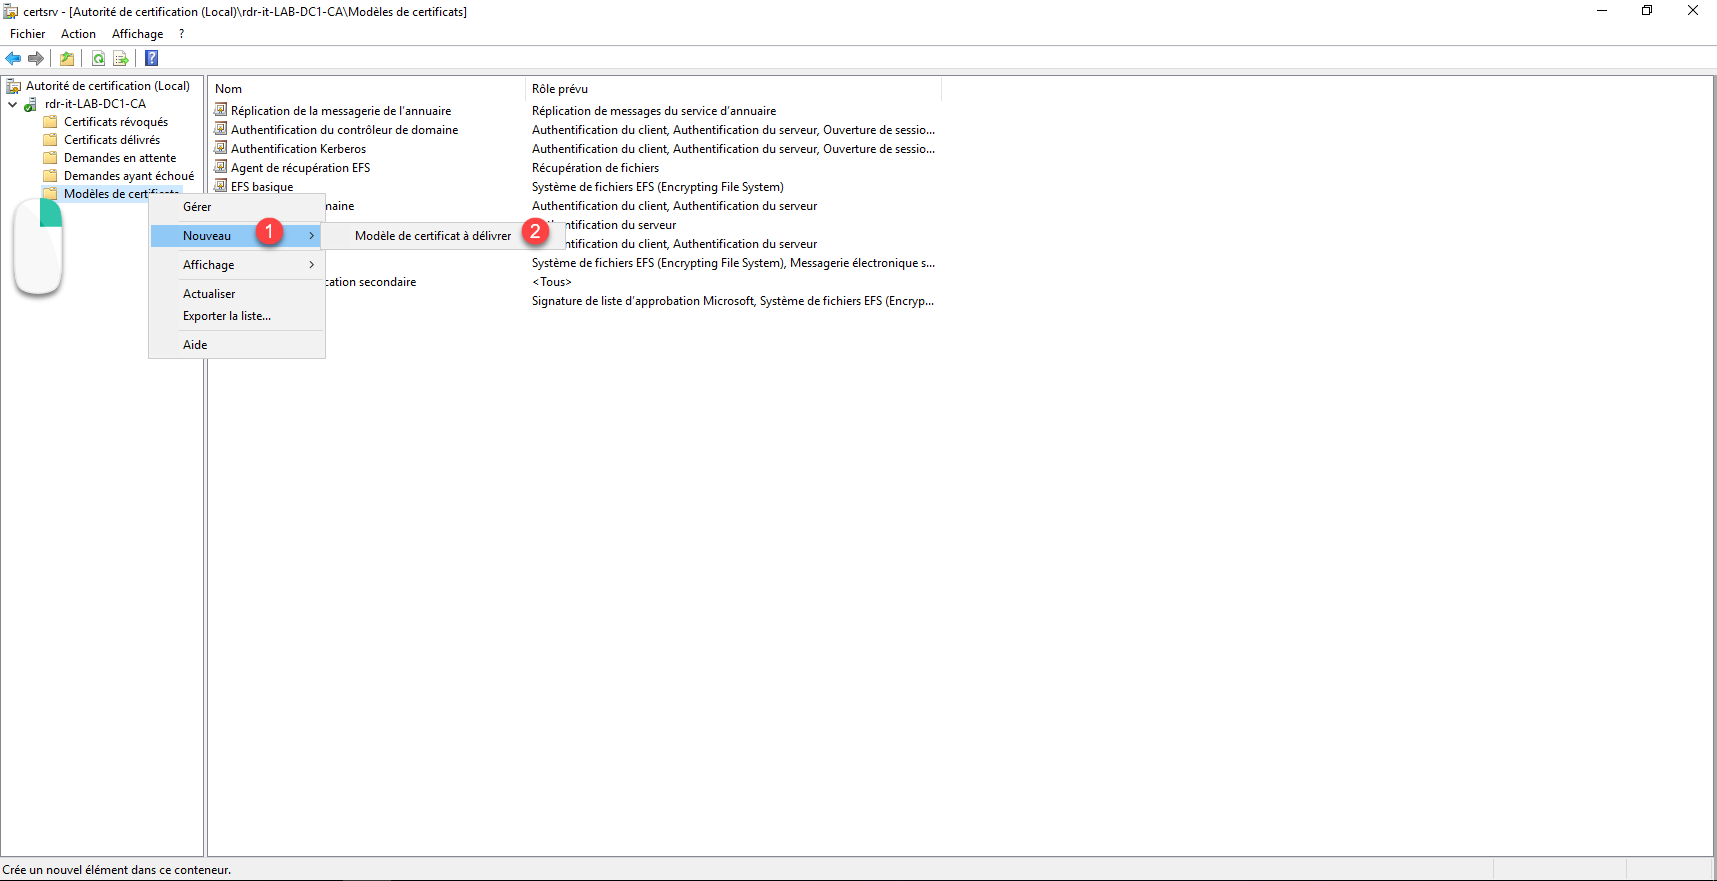
Right-click on Certificate templates, then go to New 1 and click on Certificate template to issue 2.
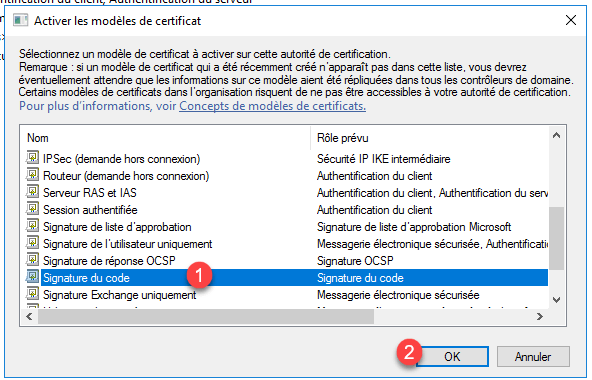
Select the Code Signing template 1 and click the OK button 2 to add it.
The model is added to the list.
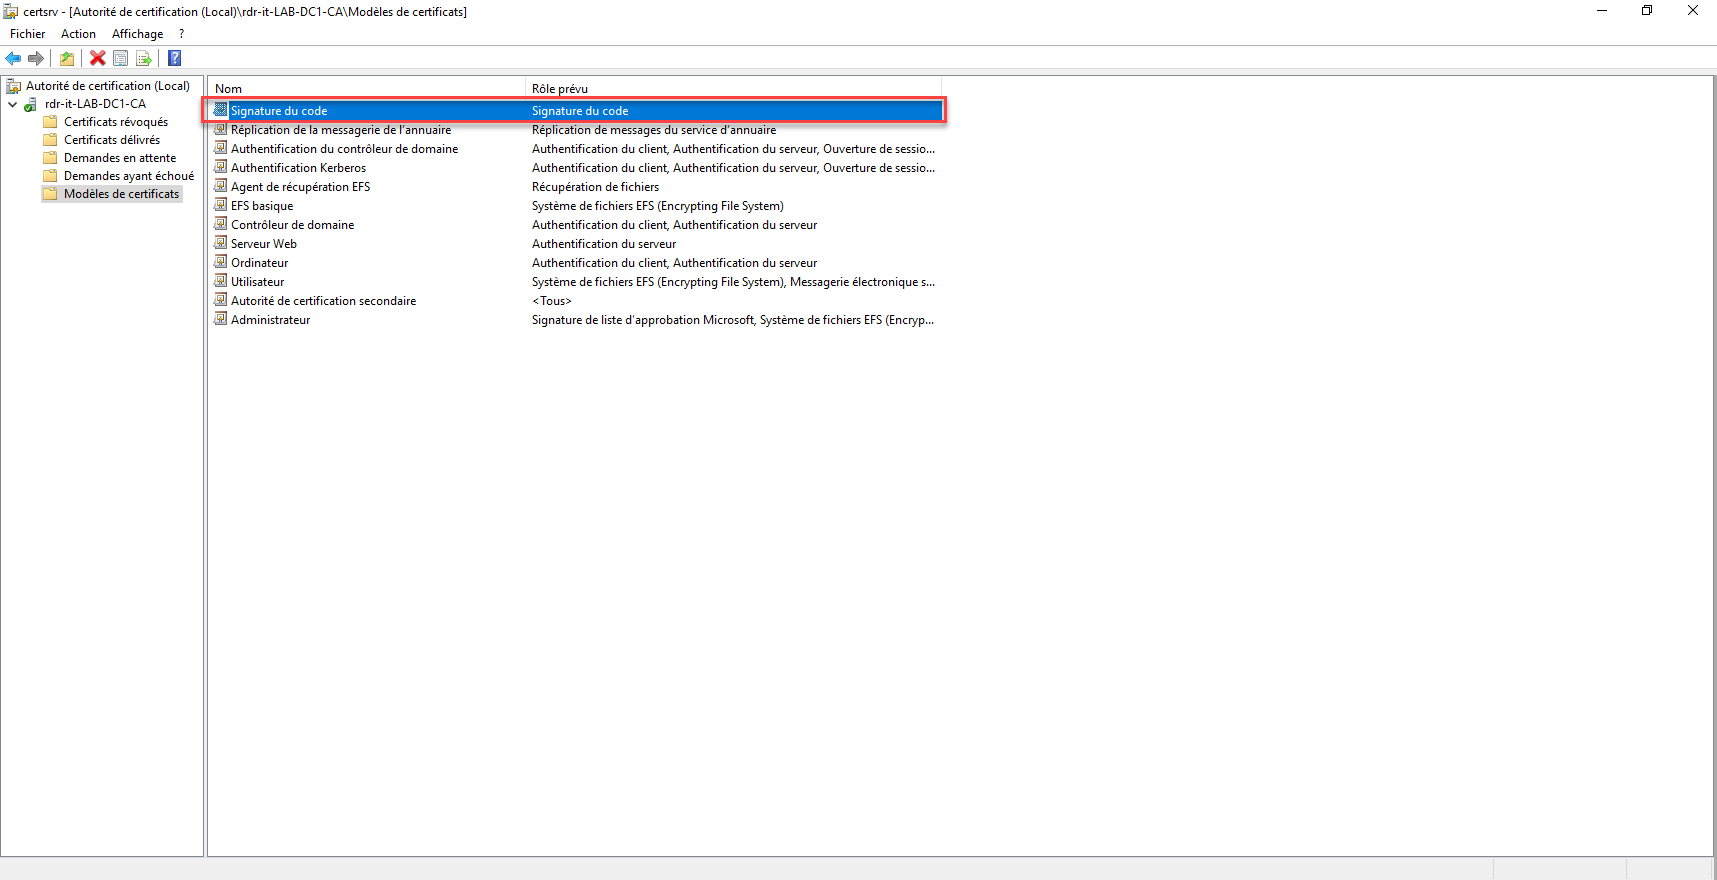
For security reasons, this certificate template can only be issued to Domain Administrators and Enterprise Administrators.
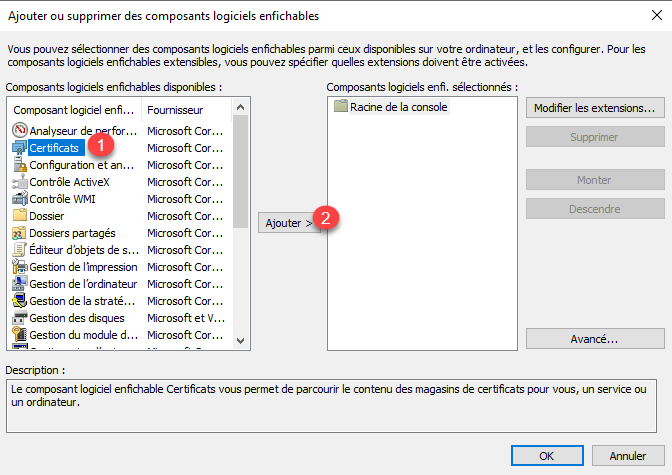
Now we will make the certificate request, still on the server of the certification authority, we will open the certificate store of the connected user.
From a running window, enter the mmc command. In the new console, click File 1 and then Add/Remove Snap-in 2.

Select Certificates 1 and click Add 2.
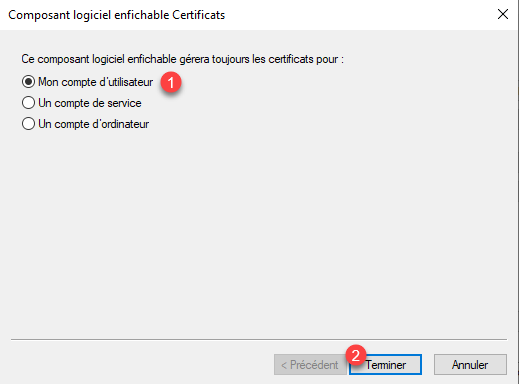
Choose My User Account 1 and click Finish 2.
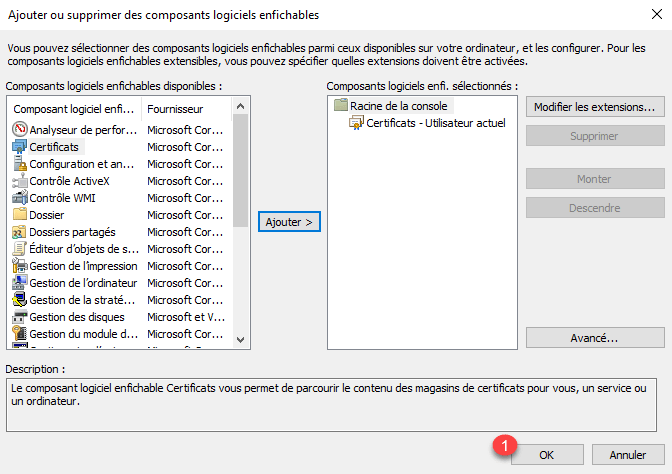
Once the Certificates component has been added, click on OK 1.
The certificate store is displayed, we will now make our request, right click on Personal, go to All tasks 1 and click on Request a new certificate 2.

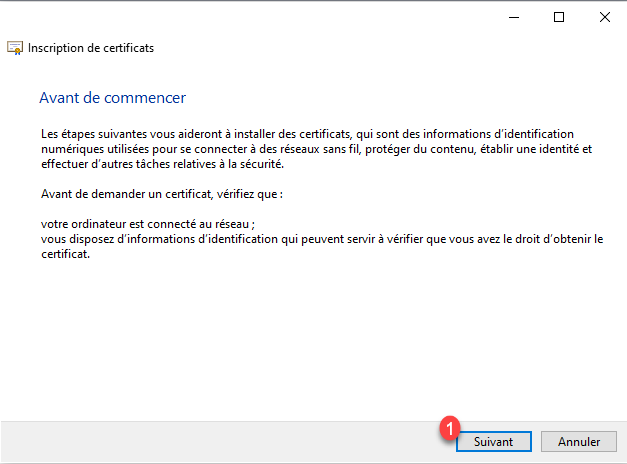
When launching the certificate request wizard, click on Next 1.
At the second step of the wizard, you must select the certification authority, by default, there is nothing to do, click on the Next button 1.

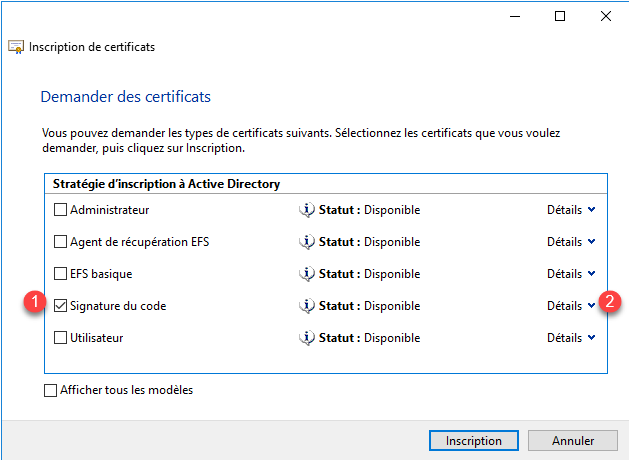
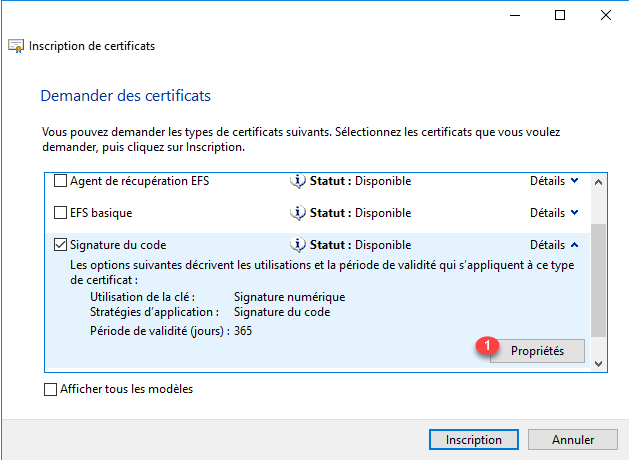
Then the list of certificates that can be requested is displayed, check the Code Signing certificate 1 then click on Detail 2. We will make the private key exportable.
Click on the Properties button 1.
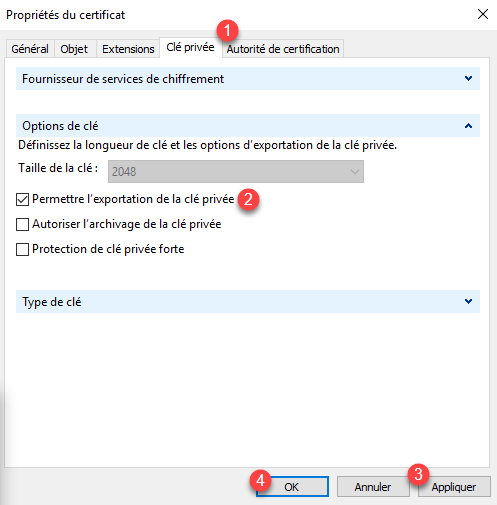
Go to the Private key 1 tab, then check the Enable private key 2 export box. Then validate by clicking on Apply 3 and close the window by clicking on the OK button 4.
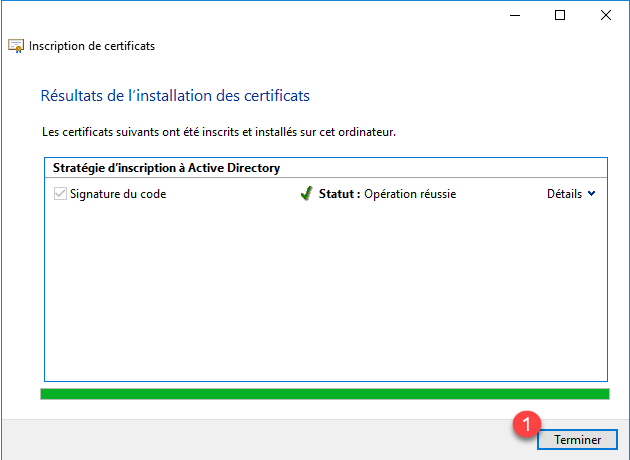
Back to the certificate request wizard, click on the Registration button 1.

The code signing certificate has been generated, click Finish to close the 1 wizard.
If we look in the Personal store, we find the code signing certificate 1.
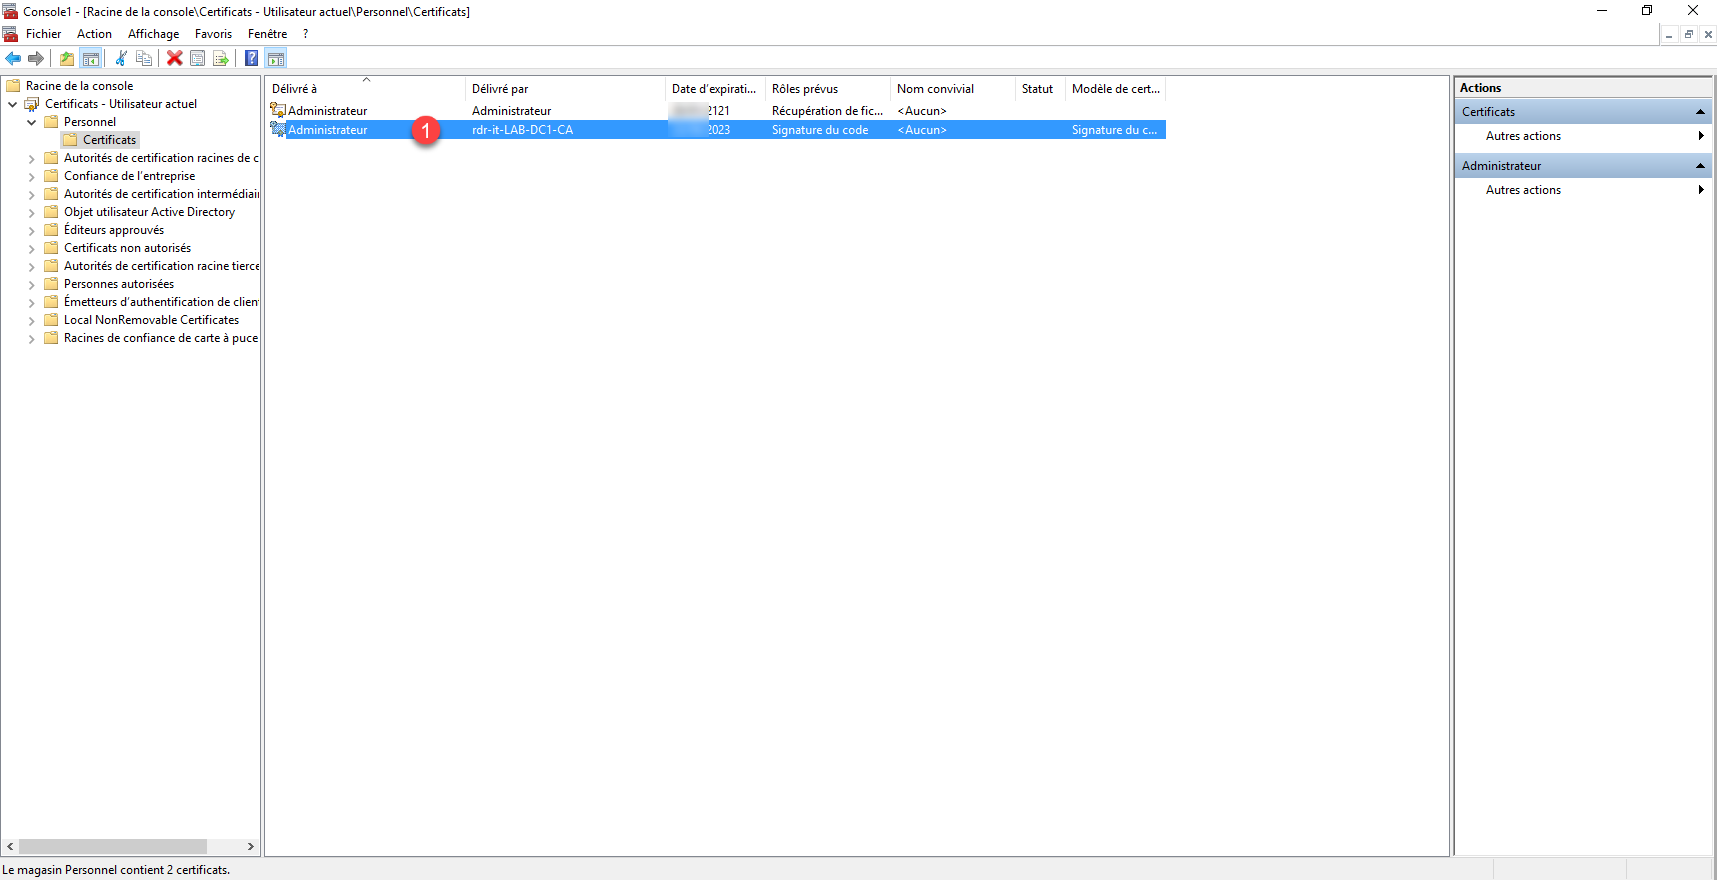
We now have our certificate for signing scripts.
The certificate having been generated directly from a server, I advise you to export it with the private key, to reimport it on another computer where you make your scripts. Once the import is done, delete the certificate from the server’s personal store.
To limit the risk of certificate leaks, I sign my scripts on a computer that is not in the domain and is encrypted so that it cannot be extracted.
You will also need to export the certificate without the private key, which will need to be deployed to the computers where the scripts will be run.
Sign a PowerShell script
In order to see how it works, I’ll go step by step so you can see what’s going on in detail.
As a reminder, I’m writing the scripts on a Windows 10 PC and running them on a Windows server.
I created a simple PowerShell script that displays the list of network cards, here is the code:
Write-Host "List of network cards :"
Get-NetAdapter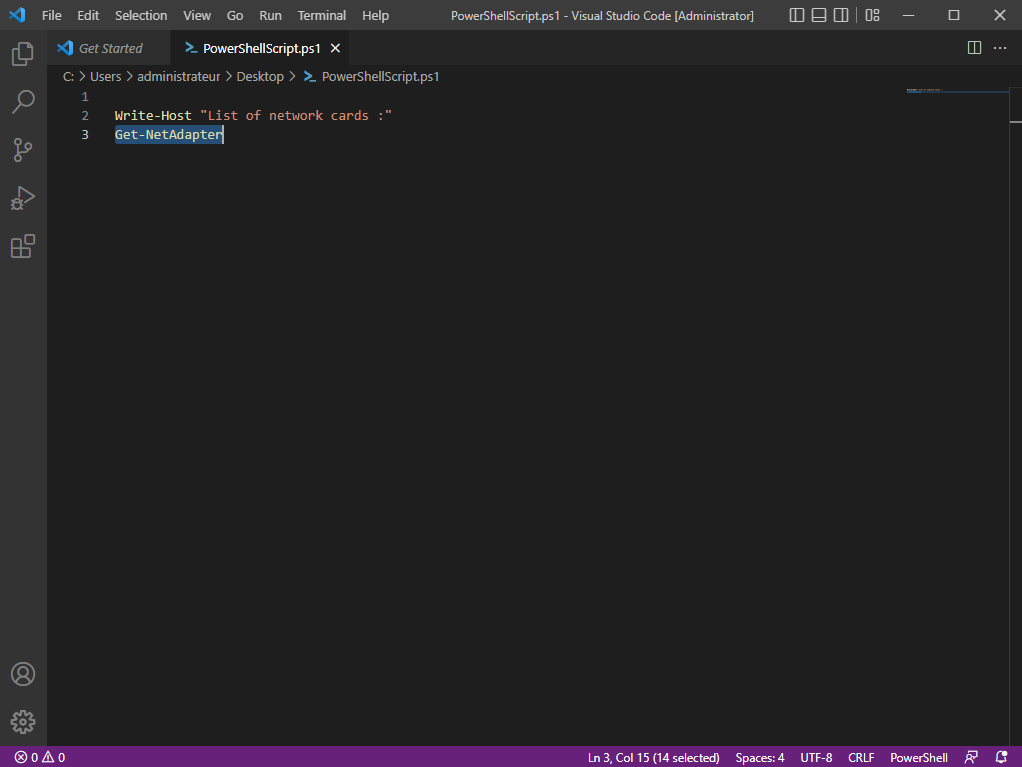
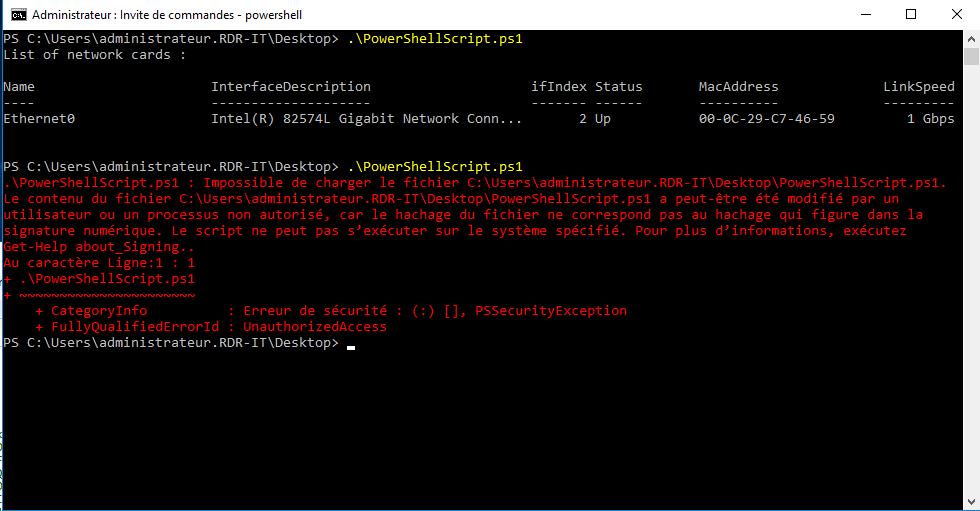
On the screenshot that follows, the script executed on the server (where we will activate the mandatory signature next).
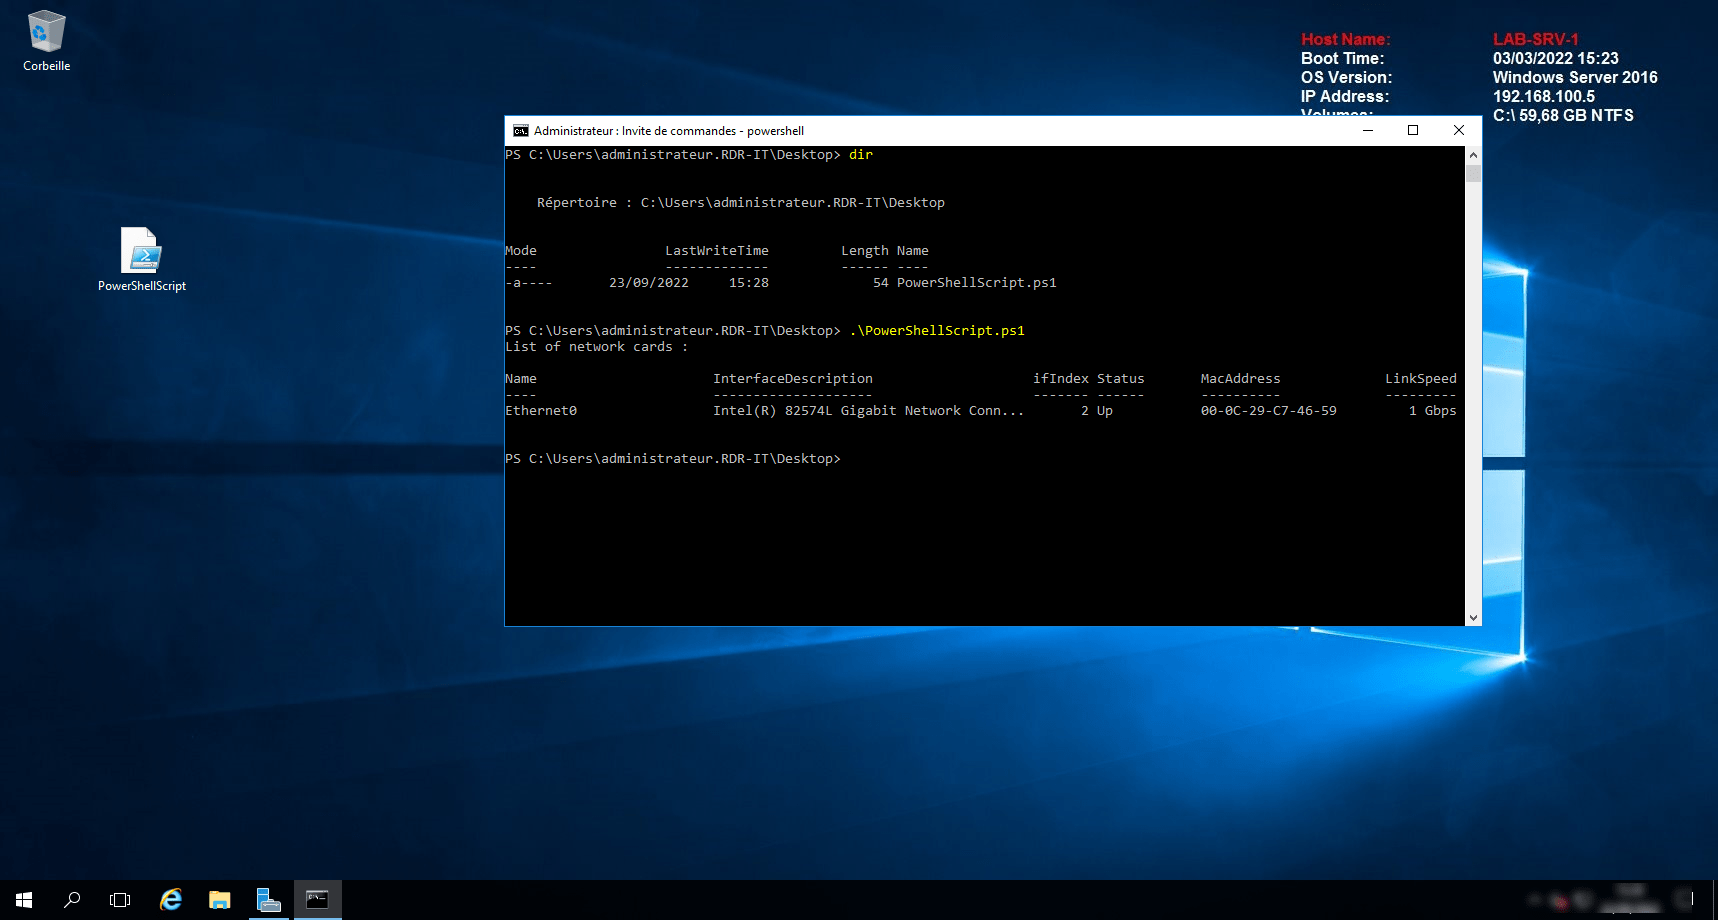
For the moment, script runs perfectly well and displays the available network cards.
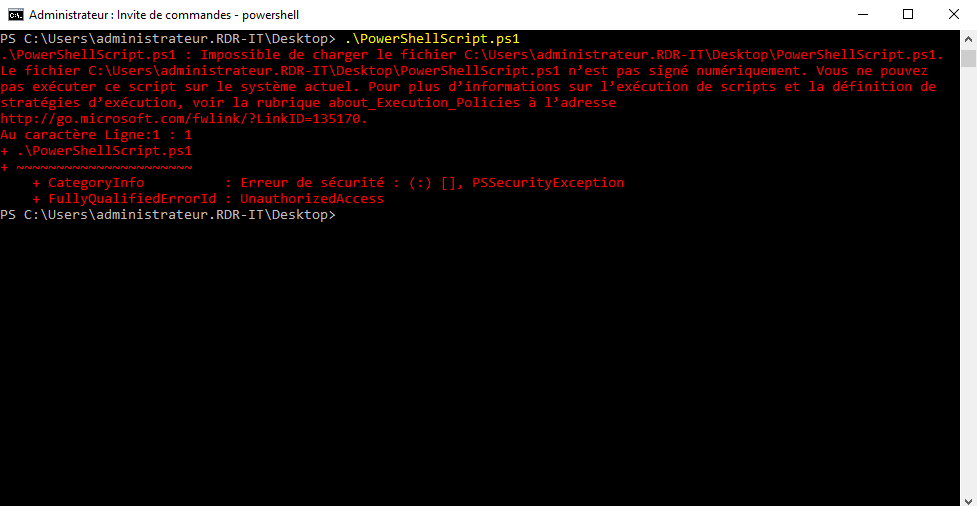
Now, we will activate the mandatory signature of scripts.
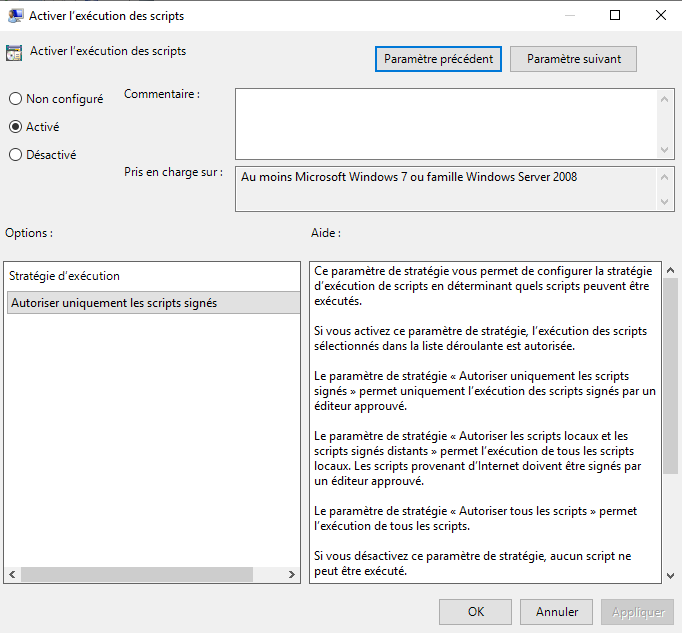
To force the mandatory signing of scripts, you must change the execution strategy.
Set-ExecutionPolicy AllSignedThis command makes it mandatory to sign PowerShell scripts
If I run the script again on the server, I get an error that the script is not signed.
To resolve this error, we’ll move on to signing the script.
Return to the computer where you created the script and which contains the certificate with the private key.
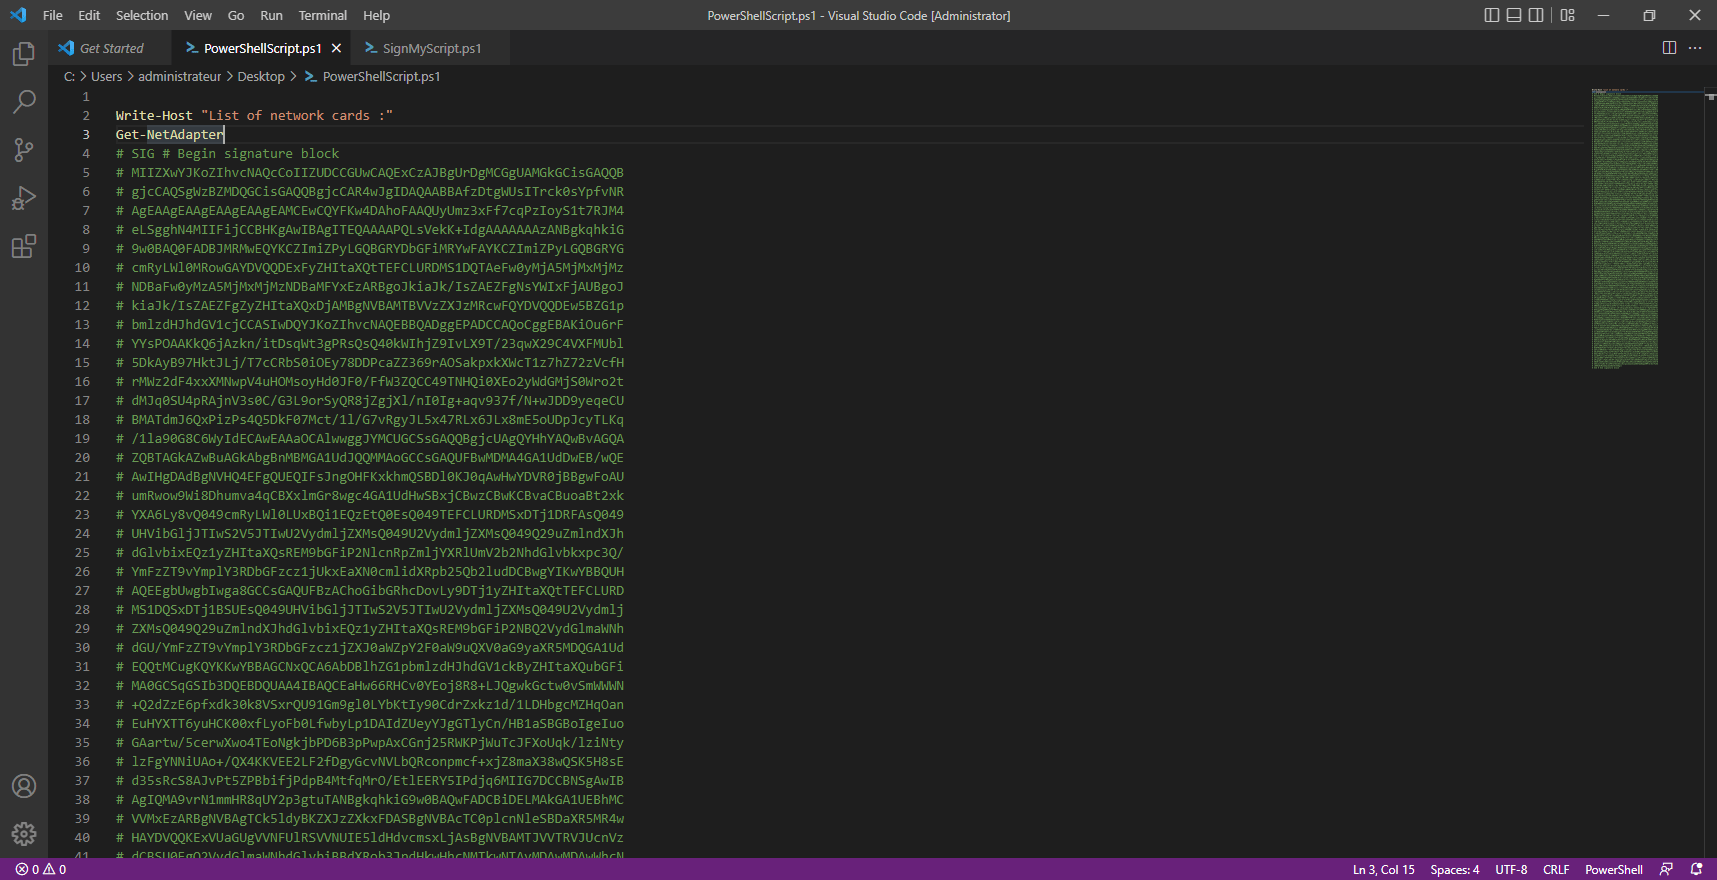
To sign our script, we will use the CmdLet Set-AuthenticodeSignature which will take 3 parameters:
- The full path of the script
- -Certificate which will indicate the certificate to use to sign the script
- -TimestampServer which allows to timestamp the signature and to continue to use the certificate and the script even if it is expired.
Which gives for the example of the tutorial:
$Cert4Sign= Get-ChildItem Cert:\CurrentUser\My\ -CodeSigningCert
$ScriptSign = "C:\Users\administrateur\Desktop\PowerShellScript.ps1"
$TimestampServer = "https://timestamp.comodoca.com/authenticode"

Set-AuthenticodeSignature $ScriptSign -Certificate $Cert4Sign -TimestampServer $TimestampServer
Once the command is executed, if we look at our script, we see the signature that was added at the end.
On the computer where the script execution policy was changed, paste the new file. Before you can run the script, you must install the certificate that was used for the signature in the Trusted Publishers store of the computer, the certificate must be exported without the private key this time.
When the certificate is installed, run the script again, it should work.
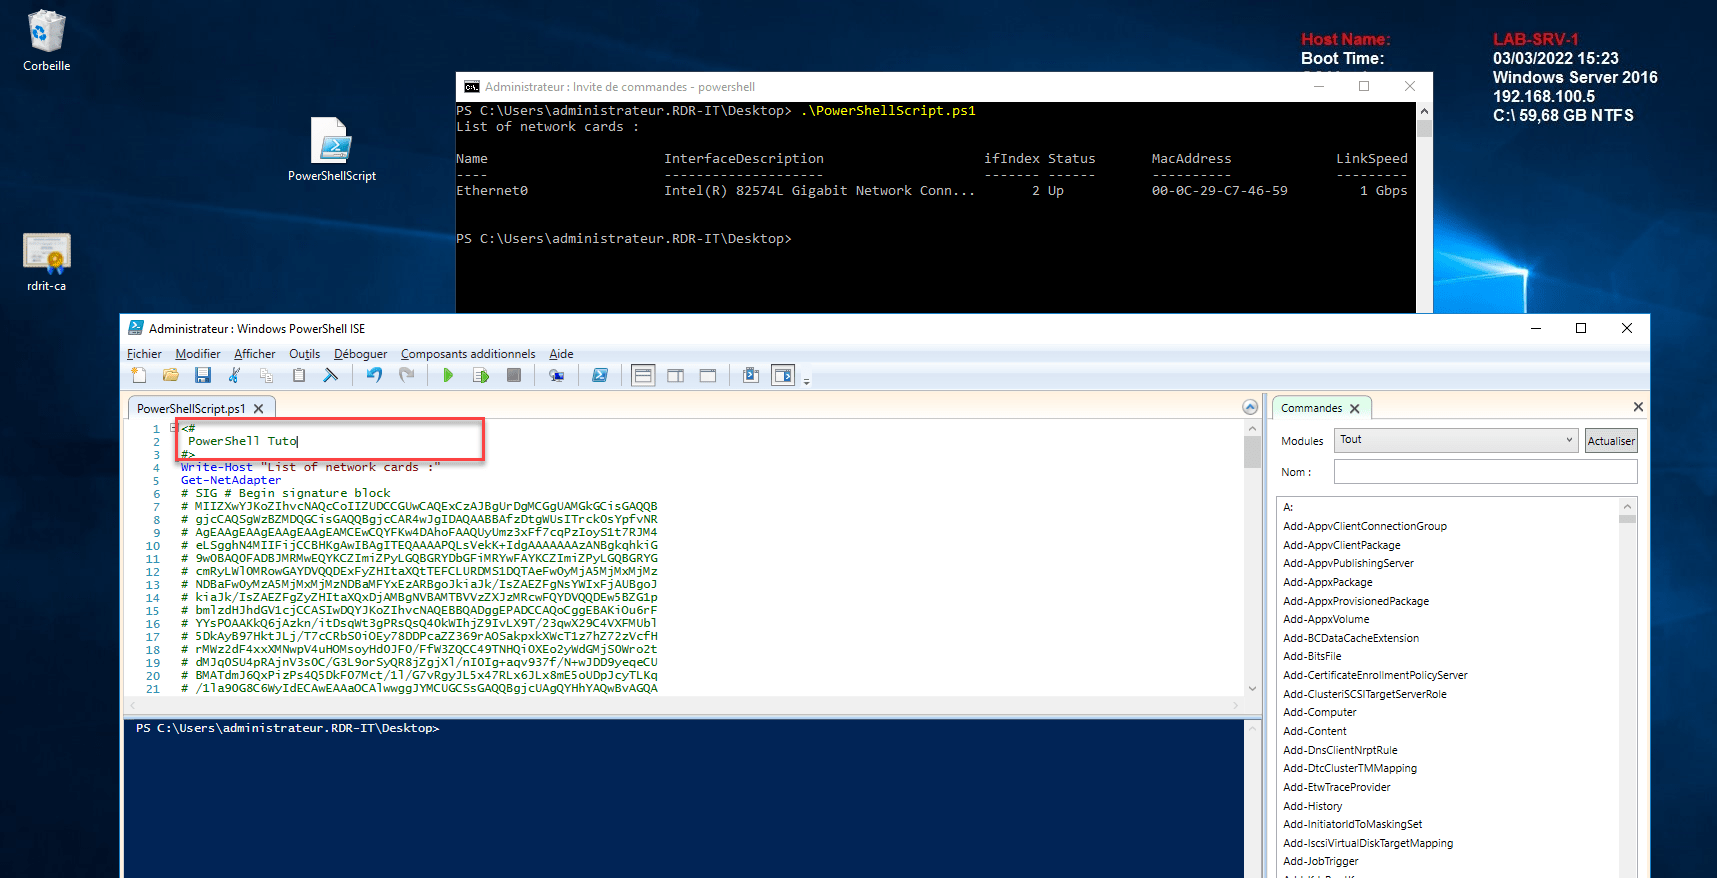
What happens if you modify the script? This will no longer be executed.
On the screenshot below, I modified the script by adding a comment block.
When running the script, an error is displayed indicating that the hash of the file does not match the hash of the file in signature.
You now know how to sign a PowerShell script
Deploying PowerShell script signing in the enterprise
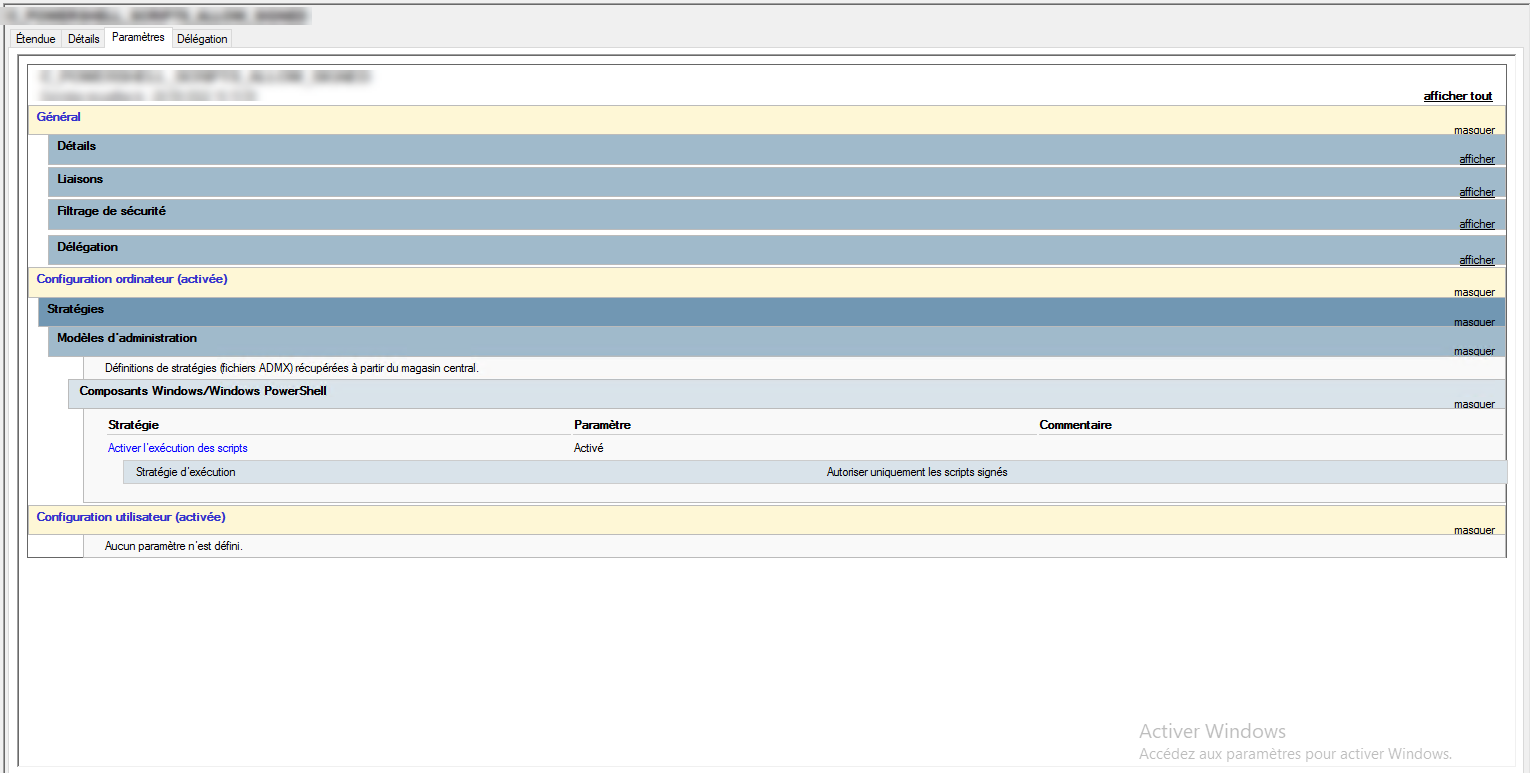
If you want to deploy script signing in your company, you must deploy the certificate by GPO and configure the computers to force the PowerShell script execution policy.
To deploy the certificate, you can follow this tutorial: GPO: deploying a certificate, you must place the certificate in the Trusted publishers store.
To force the signing of scripts, you must configure the parameter Enable the execution of scripts with the selection: Allow only signed which is in Computer Configuration / Policies / Administrative Templates / Windows Component / Windows PowerShell.
Conclusion
Forcing signed scripts to be signed increases the level of security by preventing malicious scripts from being executed and also to protect existing scripts from any alteration.