In this tutorial dedicated to Nginx, I will explain how to configure it in order to have a reverse proxy.
Before getting to the heart of the matter, I will quickly introduce you to Nginx and what a reverse proxy.
For this tutorial, I used an Ubuntu 20.04 machine.
Introducing Nginx
Nginx is a web server like Apache2 or IIS which has a “philosophy” of being light and fast. It is available on several operating systems (Windows, Linux …).
Today there are two versions:
- A community version which is open and free available here: nginx.org
- A commercial version that includes advanced configuration, security and administration features available at nginx.com.
Nginx allows “natively” to set up a reverse proxy solution, in its early days Nginx was mainly used for this.
What is a reverse proxy? and why use one?
A reverse proxy works the same way as an internal proxy to go to the Internet, but in the opposite direction, that is, it captures the HTTP request to the Internet web server and processes it itself. same.
The use of a reverse proxy with several interests:
- Save on public IP addresses: on the same public IP address it is possible to publish several Internet sites hosted on one or more DMZ servers for example.
- Optimizing performance and reducing the load on Web servers, the proxy server can act as a cache for the number of requests to the server that hosts the site, for sites with high traffic, it can also be used as an SSL offload.
- Facilitate the management of SSL certificates, by using SSL offloading and managing certificates from the reverse proxy, there is only one server to manage, which saves time and avoids forgetting when renewing a certificate, especially when using wildcart (* .xxxxxxx.yy).
- Security, which is also one of the main advantages, because it allows to modify the HTTP header by hiding the server behind, coupled with the use of fail2ban or crowsec, we can protect all published servers. It is also possible, using the locations directives, to restrict access to certain areas (/ wp-admin for WordPress, PowerShell access for Exchange, etc.).
- Load balancing, Nginx allows you to do load-balancing.
Installing Nginx
To have the most recent version of Nginx, it is possible to configure nginx.org repository
In this tutorial, I will use the Ubuntu repository in order to have the nginx-extras package, which installs different add-ons that we will see in this tutorial.
In the /etc/apt/sources.list.d/ folder create an nginx.list file.
sudo touch /etc/apt/sources.list.d/nginx.listThen edit the file using nano (or other).
sudo nano /etc/apt/sources.list.d/nginx.listAdd the lines below in:
deb [arch=amd64] http://nginx.org/packages/mainline/ubuntu/ focal nginx
deb-src http://nginx.org/packages/mainline/ubuntu/ focal nginx
Now, execute the 2 lines below to install the signature of the repository:
wget http://nginx.org/keys/nginx_signing.key
sudo apt-key add nginx_signing.key
Update the package line:
sudo apt update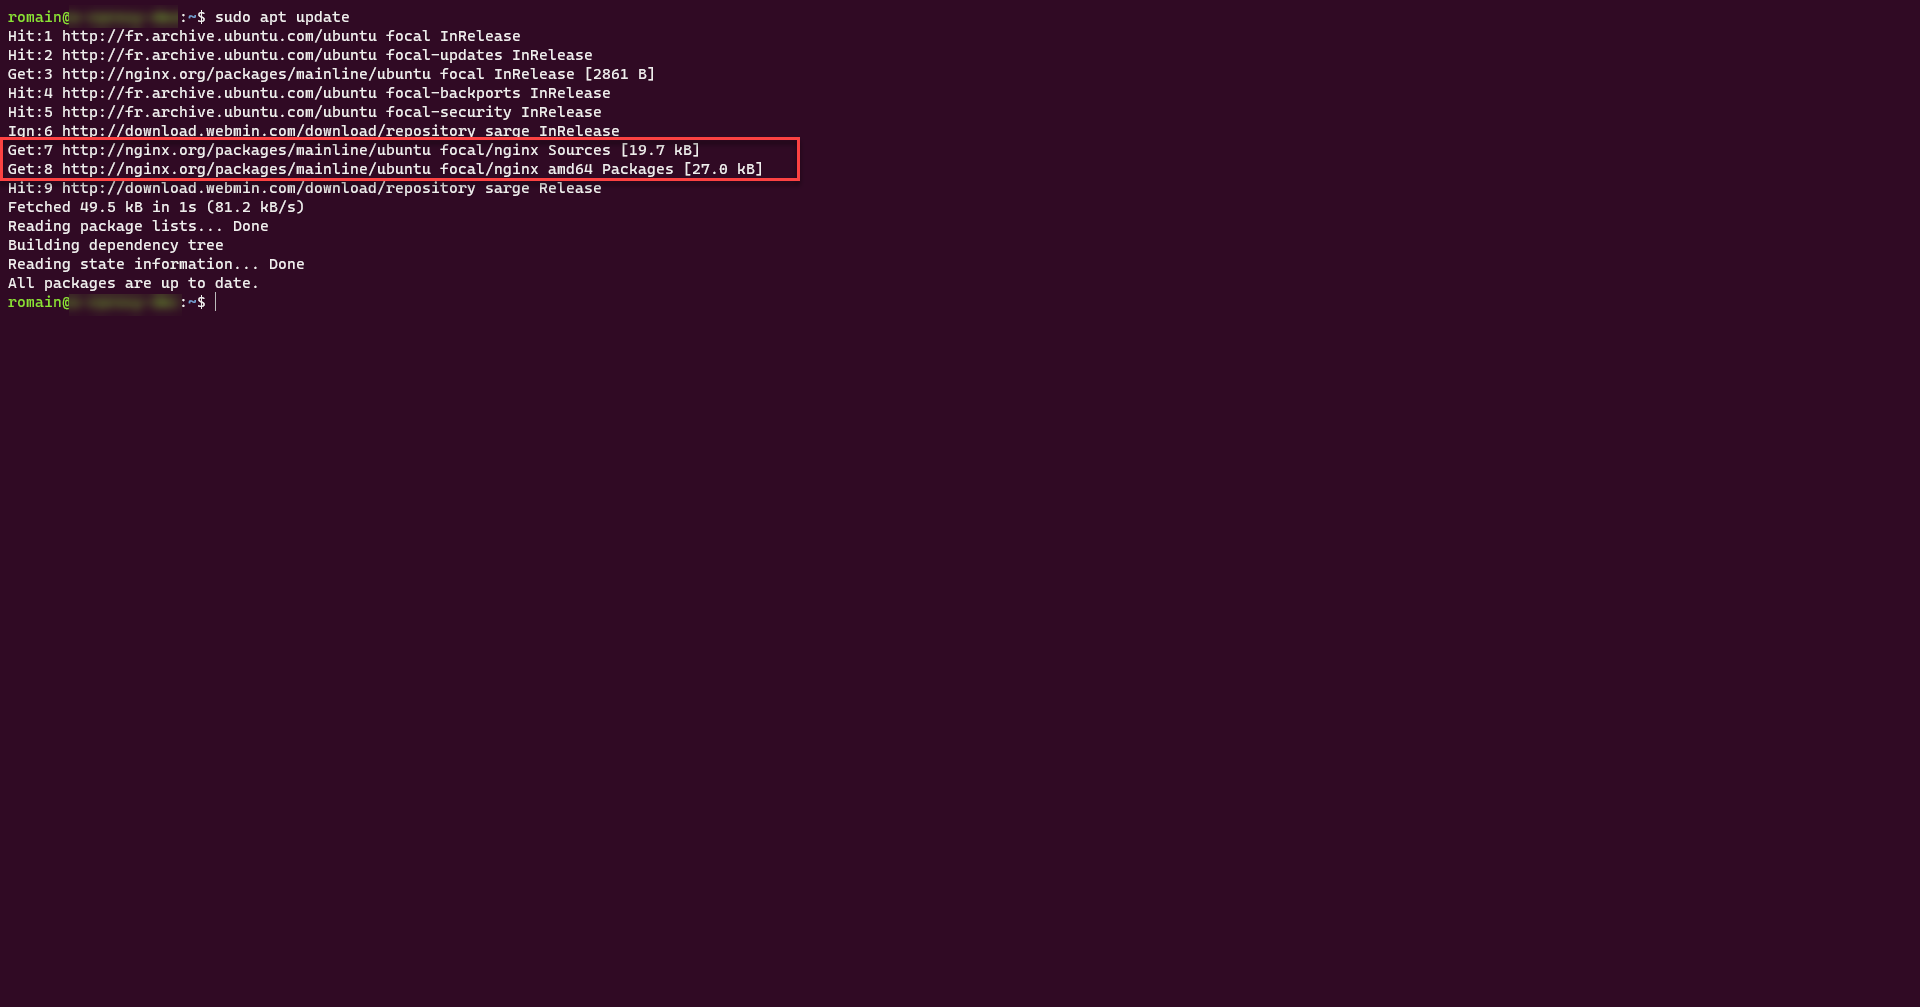
On the screenshot above, we see that the Nginx repositories have been queried.
We can now proceed to install it from Nginx.
We can now proceed to install it from Nginx.
sudo apt install nginx nginx-extras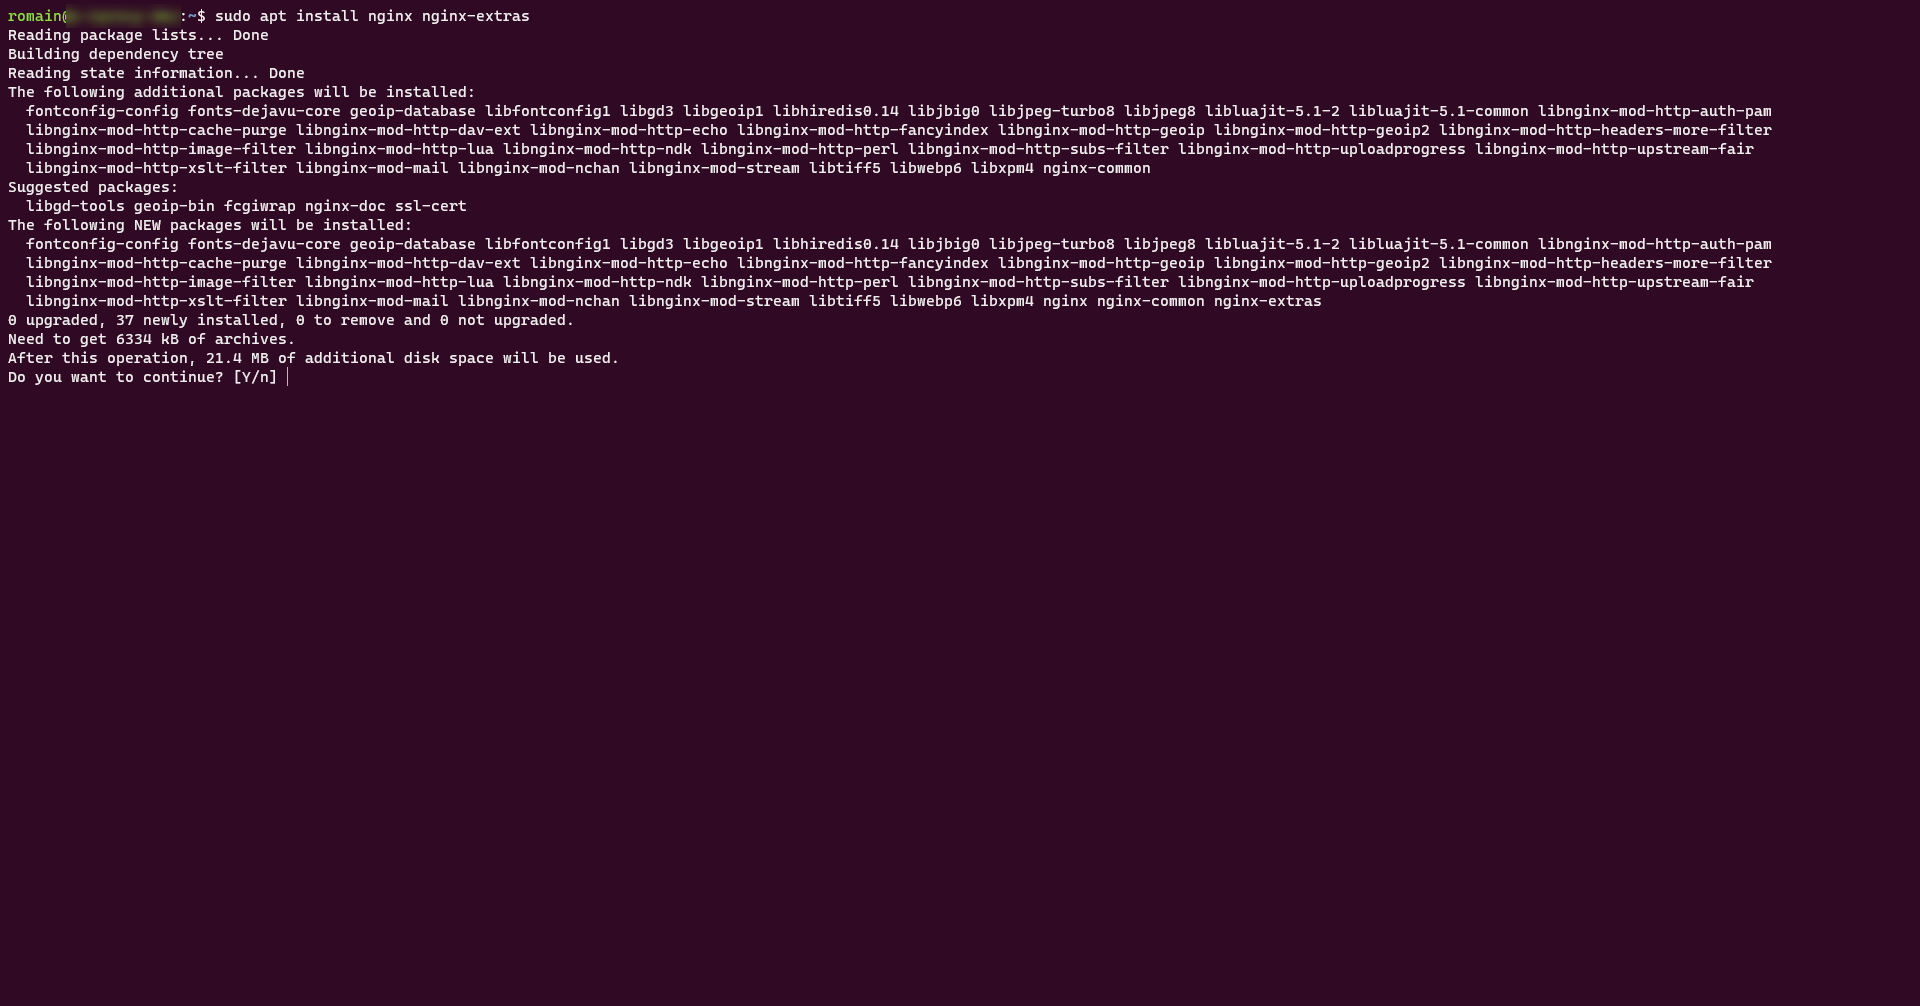
Once the installation is complete, check that Nginx is working properly:
sudo systemctl status nginxIt is also possible from a browser to go to the address: http: // server-ip. The Welcome Nginx page should appear.
In addition, it is also possible to install certbot for Nginx to generate Let’s Encrypt certificates.
sudo apt install python3-certbot-nginx
Our server is now ready, we will be able to proceed to the configuration of our various virtualhost in reverse proxy.
Configuring Nginx as a reverse proxy
As you have probably already understood, the goal here, is not to use the reverse proxy features of Nginx to serve sites that would be hosted on the server itself using a container or a other Web server (Apache, Tomcat …) but to serve sites (applications) which are hosted on another server.
In certain cases, we can have a problem of DNS registration, in particular when the server which is located after the proxy uses virtualhosts and a registration exists and that it will then point to the reverse proxy, we find this configuration mainly when the reverse proxy must resolve the url and it points above.
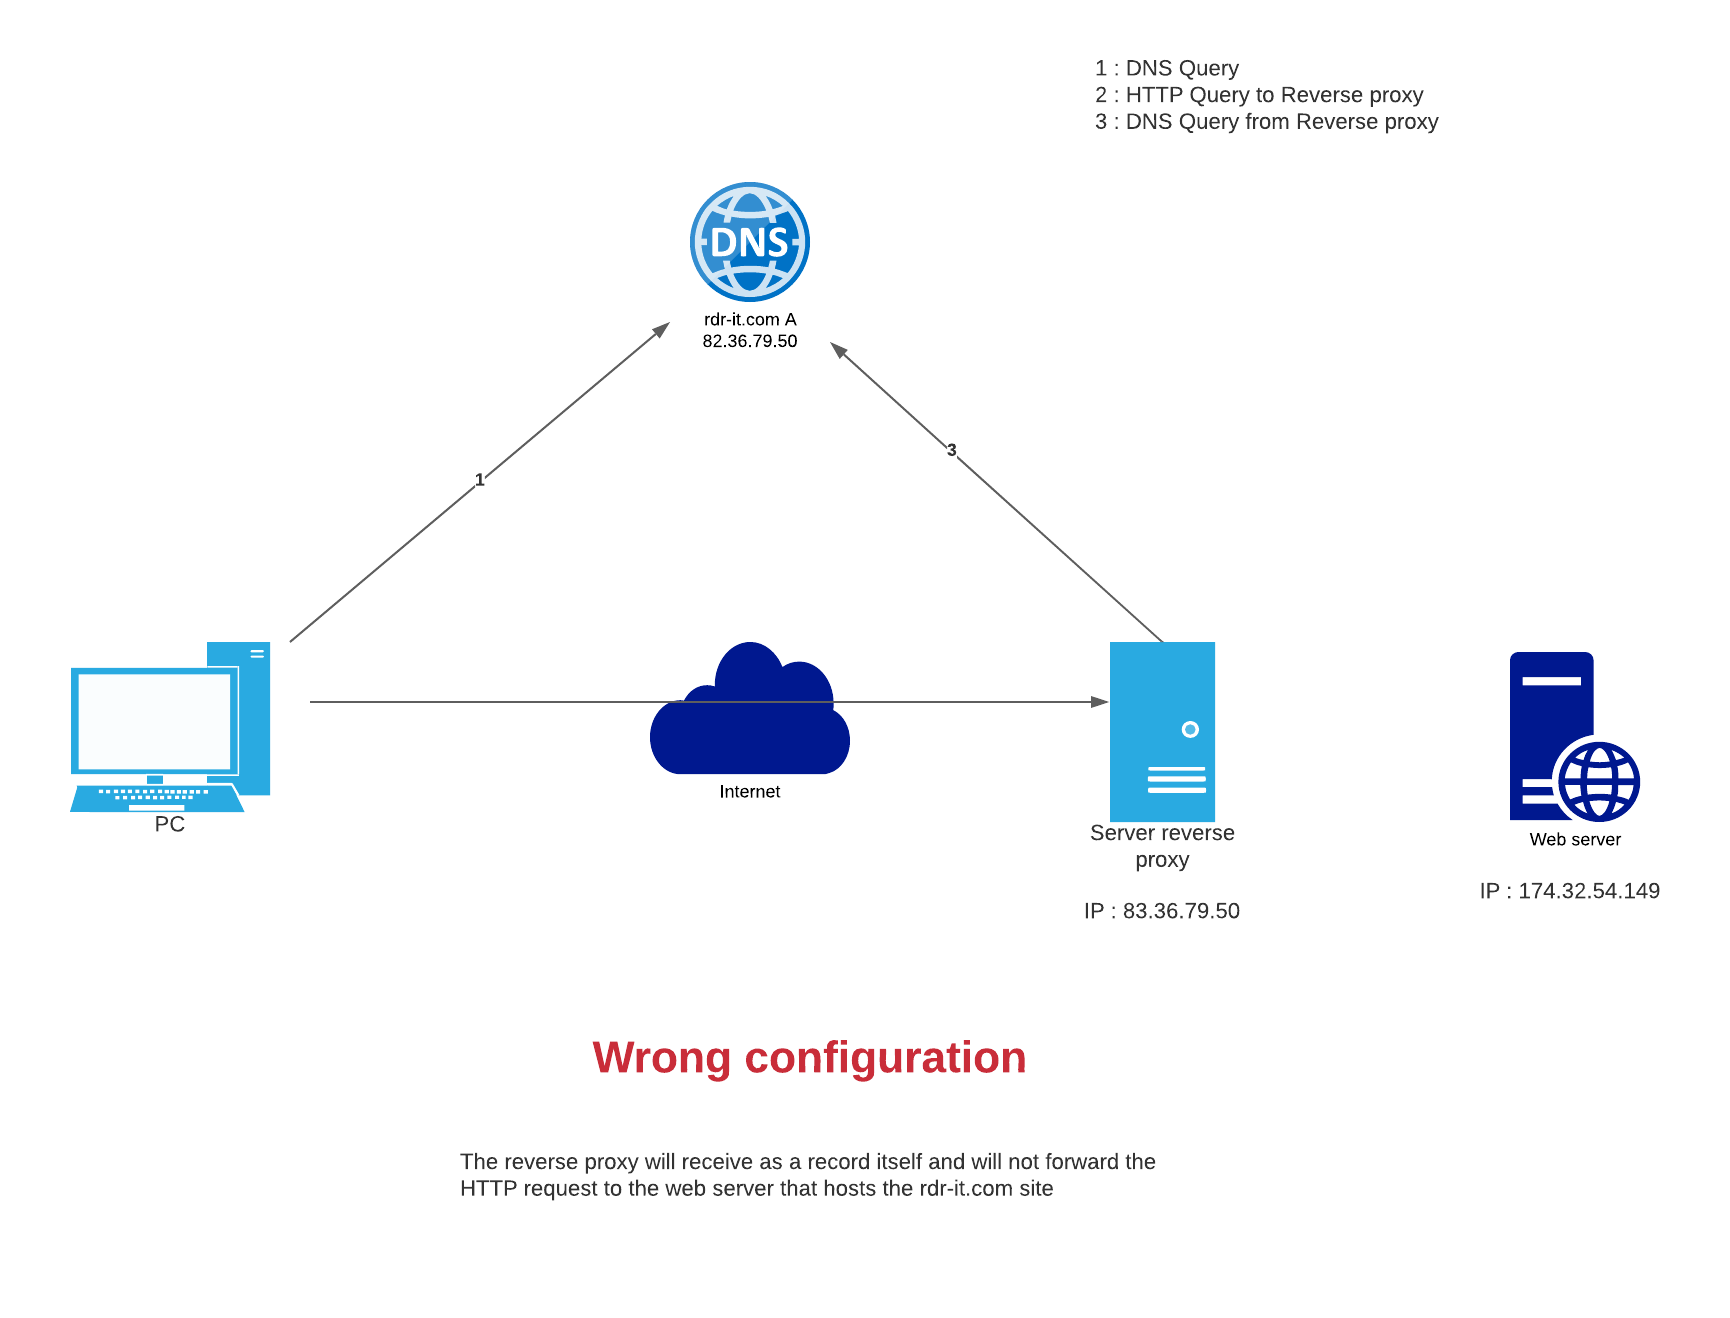
To solve this problem, we are going to hard hard on the proxy server in the / etc / hosts file the correct resolution, in order to achieve this result:
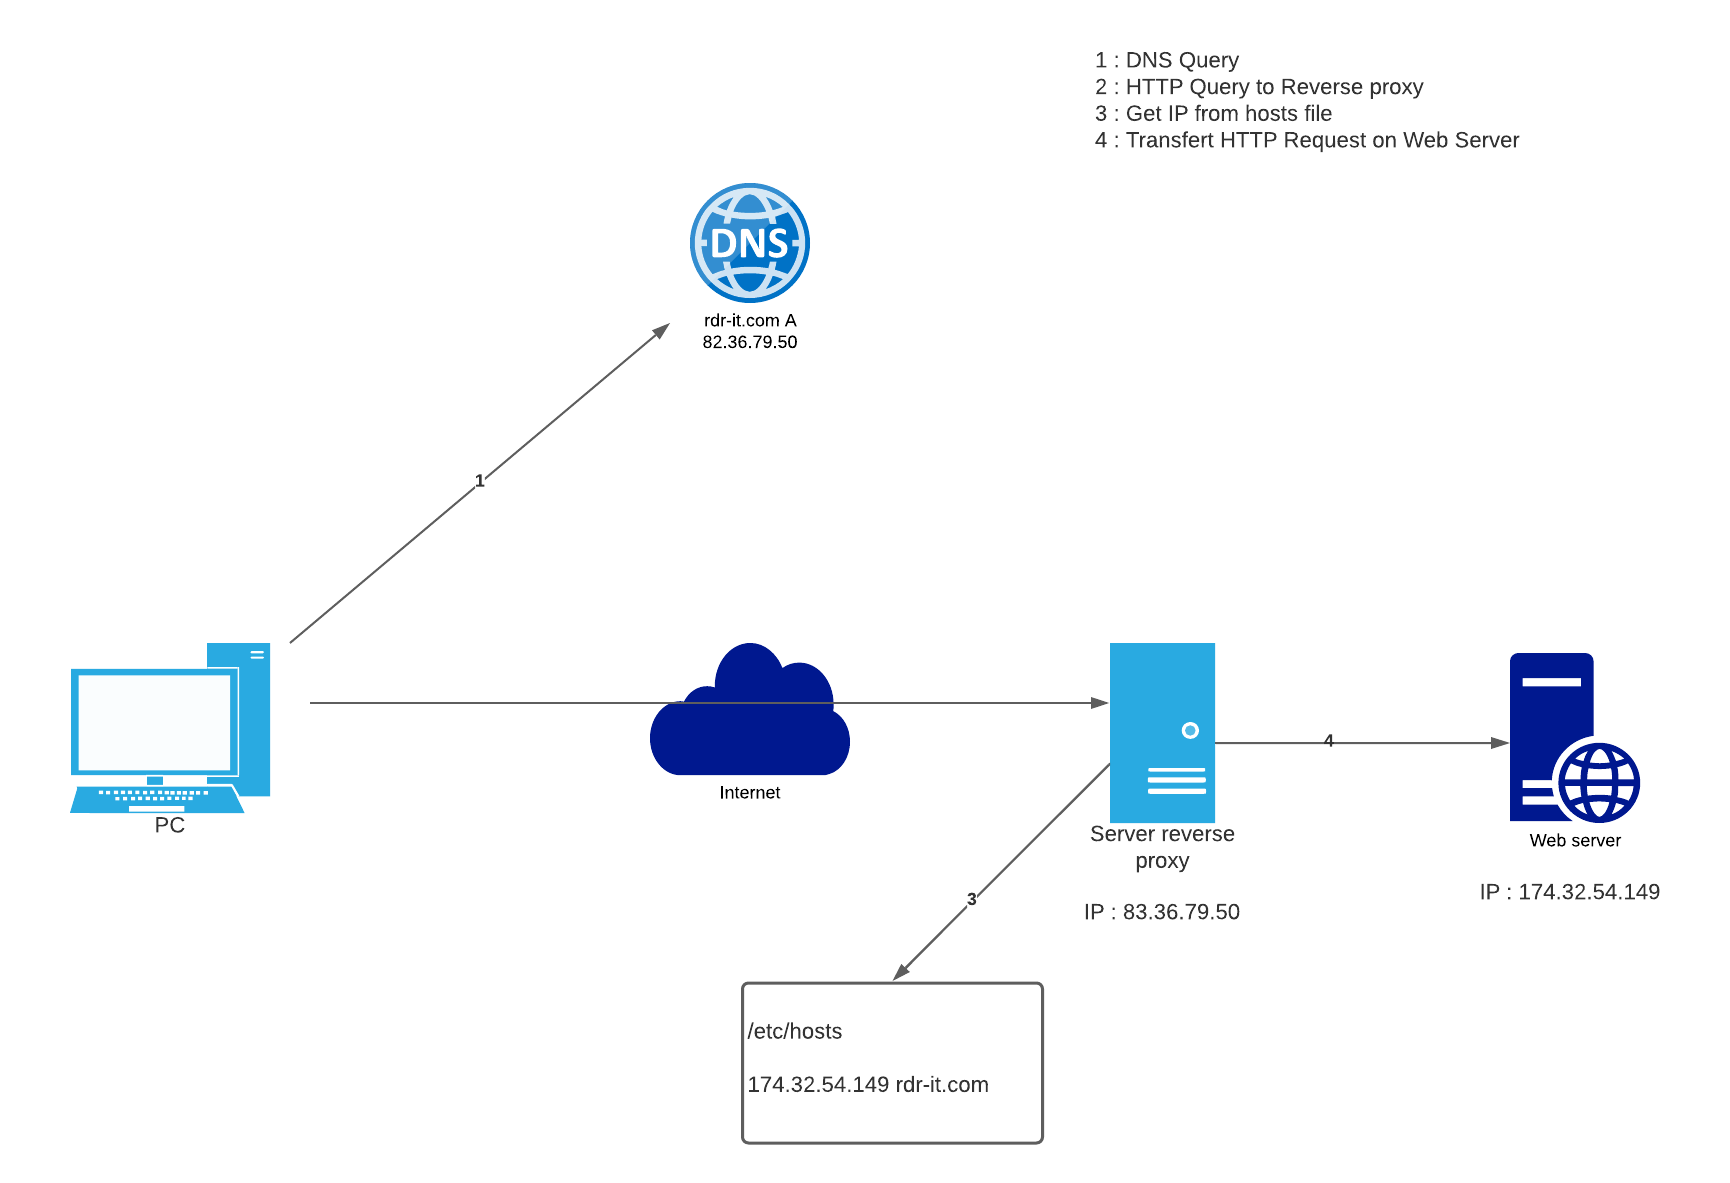
To add a recording open the file with nano (or other).
sudo nano /etc/hostsThen add the record in the format:
ip_adr dns_recordNow that this problem is dealt with, we will see how to set up our reverse proxy with Nginx.
Reverse proxy Nginx: “standard” configuration
To illustrate this first tutorial, we will send the traffic to a simple IIS server, we will use the DNS name rproxy.rdr-it.io
Create a configuration file for the virtualhost
sudo touch /etc/nginx/sites-available/rproxy-rdr-it-ioOpen the file just created:
sudo nano /etc/nginx/sites-available/rproxy-rdr-it-ioColler la configuration ci-dessous (chaque ligne est commenté) :
We must now add a symbolic link to make our configuration active:
sudo ln -s /etc/nginx/sites-available/rproxy-rdr-it-io /etc/nginx/sites-enabledTest the configuration of Nginx:
sudo nginx -tIf everything is OK, reload the configuration:
sudo systemctl reload nginxNow is the time to test, first make sure that your dns (url) record points to the reverse proxy. 😉
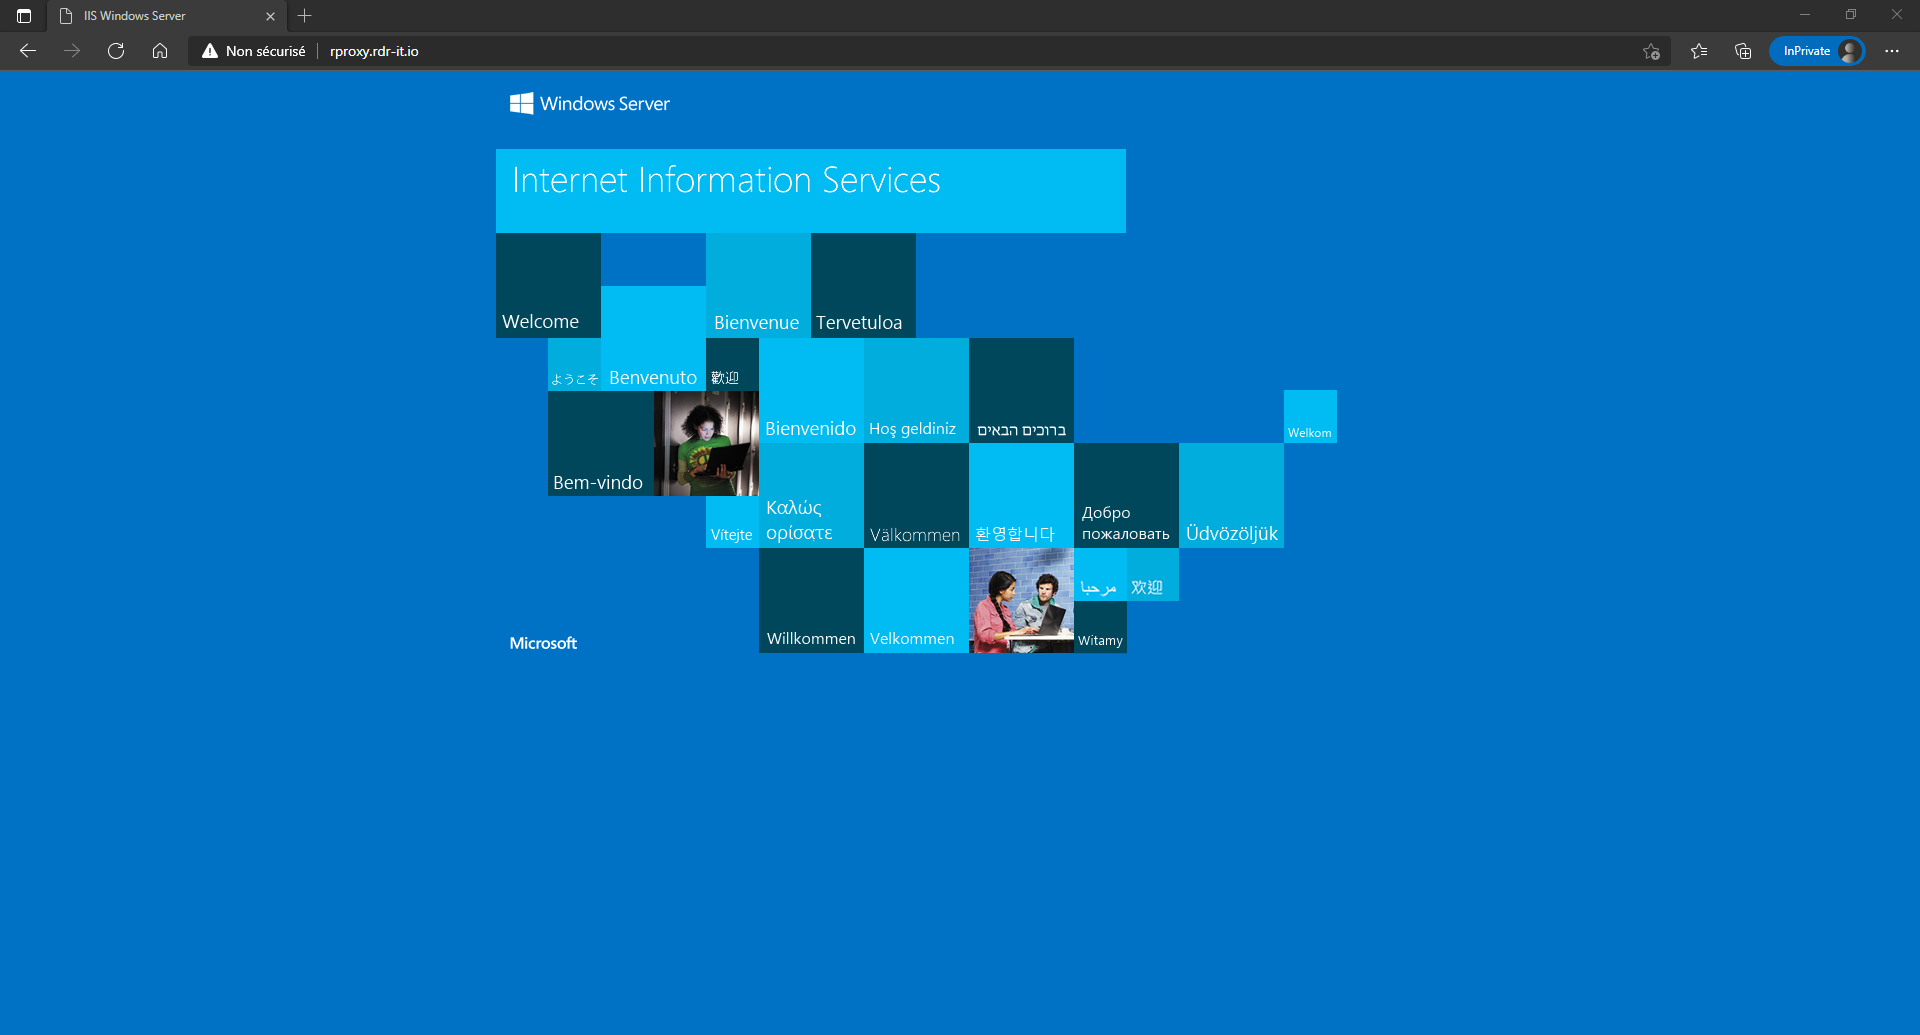
From a browser, I have the IIS page of my server which is displayed:
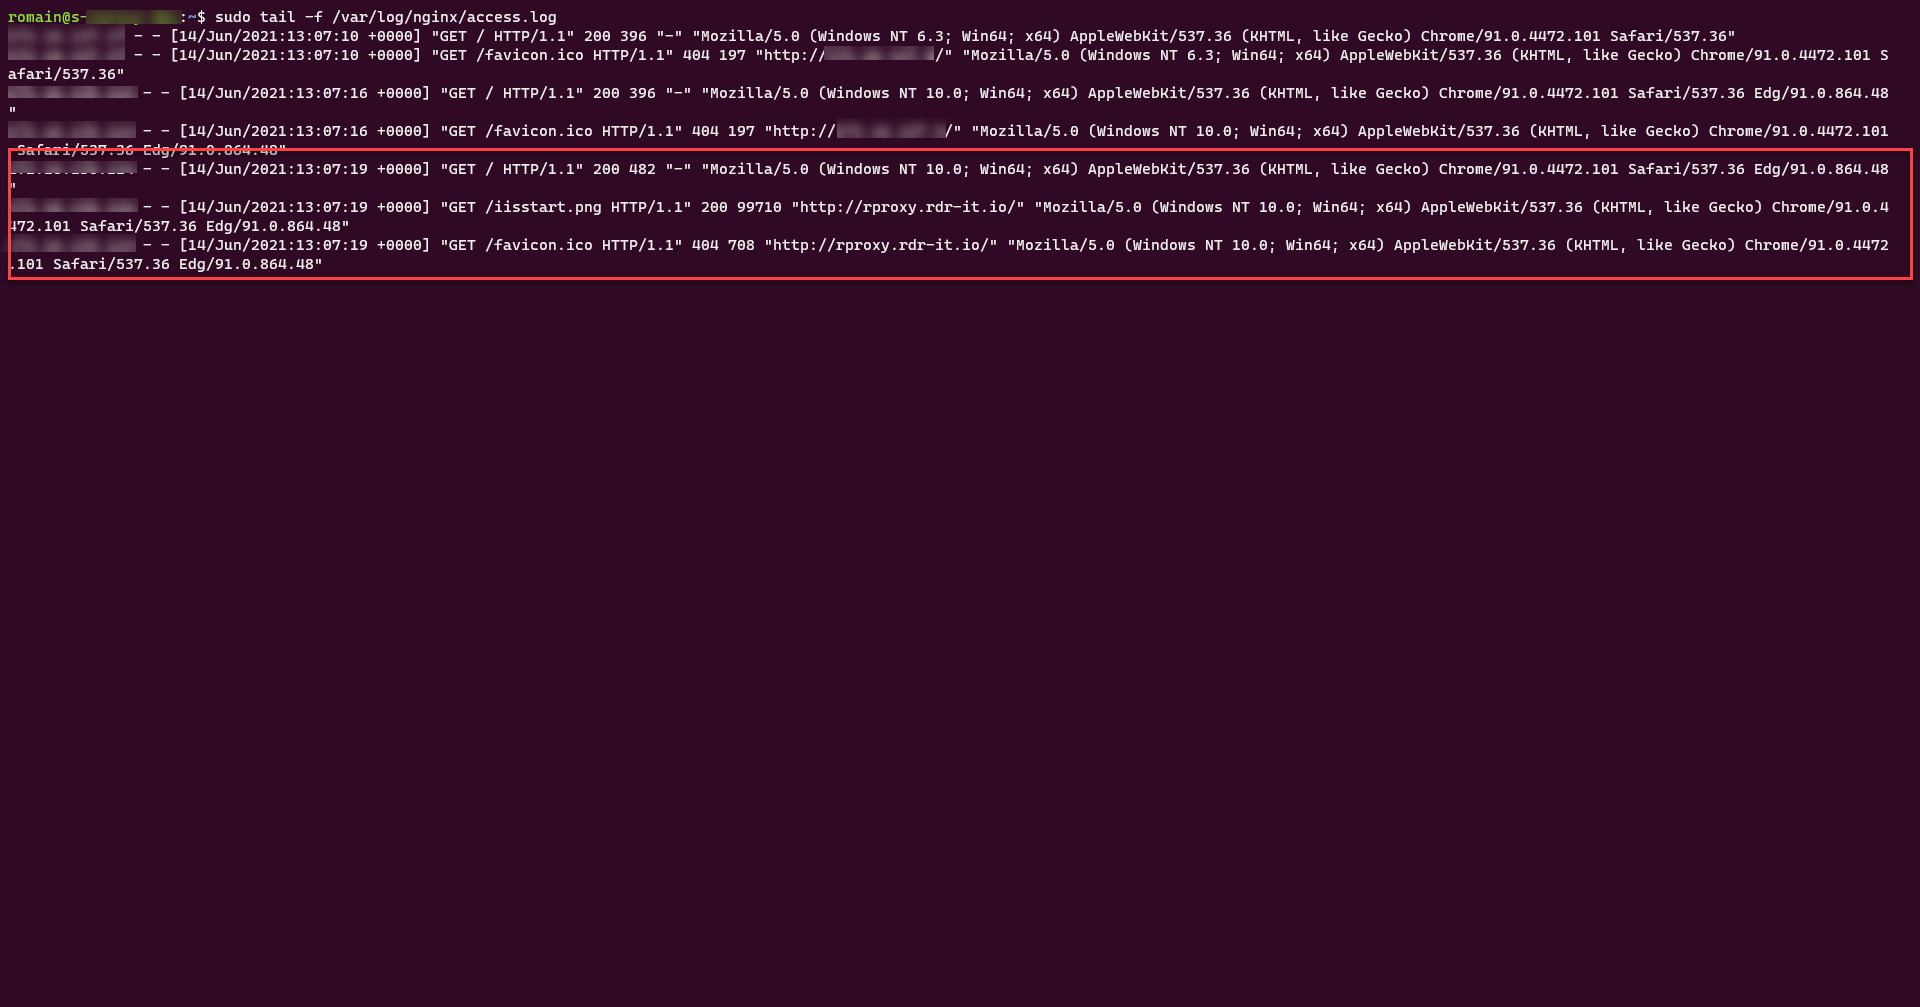
We can also see the traffic in the Nginx logs (access.log).
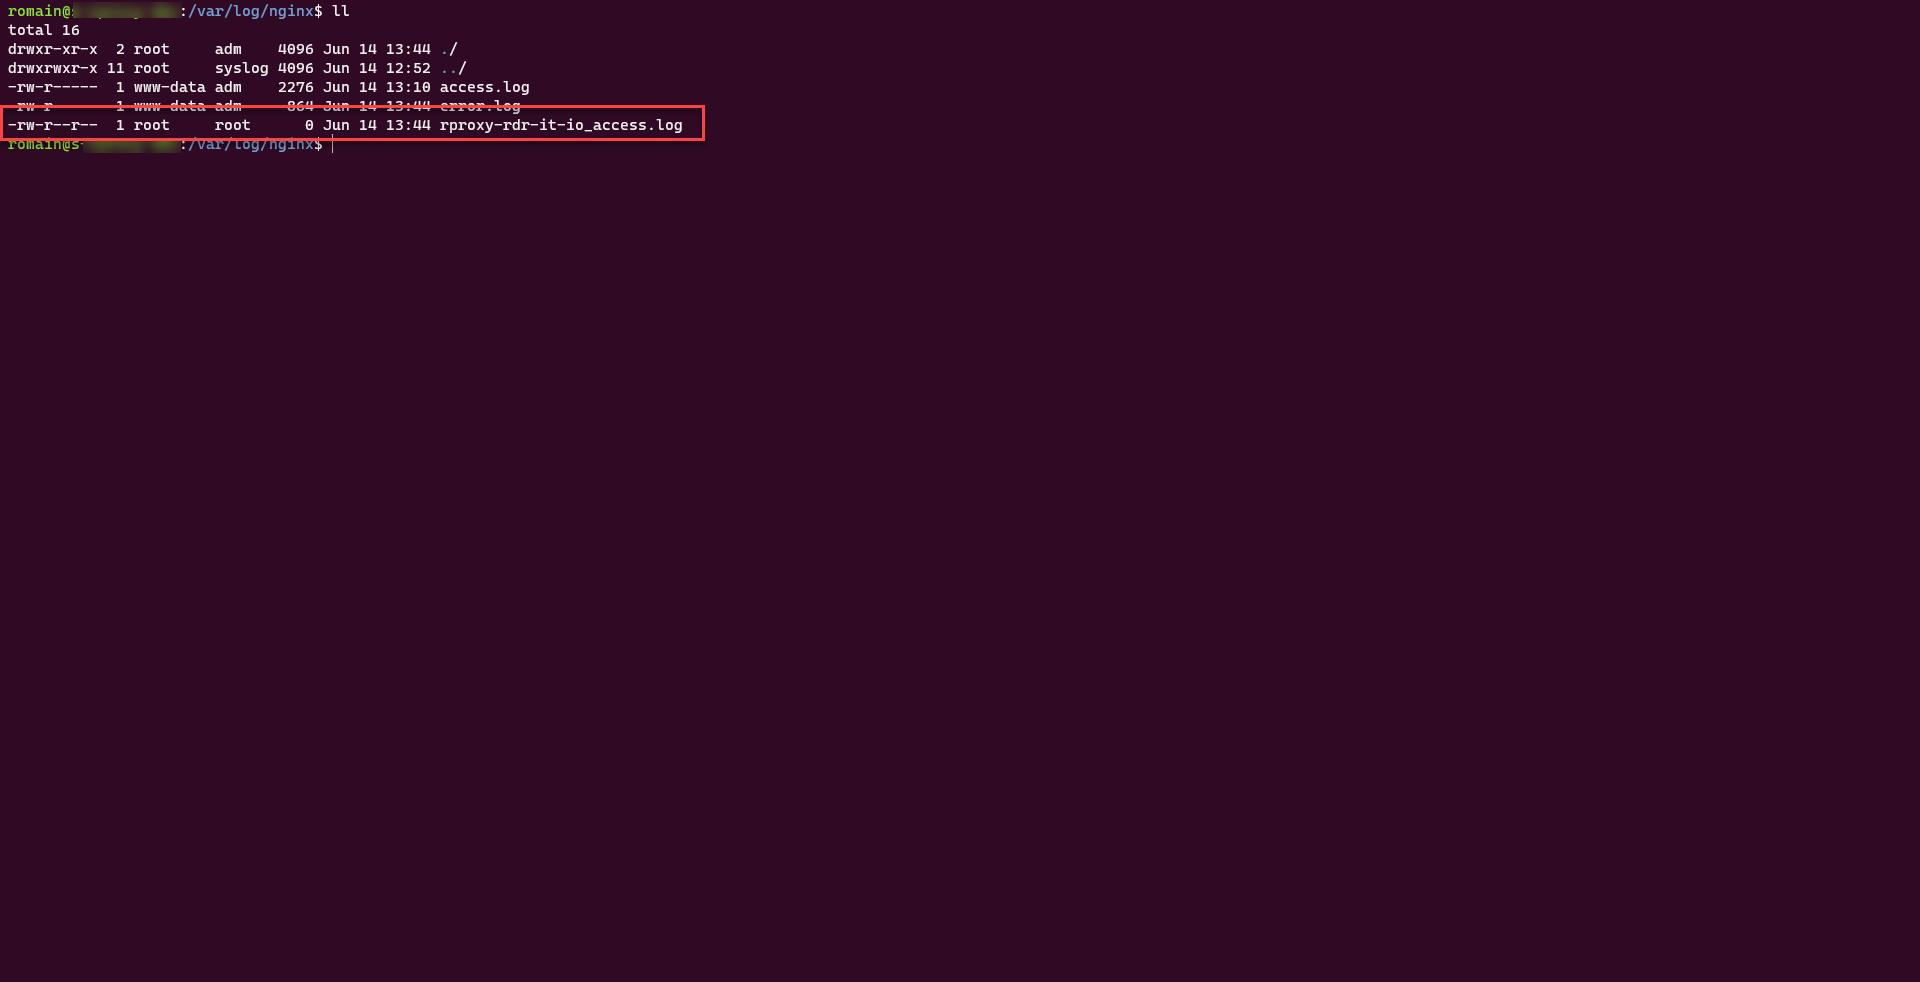
Before going to the next step, I suggest a small improvement of our virtualhost, we will separate the access logs in a separate file by adding the following code:
access_log /var/log/nginx/rproxy-rdr-it-io_access.log;Which gives in the virtualhost file:
Then reload the Nginx configuration.
The log file is present on the server, make a request to see if everything works.

You now know how to set up virtualhost in reverse proxy mode with Nginx.
Reverse proxy Nginx: rewrite / substitution configuration
We will now go to a configuration where we will rewrite the HTML code which is returned to the browser.
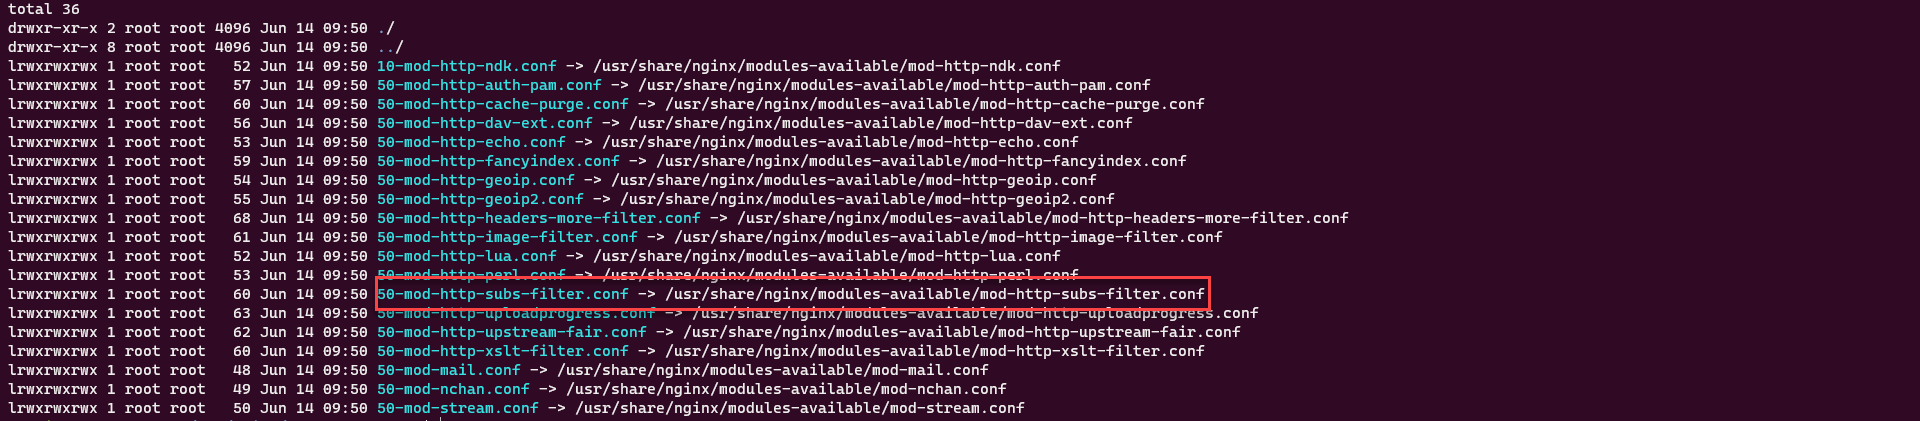
This modification is possible with the module: HTTP Subs Filter Module.
This type of configuration is used regularly when publishing applications internally and externally (on the Internet) and the application is configured with an internal URL and therefore inaccessible from the Internet. This module is also used to change the publication port of an application, for example certain application (Tomcat) uses port 8080, rewriting allows the service to be published on a standard port 80/443.
To check if the module is present, view the contents of the / etc / nginx / modules-enabled / folder and verify that the 50-mod-http-subs-filter.conf symbolic link is present.
I will not go over the creation of the virtualhost, it was discussed before.
In this part, I will show you two examples:
- A simple on HTML code
- The second on WordPress
Example 1
For this first example, we will test with a simple rewrite (substitution) in an HTML file (index.html).
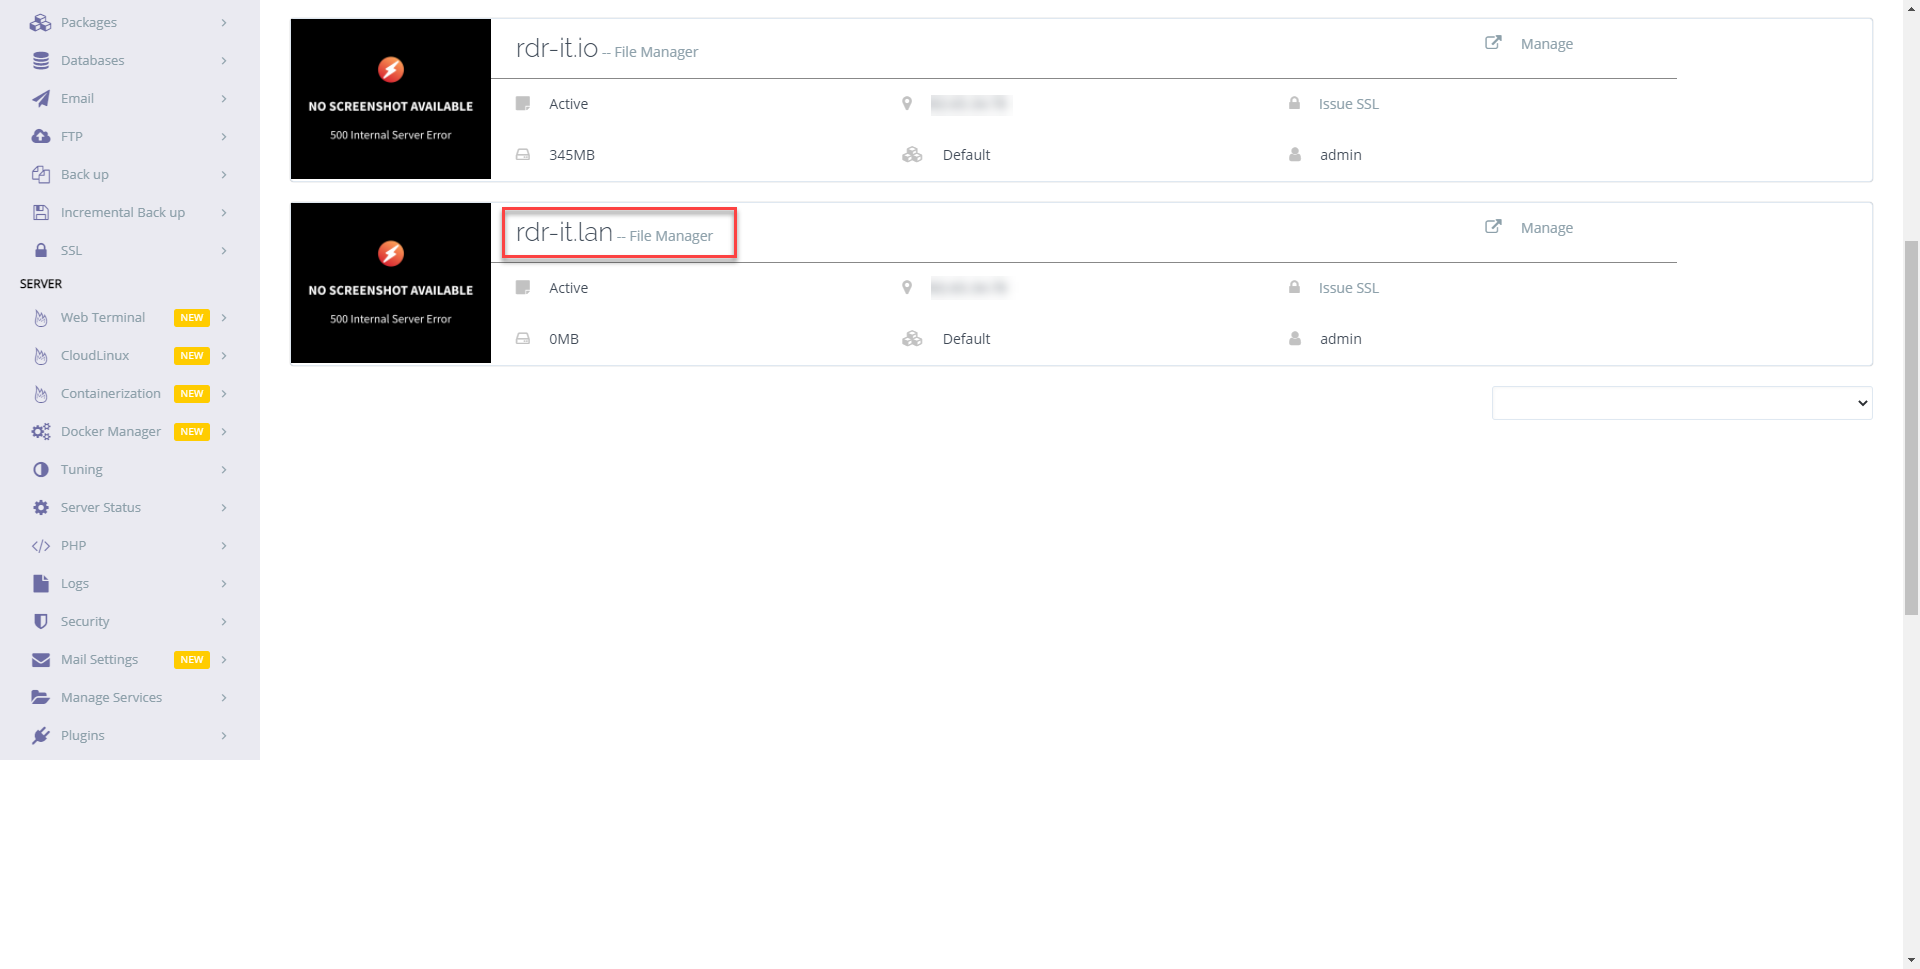
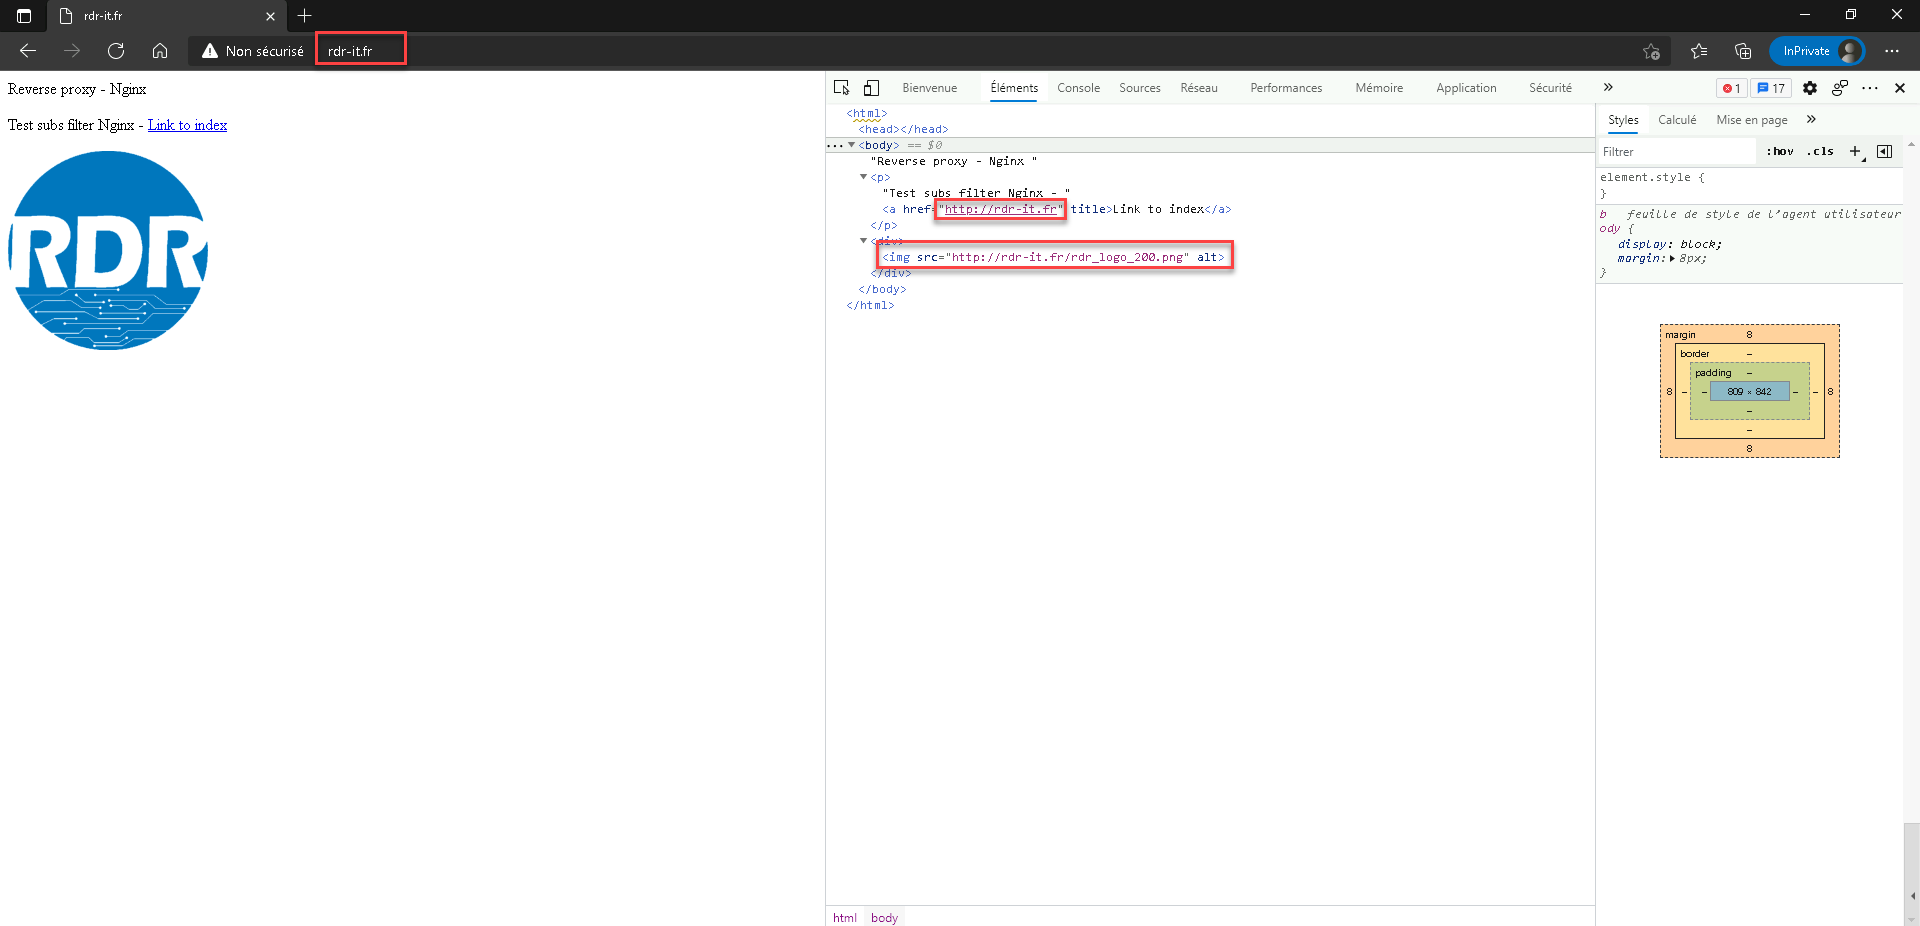
As we can see on the screenshot below, we are going to work on the rdr-it.lan domain which is only available from a private network and we now want to publish it on the Internet in rdr-it.fr.
Here is the index.html file:
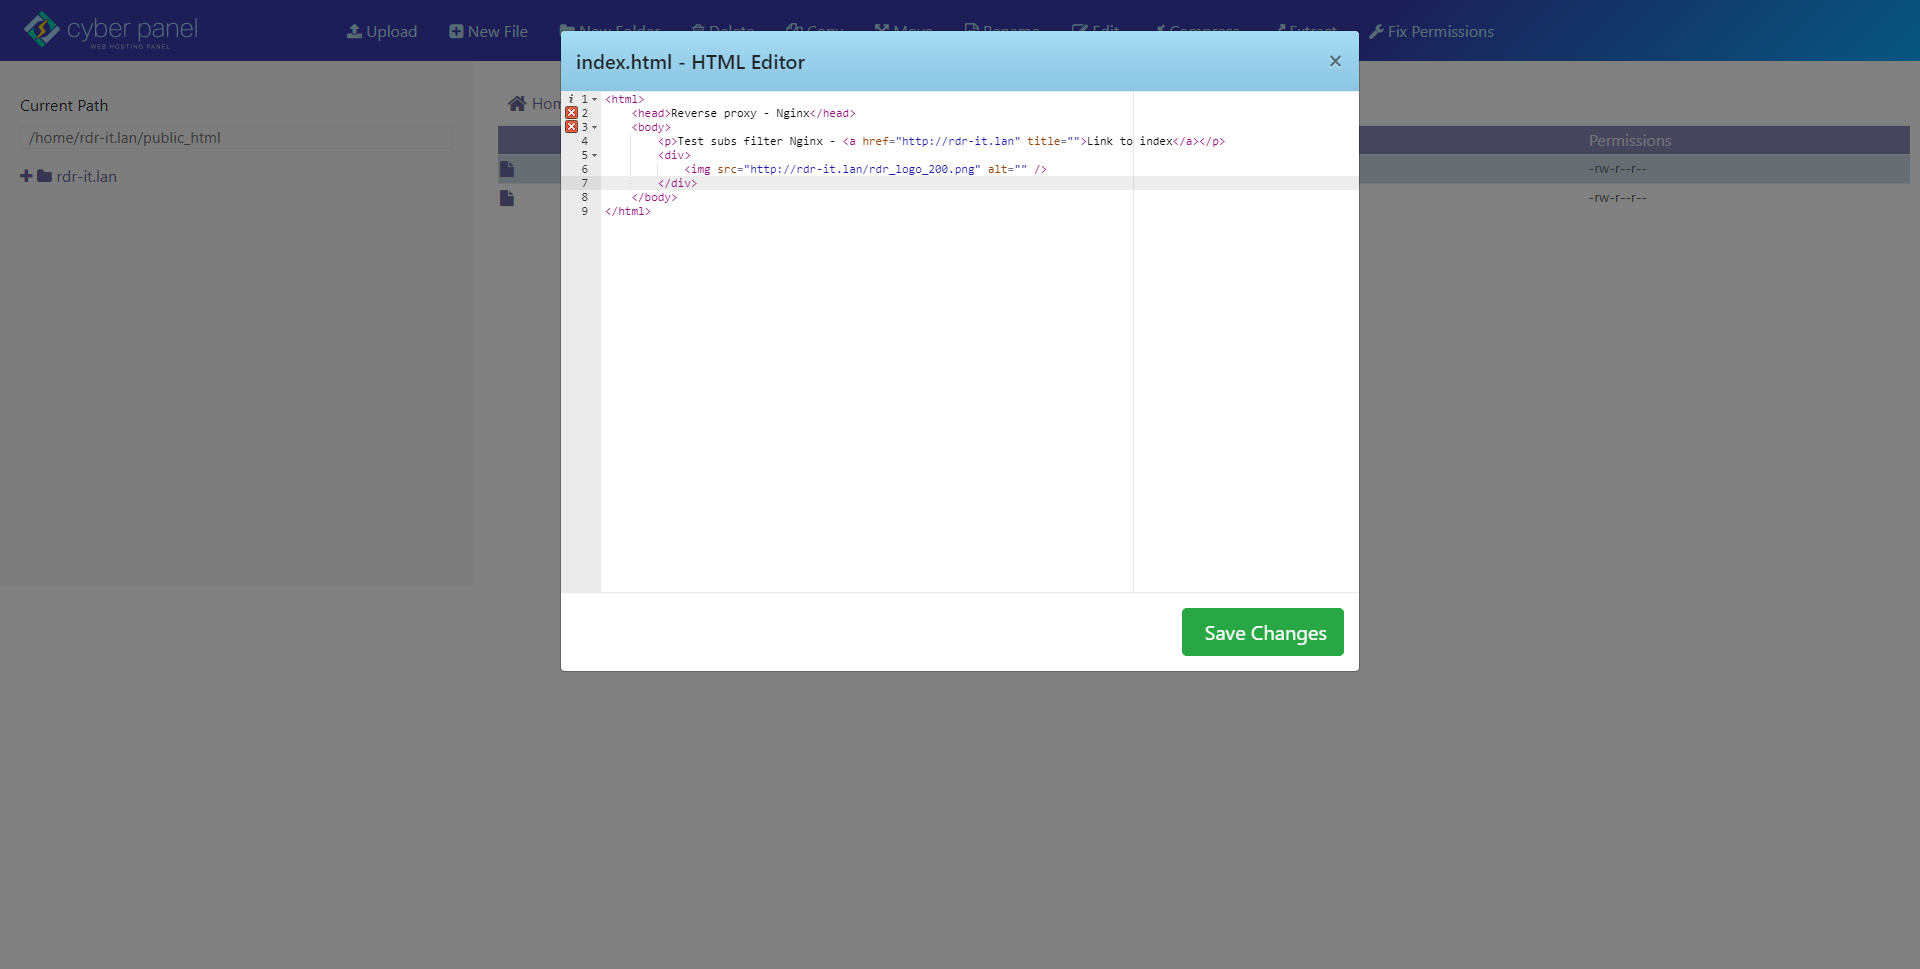
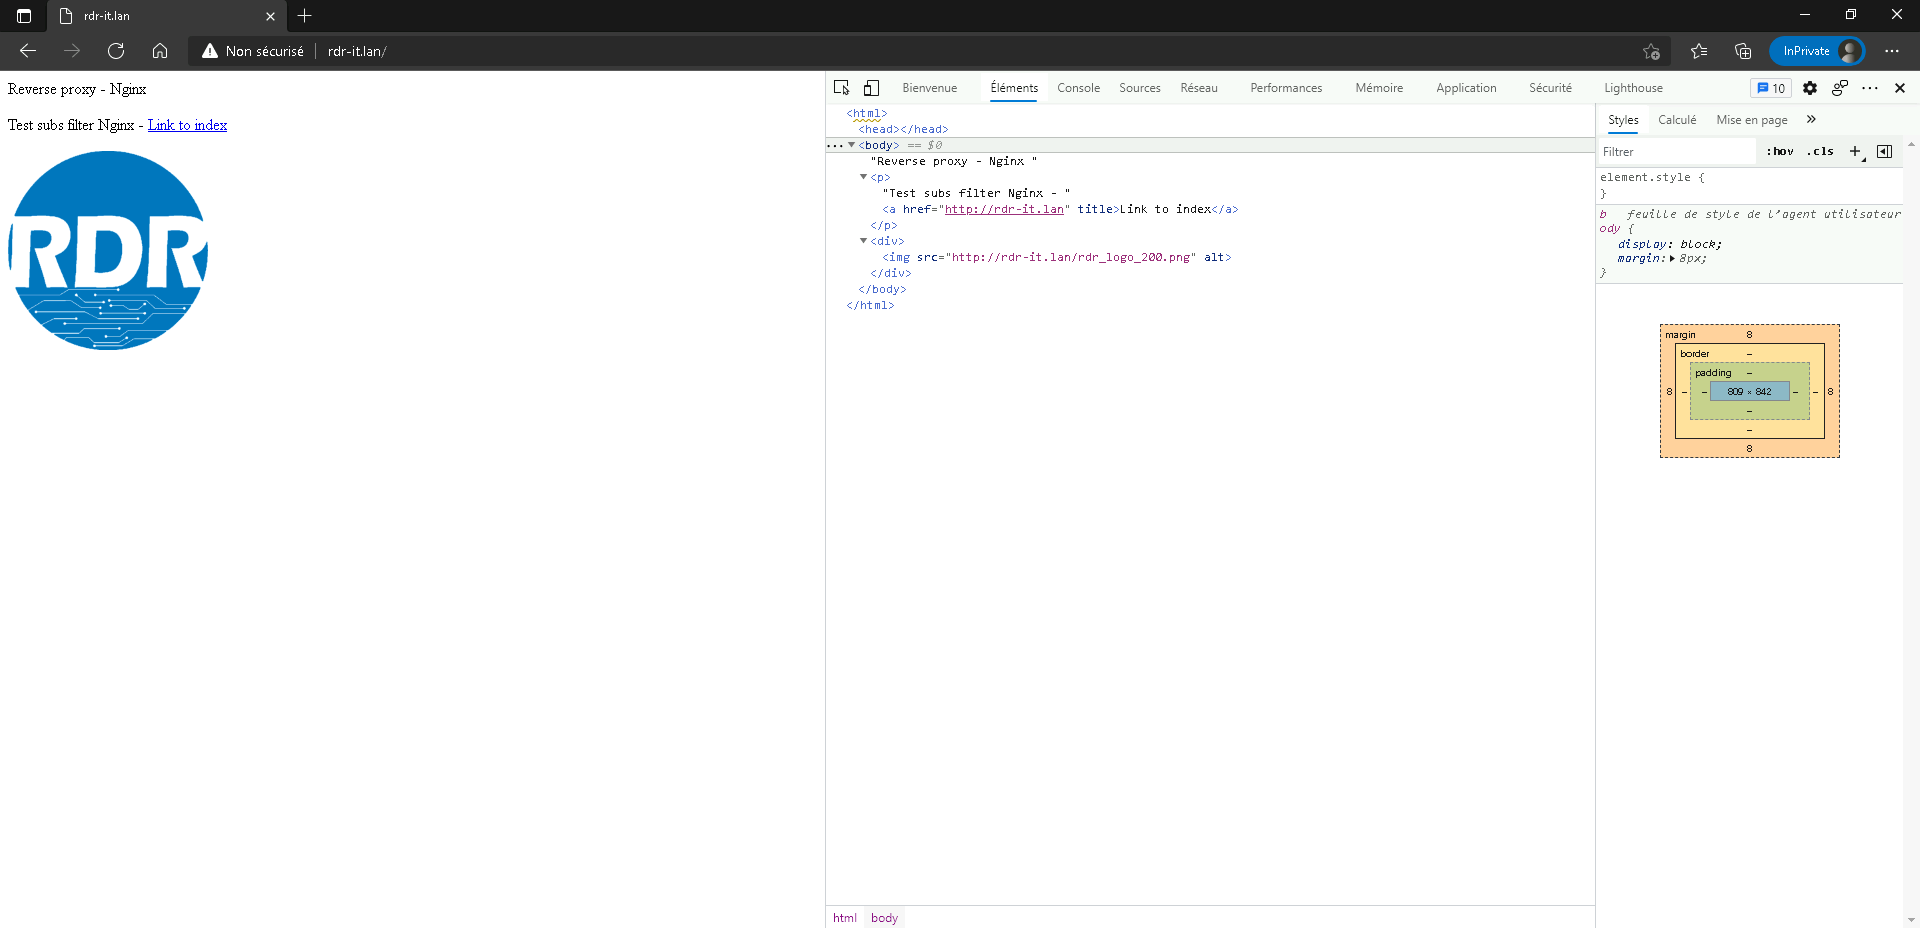
We can see that the rdr-it.lan url is hard written twice.
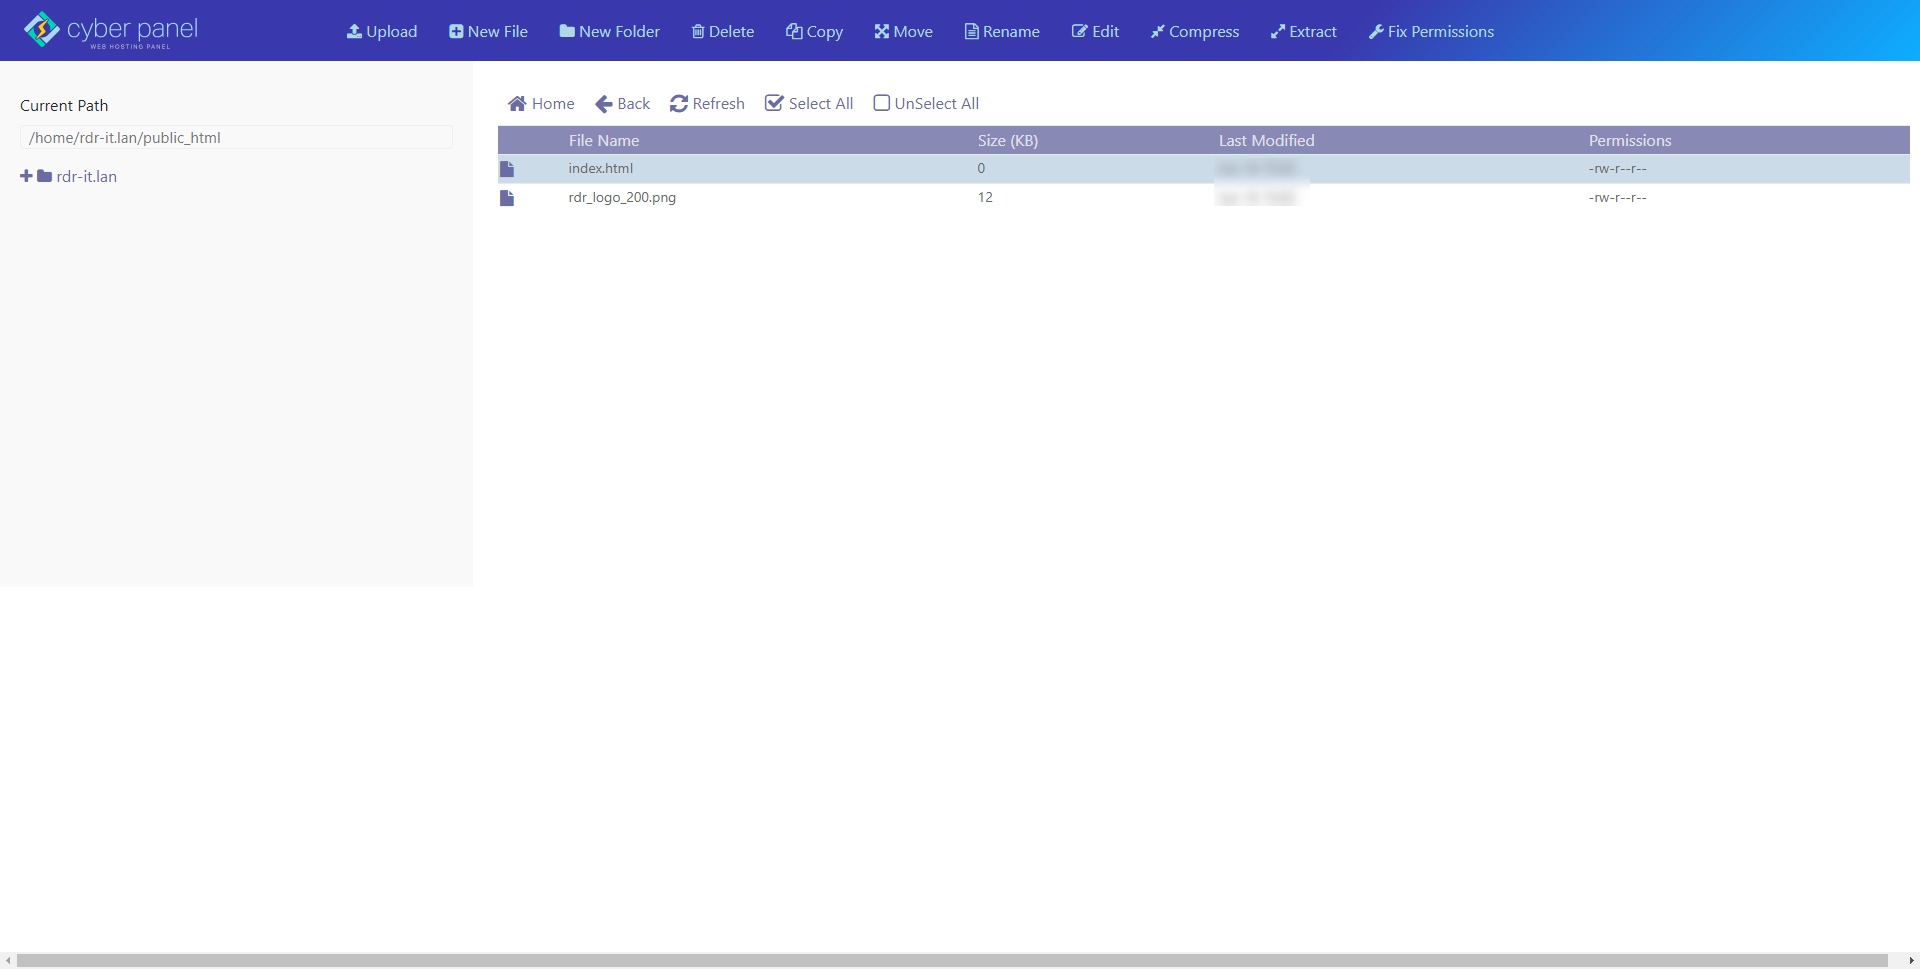
Below, the files (index.html and image):
Here is the result from an internal access.
I will now show you the configuration that will allow you to modify rdr-it.lan in rdr-it.fr in order to be able to publish the site on the Internet.
Here is the virtualhost configuration file:
Once the configuration has been added, create the symbolic link, check the configuration and reload the configuration of Nginx.
From a browser, go to the url accessible from the Internet, normally everything should be displayed correctly.
We can see below that the code has been rewritten with the correct url.
Example 2
In this second example for rewriting HTML content, I will do it with a WordPress site, as we will see later, the configuration of the virtualhost is a little more complicated and we use RegEx to modify the content.
On the screenshots below, an overview of the WordPress site:


Create the virtualhost file and copy the configuration below, adapting to your configuration.
Here are some captures:
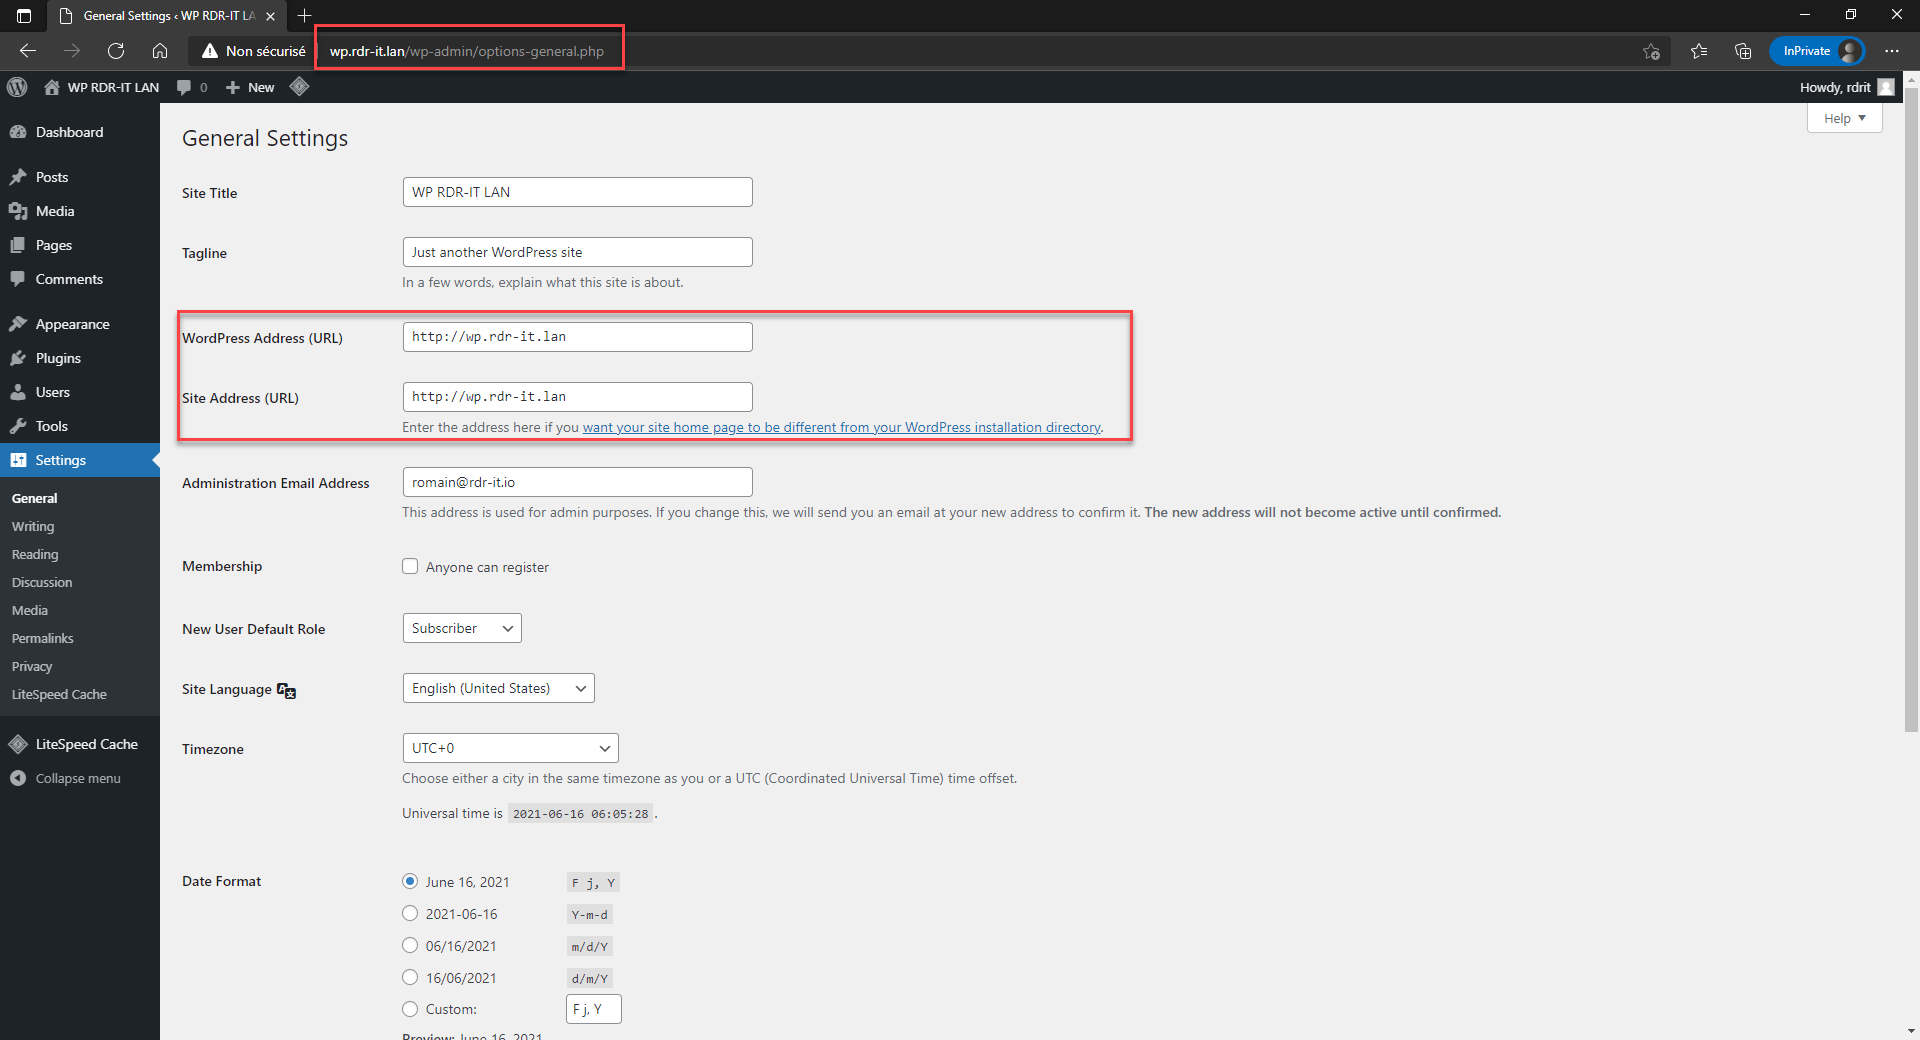
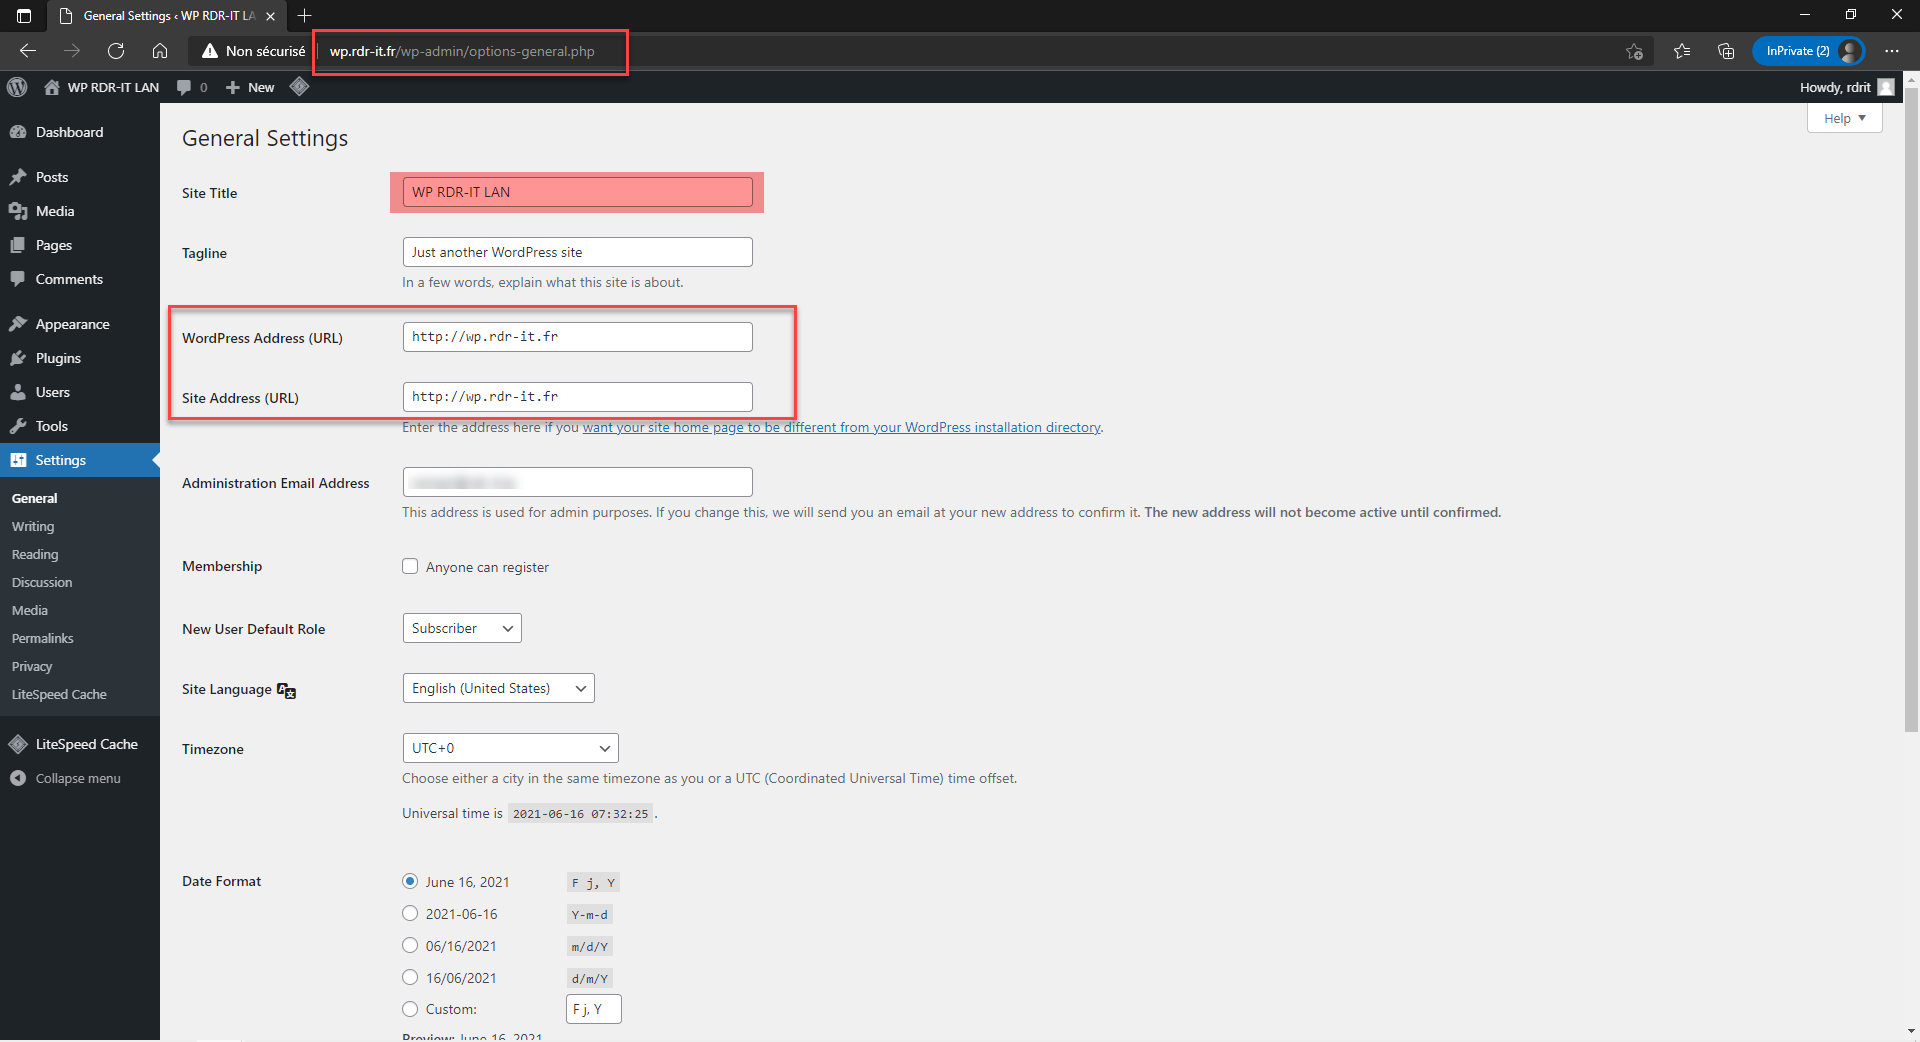
- WordPres administration where we can see that the url (config) is dynamically changed
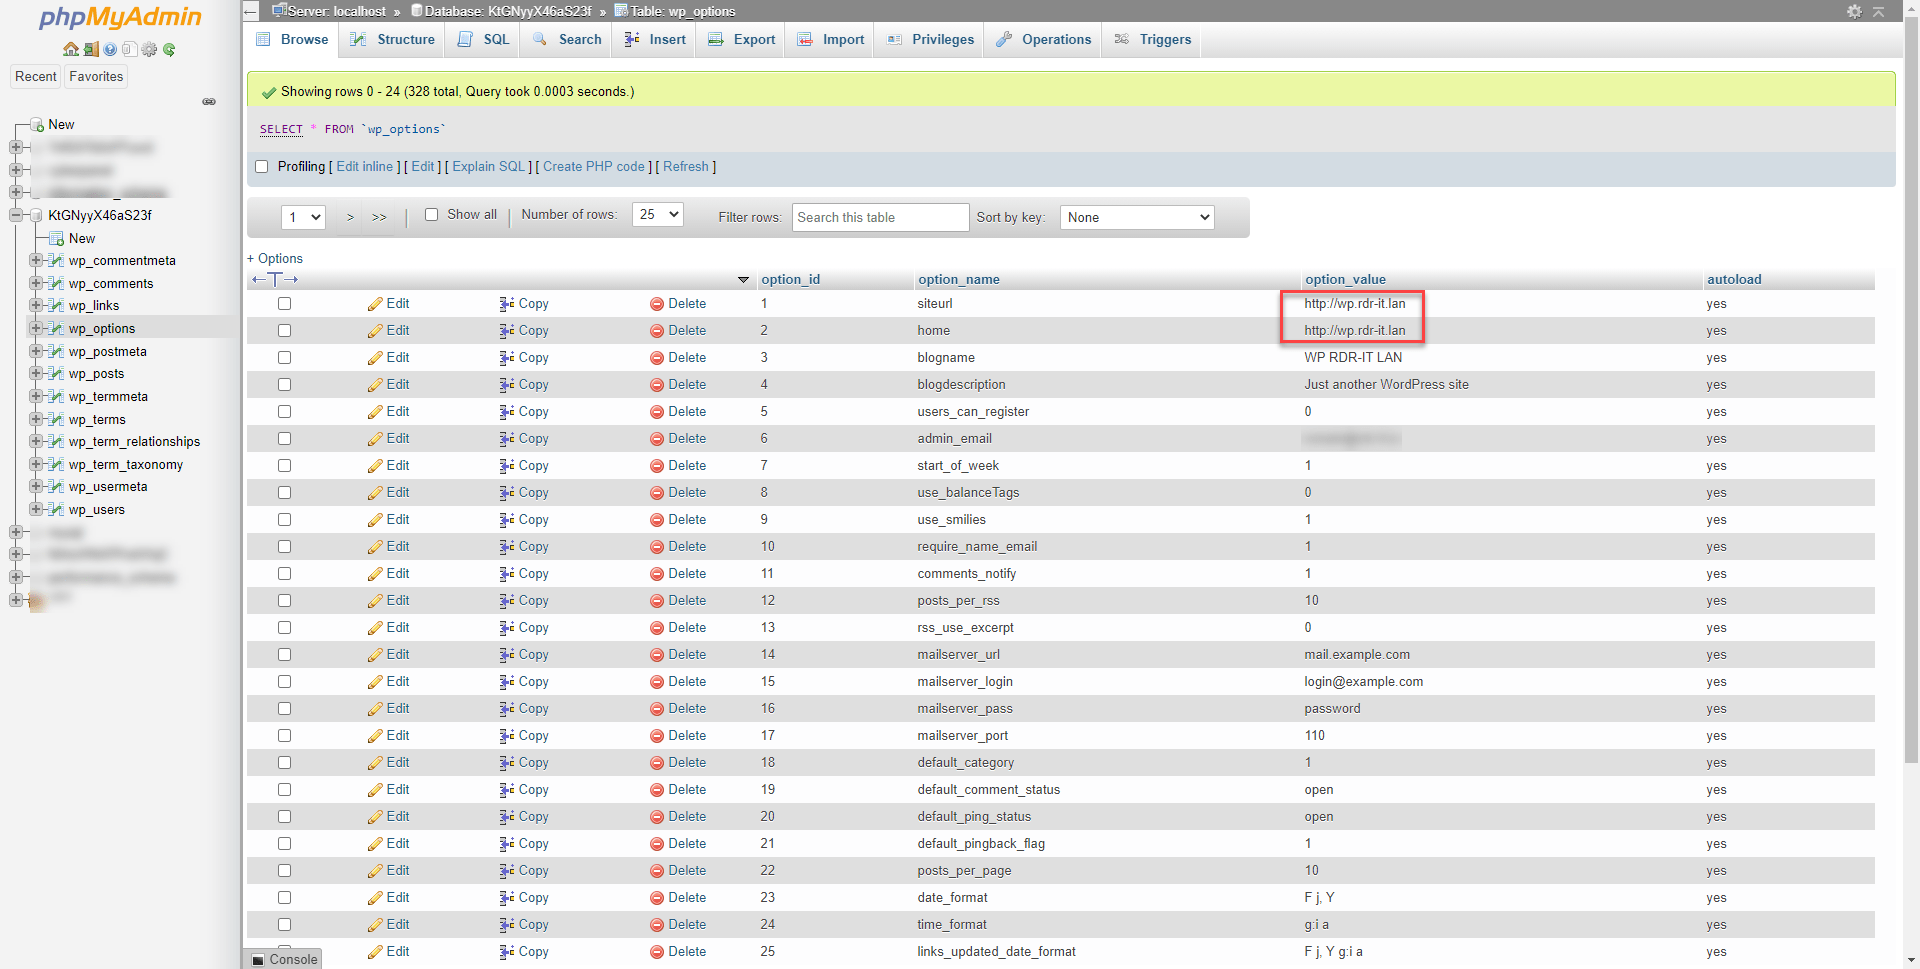
- Configuration in the database with the orginal url: wp.rdr-it.lan
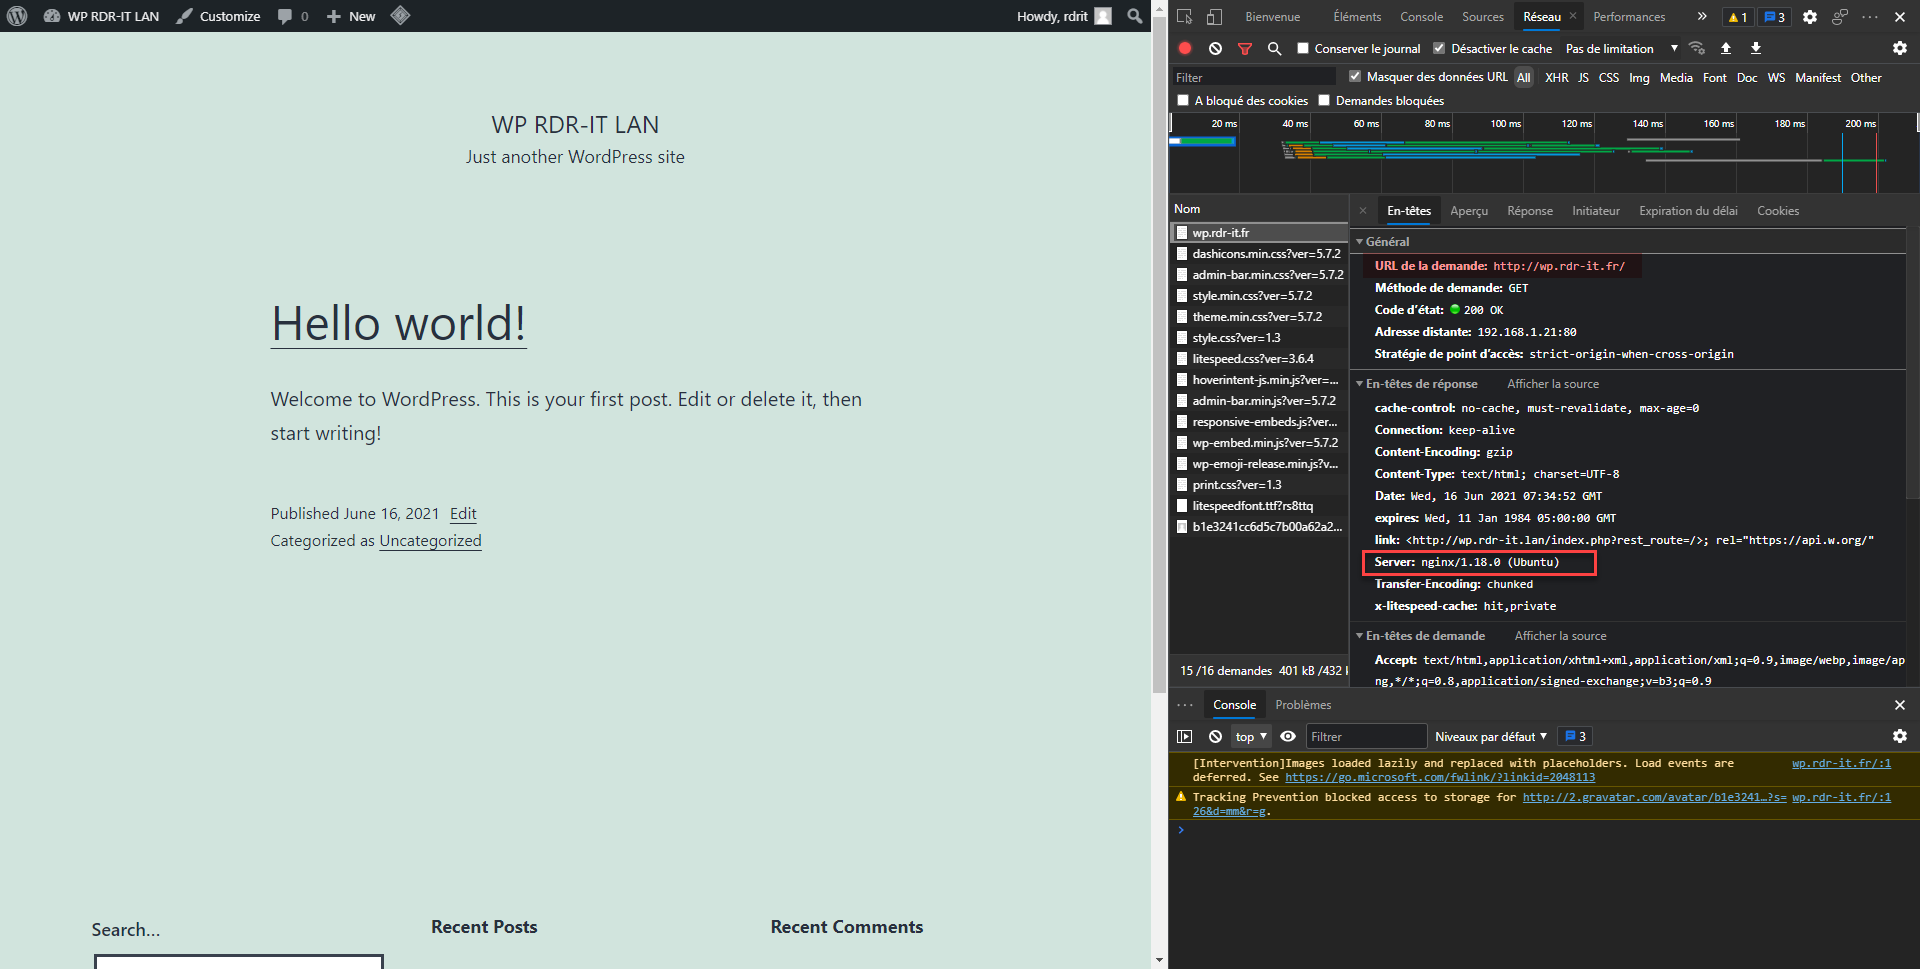
- Capture of the HTTP request where we can see that we are going through Nginx and not LiteSpeed
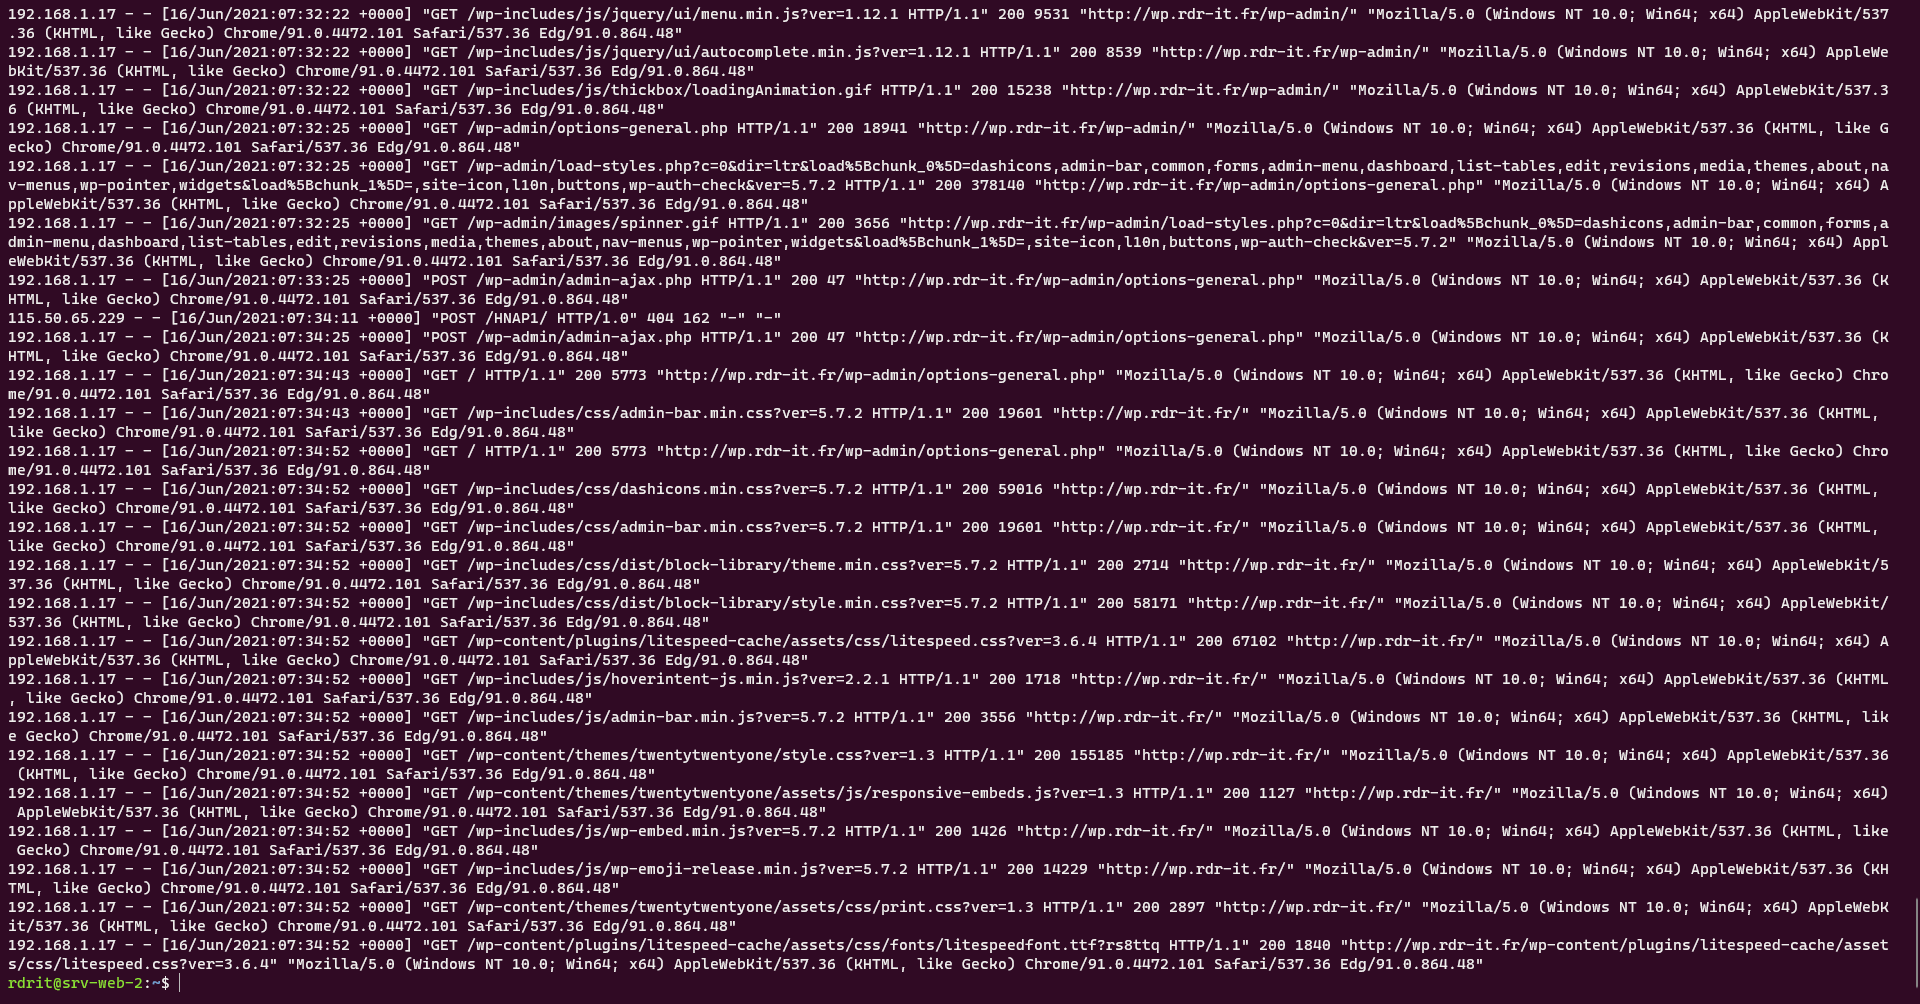
- An overview of the logs
Reverse proxy with load balancing
To finish this tutorial, I will present you an Nginx reverse proxy configuration with load balancing.
In the server declaration in the upstream block, it is possible to indicate a point (preference),
upstream ServersWebPool{
    # Declare each server
    server srv-web-01 weight=3;
    server srv-web-02;
}
In the example above, for 4 HTTP requests, 3 requests will go to srv-web-01 and one request to srv-web-02.
The last element that can be configured is the availability of the service:
upstream ServersWebPool{
    # Declare each server
    server srv-web-01 max_fails=3 fail_timeout=60s;
    server srv-web-02;
}
In the example above, after 3 failures on the srv-web-01 server, it will be considered unavailable for 60 seconds
By default the max_fails value is equal to 1 and fail_timeout to 10 sec.
Now you know how to configure Nginx as a reverse proxy and rewrite (substitute) the HTML content to match the request URL in case the HTML code is not using absolute links.