

In this tutorial, we are going to have how to add applications in MDT. This allows you to install applications when deploying Windows.
To illustrate the tutorial, we are going to add the Google Chrome application to the server.
Prerequisites
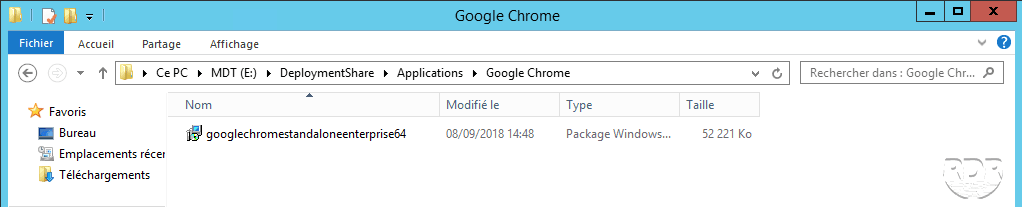
On your MDT server create a GoogleChrome folder and drop the installation file into it.
It is important to create an independent source folder per application, when copying to the deployment share, all content is copied.
Add an application in the MDT console
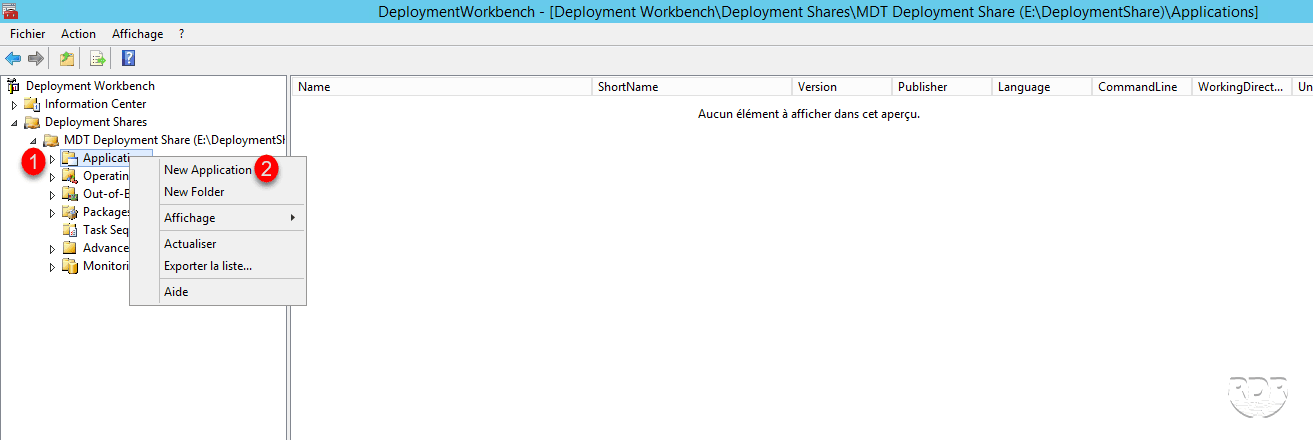
1. From the console, right-click on Applications 1 and click on New Application 2.
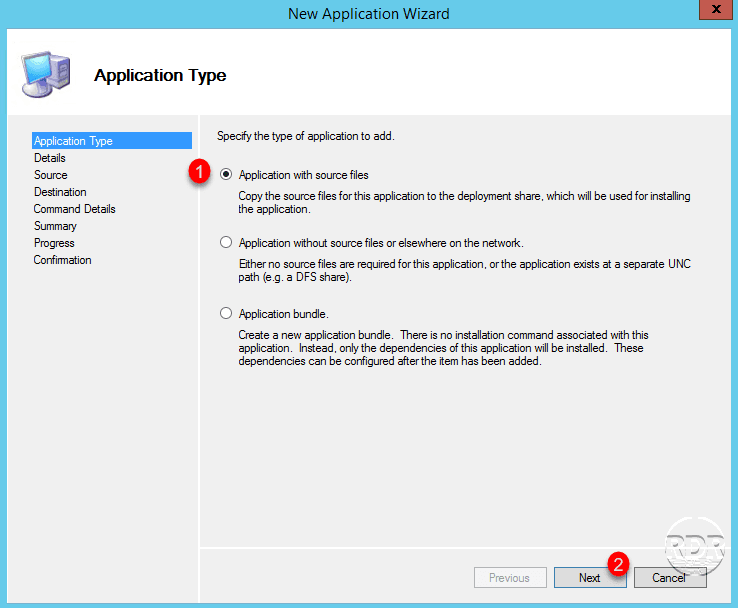
2. Select Application with source files 1 then click Next 2.
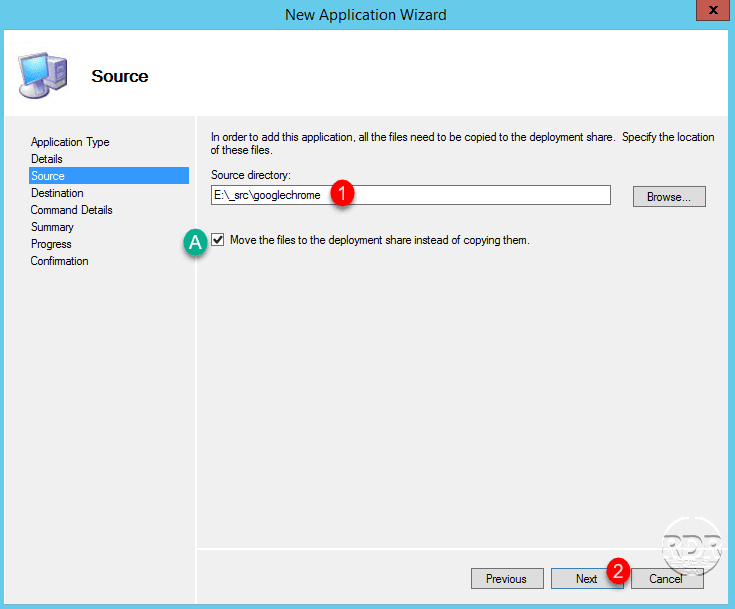
3. Indicate the location of the sources 1 then click on Next 2. A the box is checked, the files will be moved and not copied.
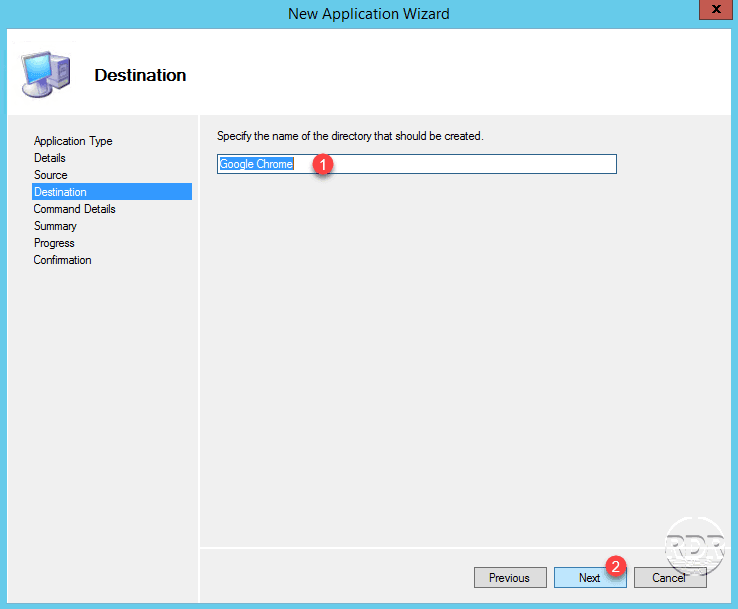
4. Enter the name of the folder 1 which will be created in the Applications folder then click on Next 2.
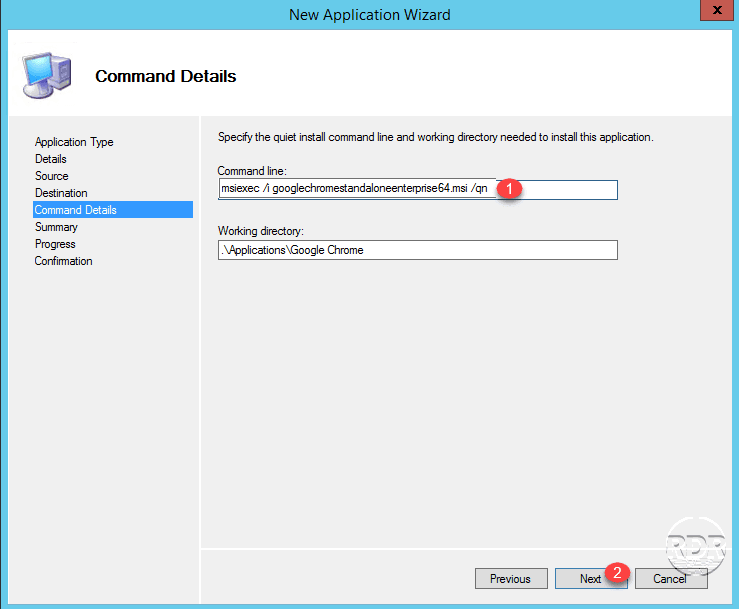
5. Enter the silent installation command 1 then click Next 2.
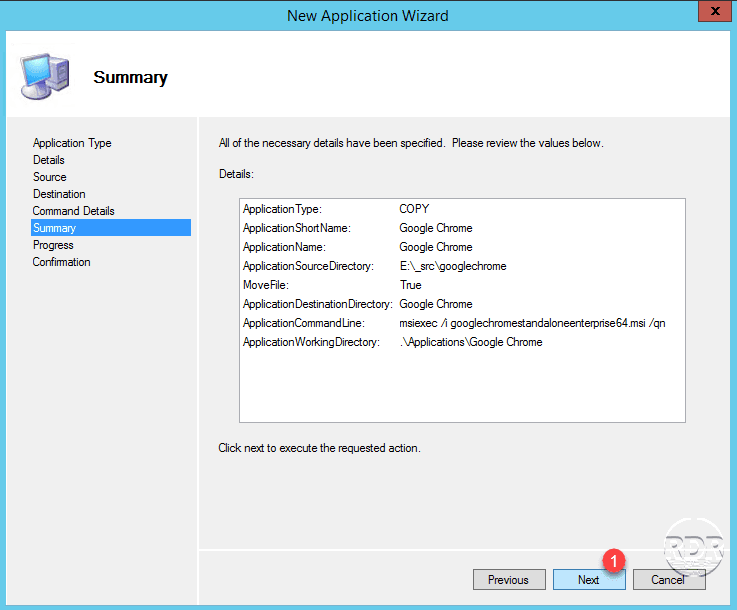
6. A summary of the actions is displayed, click on Next 1 to start adding the application.
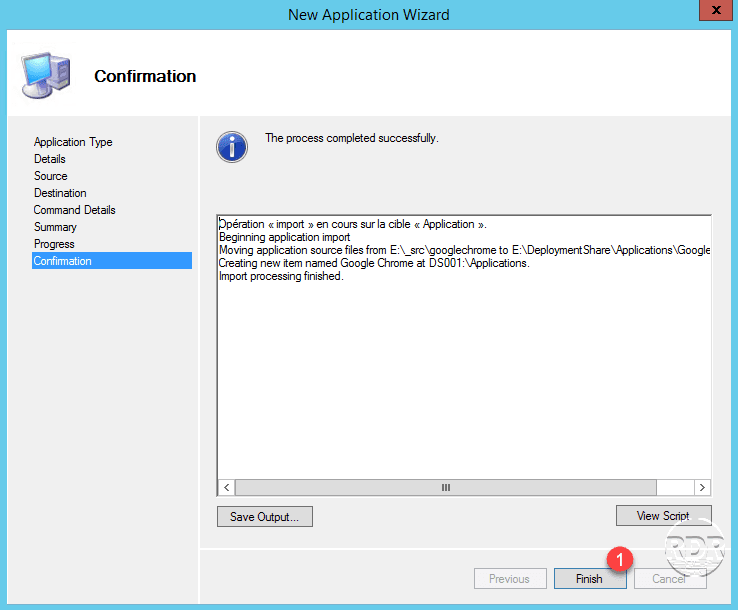
7. The application is added, click on Finish 1 to exit the wizard.
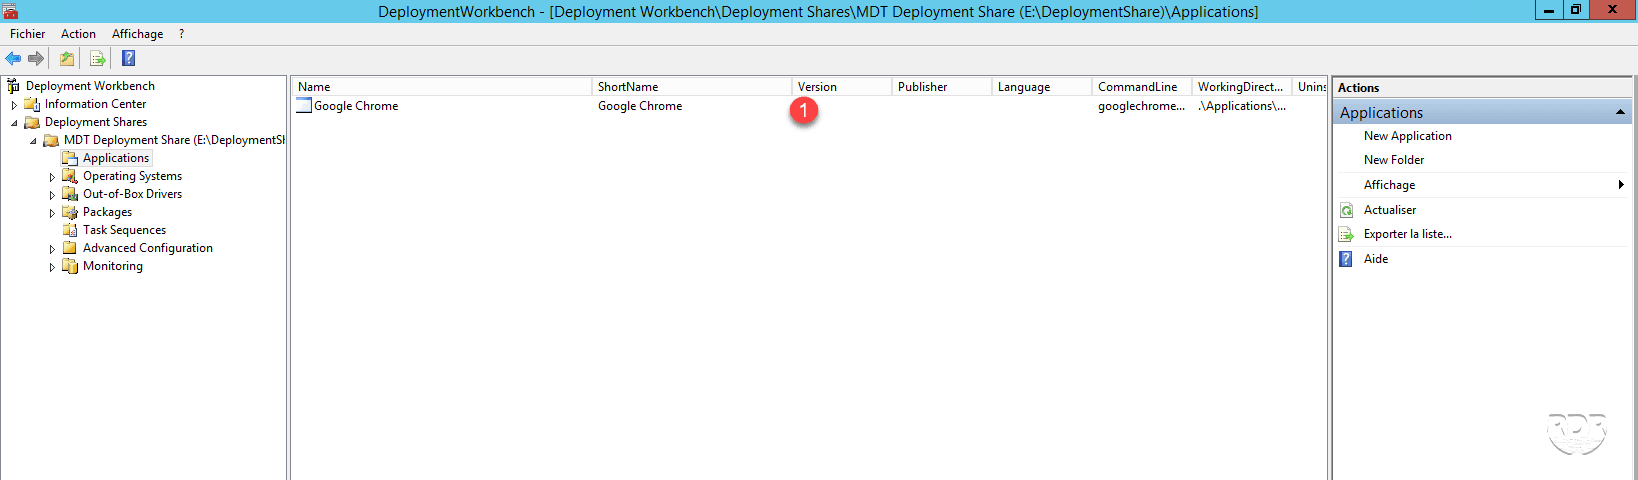
8. The application is now available 1 in the list.
If you look in the DeploymentShare / Application folder, there is a folder named configure in point 3 which contains the files and folders from the source directory.
Now that we have added an application in MDT, we are going to have how to deploy it:
- When deploying Windows
- From any post.
Install an application when deploying Windows
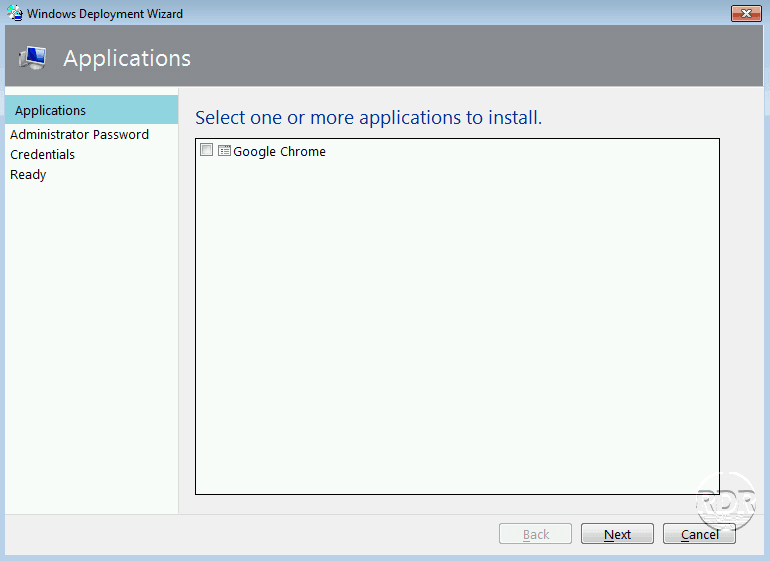
The installation during Windows deployment is the default behavior of MDT, there are several ways to configure the installation of the application:
Method 1: from the Wizard
When applications are available in MDT, an additional window is displayed during the deployment which offers them, all you have to do is select the applications you want to install.
It is possible in the CustomSettings.ini file, to check the default program to add the following line:
ApplicationsXXX ={GUID-APPLICATION}
or to force the installation of the application box checked and grayed out:
MandatoryApplicationsXXX ={GUID-APPLICATION}
XXX = numerical value from 000 to 999
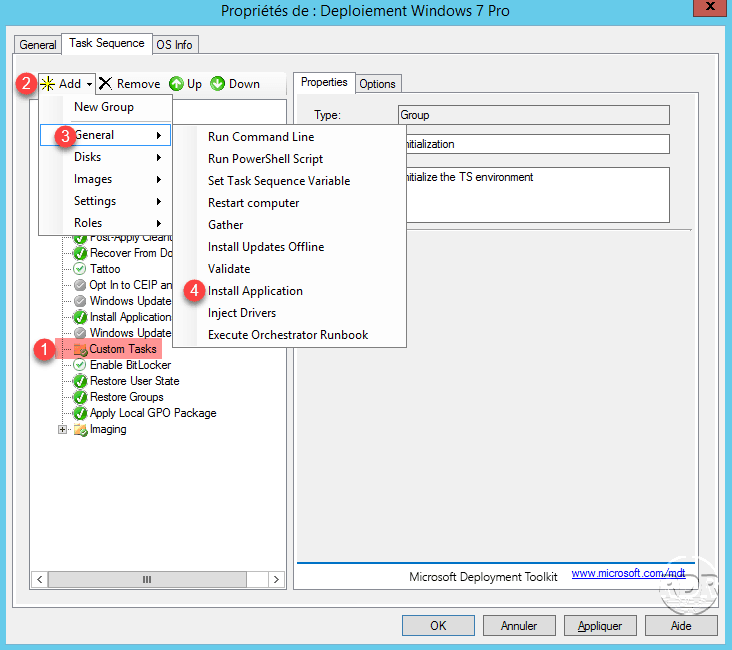
Method 2: From the task sequence
From the OS installation sequence, it is possible to force deployment.
1. Open the Sequence Properties and go to the Task Sequence tab. Select the Custom Tasks 1 folder then click on Add 2 / General 3 / Install Application 4.
2. Name task 1, select the option Install a single application 2, click on Browse … 3 select application 4 and click on Apply 5 to save the task.
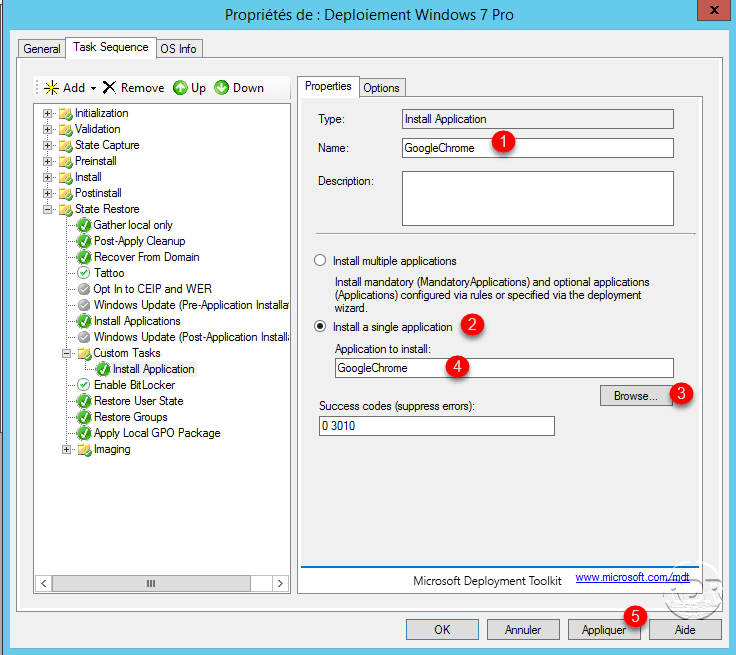
With this method the application will be installed automatically without the user having to do anything. This method is to be used when the program must be installed by default.
Install an application from a workstation
It is possible to access the Wizard MDT from any workstation on the network. You must first create a sequence and then execute it.
Créer une séquence d’installation d’application
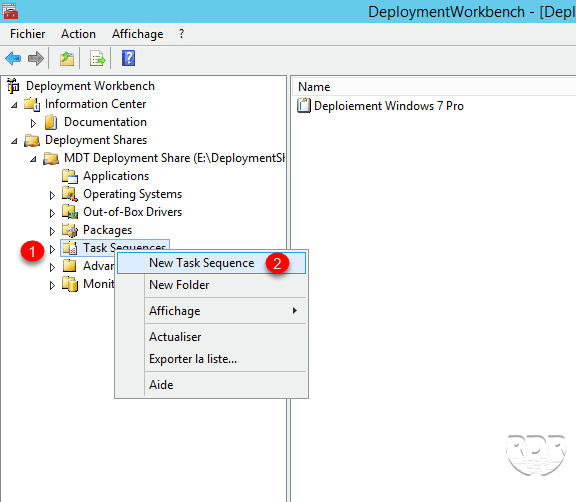
1. From the MDT console, right-click on Task Sequences 1 then click on New Task Sequence 2.
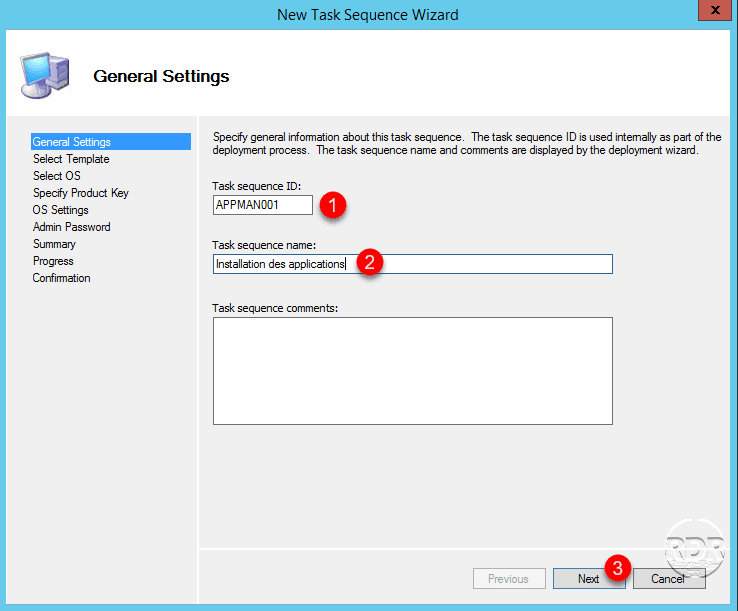
2. Enter the ID 1 and the name of the sequence 2 then click on Next 3.
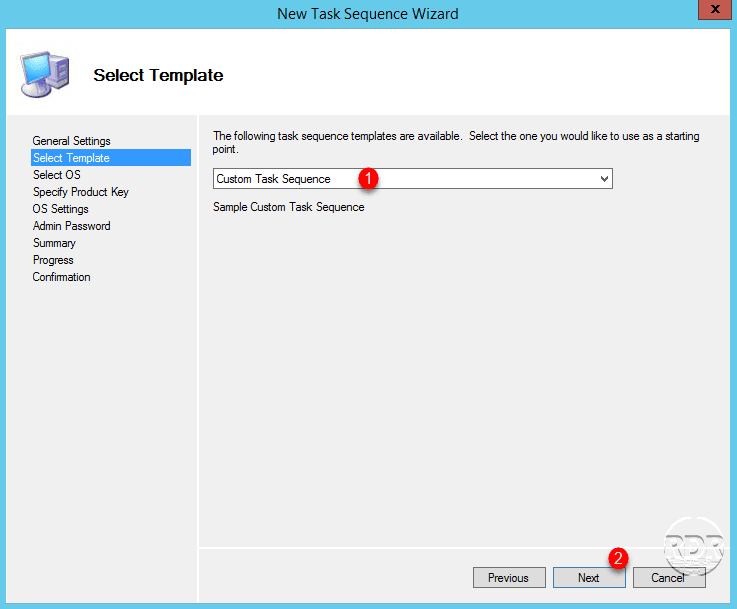
3. Choose Custom Task Sequence 1 and click Next 2.
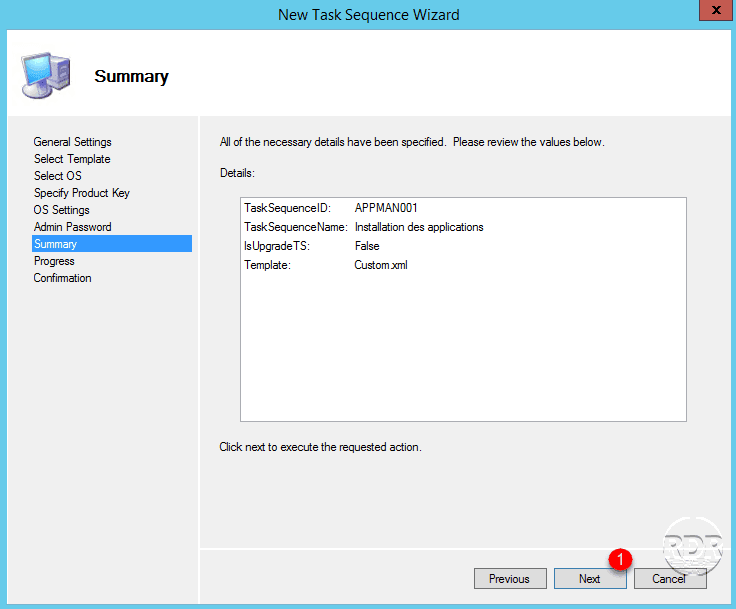
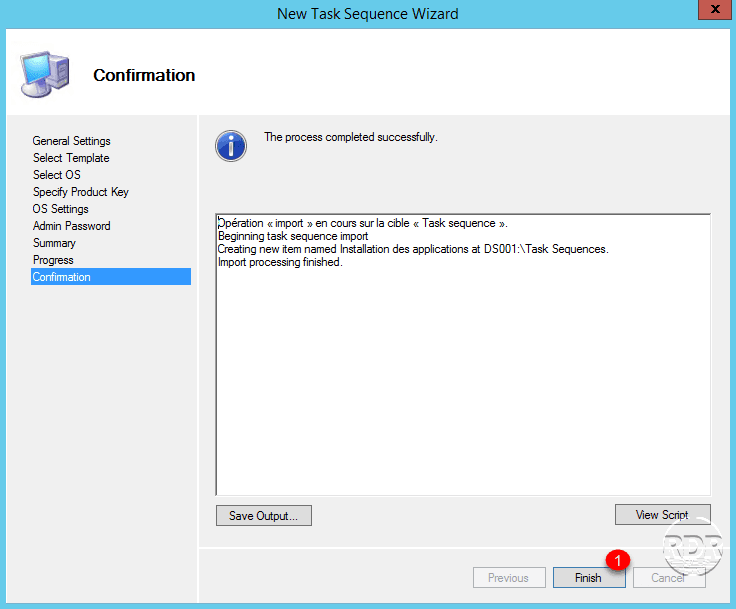
4. Confirm the creation of the sequence by clicking on Next 1.
5. Click on Finish 1 to close the wizard once the sequence has been created.
Call the sequence
1. Create a bat / cmd file with the notepad enter the following lines, adapting to your configuration:
Net use U: \\SERVEUR_MDT\DeploymentShare$ /user:DOMAINE\Administrateur Password
U:\Scripts\LiteTouch.vbs /SkipTaskSequence:YES /TaskSequenceID:ID_SEQUENCE
2. The window containing the available applications is displayed, all you have to do is choose the programs to install.