

Presentation
In this tutorial, we will have how to enable and configure remote management (WinRM – Windows Remote Management) using a Group Policy (GPO).
On Windows Server, remote access (WinRM) is enabled by default, which is not the case for client versions of Windows (10).
WinRM allows you to administer the computer using:
- Server Manager (Windows Server)
- PowerShell Remote (pssession).
- Administration by the Admin Center.
Group Policy will do the following on the computer:
- Configure WinRM.
- Start the Remote Access service.
GPO for WinRM
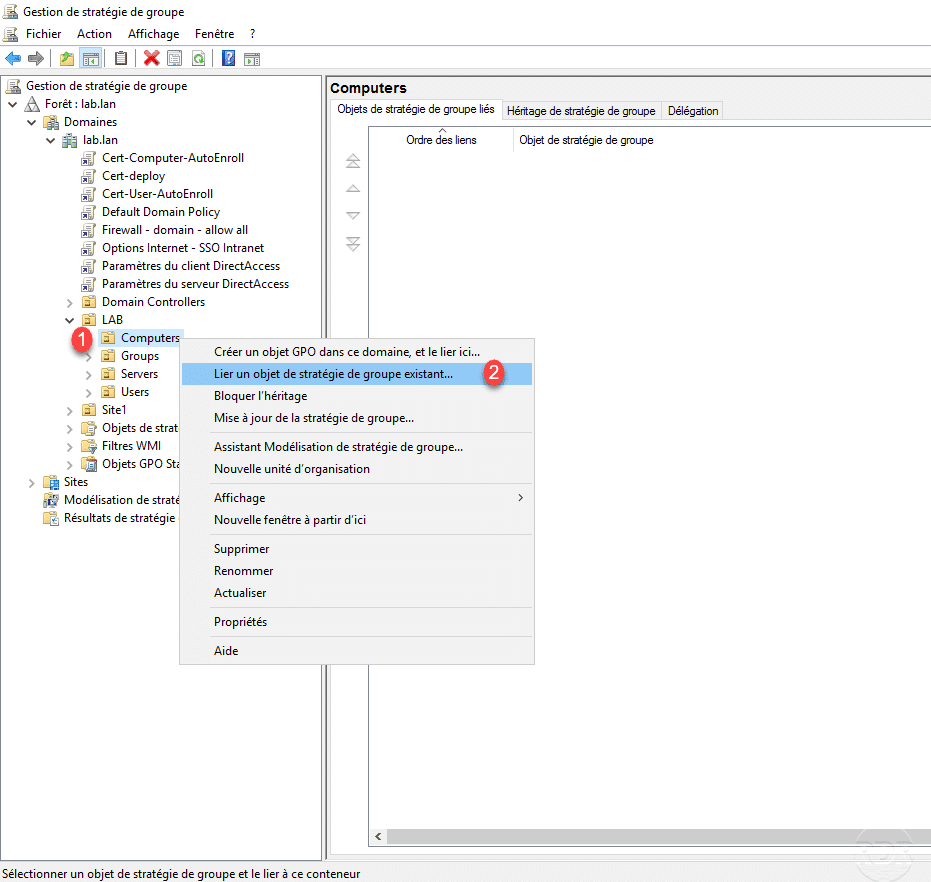
From the Group Policy Management Console, right-click 1 at the location where the policy is to be applied and click Create GPO in this area, and link it here … 2.
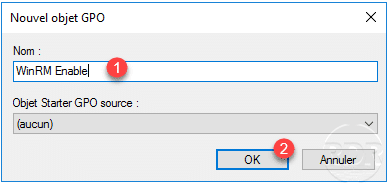
Name 1 Group Policy and click OK 2 .
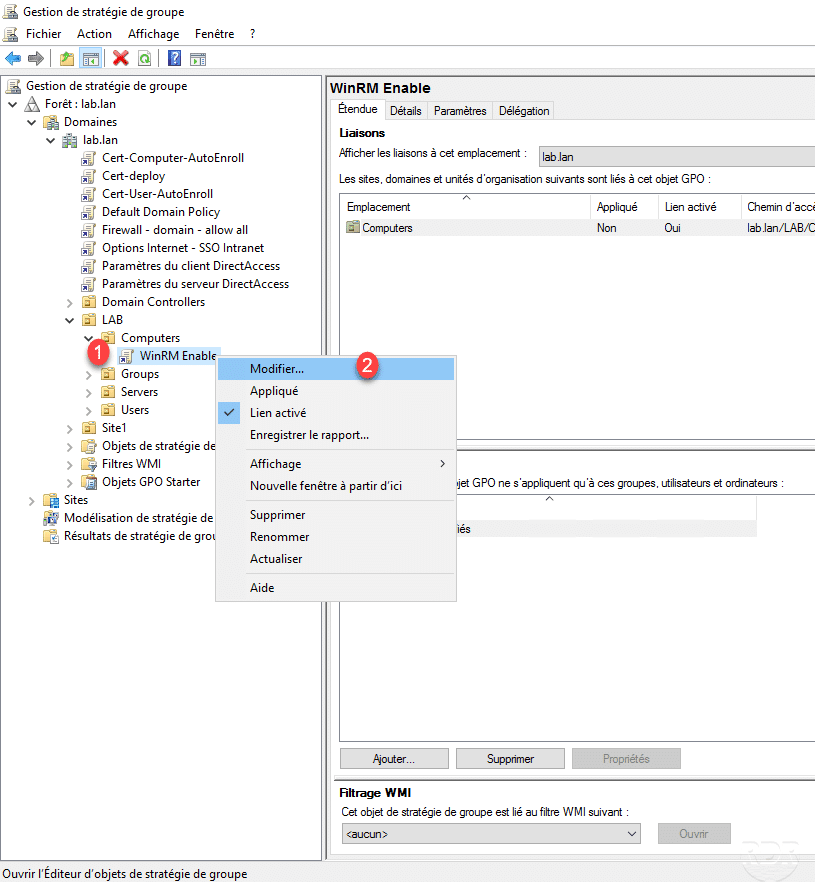
Right click on the 1 strategy and click on Edit 2 .
Configuring WinRM
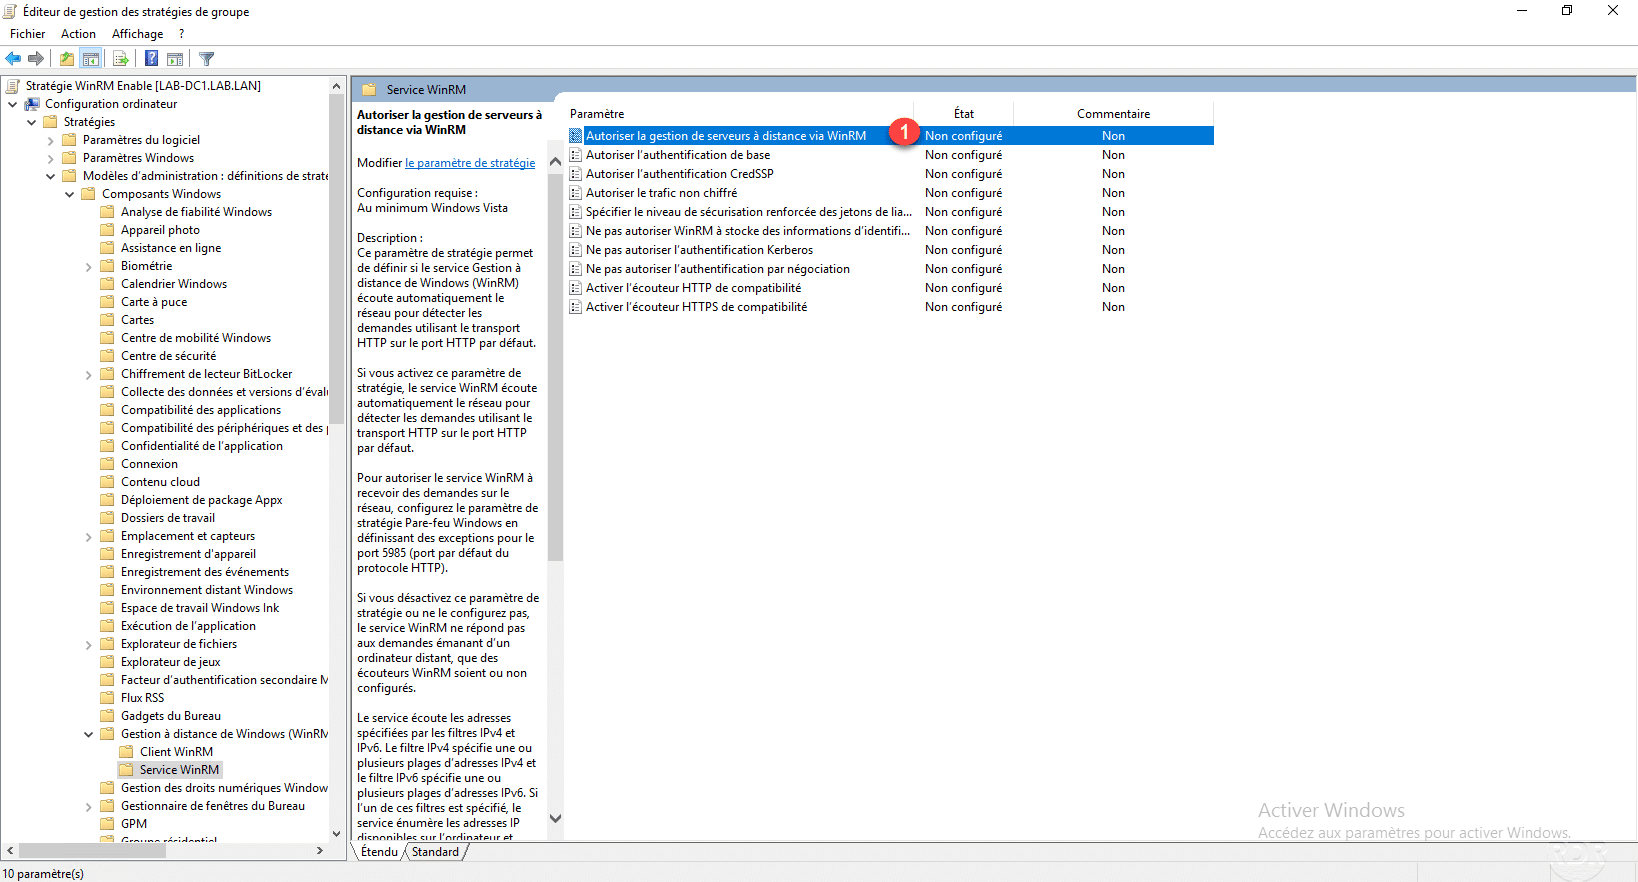
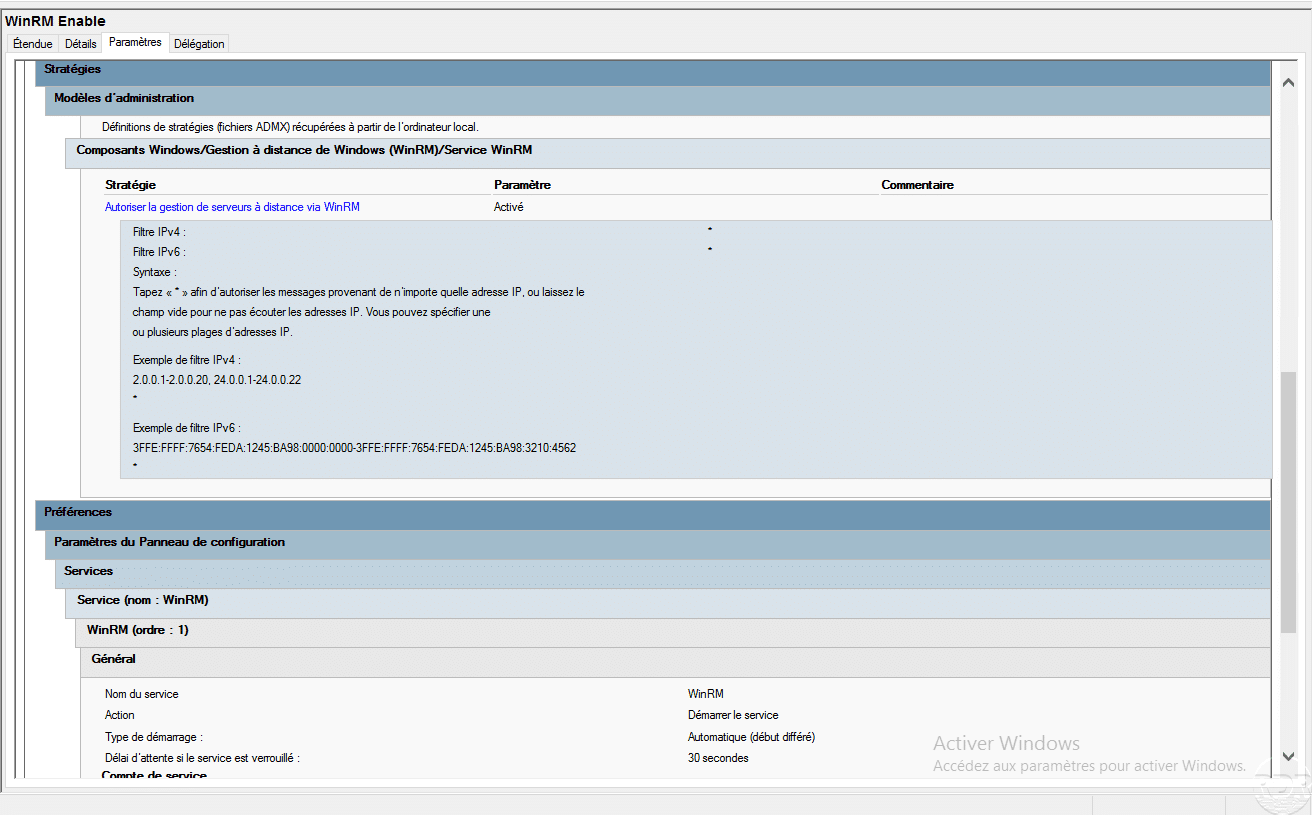
Navigate to the following location: Computer Configuration / Policies / Administrative Template / Windows Components / Windows Remote Management (WinRM) / WinRM Service 1 to access the WinRM settings.
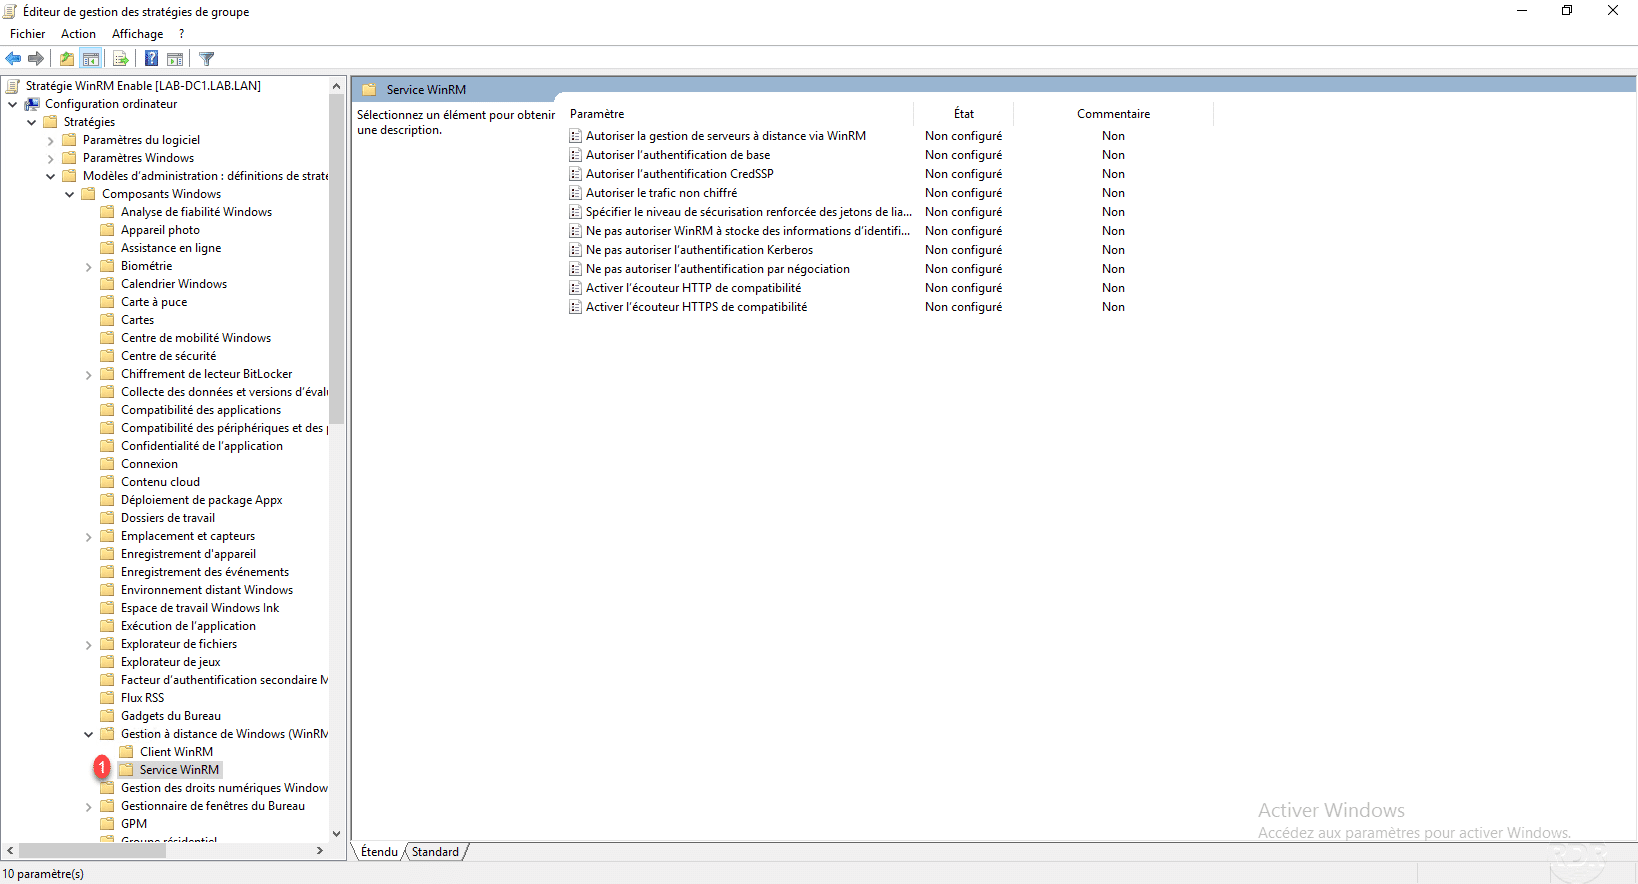
Double click on Allow remote server management via WinRM 1 to edit the parameter.
Enable 1 the settings, configure the IP addresses allowed to connect 2 . (* allows to allow all IP addresses), click on Apply 3 and OK 4 .
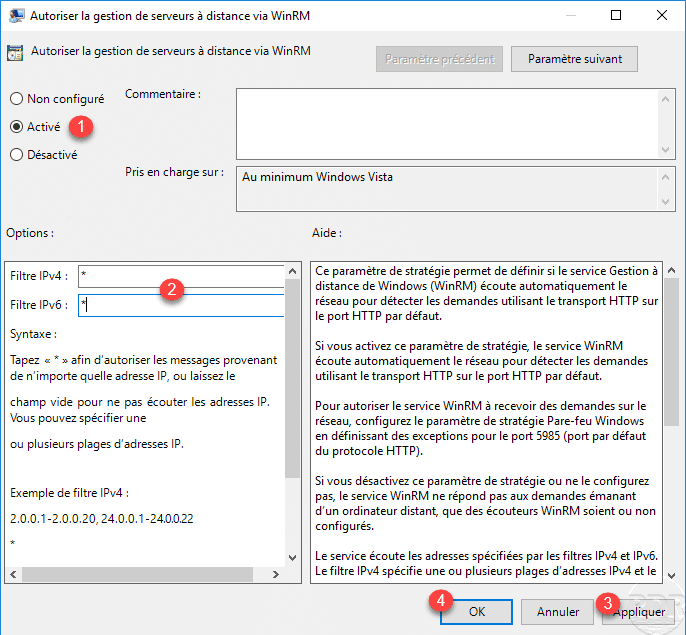
The configuration of the remote access.
Service configuration
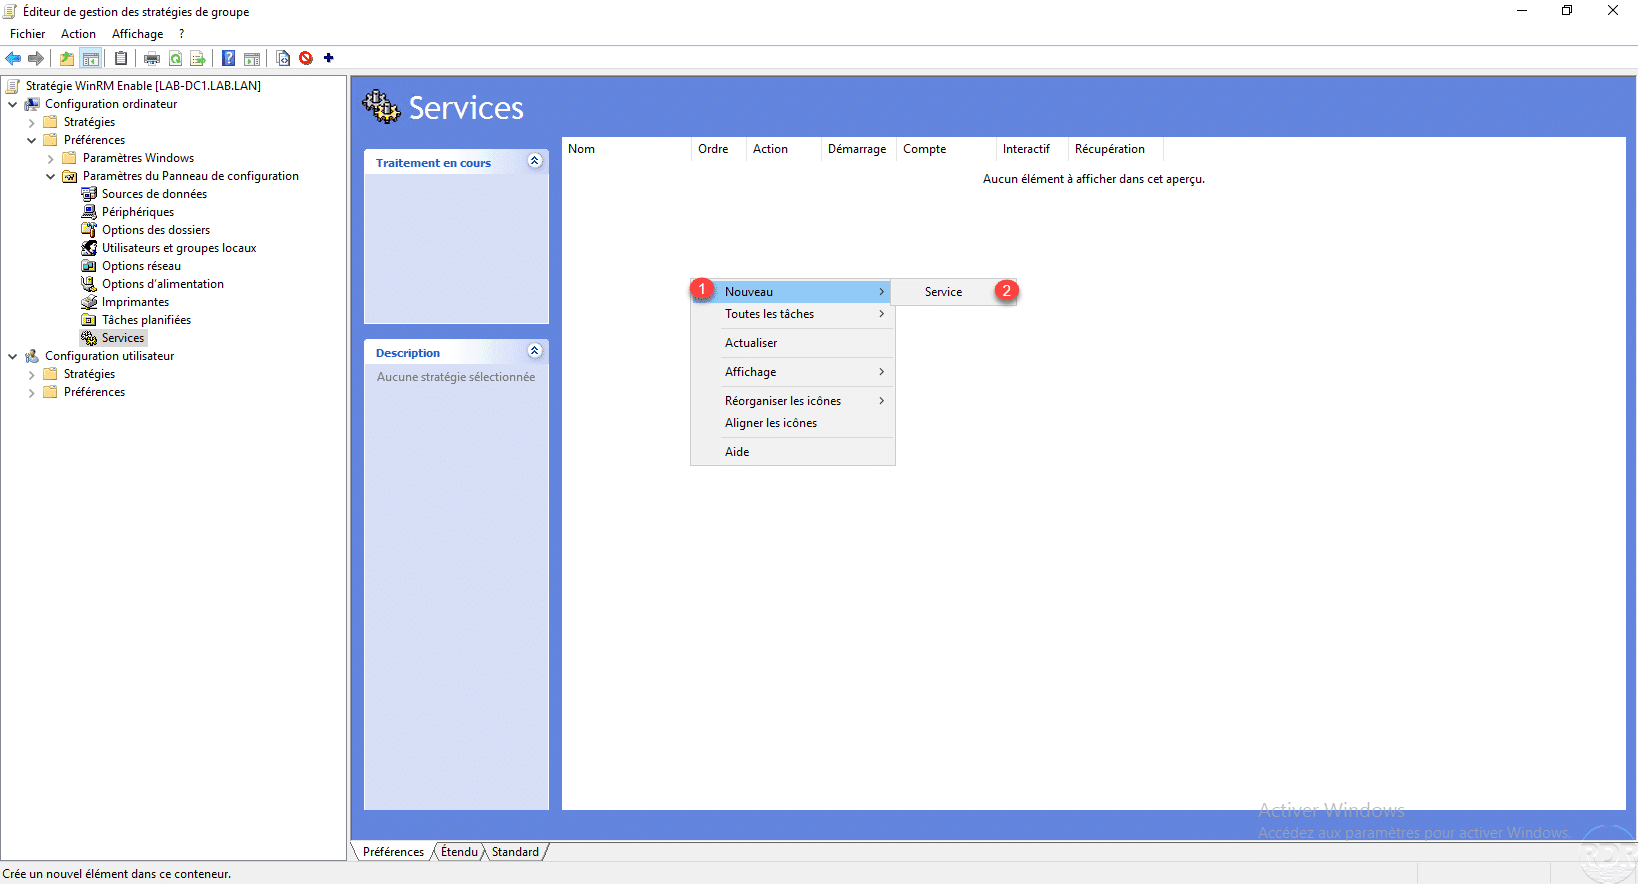
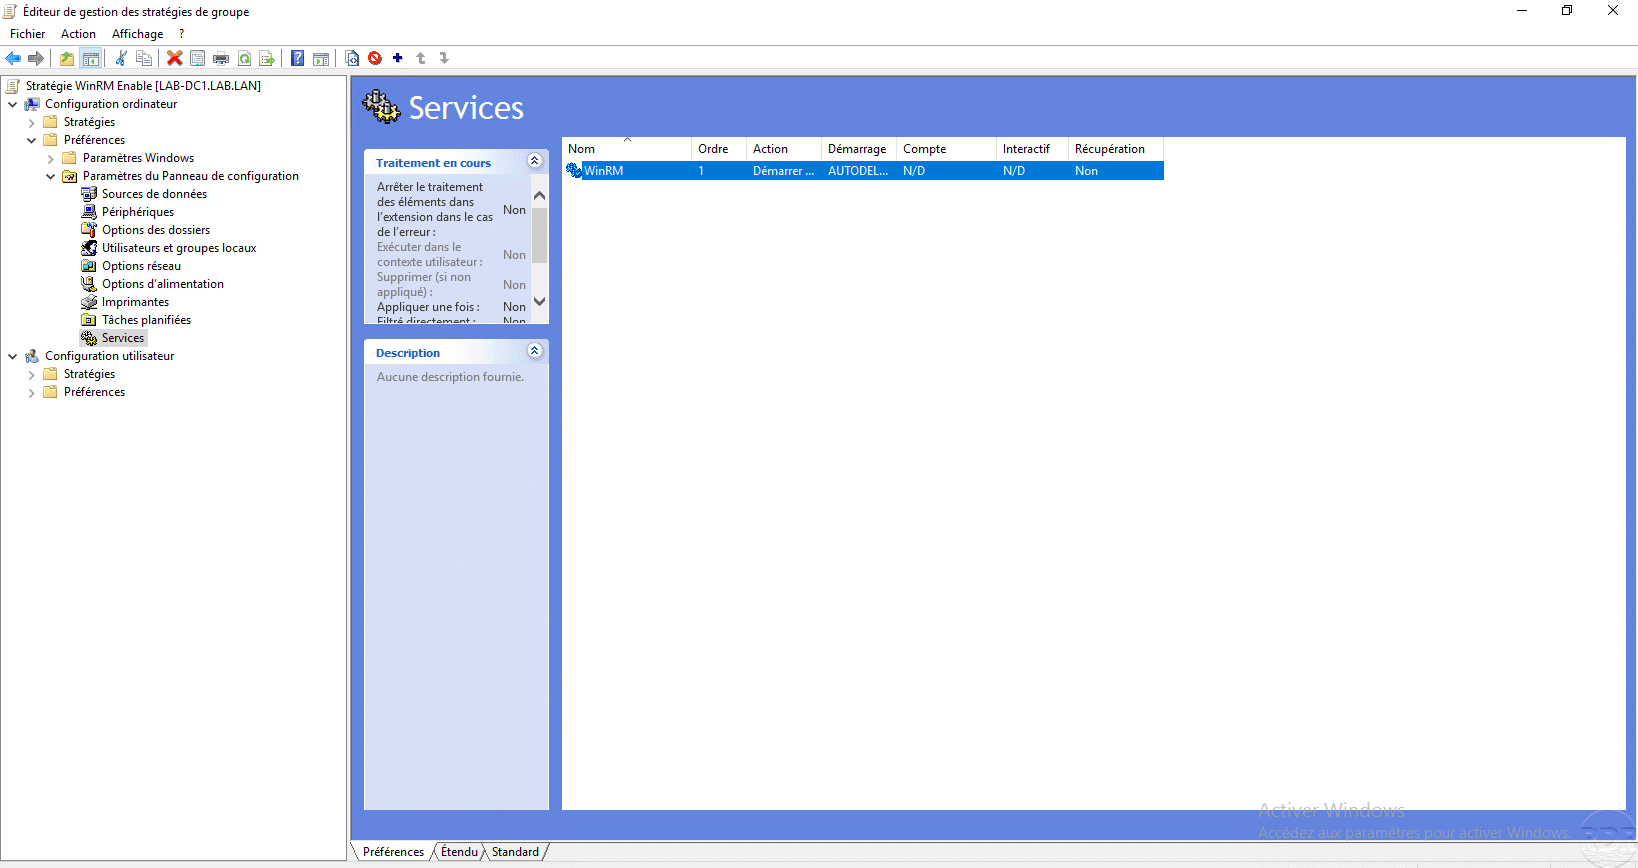
Go to Computer Configuration / Preferences / Control Panel Settings / Services 1 .

In the central area, right click then go to New 1 and click on Service 2 .
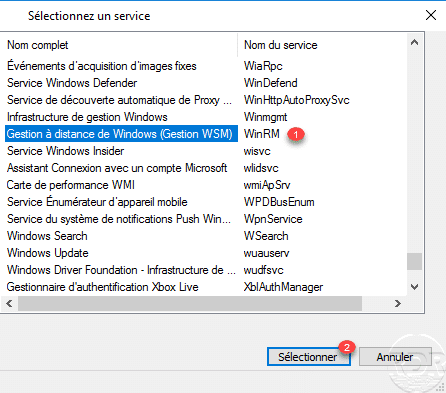
Change the start of the service to Automatic (delayed start) 1 then click on the Browse button (…) 2 to select the service.
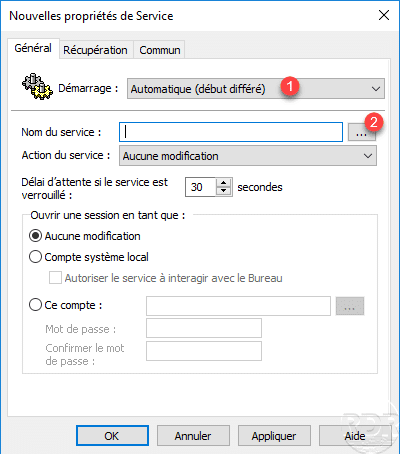
Choose the Windows Remote Management Service (WSM Management) – WinRM 1 and click on the Select button 2
Configure the service action by selecting Start service 1 and click Apply 2 and OK 3 .
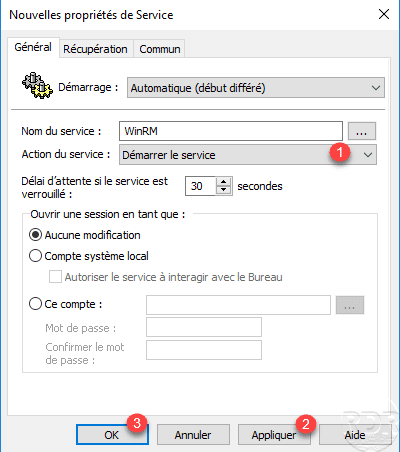
The WinRM service is configured.
Overview of Group Policy settings to configure WinRM.
When applying the policy on computers, they will be administrable using WinRM.