Presentation of automatic actions
The automatic actions in GLPI is a brick essential to the proper functioning of it.
They perform back-to-back tasks for software optimization and also inventory actions, helpdesk ….
Some examples :
- Automatic closing of incidents
- Send email
- Collecting emails
- Discovery Management and Inventory in FusionInventory
- Log rotation
- …
Automatic actions can be performed in two ways:
- GLPI : the action is triggered by the user surf
- CLI : the action is triggered by a scheduled task running on the web server (recommended).
Implementation
Configuring GLPI
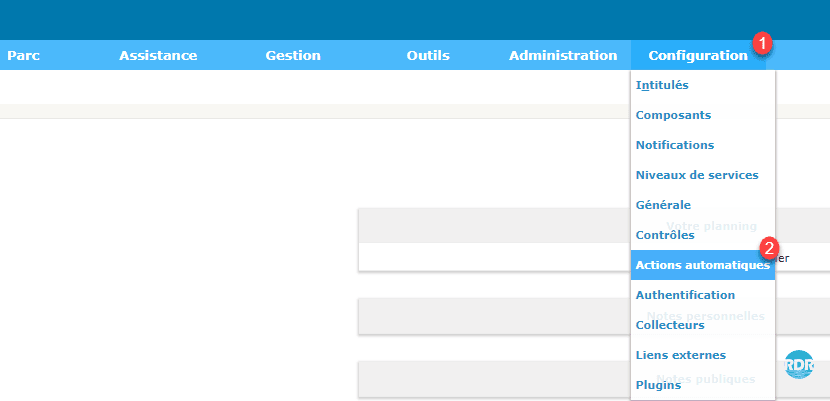
1. Go on your GLPI.
2. From the navigation menu go to Configuration 1 > Automatic Actions 2 .
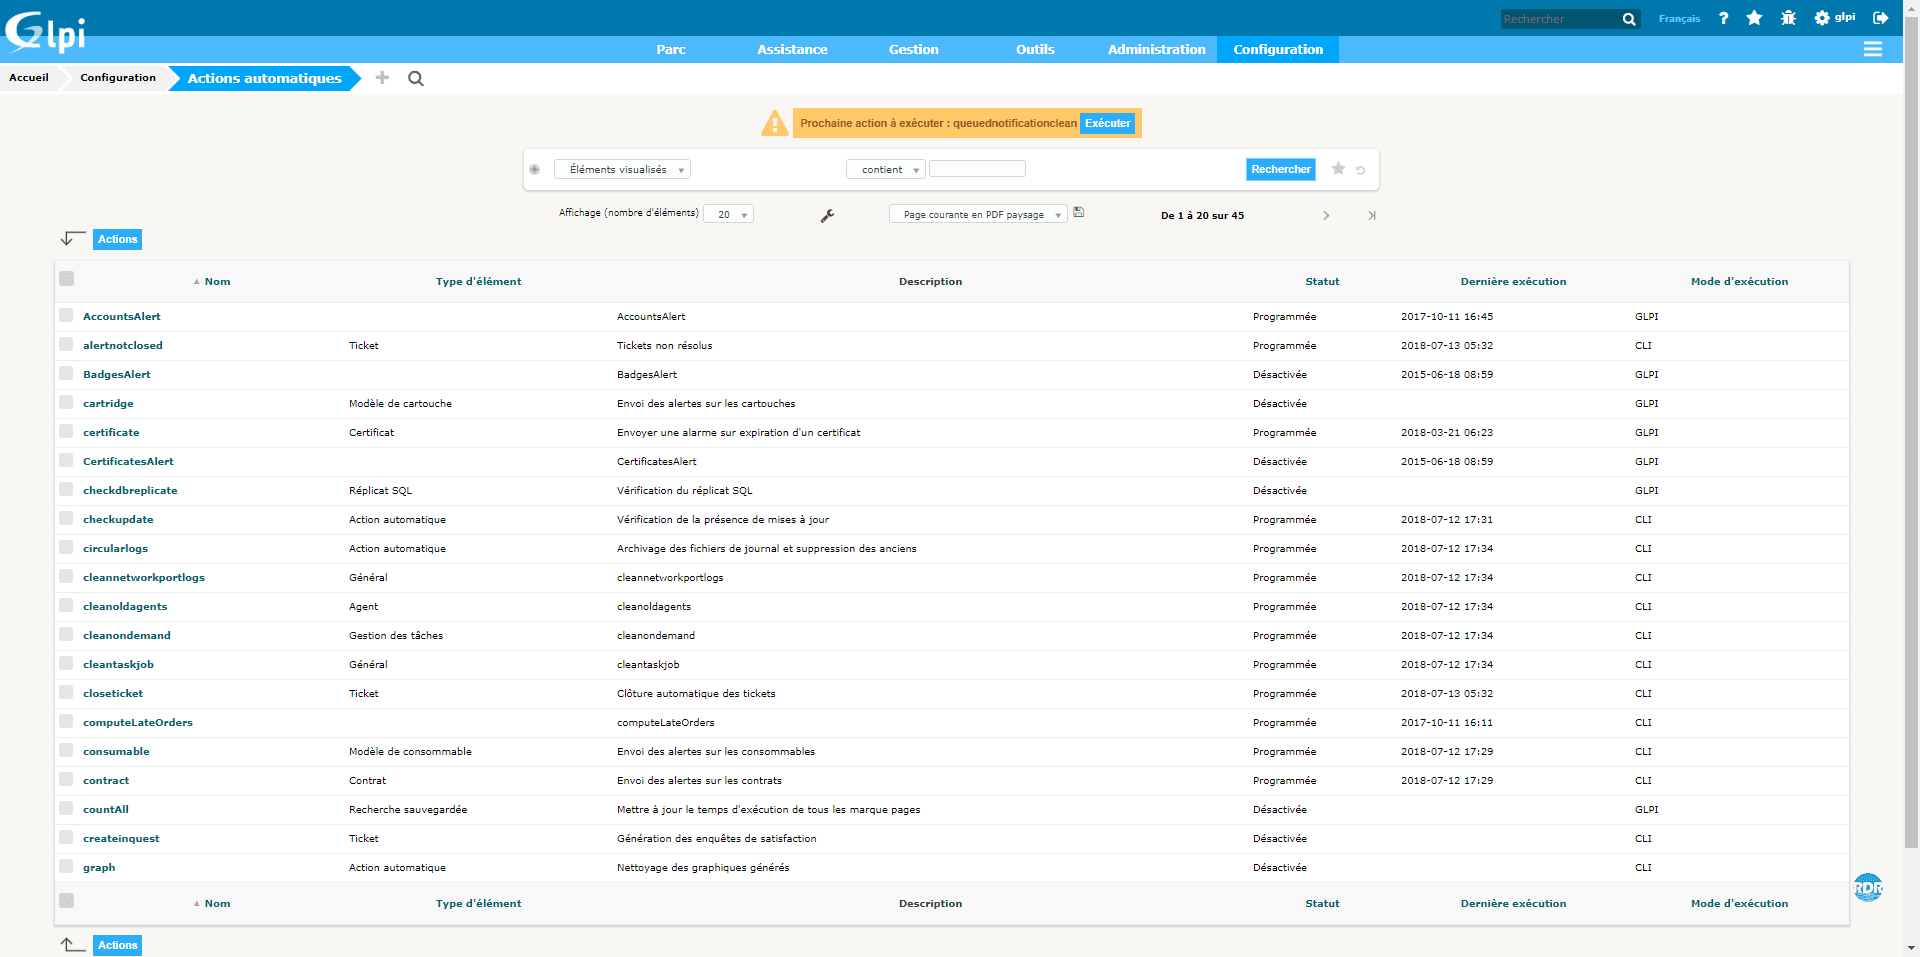
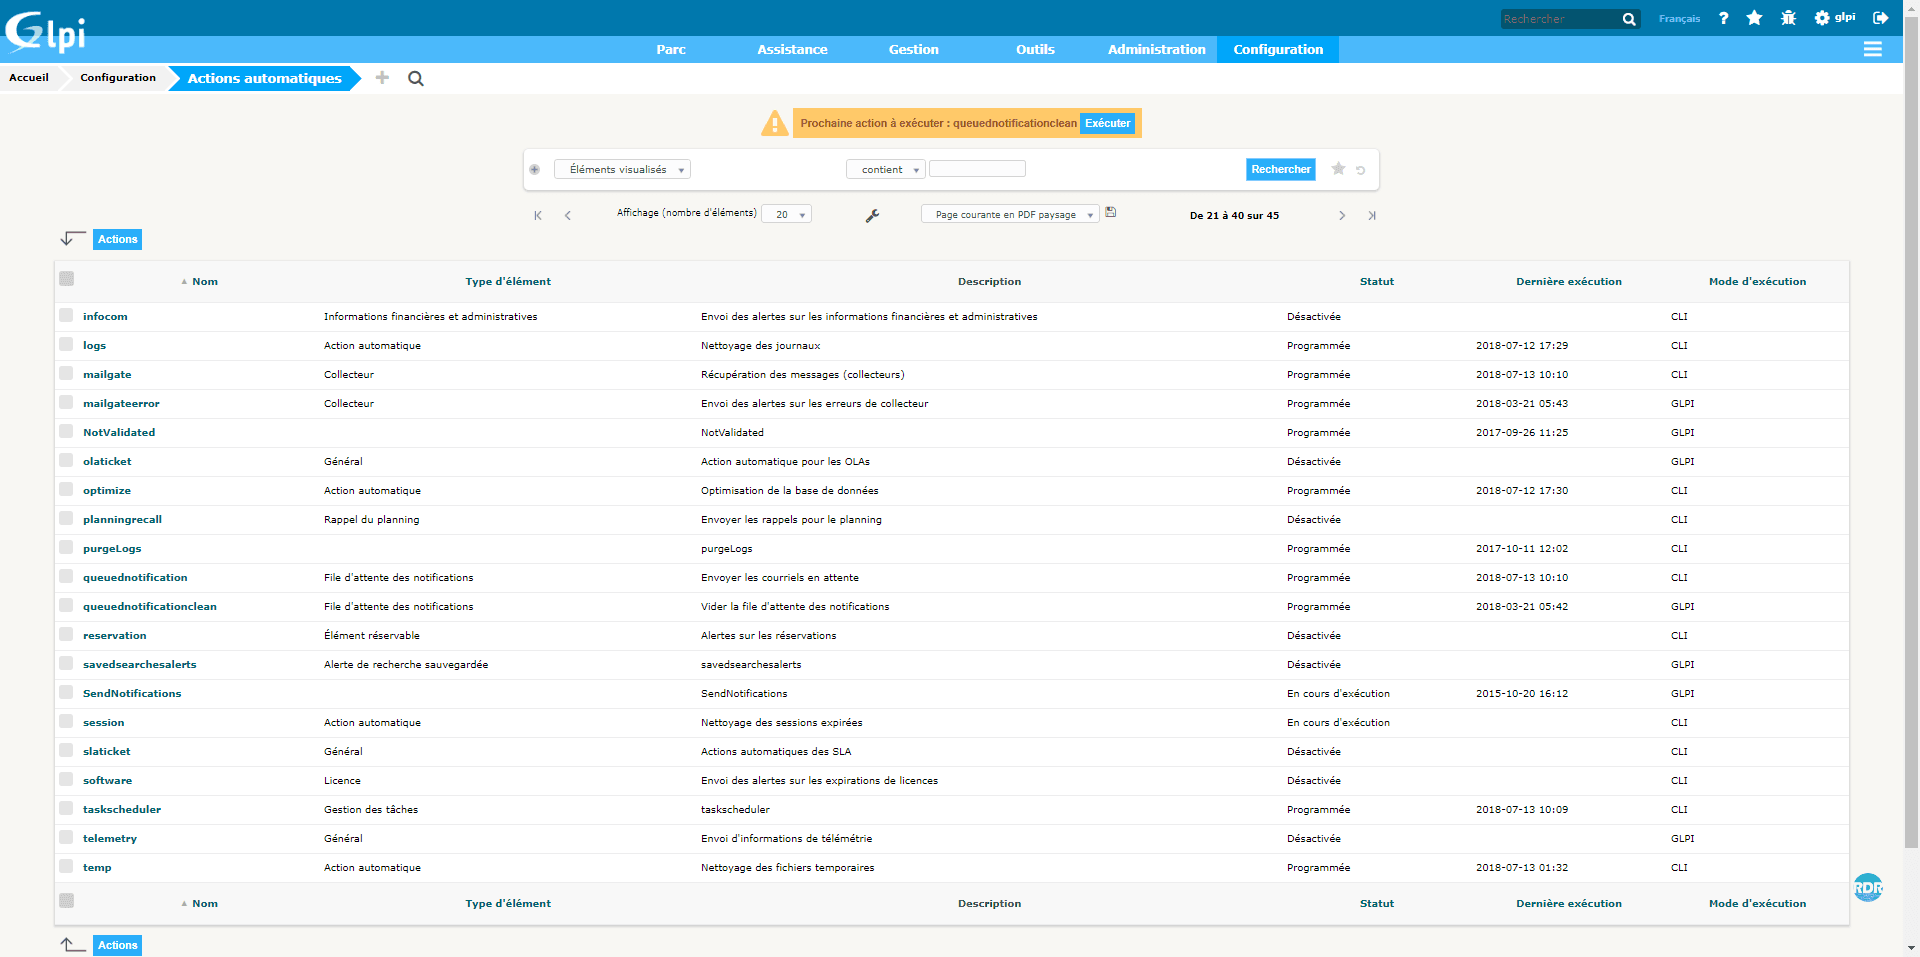
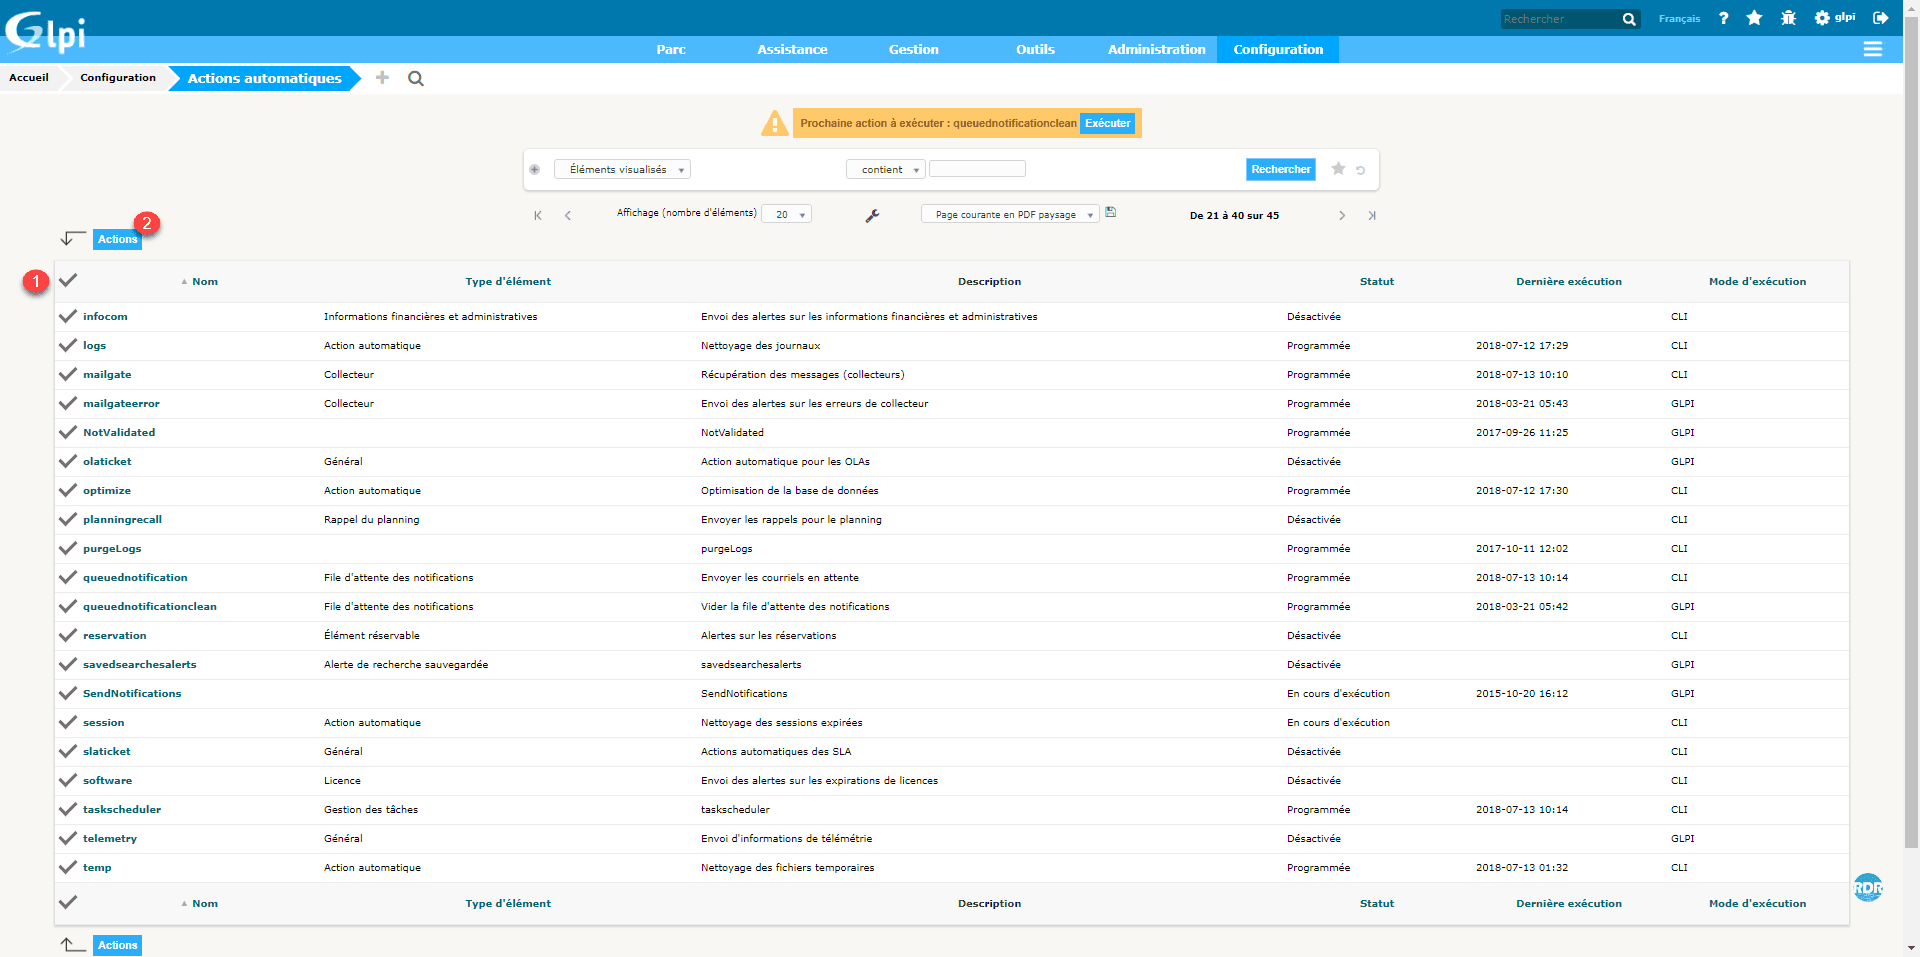
3. The list of automatic tasks is displayed with their execution mode, their status and the last execution date.
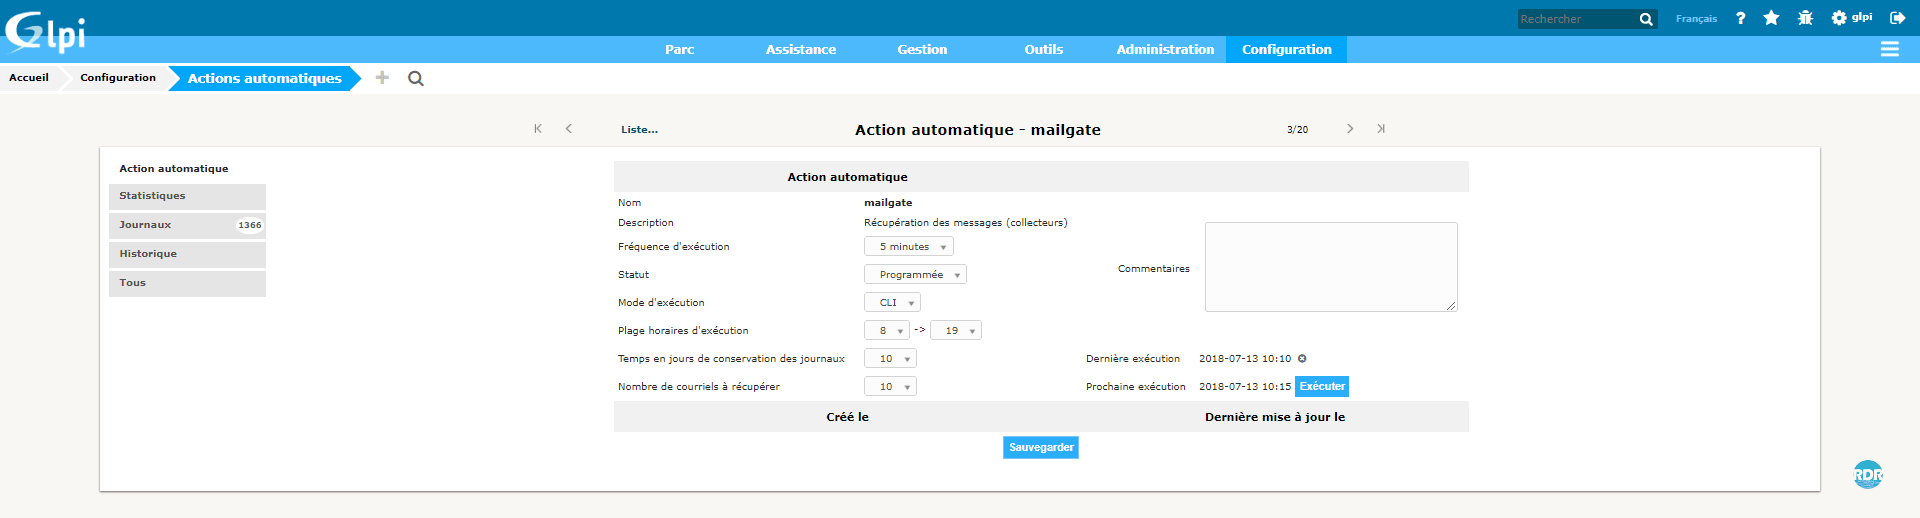
4. Click on an action to get the details. On the main tab we find the task planning, the execution mode and the status.
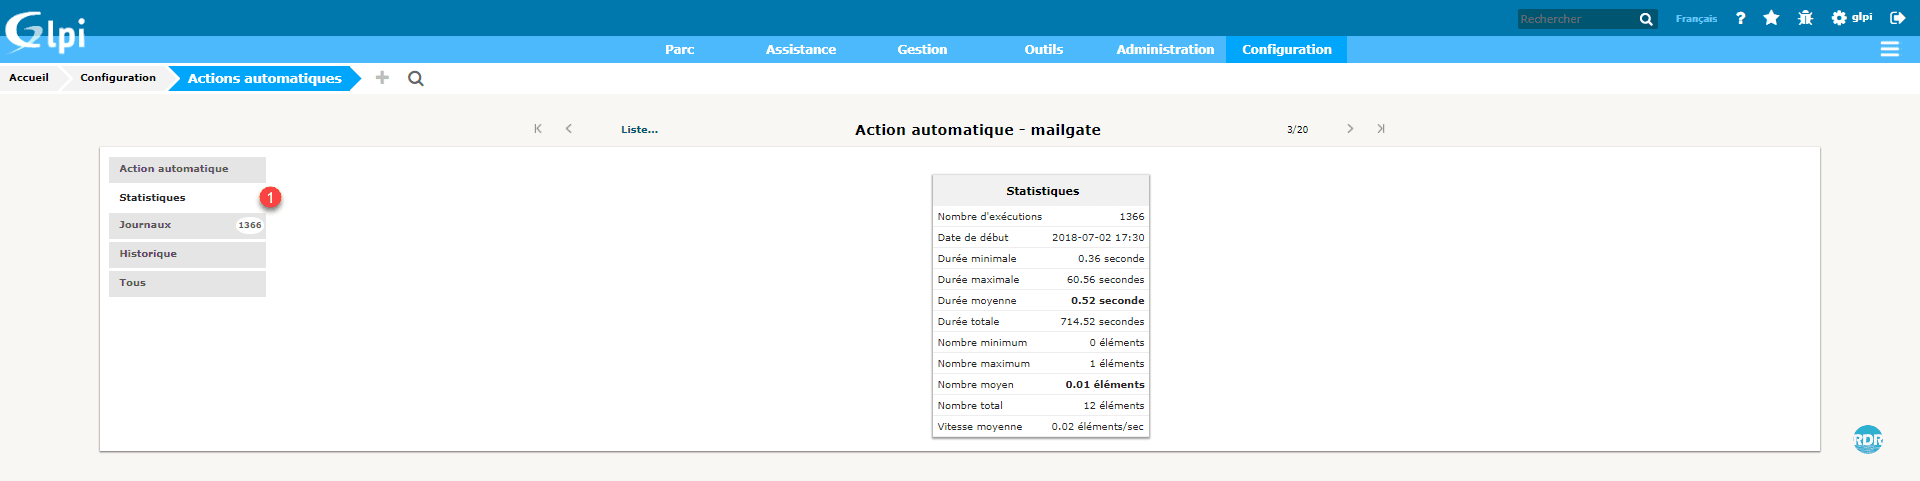
5. The Statistics 1 tab provides information on the execution of the task.
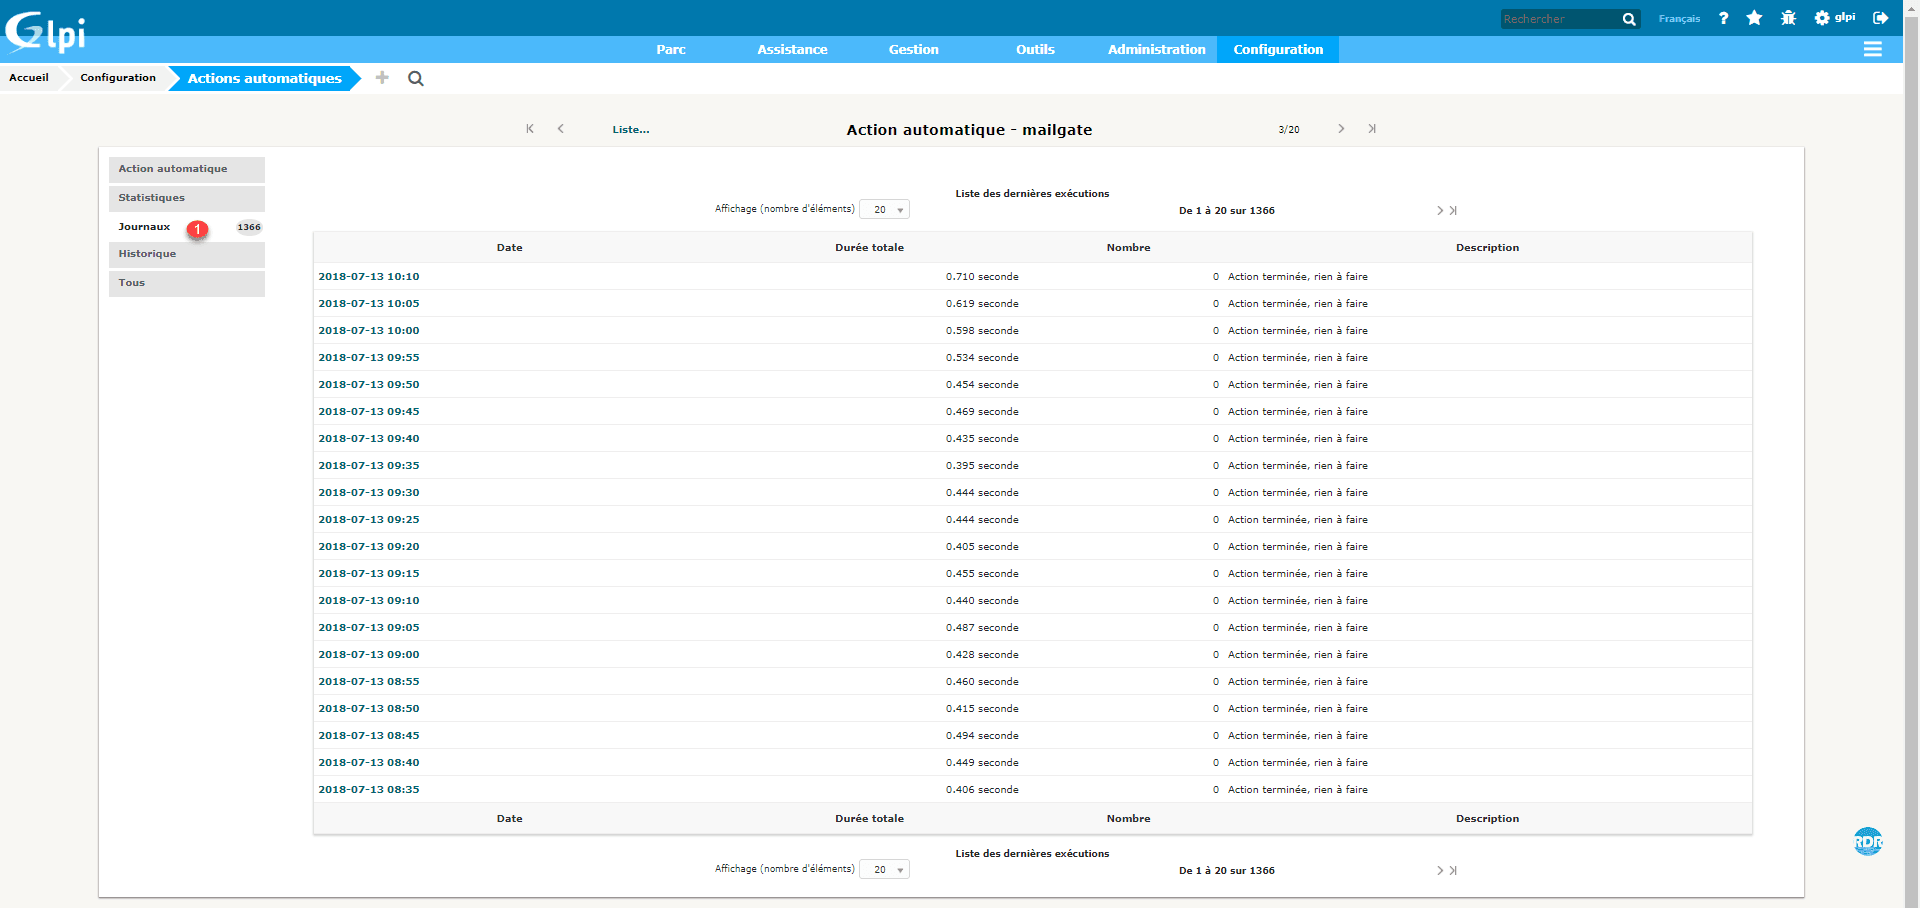
6. The Logs 1 tab allows the visualization of the logs of the task.
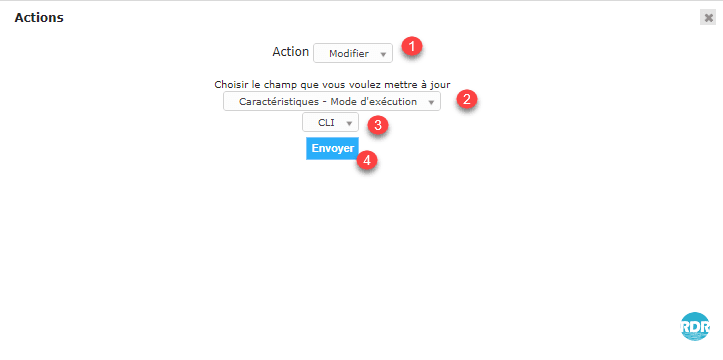
Skip all actions in CLI mode
1. Go to the list of actions.
2. Check box 1 to select the entire list and click Actions 2.
3. Action choose Edit 1, select Features – Execution Mode 2, choose CLI 3 and click Send 4.
Set the number of actions per scheduled task
1. From the navigation menu go to Setup 1 > General 2.

2. Go to the System 1 tab and change the Maximum number of simultaneous automatic actions (CLI execution) 2 and Save.
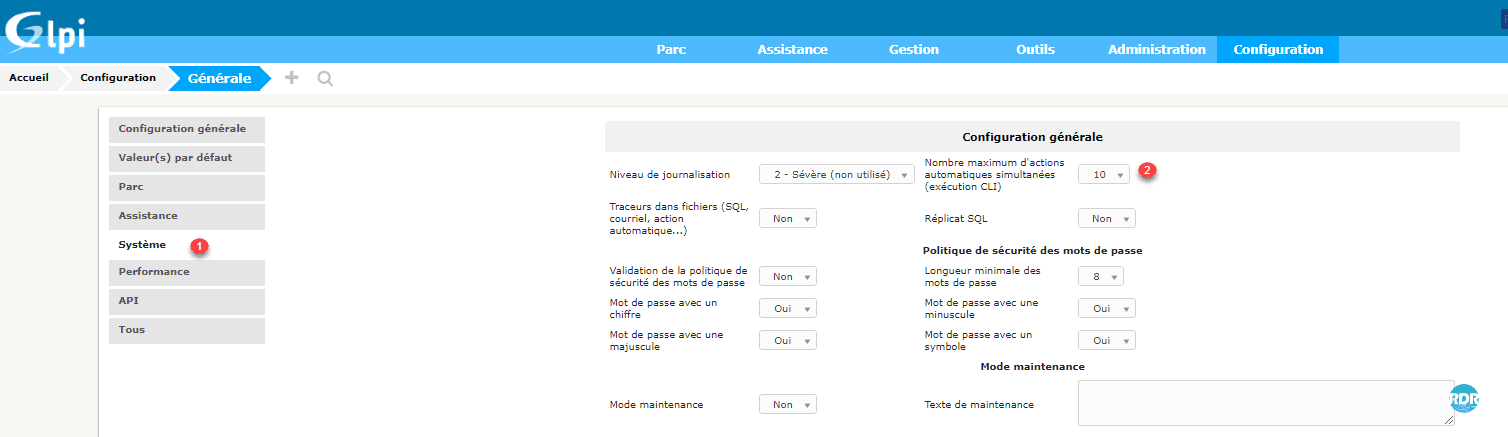
This value is to be adapted according to your installation of GLPI, operating system and the configuration of PHP. Start with a value between 5 and 10.
Configuring a scheduled task (cron)
Windows
1. Create a file on your web server in the format xxxx.bat in the directory of your choice.
2. Open the file with the editor of your choice.
3. Enter the code below for your installation.
"chemin_installation_de_phpphp.exe" "chemin_installation_de_glpifrontcron.php"
Example:
"C:Program Files (x86)PHPv5.5php.exe" "D:wwwglpifrontcron.php"
4. Save your file.
It is possible to test your script by running it directly and to check in GLPI the execution of the tasks.
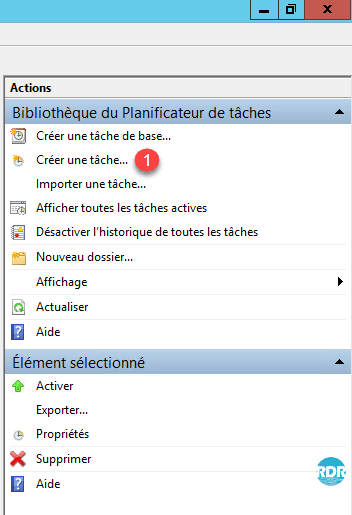
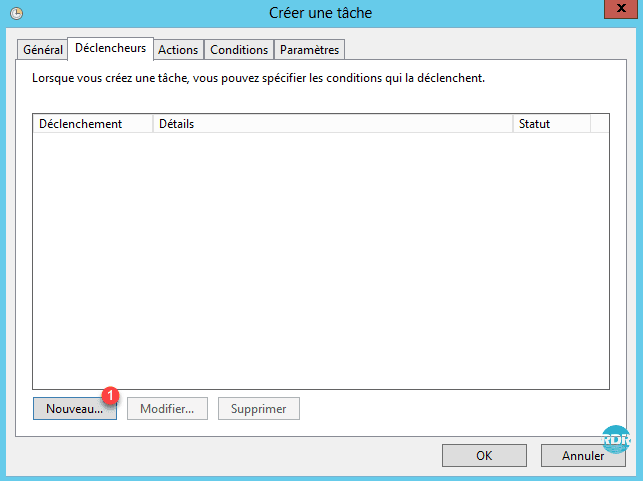
5. Open Task Scheduler 1.

6. Click Create Task … 1.
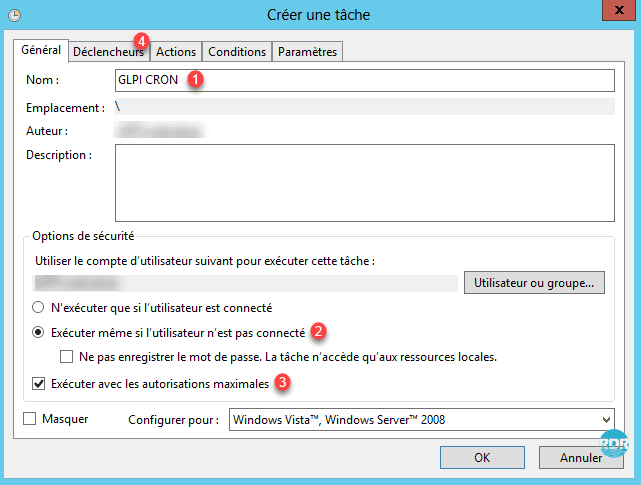
7. Give a name to task 1, check the Execute box even if the user is not logged in 2 and Execute with the maximum permissions 3. Then go to the Triggers tab 4.
8. Click the New … button 1.
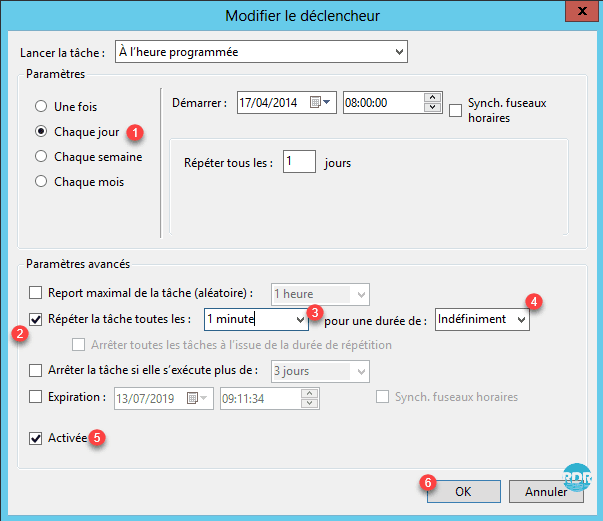
9. Select the execution frequency every day 1, check the box Repeat task every: 2, indicate frequency 3 and duration 4. Check that the trigger is activated 5 and finally click on the OK button 6.
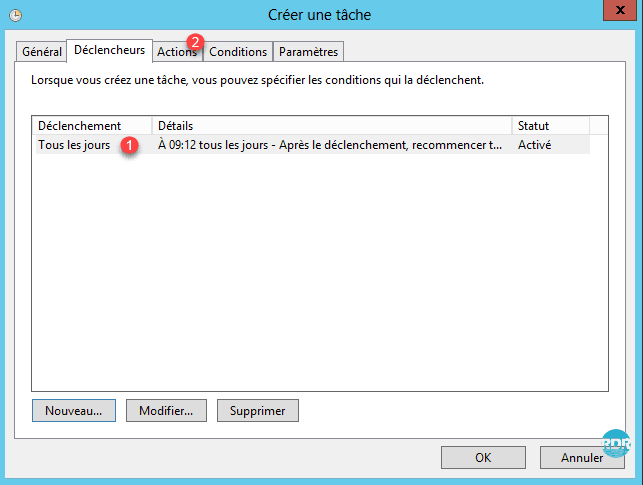
10. The trigger is added 1, go to the Actions tab 2.
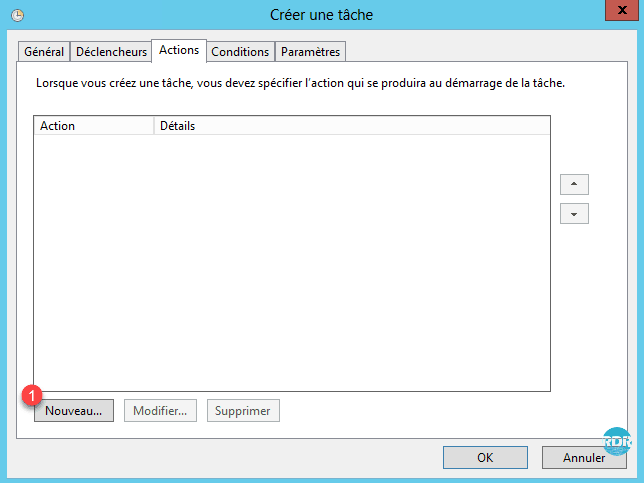
11. Click New … 1.
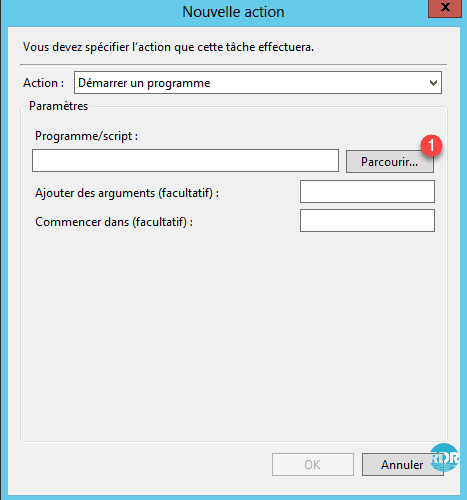
12. Click the Browse button … 1.
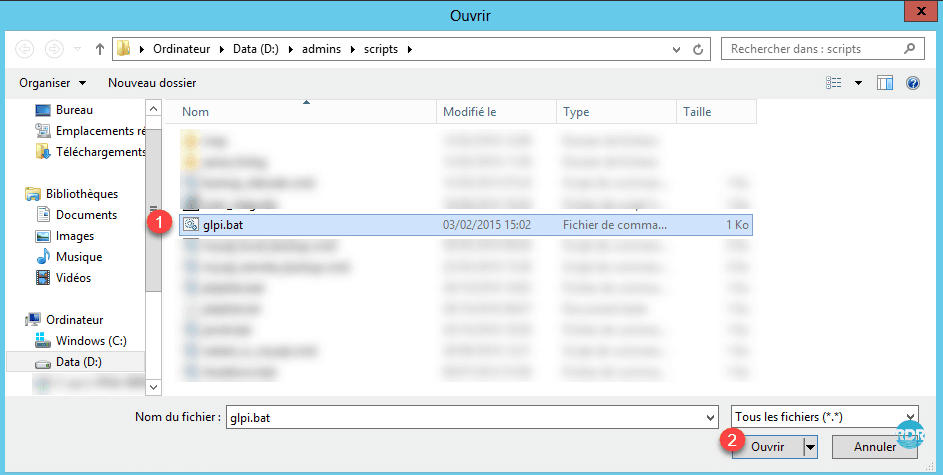
13. Select your script 1 and click Open 2.
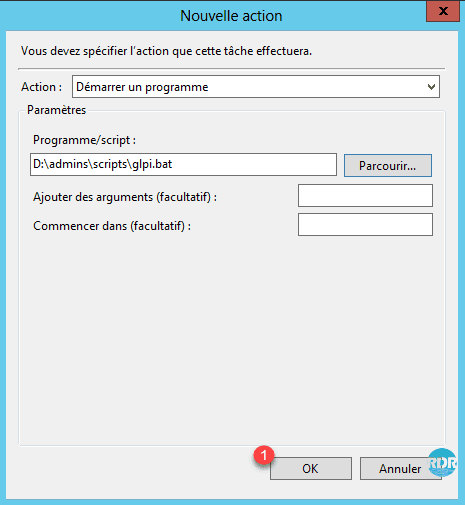
14. Click OK 1.
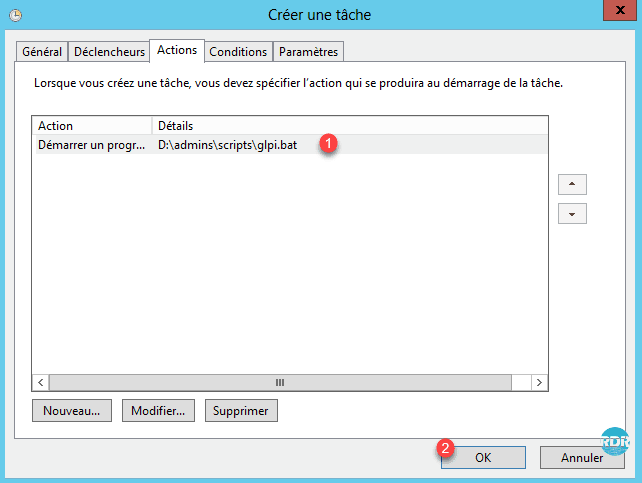
15. Check that action 1 has been taken into account and click OK 2 to validate the creation of the task.
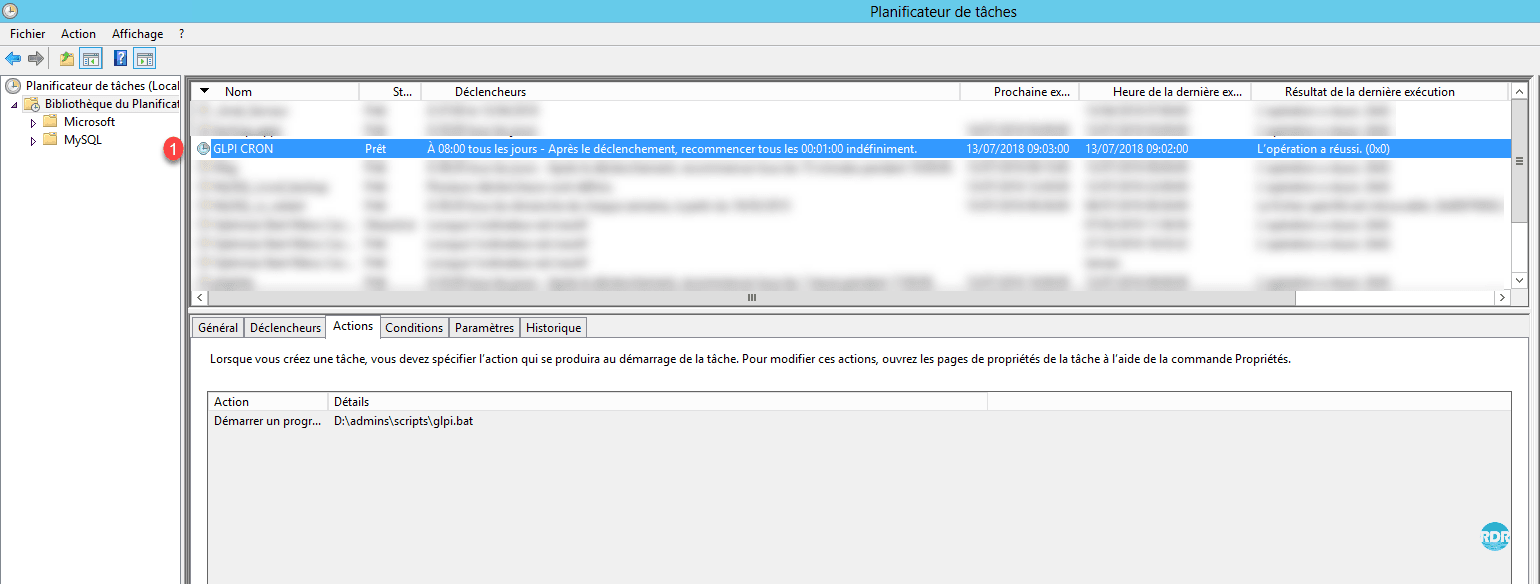
16. The scheduled task has been added to list 1.
On Linux (Ubuntu)
1. Open an SSH session on your WEB server.
2. Enter the following command to edit the scheduled tasks.
sudo crontab -e
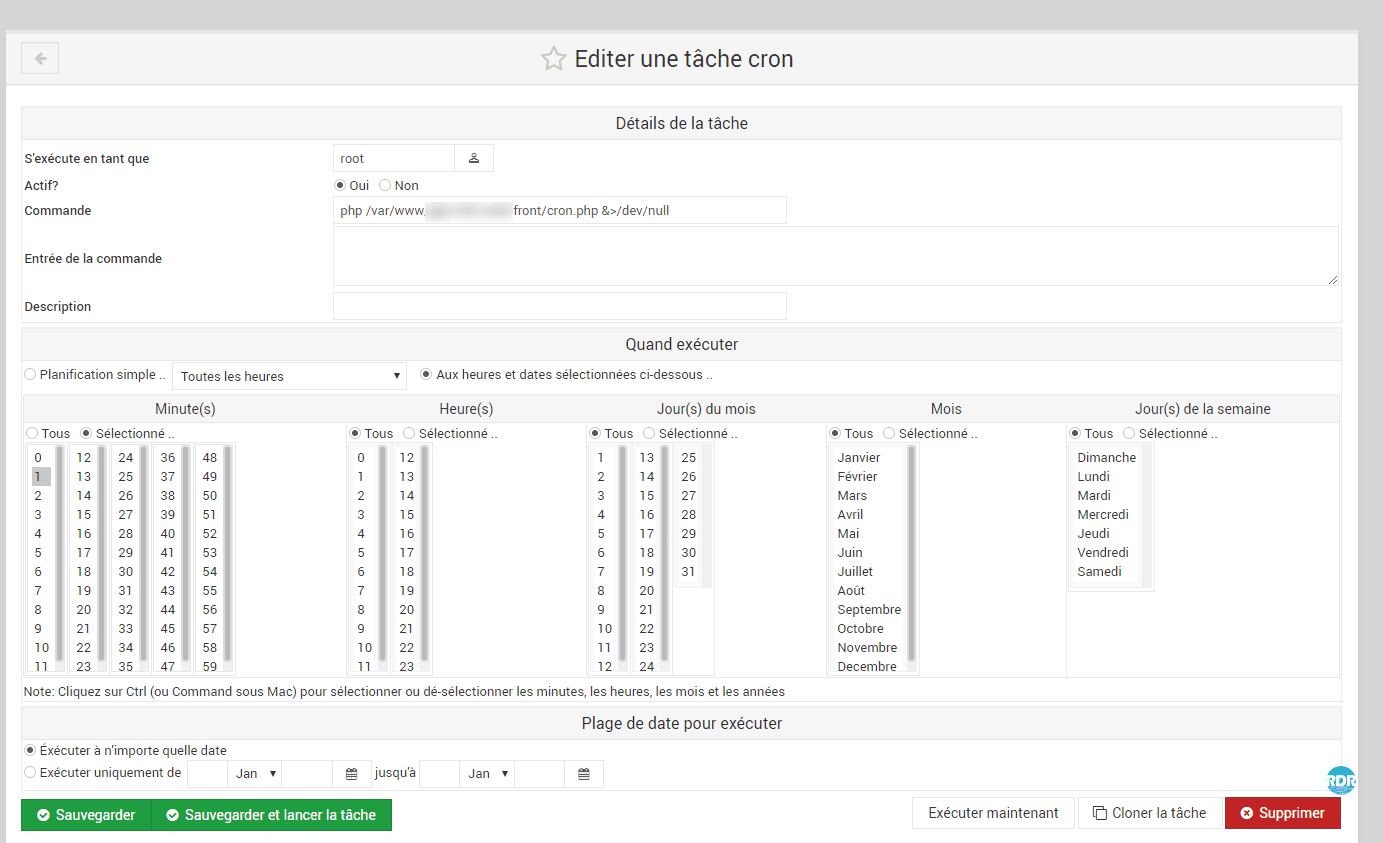
3. Create the task by entering the following line to execute the action every minute:
1 * * * * php /chemin_installation_glpi/front/cron.php &>/dev/null
4. Save the changes.
5. Restart the cron service.
sudo service cron restart
6. Check in GLPI the execution of automatic actions.
If the cron does not work, the following article should help you solve the problem: CRON scheduled task that does not run.
If you are using webmin, the cron job should be configured as below: