Introduction
In this tutorial, I will explain how to set up automatic inventory in GLPI 10 with GLPI Agent.
Before version 10 of GLPI, you had to go through a plugin (Fusioninventory or OCSInventory) to have automatic inventory in GLPI.
Since this functionality is native to GLPI, if you are used to using FusionInventory, you will not be lost, because Teclib has simply integrated the plugin directly into GLPI 10.
I will not return here to the controversy that this creates.
The inventory will allow us to retrieve computer information in GLPI:
- General computer information
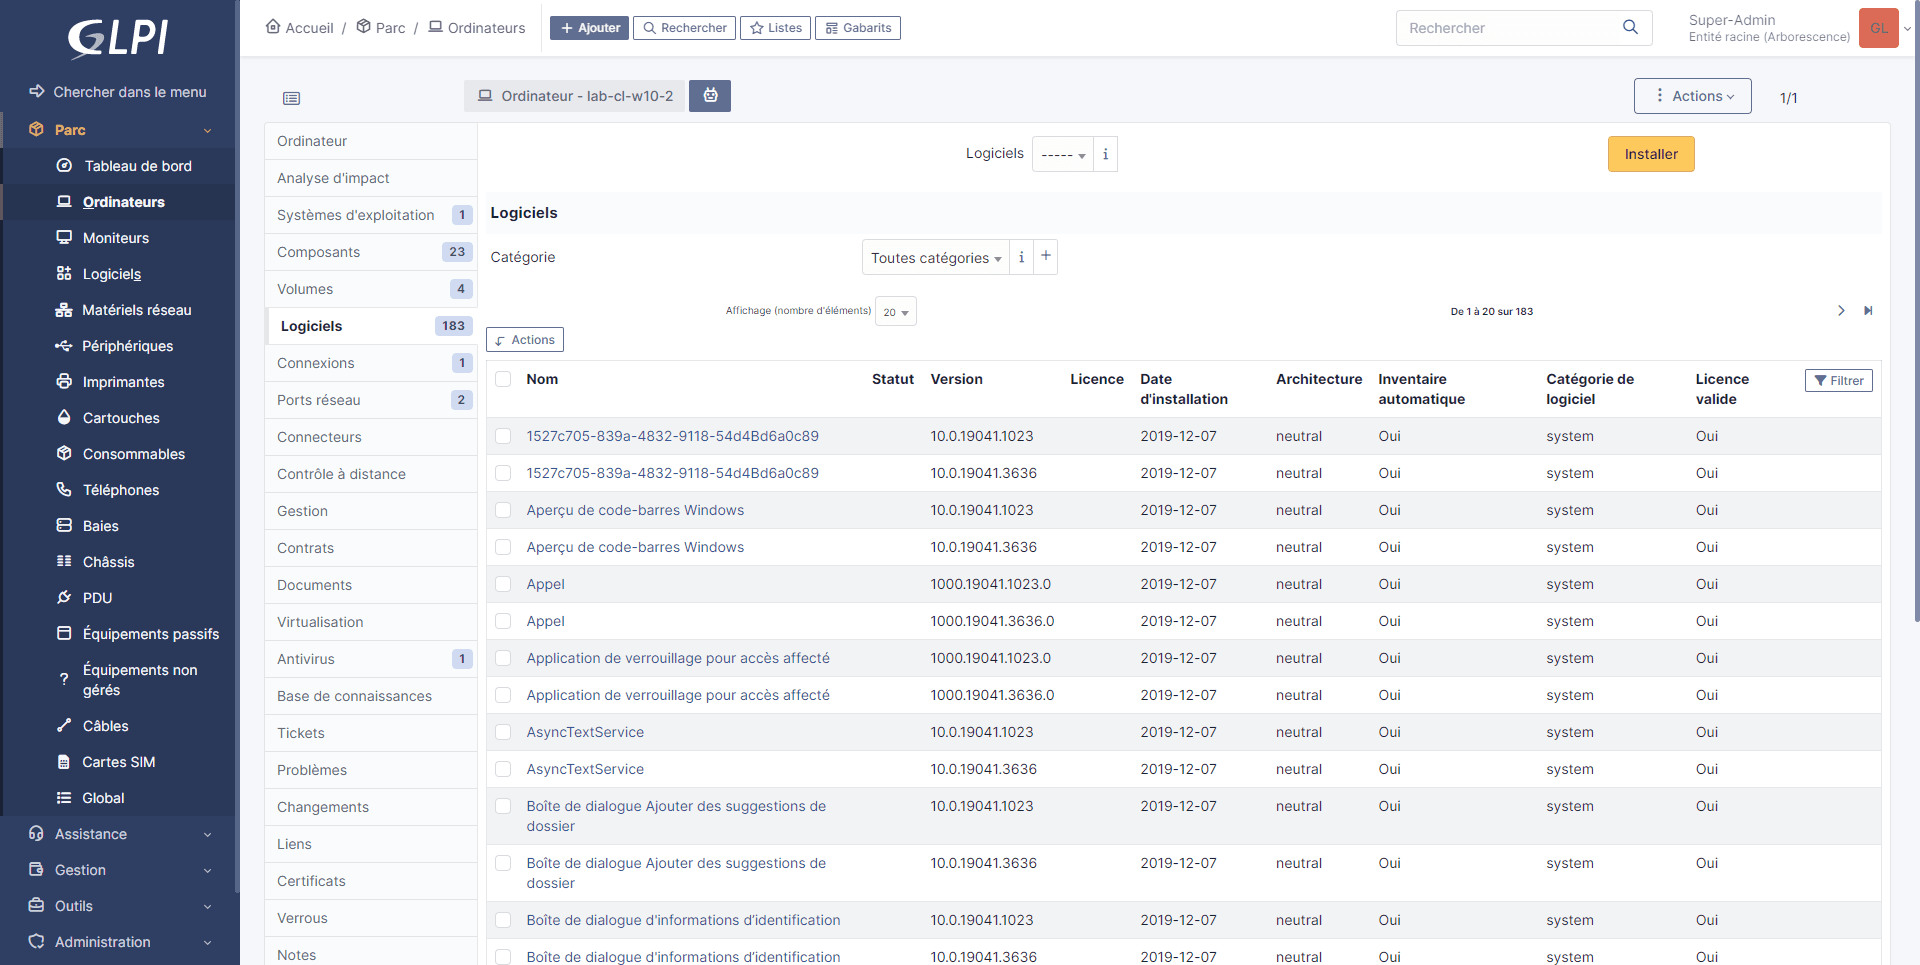
- Software inventory
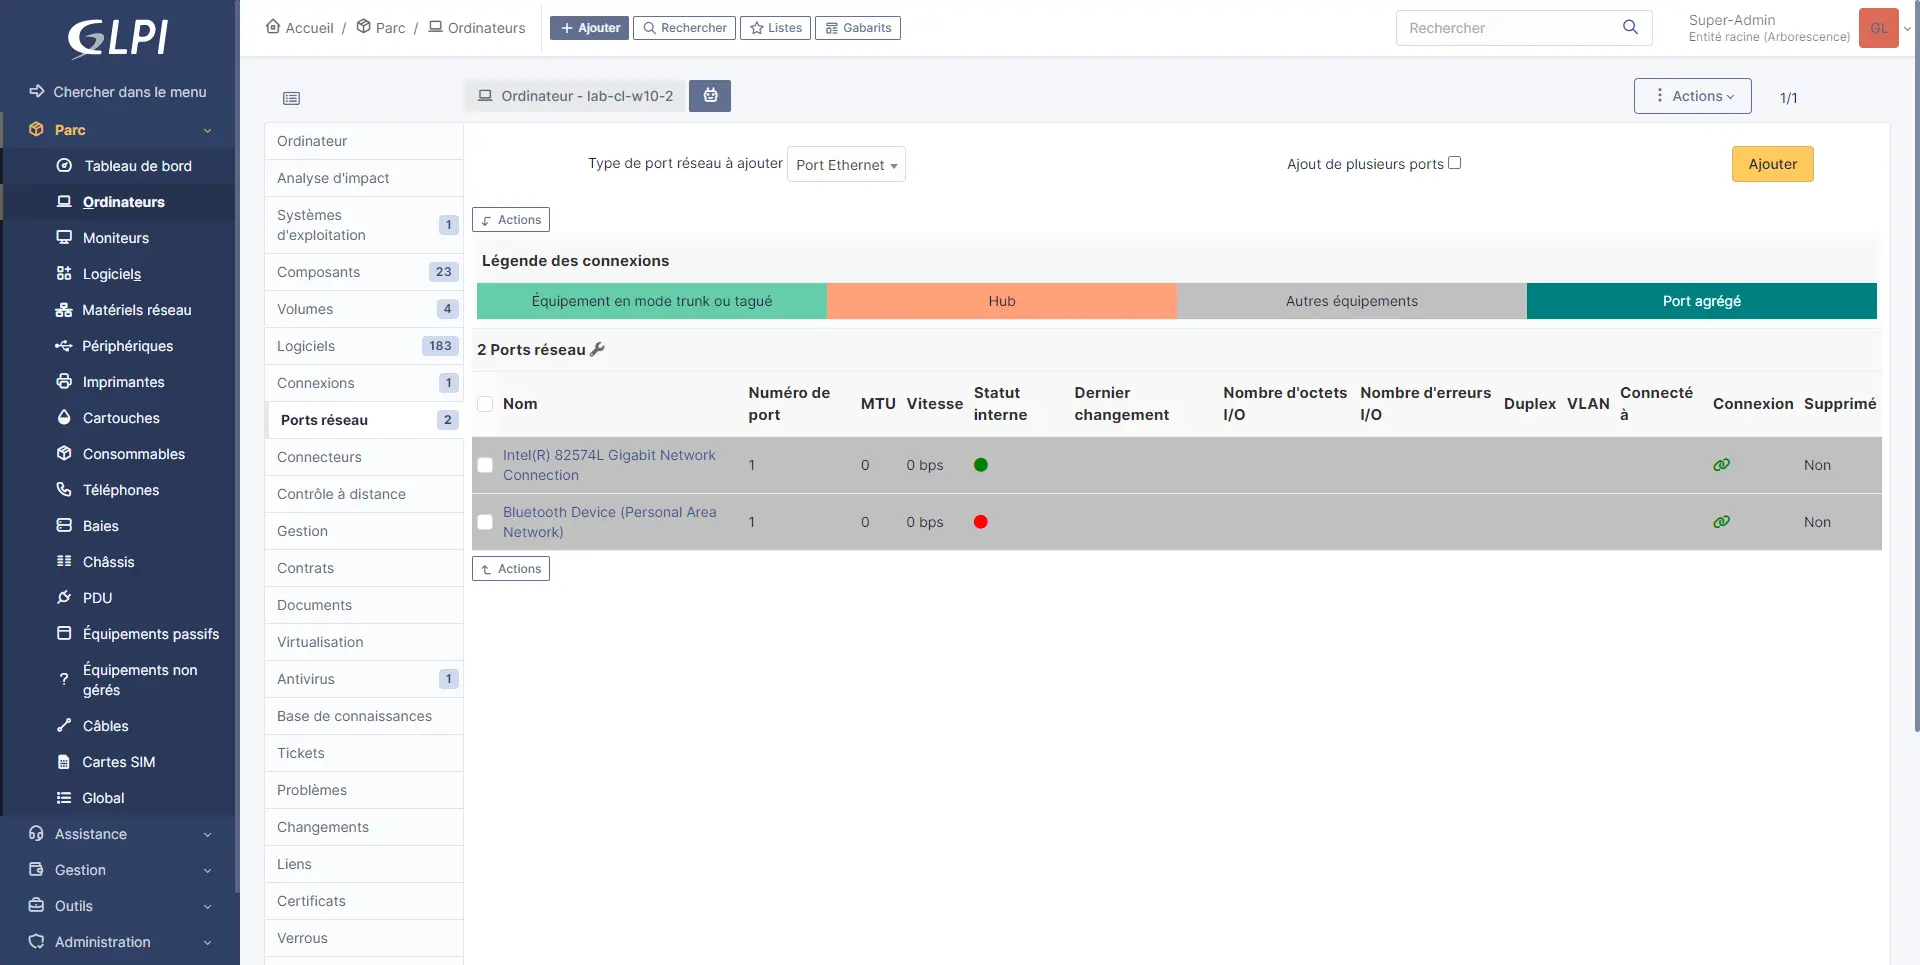
- Network connections
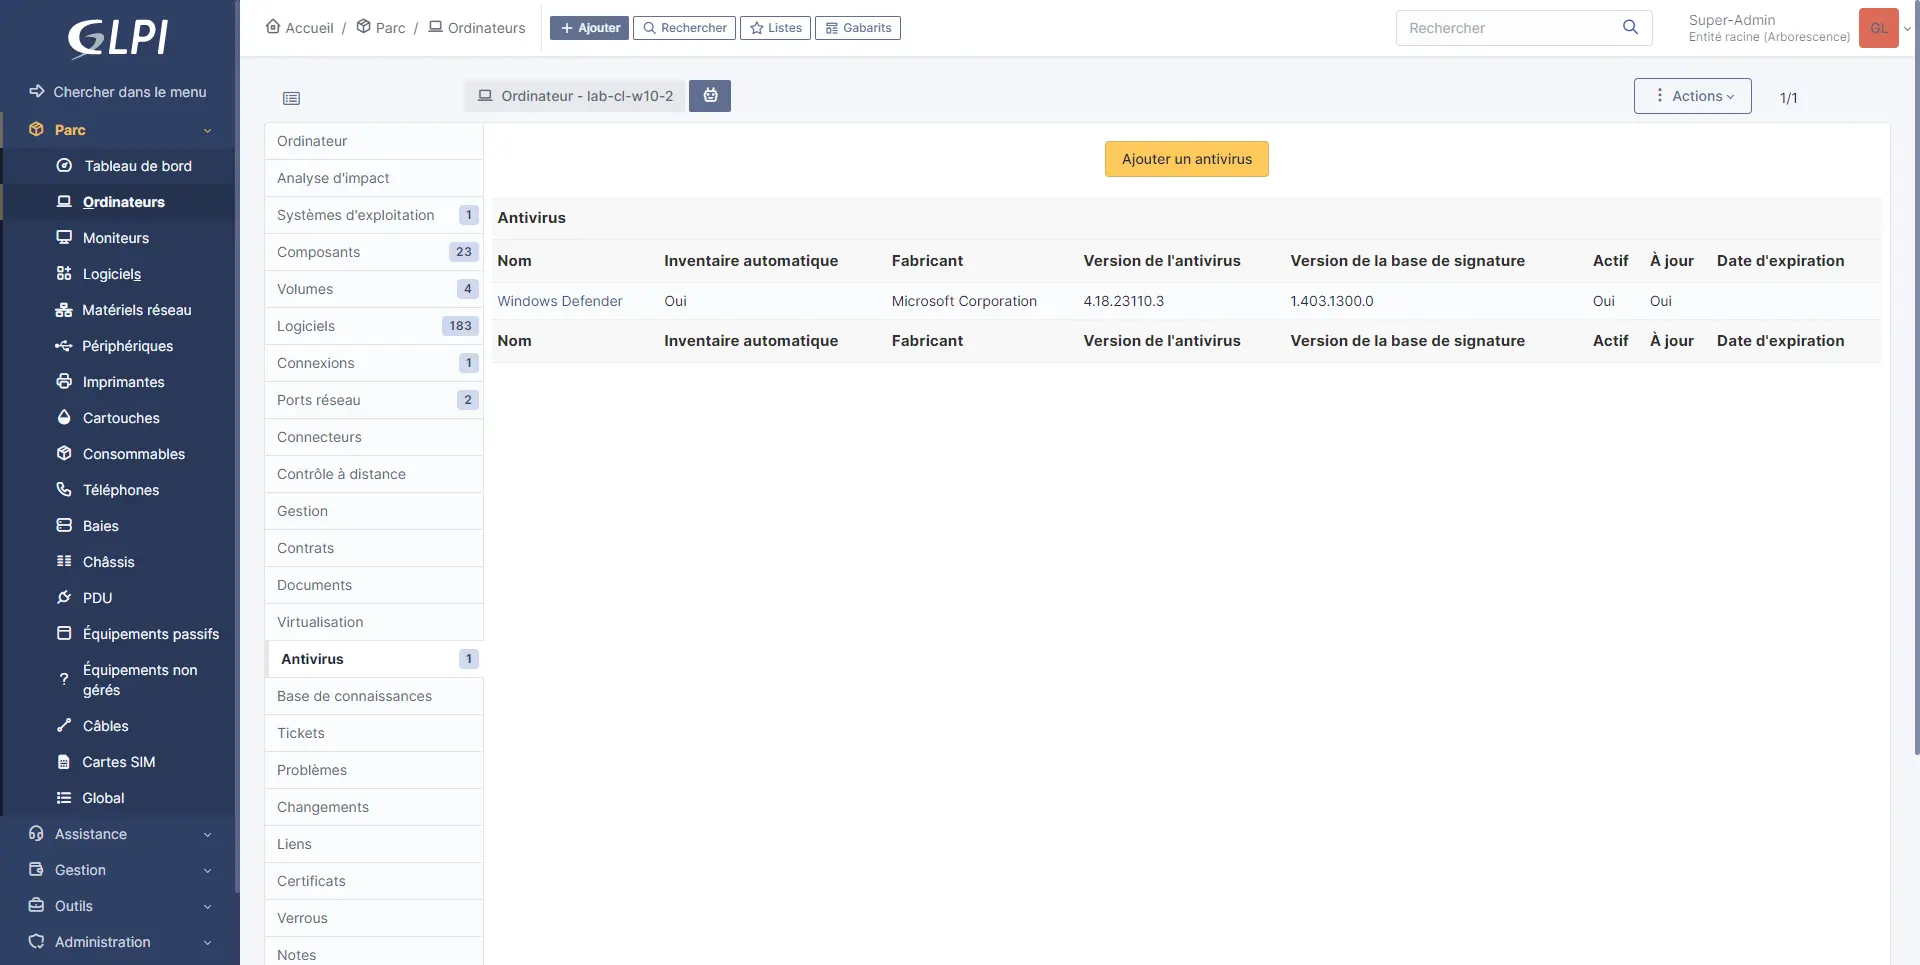
- Antivirus
- …
Enable automatic inventory in GLPI 10
Although this is built into GLPI 10, by default the automatic inventory functionality is not active.
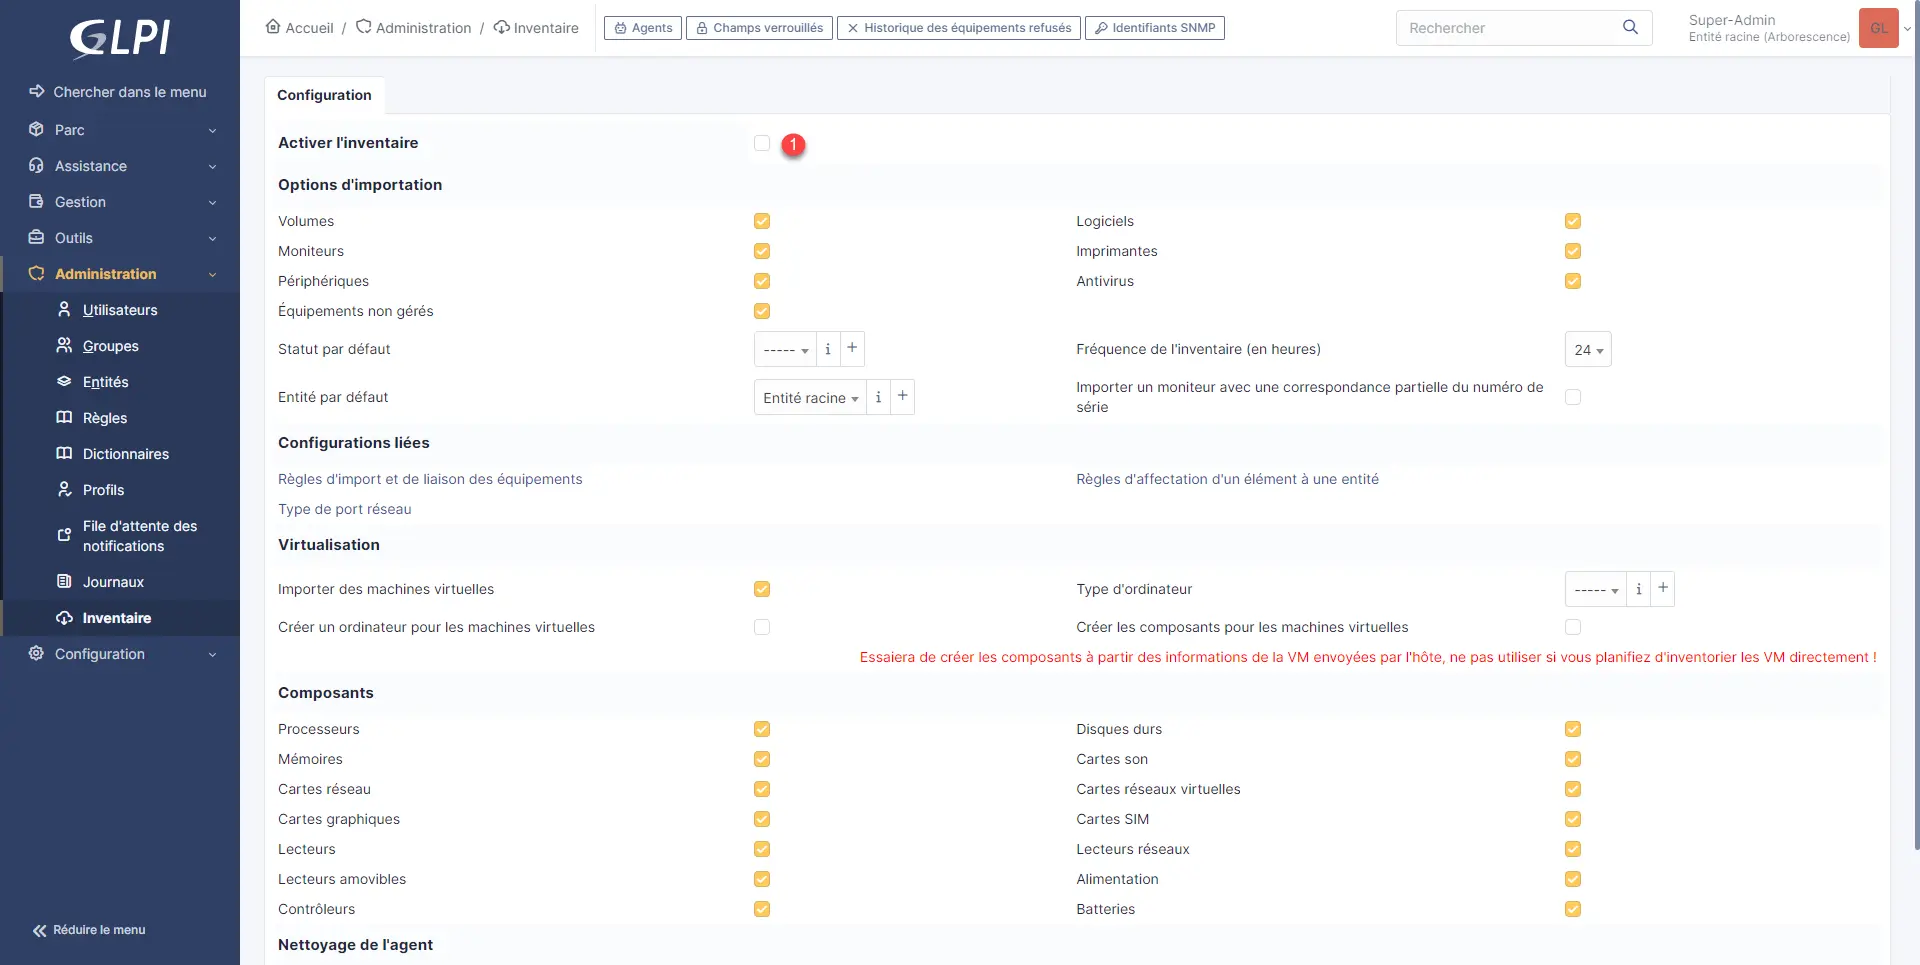
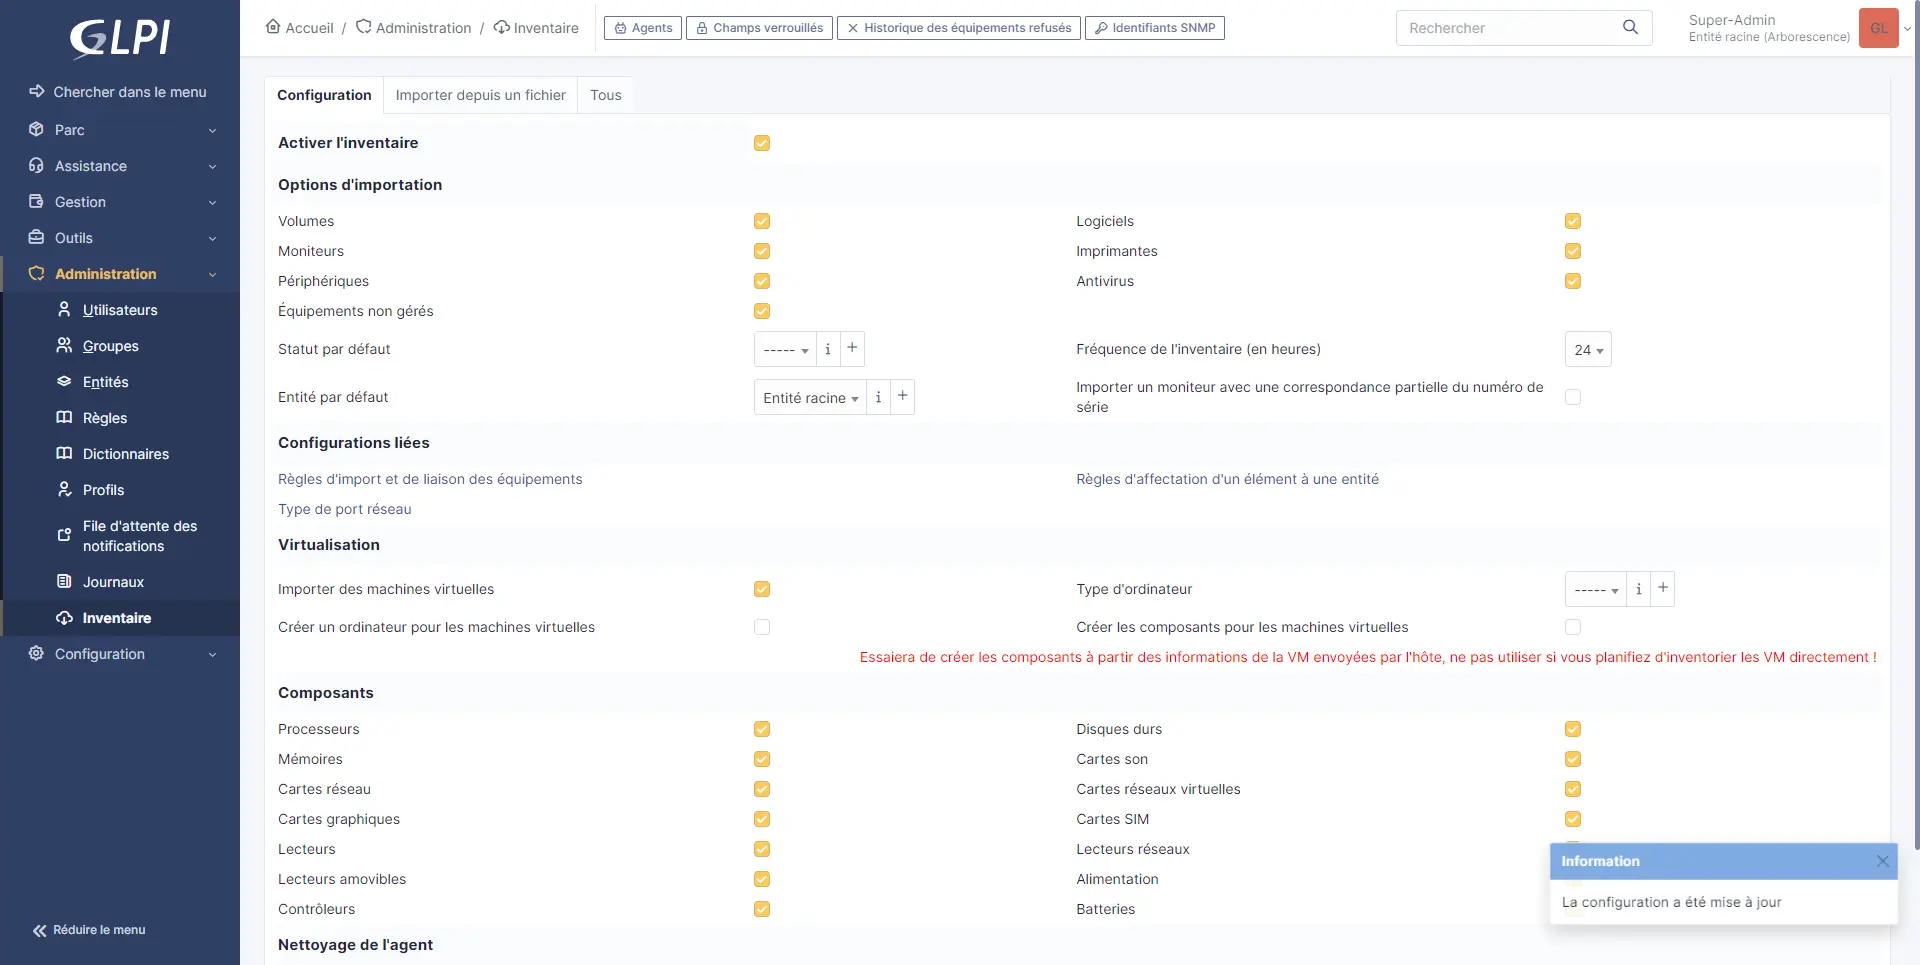
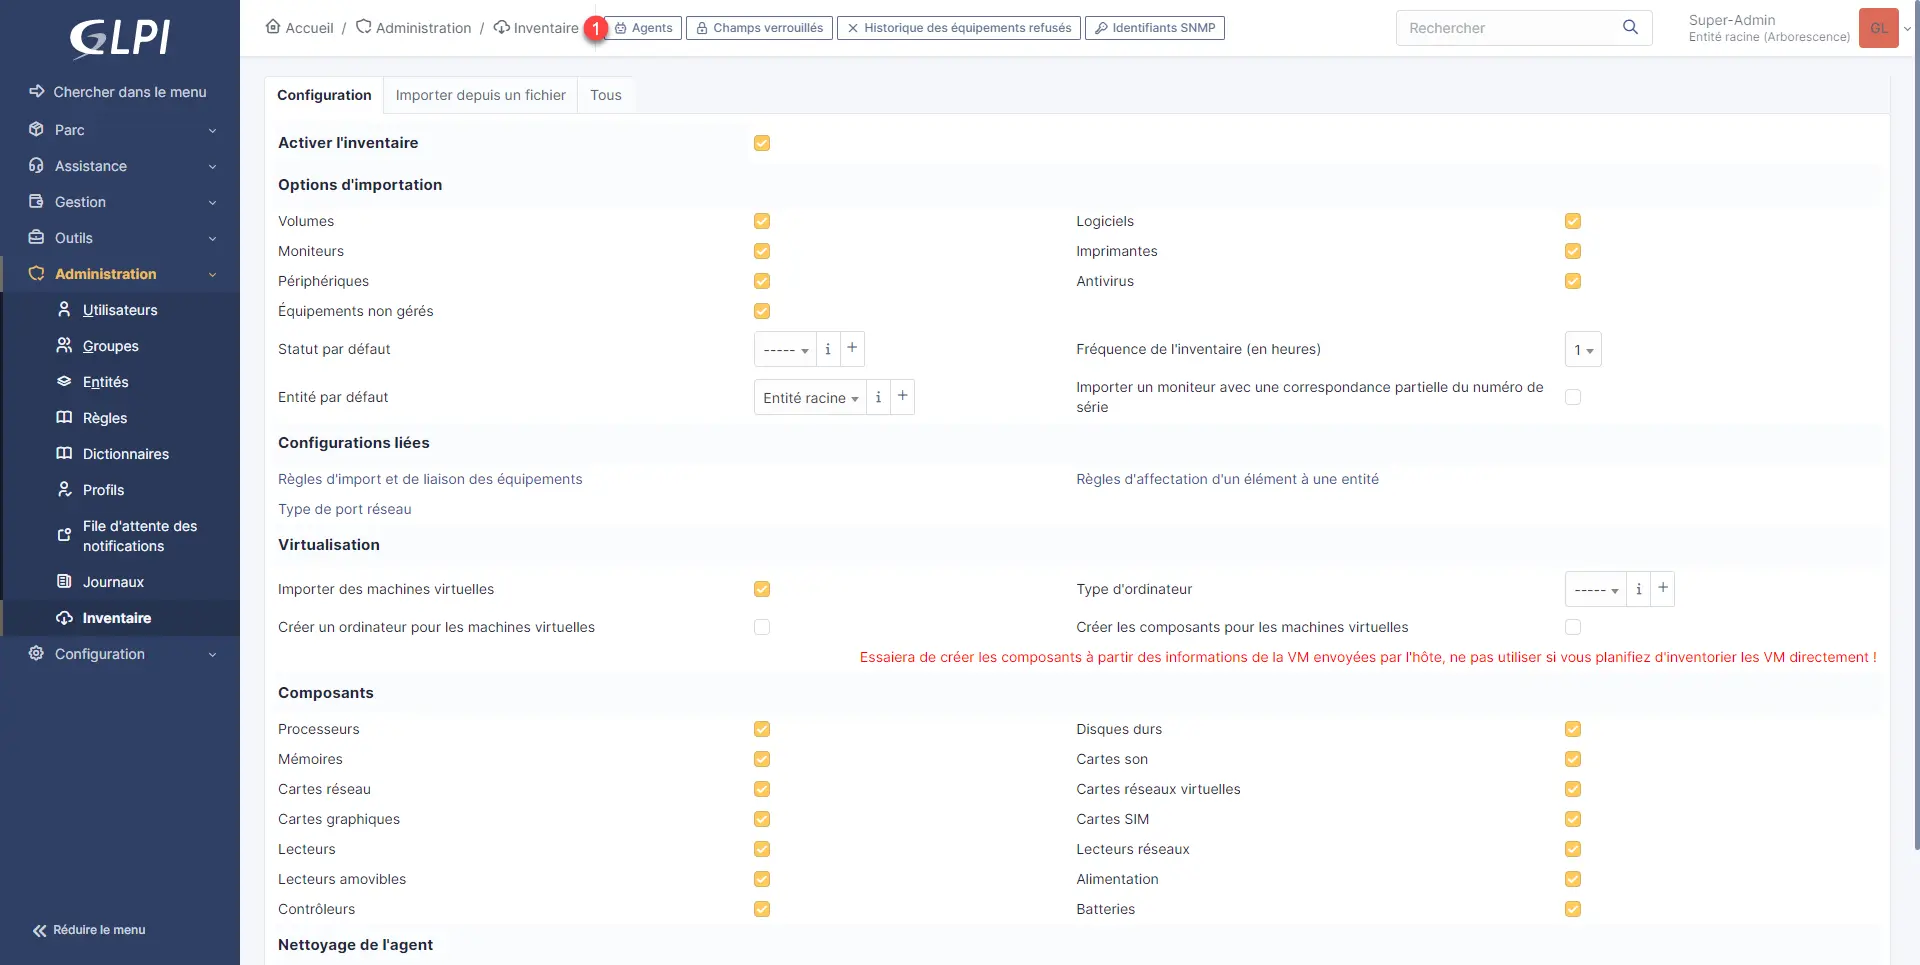
From the menu, expand Administration 1 and click on Inventory 2.
As we can see, Enable Inventory 1 box is not checked.
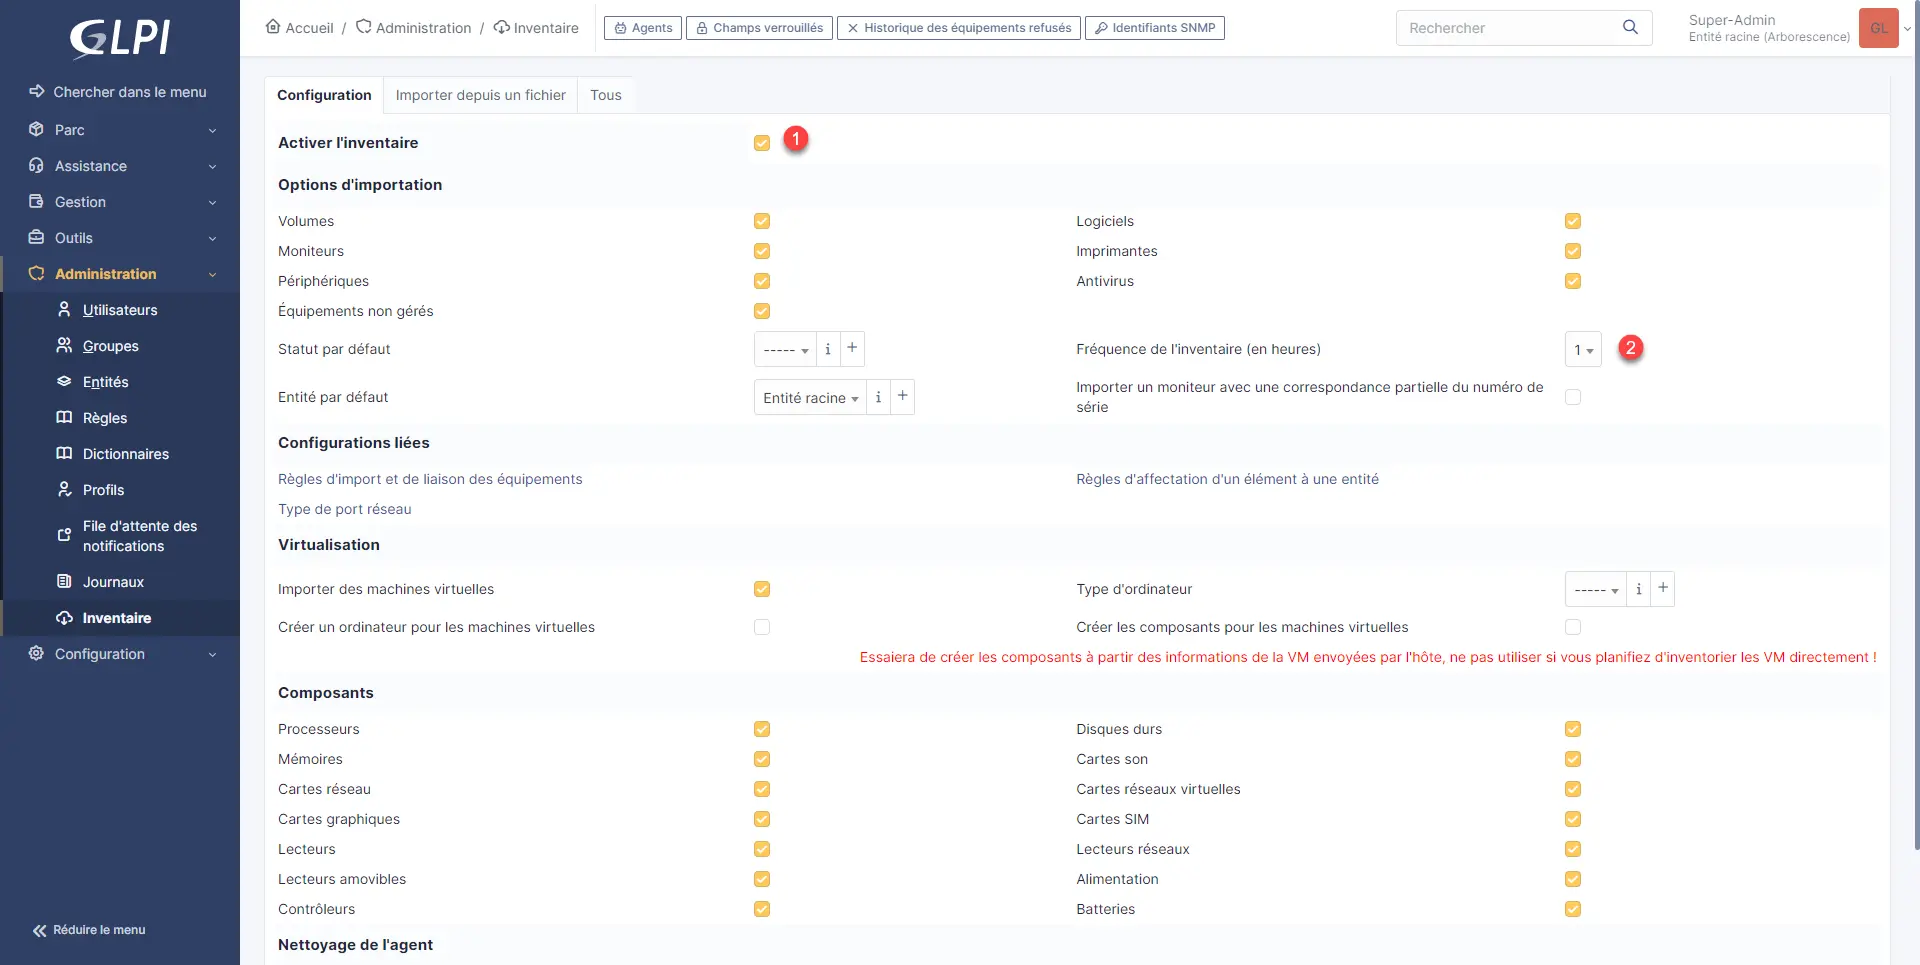
Check the box Enable the inventory 1 then adjust the frequency of the inventory if necessary 2, then click on the Save button 3 which is at the bottom of the page.
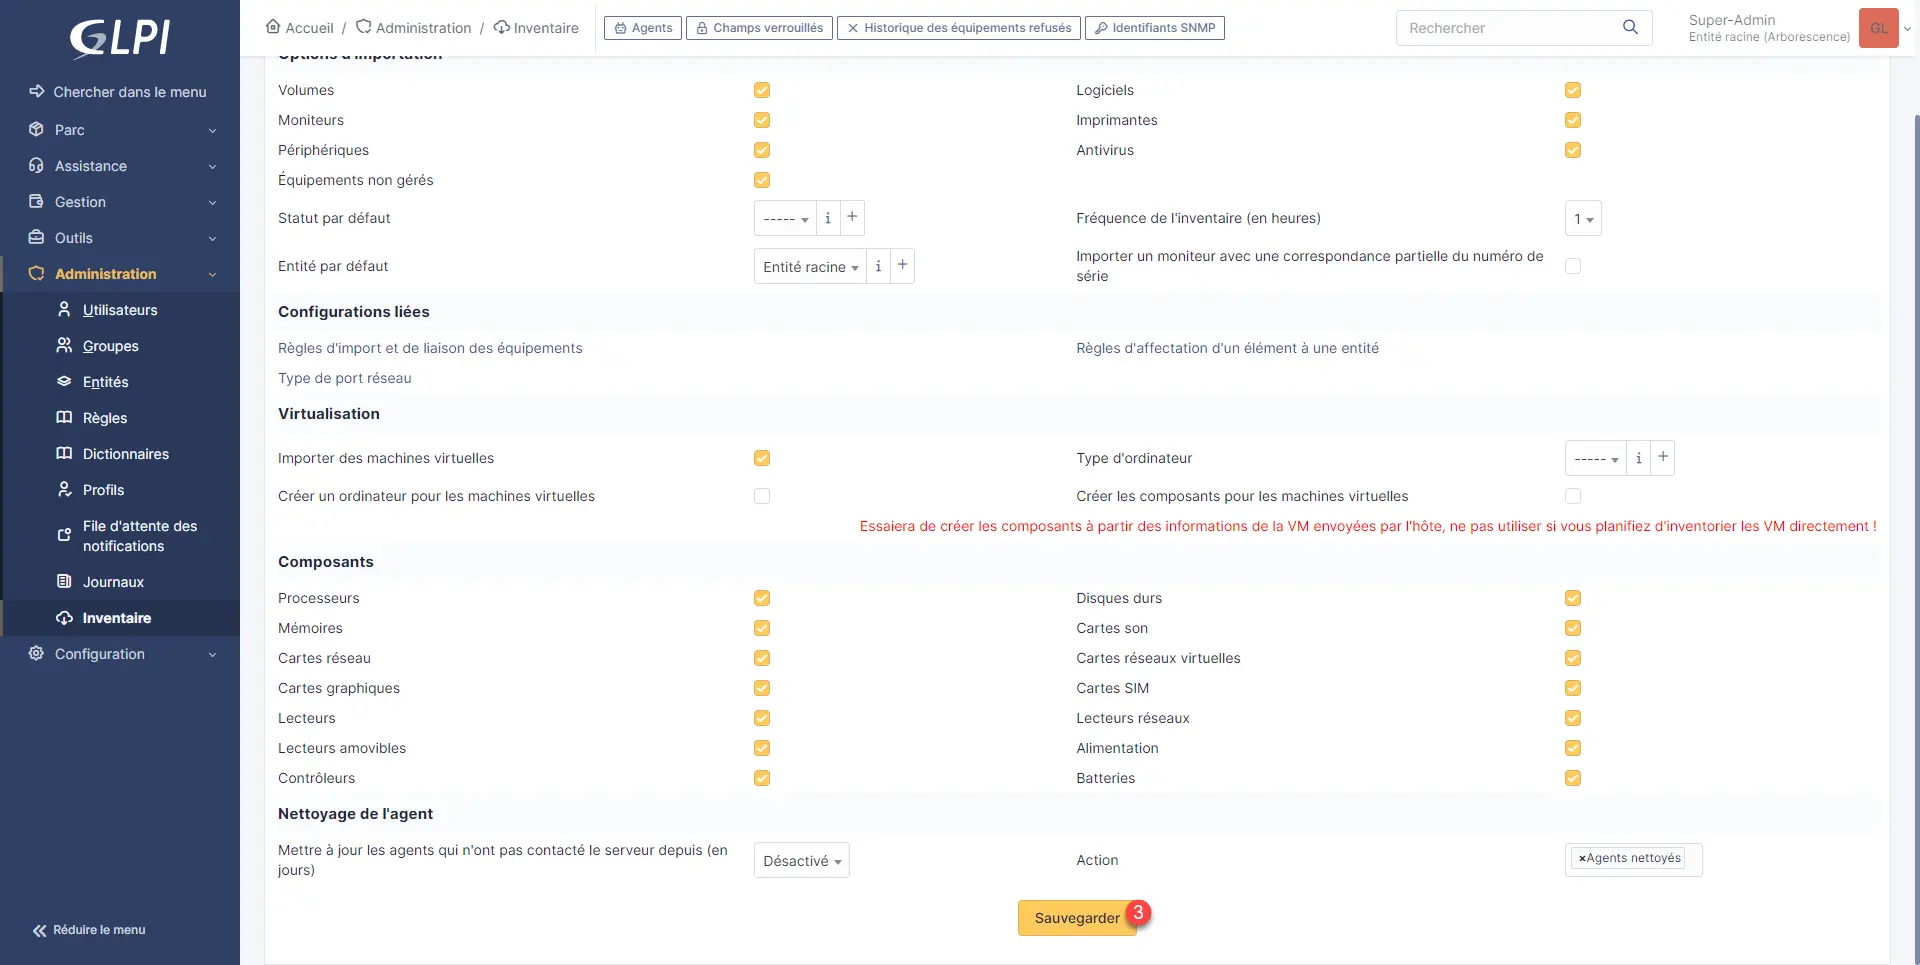
The inventory is activated in GLPI 10. A tooltip indicating that the configuration has been updated.
Install GLPI Agent
Now, you need to install GLPI Agent on the computers so that the information can be sent to GLPI.
Like the FusionInventory agent, there are two operating modes:
- Windows Services
- Scheduled task
Personally I prefer the second solution.
To get started, go to the GLPI Agent Github to download it : https://github.com/glpi-project/glpi-agent
Go to the list of releases and download the desired version:
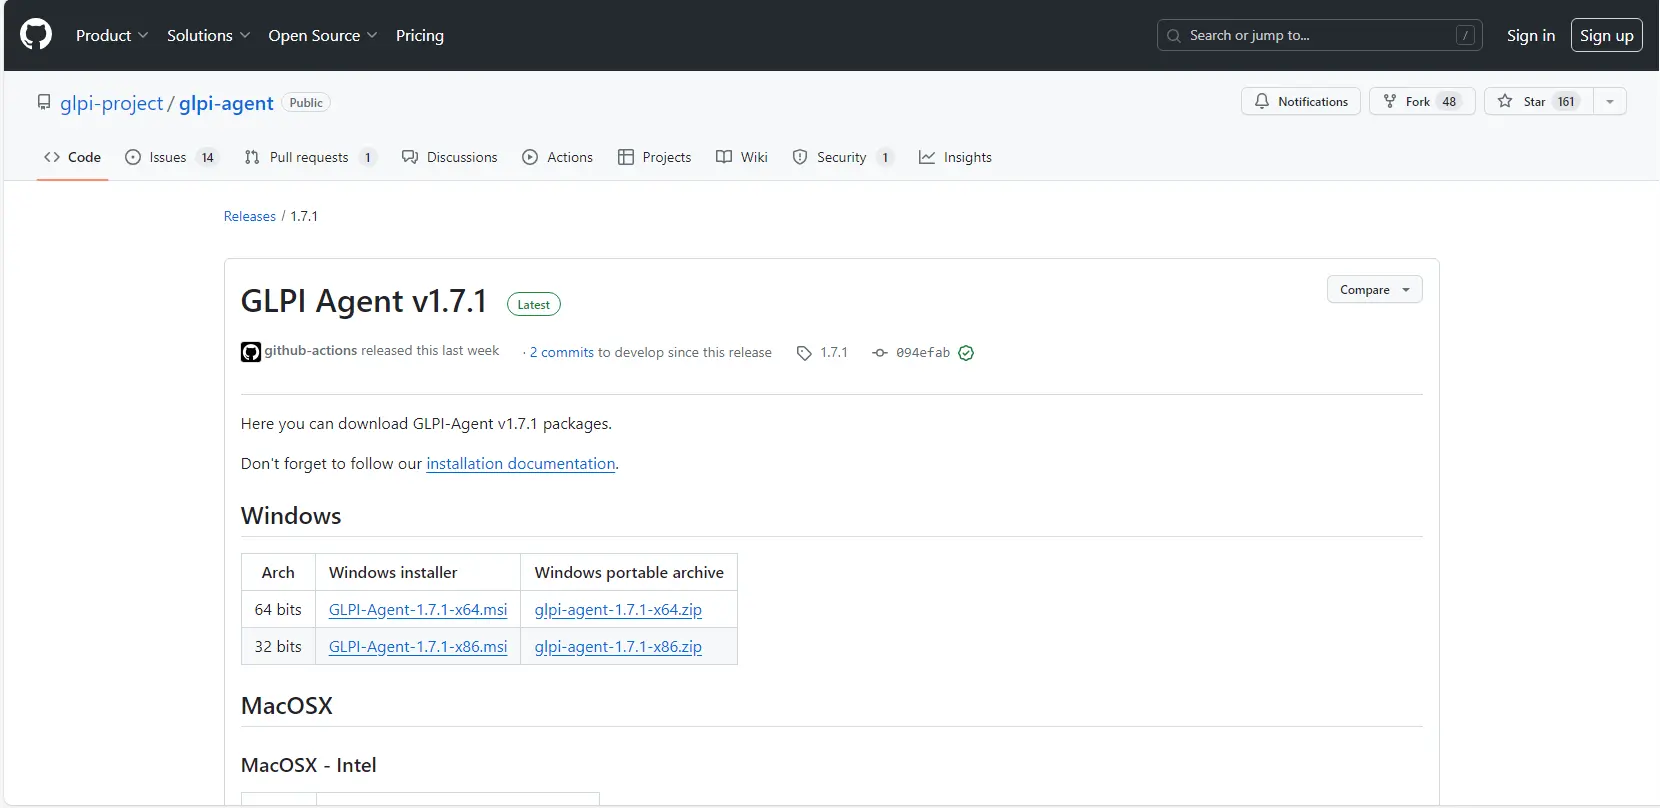
For my part I chose the x64 version in Windows installer format (.msi)
Manual installation of GLPI Agent
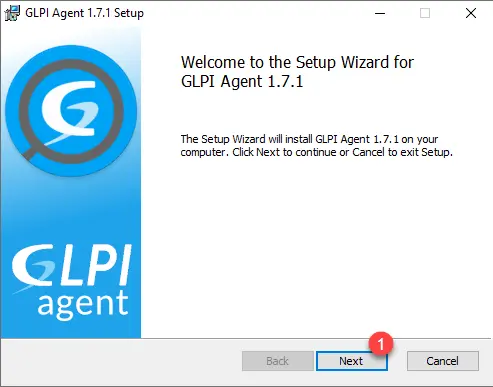
Once downloaded, double-click on it to launch the installation wizard.
When launching the wizard, click on the Next 1 button.
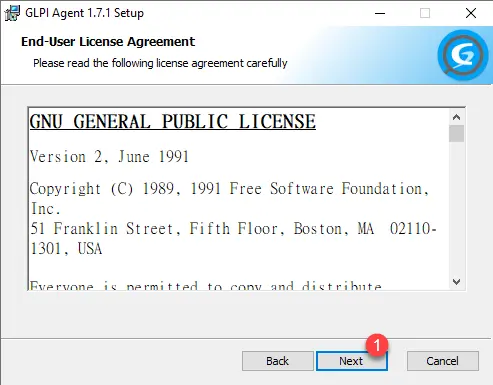
Accept the license agreement by clicking on the Next 1 button.
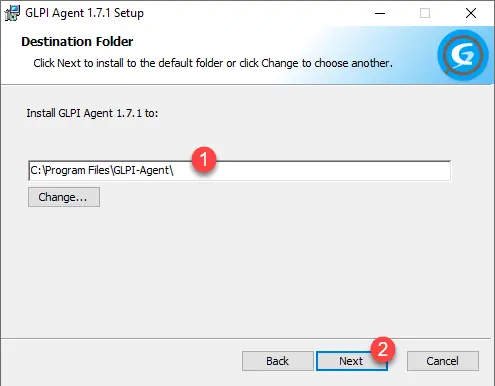
If necessary change the installation path 1 click on Next 2.
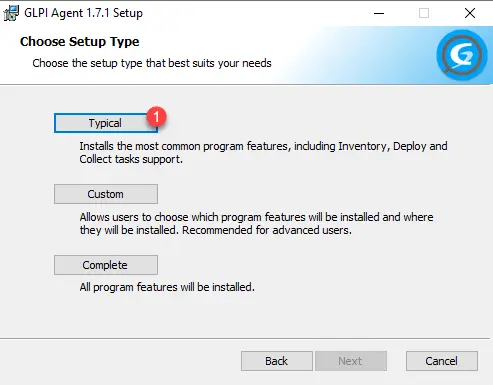
Select the installation type: Typical 1.
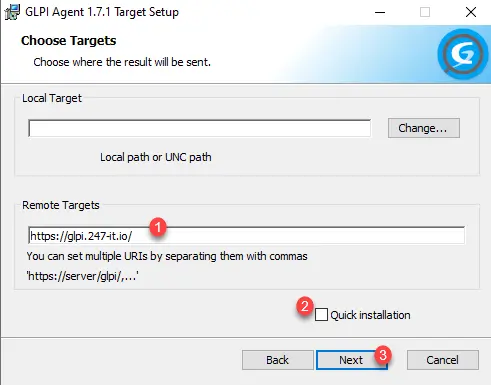
Indicate the URL of the GLPI 10 server 1, uncheck Quick installation 2 and click on Next 3.
Pass the SSL options, click on Next 1.
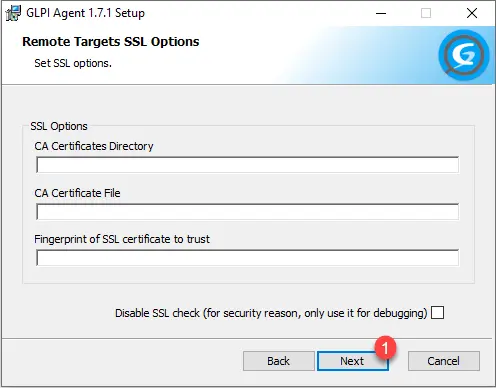
In a future tutorial, I will explain how to set up SSL options for inventory.
If access to the GLPI server requires the use of a proxy, configure it here then click on Next 1.

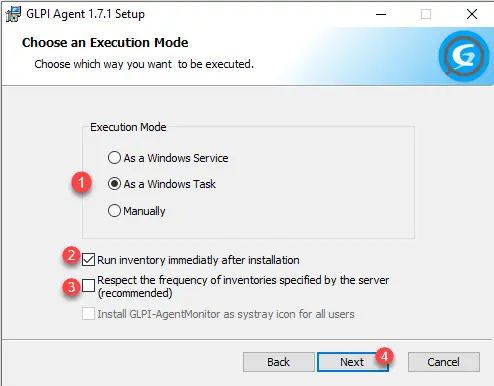
Choose the execution mode of the desired agent 1, check the box Run inventory immediately after installation 2, uncheck the box Respect the frequency of inventories specified by the server 3 and click on the Next 4 button.
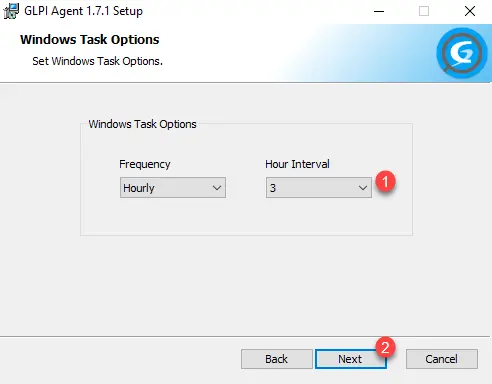
Configure the inventory frequency for scheduled task 1 and click Next 2.
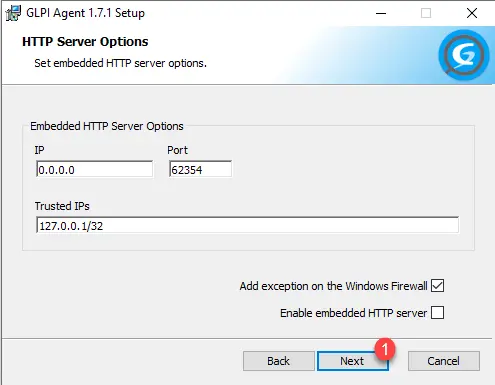
Configure the embedded HTTP server with the agent if installation mode is in use, it is also possible to deactivate the server by unchecking the Enable embedded HTTP Server box, click on Next 1.
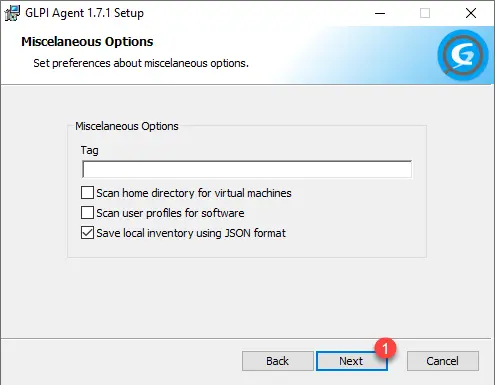
If you wish to add a TAG, do it here (this allows you to play the rules when sending it to the inventory on GLPI), click on Next 1.
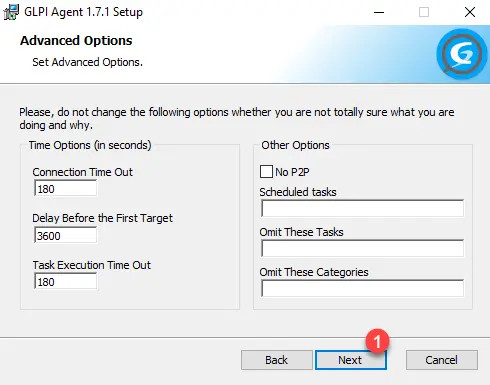
Skip the advanced options by clicking on the Next 1 button.
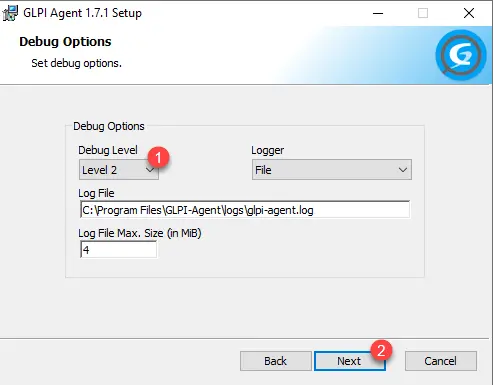
For the debug options, I advise you to activate them, in the event of a problem, this will be easier to troubleshoot, select the debug level 2 (Level 2) 1 and click on Next 2 .
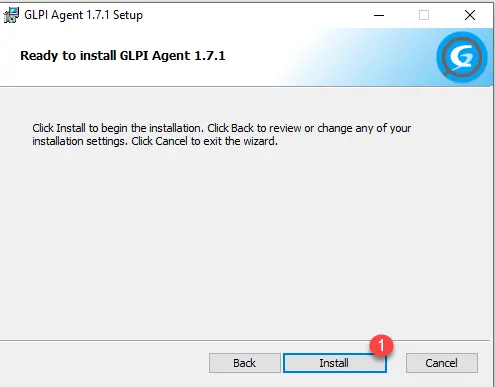
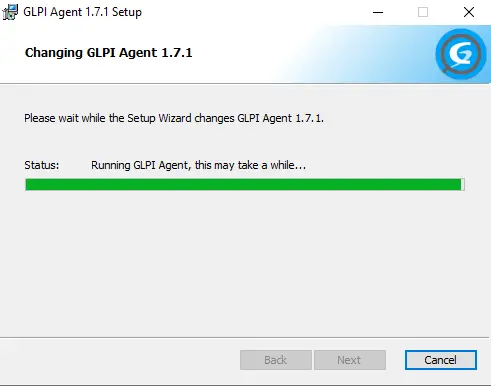
Start the installation by clicking on the Install 1 button.
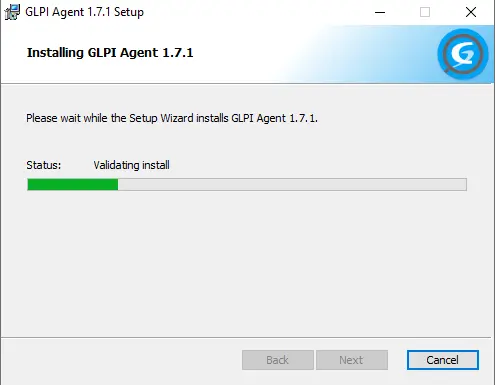
Wait during the installation and the first inventory…
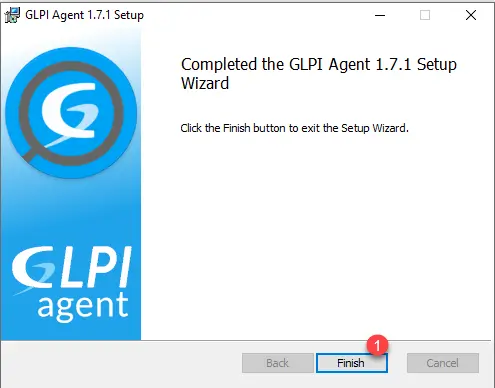
Once the installation is complete, click Finish 1 to close the wizard.
If you go to GLPI, in the Park section you should have the computer in the inventory (we will see this later in the tutorial).
Deploy the agent by Group Policy (GPO) in an Active Directory environment
Now we will how to deploy GLPI Agent by Group Policy. In reality, there is not one solution but several solutions to deploy the agent by GPO:
- We can go through application deployment
- Use a startup script
I will show you several solutions, it’s up to you to choose the one that suits you.
GPO: Software installation to install GLPI Agent
As the agent is available in MSI format, we will be able to pass a group policy that uses the software installation.
I’m not going to go into detail but you give the main points, a complete tutorial is available here: GPO: deploy msi applications
As you will have noticed, you have to pass information during the installation of GLPI Agent to configure it, the deployment of MSI by GPO does not allow you to pass parameters, but there is a solution:
- Pass an .msp file which will contain the parameters you wish to pass to the MSI file.
- The configuration of the agent being done in the registry, we can add the registry keys in the group policy.
Create an .msp file with GLPI Agent settings
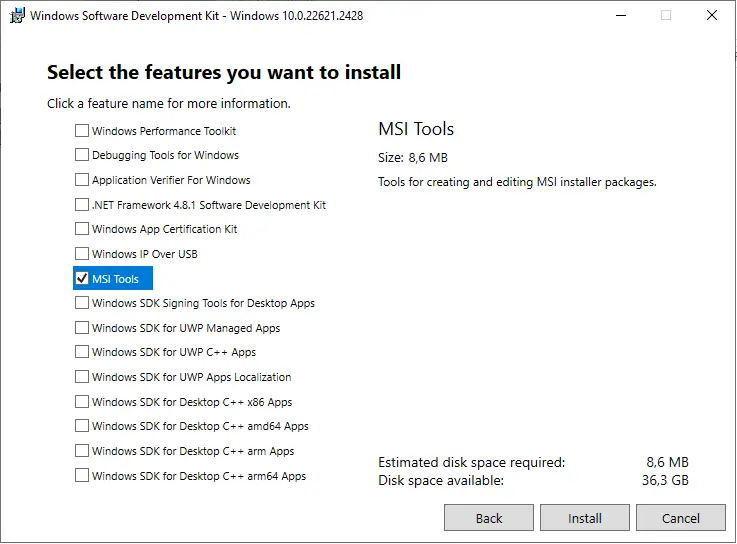
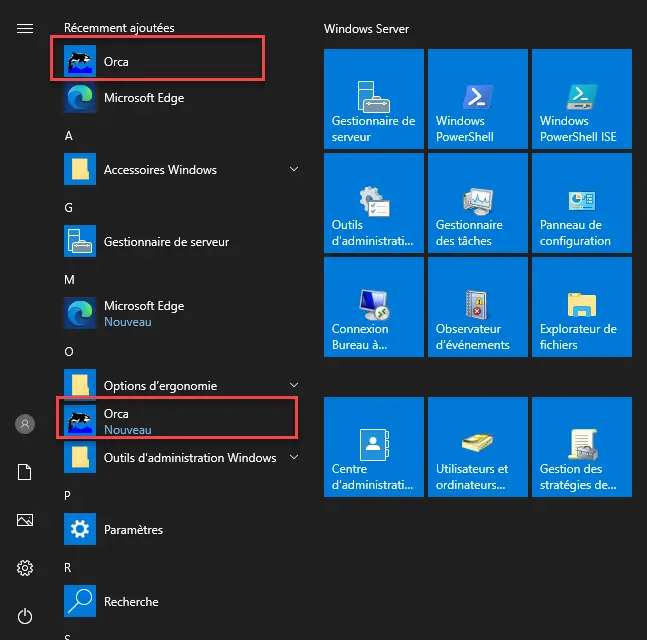
To create an .msp file you will need Orca which is located in Windows SDK.
When installing the SDK, check only MSI Tools.
Once the SDK is installed, go to the installation folder C:\Program Files (x86)\Windows Kits\10\bin\10.X.X.X\x86 and run the Oraca-x86_en-us file.
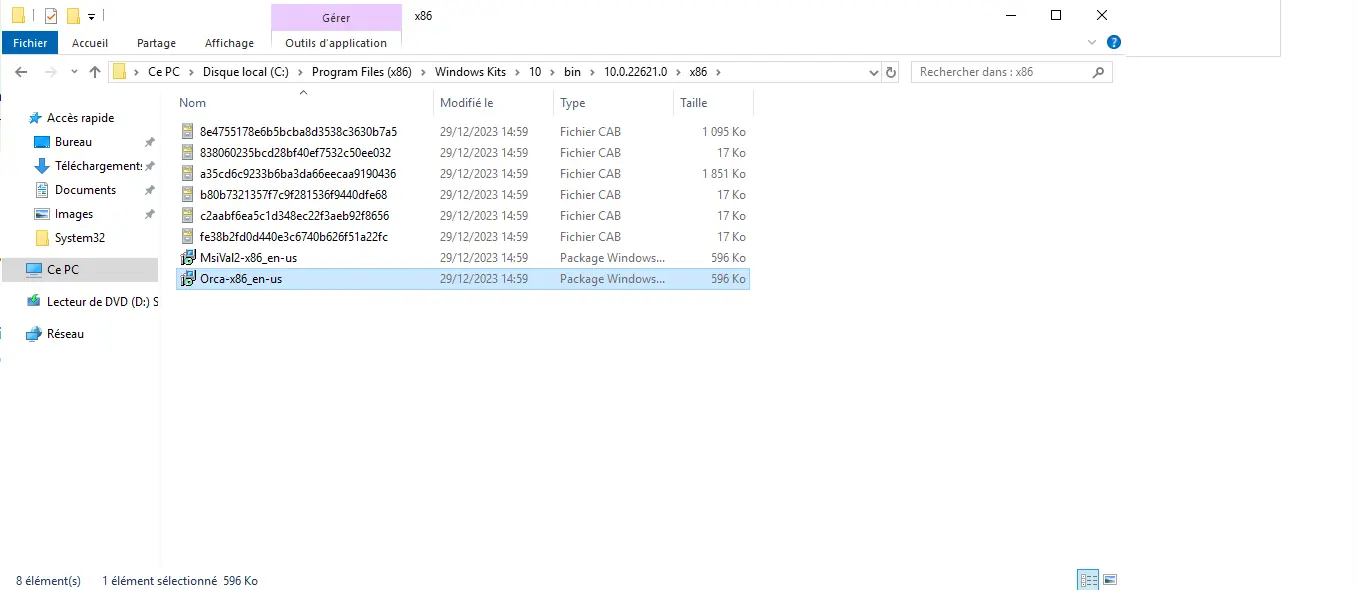
Then launch Orca which is available in the Start menu.
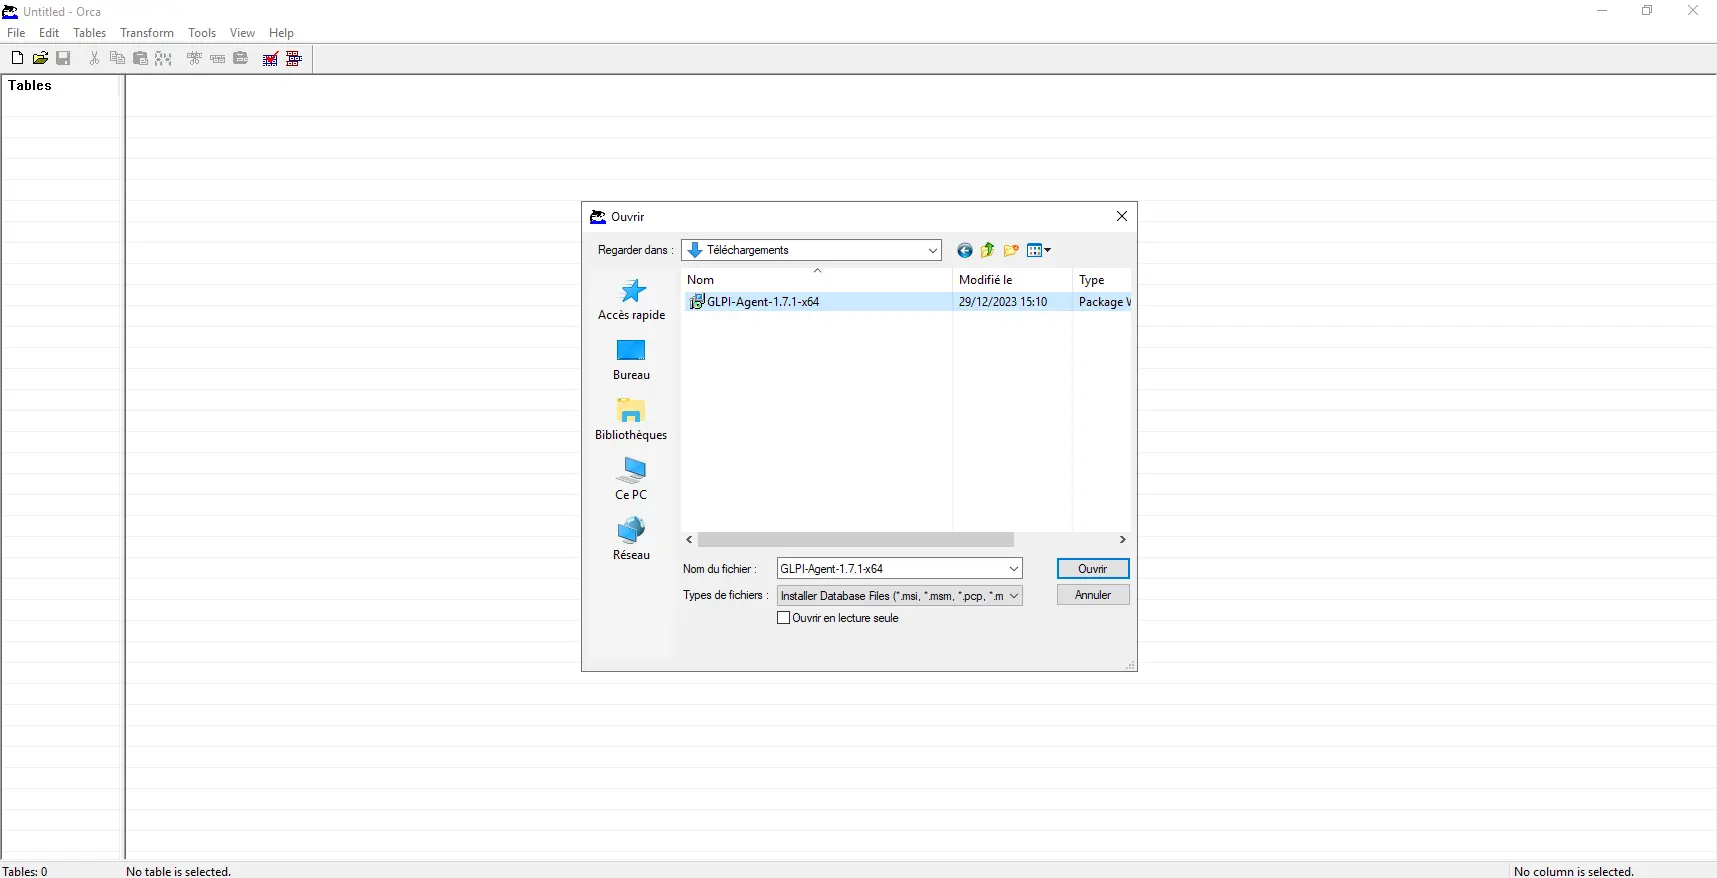
Open the agent MSI file, click on the open folder 1.

Select the GLPI Agent msi file.
Go to Transform 1 then click on New Transform 2.
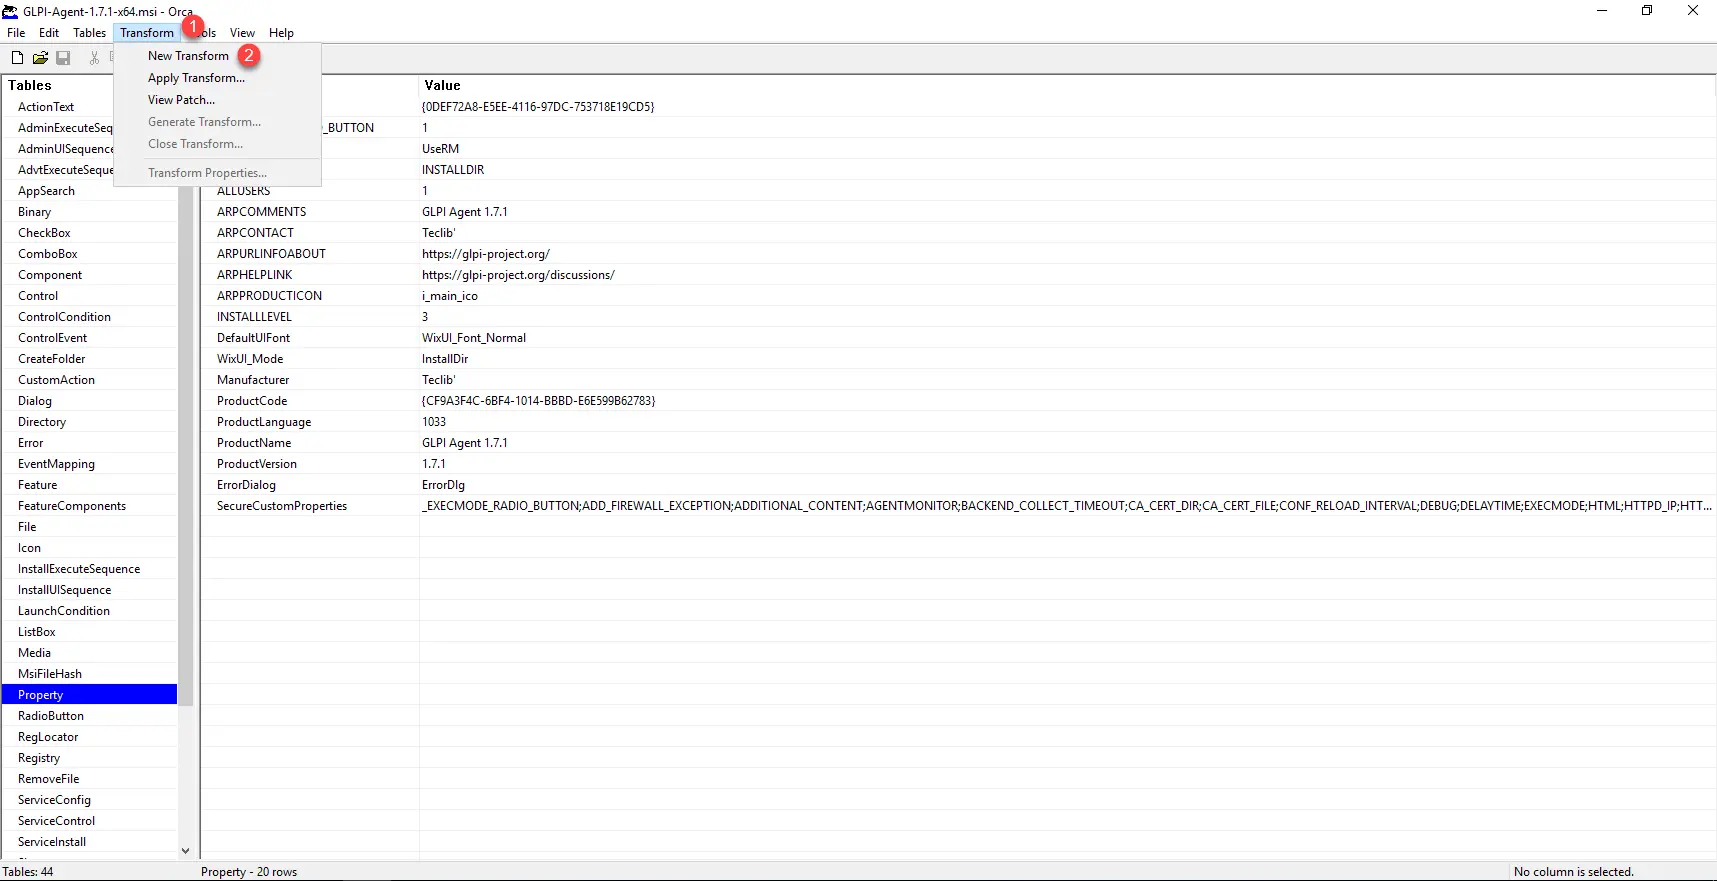
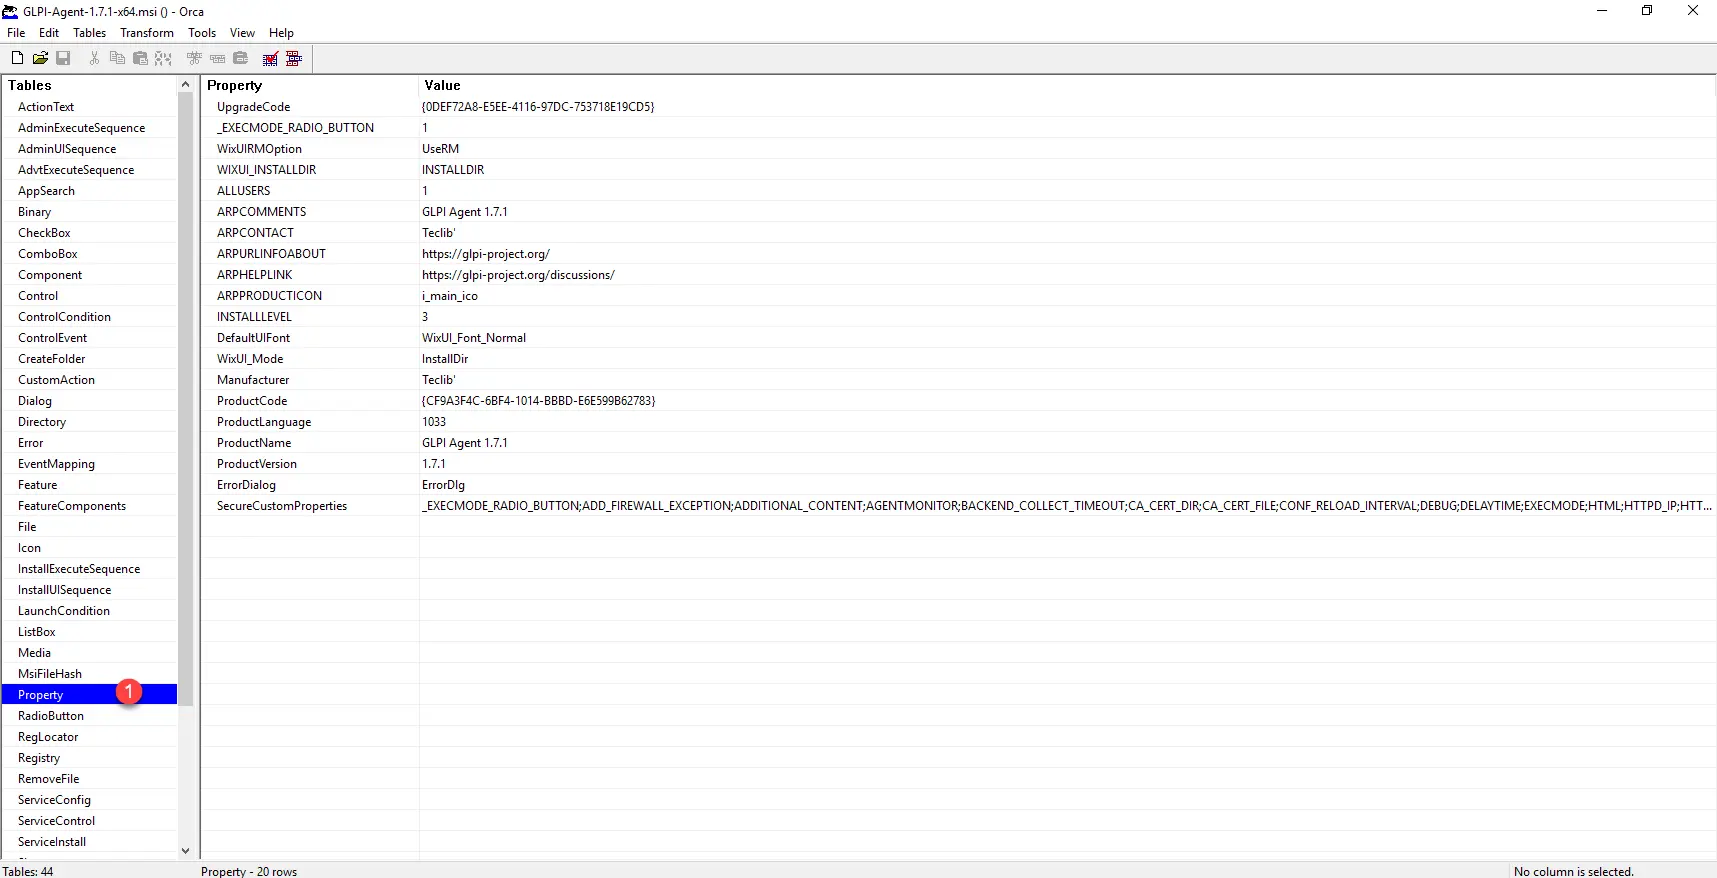
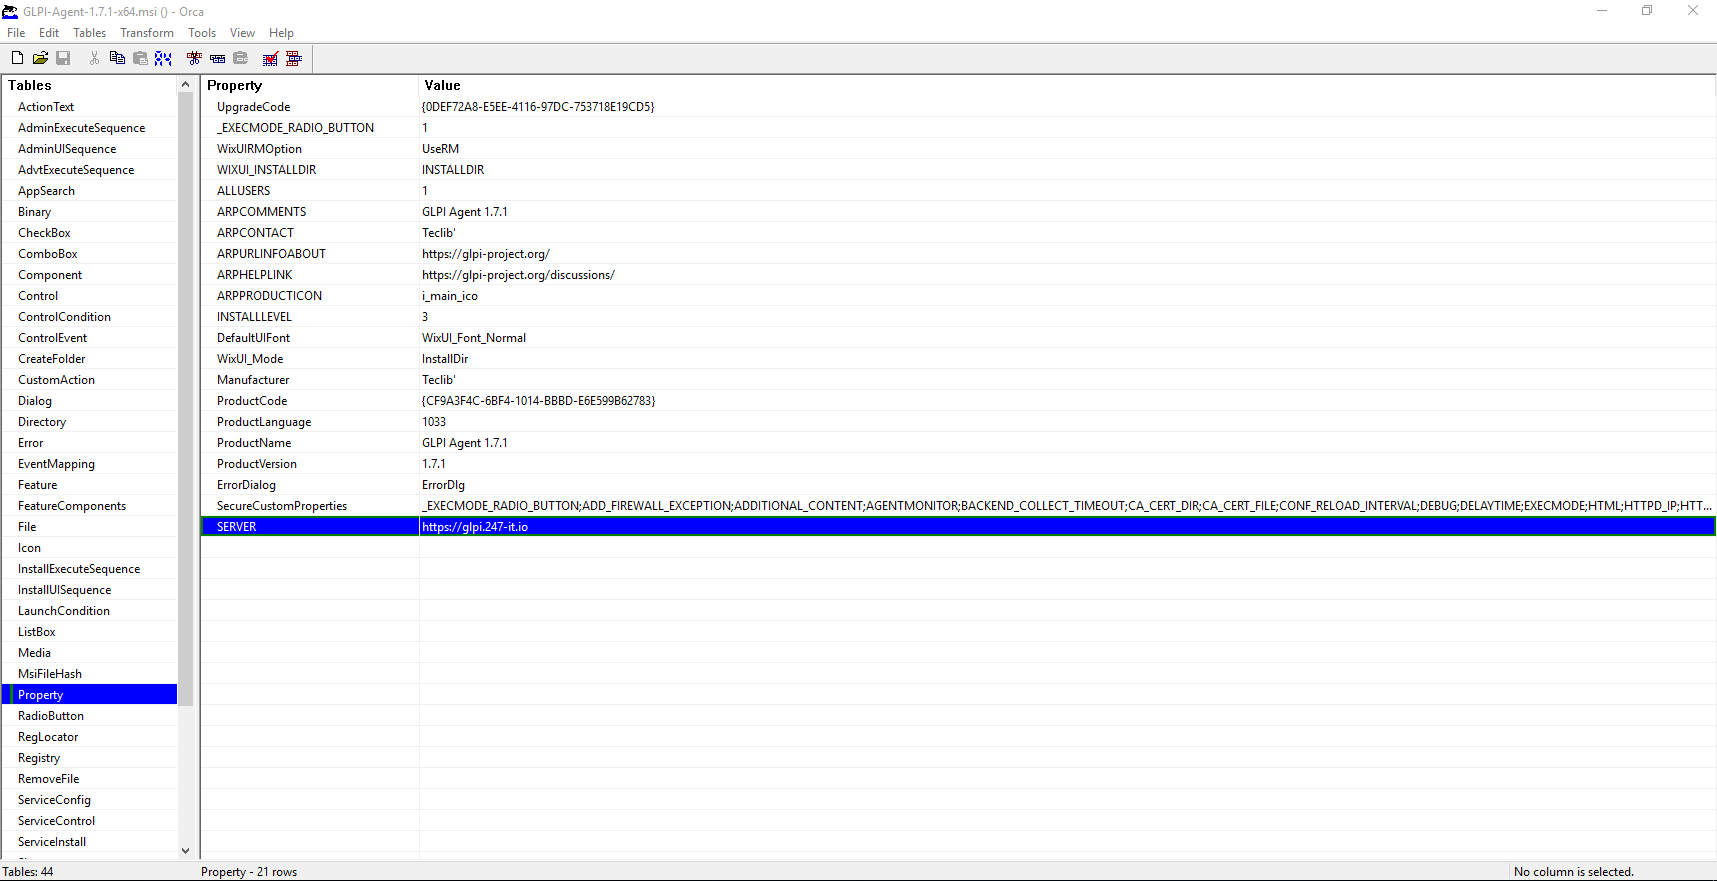
In Tables, go to Property 1, double-click on an empty row to add an entry.
Start by entering the property name 1 here SERVER and click OK 2.

Then indicate the value 1, here the URL of the GLPI server and click on OK 2.

The line is added:
You can find the list of parameters here : https://glpi-agent.readthedocs.io/en/latest/installation/windows-command-line.html#command-line-parameters
Once you have added the parameters you need, click on Transform 1 then Generate Transform 2.
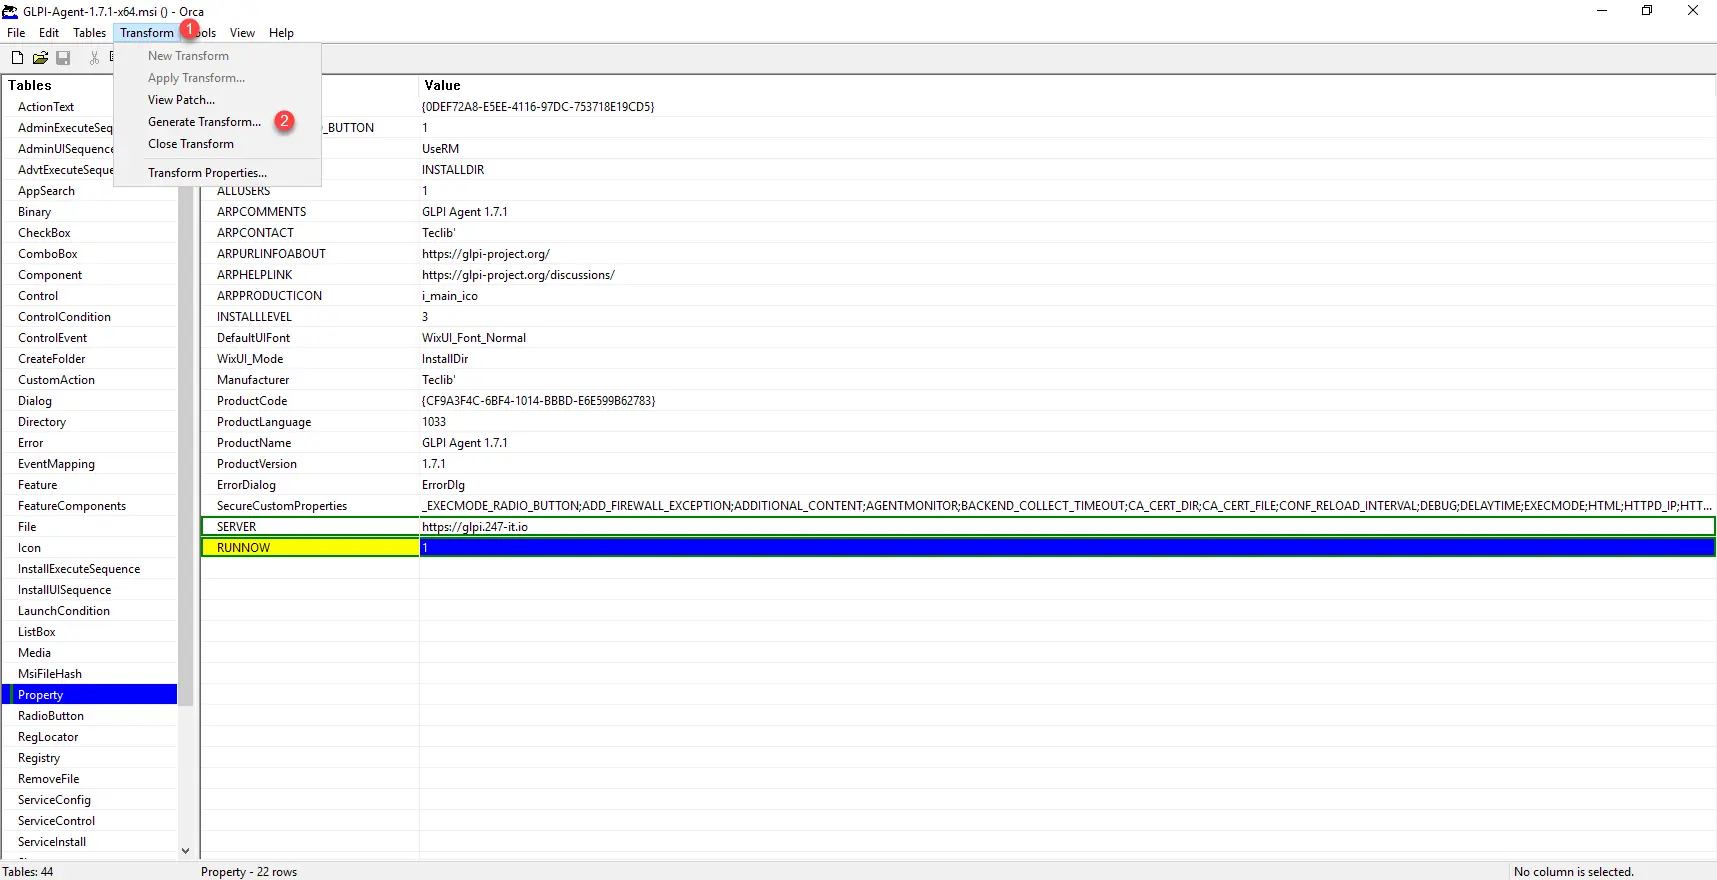
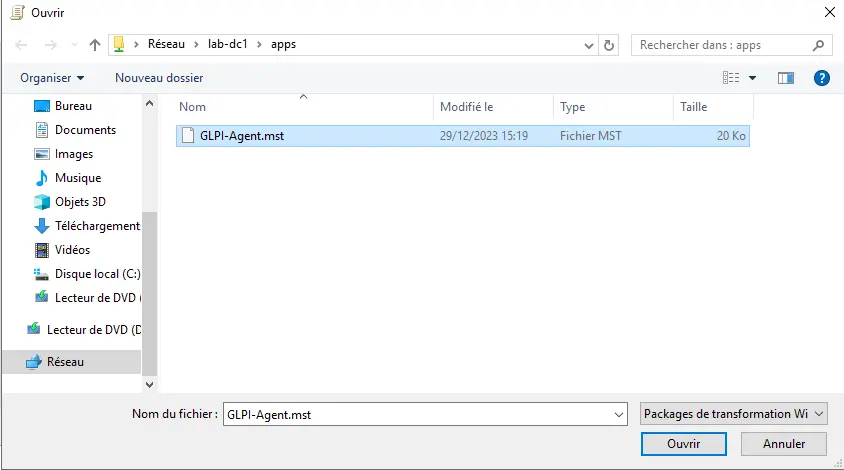
Enter the MST file for GLPI Agent.

On the network share for application deployment, put the agent’s MSI and MST file.
On the network share for application deployment, put the agent’s MSI and MST file.
In Properties, go to the Modifications tab and click on the Add button.
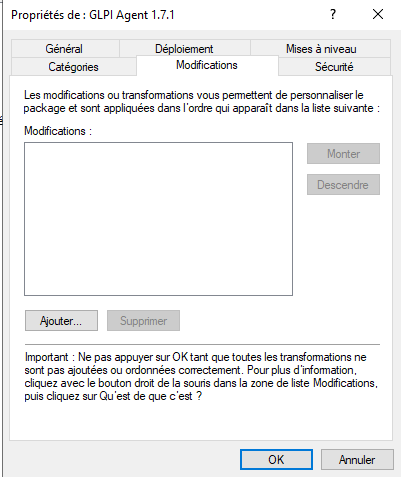
Select the MST file.
The MST file is added, click OK to close the properties window.

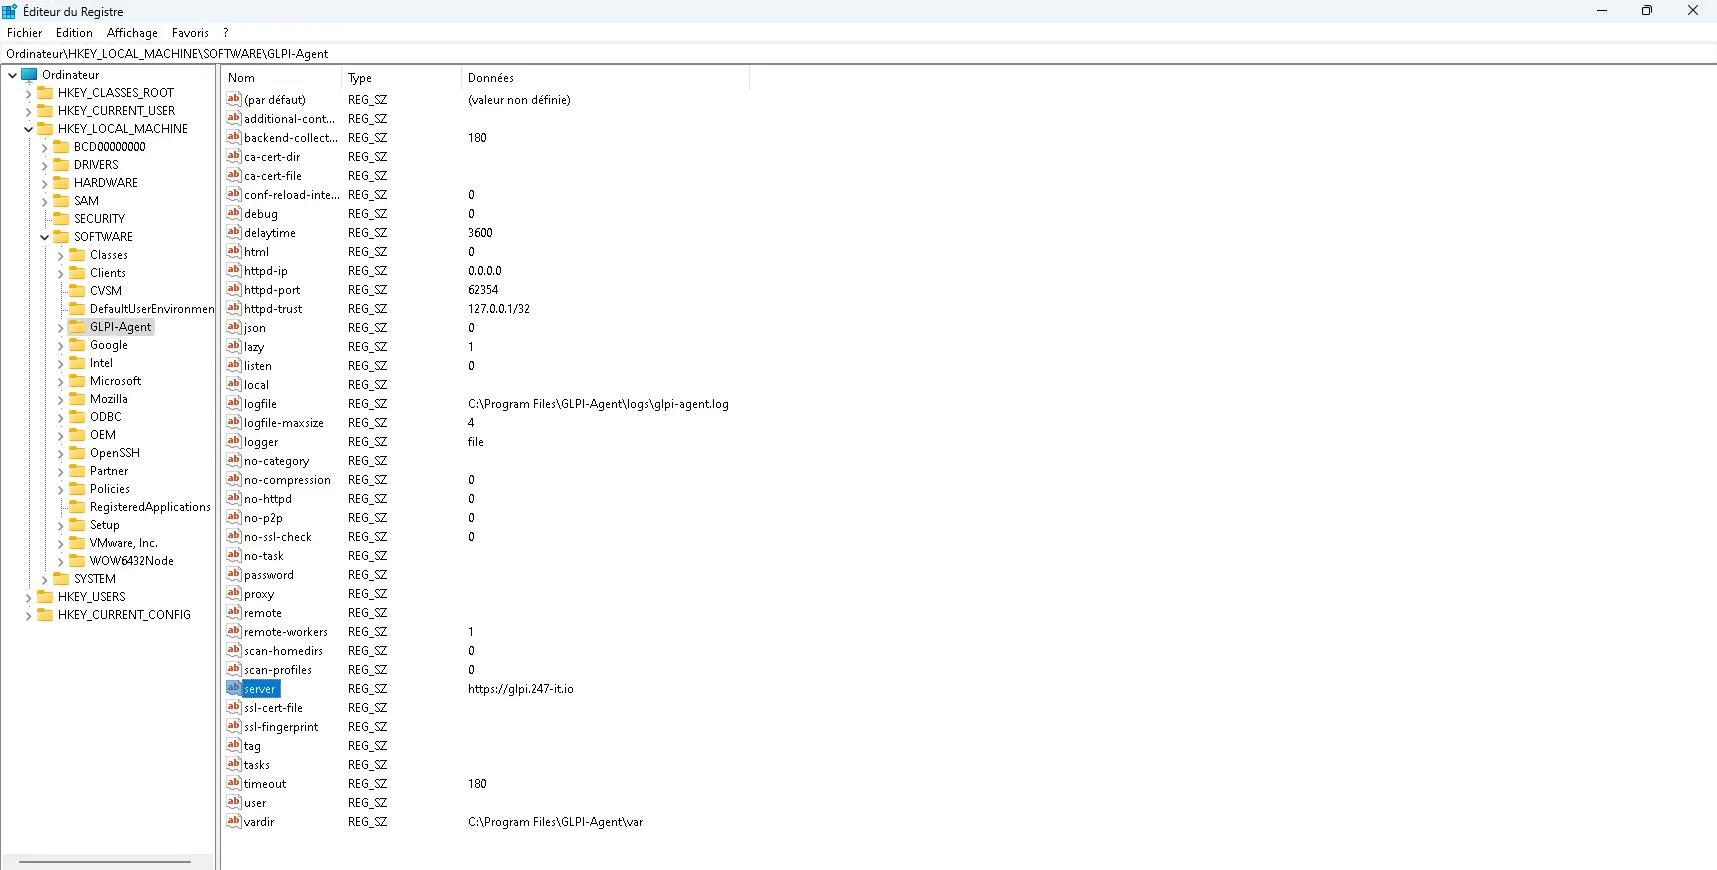
Then to verify the correct application of the parameters, you can check in the registry whether the server has been correctly configured:
The computer should also be listed in the GLPI inventory.
This technique can be used with all MSI files.
Passer les paramètres de GLPI Agent directement en modifiant le registre
The second method for deploying GLPI Agent by installing software, consists of deploying normally the MSI file and in another group policy passing the configuration parameters found in the registry.
I’m not going to go into detail, but you’ll find a tutorial here that explains how to do it: GPO: add a registry key
Key location: HKEY_LOCAL_MACHINE\SOFTFARE\GLPI-Agent.
At a minimum, you must configure the server key by indicating the URL of the GLPI server.
Here are the registry keys:
To find out what they correspond to, you must compare it with the installation parameters of the MSI file ( https://glpi-agent.readthedocs.io/en/latest/installation/windows-command-line.html#command-line-parameters)
Deploy GLPI Agent by script
A more classic method already used with the FusionInventory agent is to use a script by GPO which is executed when the computer starts.
A more classic method already used with the FusionInventory agent is to use a script by GPO which is executed when the computer starts. : https://glpi-agent.readthedocs.io/en/latest/installation/index.html#large-installations
I also wrote a PowerShell script which allows you to install GLPI Agent : https://git.rdr-it.io/scripts/glpi-agent-powershell-install/-/tree/main
I advise you to use the script, PowerShell, because Microsoft plans to no longer support the VBS language in Windows 11 natively.
Then for group policy, you can read this tutorial: GPO: run a script when the computer starts.
Access the agent inventory in GLPI 10
Now, all that remains is to check in GLPI 10 that GLPI Agent has done its job.
Agent management
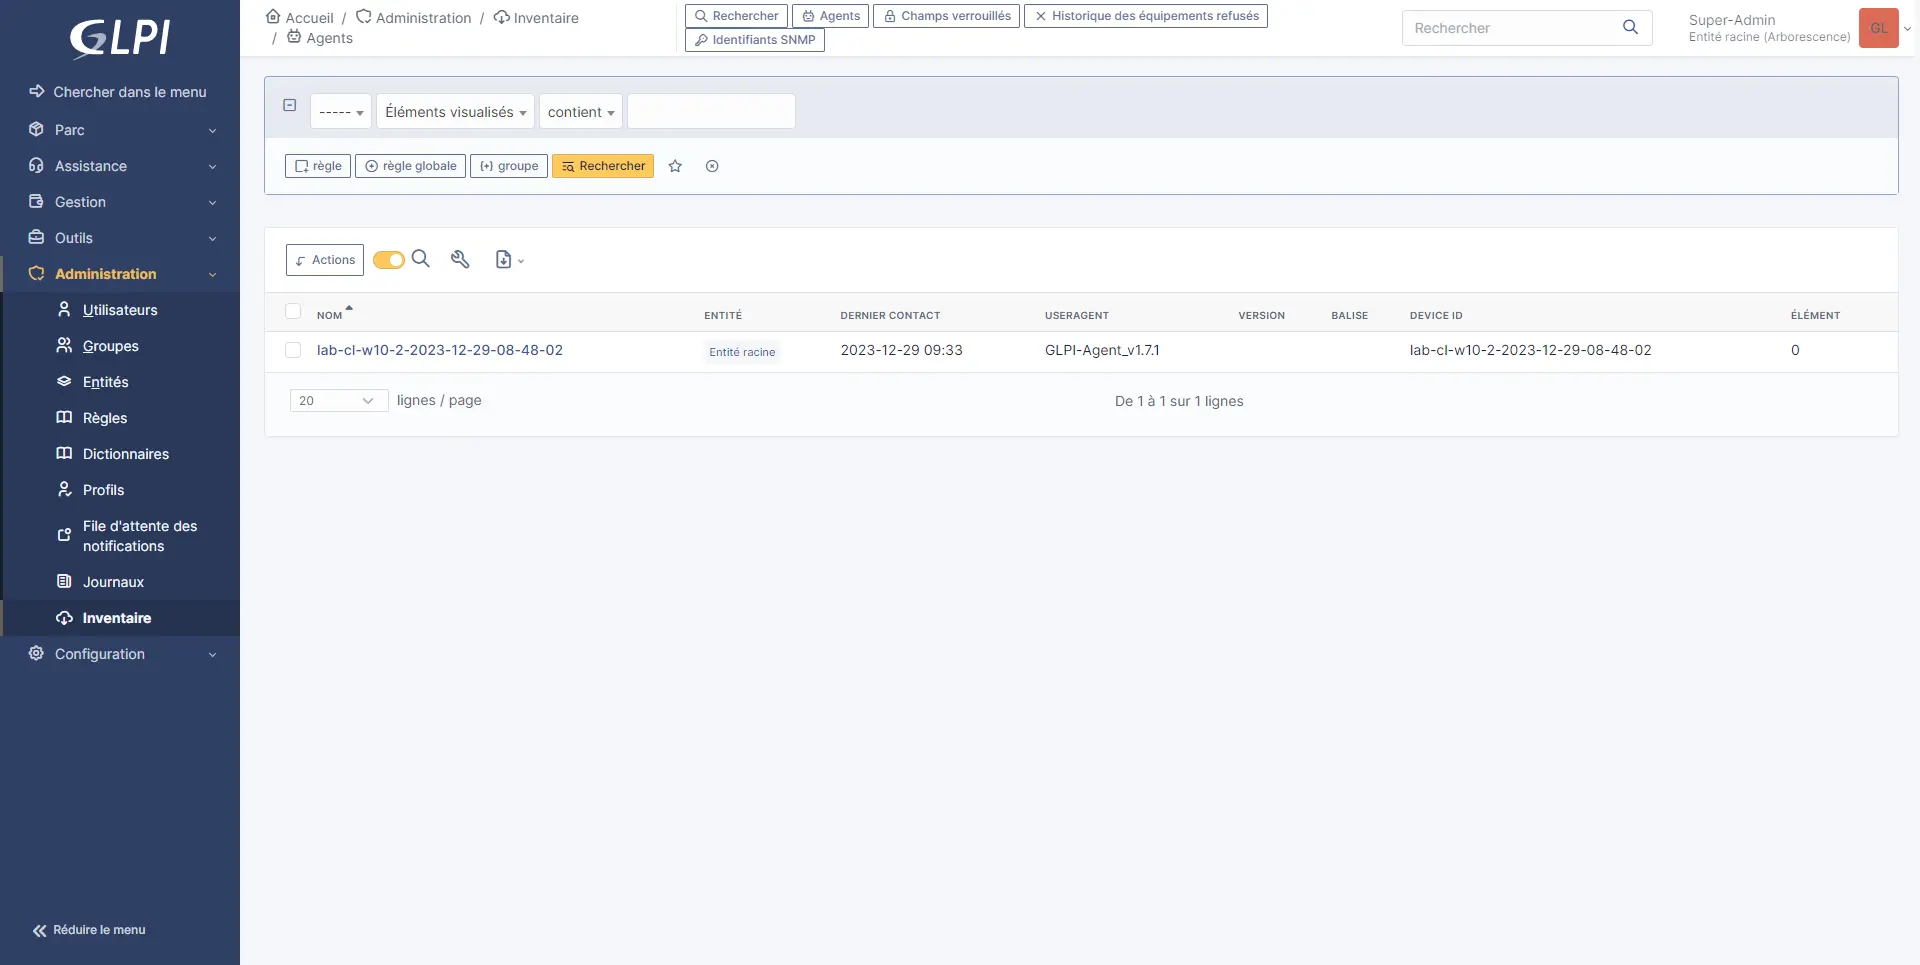
Computers are visible in two places in GLPI, from the inventory administration page by clicking on Agents 1.
You have the list of installed agents.
We will return to Agents in GLPI in other tutorials, notably on network discovery and software deployment.
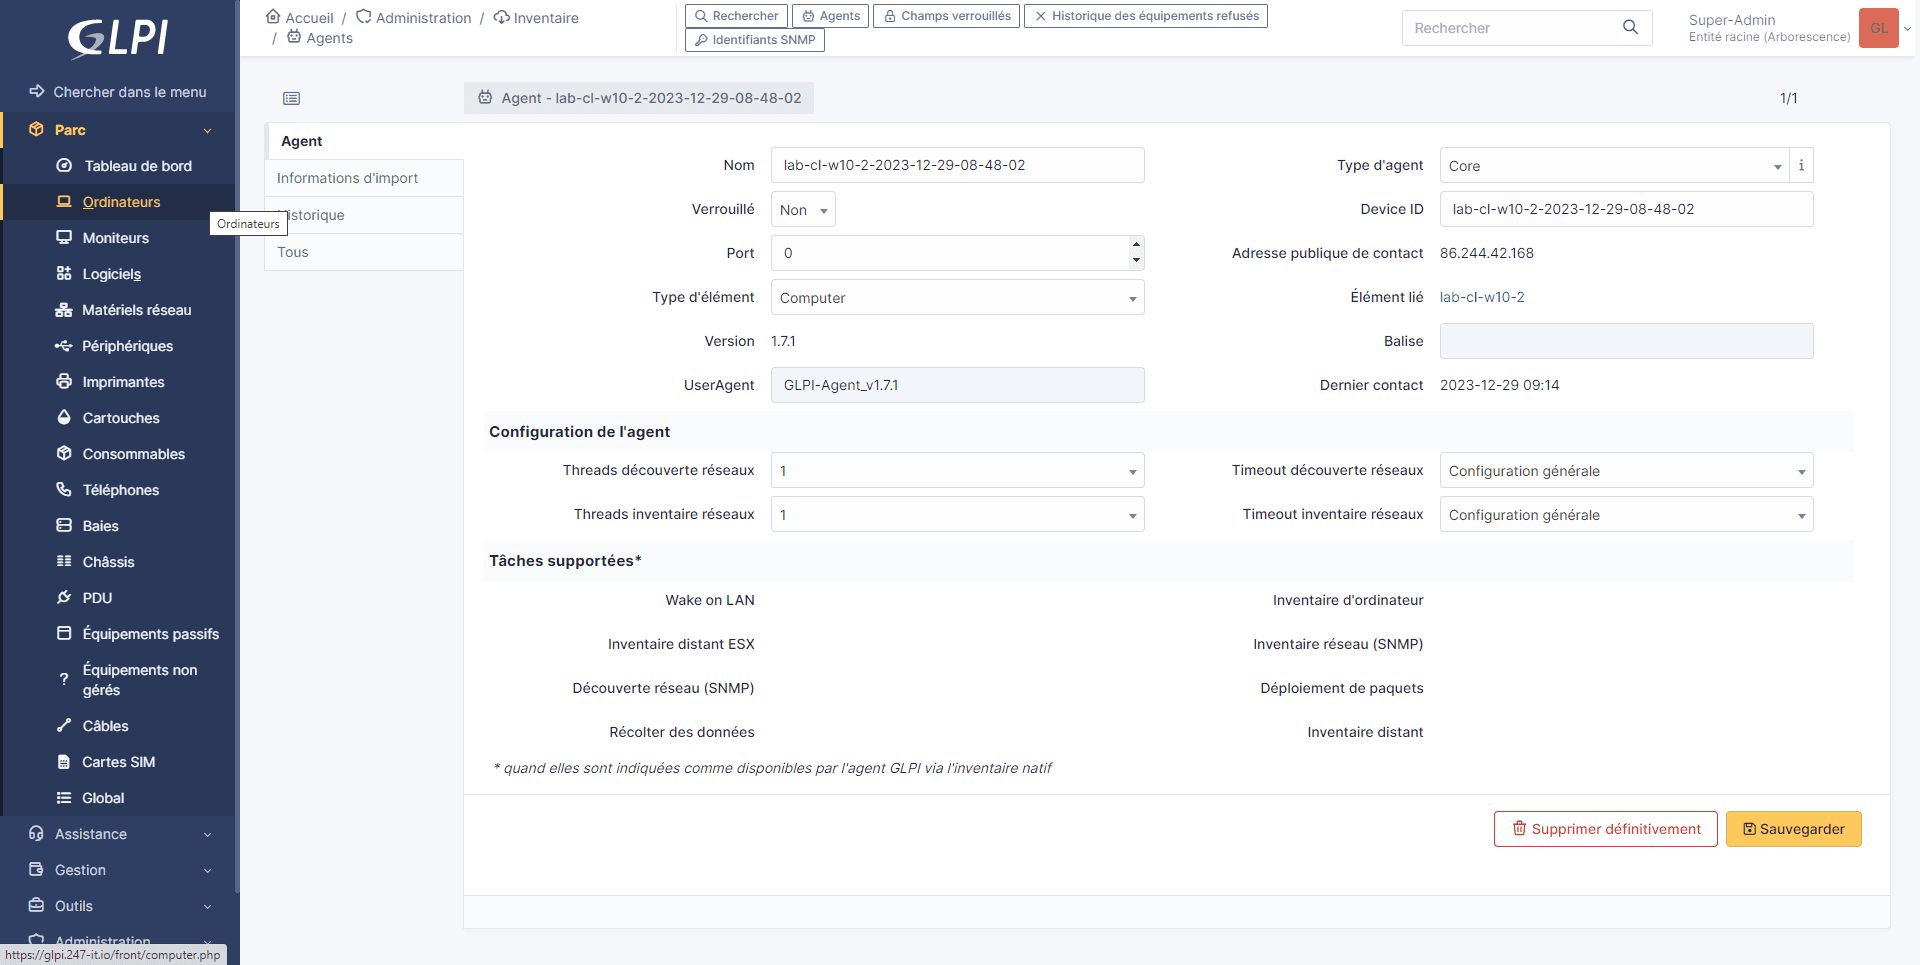
For the curious, here is the detail page of an agent:
Computer inventory (Fleet)
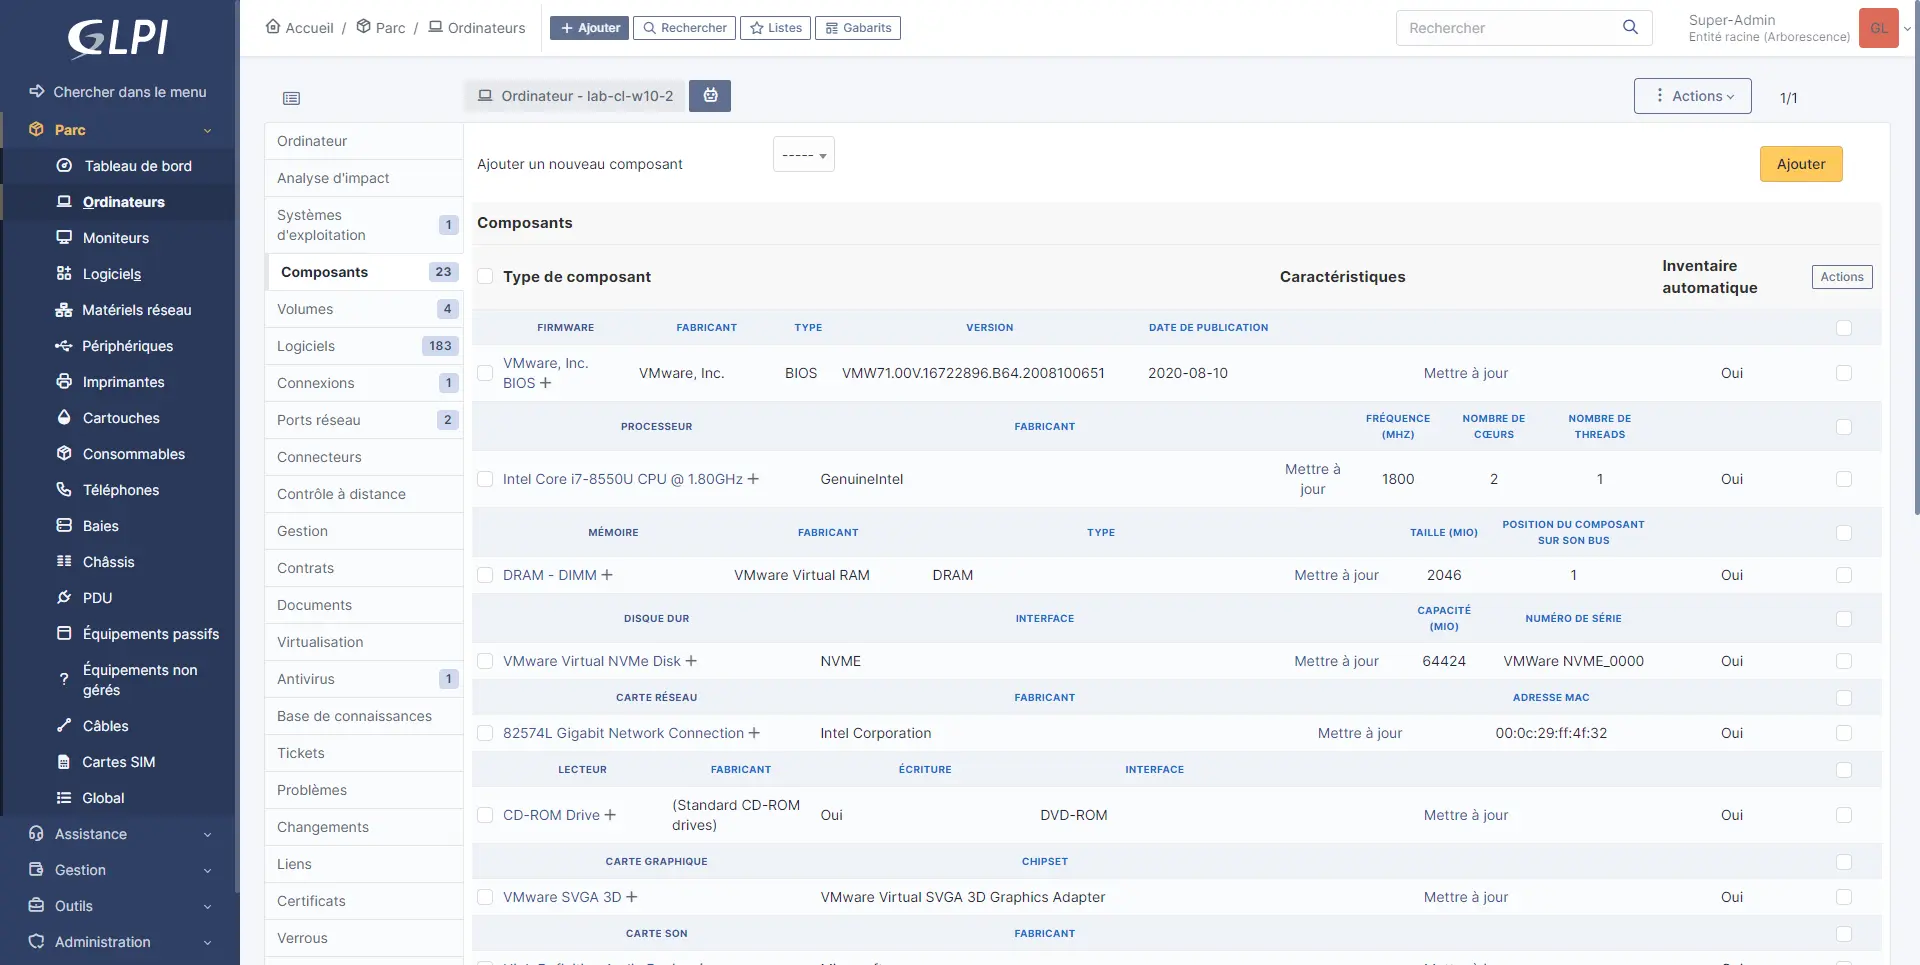
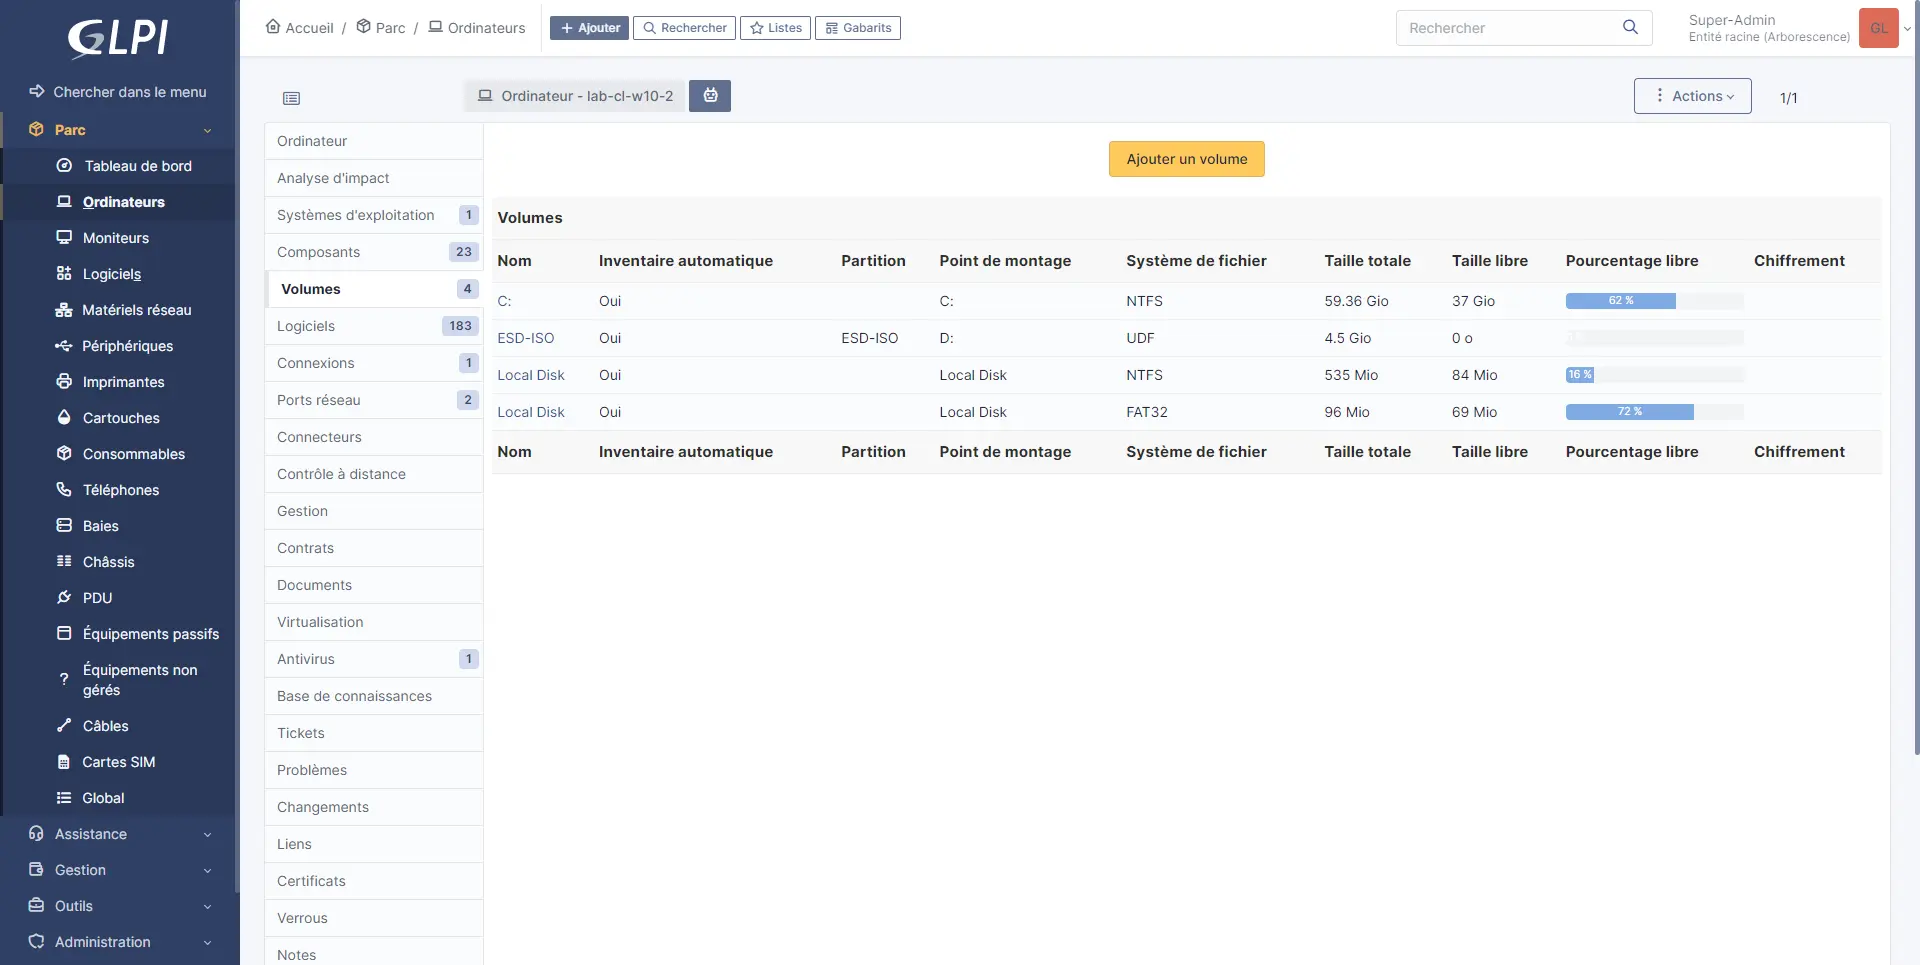
The second place where we will find the computers sent by the agent is in the Park (Inventory) section. This is where we will be able to obtain technical information on the computers.
Expand Park then click on Computers:
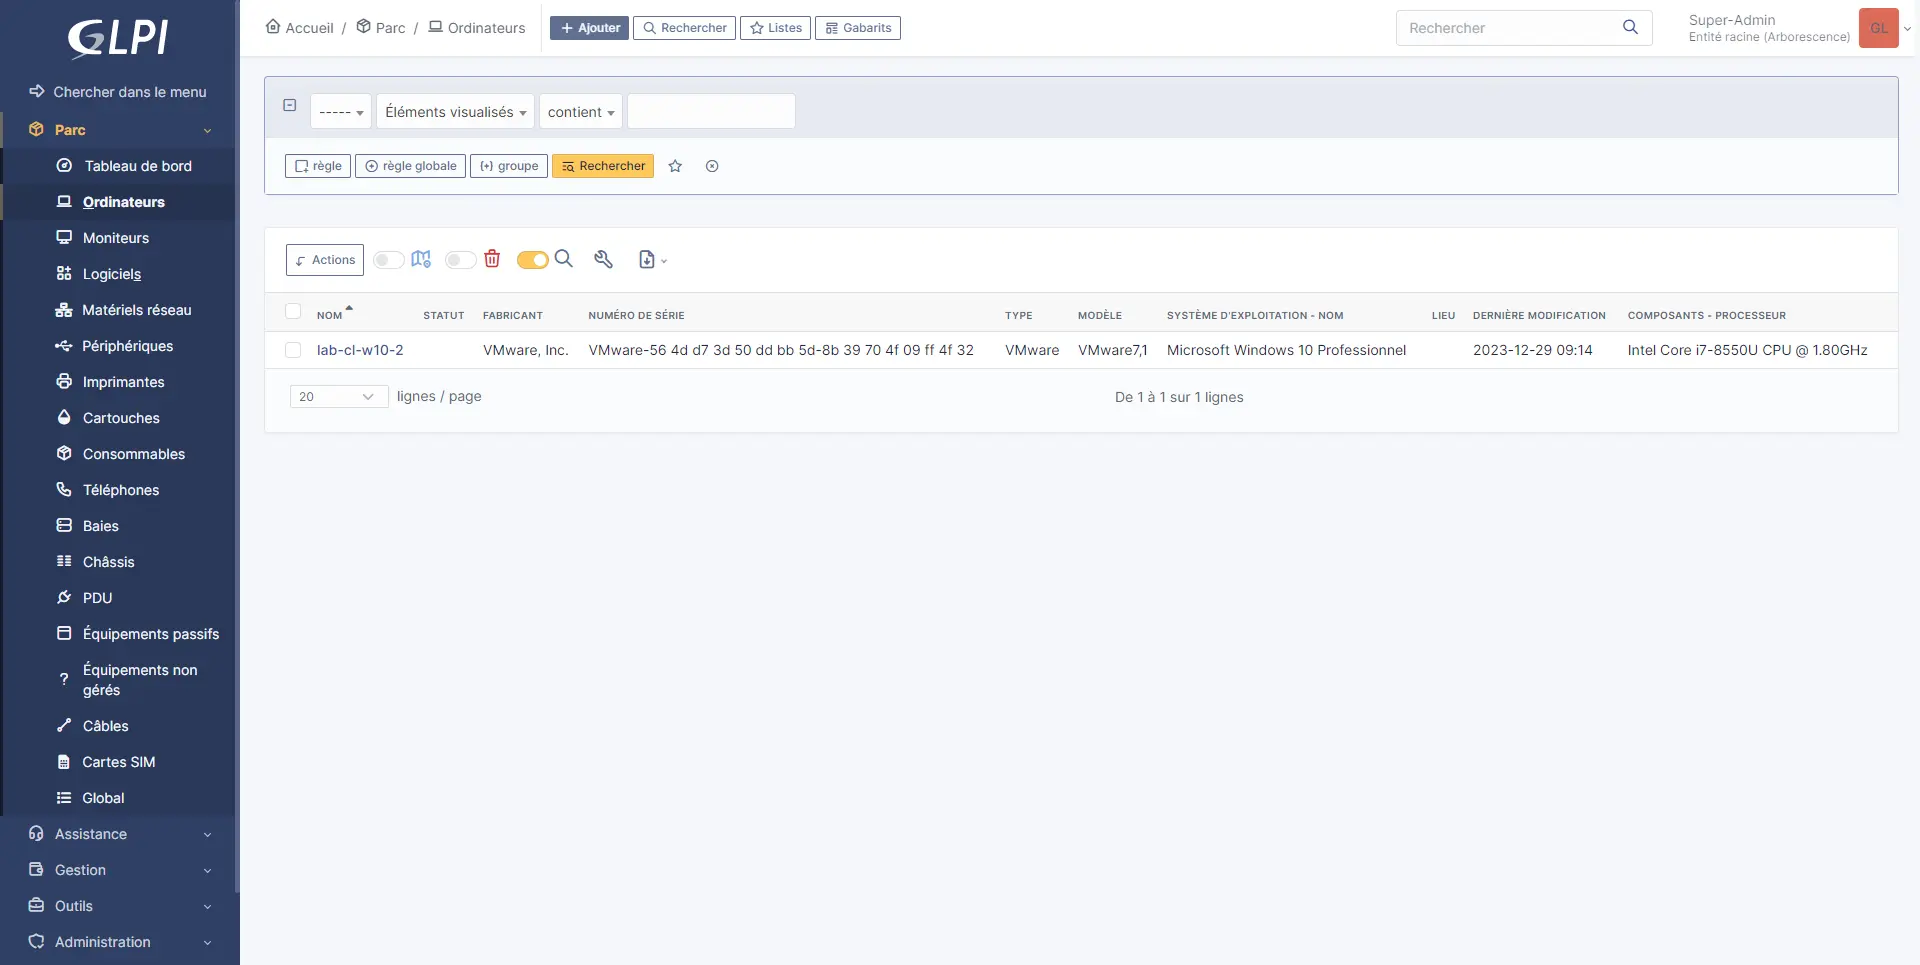
Below are some screenshots of the available information:

This tutorial ends here, you normally have all the information to install GLPI Agent on Windows, whether manually or automatically.
In addition to seeing how to install GLPI Agent, you saw how to create an MST settings file for MSI files with Orca.
For any questions or problems, talk about it in the comments. Which GPO deployment solution have you chosen? Scripts or Software Installation?
Hi, excuse me. How can I run the inventory actualization manually??