Dans ce tutoriel, je vais vous expliquer comment configurer les actions automatiques dans GLPI 10.
Overview of automatic actions in GLPI
To carry out certain background actions such as email notifications, collection of messages for ticket generation, various maintenance tasks, etc. GLPI 10 uses automatic actions also called cron.
Automatic actions are executed with two modes:
- GLPI : automatic actions are executed when browsing GLPI
- CLI : automatic actions are executed with a scheduled task at the operating system level by calling the cron.php file
For better performance and better regularity of execution of automatic actions, it is preferable to use CLI mode.
Some additional details regarding automatic actions in GLPI and the task that we are going to configure to execute automatic actions.
Automatic actions in GLPI have their own schedule with:
- A frequency: every minute, 5 minutes, one day, one week…
- An execution range which can be for example 8 a.m. and 6 p.m.
On large GLPI databases, you must avoid purging logs during the day to avoid a slowdown or even blocking of GLPI. For example, we will configure it to an execution range between 1 a.m. and 5 a.m.
If you have an email ticket collector, you can run the automatic collection action every 5 minutes between 8 a.m. and 6 p.m.
At the operating system level, we will configure a scheduled task (cron) that will run every minute which will be called the glpi cron.php file. The cron.php file call will check if tasks should be executed in the automatic actions based on the frequency and execution range.
Configuring automatic actions in GLPI
To begin, we will configure all automatic actions to use CLI mode.
From the navigation menu, expand Configuration 1 then click on Automatic actions 2.

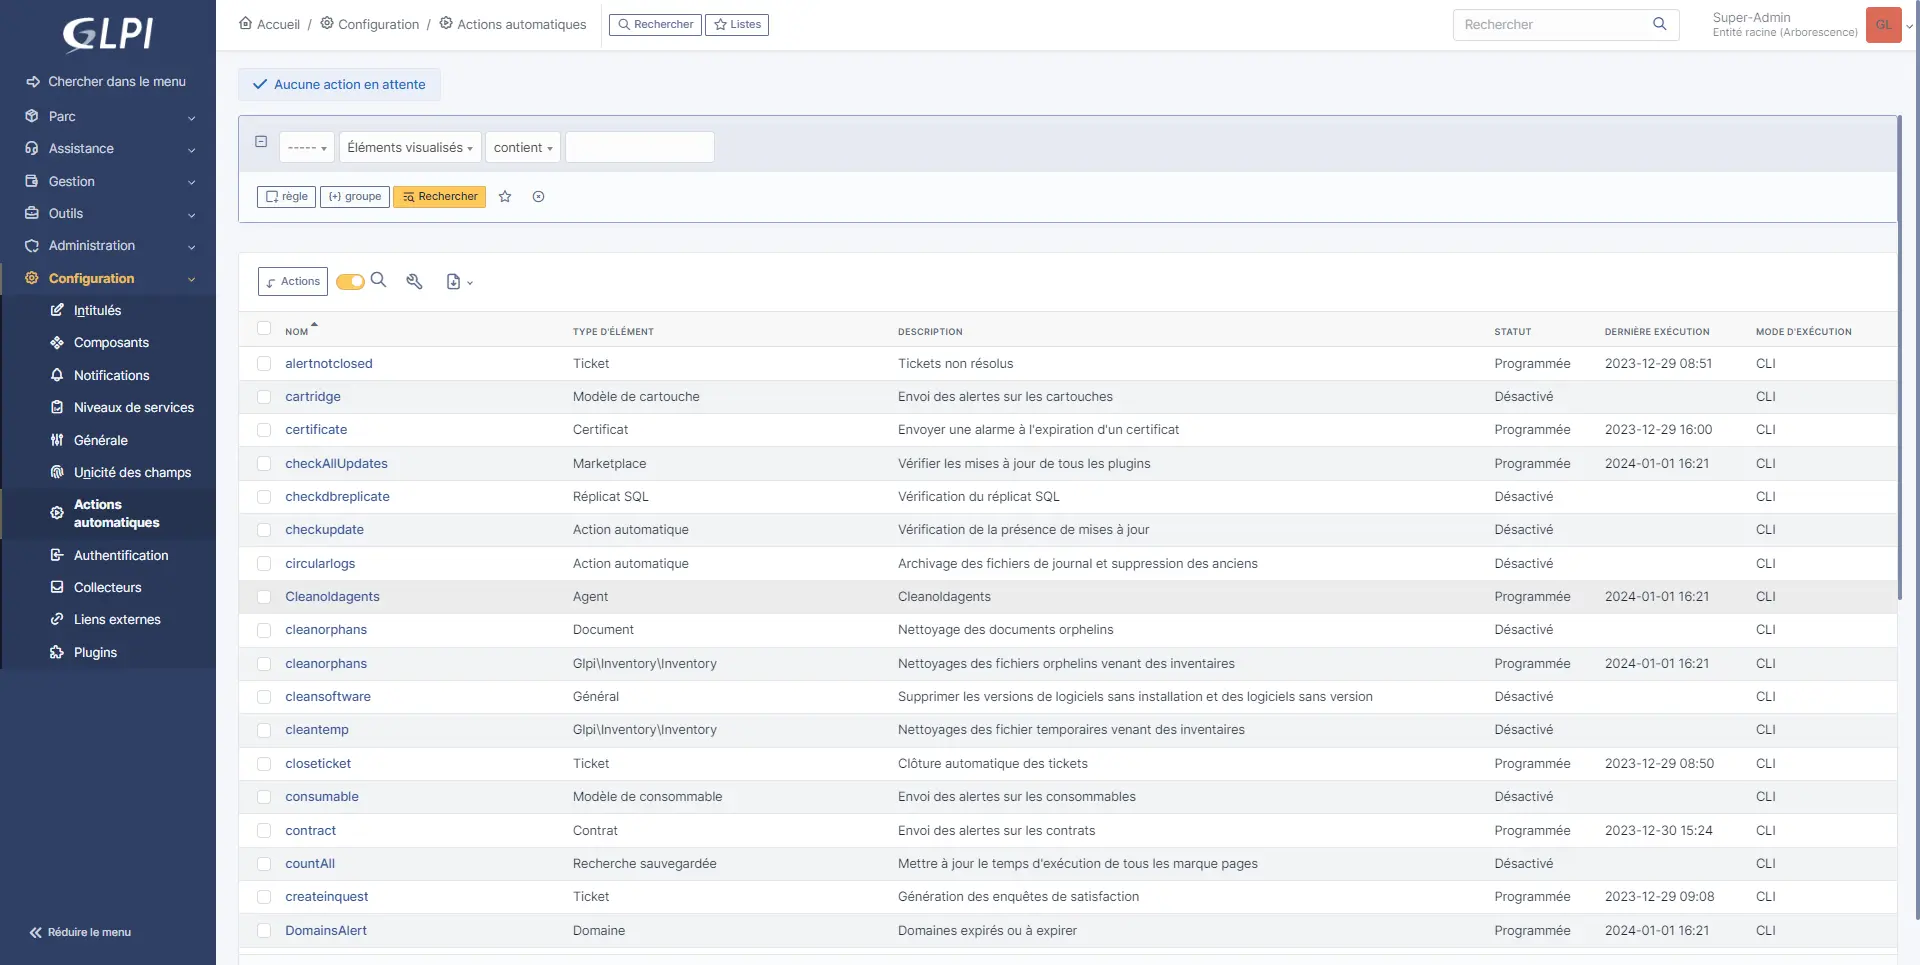
The list of automatic actions is displayed.
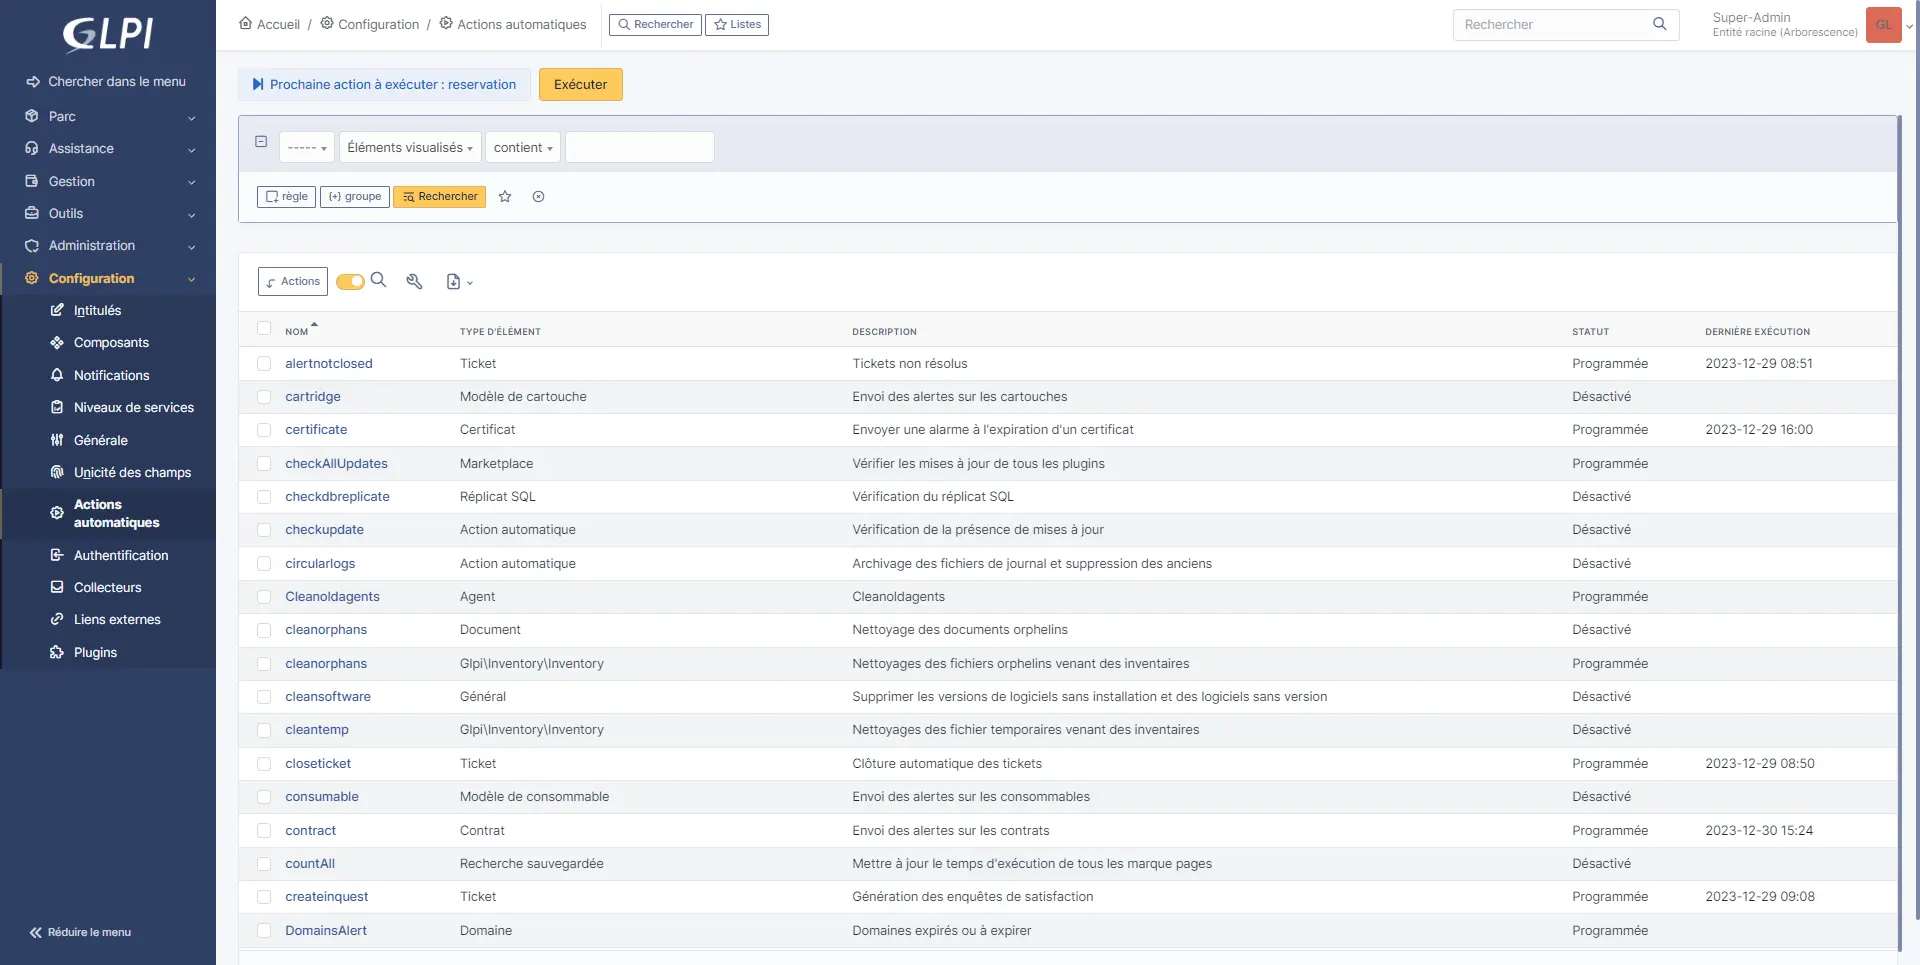
As you can see in the screenshot, not all automatic actions are Scheduled, although automatic actions are disabled, this is normal, some automatic actions are enabled (scheduled) depending on the settings in GLPI.
To have more information on an automatic task, click on it to access the details and its settings.
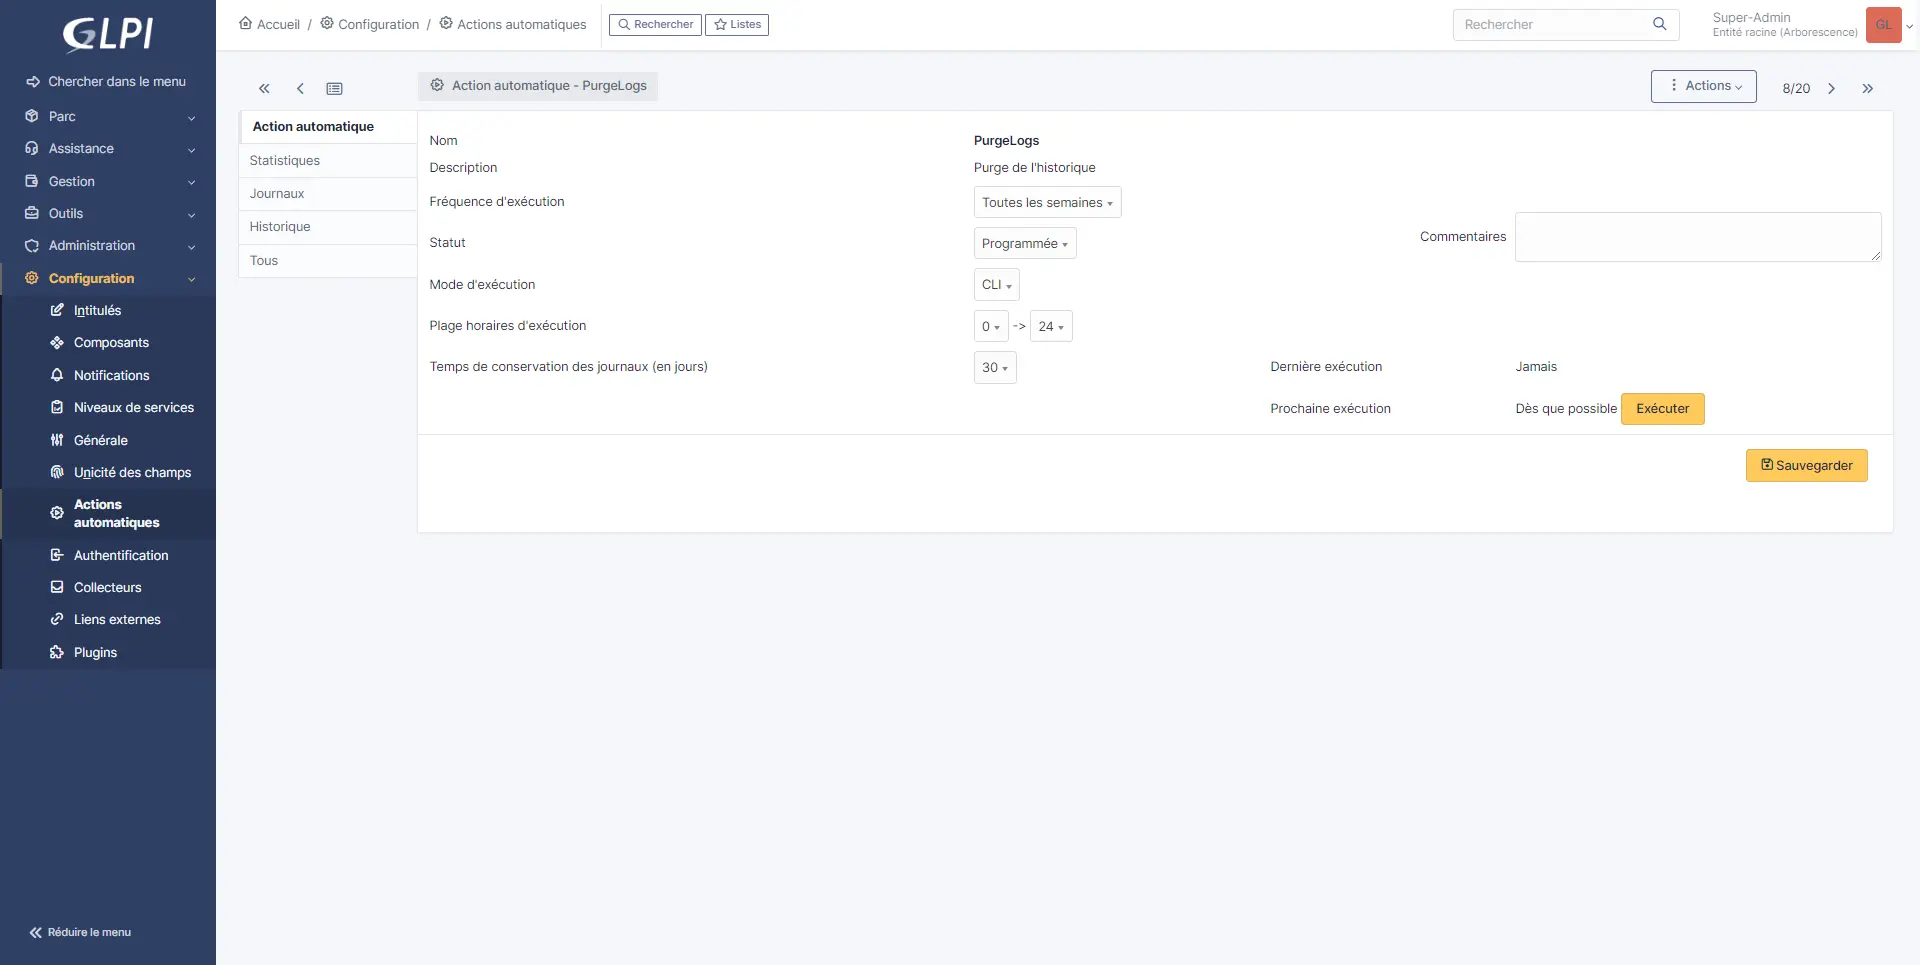
Here we can see that the PurgeLogs task is executed with CLI mode, once a week at any time of the day.
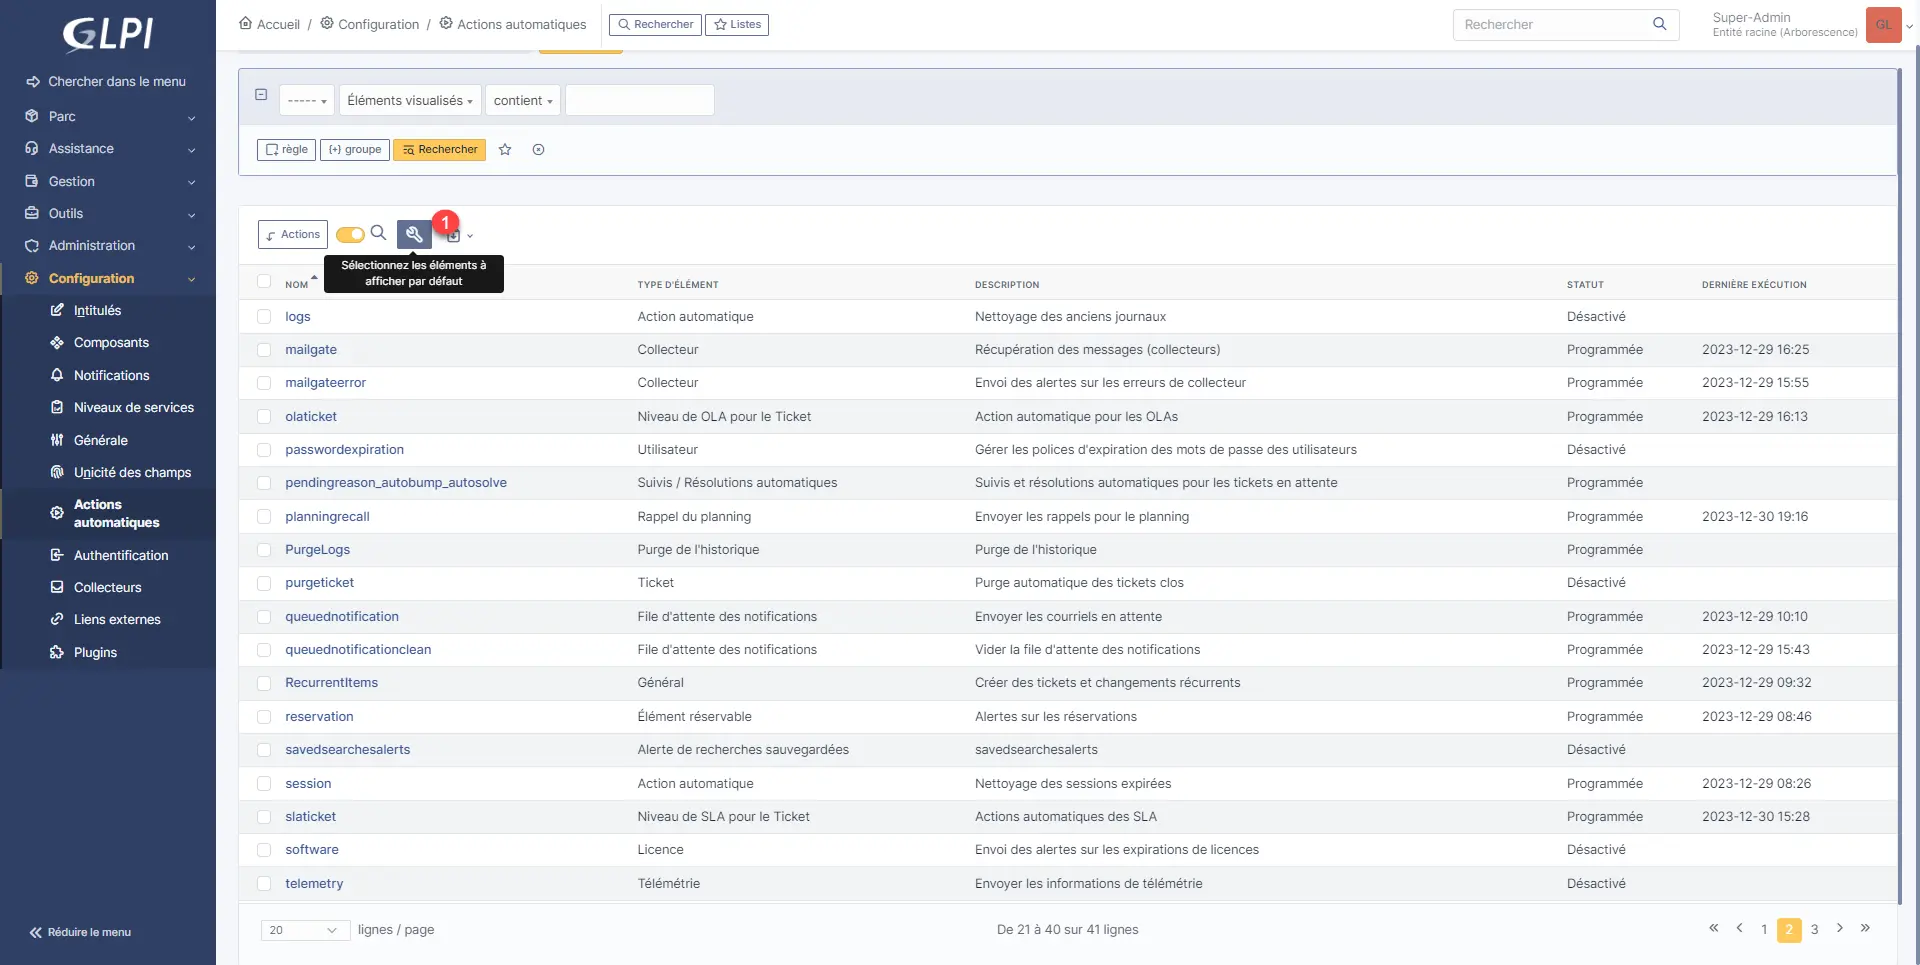
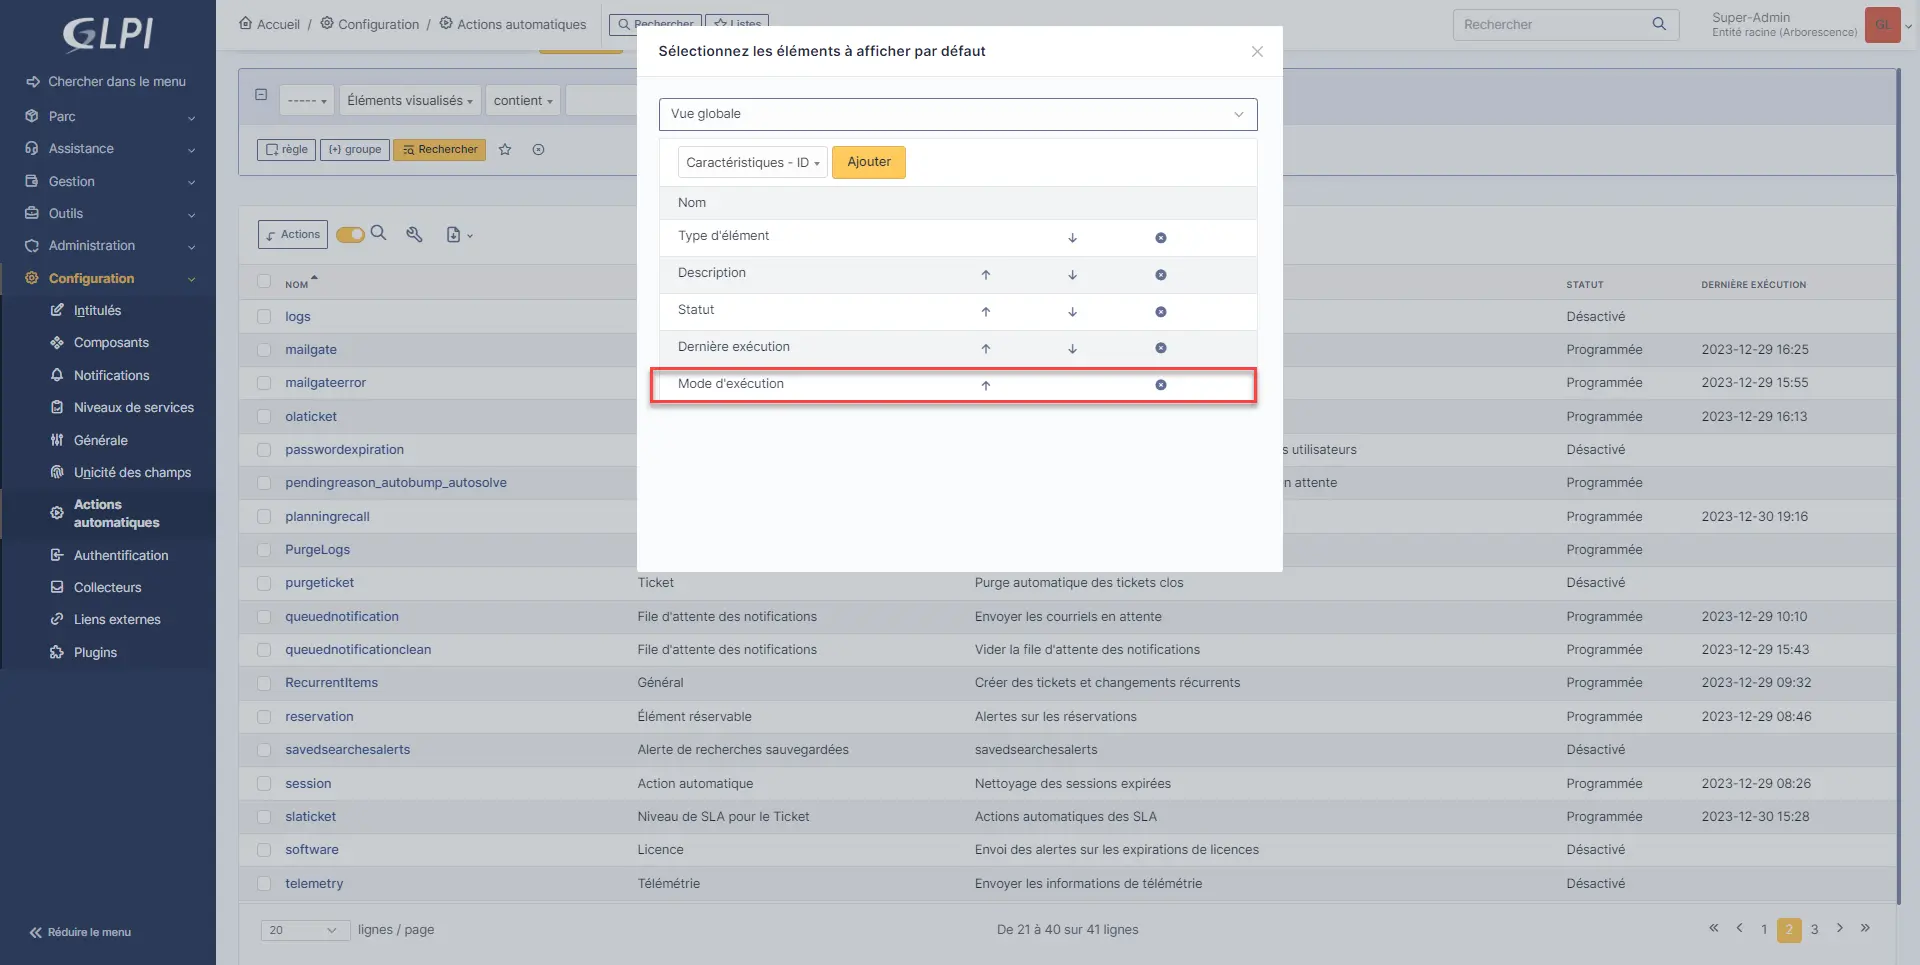
Retourner à la liste des actions automatiques, on va personnalisé l’affichage de la liste pour voir le monde d’execution.
Click on the 1 key.
In the drop-down list which contains the list of available fields, select Execution mode 1.
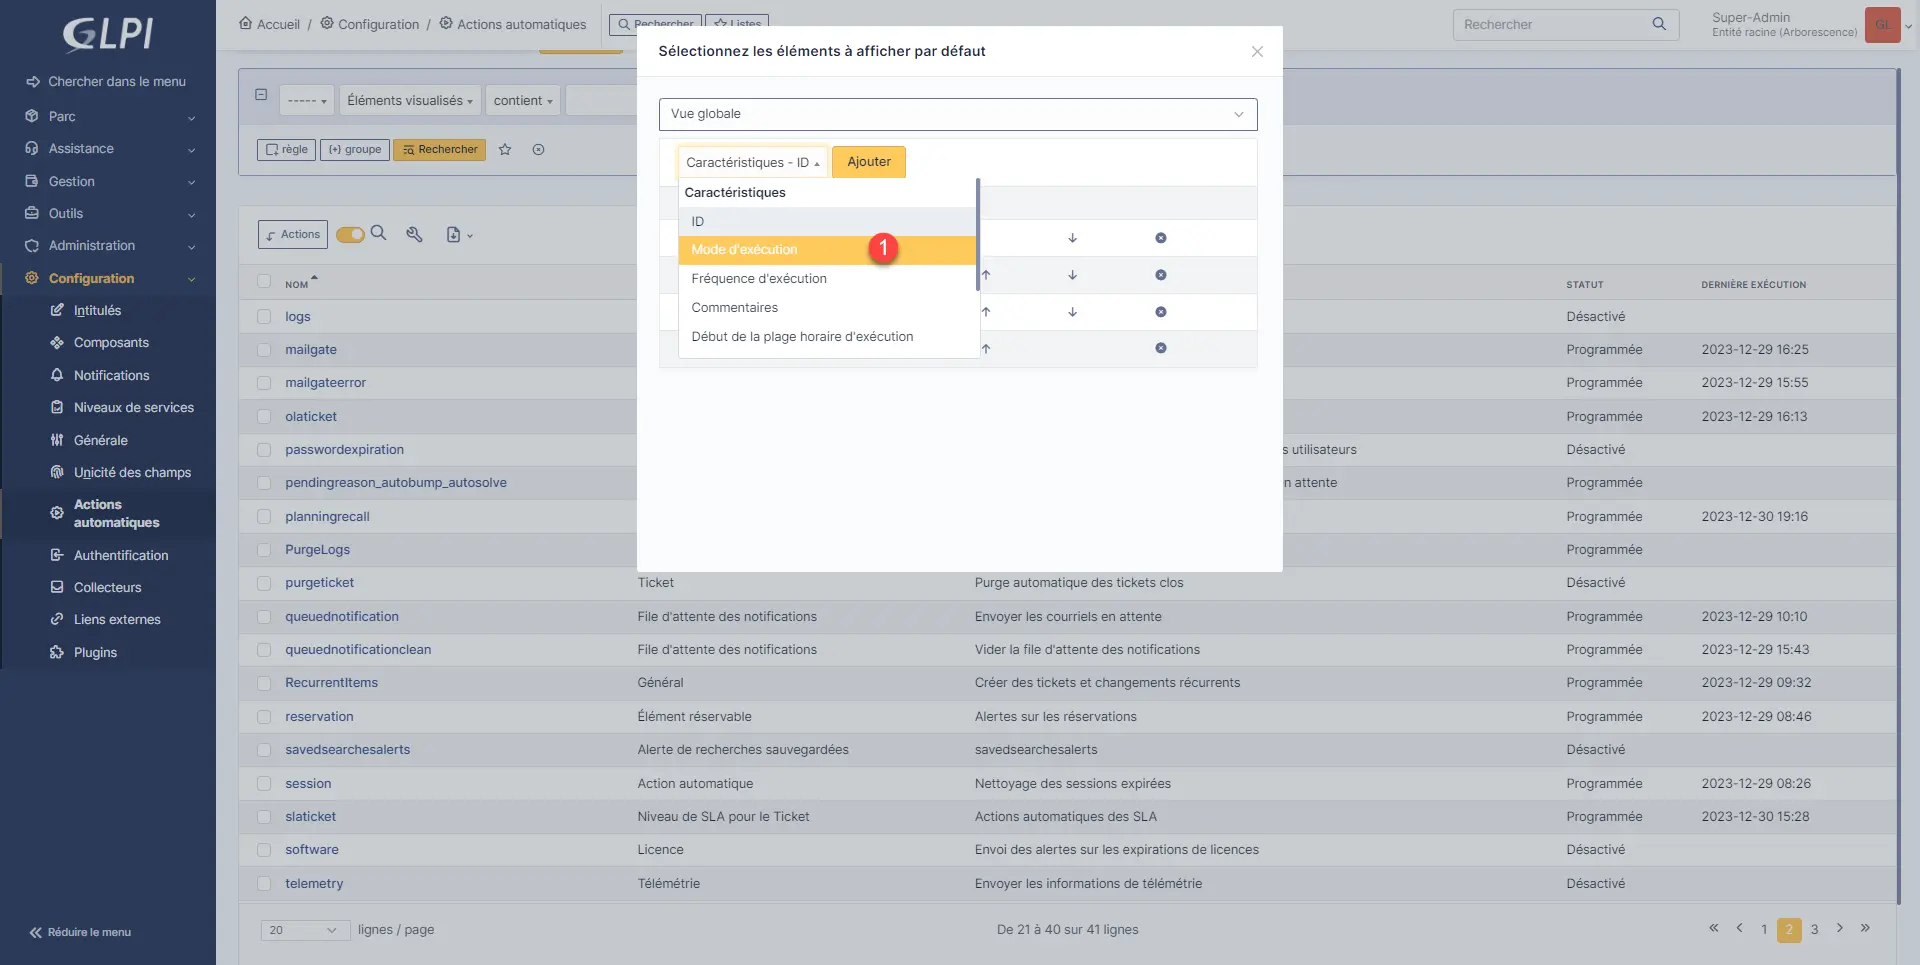
With the field selected, click on the Add 1 button.

The Execution Mode field is added to the list of default items, close the window (modal).
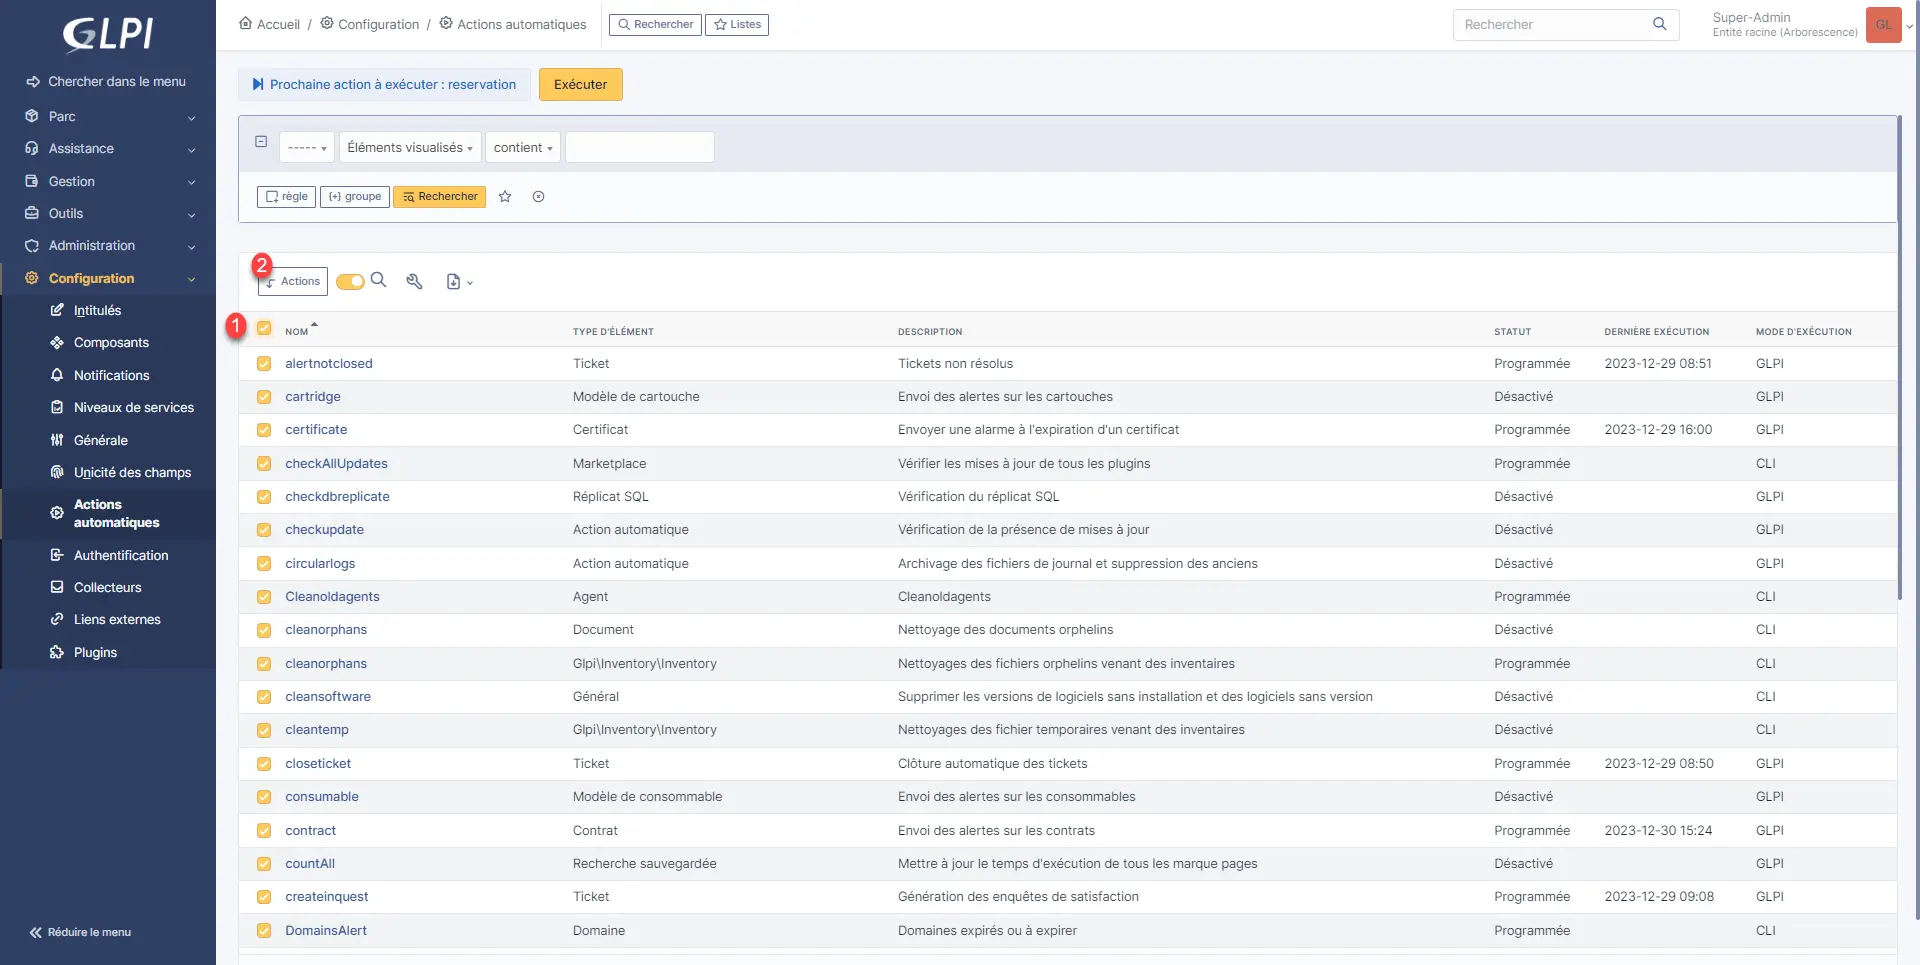
At the bottom of the list, change the number of items displayed in order to have all automatic actions.
Select all automatic actions 1 and click on Actions 2.
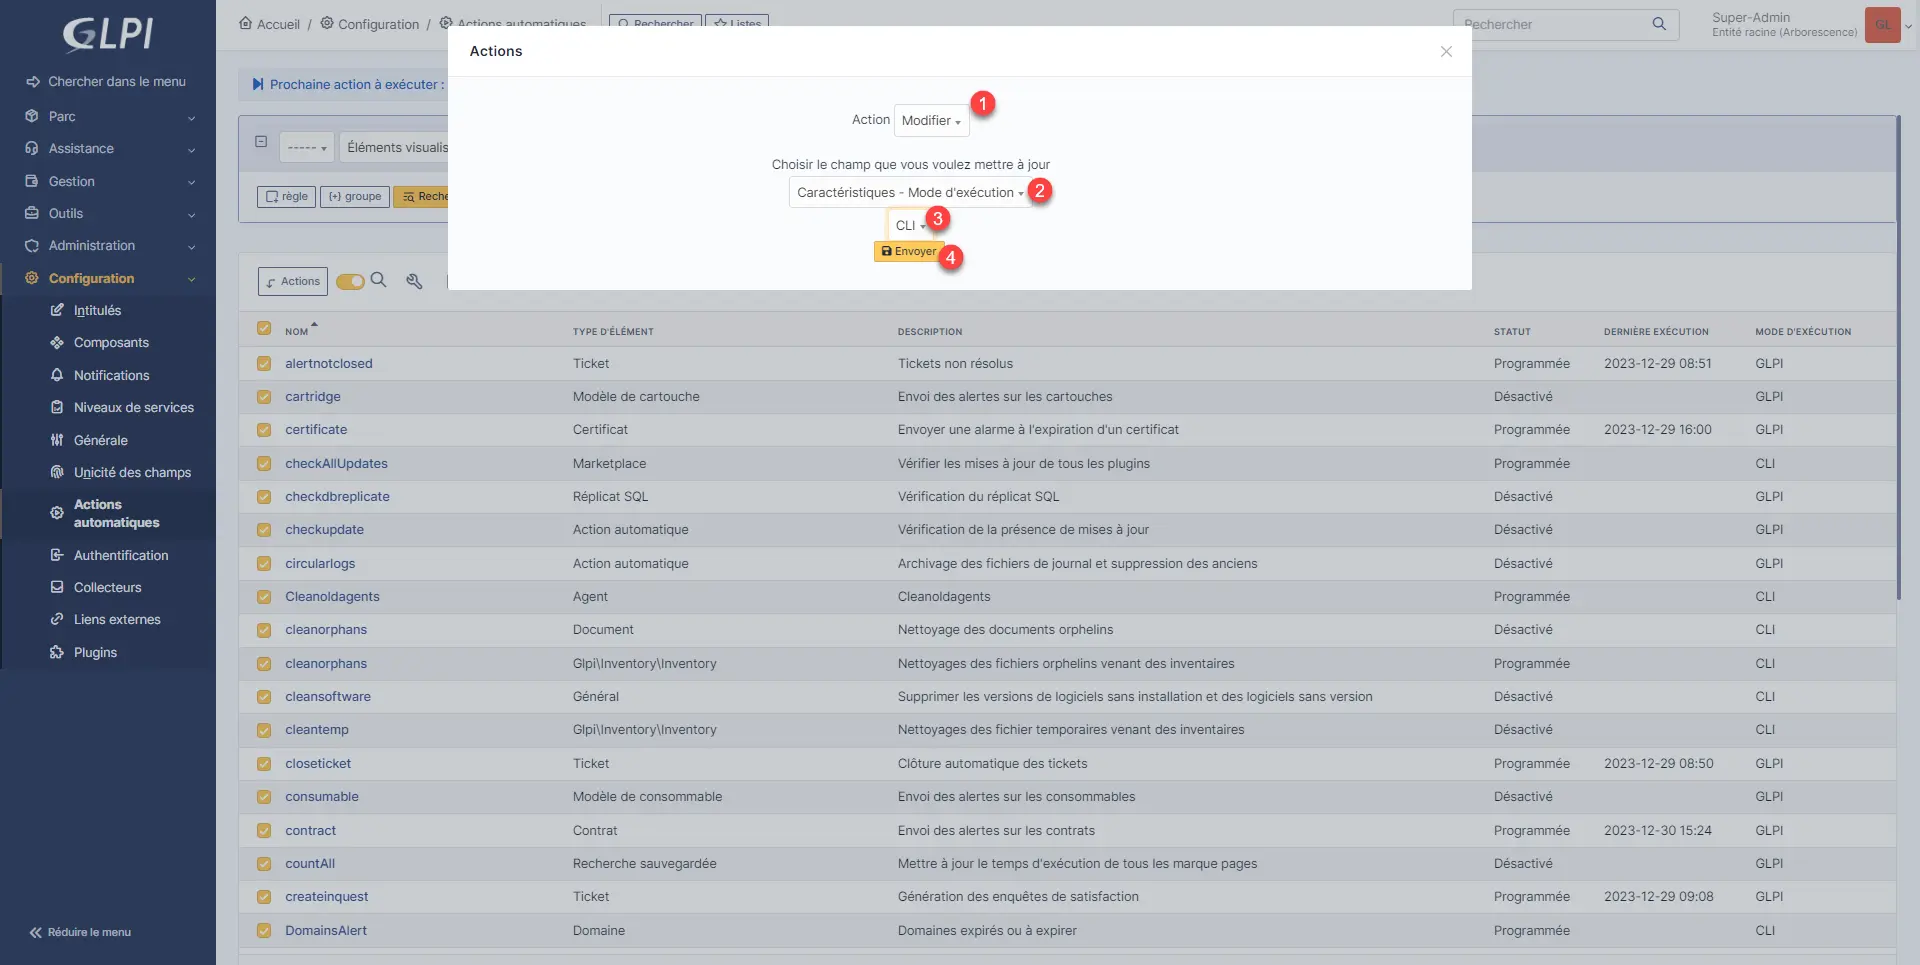
Choose the action Modify 1 then Characteristic – Execution mode 2, select CLI 3 and click on Send 4.
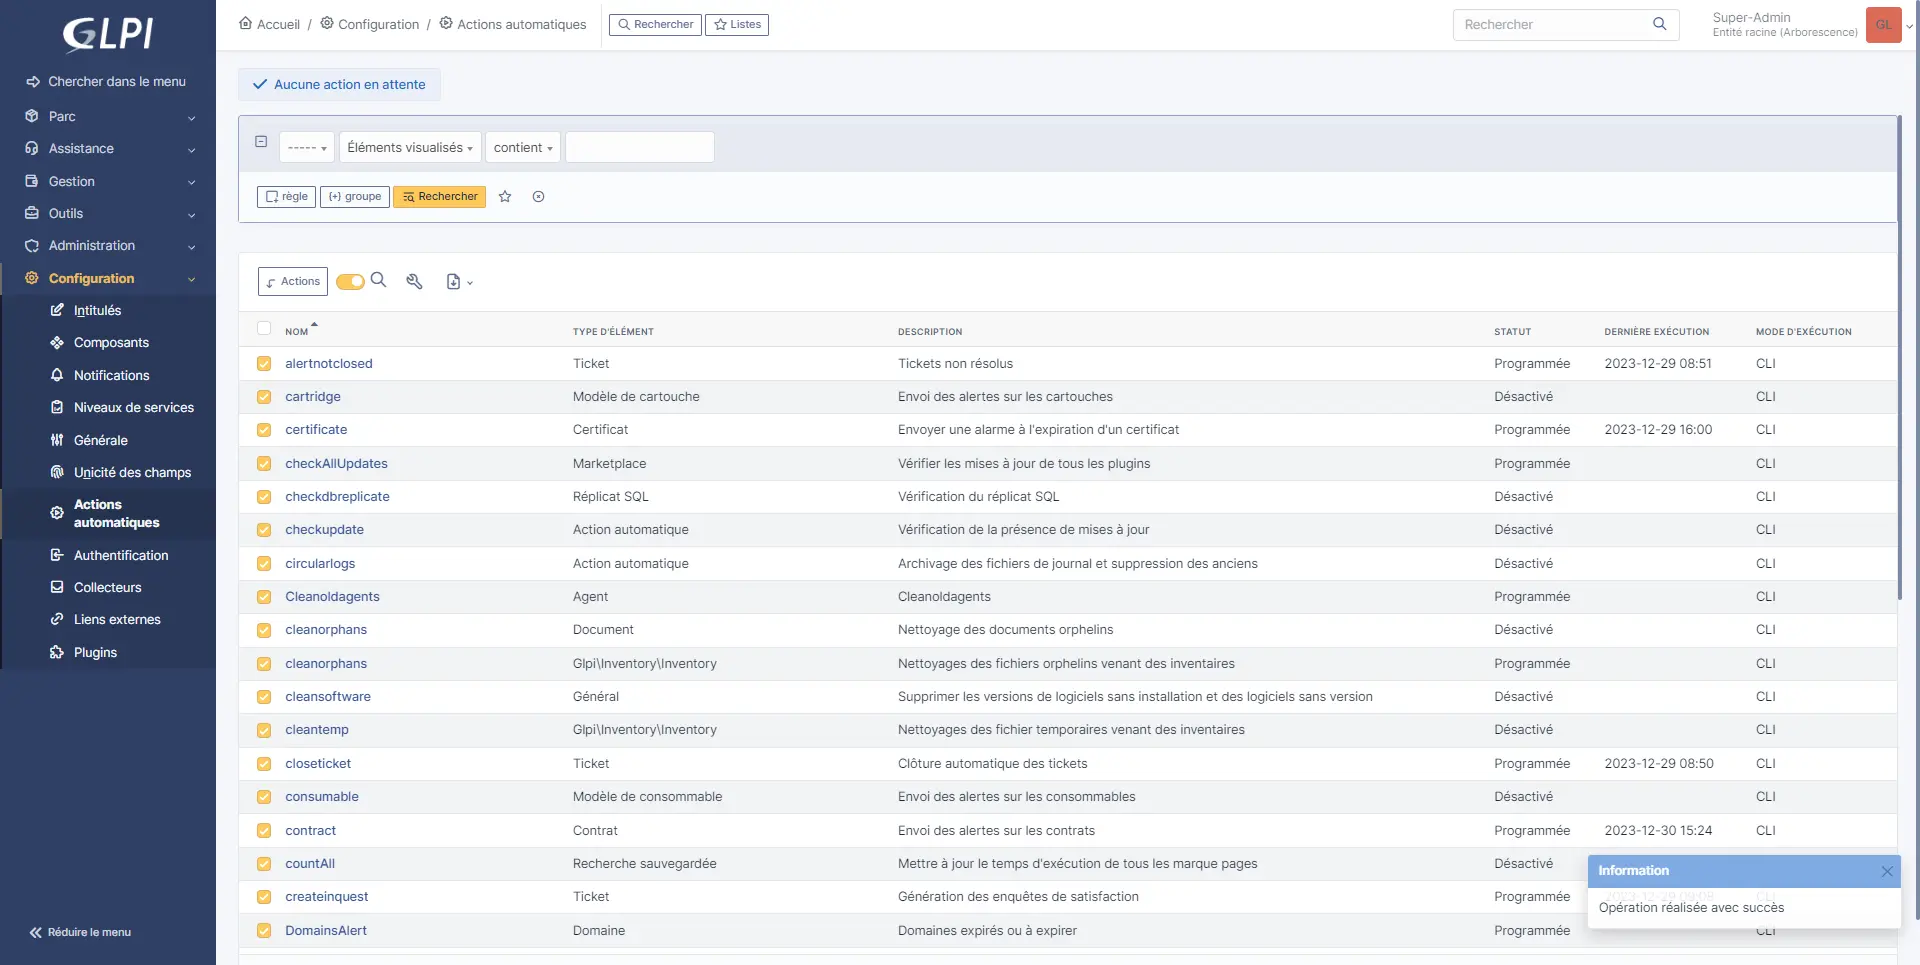
All automatic actions now use CLI mode.
Configure the execution of automatic actions on the operating system
Now you need to configure the execution of automatic actions from the operating system.
To do this, you must execute the following file in GLPI via php: front/cron.php.
To summarize, here is the command to execute:
php /path/of/glpi/front/cron.phpTo run this command, we will either use crontab on Linux or the task scheduler on Windows.
This configuration being identical for GLPI 9..X and GLPI 10, you will find how to do it in this tutorial: GLPI: automatic configuration actions
In this tutorial, I will explain how to configure the scheduled task (cron) if you are using containers for GLPI.
To execute a command in a container, you must use docker exec with the name of the container as a parameter and then the command to pass.
Which give :
sudo docker exec <container-name> <command with parameters>For GLPI 10:
sudo docker exec glpi-php php /var/www/html/front/cron.phpAs you will notice in the command, it indicates the location of the file in the container and where the file is stored on the container host.
To configure the cron task, open the crontab editor:
sudo contab -eAdd the following line to run automatic actions every minute:
*/1 * * * * docker exec glpi-php php /var/www/html/front/cron.phpAs you can see, there is no sudo in the command, because by editing the crontab with sudo previously, we configure the task with the root user.
Save and exit the file.
Wait a few minutes and check on GLPI the date of last execution of automatic actions.
To test the command, it is possible to run it directly in the terminal.