

The failover clustering feature ensures high availability of a service by using multiple servers (nodes) that can make it work.
Some examples of services that can be used with the Failover Cluster feature:
- Hyper-V
- SQL Server
- DAG Exchange
- …
Prerequisites
- 2 servers minimum having the same hardware and software configuration.
- Nodes must be members of the same Active Directory domain.
- A SAN type of storage which presents to all the servers the same LUNs.
- A storage type SAN with a volume of 1 to 10 GB that will serve as a quorum.
- Recommended: A network adapter dedicated to the cluster.
Configuration of the control disk (Quorum)
Quorum is a very important element of the Failover Cluster, it has 2 main functions:
- Maintain online cluster maintaining a sufficient number of voters
- Contains a copy of the cluster configuration.
More information on quorum : https://docs.microsoft.com/fr-fr/windows-server/storage/storage-spaces/understand-quorum
The quorum configuration must be done on one of the nodes of the future failover cluster.
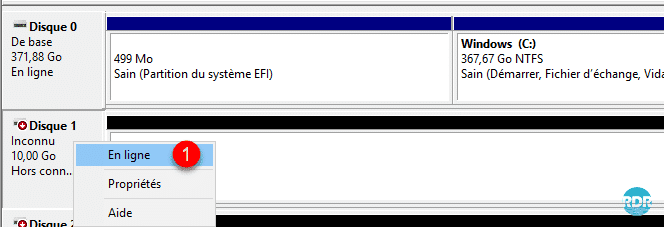
1. Present a LUN from 1 to 10GO to all nodes.
2. Open the Disk Manager. Right click on the disk and click on Online 1.
3. Right-click on the disk again and click Initialize Disk 1 .

4. Click OK 1 .
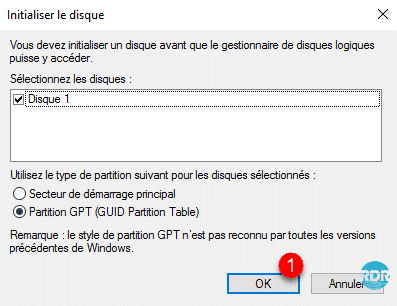
Right click on the disk and click on New Simple Volume. This one must be formatted in NTFS and with the letter Q.

Installing the feature
The installation of the failover cluster feature must be done on all nodes.
Powershell
1. Open a PowerShell command prompt as an administrator and enter the following command:
Install-WindowsFeature -Name Failover-Clustering -IncludeManagementTools2. Wait during the installation.

3. When the installation is complete, close the window.

Graphic mode
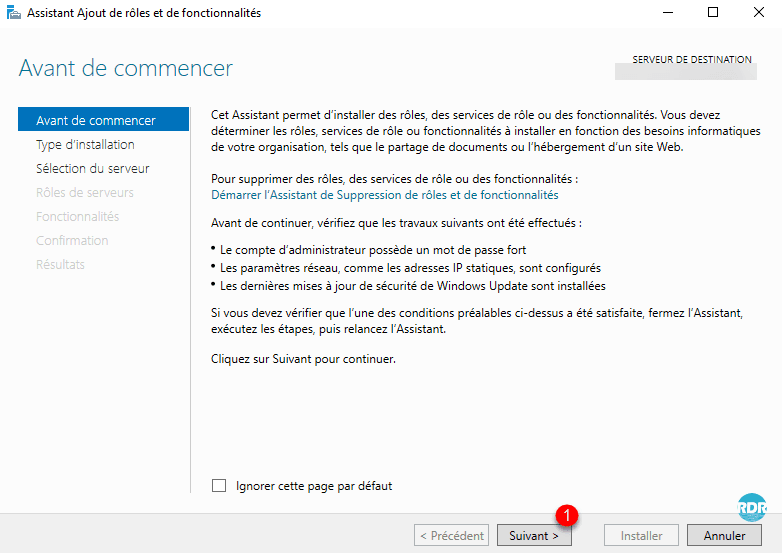
1. Launch the Add Role and Function Wizard, in the first window click Next 1 .
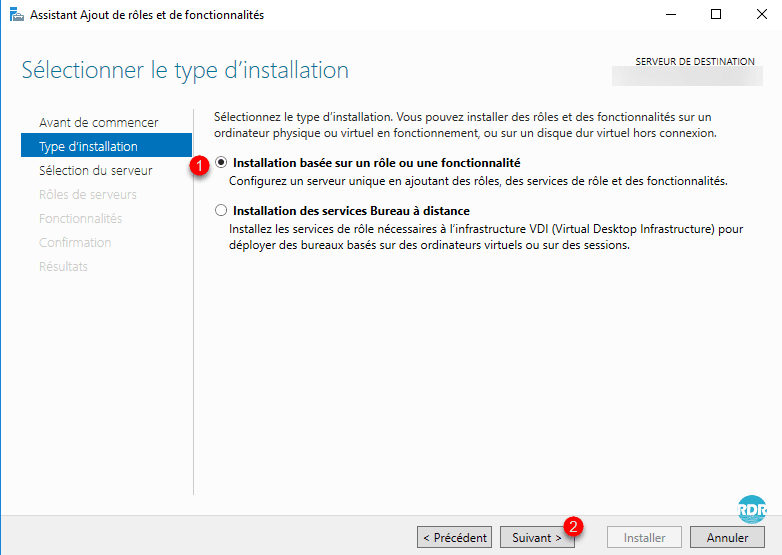
2. Choose the Role Based Installation or 1 feature and click Next 2 .
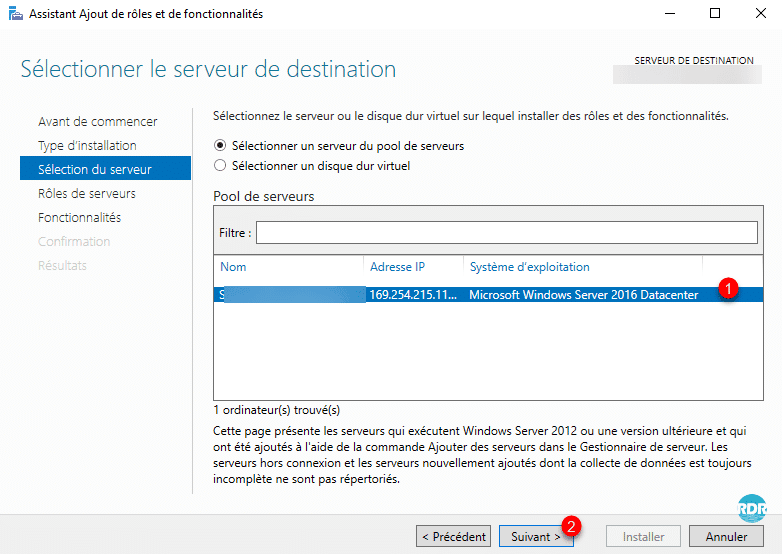
3. Select the server where clustering functionality is to be installed 1 and click Next 2 .
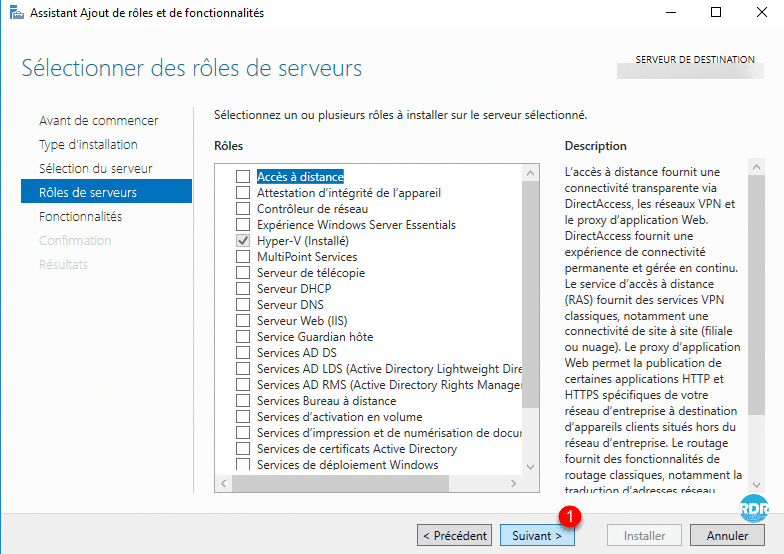
4. Skip the list of roles by clicking Next 1 .
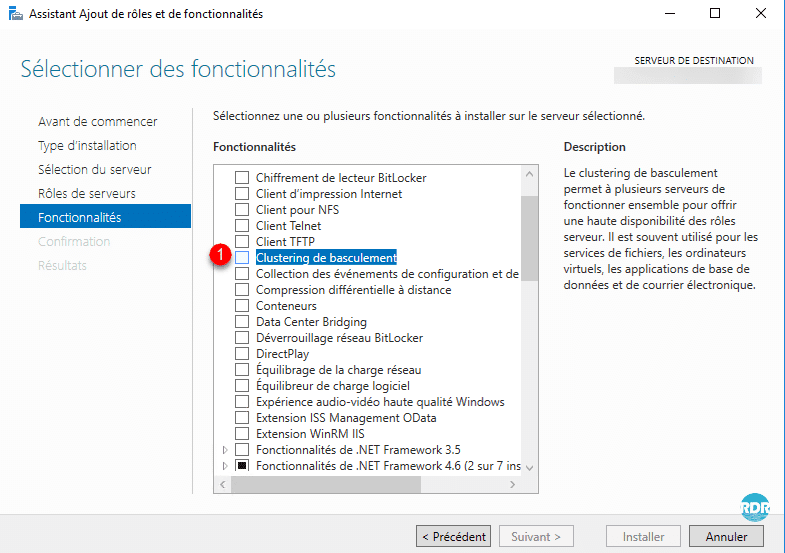
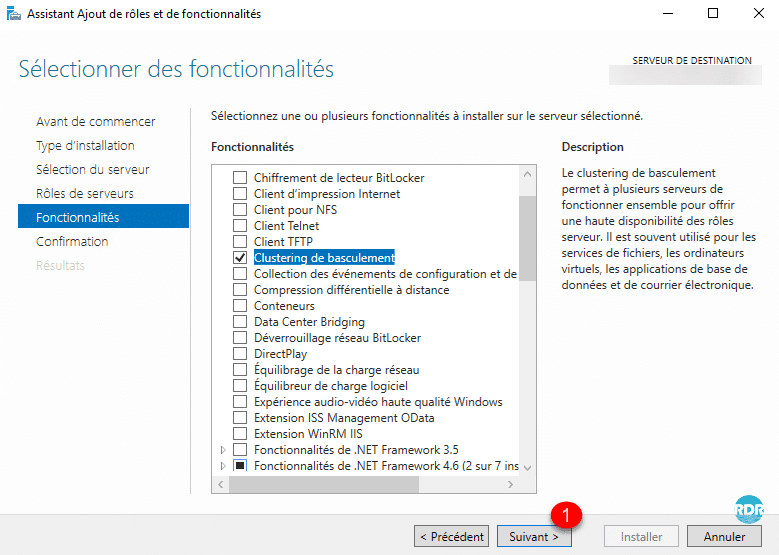
5. Check the Failover Clustering 1 box.
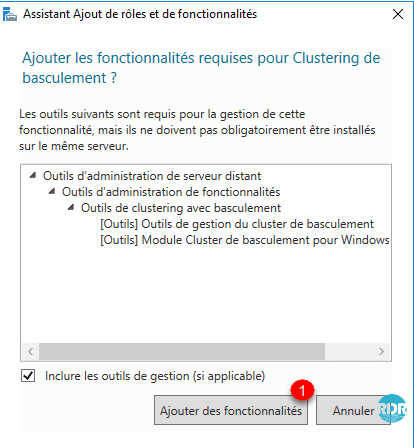
6. Click Add Features 1 to validate the installation of the dependencies.
7. Click Next 1 .
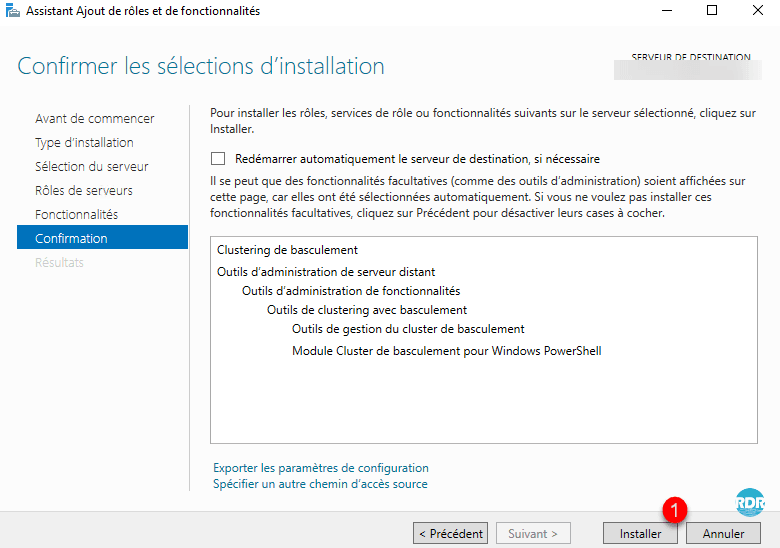
8. Confirm the installation by clicking Install 1 .
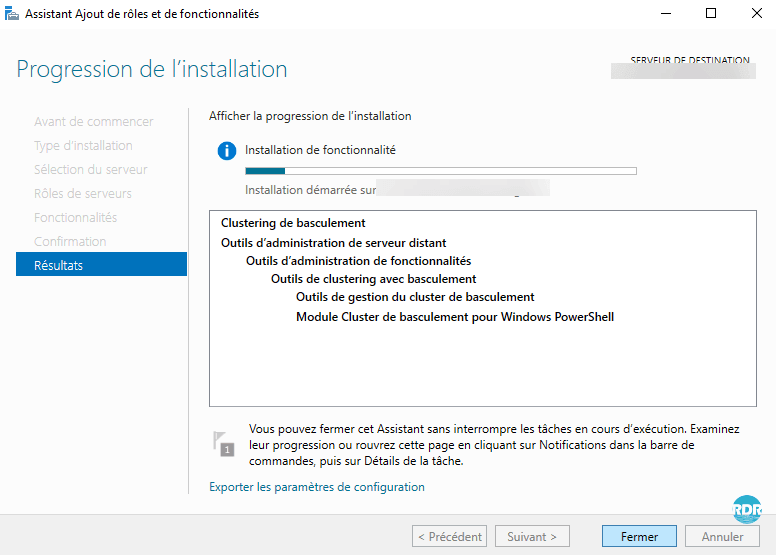
9. Wait during the installation …
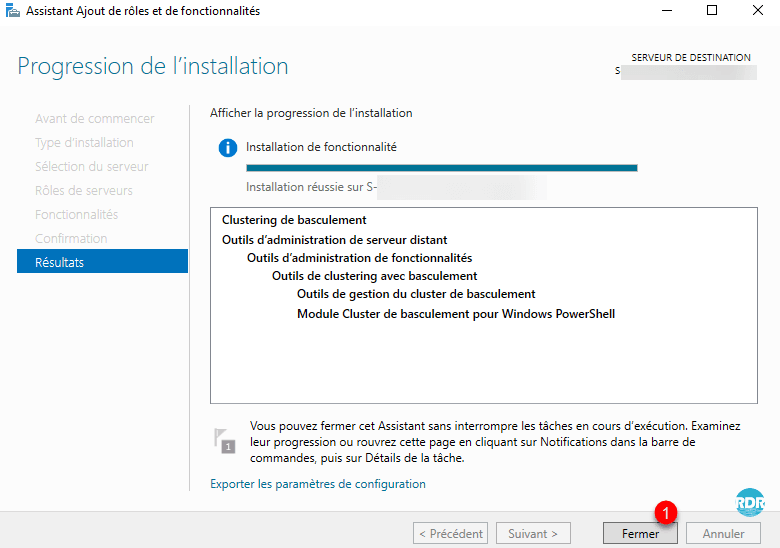
10. When the installation is complete, exit the wizard by clicking Close 1 .
Now that the clustering feature is installed on the server set, we will proceed to cluster creation.
Creating the failover cluster
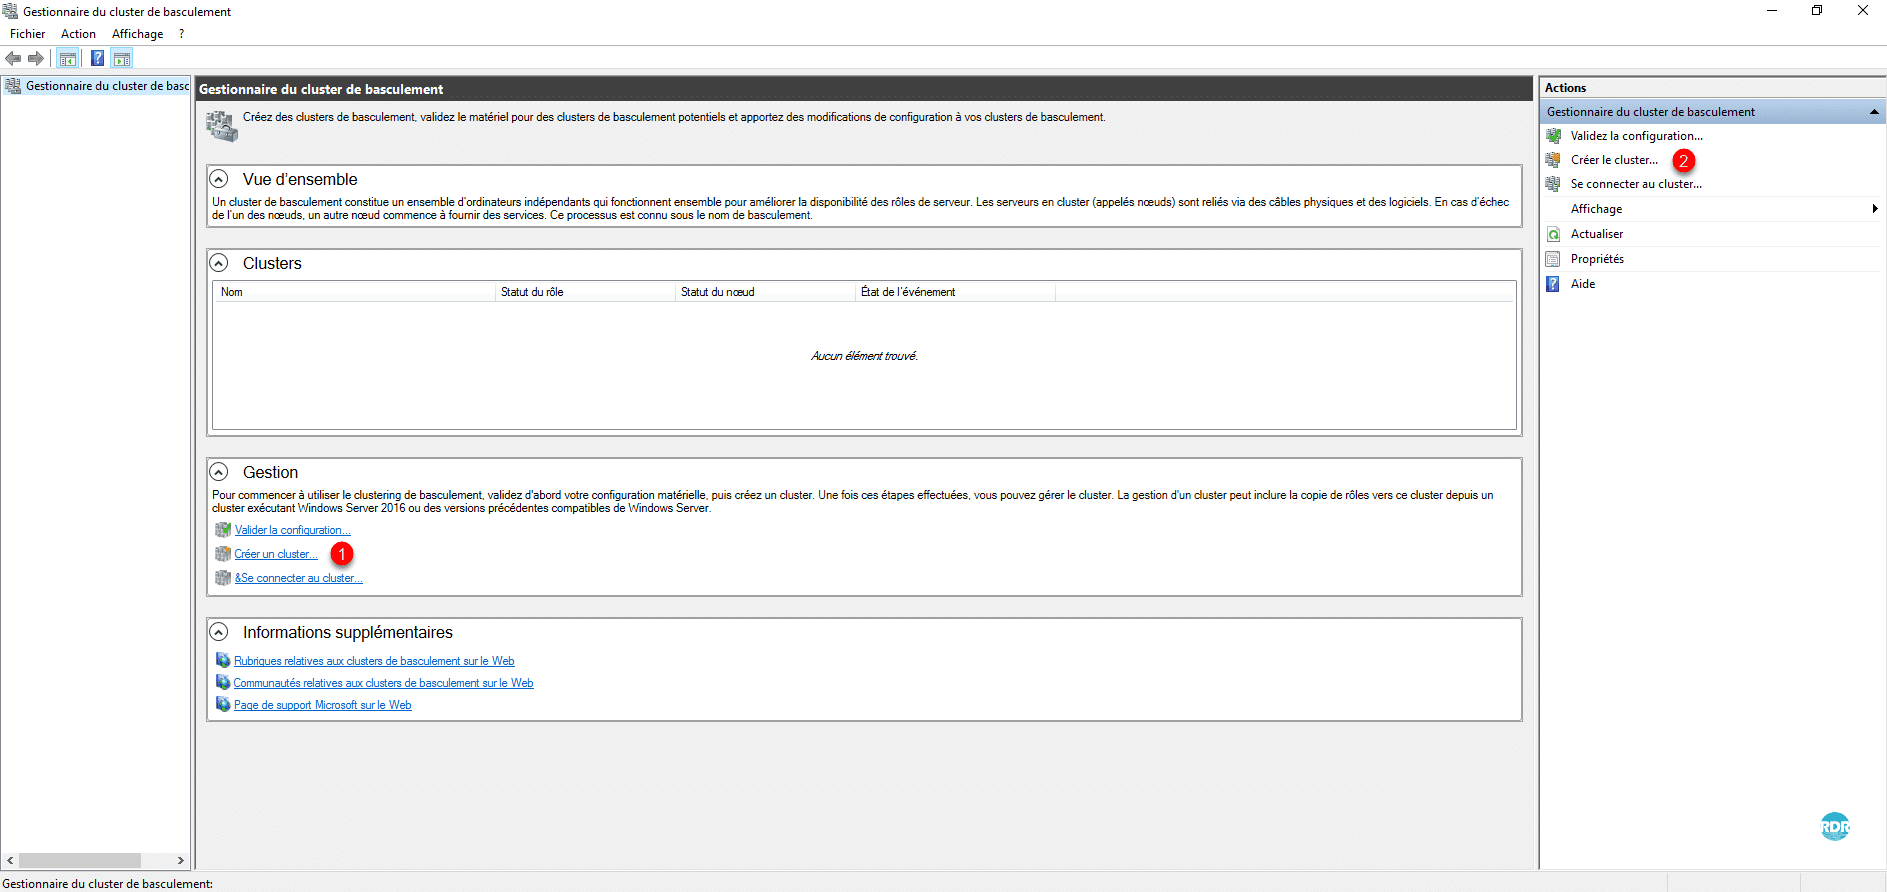
1. Launch the Failover Cluster Manager console available from the Start menu.
2. From the console click on Create a cluster 1 available in the central section in the Management section or on the left in the Actions menu.
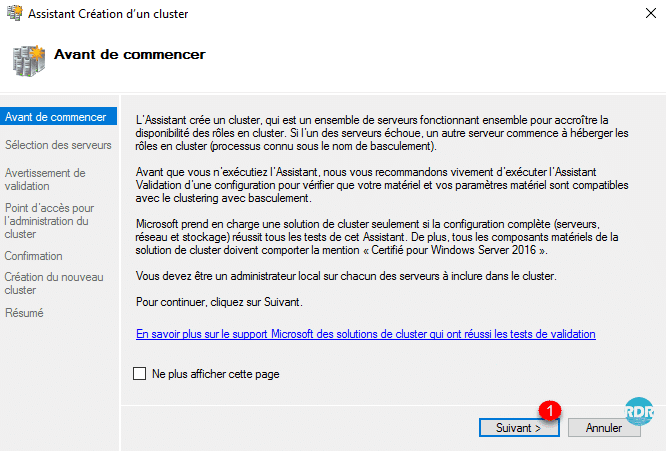
3. Skip the first step of the wizard by clicking Next 1 .
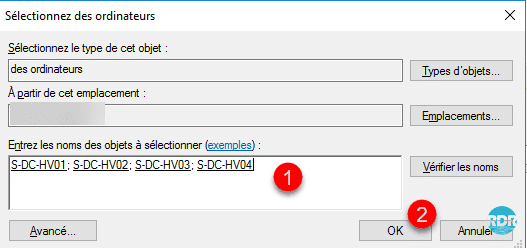
4. Click Browse … 1 .

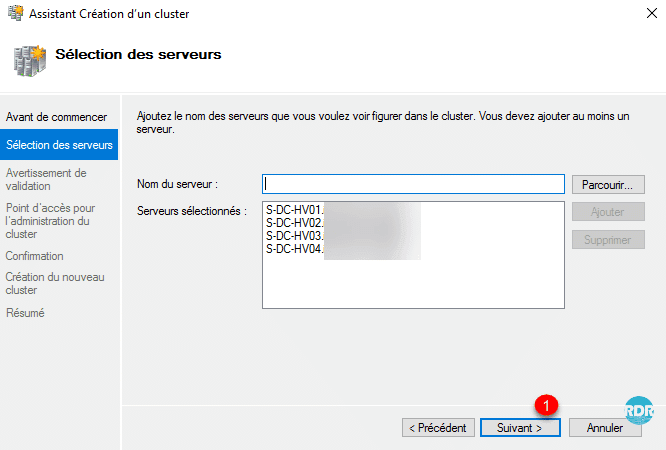
5. Select the servers that will be cluster nodes 1 and click OK 2 .
6. Selected servers, click Next 1 .
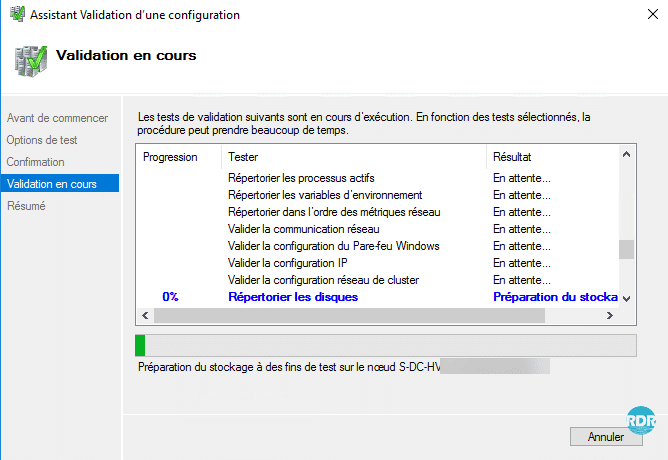
7. To validate the cluster, select test validation 1 and click Next 2 .
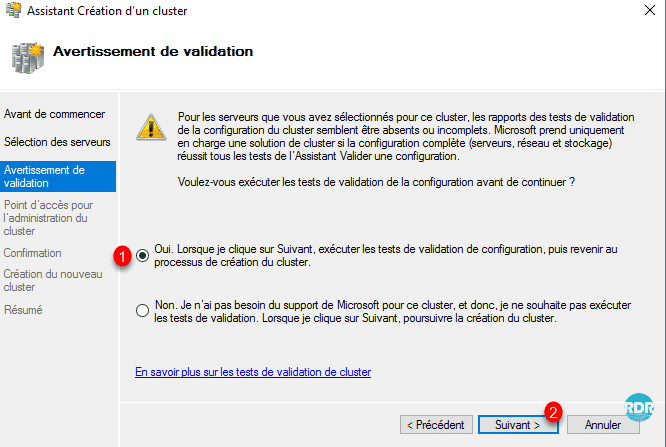
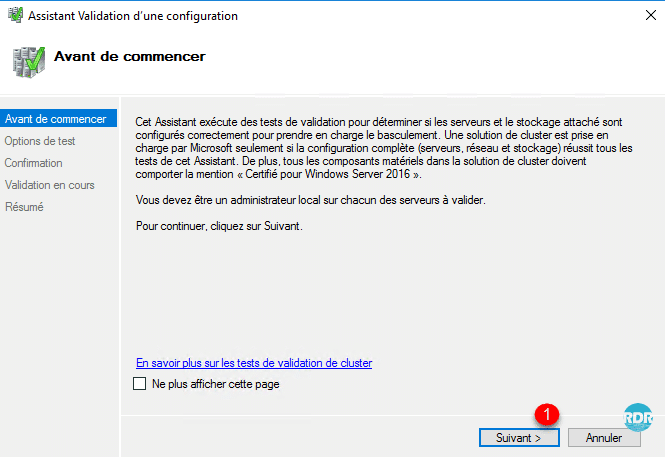
8. An assistant launches, click Next 1 .
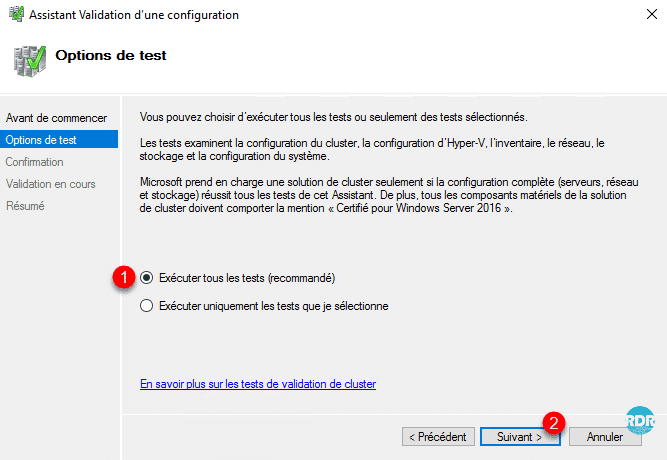
9. Select Run all tests 1 and click Next 2 .
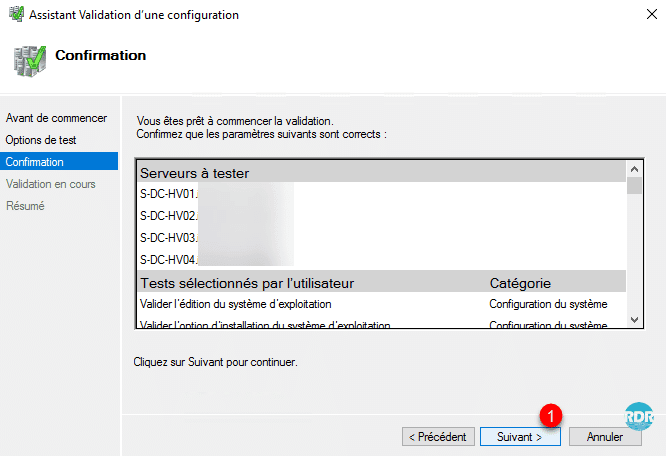
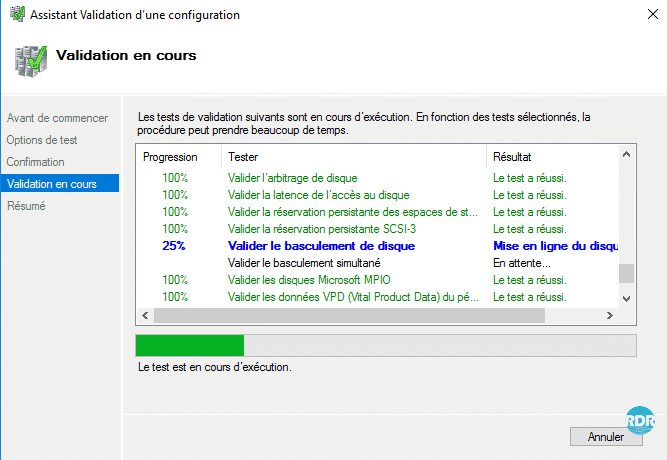
10. Confirm test execution by clicking Next 1 .
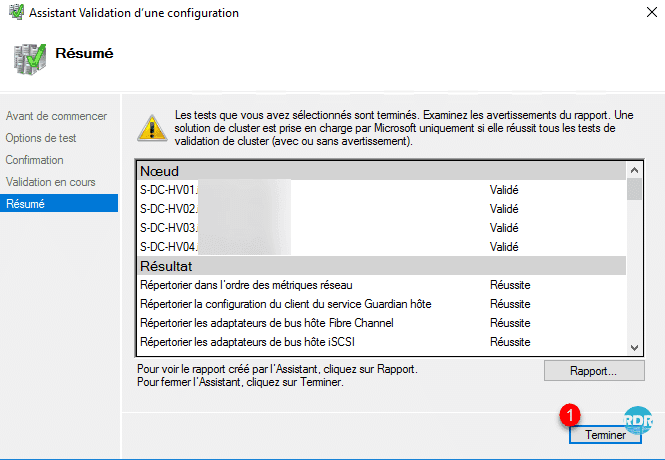
11. Wait during the validation, it can take more or less time depending on the number of nodes …
12. When the tests are complete, if no blocking point is found, click Finish 1 .
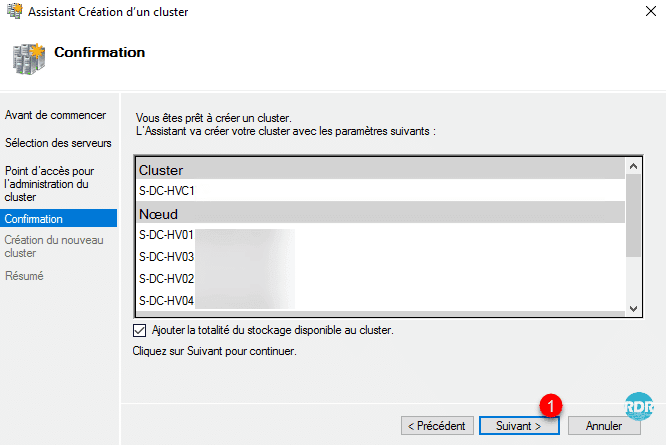
13. Back to the cluster wizard, enter the cluster name 1 and its IP address 2 and click Next 3 .
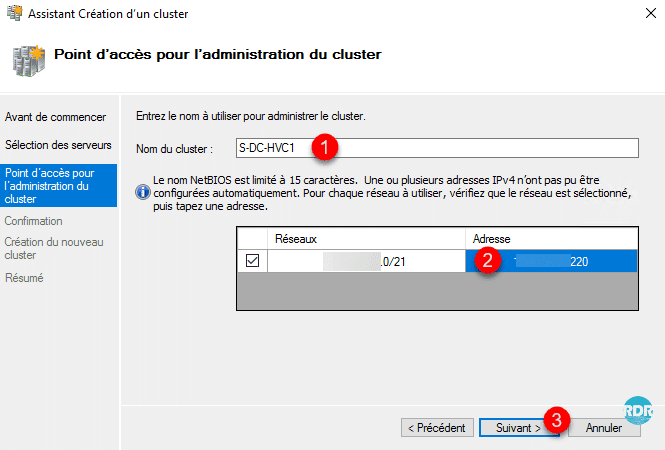
An AD computer object will be created in the directory.
14. Confirm cluster creation by clicking Next 1 .
15. Wait while creating …
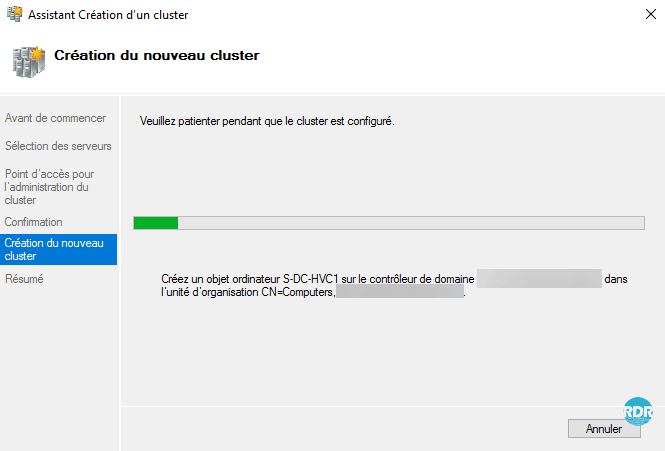
16. The cluster is created, exit the wizard by clicking Finish 1 .
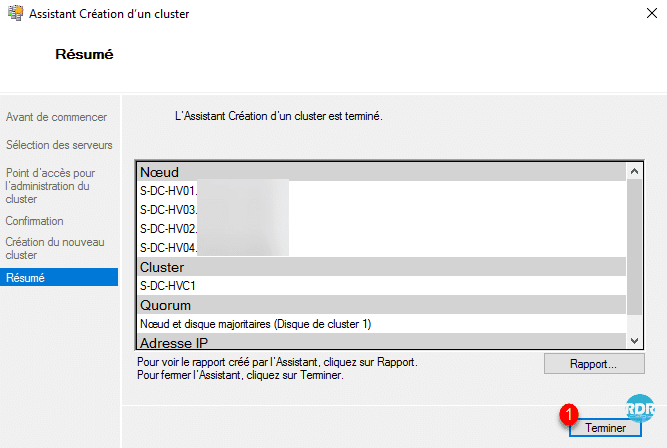
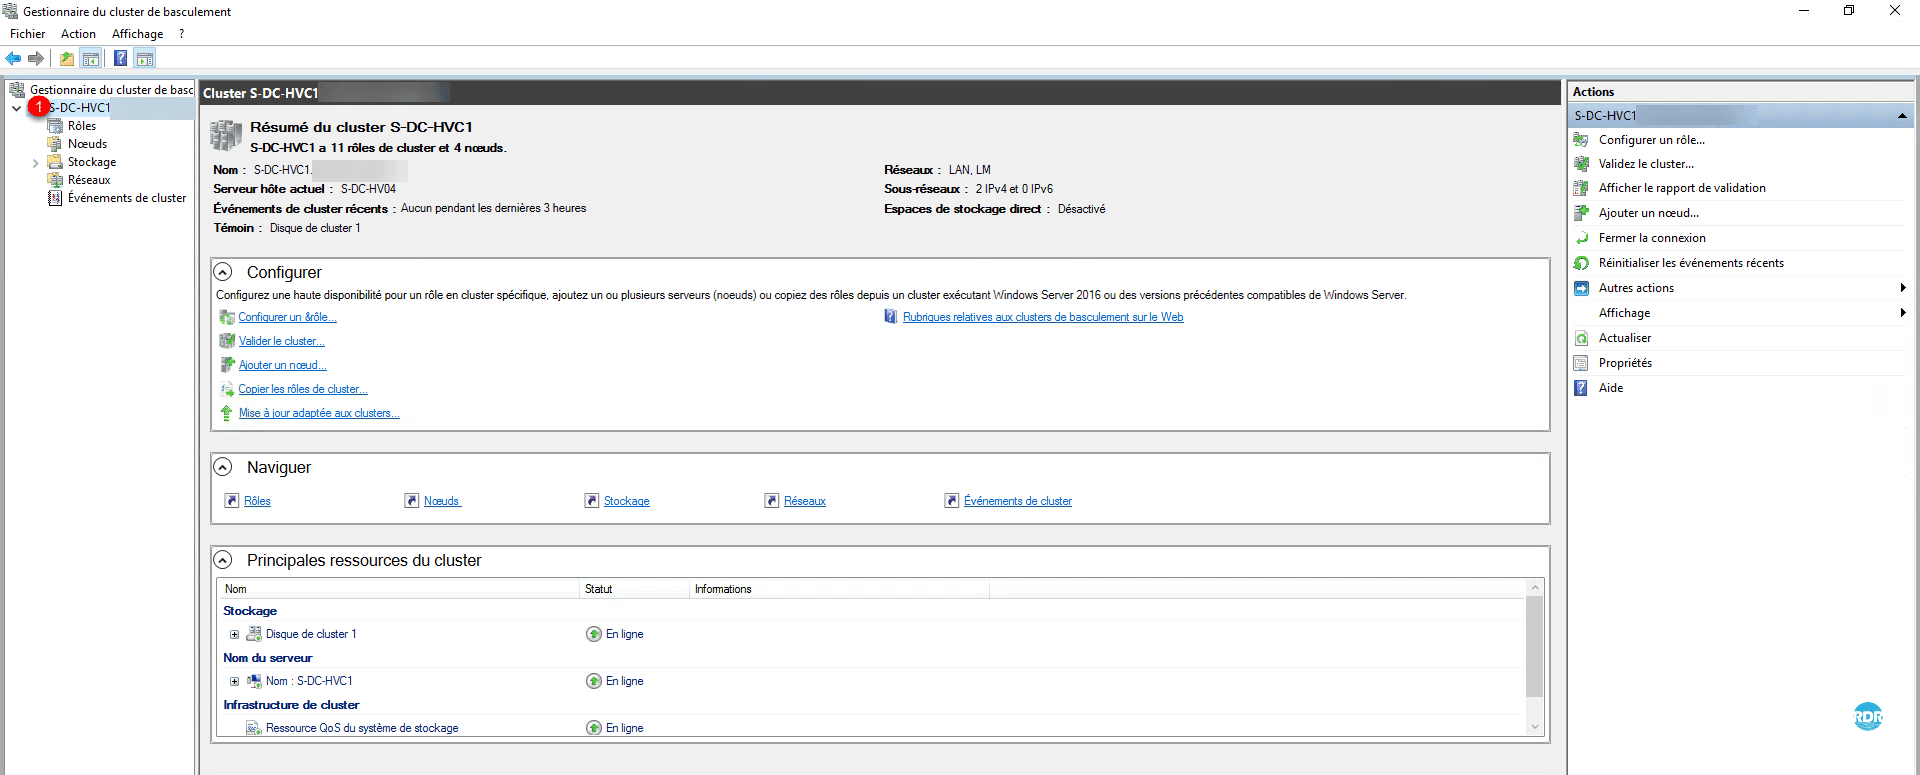
17. Back to the management console, it displays the cluster and settings.
Configuration and administration of the failover cluster
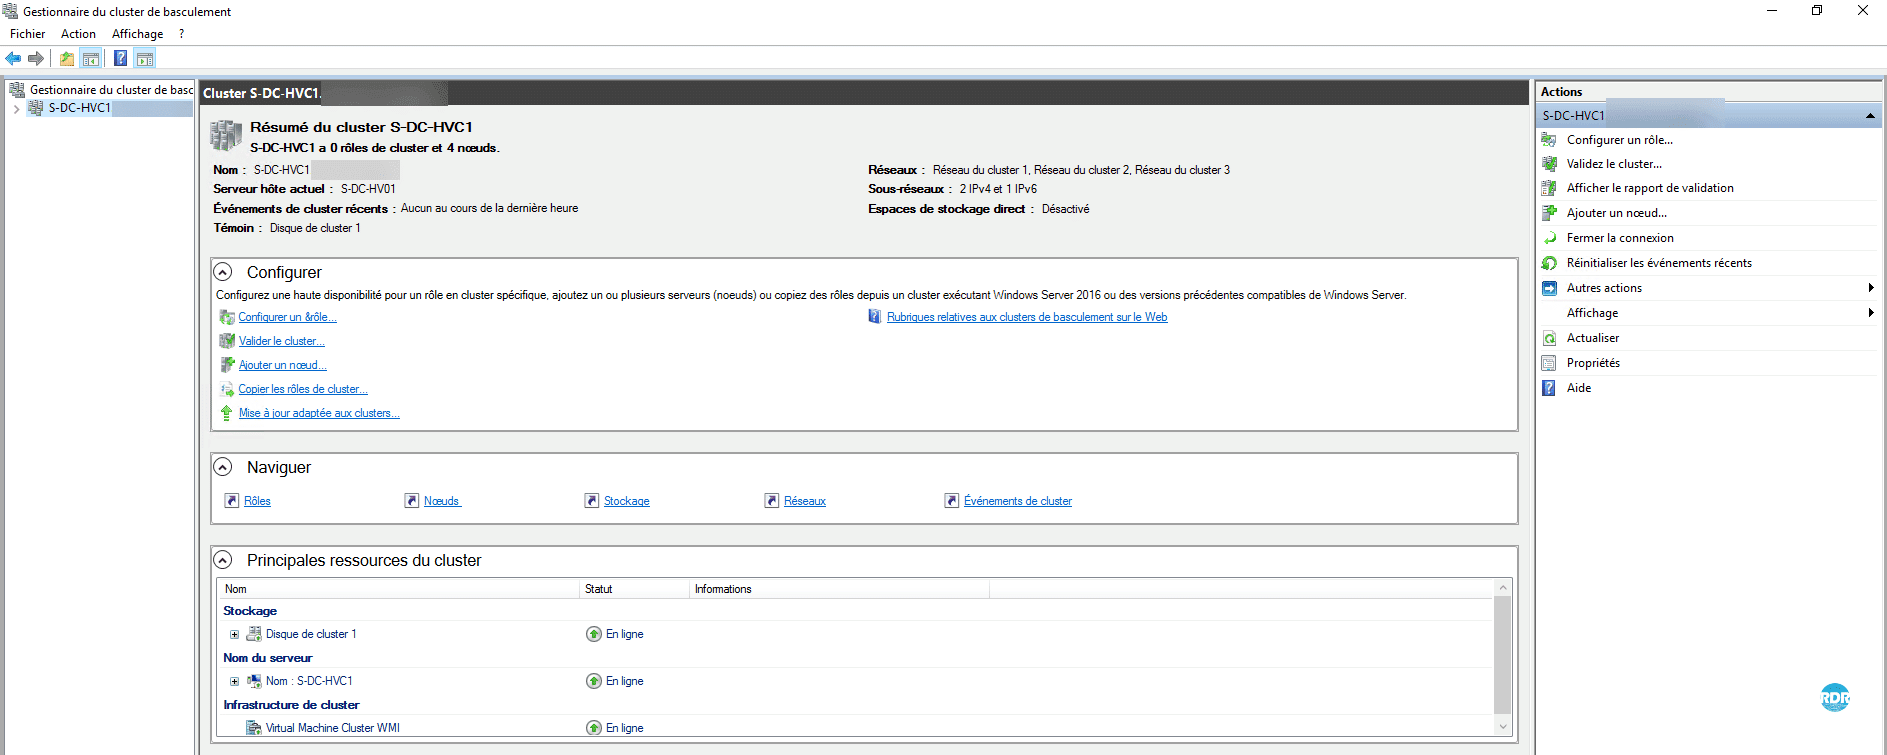
Cluster and role (service) administration is done using the MMC: Failover Cluster Manager.
In this part, I will present you in a general way this console.
1. Click on the chevron before the cluster name 1 to scroll through the available sections.
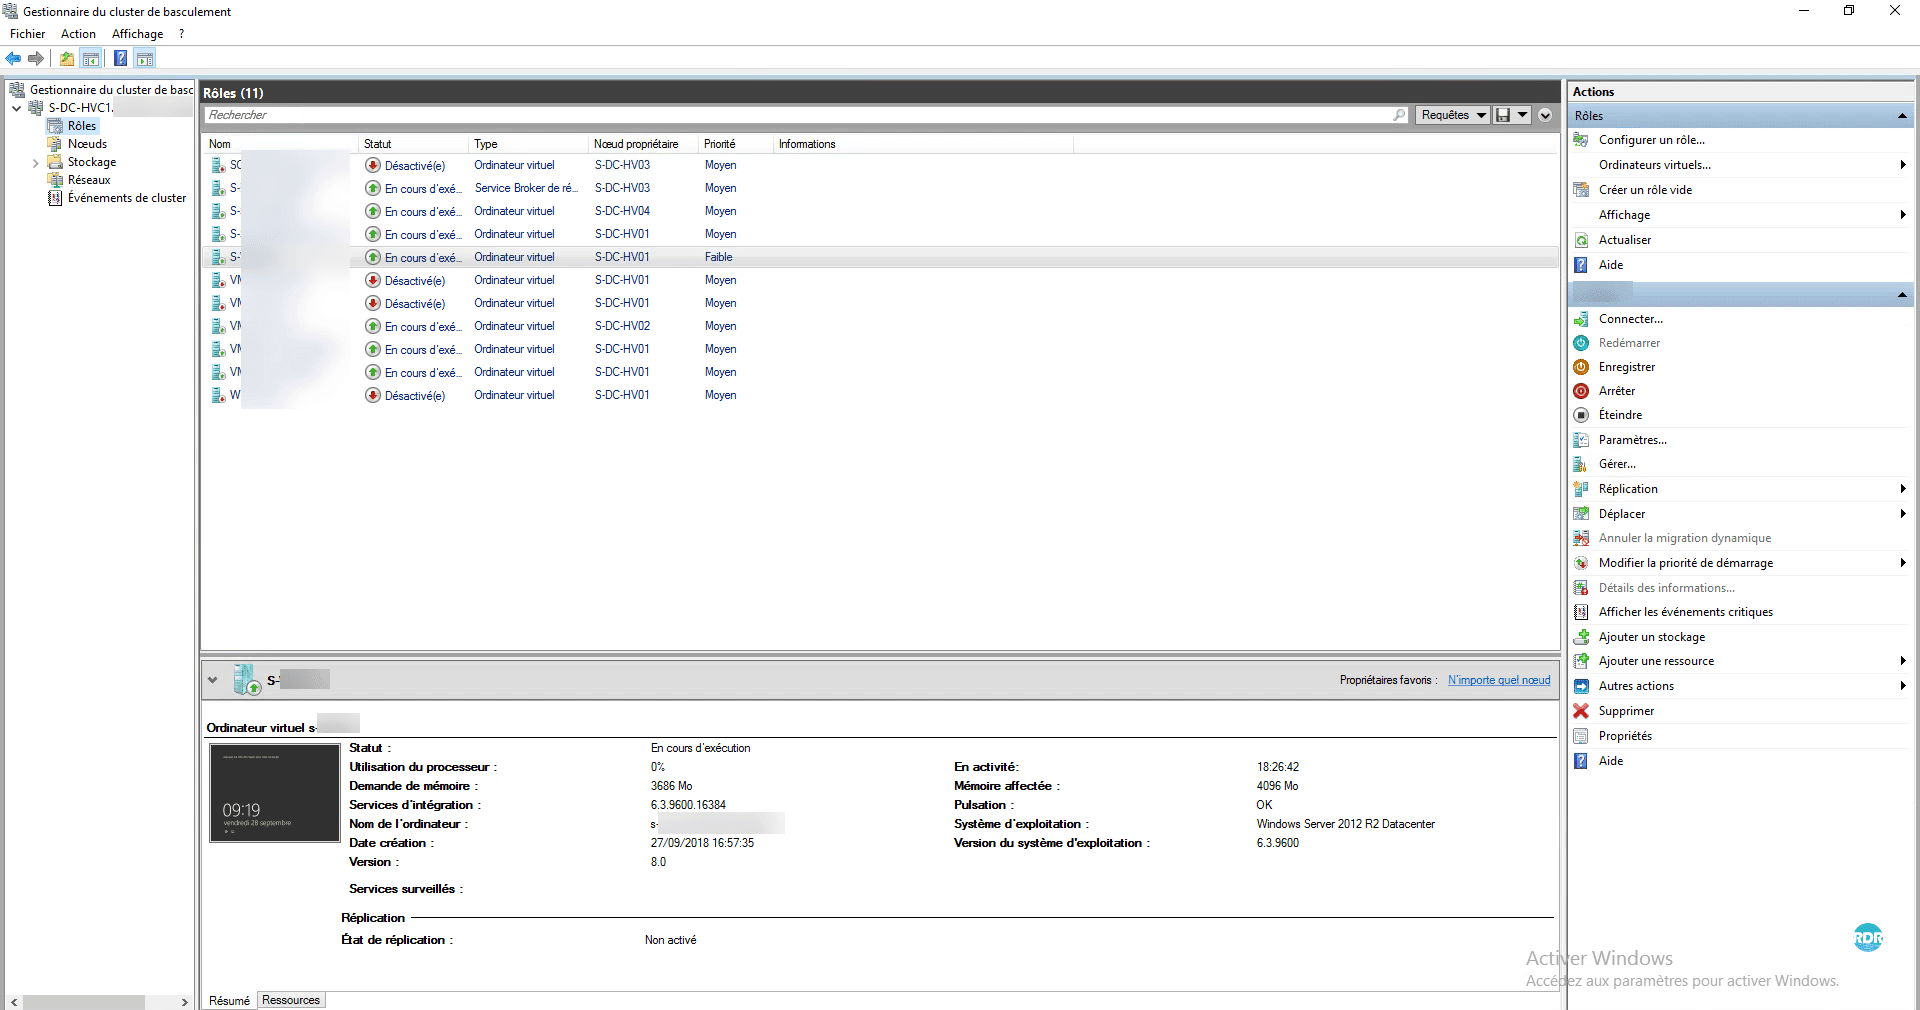
Roles
This part groups together all the services that are distributed by the cluster. Role administration is done here.
In the example below, we find all the virtual machines running on the Hyper-V cluster. The configuration is VM is made from this page by the Actions menu available to the left of the console.
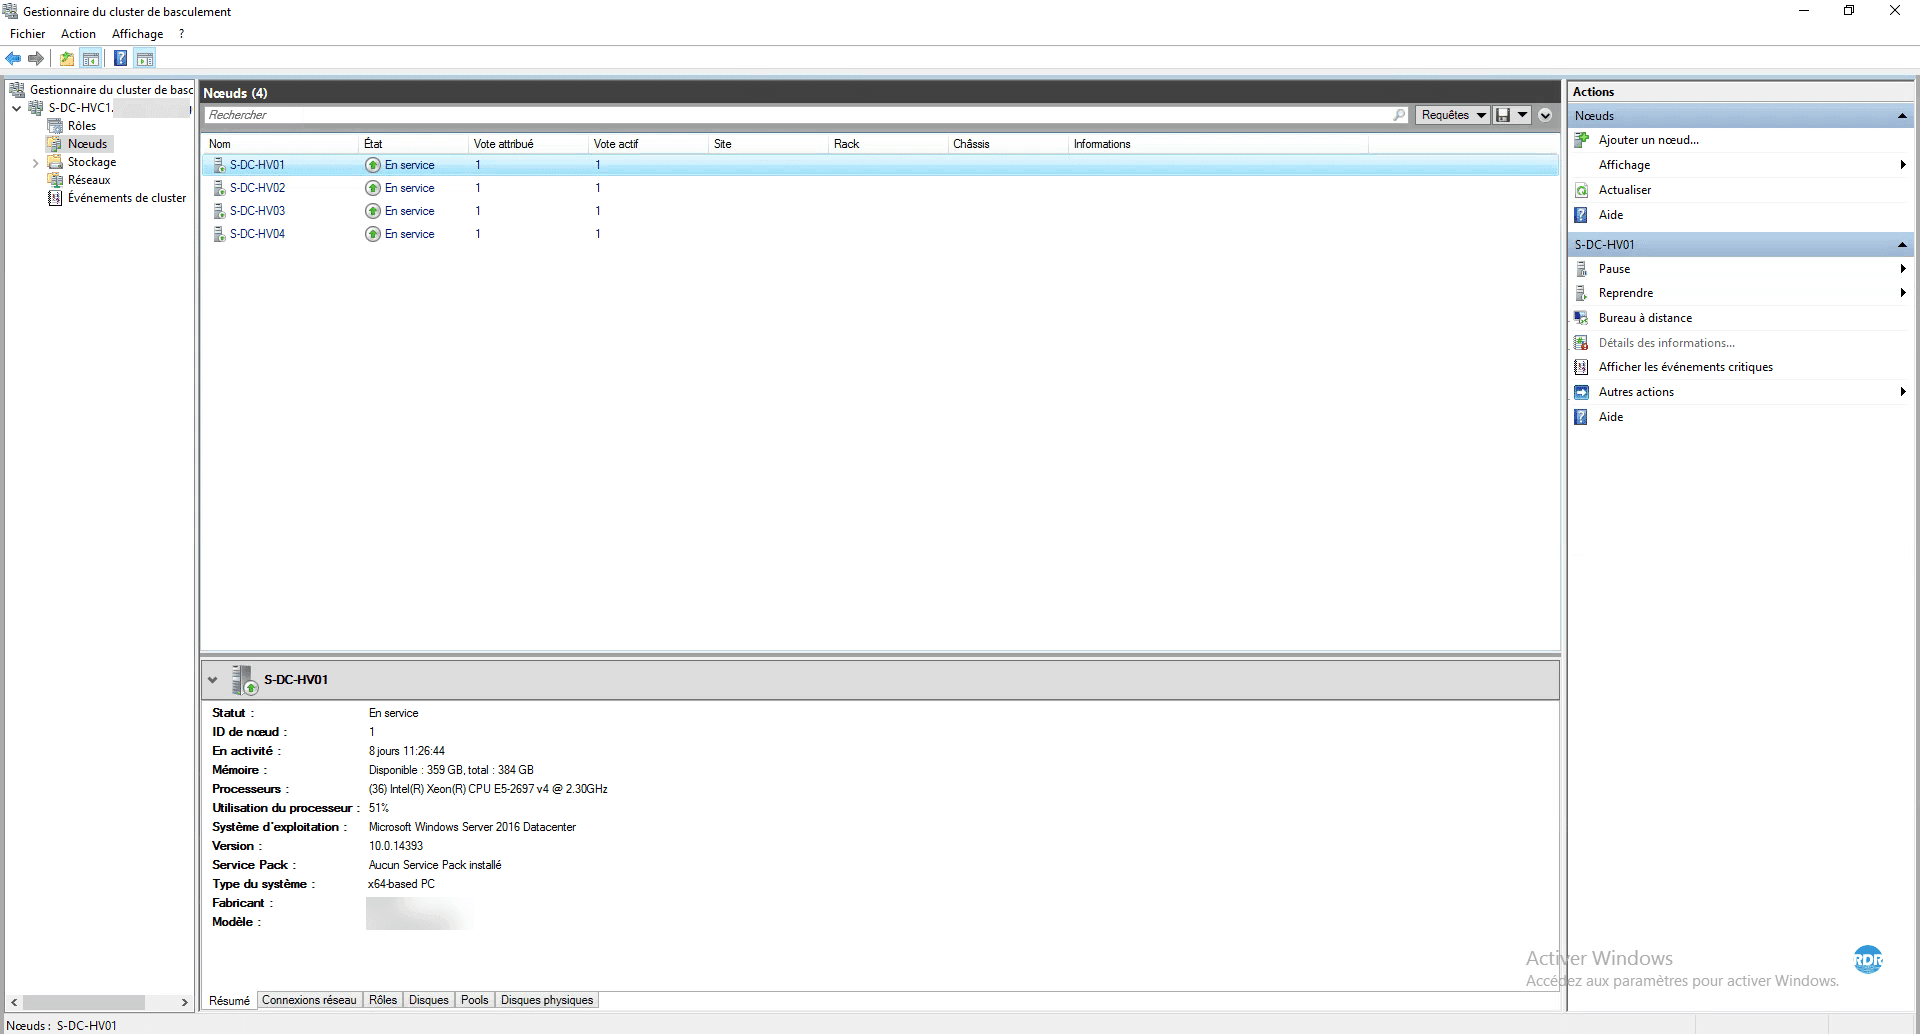
Nodes
In this section, we see the server members of the cluster, with the ability to act on how to pause them for maintenance. It is also possible to add nodes to the cluster from this page.
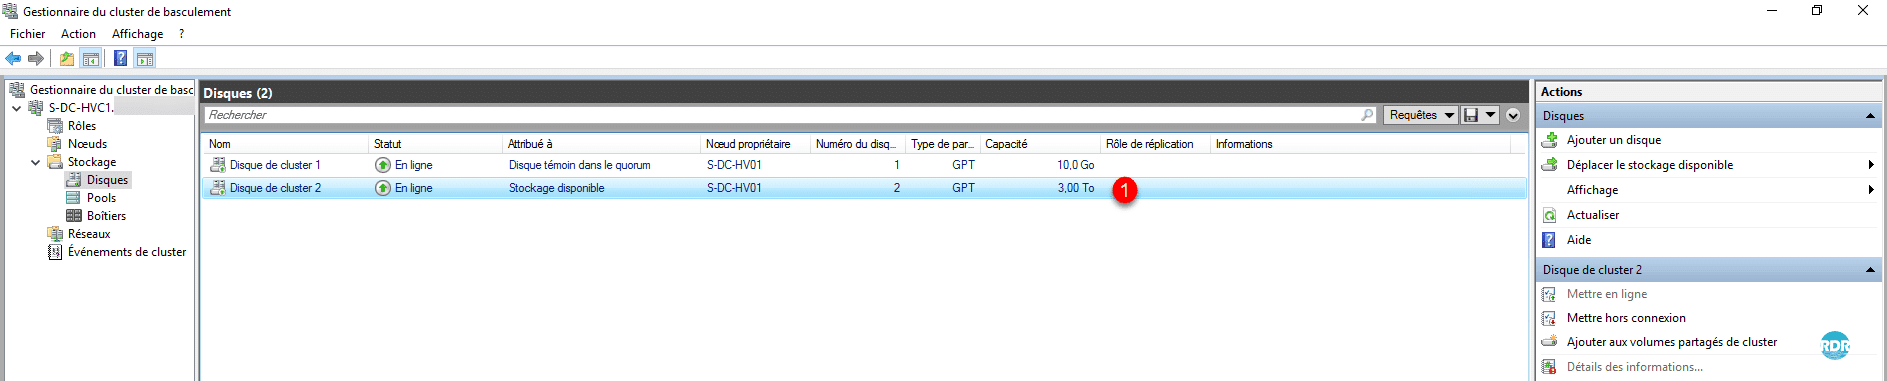
Storages / Disks
This is where you manage the available storage for the cluster. We find the Quorum disk 1 that we configured at the beginning of the tutorial. In an S2D cluster it is here that we will also manage the physical disks.

Add a disk to the cluster
A regular operation on a Hyper-V cluster is adding disk.
1. Present a SAN LUN to all nodes in the cluster.
2. On one of the cluster nodes, open the disk manager, bring online, initialize, and format the disk.
3. From the disk section in the cluster console, click Add Disk 1 in the Actions section.

4. If your disk is properly presented to the nodes and formatted, it should be displayed. Select 1 and click OK 2 .

5. The disk is now added to cluster 1 , for the moment it is available only for the owning node.
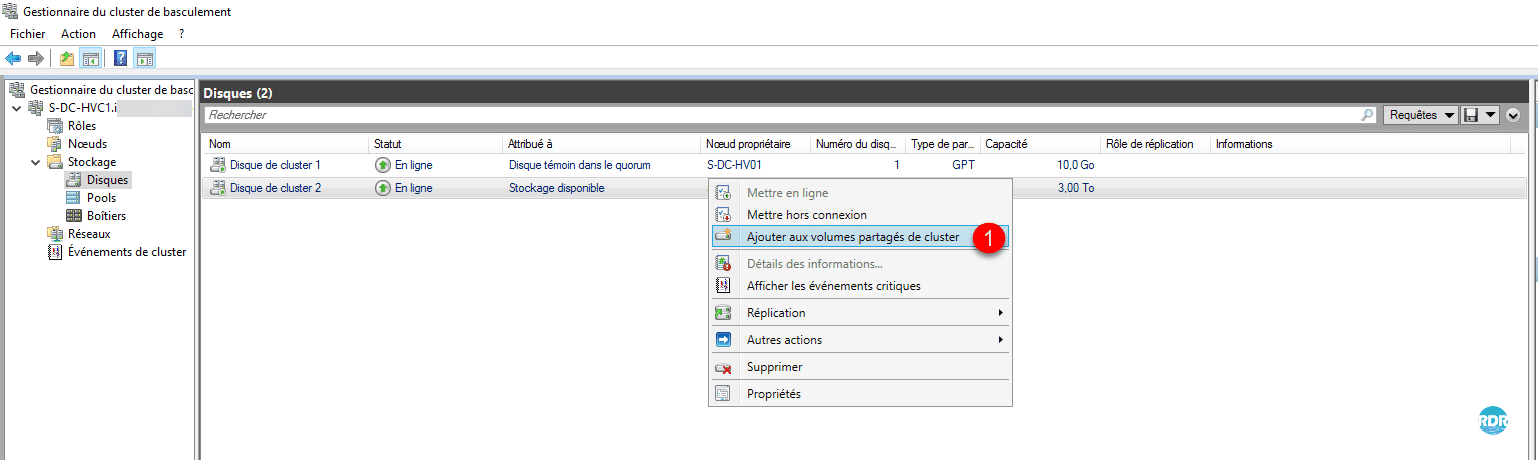
6. Right-click on the disk and click Add to shared volumes in cluster 1 .
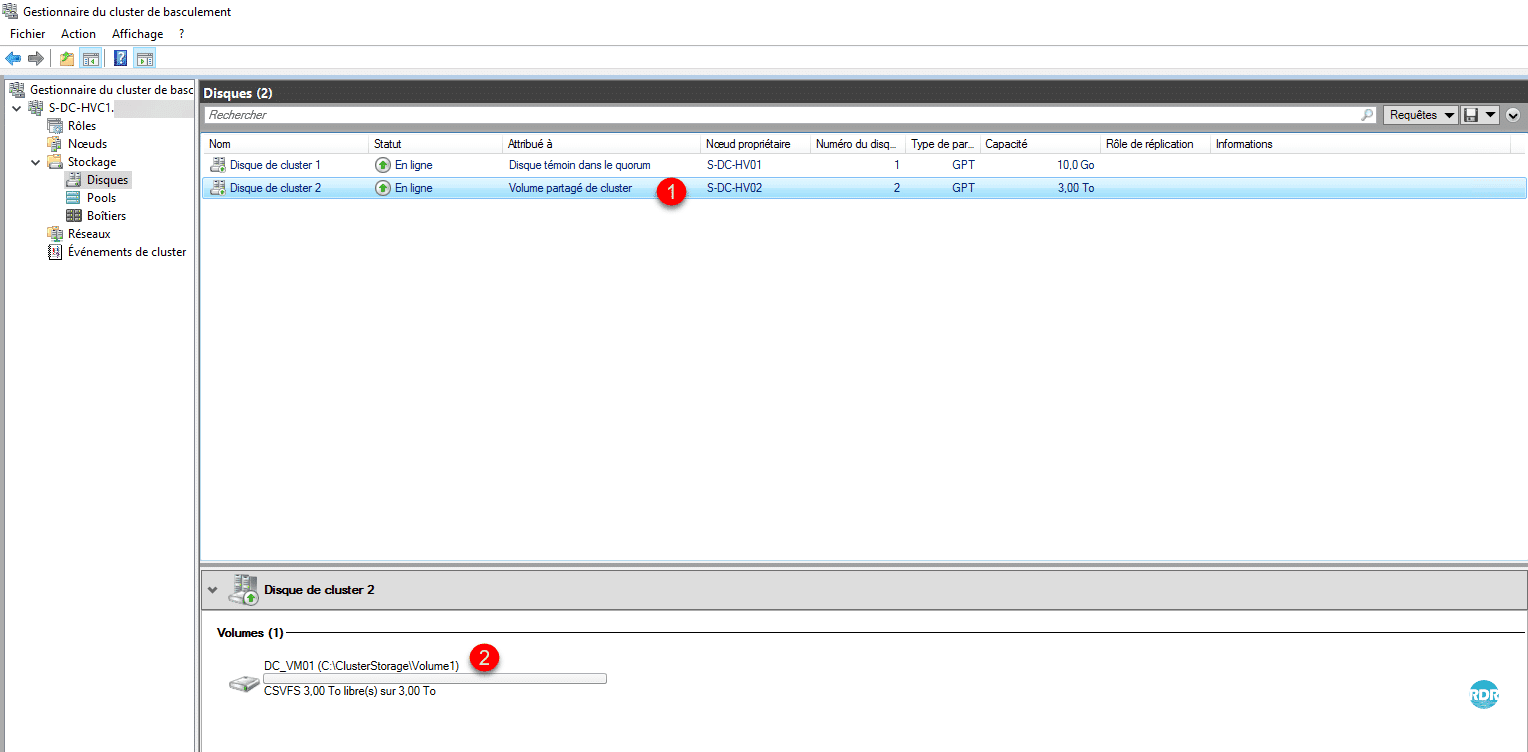
7. Disk 1 is now shared for all nodes in the cluster. In the details of the disc, we find the mount point (C: ClusterStorageVolumeX) 2 . If we look at all the nodes we can access the disk via the explorer. Note also the disk format is now CSVFS (Cluster Storage Volume Files System).
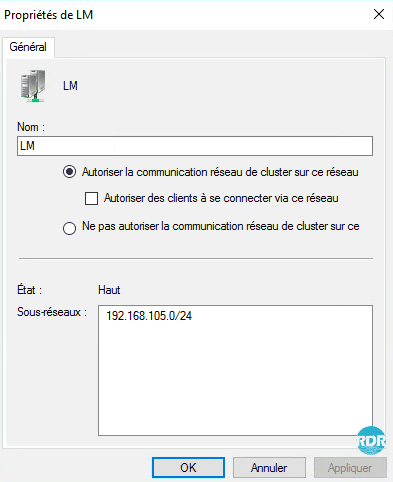
Networks
The network management allows parameter communication between the clients and the cluster and the inter-node communication part. This is also where this setting the Live Migration as part of a Hyper-V cluster.

The properties of the network allow you to configure which communications pass over it.
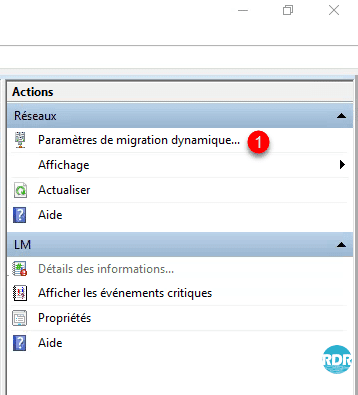
Setting up dynamic migration
1. Click Dynamic Migration Parameter 1 accessible from the Actions menu.
2. Check the networks that can be used for the migration, if several networks are activated, configure the priority of use with the Up and Down buttons.
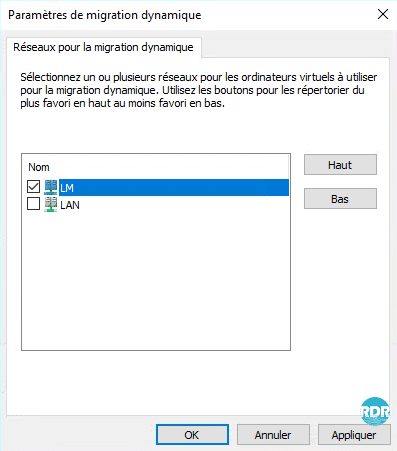
For networks to appear in this section, each node in the cluster must have an IP address in the configured network.
Load balancing for virtual machines
Since Windows 2016, it is possible to enable load balancing for virtual machines.
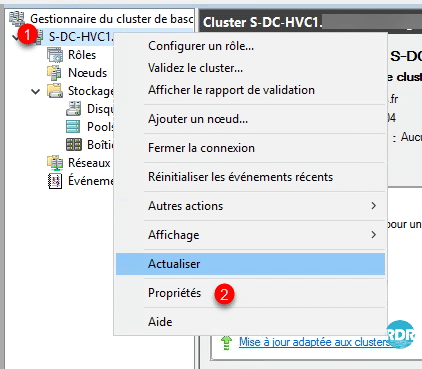
1. Right click on the cluster name 1 and click Properties 2 .
2. Go to the Balancer tab 1 and set the option according to your needs.
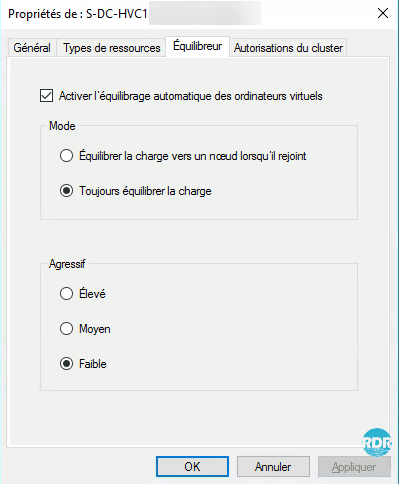
The load-balancing is to be used with caution, because in an “overloaded” environment this can cause a large displacement of vm and impact the overall performance. It is also advisable not to enable this feature in a cluster of 2 nodes.
Change the IP address of the cluster
1. From the cluster main page in the Cluster 1 Main Resources section, scroll down the Name 2 part, right-click on the IP address 3 and click Properties < <4 .
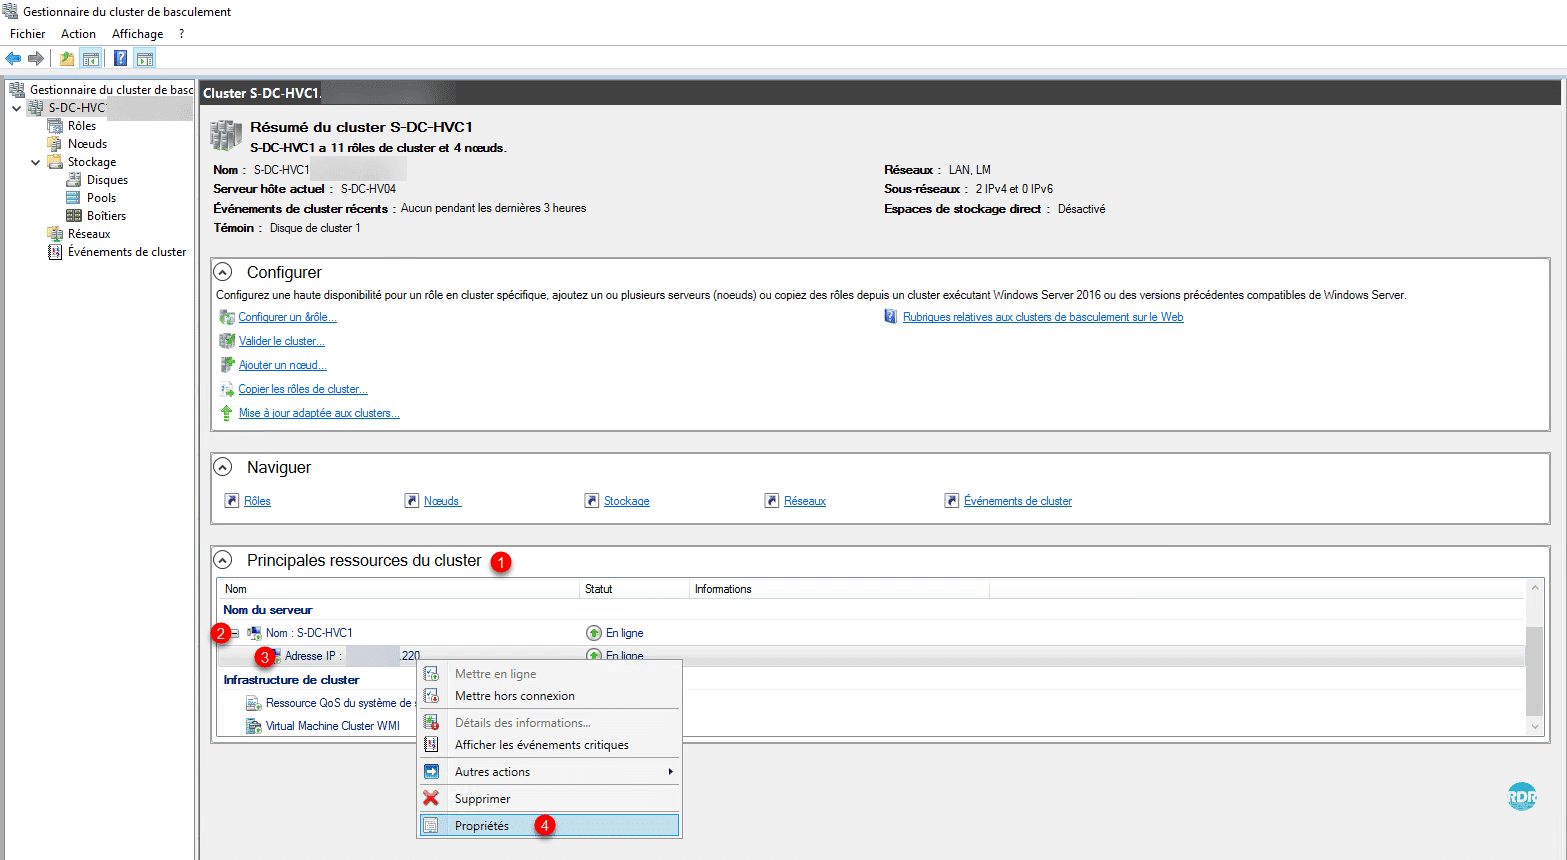
2. On the General tab, it is possible to change the network settings of the cluster.
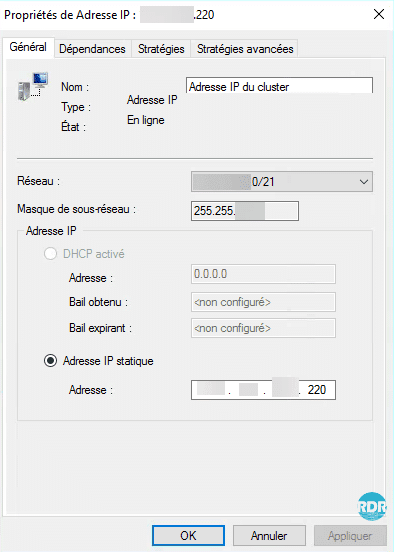
If you change the IP address of the cluster after it goes into production, consider reconfiguring the services that use it and the DNS records.