In this tutorial, I will explain to you how to create and especially configure receive connectors in Exchange during a migration between two versions.
When we do an Exchange migration, especially on large environments, it happens that we cannot do it in an evening or a weekend and we will end up with mailboxes in both environments.
In order for cohabitation to go smoothly, it is necessary to have a reception connector on each Exchange server which will allow messages to be sent between the two environments, whether for “internal” or external messages because they will have to be transferred.
Before moving on to creating connectors on the servers, you must check your current connectors especially if you have an anonymous one for applications and devices, the Exchange servers must not be configured in it, that is to say that their address IP must not be declared.
Below, the receive connectors on an Exchange 2016 server, we can see a connector named From2010 1, which allows the reception of messages from Exchange 2010 servers in cohabitation.

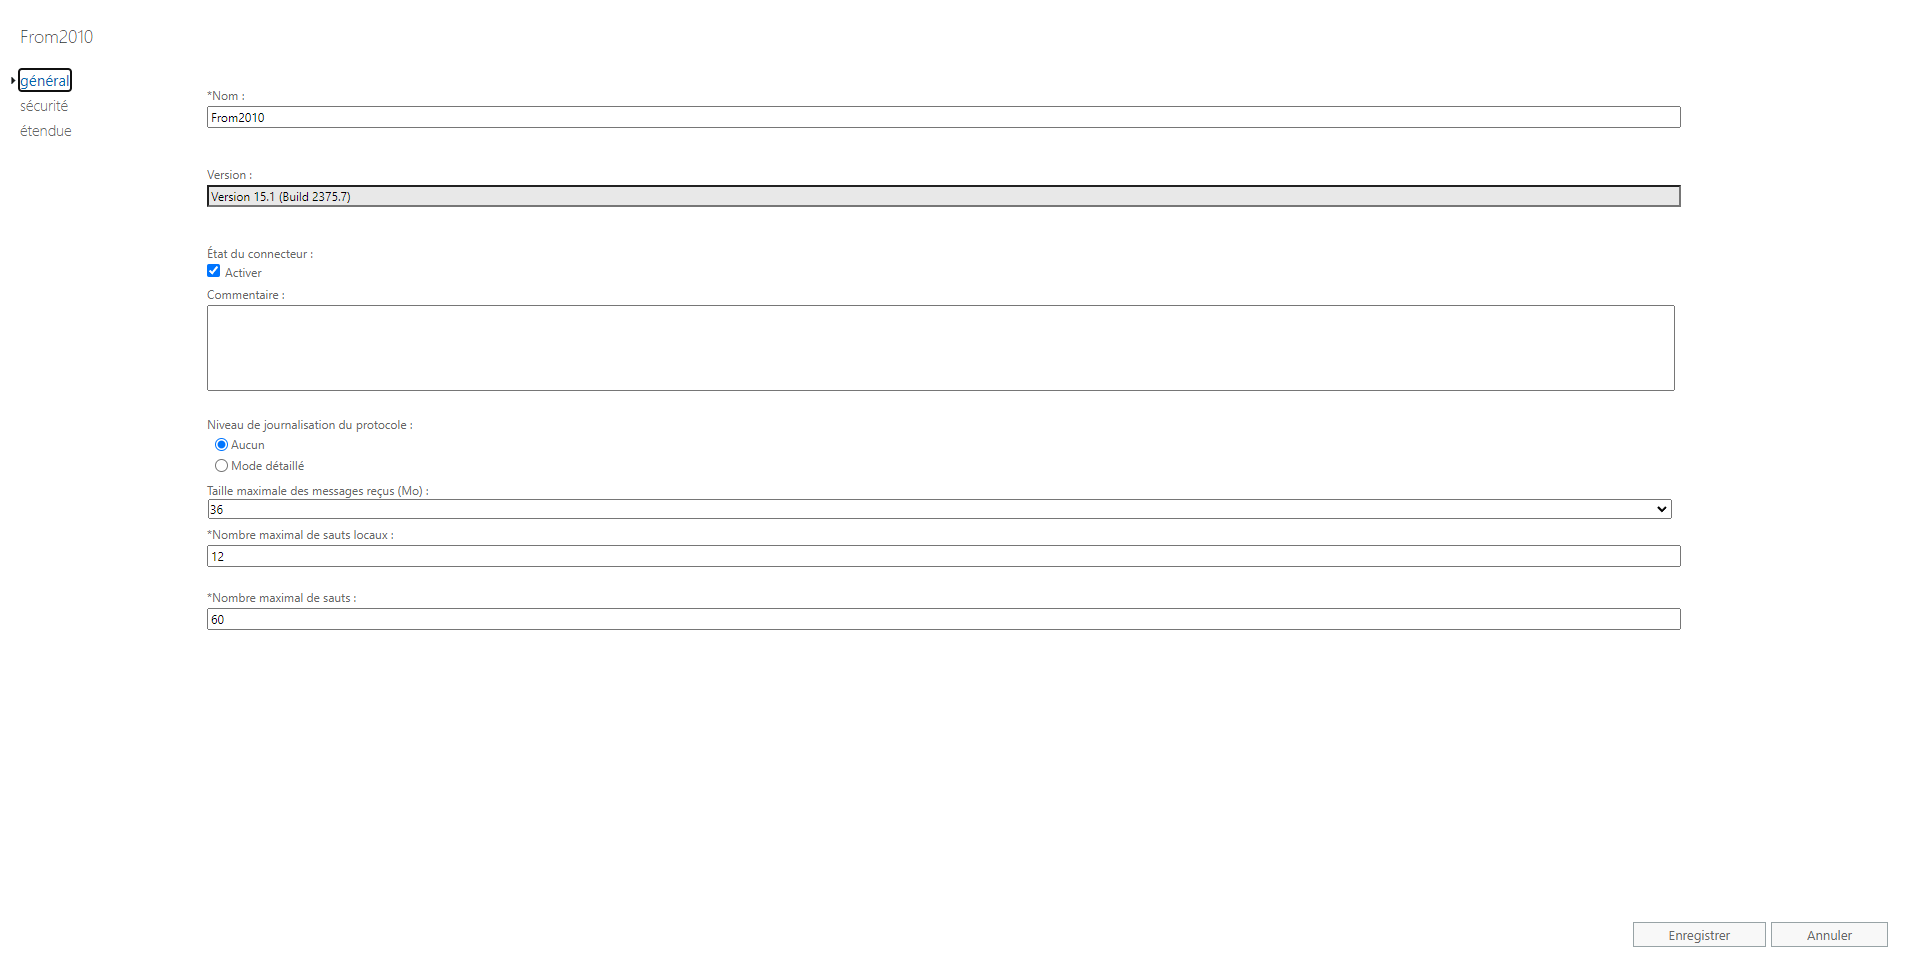
In the General part of the connector, there is nothing special, it just needs to be activated.
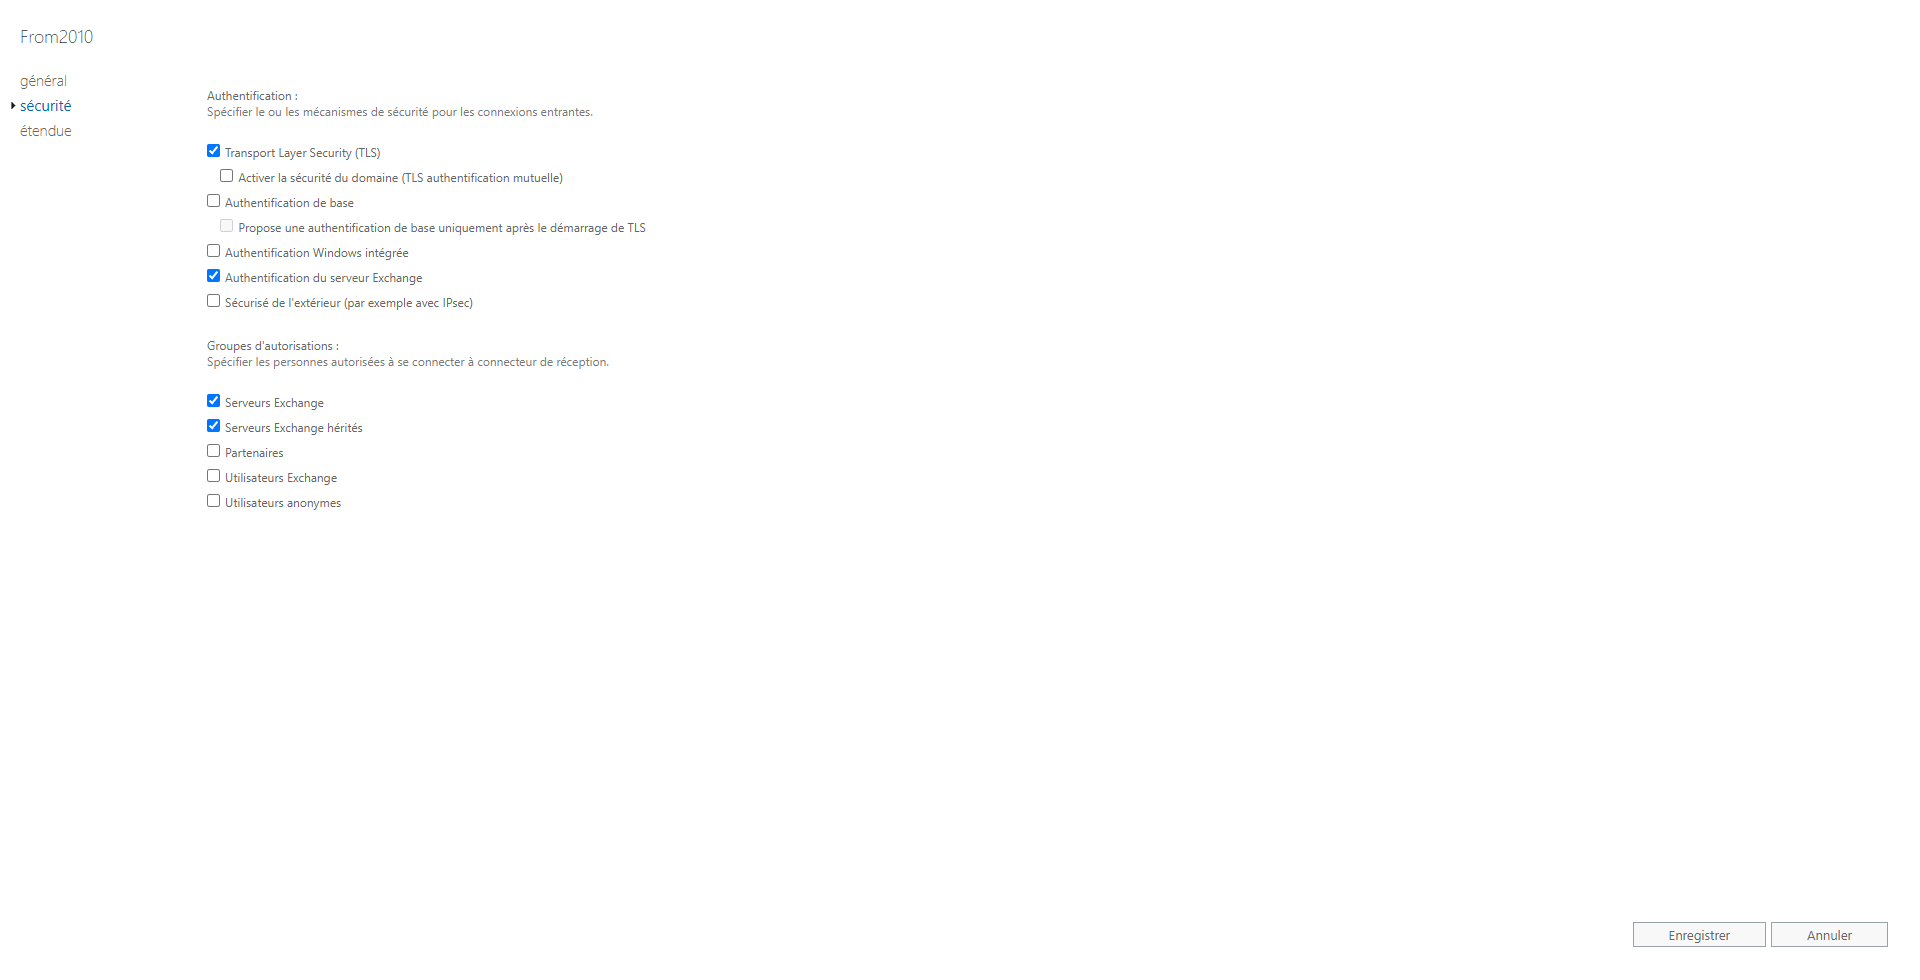
In the security part, at the authentication level, you must select TLS and Exchange Server Authentication and in the authorization groups, choose Exchange Servers and Legacy Exchange Servers.
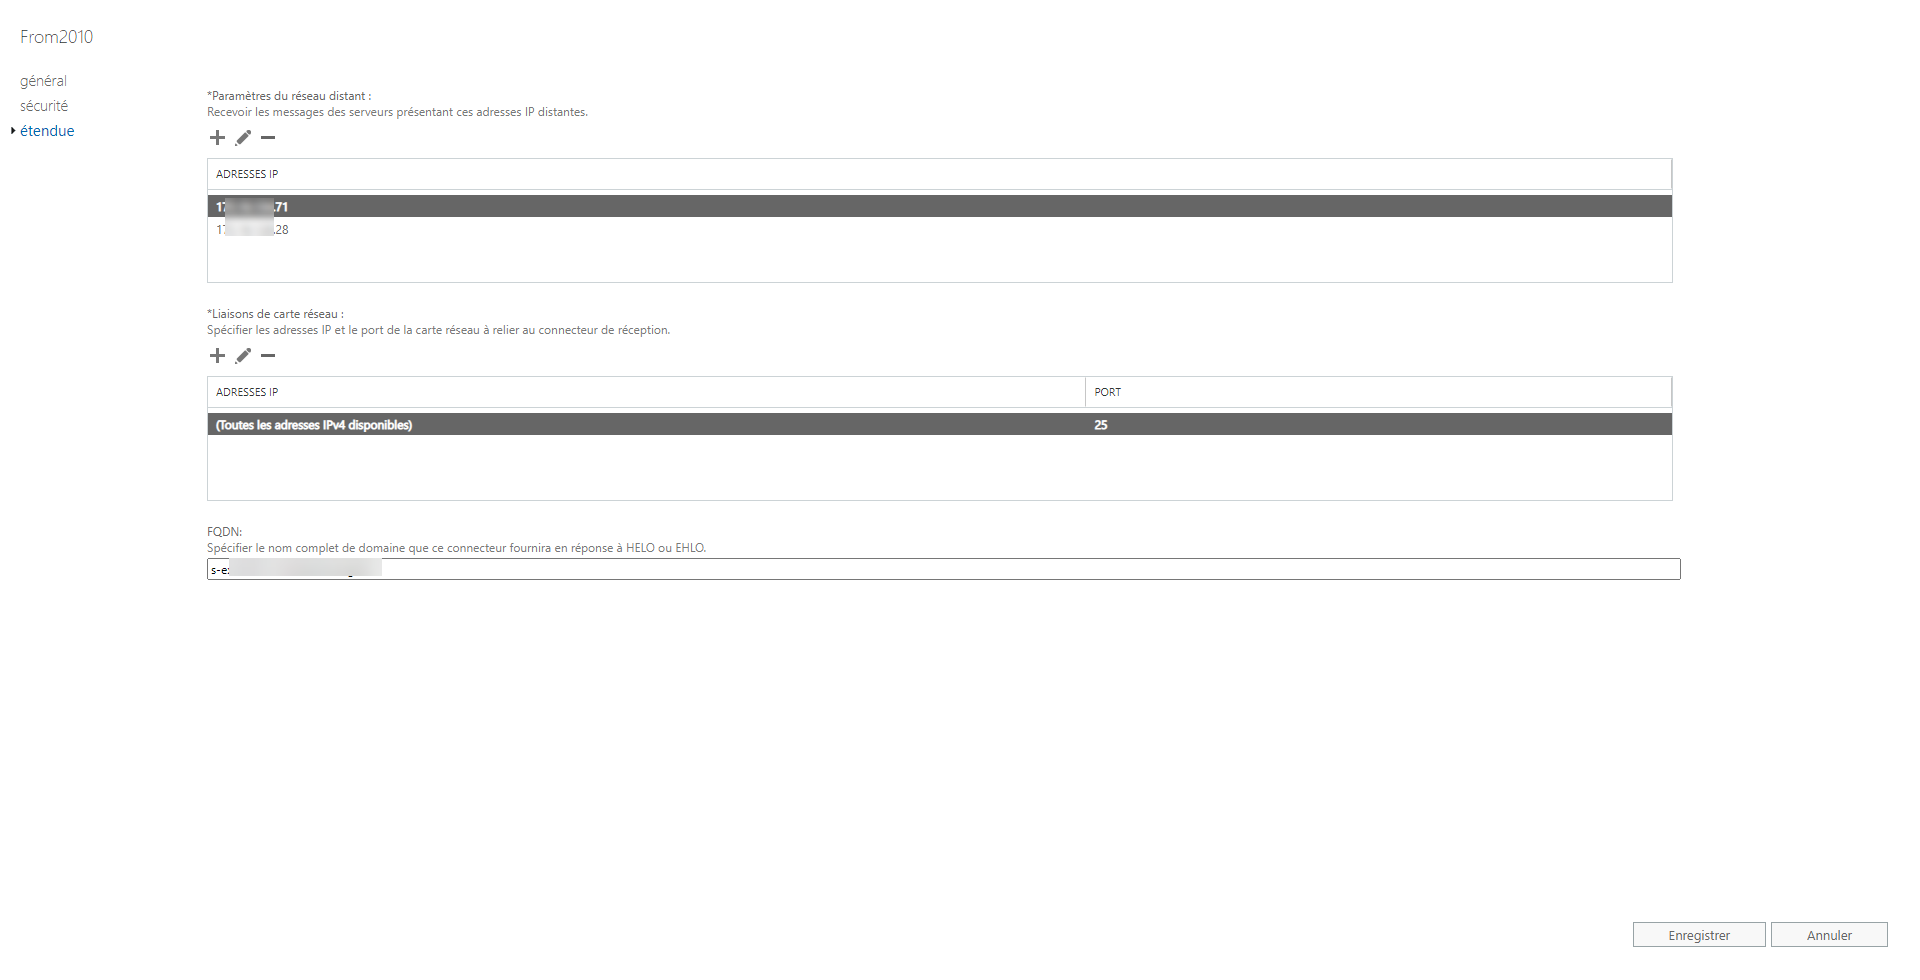
Finally, in the extended part, you must add the Exchange cohabitation server(s).
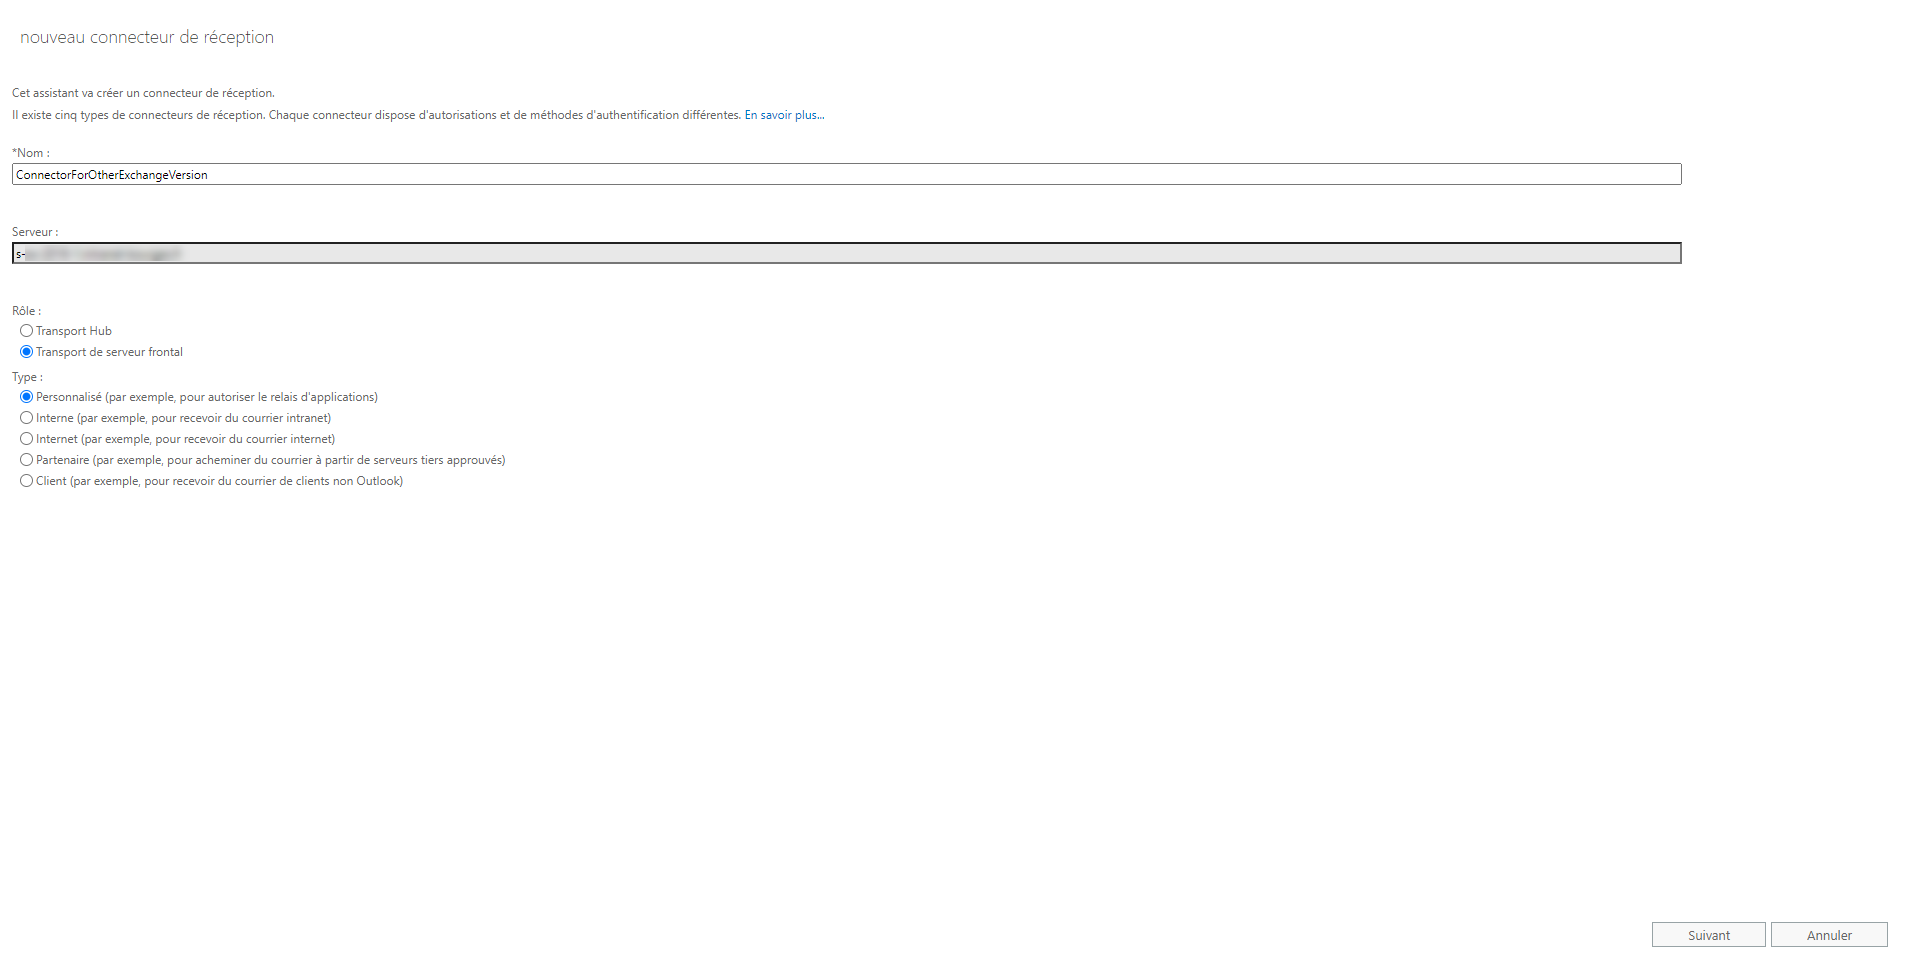
When creating the connector, you must choose the Front Server Transport role and choose the Custom type and then indicate the information as explained above.
You must create a connector on all Exchange servers.