

Introduction
In this tutorial, we will see how to install and configure Exchange 2016.
Exchange is a mail server designed by Microsoft, it is the professional version of Hotmail (Outlook).
Environment
- An Active Directory domain.
- A Windows Server 2016 server that is a member of the domain with 3 partitions (OS / Data / Logs)
Prérequis
- Download the latest version of Exchange 2016 (CU11).
- Install the Framework .NET 4.7.1.
- Install VC++ 2013.
- Install the update KB3206632.
- Install Unified Communications Managed API 4.0 Runtime.
- Optional: If multiple sites are defined in the AD, they must all have a configured subnet
1. On the server open a PowerShell command prompt and enter the command below to install the necessary roles.
Install-WindowsFeature NET-Framework-45-Features, RPC-over-HTTP-proxy, RSAT-Clustering, RSAT-Clustering-CmdInterface, RSAT-Clustering-Mgmt, RSAT-Clustering-PowerShell, Web-Mgmt-Console, WAS-Process-Model, Web-Asp-Net45, Web-Basic-Auth, Web-Client-Auth, Web-Digest-Auth, Web-Dir-Browsing, Web-Dyn-Compression, Web-Http-Errors, Web-Http-Logging, Web-Http-Redirect, Web-Http-Tracing, Web-ISAPI-Ext, Web-ISAPI-Filter, Web-Lgcy-Mgmt-Console, Web-Metabase, Web-Mgmt-Console, Web-Mgmt-Service, Web-Net-Ext45, Web-Request-Monitor, Web-Server, Web-Stat-Compression, Web-Static-Content, Web-Windows-Auth, Web-WMI, Windows-Identity-Foundation, RSAT-ADDS2. Restart the server.
3. Mount the ISO Exchange.
Now that the environment is ready, we will move to installing Exchange 2016.
Exchange 2016 installation
1. On the ISO run Setup 1 as administrator.

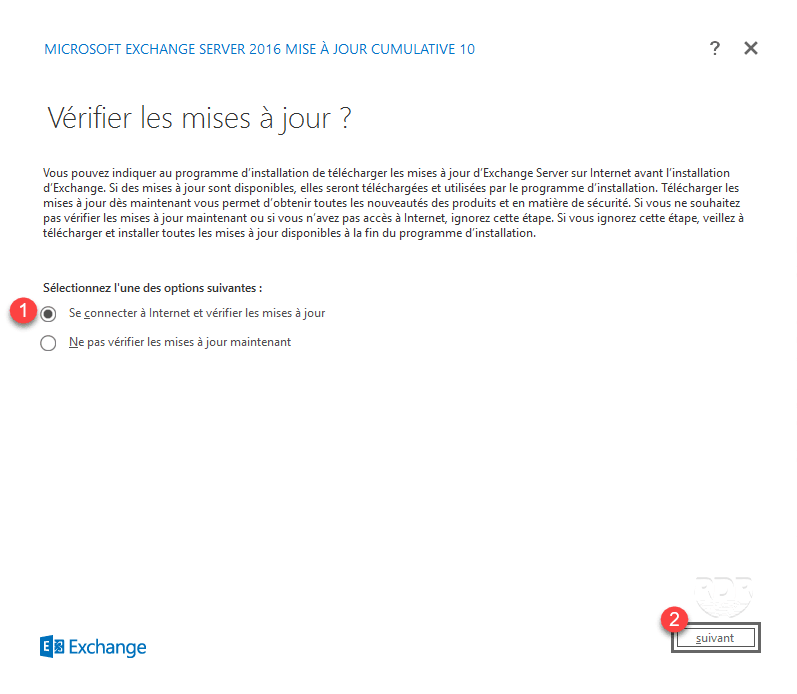
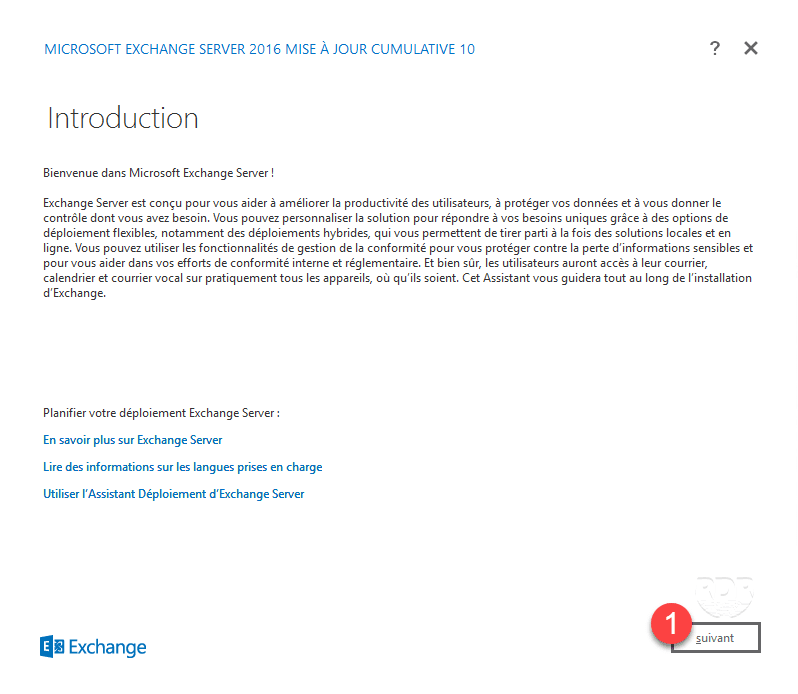
2. When launching the wizard, select the option Connect to the Internet and check for updates 1 then click on Next 2 .
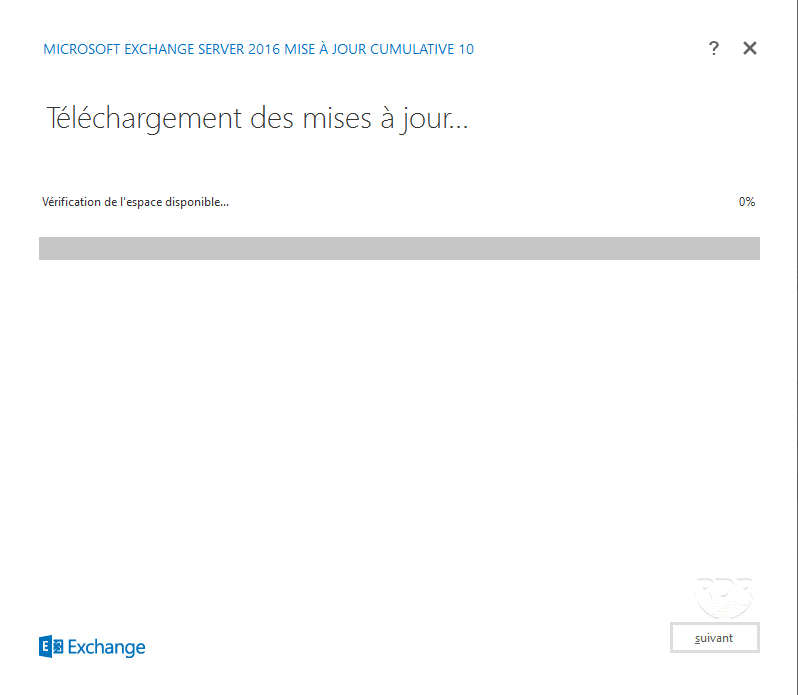
3. Wait while searching …
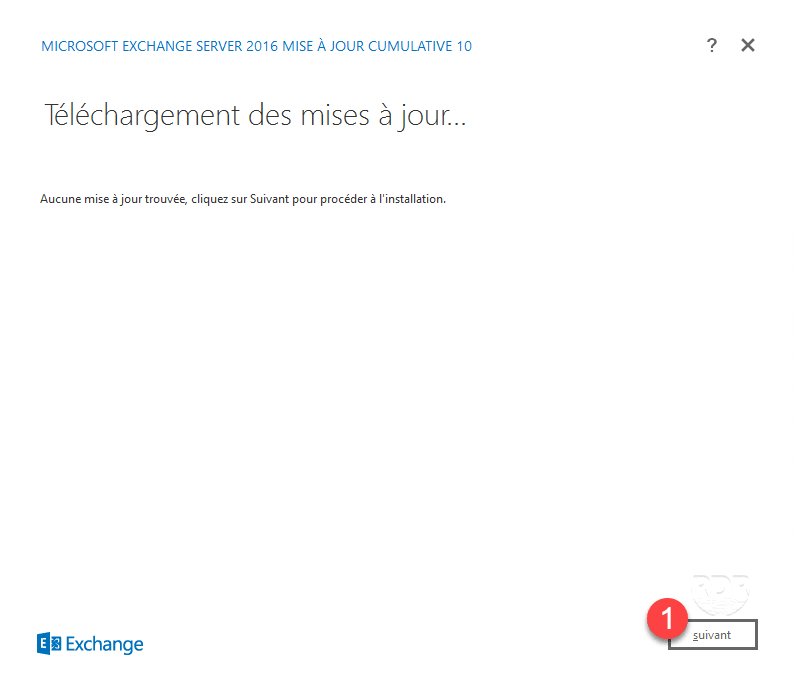
4. Once this step is finished, click on next 1 .
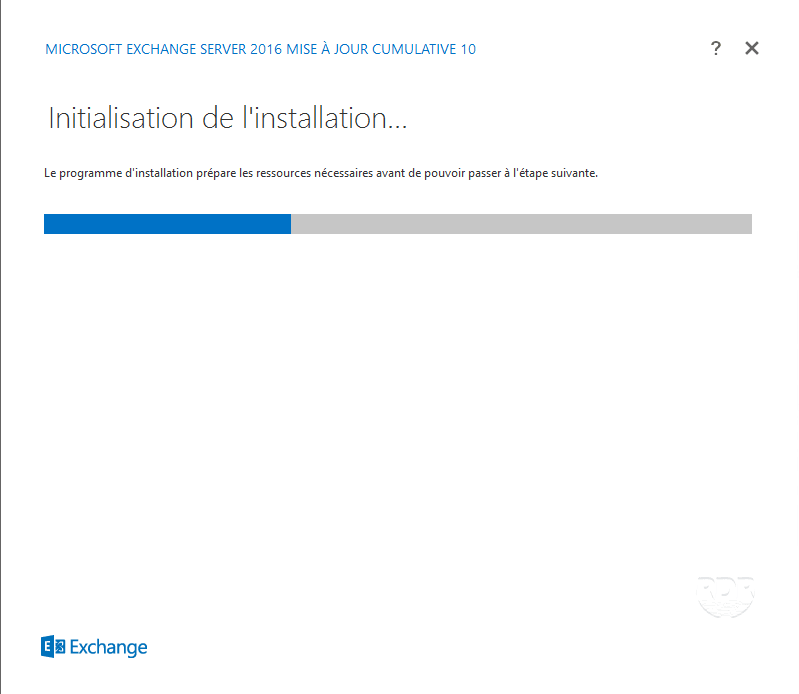
5. Wait while initializing the installer …
6. Click Next 1 .
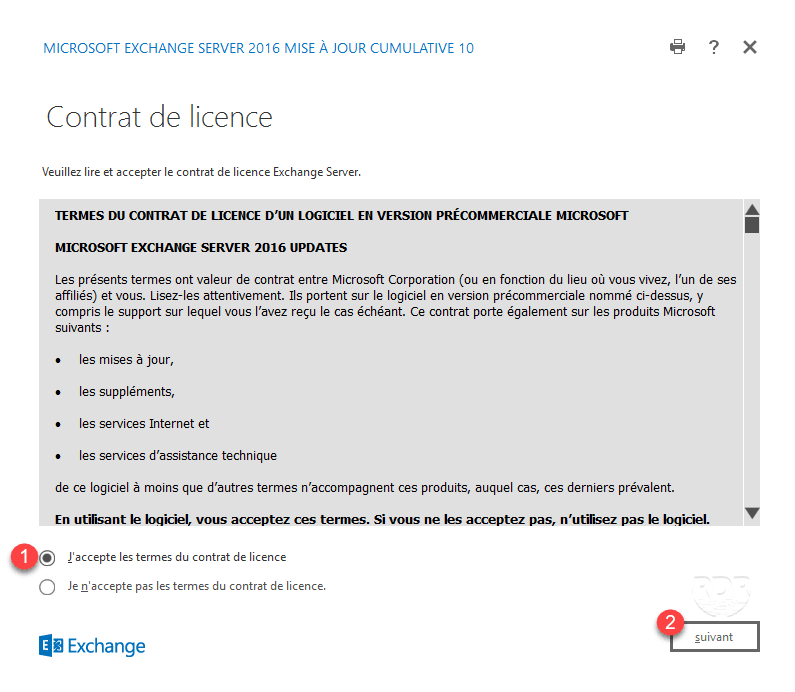
7. Accept the 1 license agreement and click Next 2 .
8. Select the option Use Recommended Settings 1 and click Next 2 .

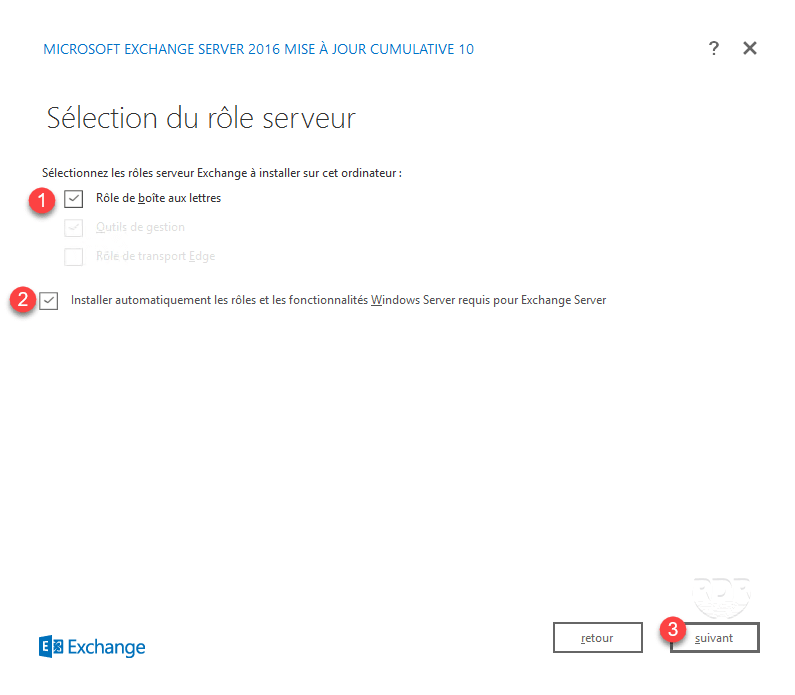
9. Select Mailbox Role 1 , select the Automatically Install Windows Server Roles and Features Required for Exchange Server 2 check box and click Next 3 .
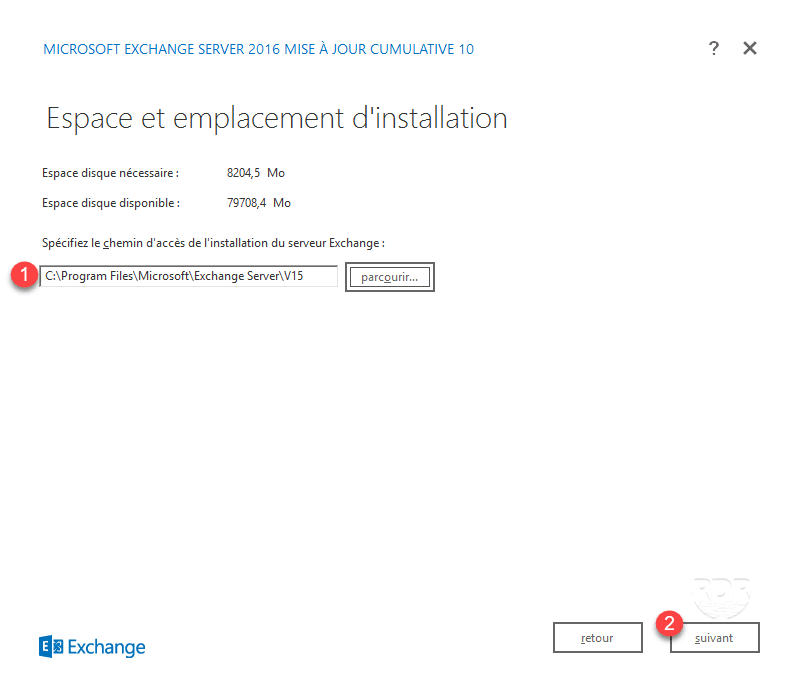
10. If necessary change the installation path 1 and click on next 2 .
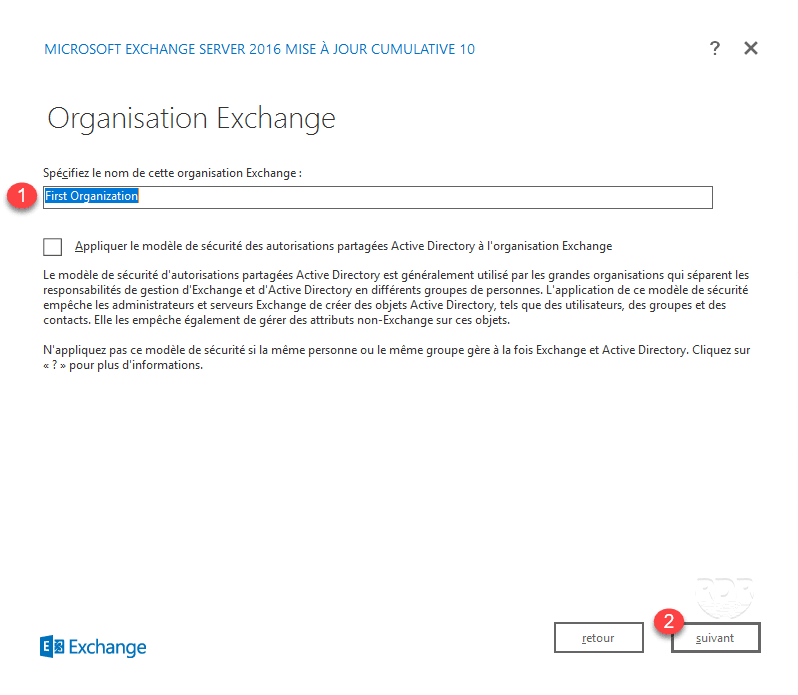
11. Enter the name of the organization 1 then click next 2 .
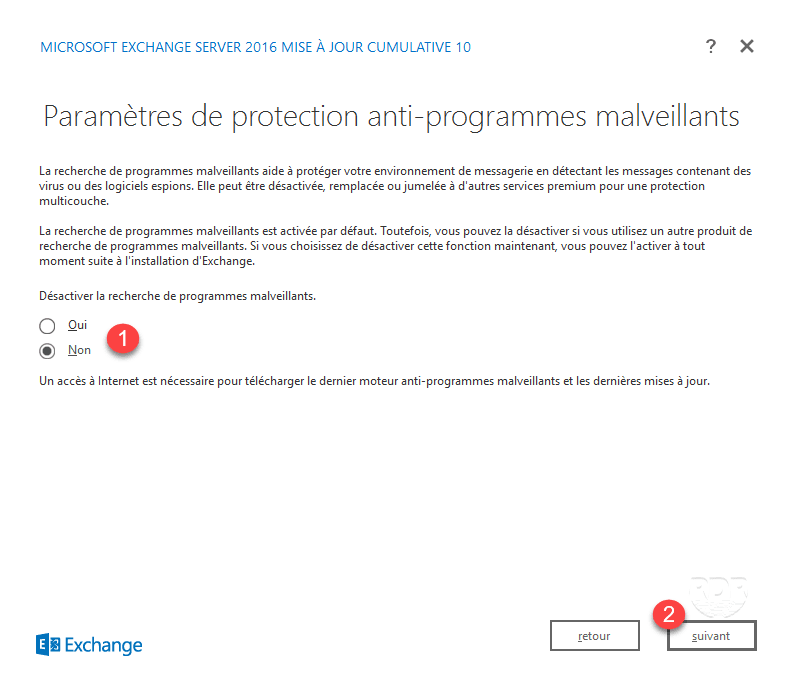
12. Configure the malware search 1 and click Next 2 .
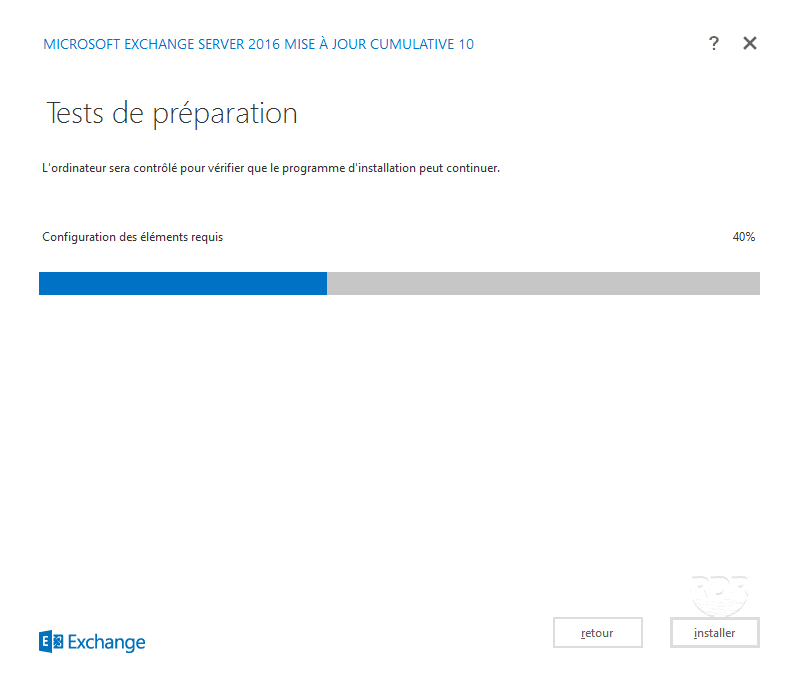
13. Wait during the tests …
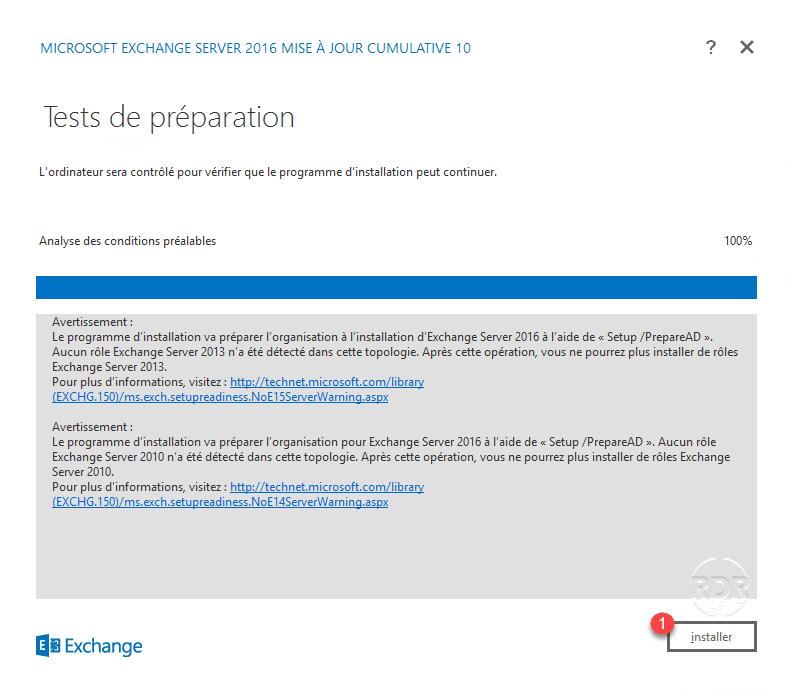
14. After the tests are run, warning messages appear on the Active Directory changes that will be made. Click on install 1 .
15. Wait during the installation (30 minutes to 2 hours) …

16. When the installation is complete, check the box Launch Exchange Administration Center 1 and click Finish 2 .
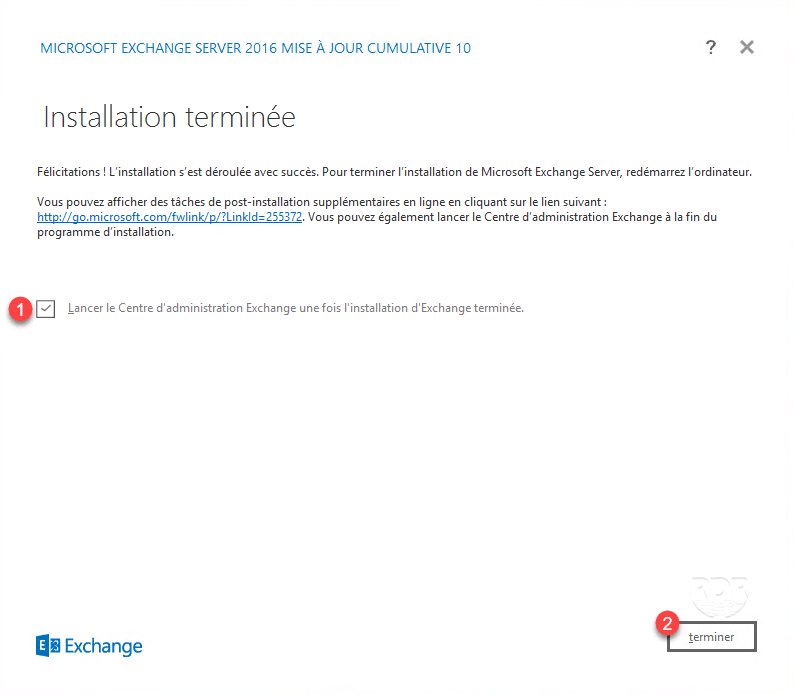
17. The ECP interface should open in the browser.

Now that Exchange 2016 is installed, we will see how to access the administration tools.
Administration Tools for Exchange 2016
When installing Exchange 2016, 3 administrative tools are available:
- The ECP web interface
- Powershell commands
- The Exchange Toolbox console
ECP interface
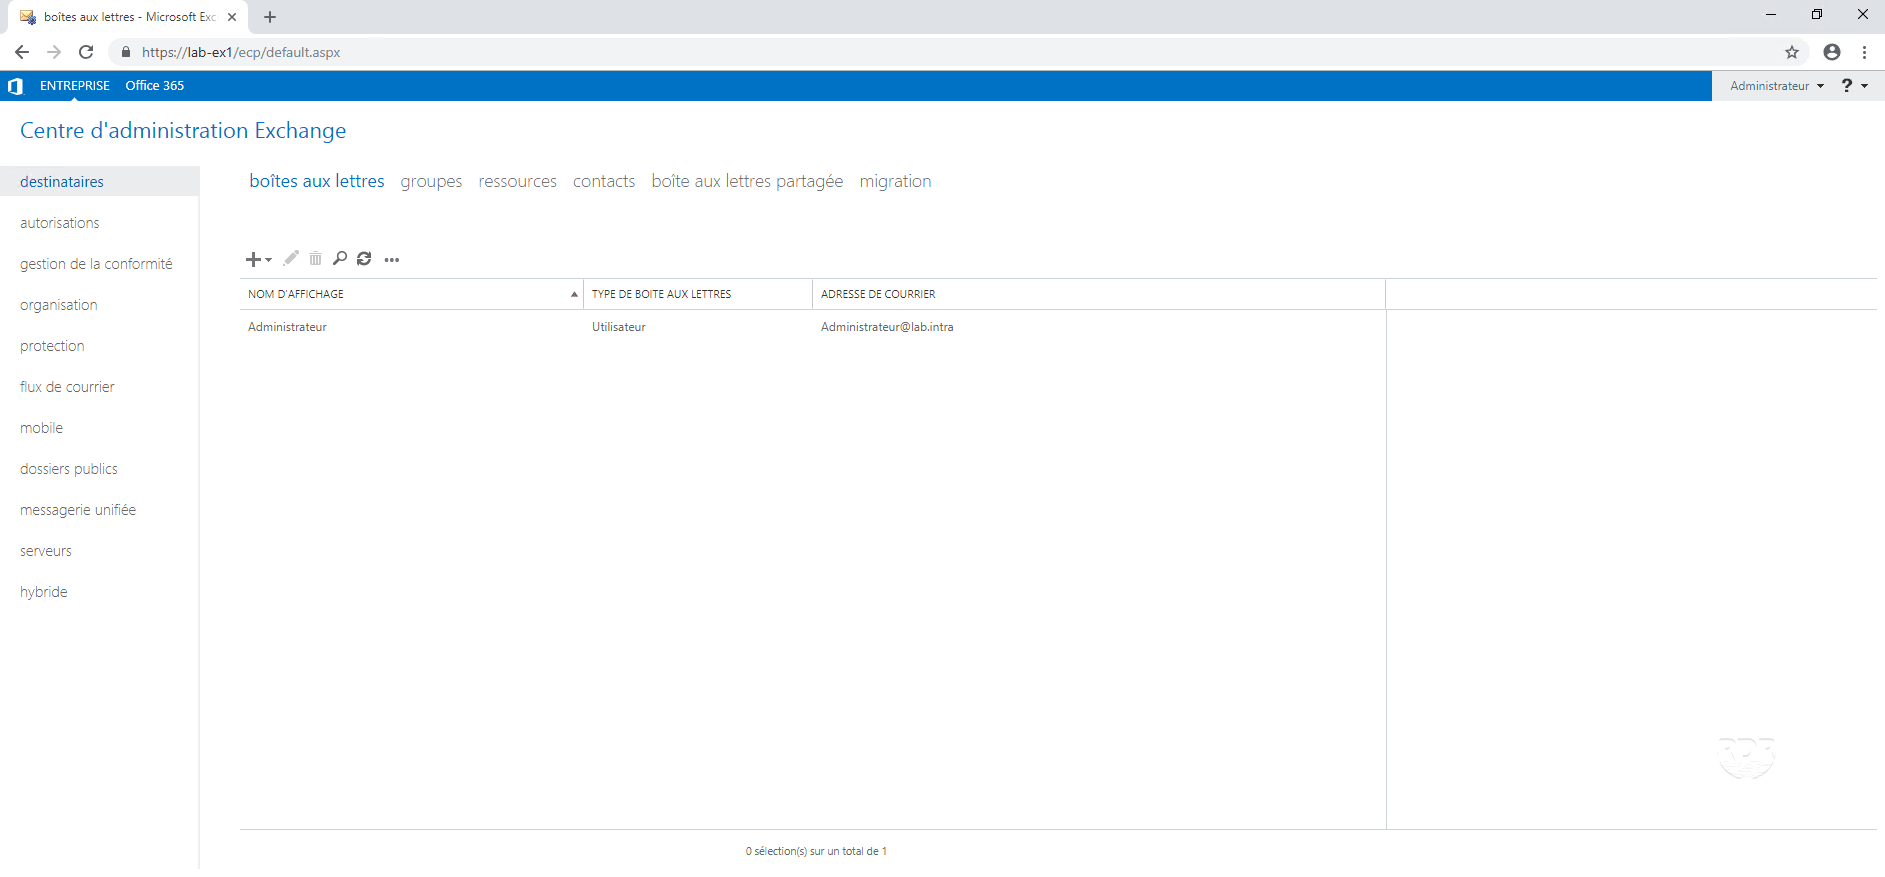
The ECP interface is a web interface accessible from any browser.
It allows the current administration of Exchange:
- Create / delete MAILBOX
- Administration of the MAILBOX (alias, quota …)
- Moving the MAILBOX
- Database creation
- Import / Export …
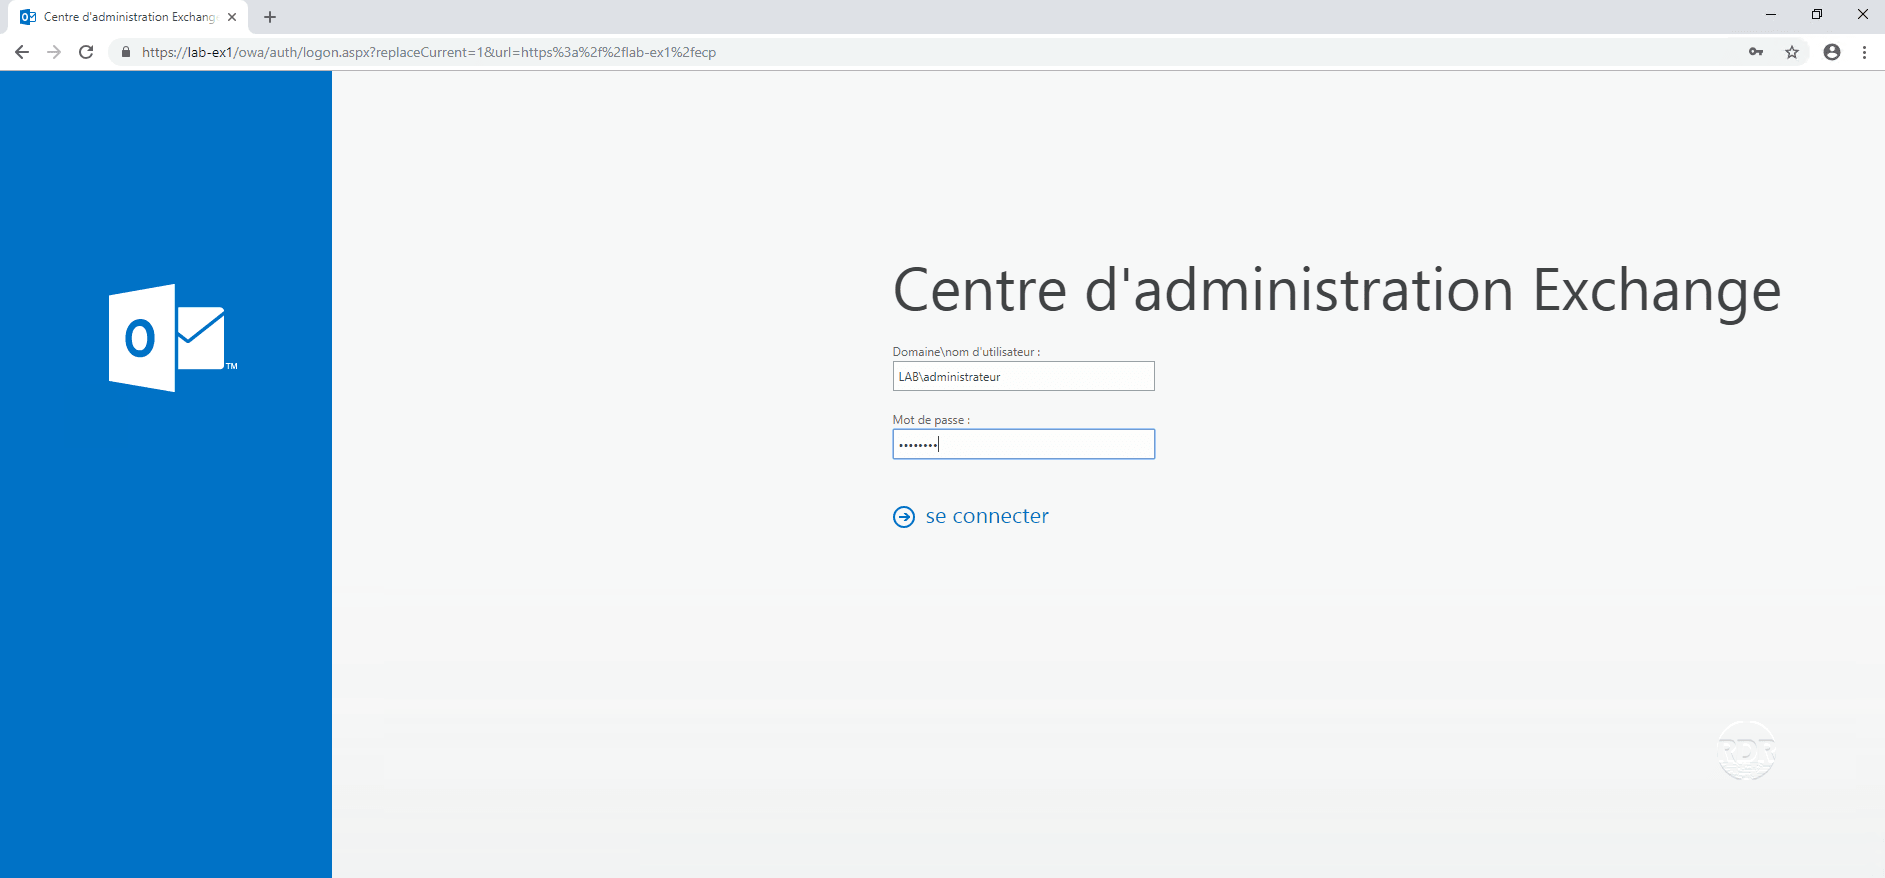
1. Open an internet browser and enter the following address: https://exchange-server-name / ecp.
2. Enter the information of an administrator account to log in.
3. Configure the language and time of the Exchange account.
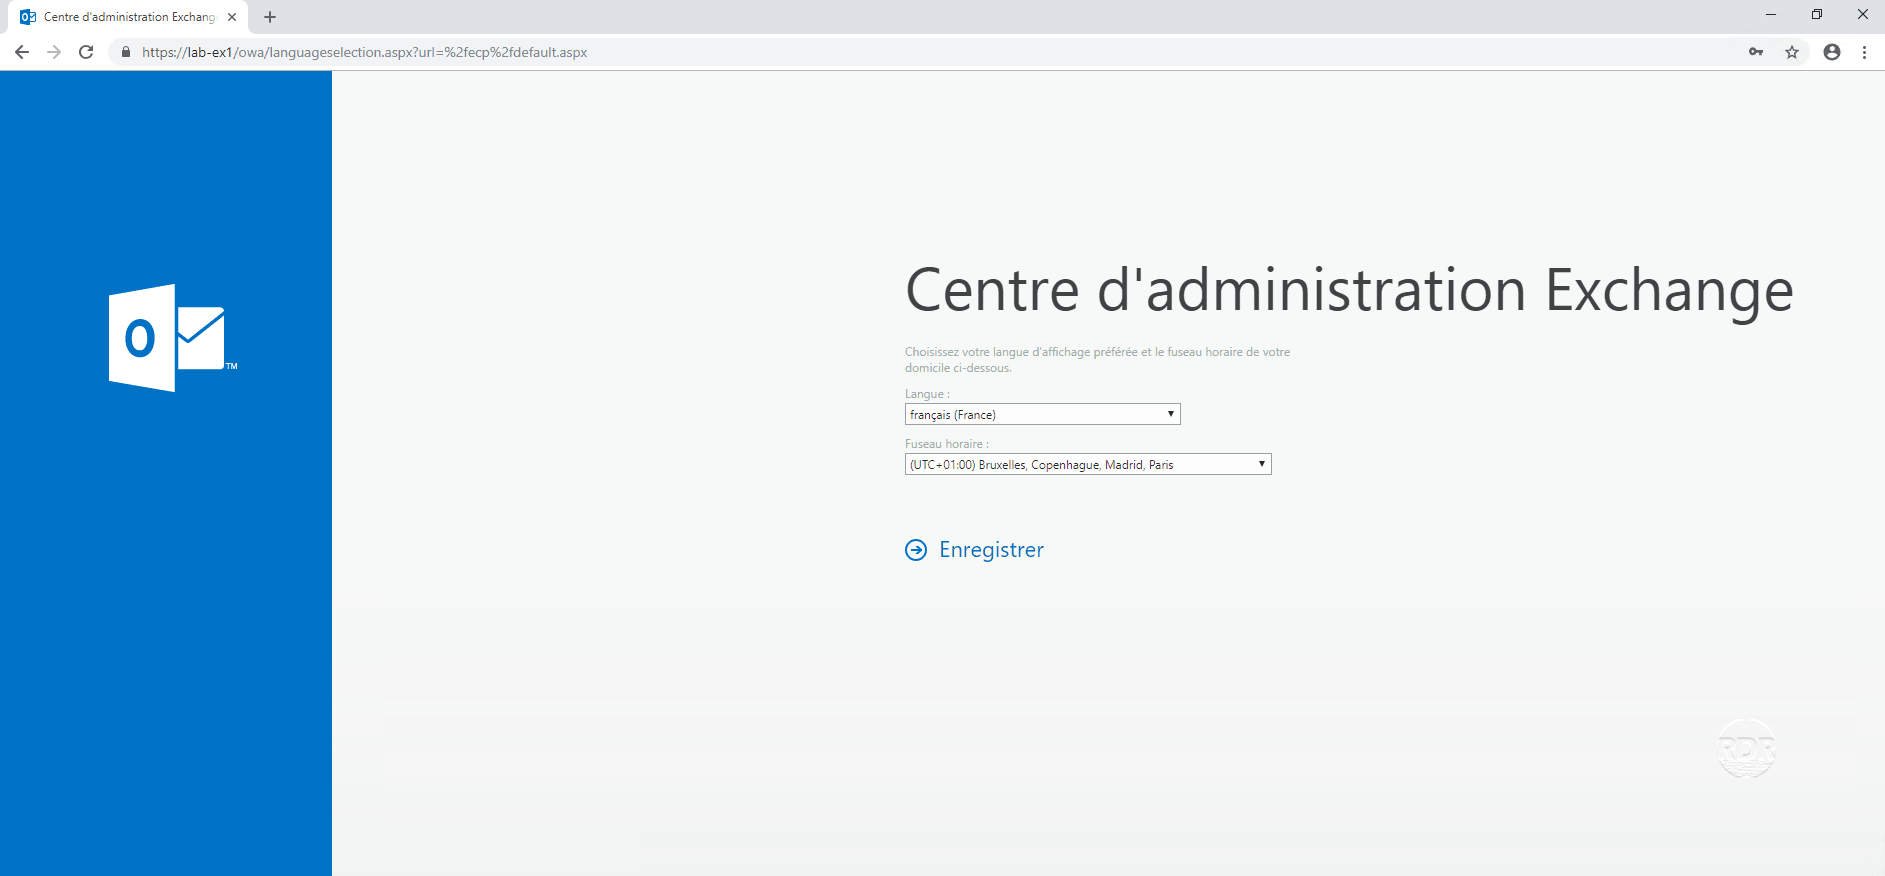
This information will be requested from all users when they first login.
4. You are now connected to the administration.
PowerShell Console
1. From the Start menu, look for the Exchange Management Shell (run EMS as Administrator).

2. Console PowerShell Exchange :
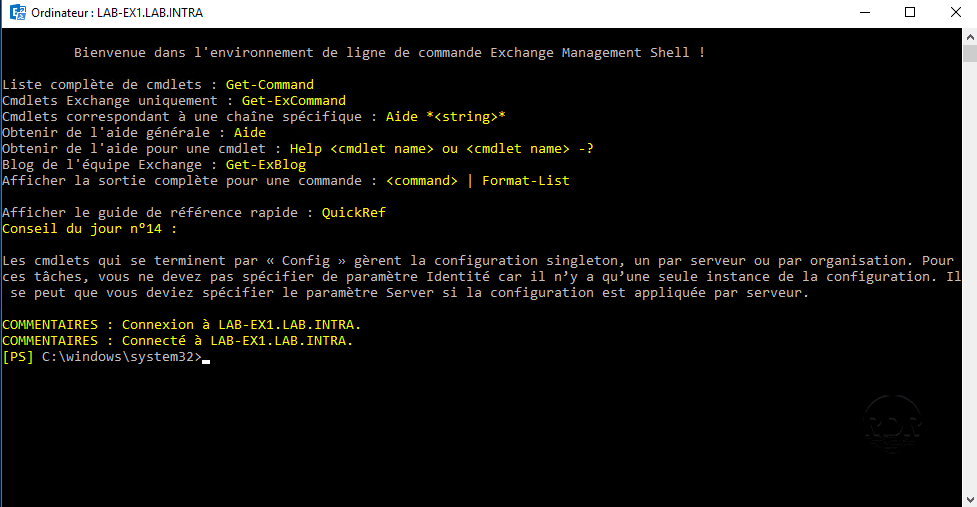
Some operations can only be done in PowerShell (database move, batch action …).
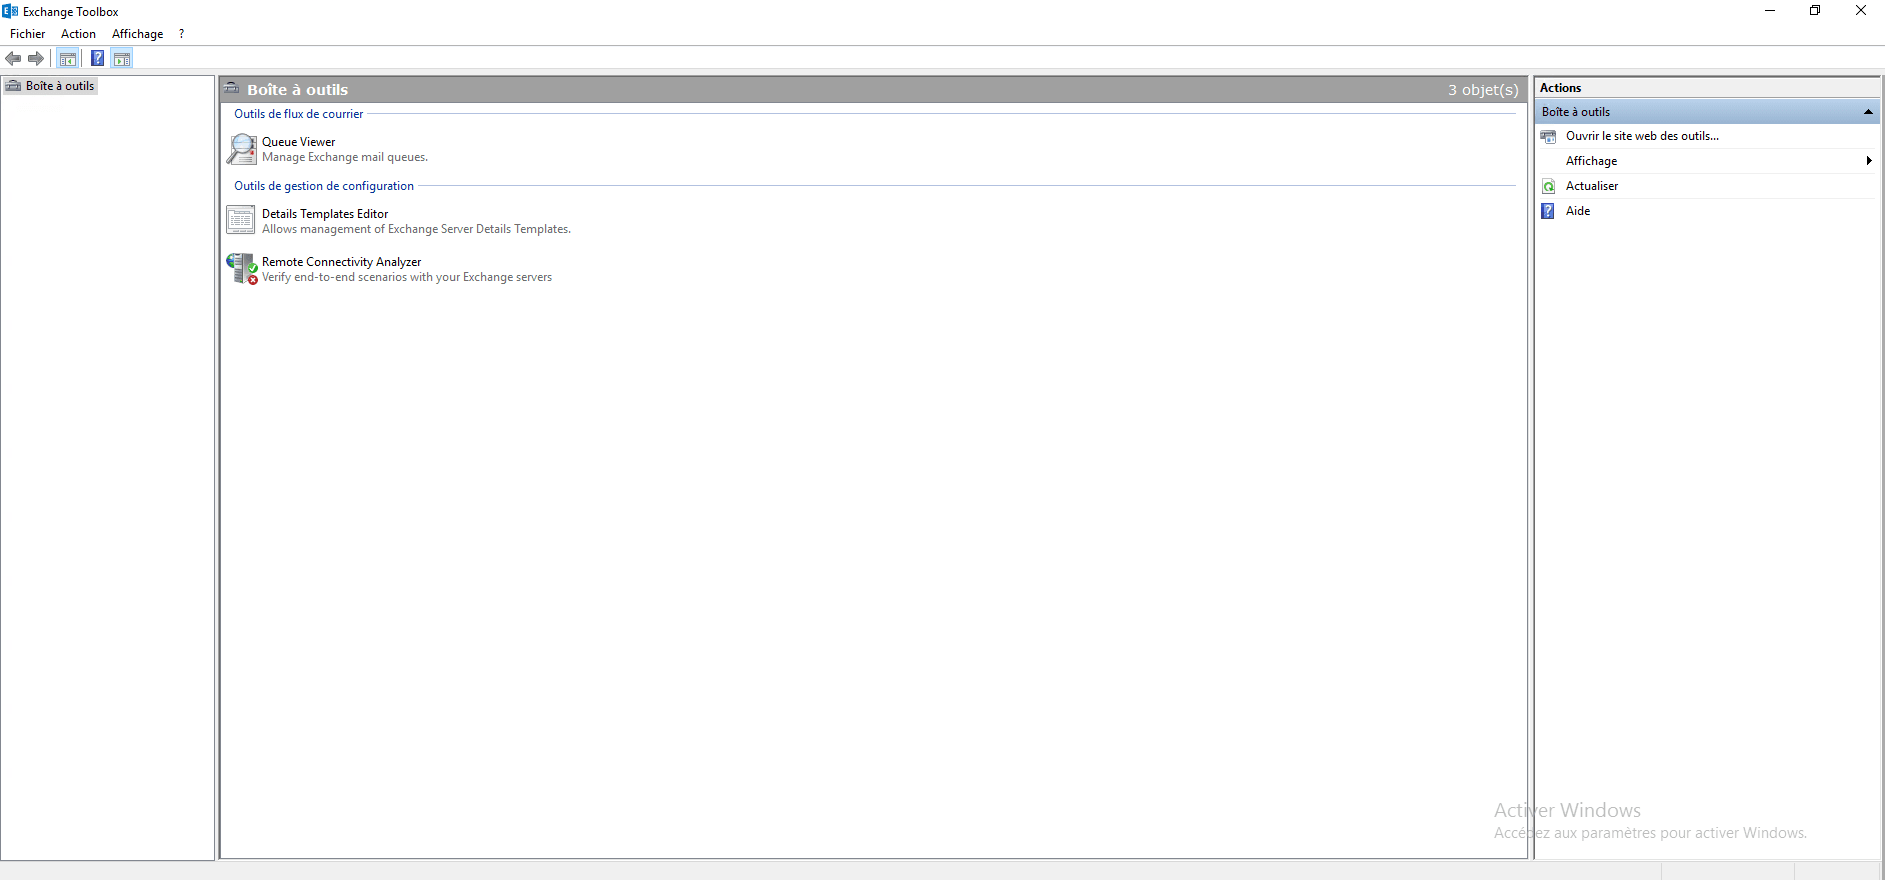
Exchange Toolbox
This console offers “3” tools:
- Visualization of mail queues
- Modification of the templates of the address book files
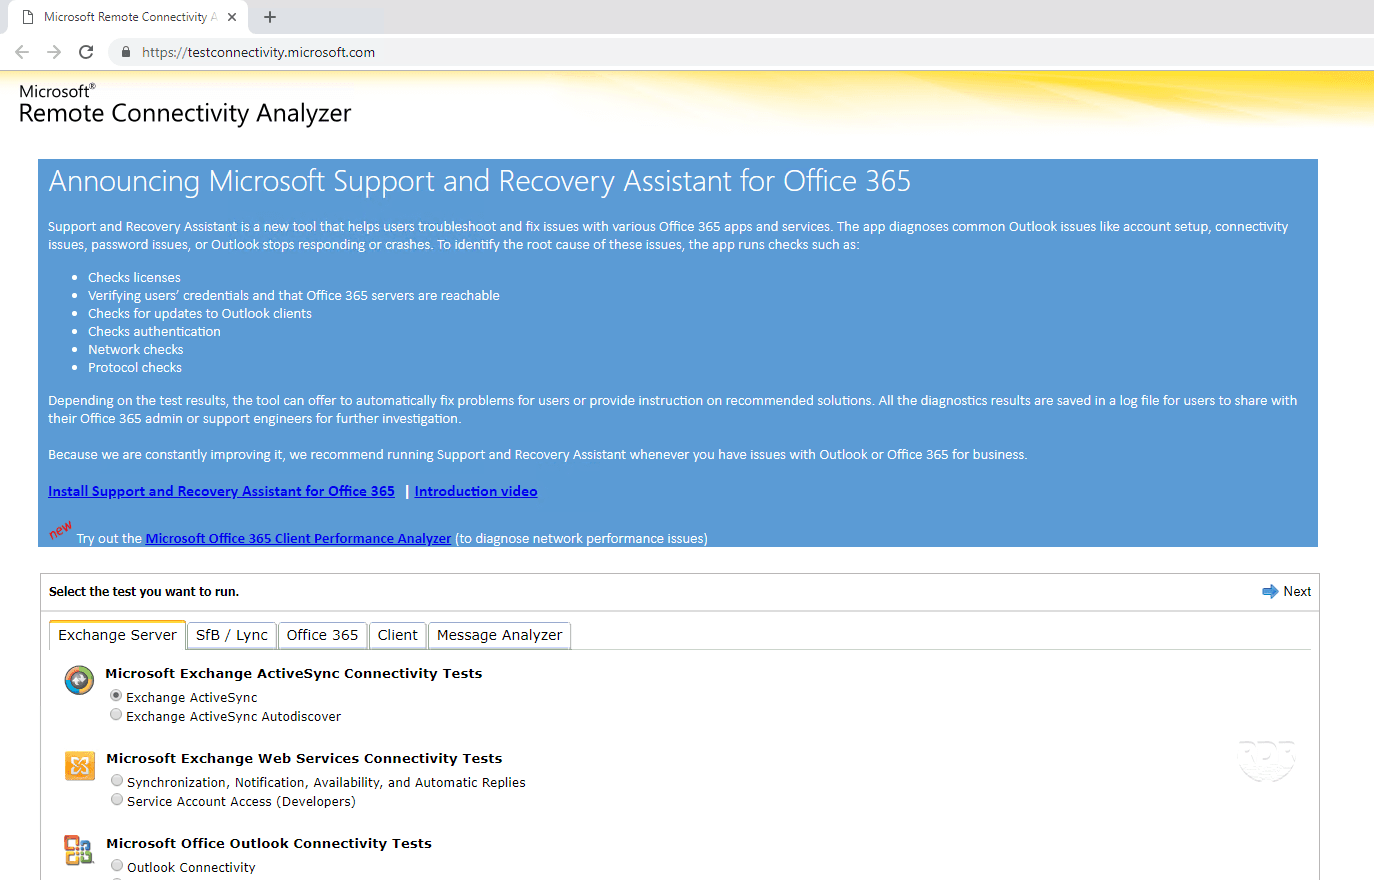
- A link to https://testconnectivity.microsoft.com/ which allows you to test the configuration of your Exchange infrastructure from the outside.
1. From the Start menu, open the server Exchange toolbox (Administrator).

2. Exchange toolbox console with links to 3 tools:
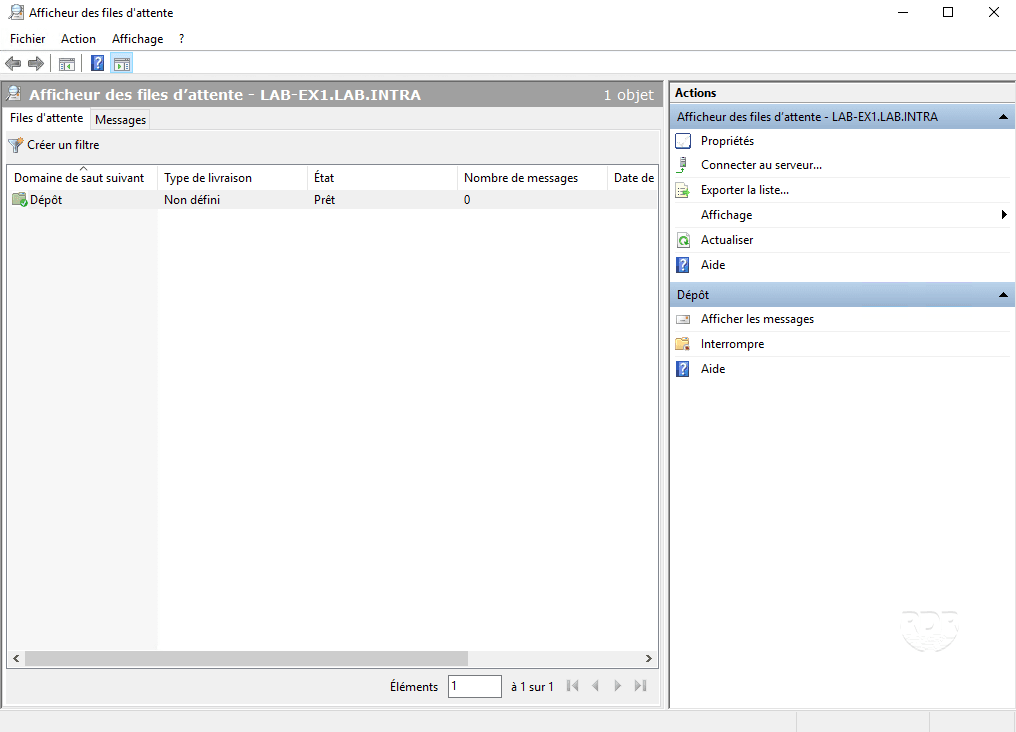
3. Queues:
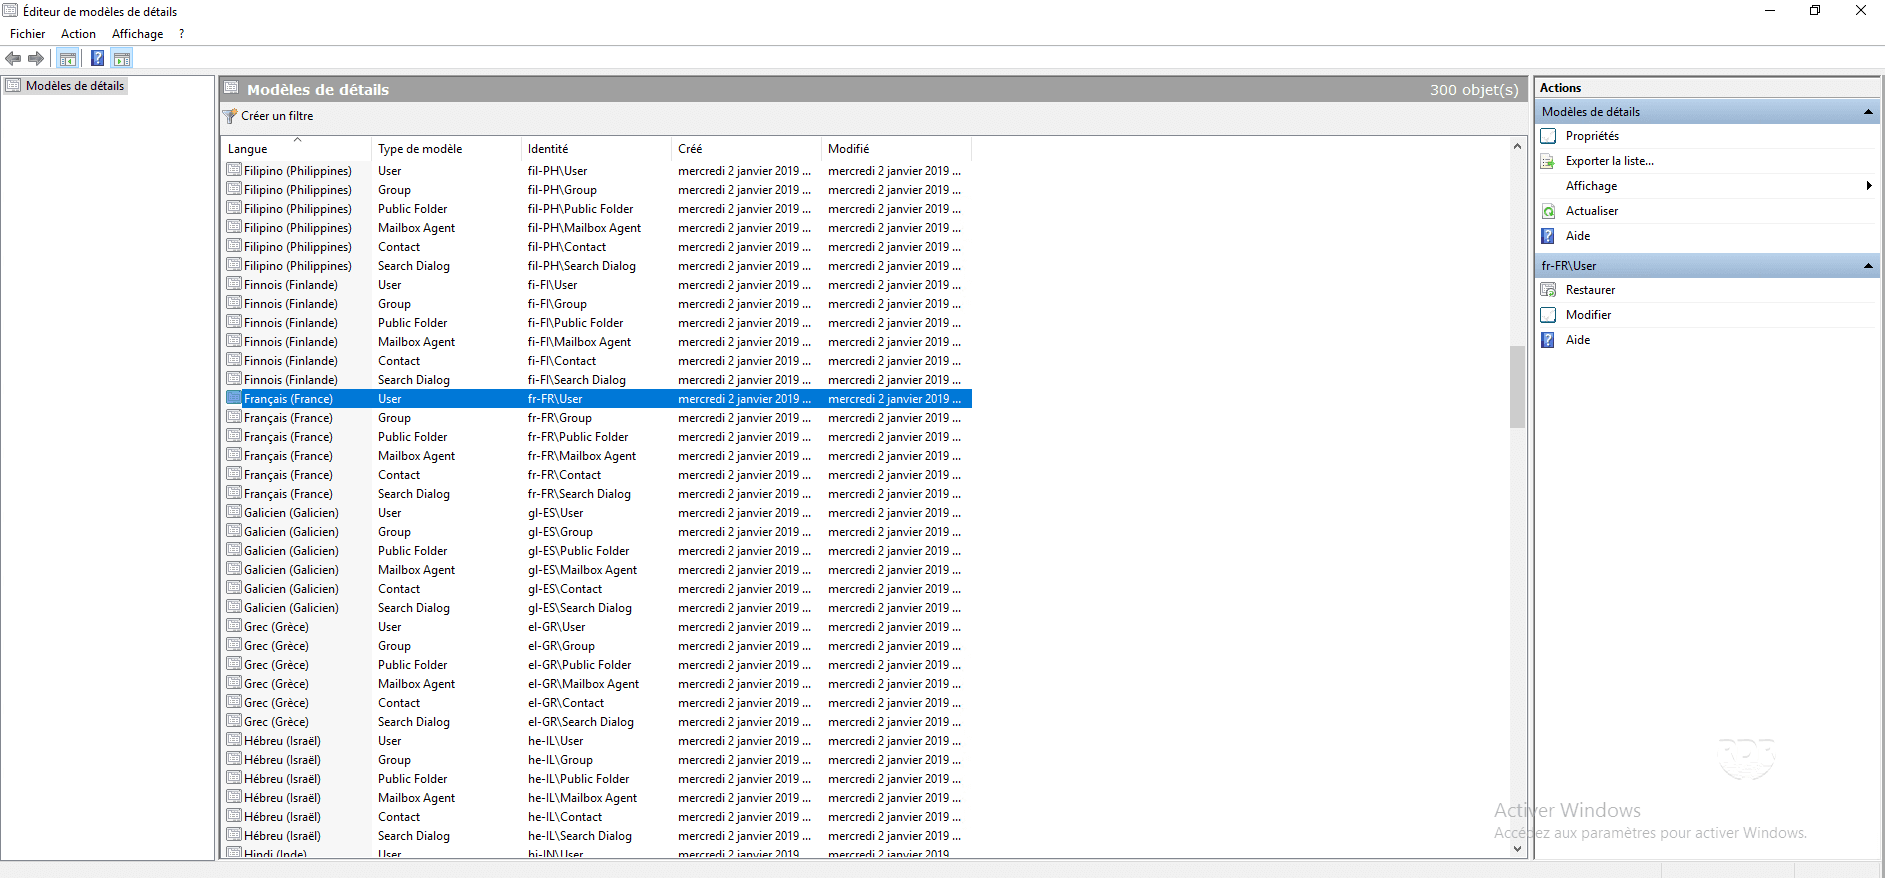
4. Address Book Template :
5. Remote Connectivity Analyzer
Now that we have seen the different tools available to manage Exchange 2016, we will move on to its configuration and administration.
The configuration points that I propose as a result of this tutorial follow the various installations that I have been able to perform.
Basic configuration of Exchange Server
Configuration: rename the default database
By default, when you install Exchange, a database is created with a name of type: Mailbox Database 123456789. Here’s how to rename the database.
1. From the ECP interface, go to servers 1 / databases 2 . Select the default database 3 and click on the modification icon 4 .
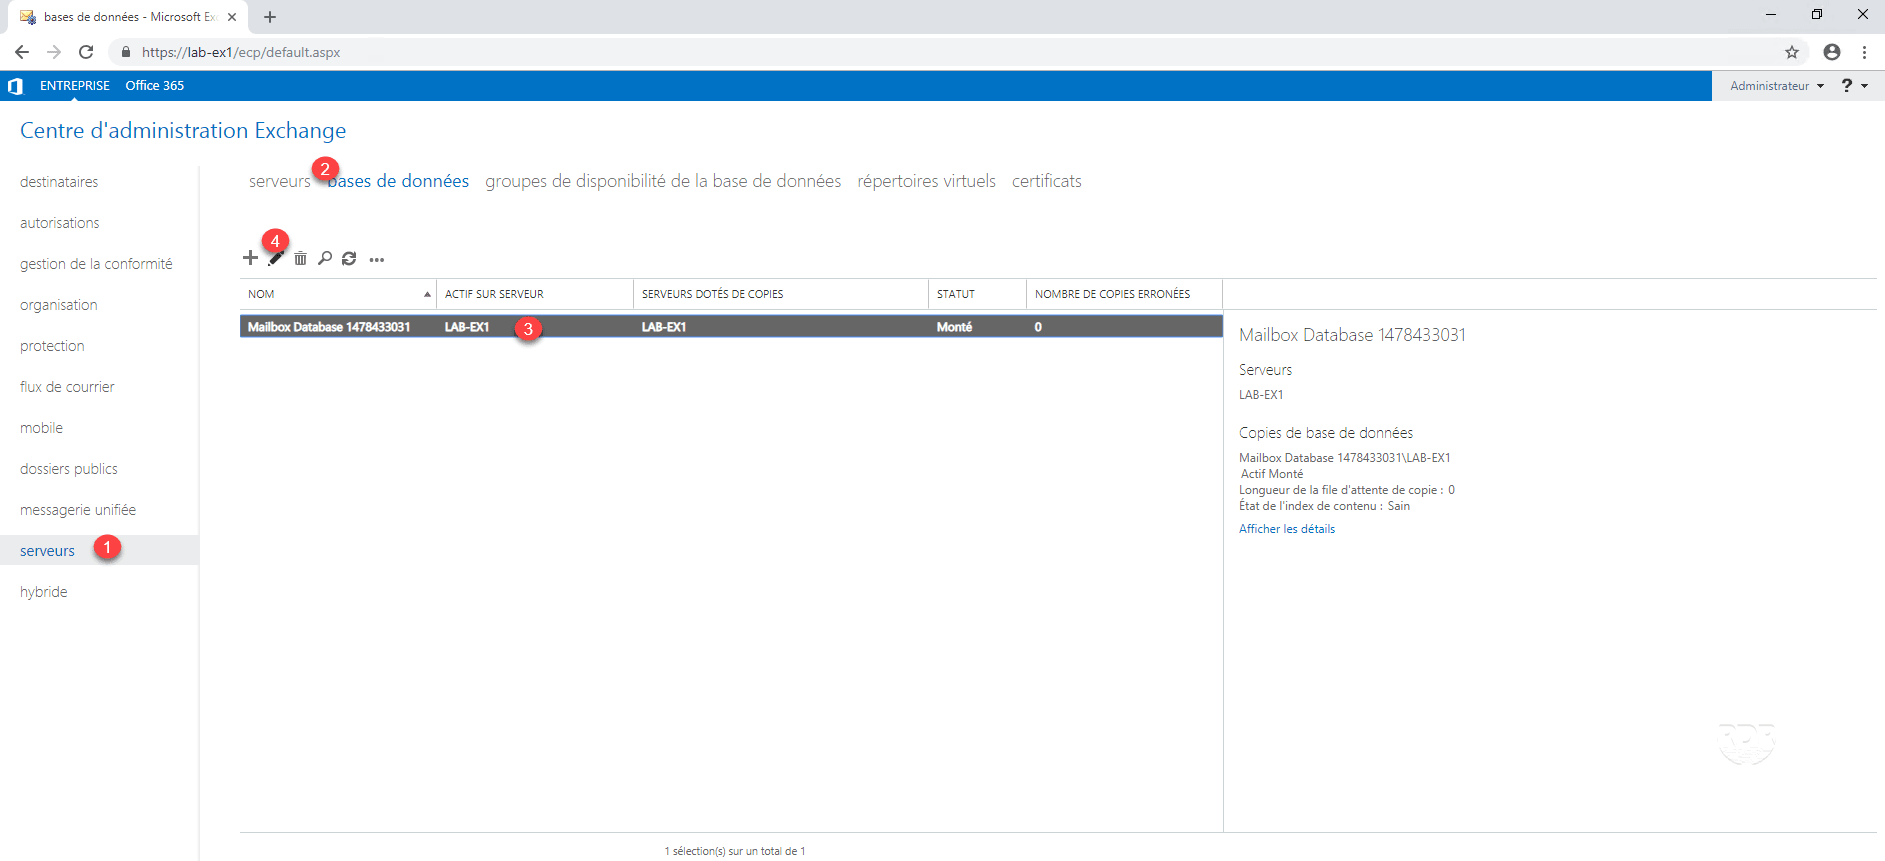
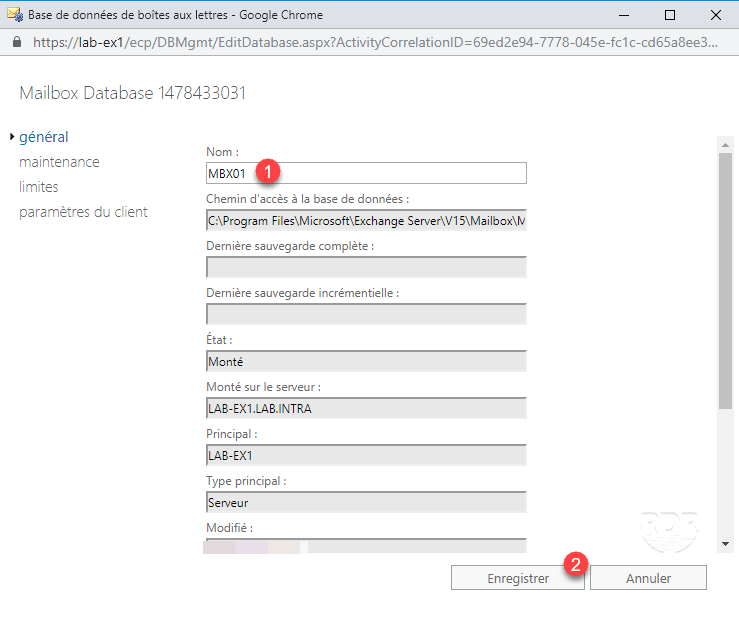
2. Rename base 1 and click Save 2 .
3. The base is renamed in the ECP interface.

Configuration: move the default database
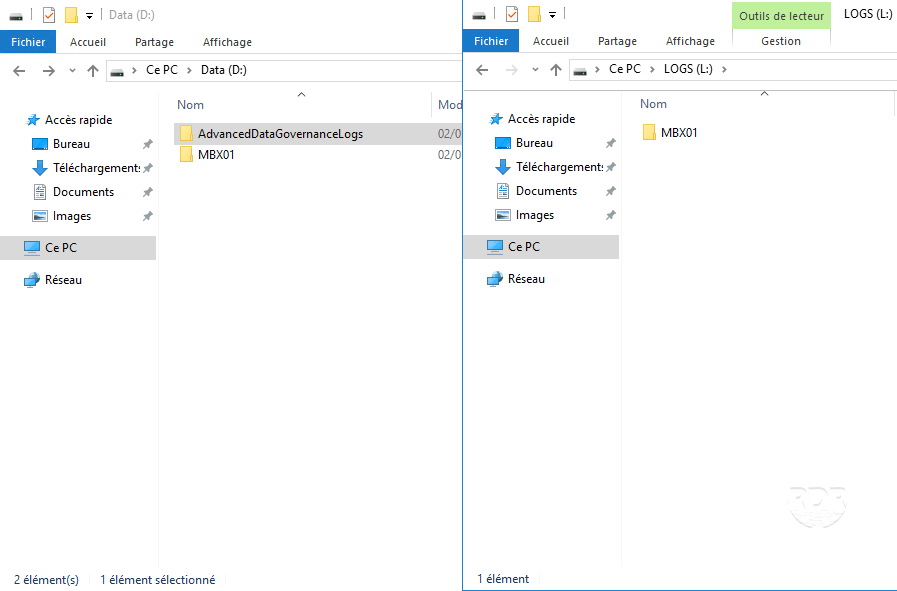
Now that the database is renamed, let’s see how to move it. By default, the database is created in the Exchange installation folder. At the beginning of this tutorial, in the prerequisites, the server has been configured with 3 disks / partitions, one for the databases and the other for the logs.
1. On the disks, create at the root a folder MBX01 (base name).
2. Open the Exchange Management Shell and enter the following command to adapt based on your configuration:
Move-Databasepath MBX01 -EdbFilePath D:\MBX01\MBX01.edb -LogFolderPath L:\MBX01
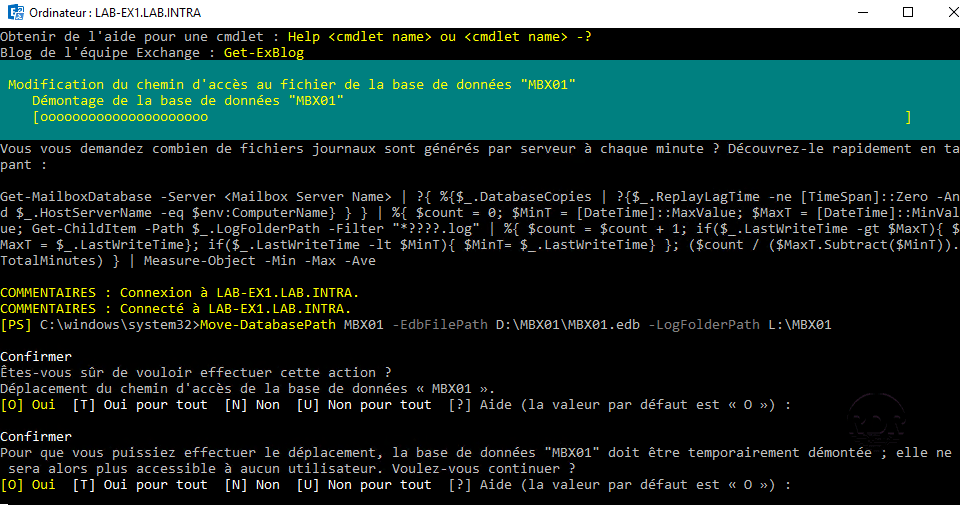
3. Confirm the removal and disassembly of the database.
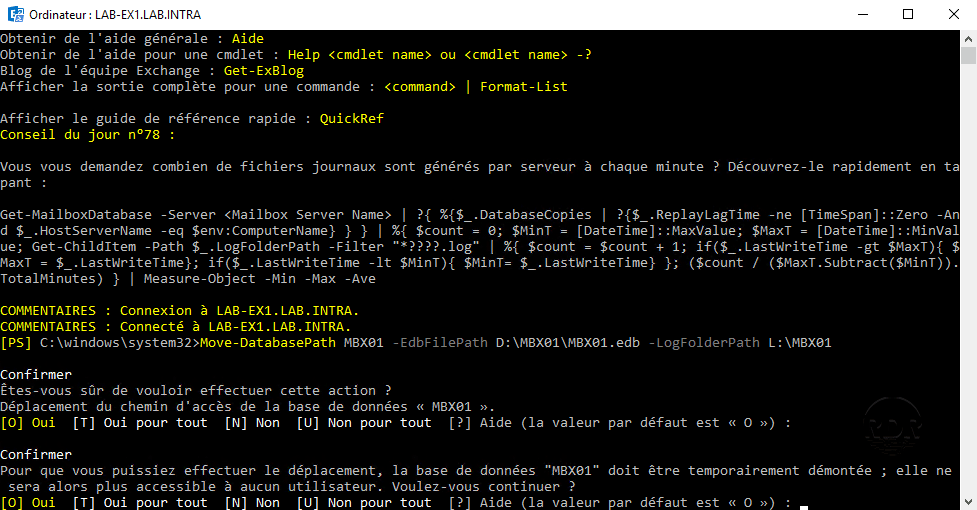
4. Wait while moving …
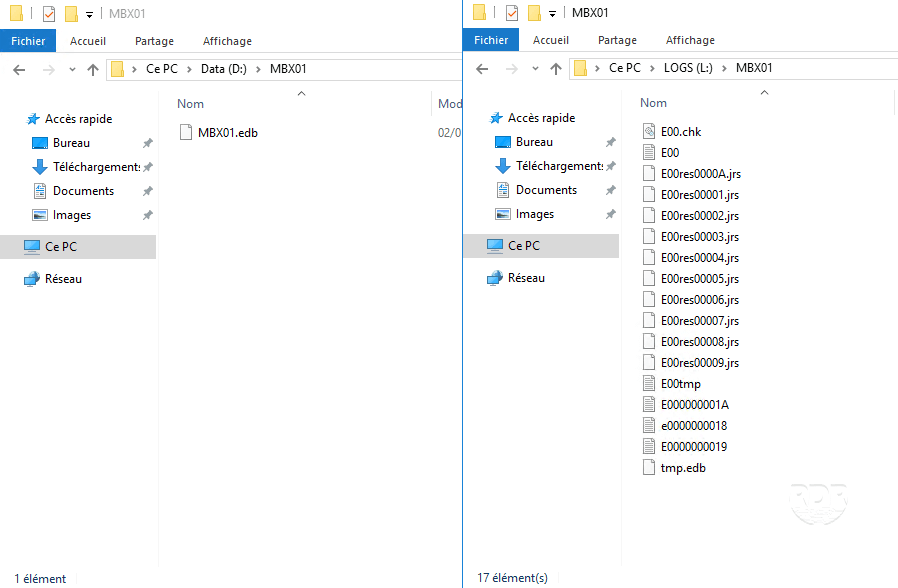
5. The base is moved, check in the explorer for moving files.
6. In the ECP, it is also possible to check the path 1 to the base in the properties.
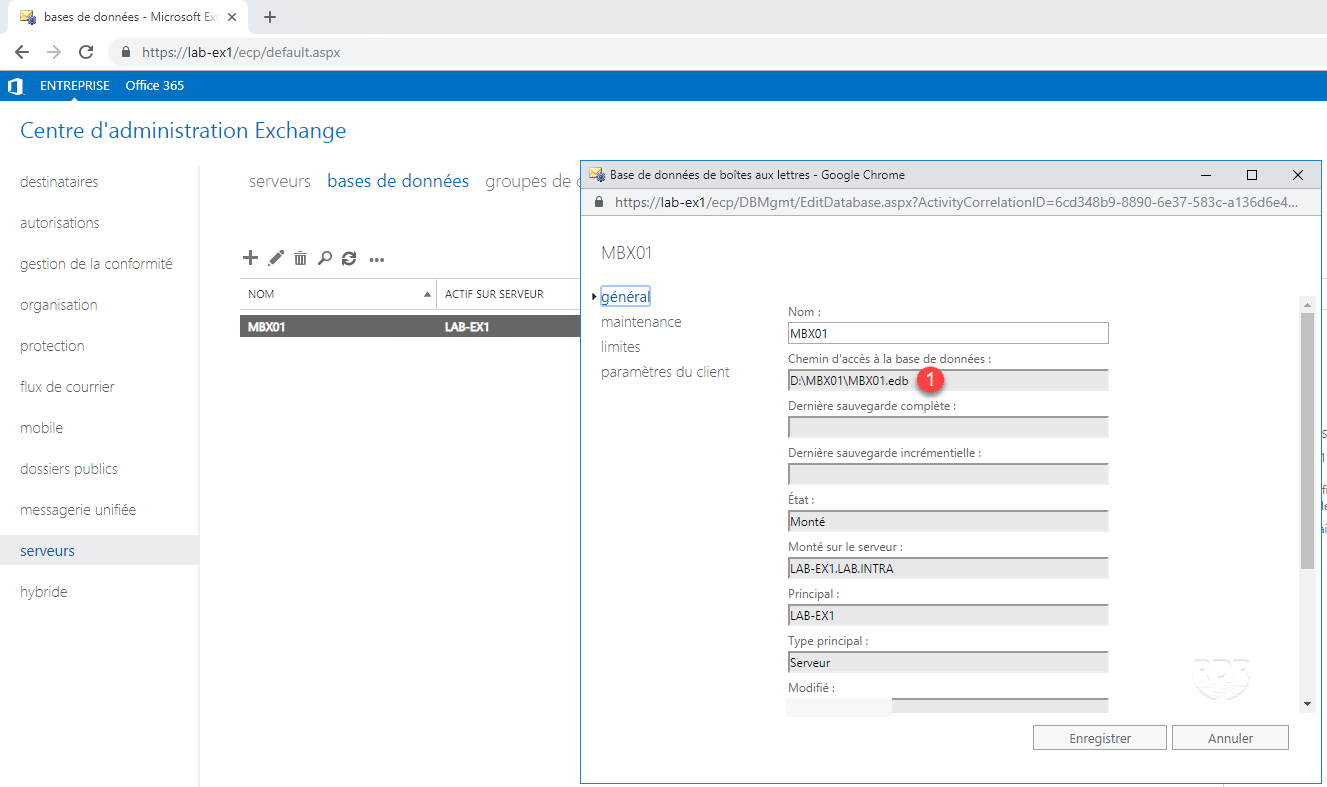
You can use the Move-Databasepath command to later change a location database.
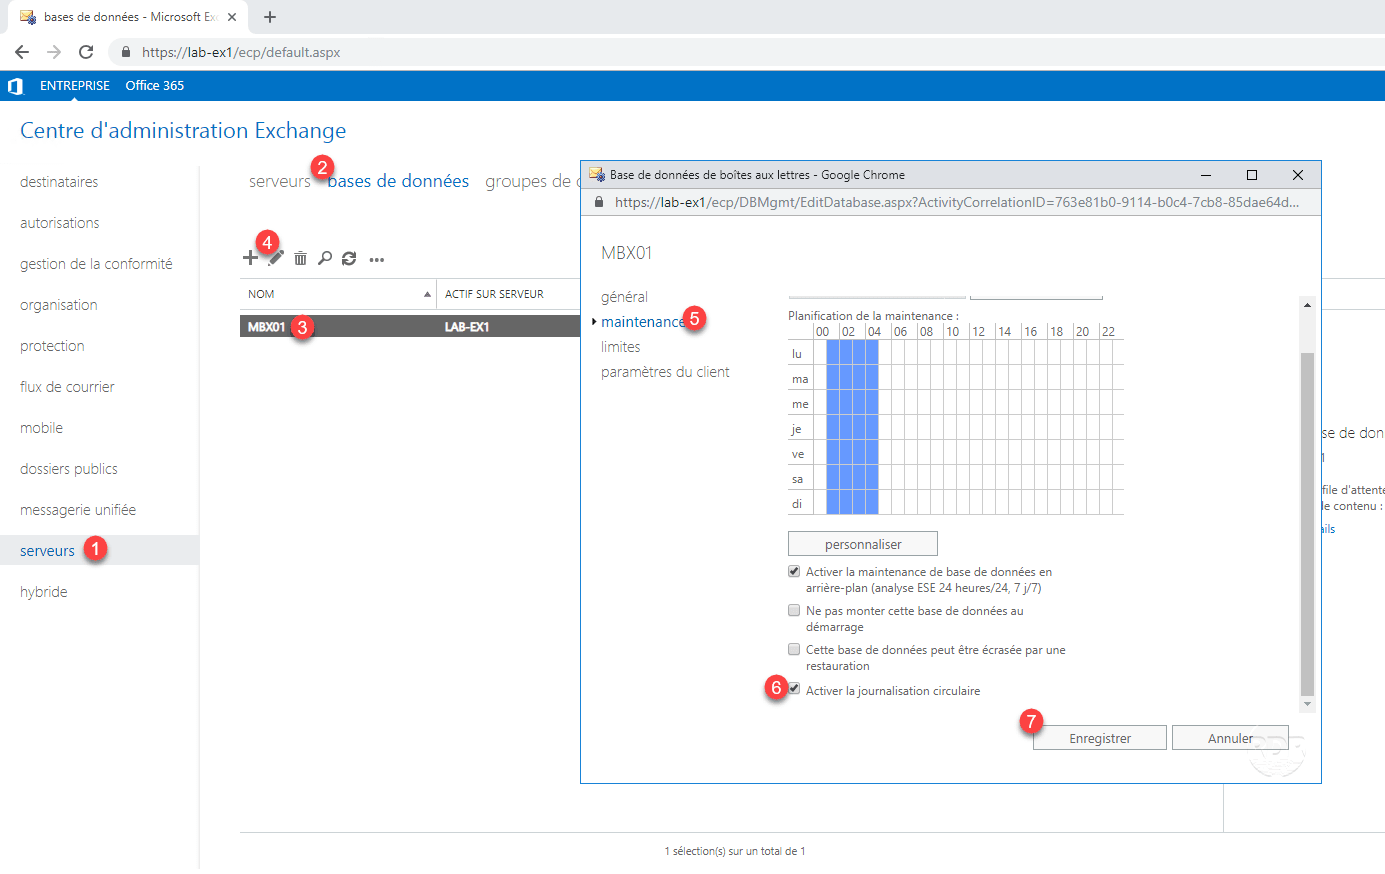
Configuration: Enable Circular Logging
Circular logging allows Microsoft Exchange to replace transaction log files after the data is saved and committed to the database.
If you plan to have the database in high availability (DAG), enable logging after it is put into the dag.
Log truncation can also be provided by backup software (Veeam / BackupExec …).
1. From the ECP interface, go to servers 1 / databases 2 . Select base 3 then click on the modification icon 4 . Go to the maintenance section 5 , check the box Enable circular logging 6 and click on Save 7 .
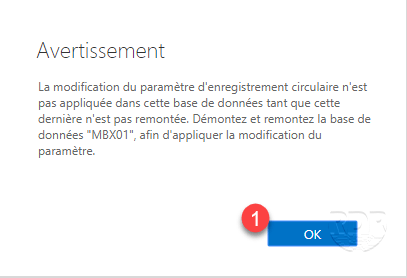
2. To apply the parameters, it is necessary to disassemble / reassemble the base, close the warning by clicking on OK 1 .
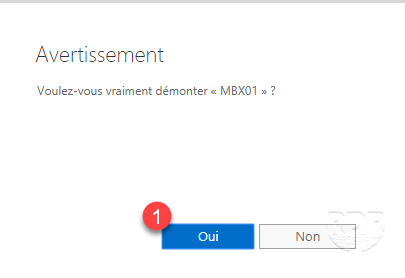
3. Select base 1 , click on 2 / Disassemble 3 .
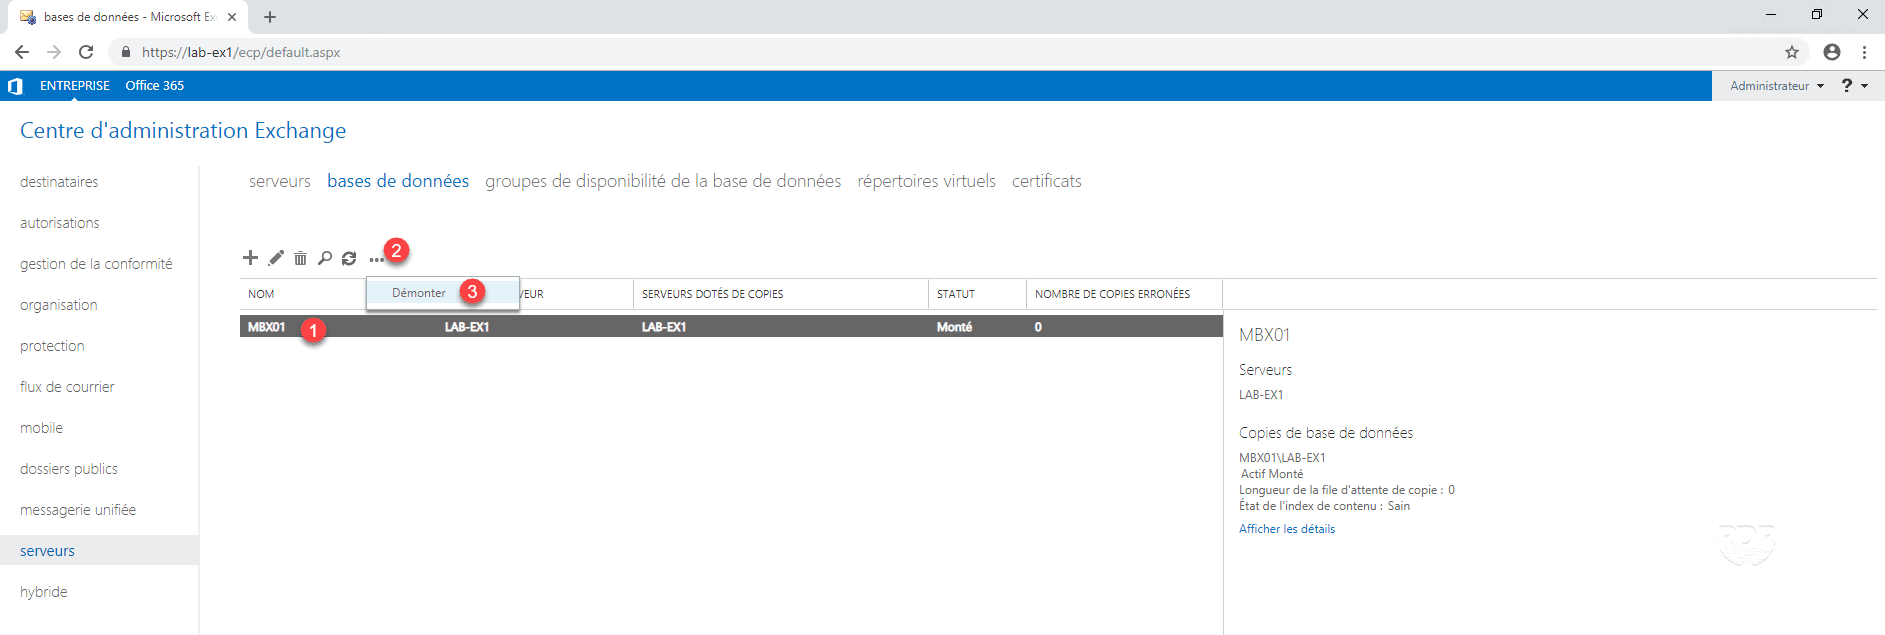
4. Confirm by clicking Yes 1
5. The base is unmounter, select the base 1 again, click on 2 then on 3 .

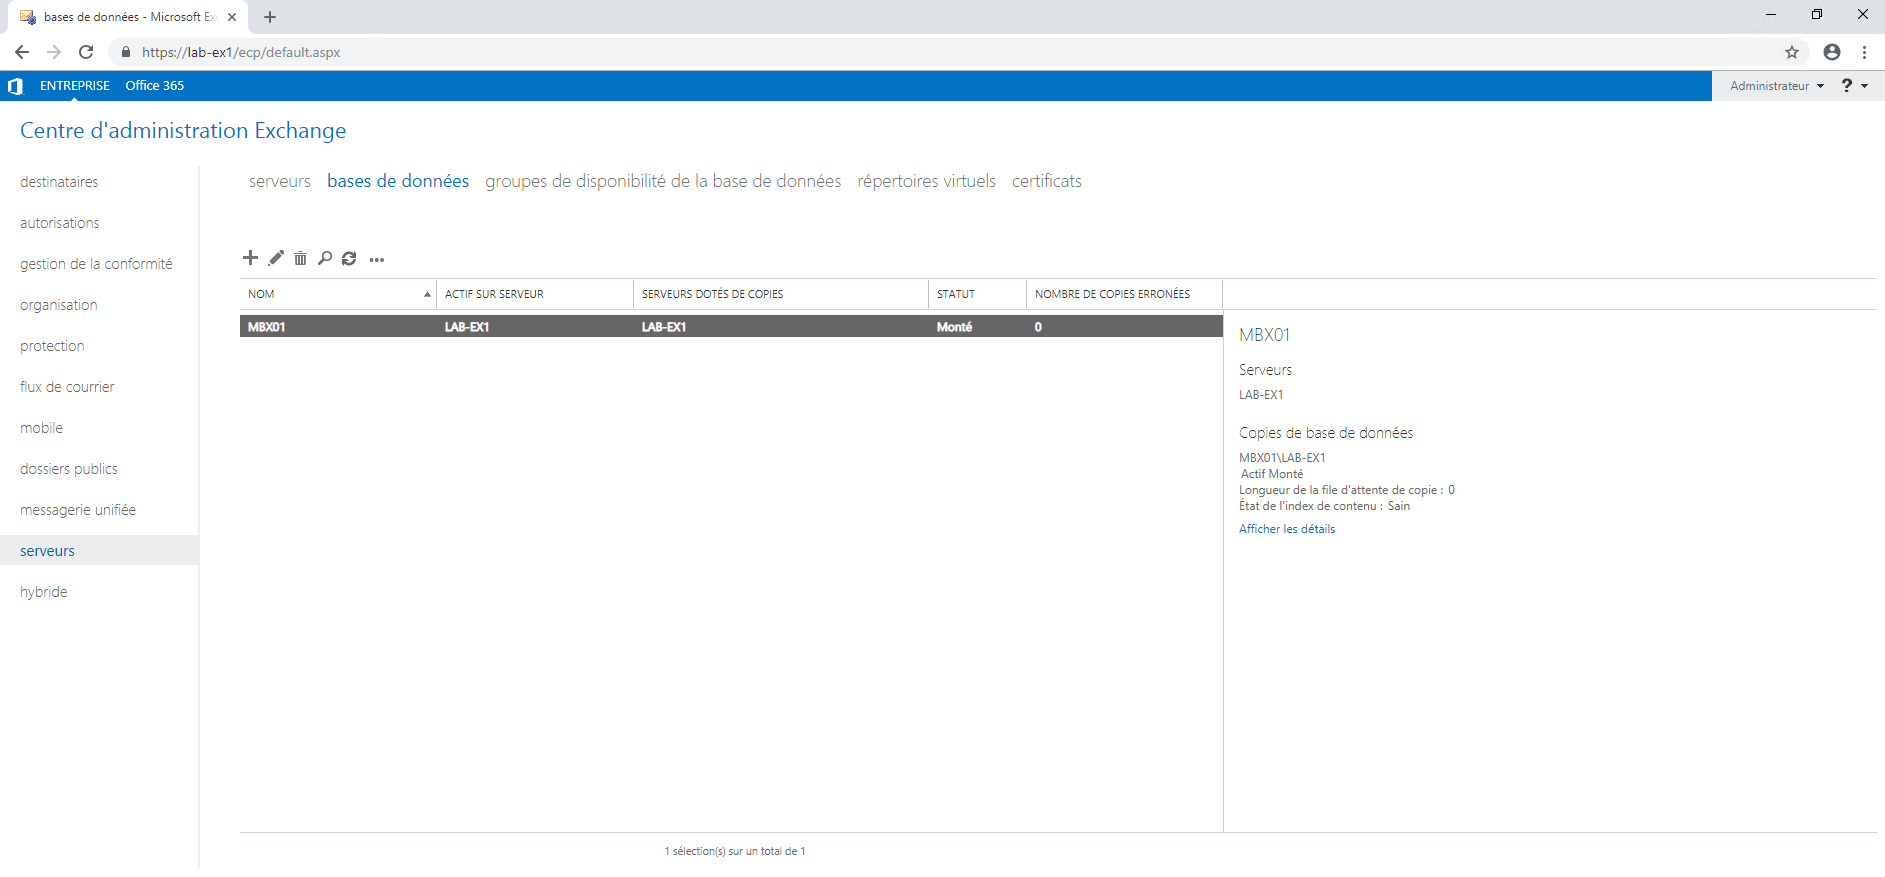
6. The database is mounted.
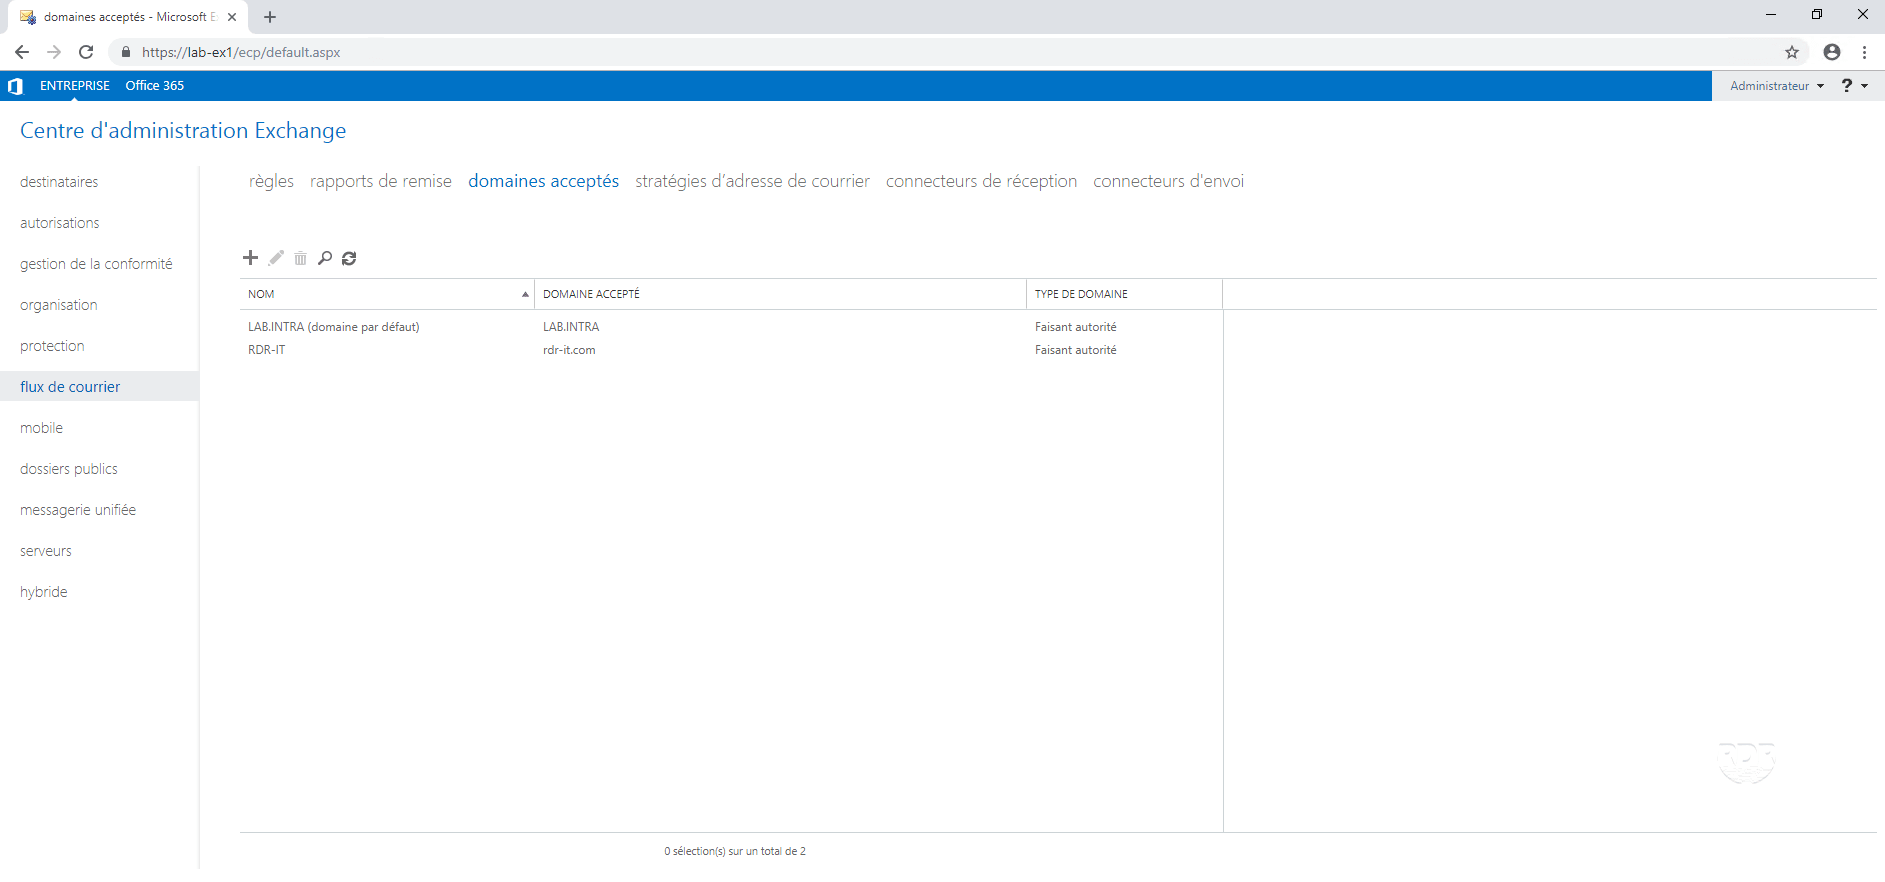
Configuration: add a domain
During installation, the default domain in Exchange is this one from your Active Directory domain. If this is not the mail domain, we will see how to add a domain.
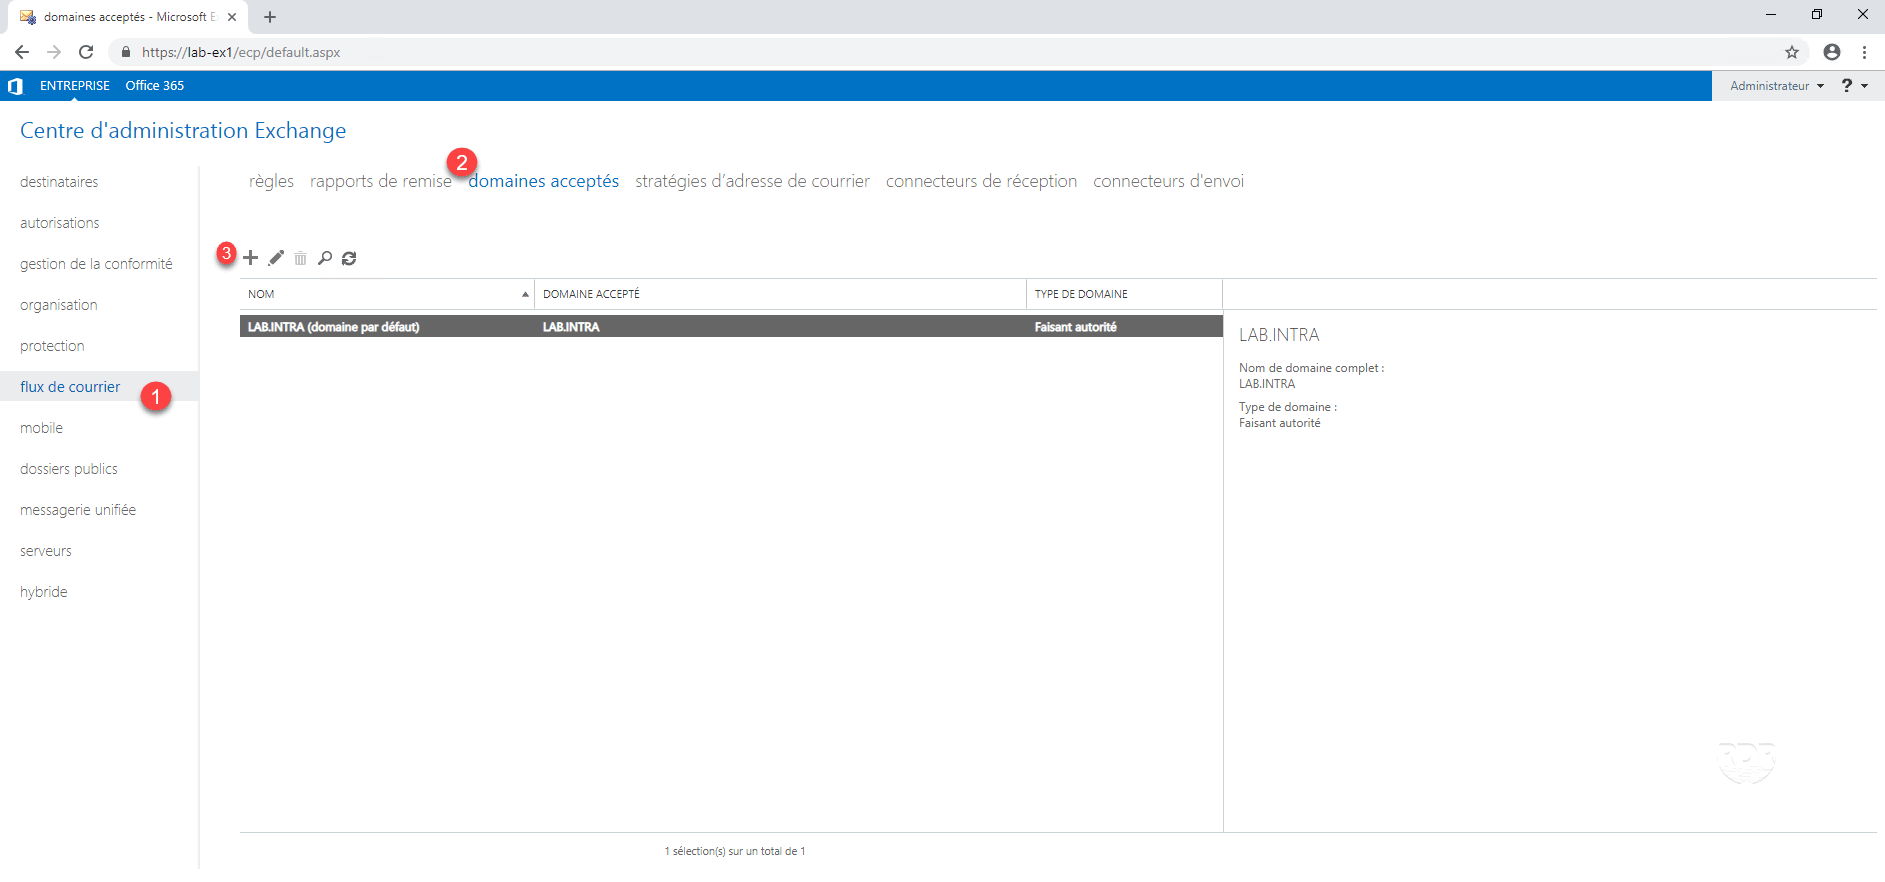
1. From the ECP interface, click mail flow 1 / accepted domains 2 to view the domains managed by Exchange. Click on + 3 to add a domain.
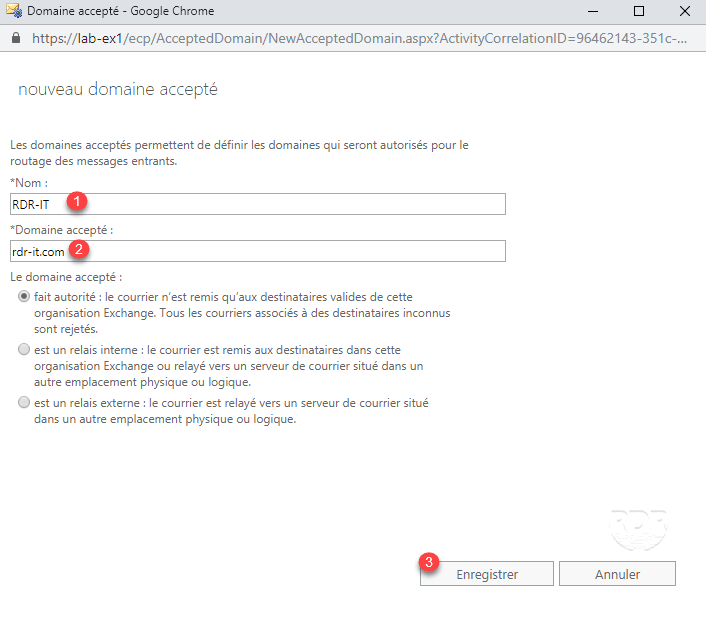
2. Enter a name to identify the domain 1 then the domain name 2 and click Save 3 .
3. The domain is added.
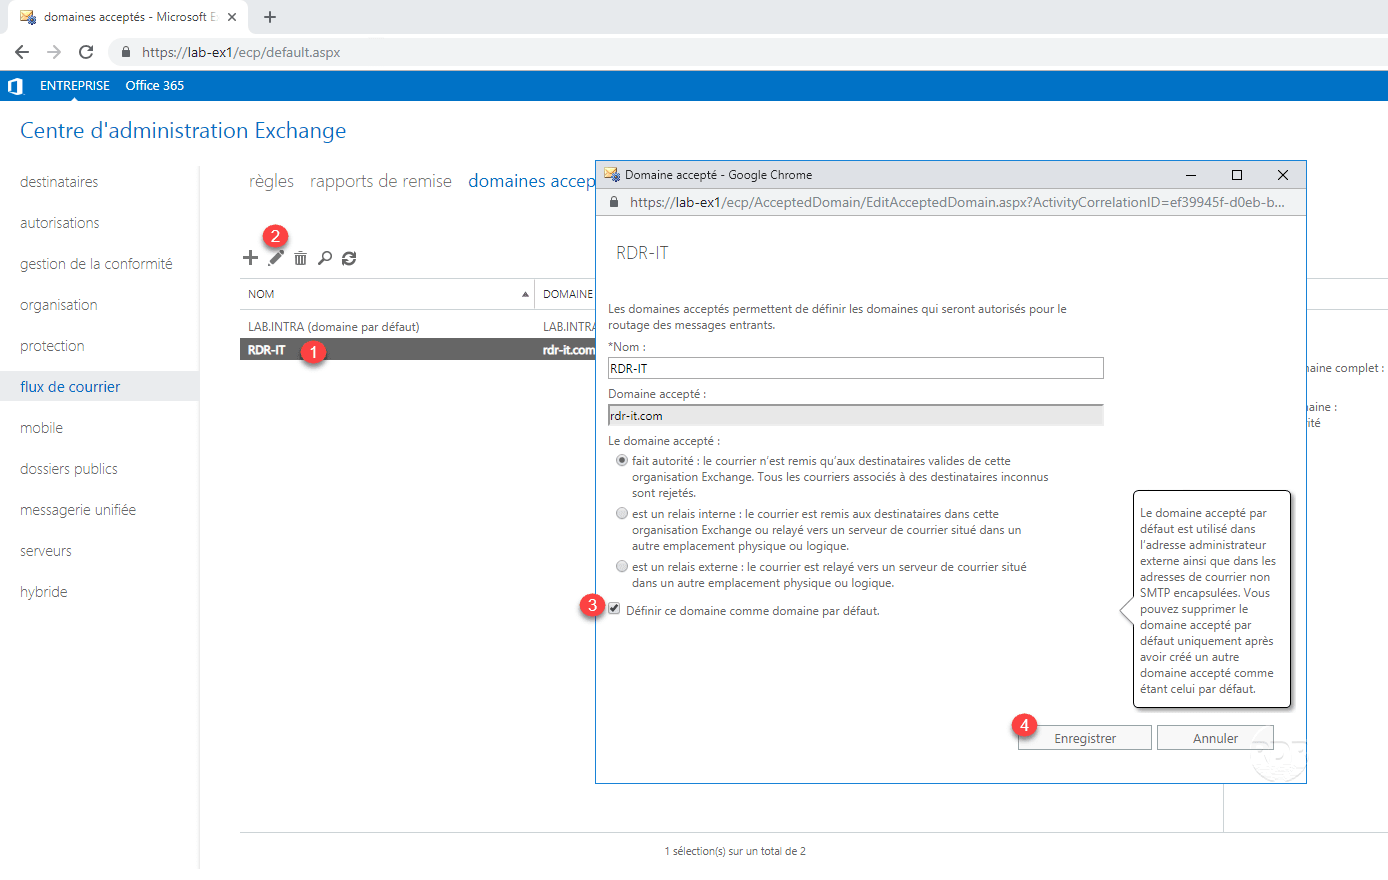
4. Skip the default domain: select the domain 1 , click on the edit icon 2 , check the box Define this domain as default domain 3 and click Save 4 .
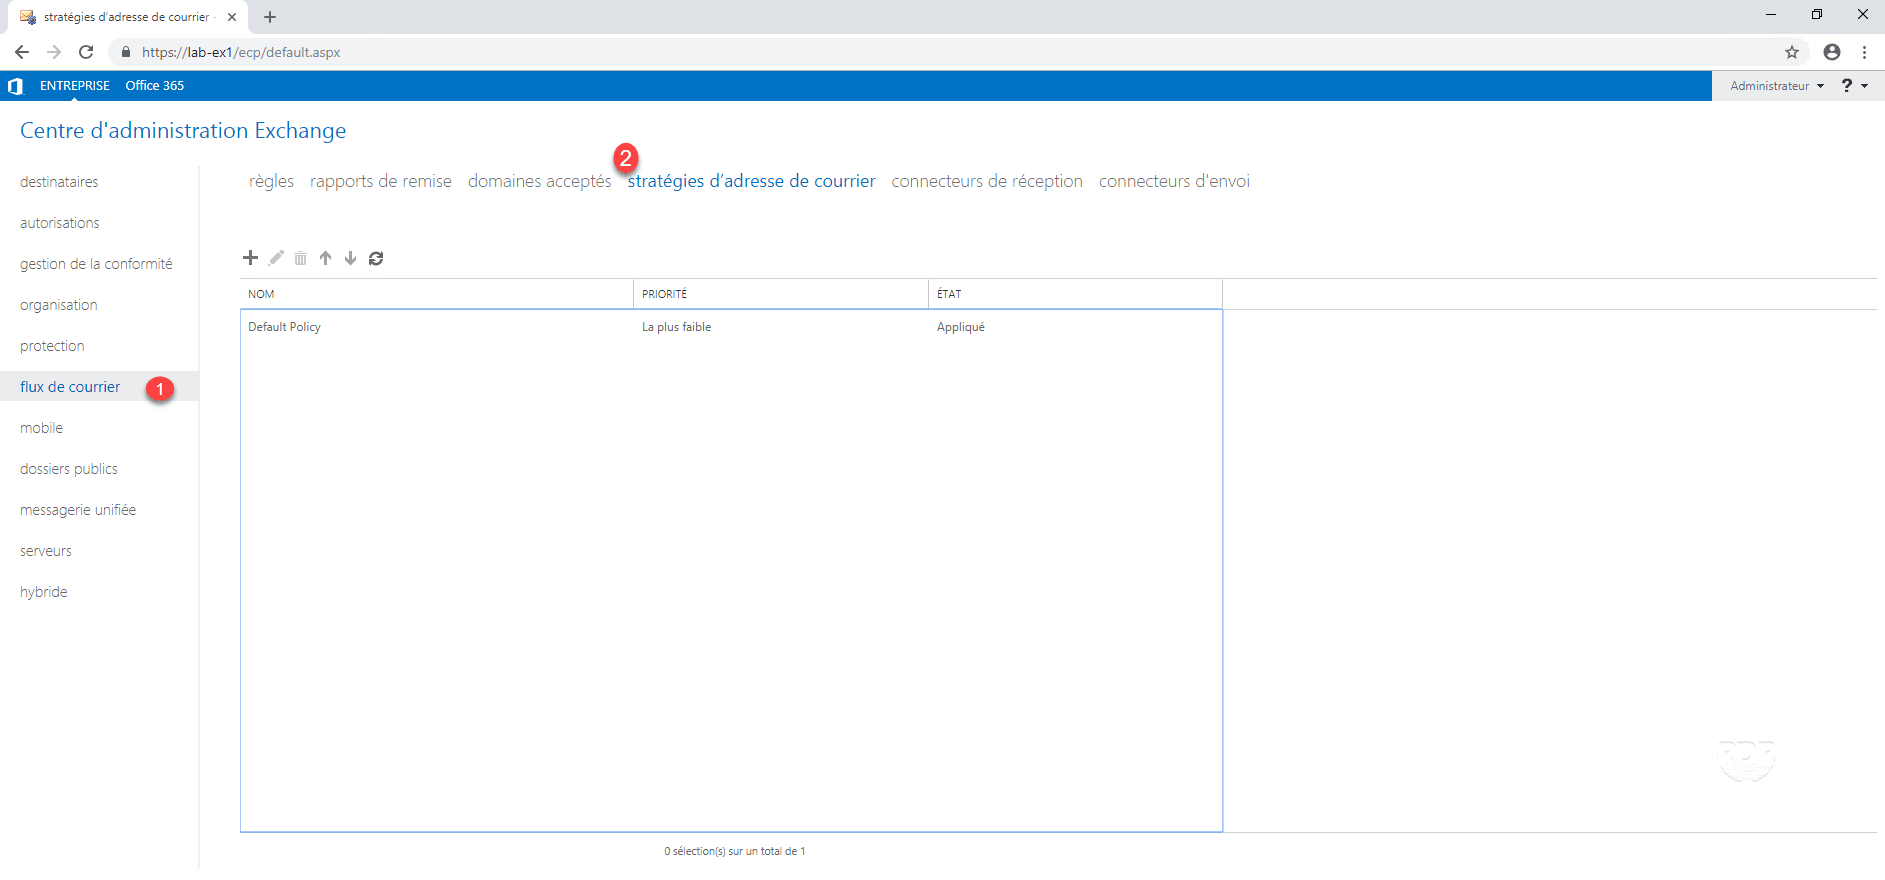
This manipulation does not make the domain for mailboxes by default, for this you have to modify the mail address strategy.
Configuration: Mail Address Strategies
A mail address policy, allows when creating a mailbox to automatically apply aliases for the same domain or add another domain …
In continuation of this tutorial, we will make sure to change the default policy so that the main address of users is alias@rdr-it.com.
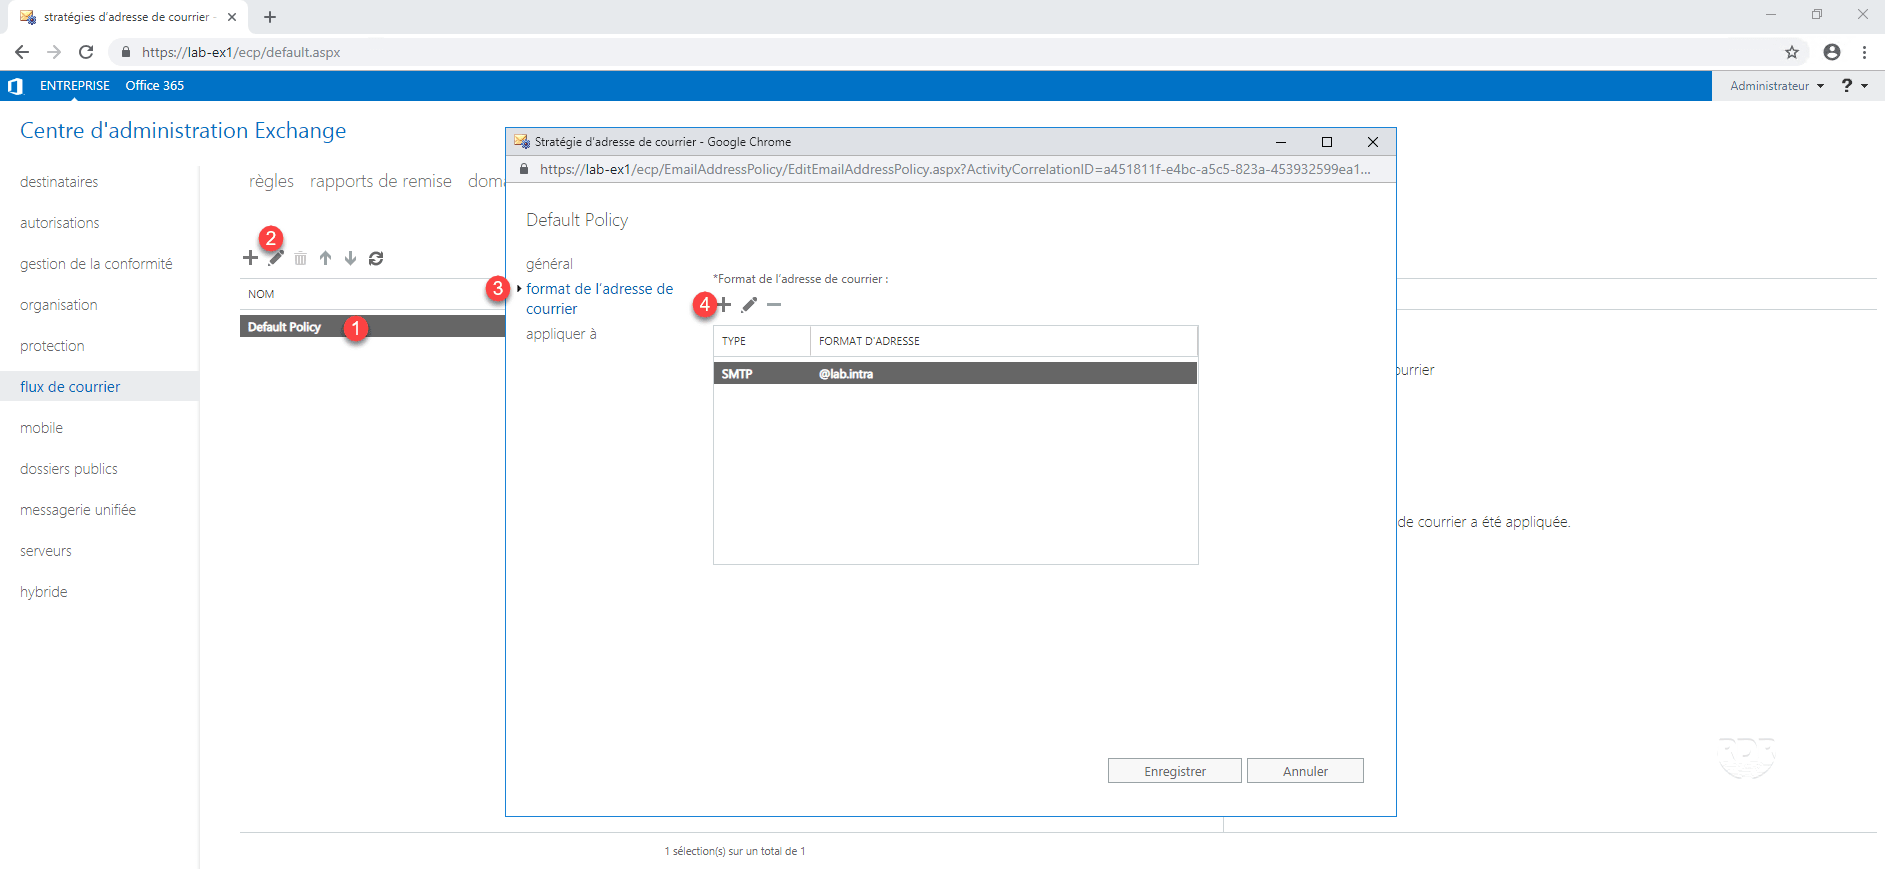
1. From the ECP interface, go to mail flow 1 / mail address strategies 2 .
2. Select the default strategy 1 , click on the edit icon 2 , in the new window go to format of the mail address 3 and click on + < <4 .
3. Select domain 1 and address format 2 , check the box Define this format as response mail address 3 to set the new format as the main address and click on Save 4 .
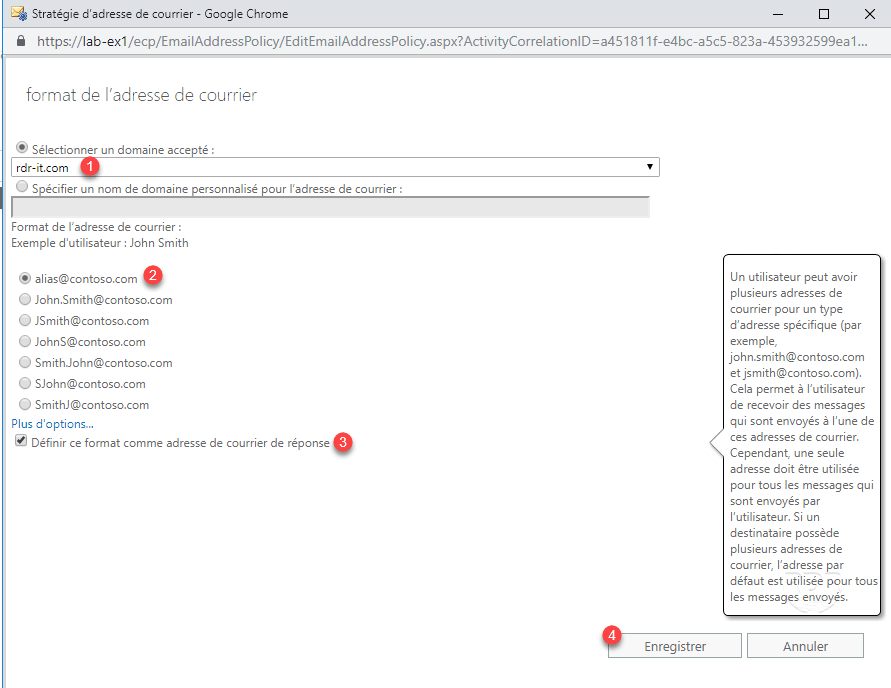
4. The format is added, click Save 1 .
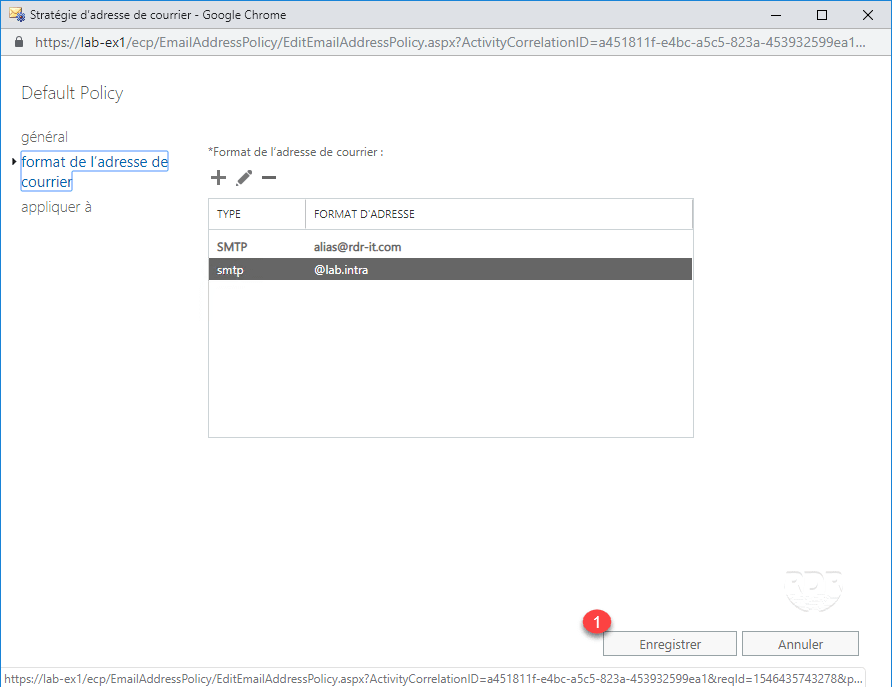
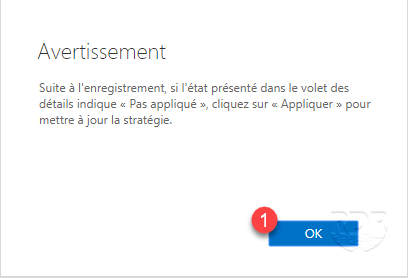
5. Close the warning message by clicking OK 1 .
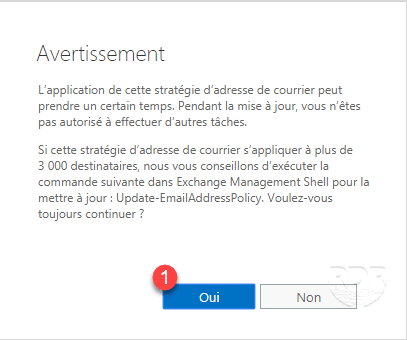
6. Select strategy 1 and click Apply 2 .
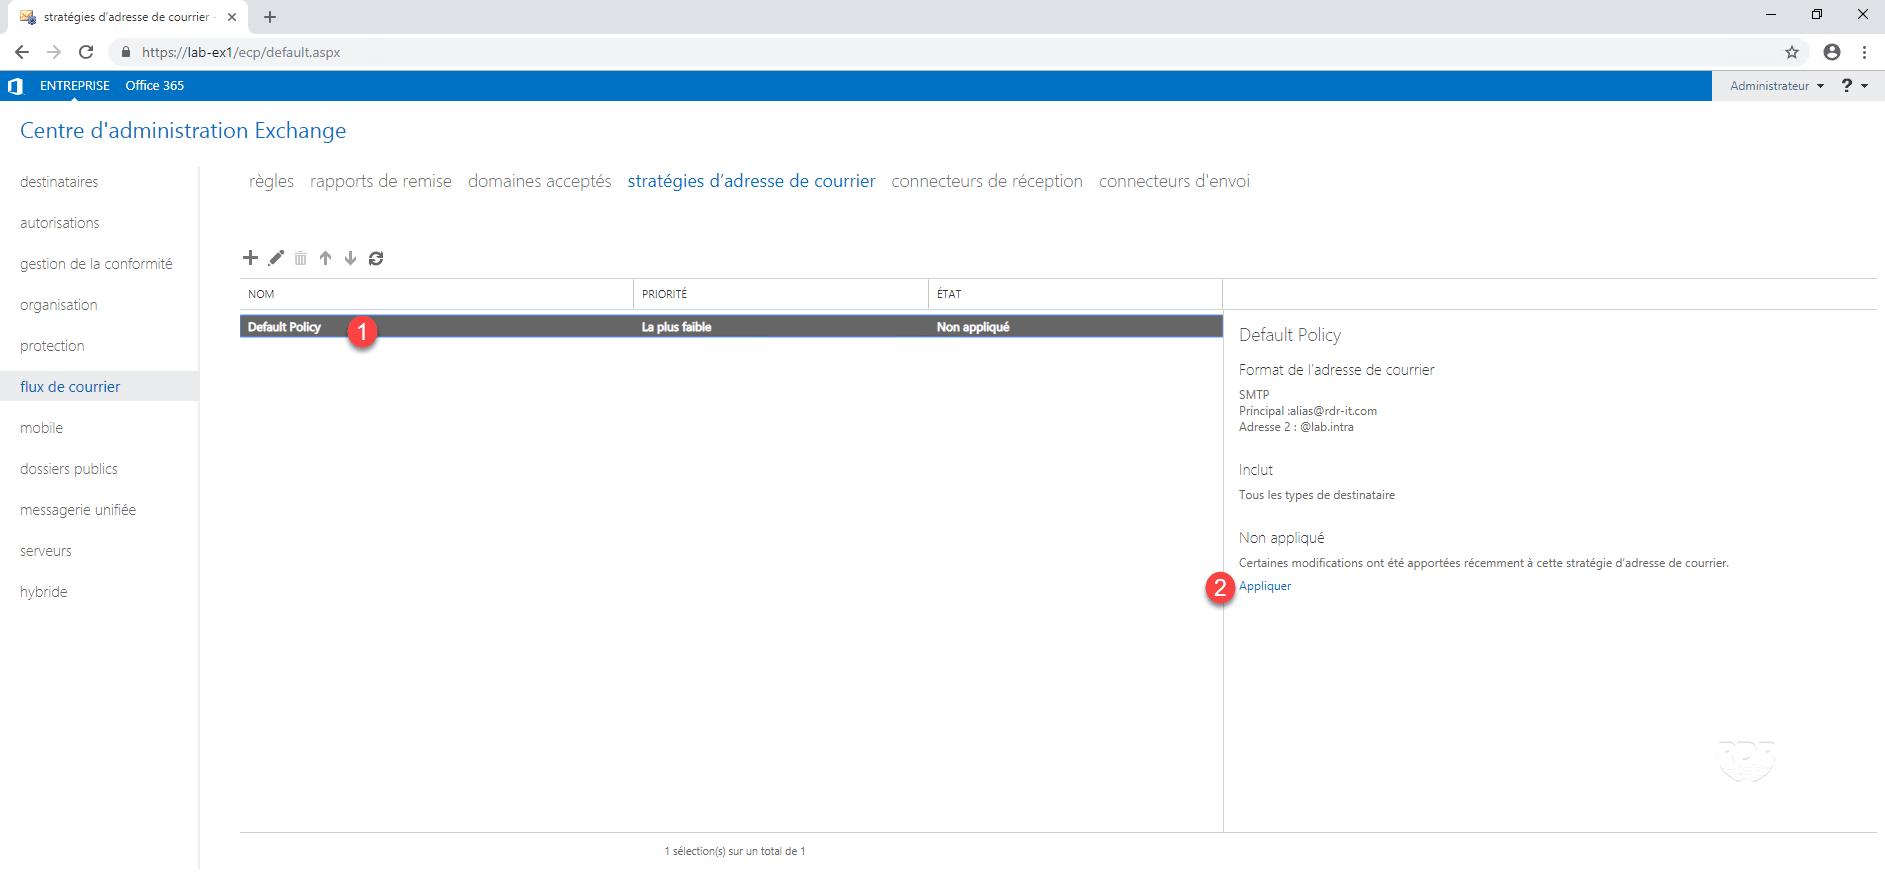
7. Click Yes 1 to apply the strategy.
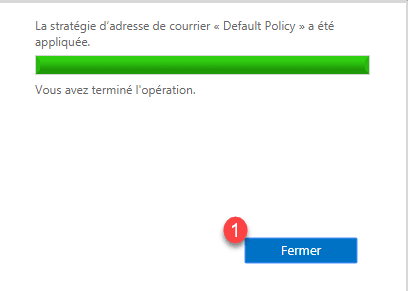
8. The strategy is applied, click Close 1 .
9. Go back to the list of mailboxes and check that the default mail address is alias@rdr-it.com.
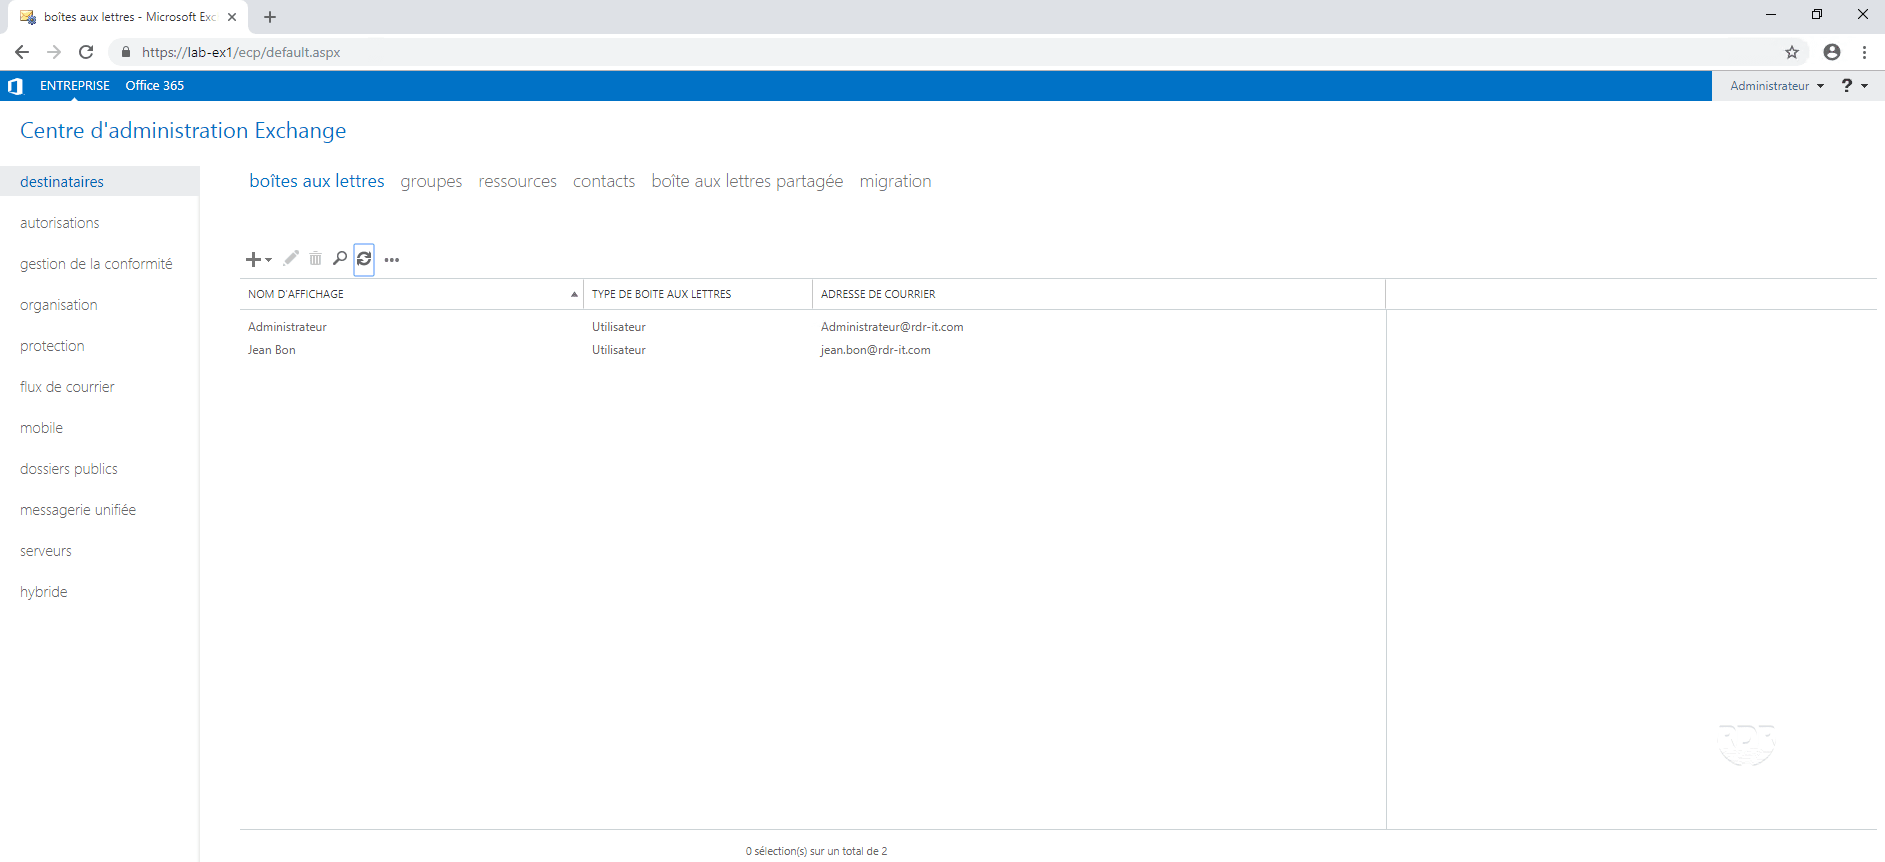
If the addresses have not changed, refresh the list.
Configuration: add a database
In Exchange 2016, databases are a group of mailboxes that share the same volumetric setting.
Depending on your type of Exchange 2016 license, the number of active mailboxes varies:
- 5 for the standard version
- unlimited for the enterprise version
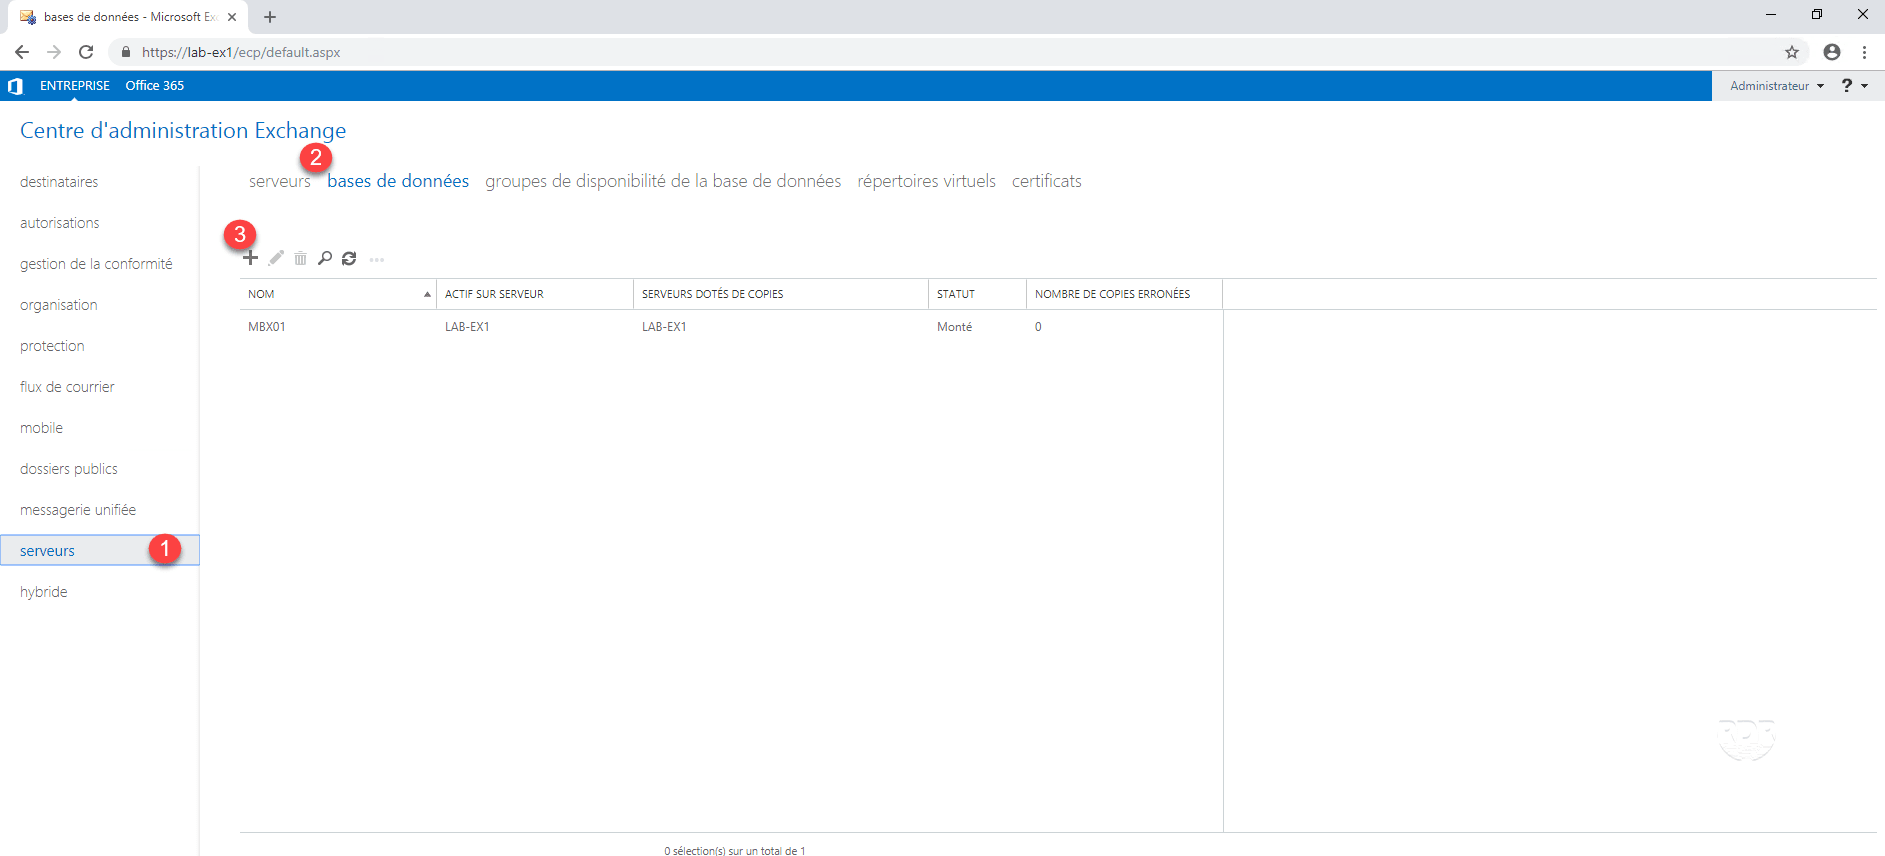
1. From the ECP interface, go to servers 1 / databases 2 and click on + 3 .
2. Enter the database name 1 , the file location 2 and logs 3 and click Save 4 .
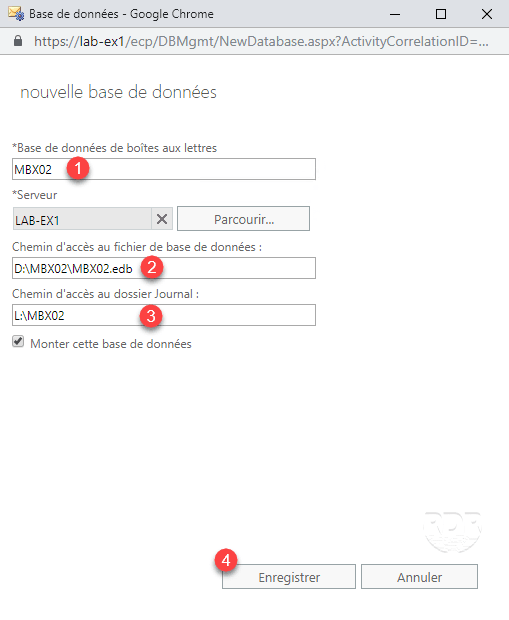
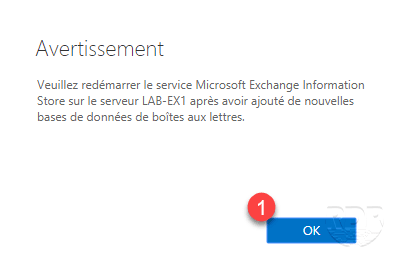
3. Click OK 1 to close the warning message.
4. The new database, select 1 then click on the edit icon 2 .
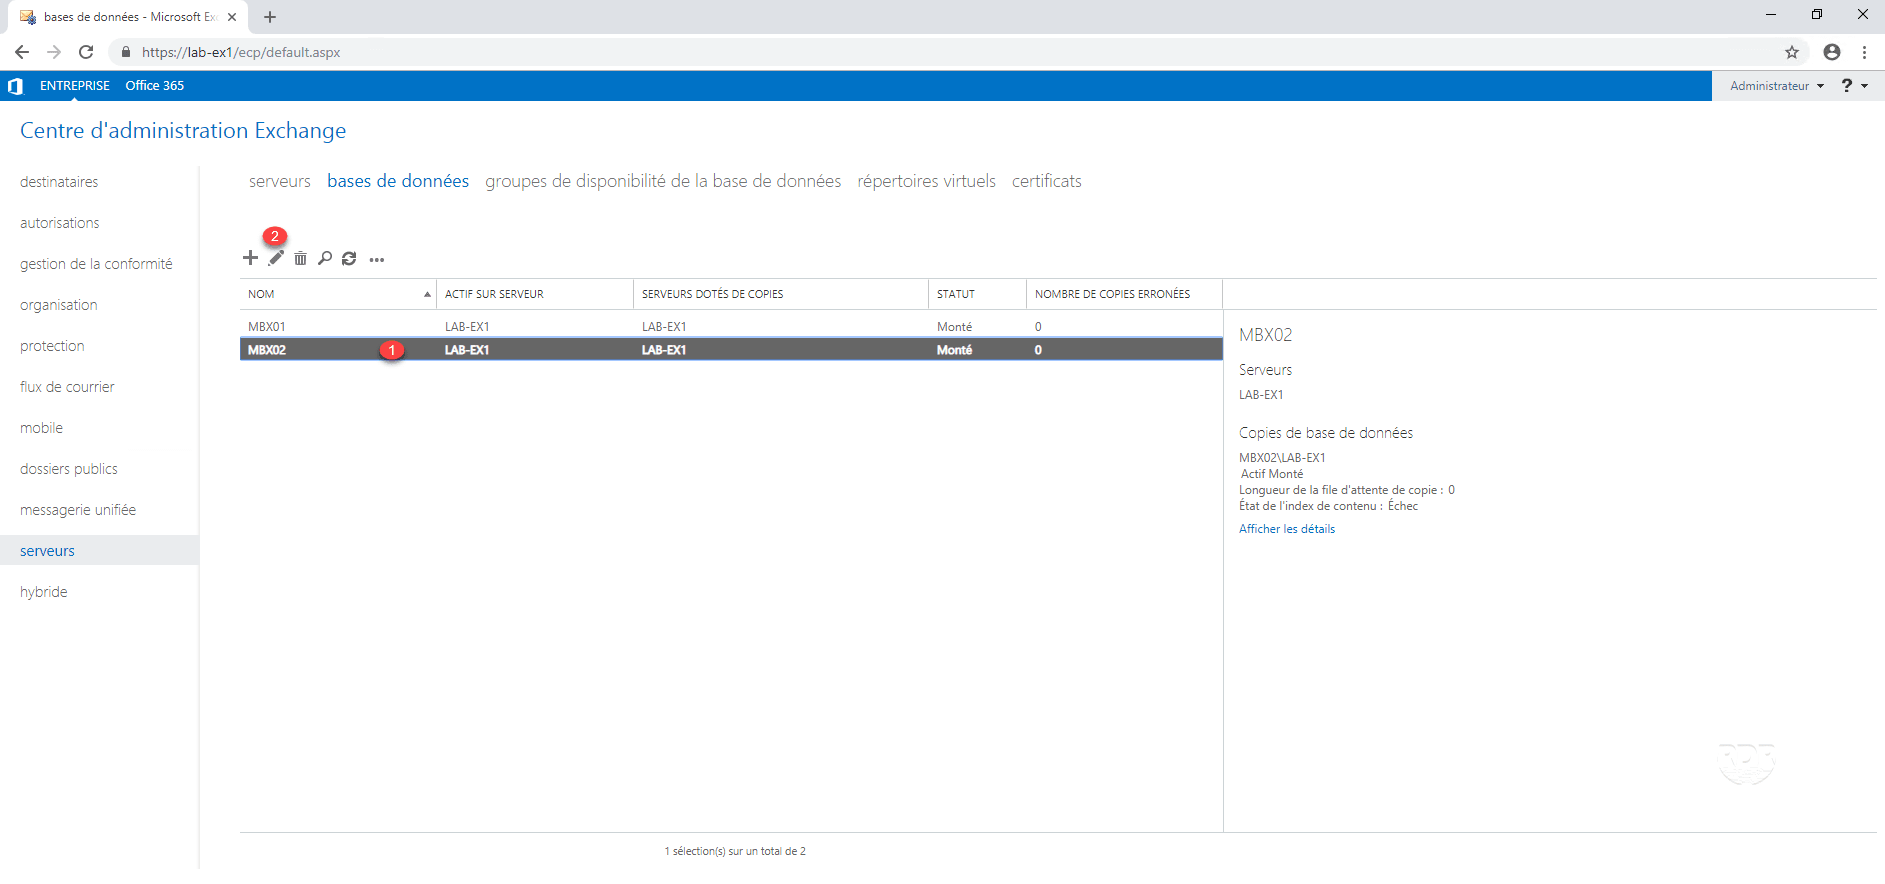
5. Go to 1 limits and configure them as needed 2 then click on Save 3 .

6. Restart the Microsoft Exchange Information Store service.
FYI: the limits applied by a database can be circumvented by directly modifying the same limits at the level of the box.
Configuration: Define Access URLs for Exchange 2016
For the moment, the Exchange 2016 server is configured to send the fqdn.lab.intra url to the client. With this configuration, it is not possible to access Exchange with Outlook from outside.
It is necessary first to define the address that will be used to access the server from outside.
To illustrate the tutorial, I will use the address mail.rdr-it.com
Editing directories by ECP
Outlook AnyWere
Outlook Anywhere allows your users to connect to their Exchange mailboxes through Outlook.
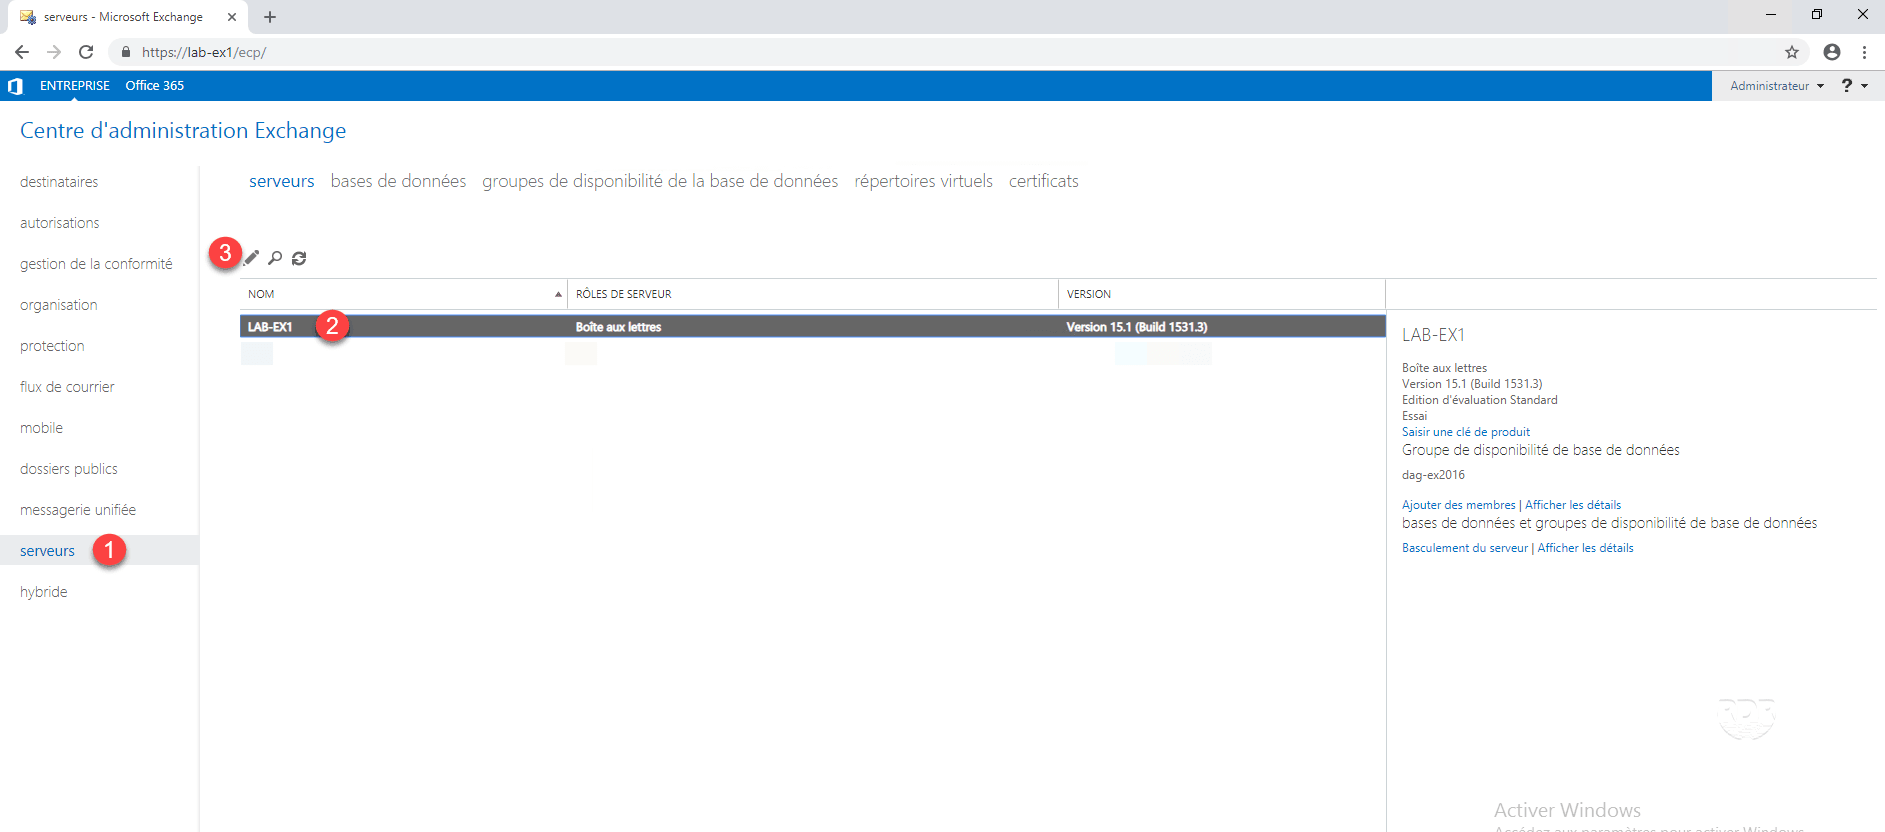
1. From the ECP interface, go to servers 1 , select the server in the list 2 and click on the edition icon 3 .
2. Go to the Outlook AnyWhere 1 section and enter the external address 2 then Save 3 .
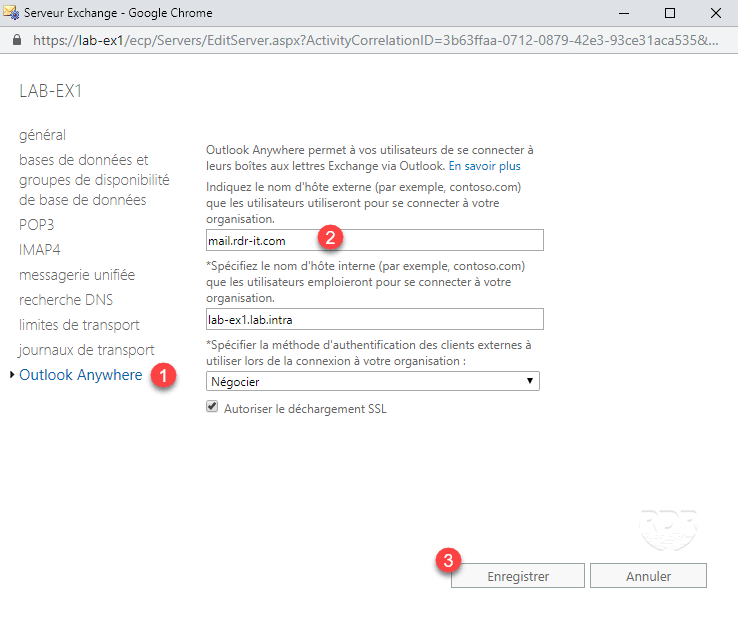
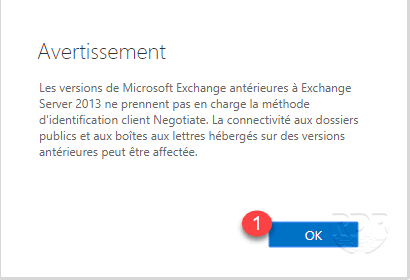
3. Close the warning by clicking OK 1 .
Virtual Directories
1. From the ECP interface, go to servers 1 then virtual directories 2 .
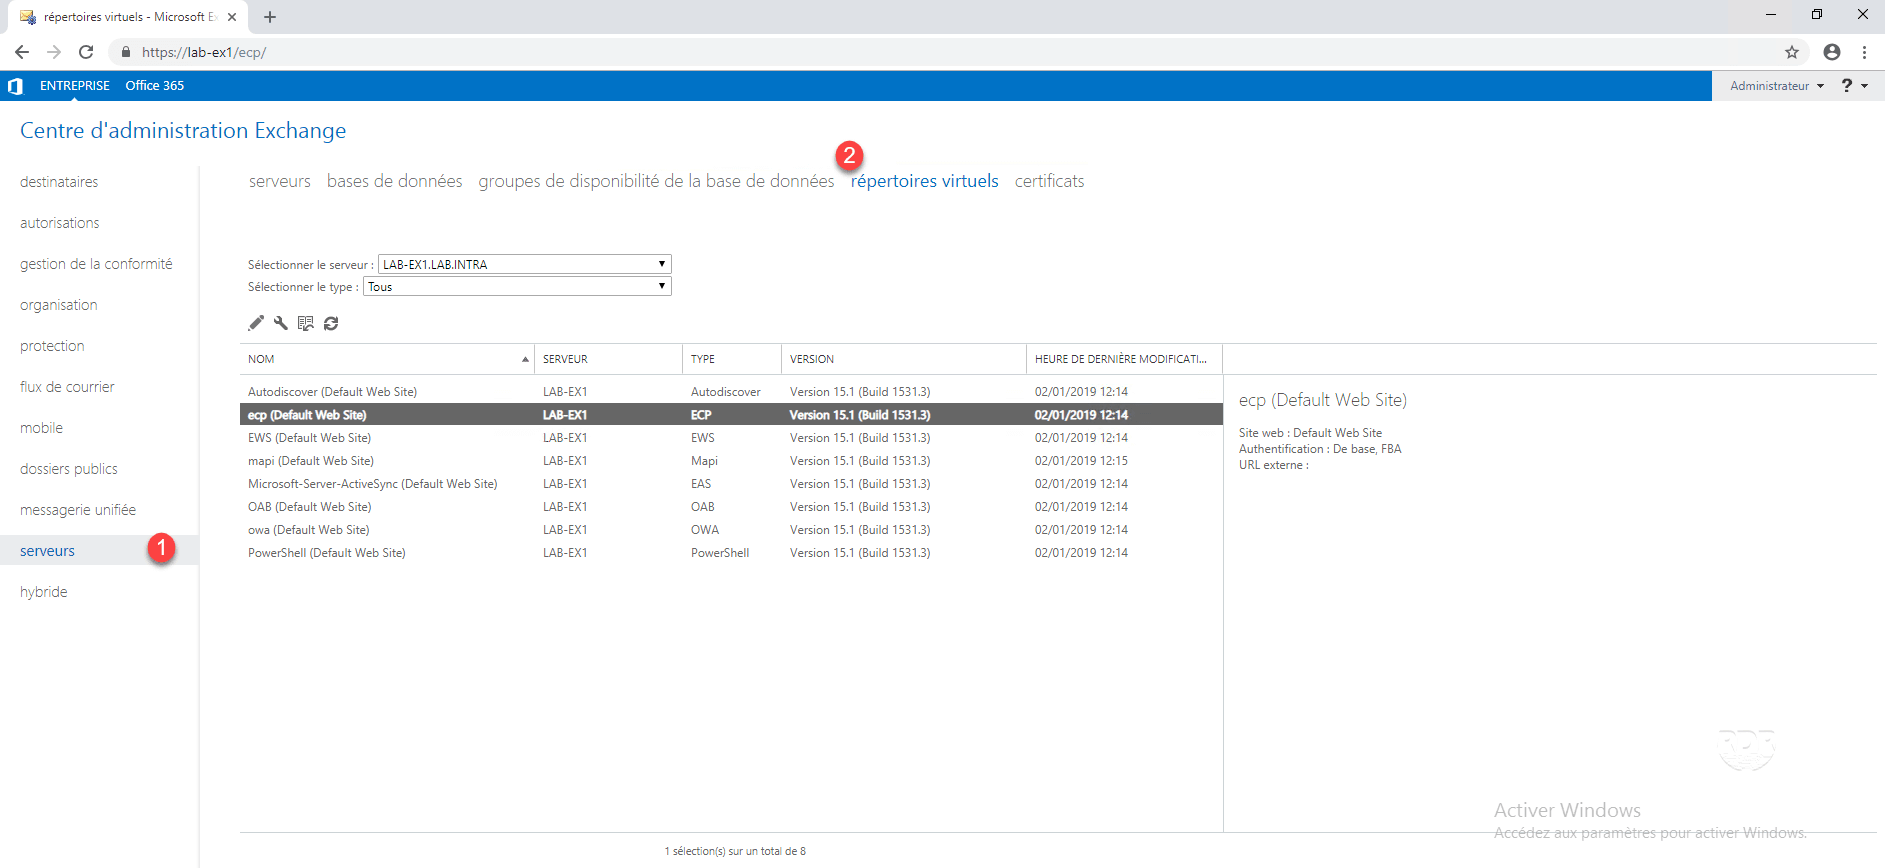
2. Select the ECP directory 1 and click on the edit icon 2 .
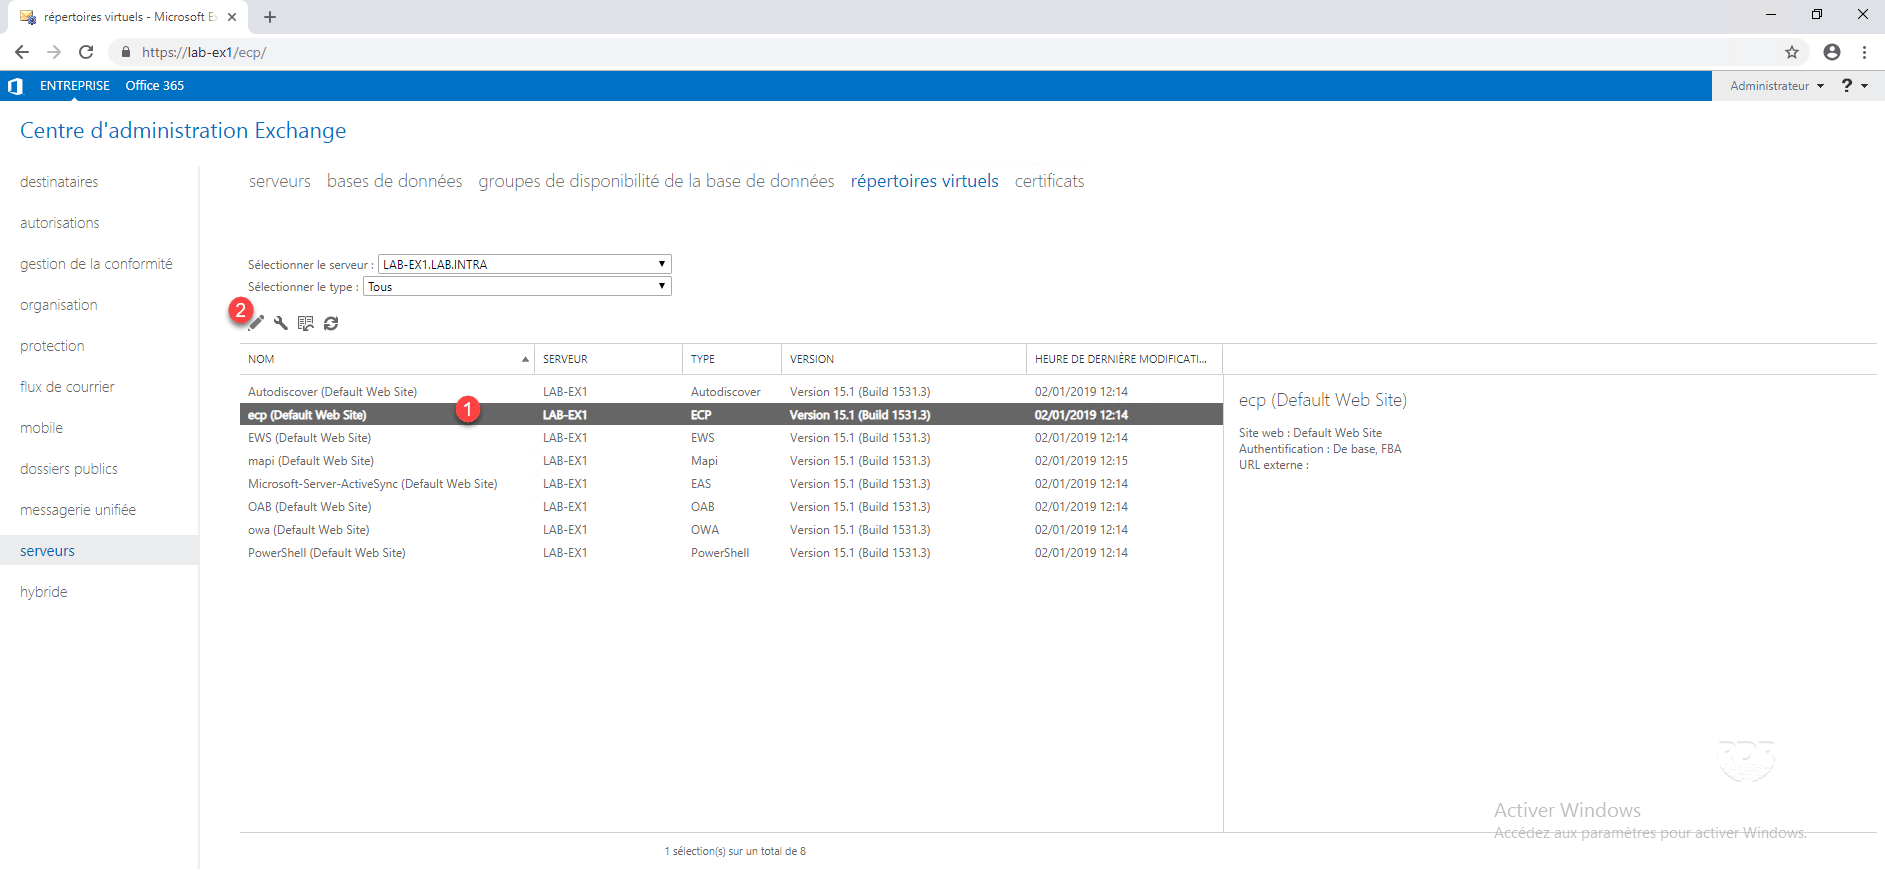
3. Configure External Url 1 then click Save 2 .
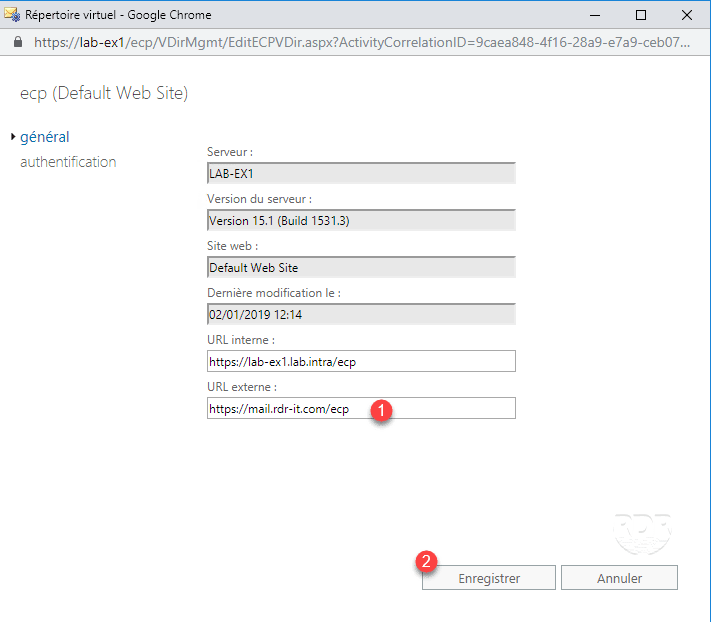
Make a copy / paste of the internal URL in the external and replace the name fqdn of the server by the external url by keeping the parameters of the url.
4. Close the warning message by clicking OK 1 .
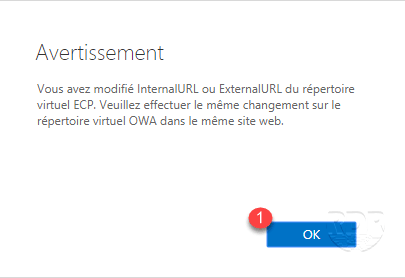
5. Repeat for all directories except the Autodiscover.
Editing Directories by Scripts
There is a script, which allows to make the changes by a powershell script.
1. Download the script on the Exchange 2016 server.
2. Open the Exchange Management Shell and go to the folder where the script is located.
3. Run the script:
.\ConfigureExchangeURLs.ps1 -Server LAB-EX1 -InternalURL lab-ex1.lab.intra -ExternalURL mail.rdr-it.comConfiguration: add a send connector
To send e-mails to the outside (Internet), you have to configure an SMTP send connector.
1. From the ECP, go to mail flow 1 / send connector 2 and click on + 3 to add a new connector.
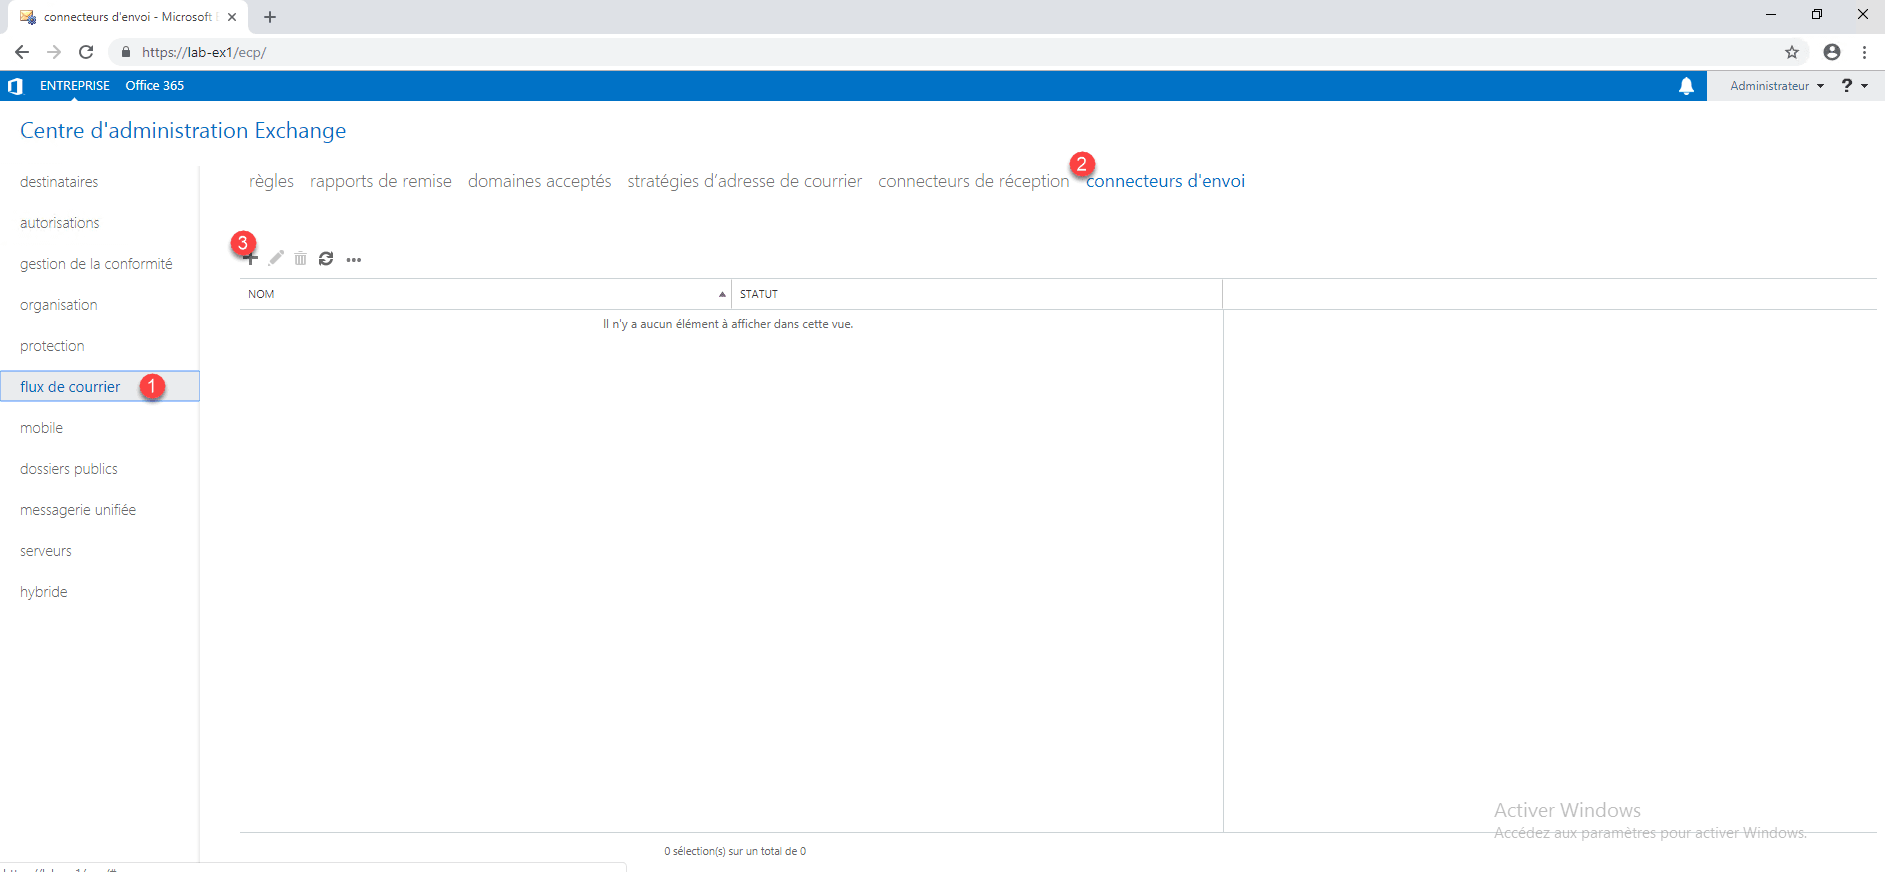
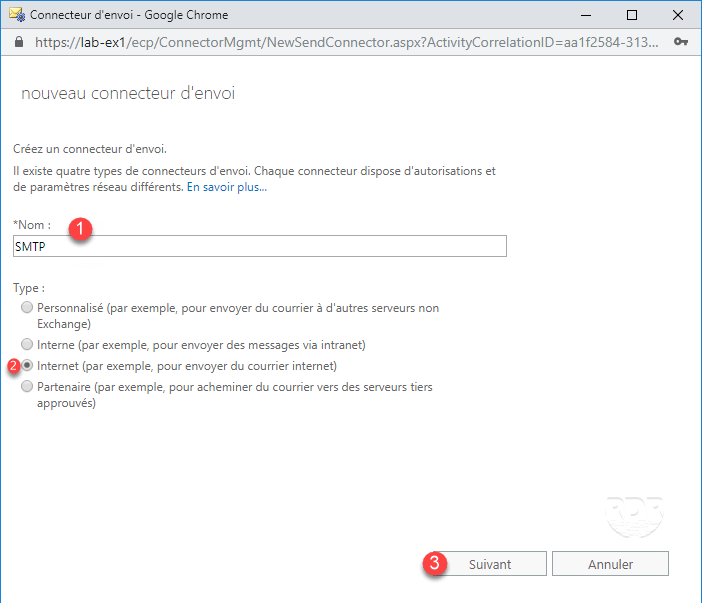
2. Enter the connector name 1 , choose type: Internet 2 and click Next 3 .
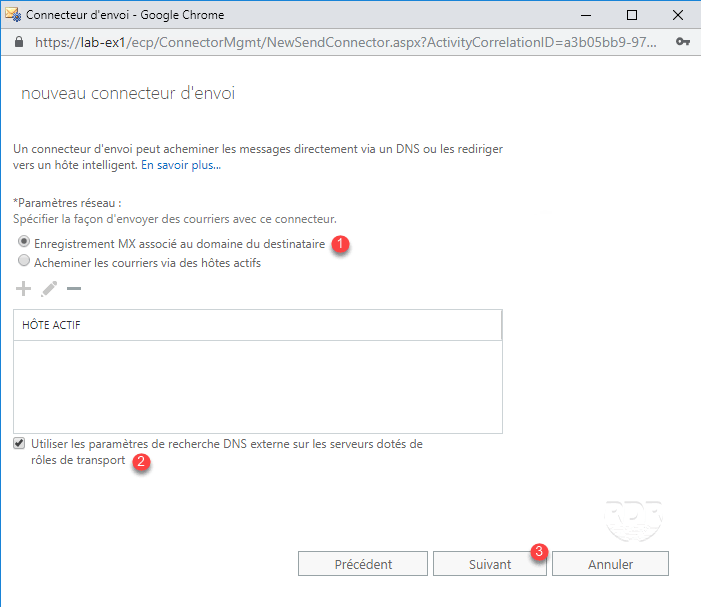
3. Select MX record associated with recipient’s domain 1 , check the box Use external DNS search settings on servers with transport roles 2 and click Next 3 .
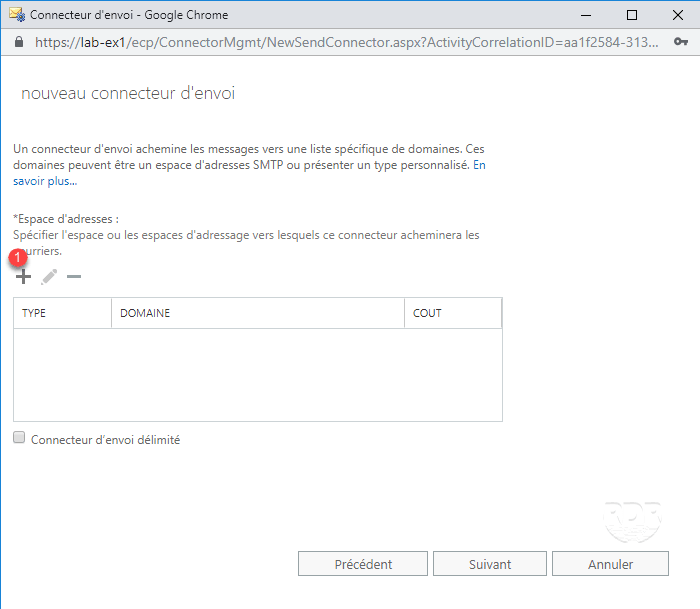
4. Click on + 1 .
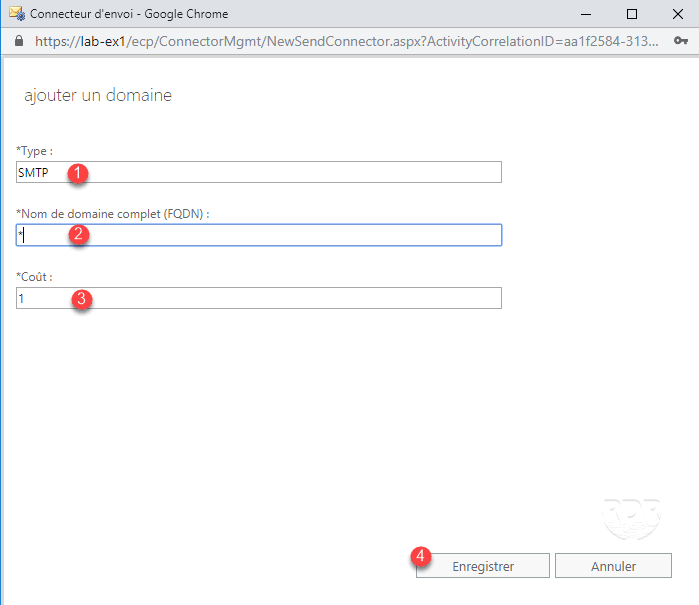
5. Type: SMTP 1 / Fully Qualified Domain Name (FQDN): * 2 / Cost: 1 3 and click Save 4 .
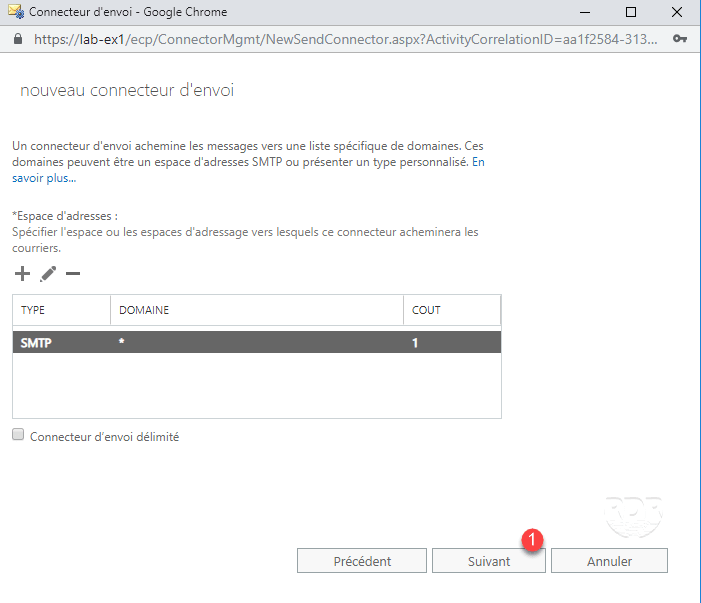
6. Click Next 1 .
7. Click on the + 1 .
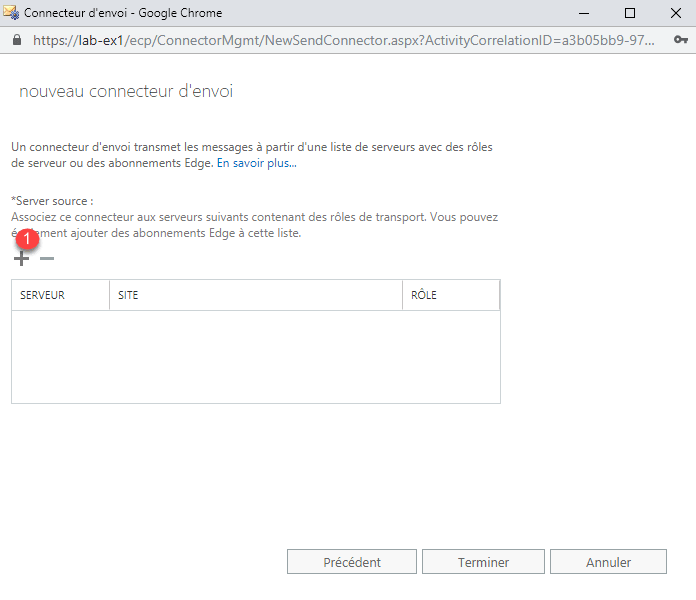
8. Select server 1 , click on add -> 2 then on OK 3 .
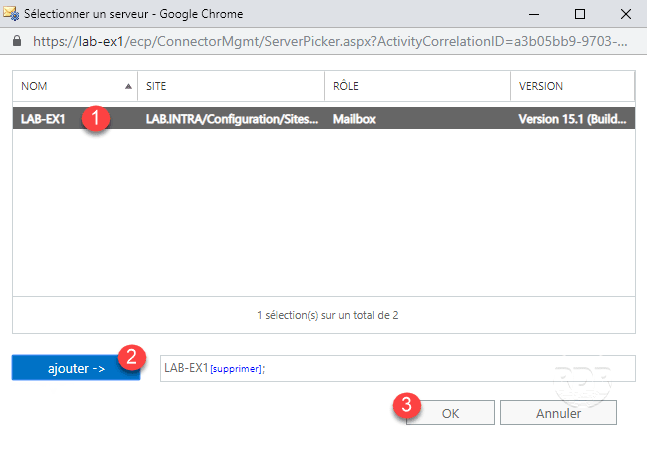
9. Click Finish 1 to create the Send connector.

Exchange Email Administration
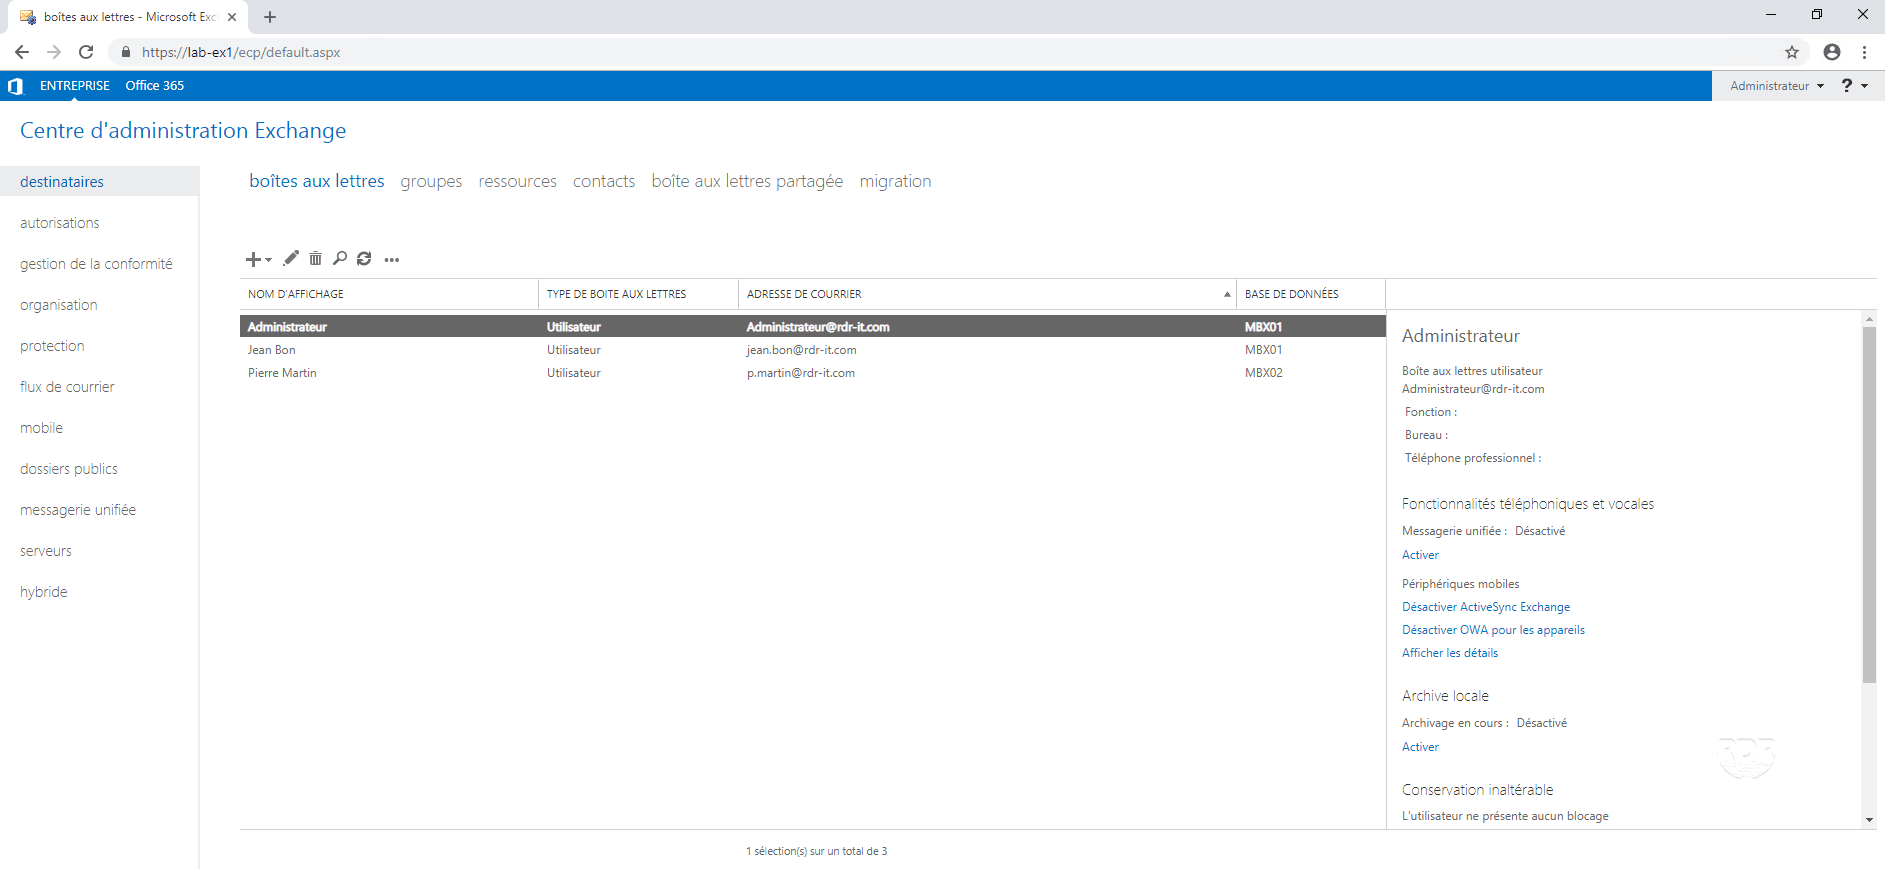
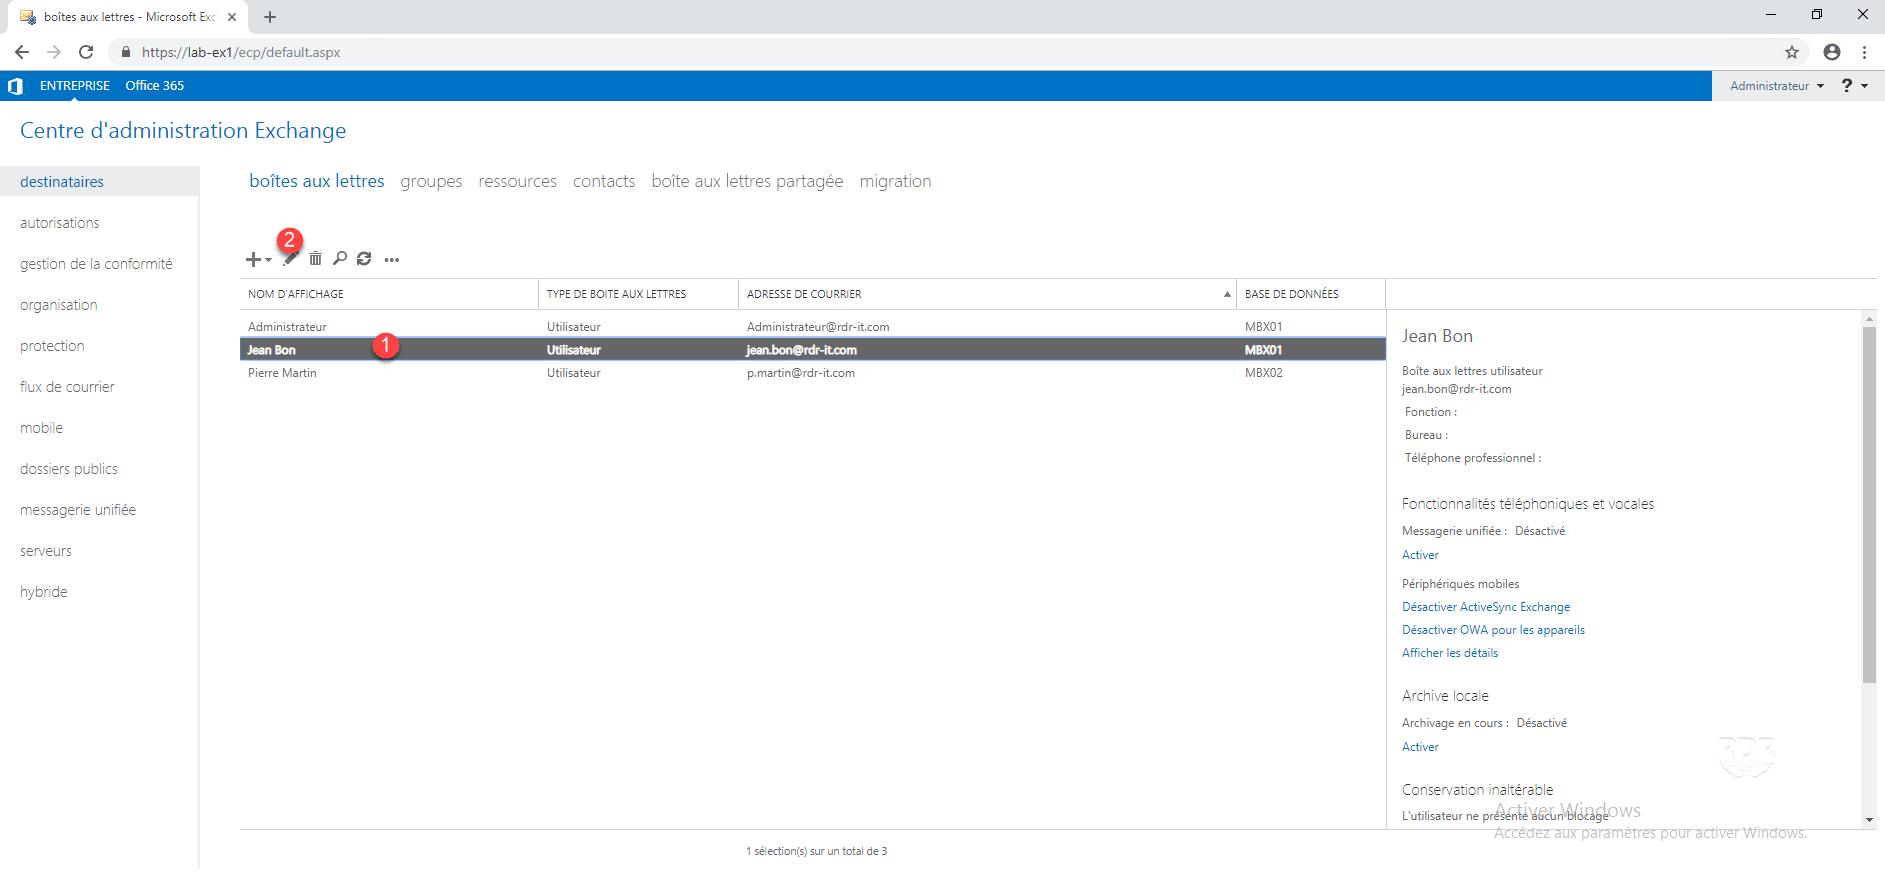
Administration – add a mailbox – example 1
In this first example, we will see how to add a mailbox to an existing user, without having yet changed the mail address policy.
1. From the ECP interface, go to recipients 1 / mailbox 2 , click on the add icon 3 then user mailbox 4 .
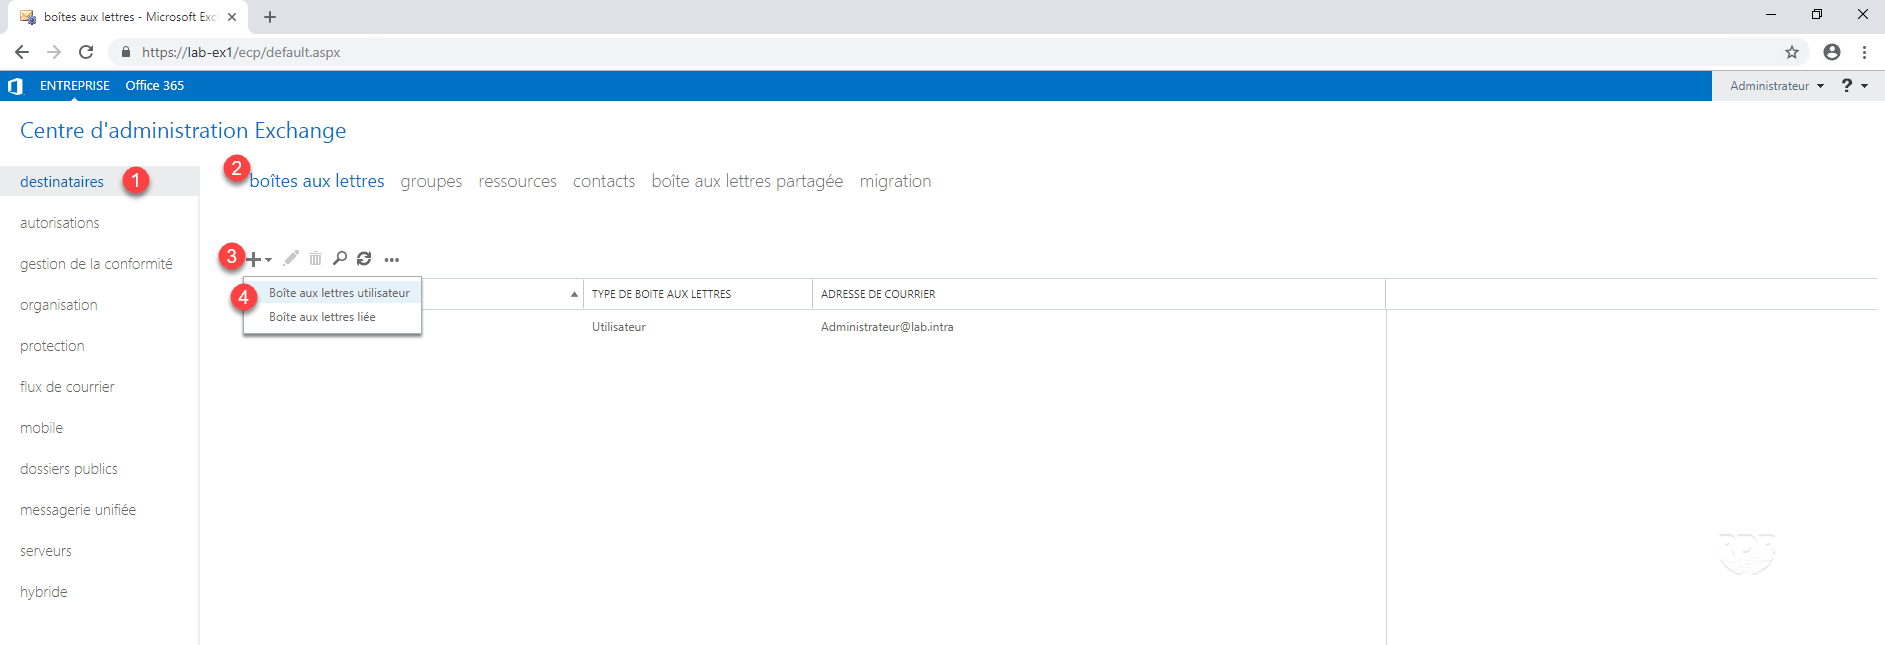
2. Enter the alias (part before the domain) of the user 1 and click on 2.
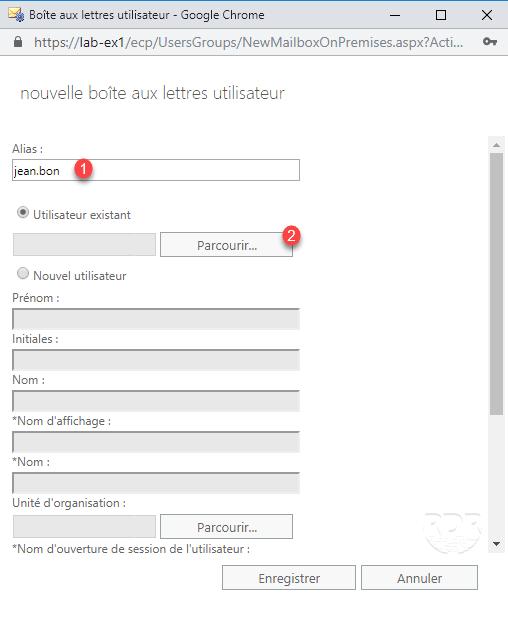
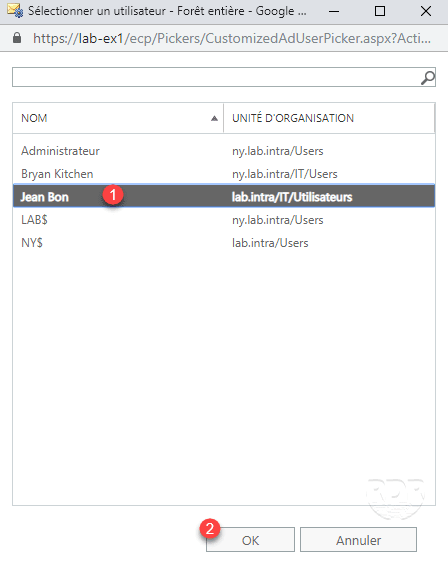
3. Select the corresponding AD user 1 and click OK 2 .
4. Click Save 1 to create the mailbox.

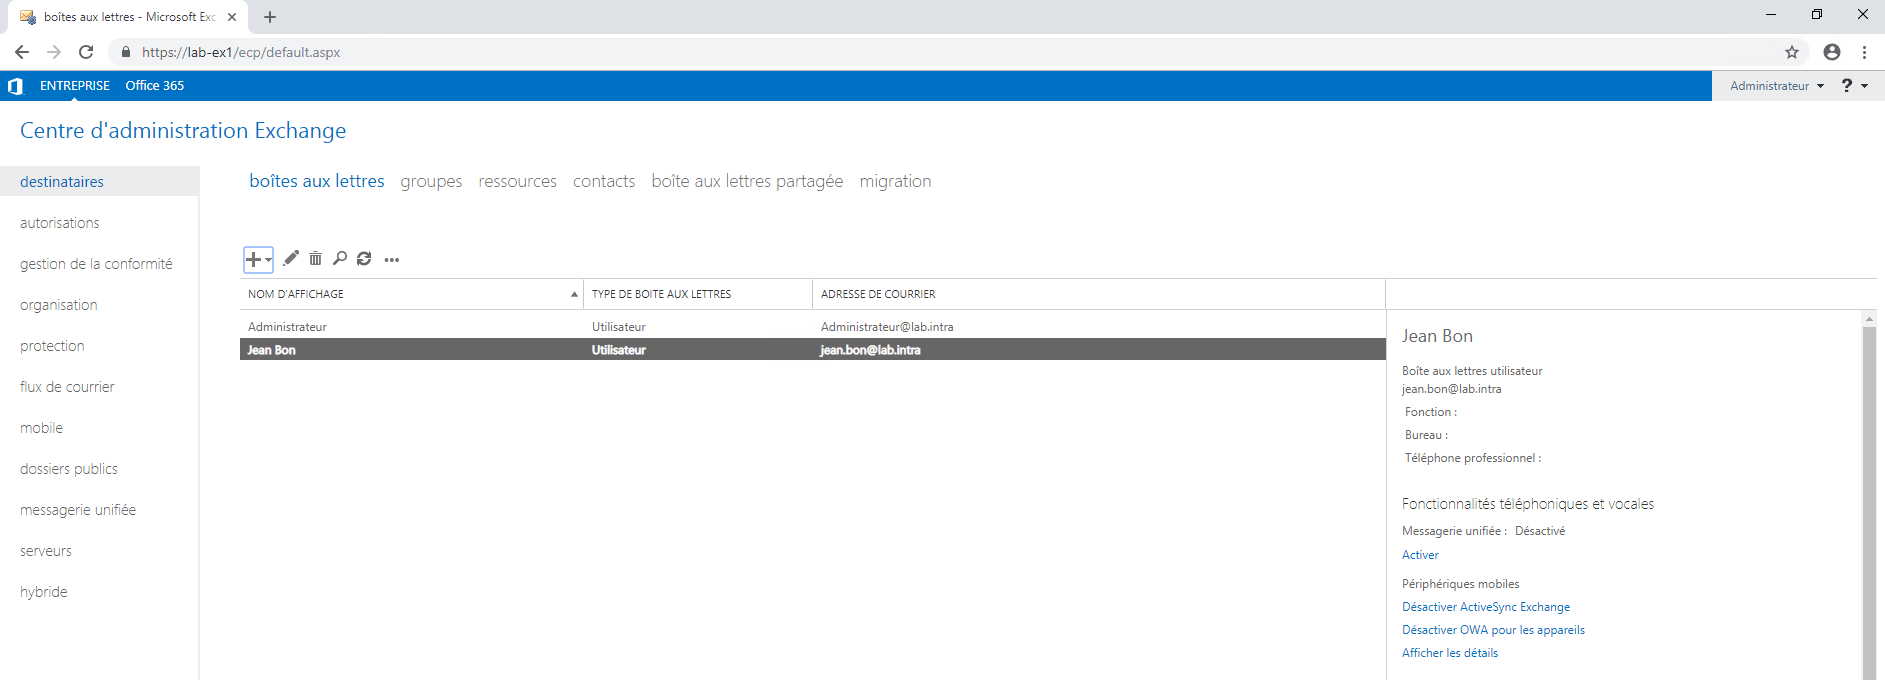
5. The mailbox is created, but on the old default domain.
The following is optional, I will just use this configuration to show you how to add an alias.
6. Select mailbox 1 , click on the edit icon 2 . On the new window, click on mail address 3 and on + 4 .
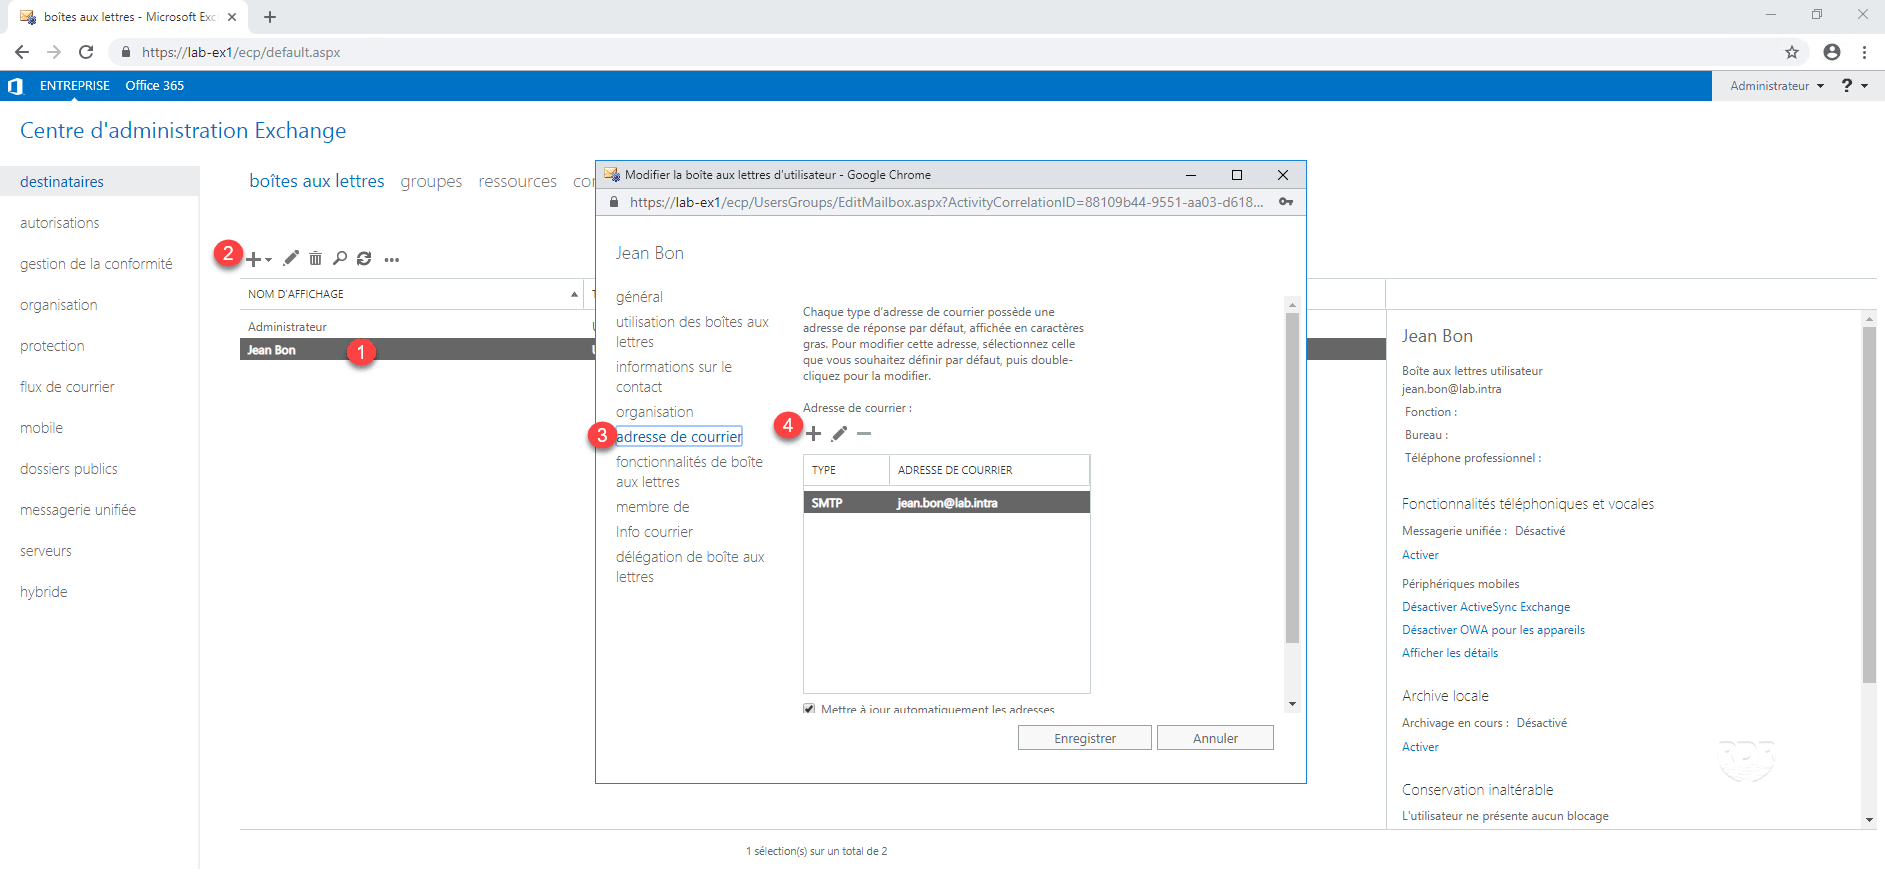
7. Address type, select SMTP 1 , enter address 2 and click OK 3 .
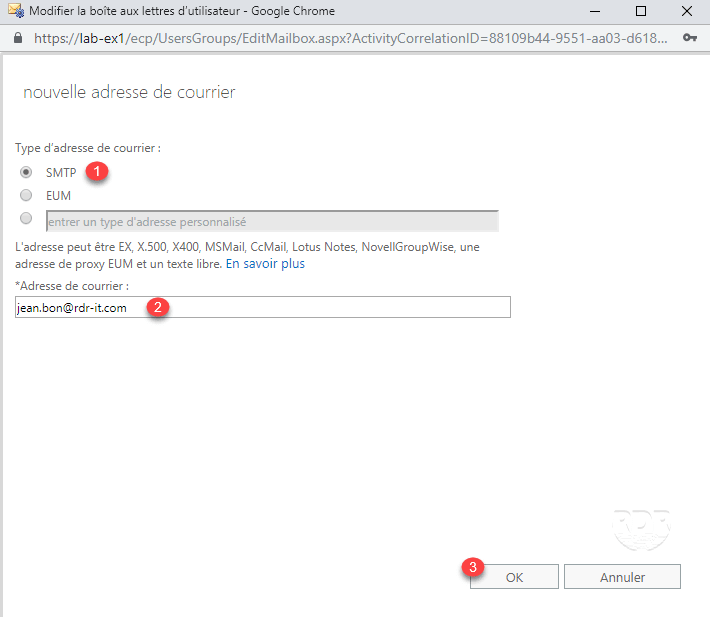
8. The address is added 1 , click on Save 2 .
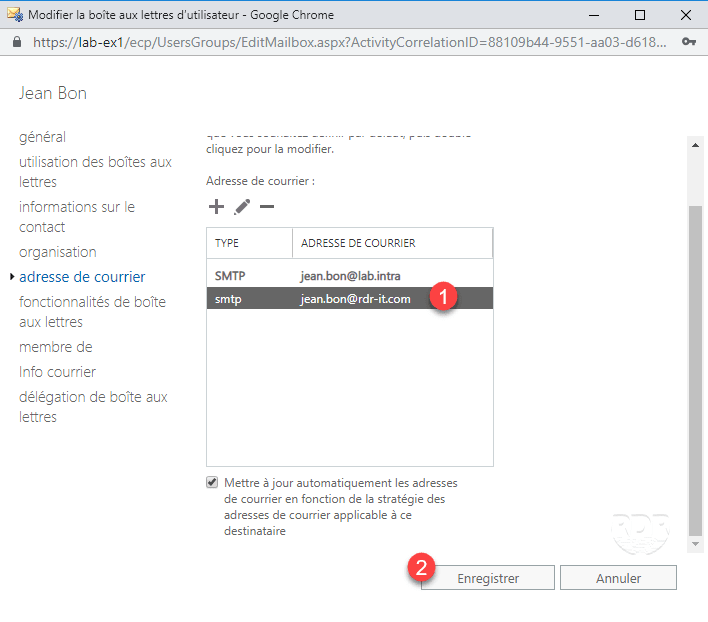
The address with the SMTP type is the main address.
If you do not want address policies enforced for a mailbox, you must clear the Automatically update mail addresses check box depending on the mail address policy that applies to that recipient.
Administration – add a mailbox – example 2
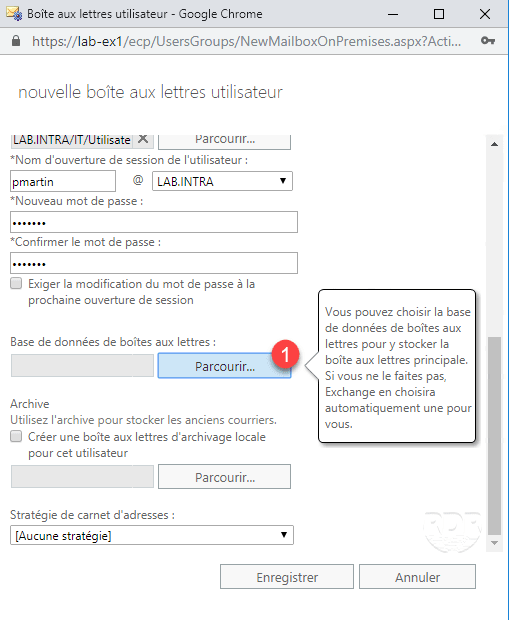
In this example, we will add a new user mailbox, directly creating the user using the ECP interface of Exchange 2016. This mailbox will be assigned to the database created in the previous point.
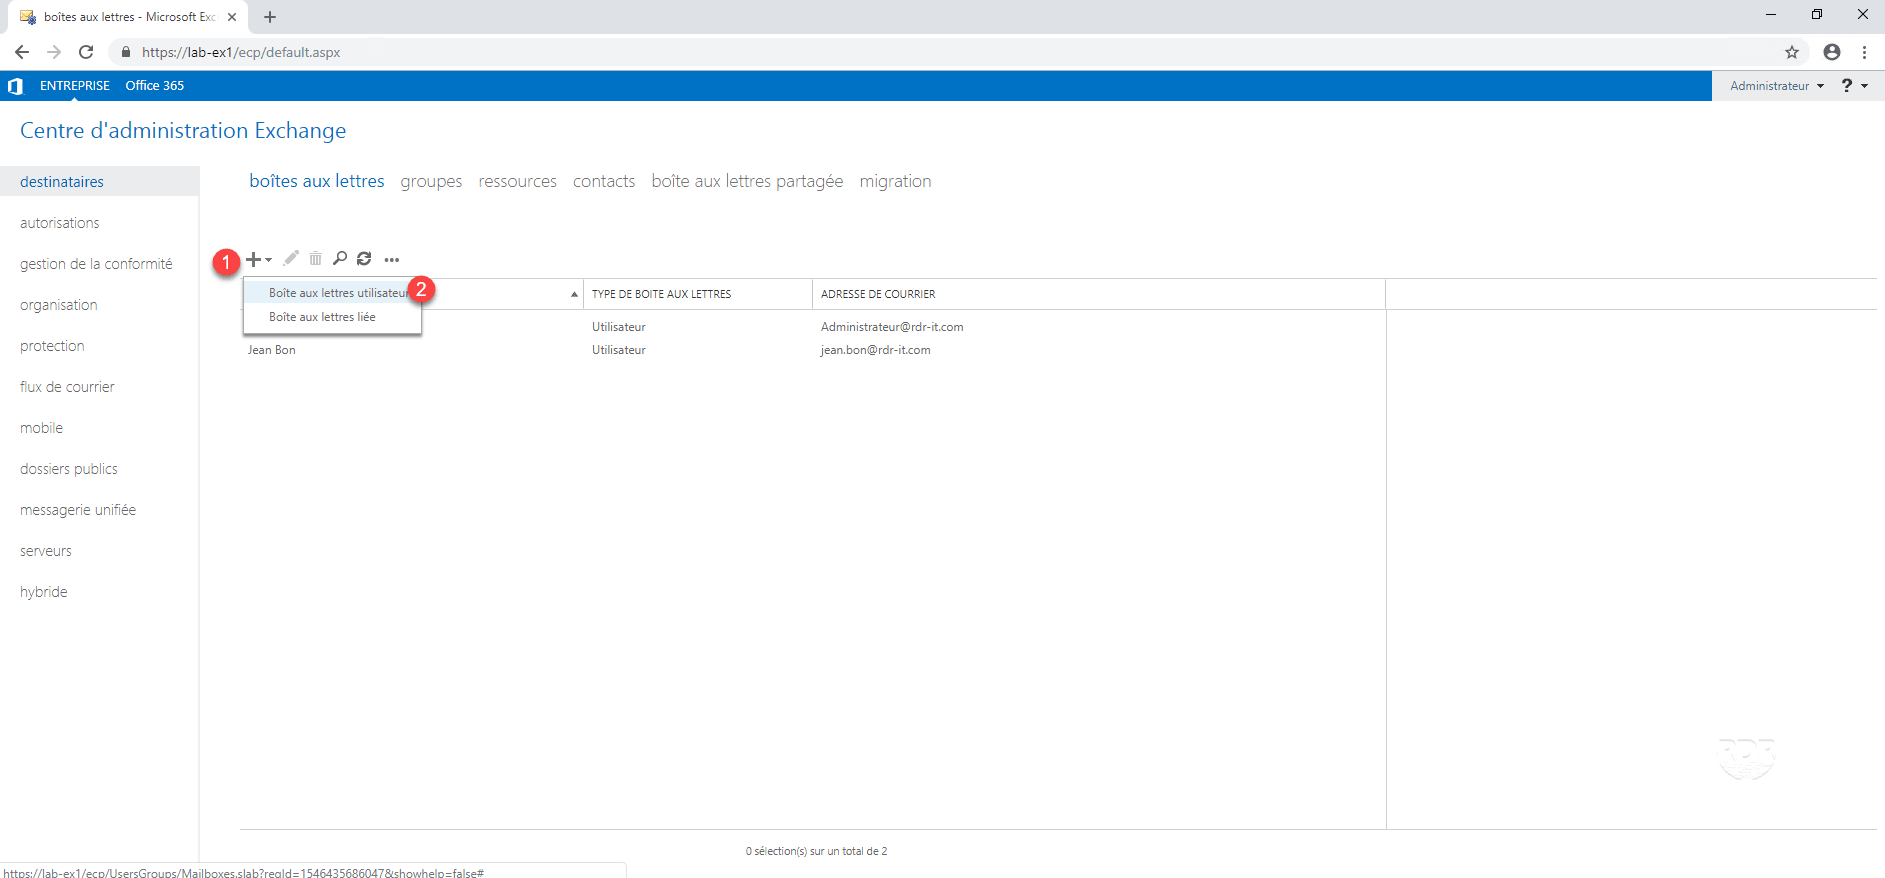
1. From the user interface, go to the mailboxes list, click on the + 1 and then on User mailboxes 2 .
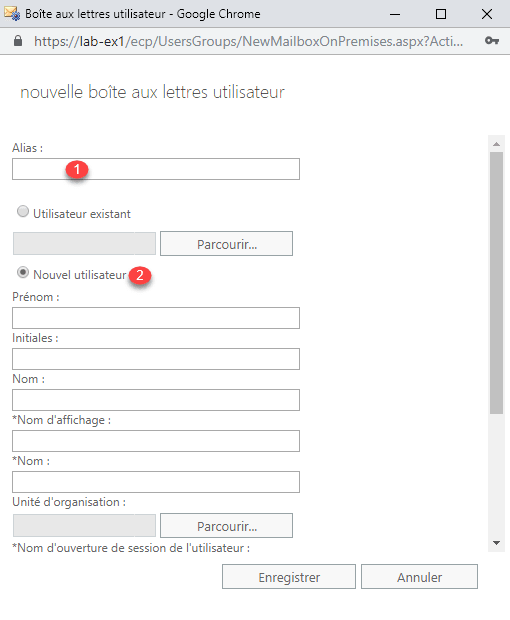
2. Enter the user alias 1 and select New user 2 . Enter Active Directory account information 3 then click More options 4 .
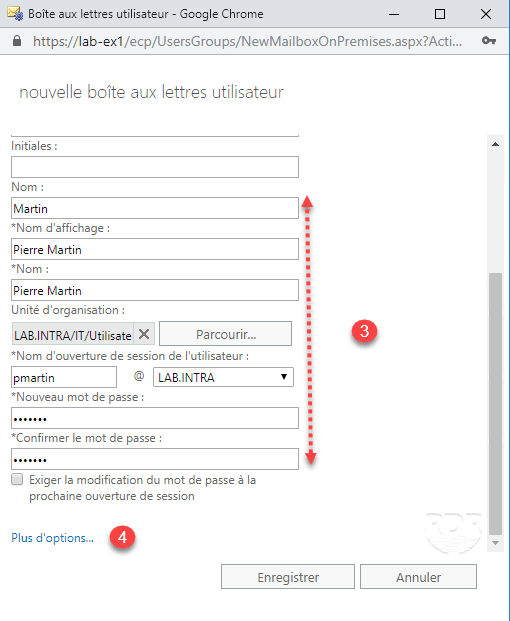
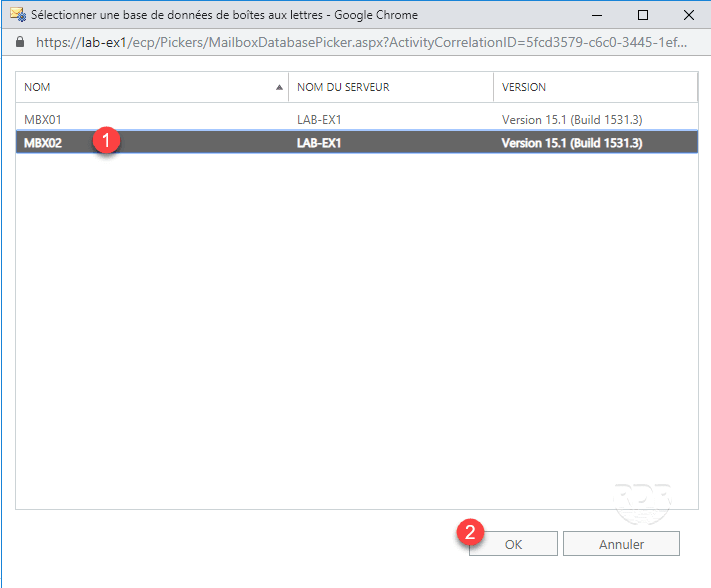
3. Click the Browse 1 button in the Mailbox Database option.
4. Choose the database 1 for the assignment of the mailbox and click OK 2 .
5. Click Save 1 to create the user in AD and the mailbox.
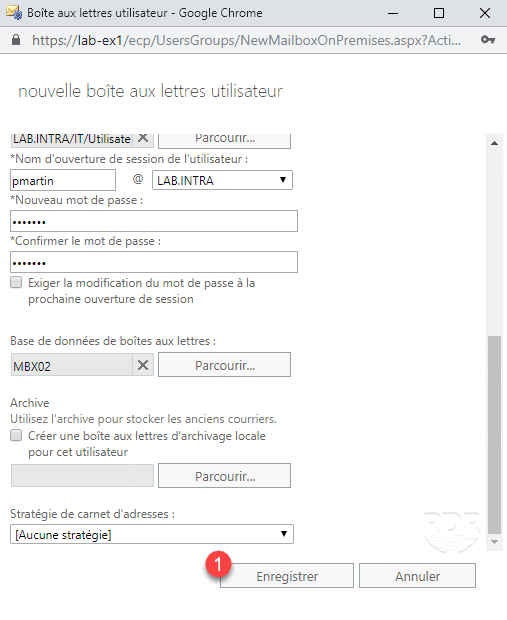
6. The user and the mailbox are created.
The following points are optional, I will explain how to display the database where the mailbox is located.
Customize the display of mailboxes
1. On the mailboxes page, click … 1 and then click Add / Remove columns 2 .
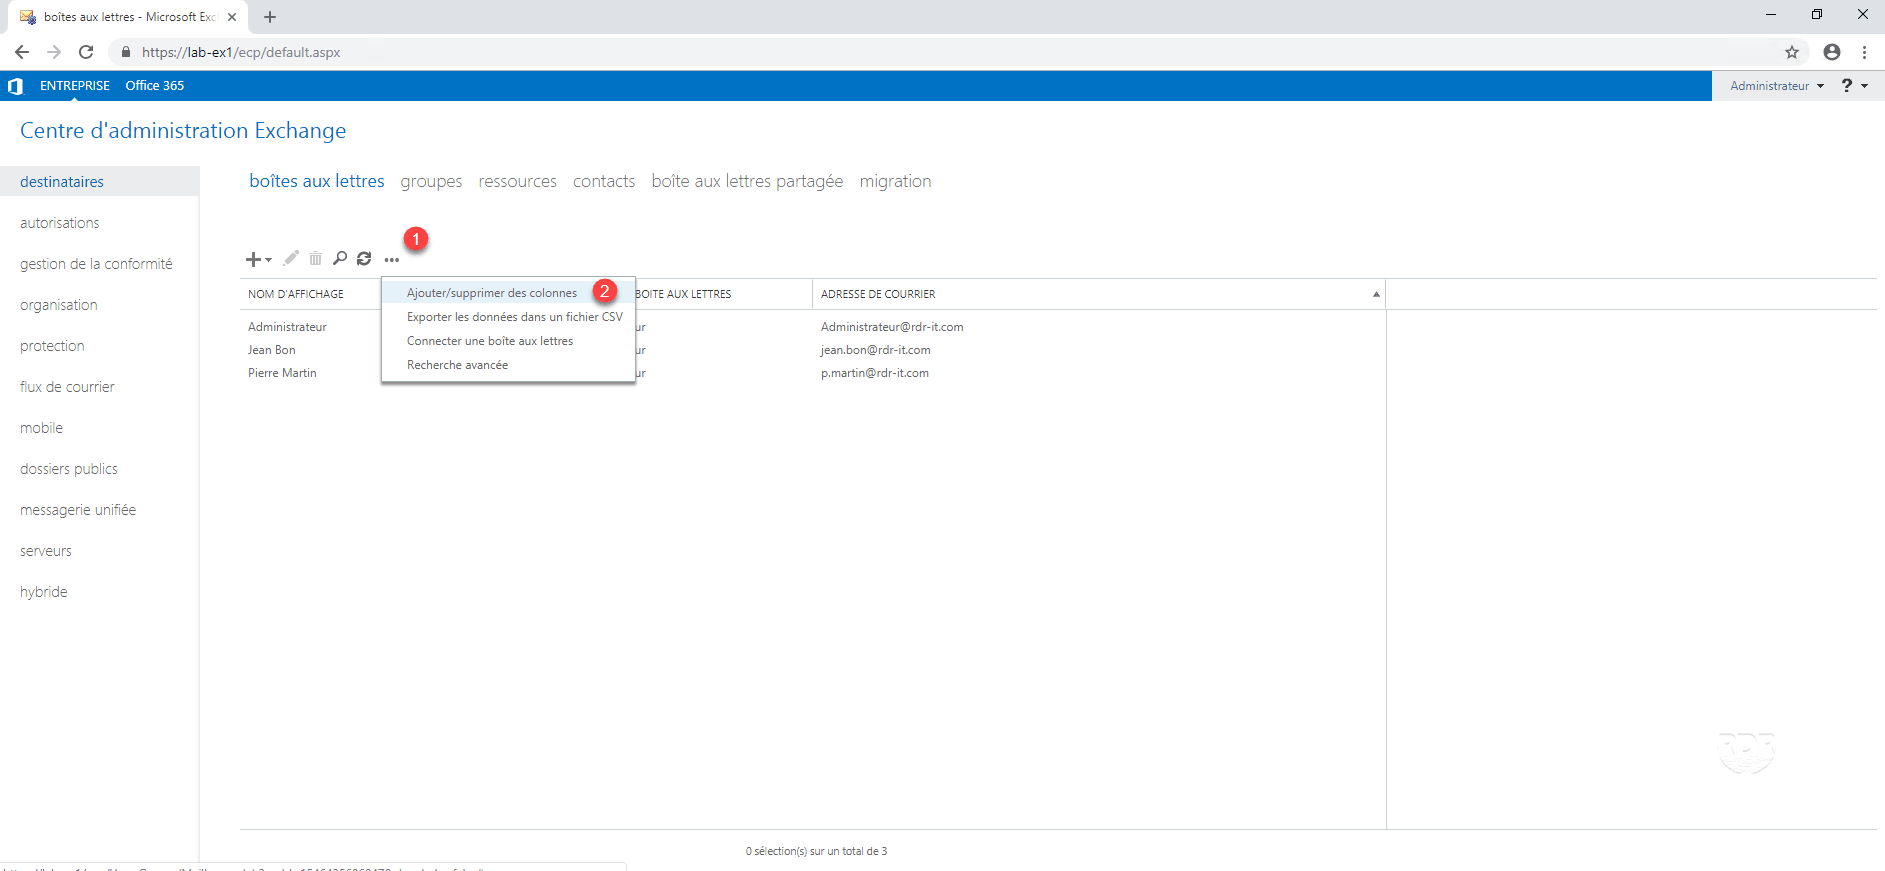
2. Check DATABASE 1 and click OK 2 .
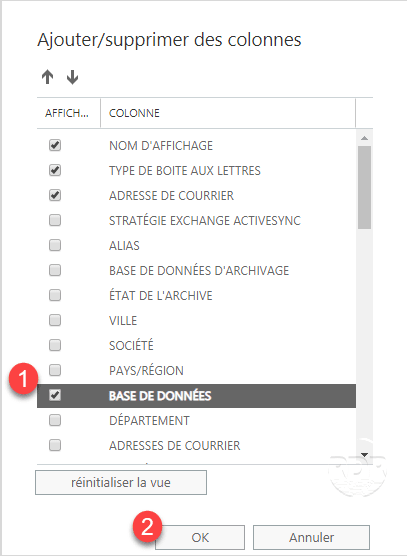
3. The database is now visible for each mailbox.
Configuration: give access to an email box for another user
Request that comes back regularly is to be able to give access to a mailbox of another user.
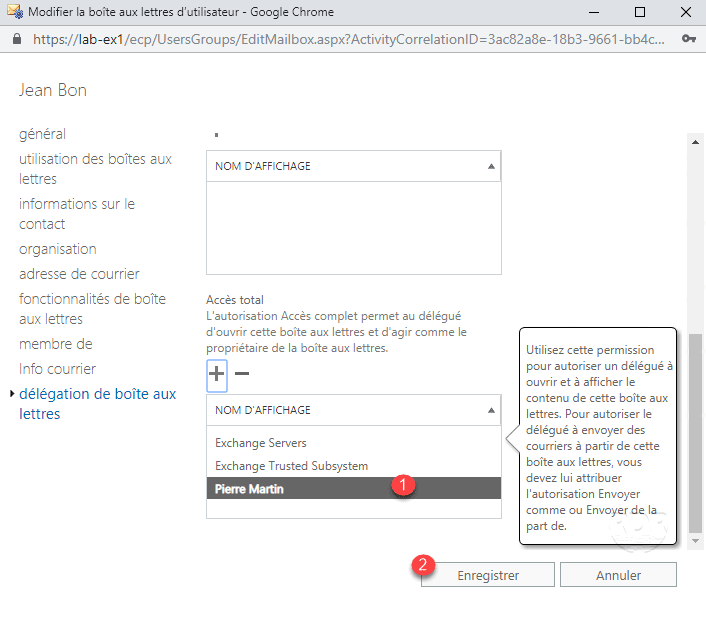
1. From the ECP, go to the list of mailboxes, select the box to be seen by another user 1 and click on the edit icon 2 .
2. Go to mailbox delegation 1 then Total access 2 . Click on the + 3 .
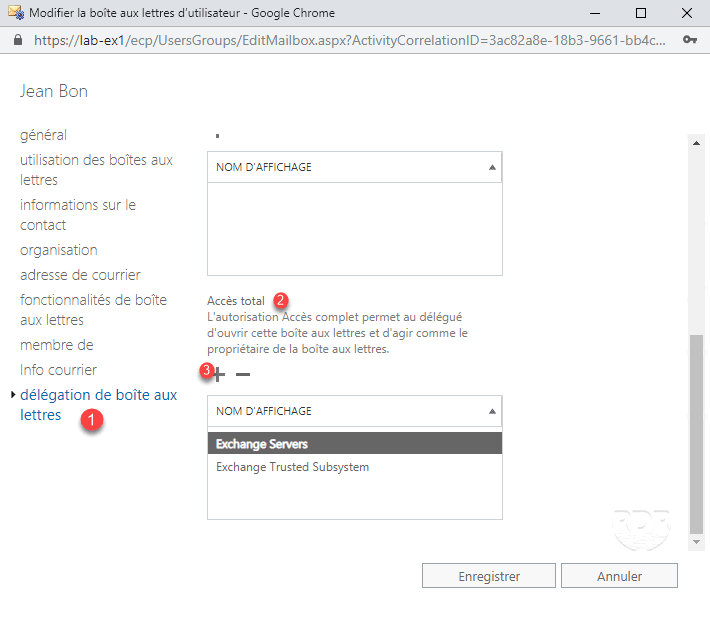
3. Select the user who must have access to box 1 , click on add -> 2 then on OK 3 .
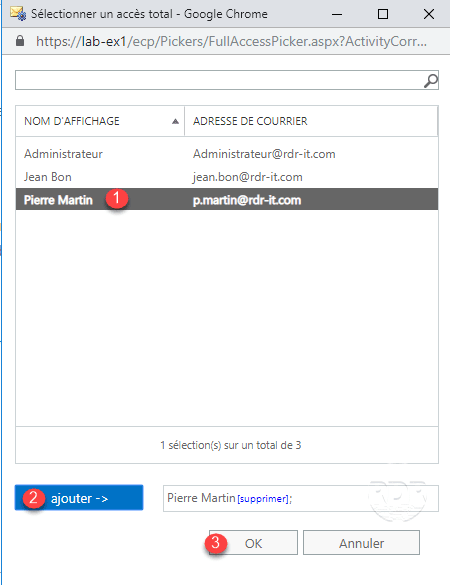
4. The user is added to access 1 , click on Save 2 .
Test the user part of Exchange
Test: connection to webmail
We will now check the functioning of the webmail part.
1. Open an internet browser and enter the address https://fqdn-du-serveur-exchange/owa
2. Enter the credentials of a user with a mailbox.
To connect to the webmail, you must use the AD account and not the e-mail address.
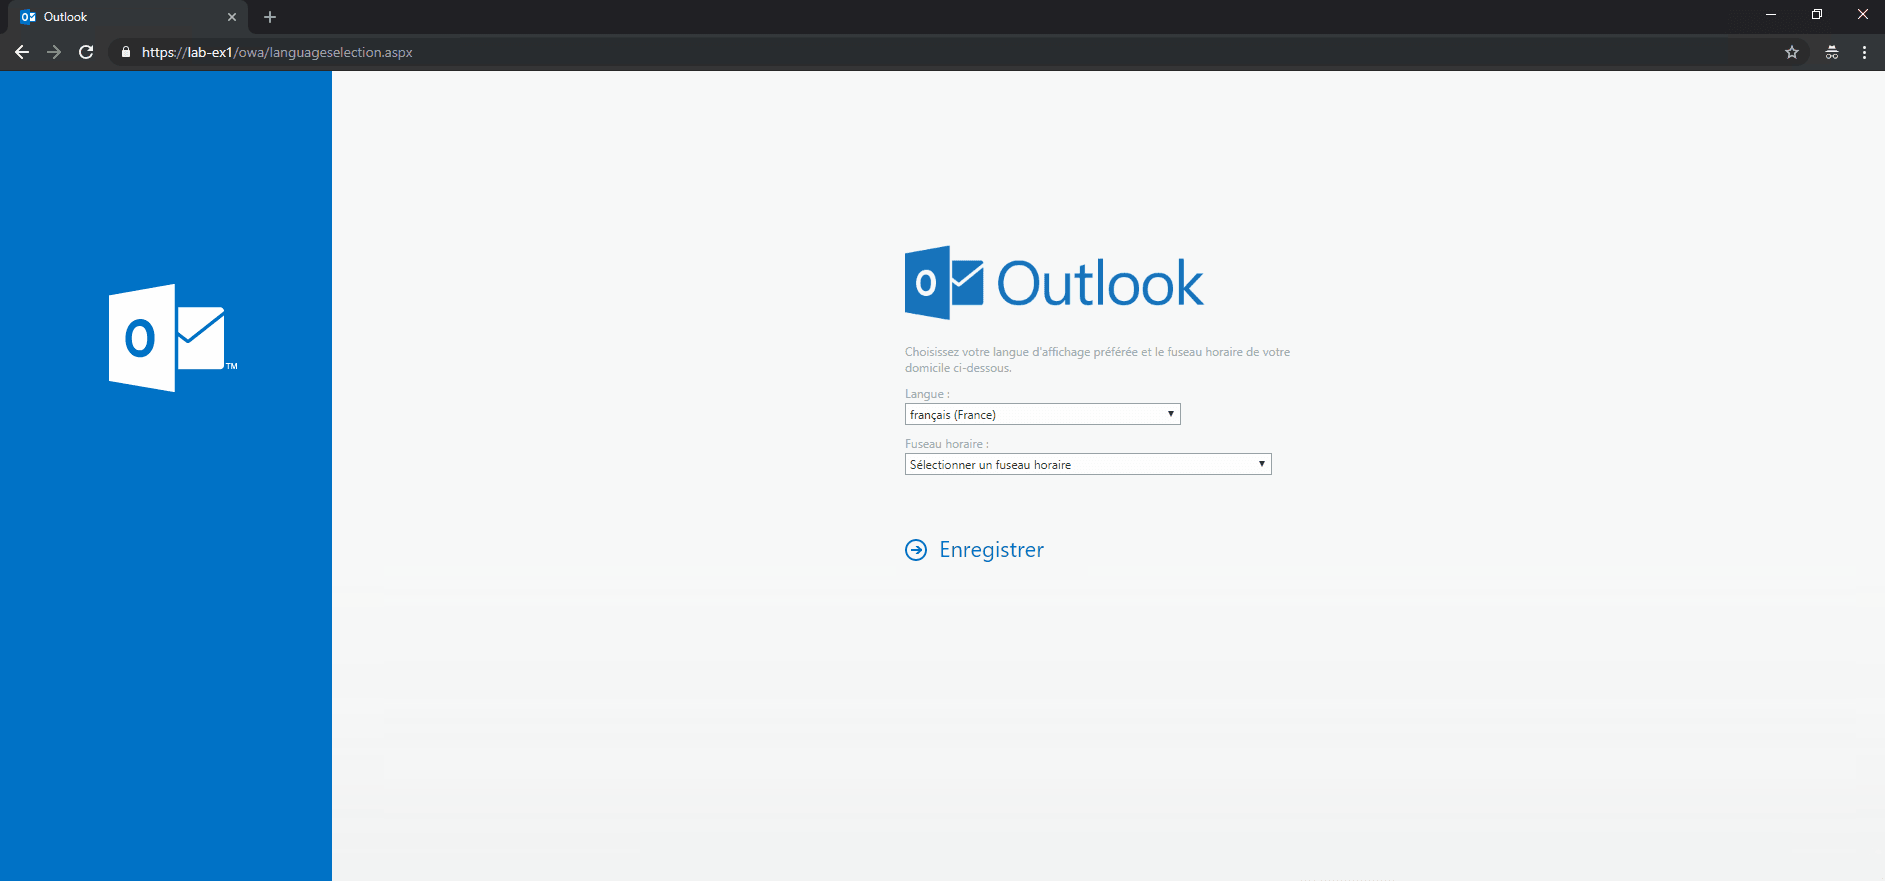
3. Configure the language and time zone.
4. The user can use his mail.
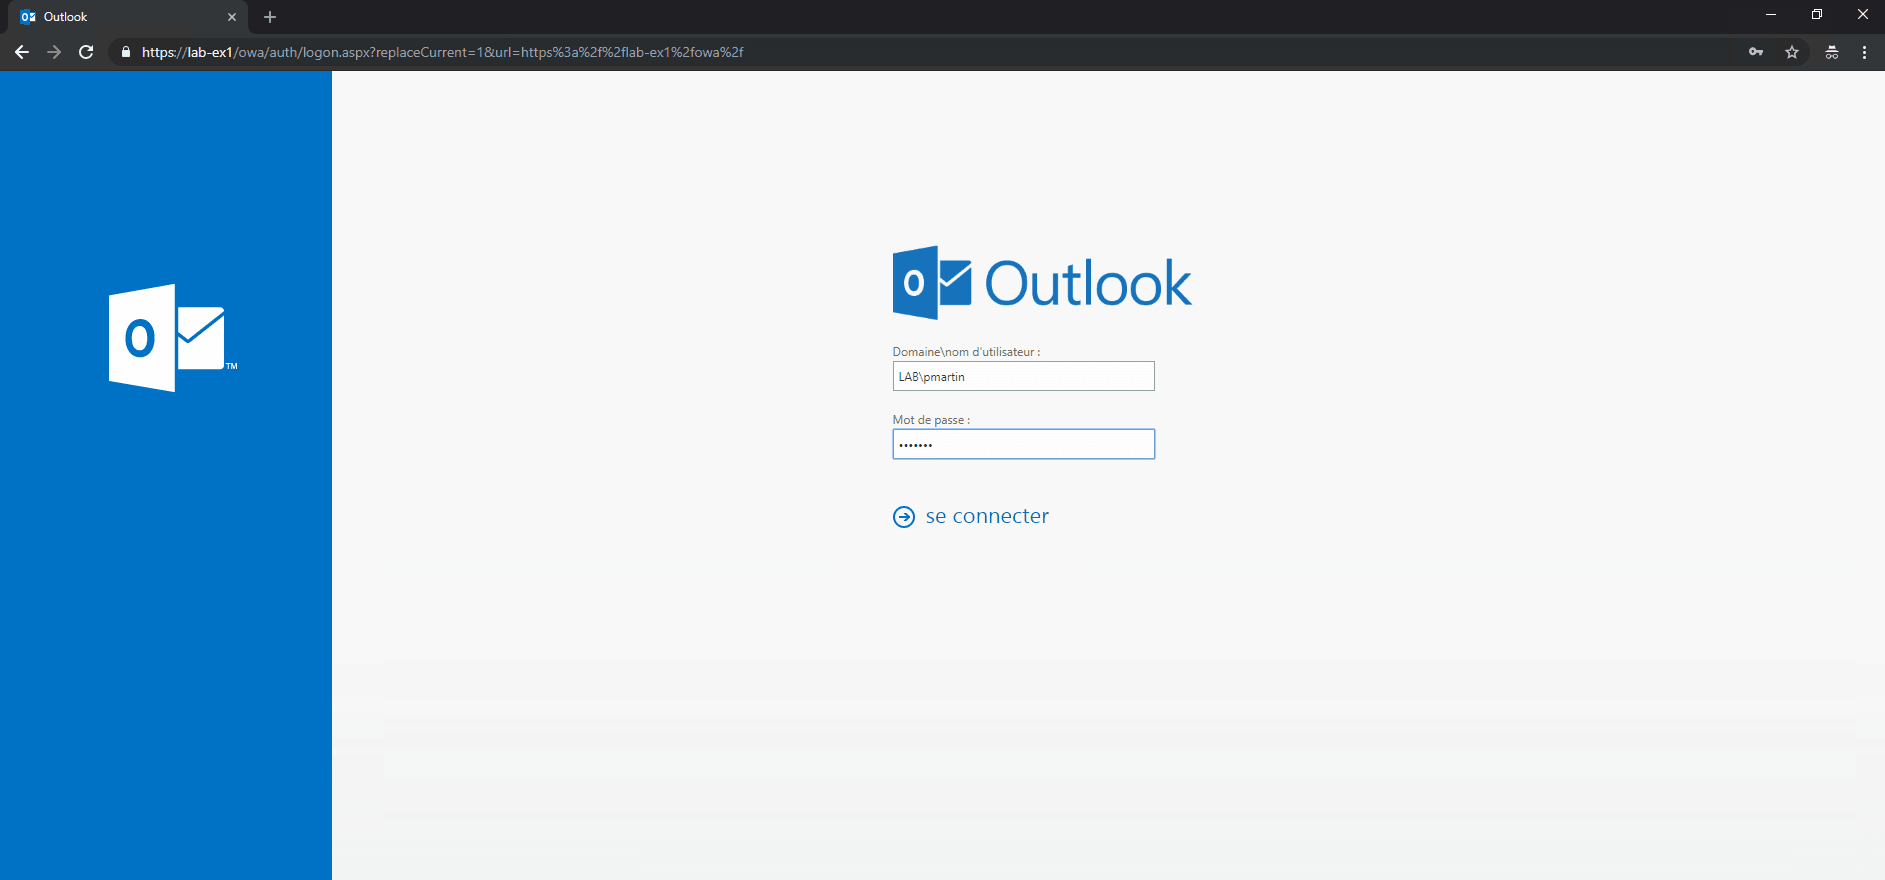
Test: access another box
Now that the user has access to the box, we will see how to consult it through the webmail.
For Outlook clients, the total access box will automatically be added to the user box.
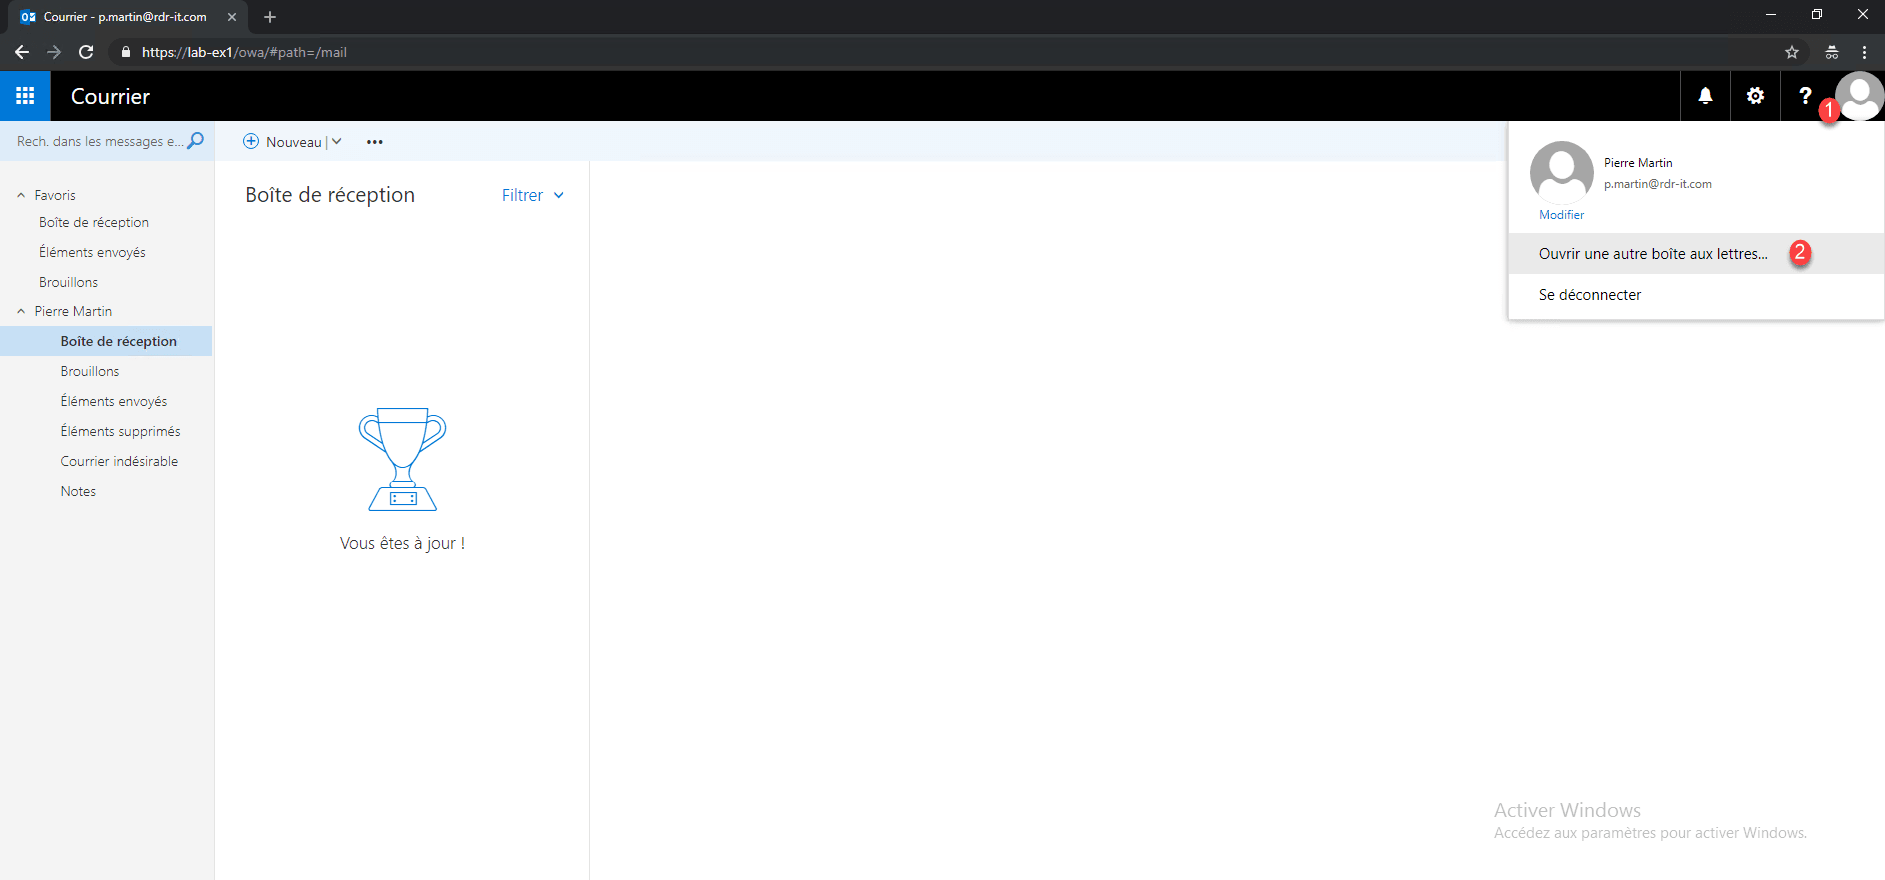
1. From the webmail, click on the avatar of the user 1 then on Open another mailbox 2 .
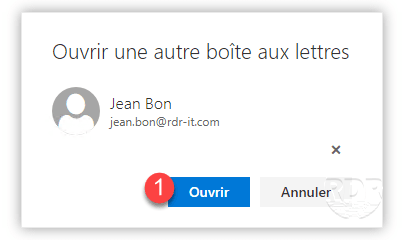
2. Enter the name of the mailbox and click on Open 1 .
3. The mailbox opens in a new tab.

Test: Configuring an Outlook Client
In this part, we will see how to configure an Outlook client with Exchange 2016.
Environment:
- Post under Windows 7 in the field
- Outlook 2016
- Using a user account with mailbox.
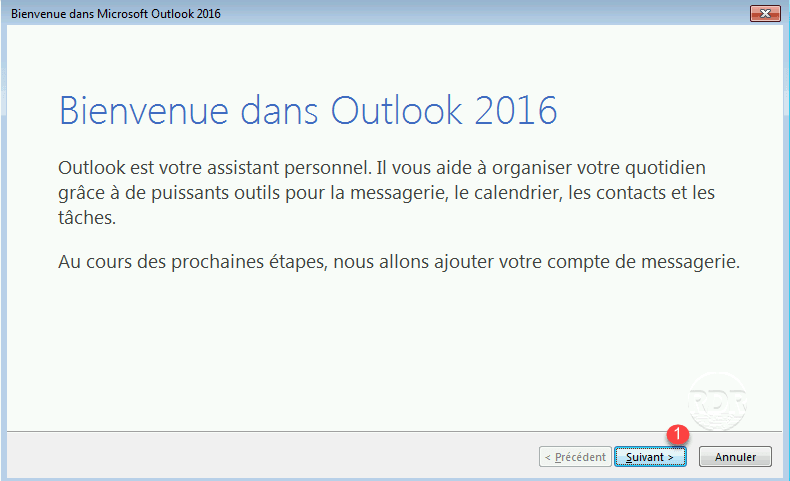
1. Start Outlook.
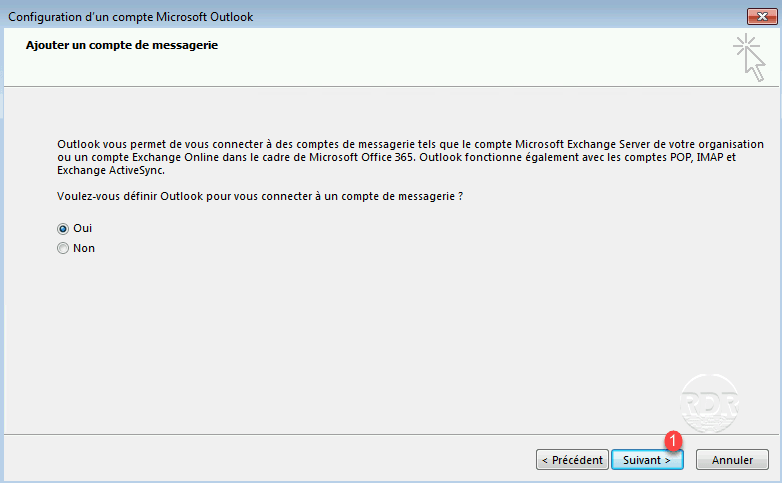
2. Skip the Welcome window by clicking Next 1 .
3. Click Next 1 .
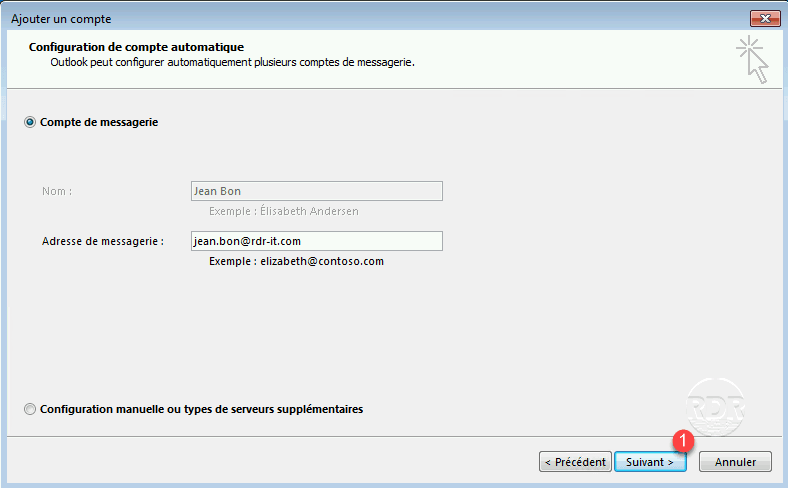
4. Outlook should automatically recover the name and email address for the account. Click Next 1 .
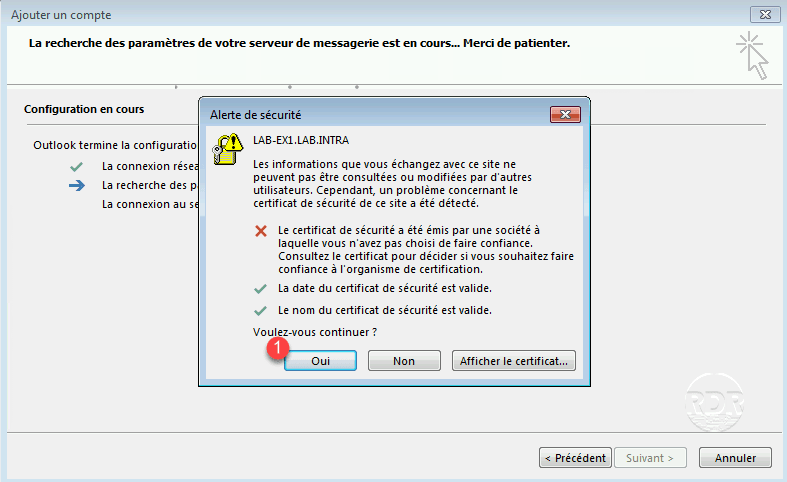
5. Validate the certificate alert by clicking Yes 1 .
6. Once the automatic configuration is found, click on Finish 1 .
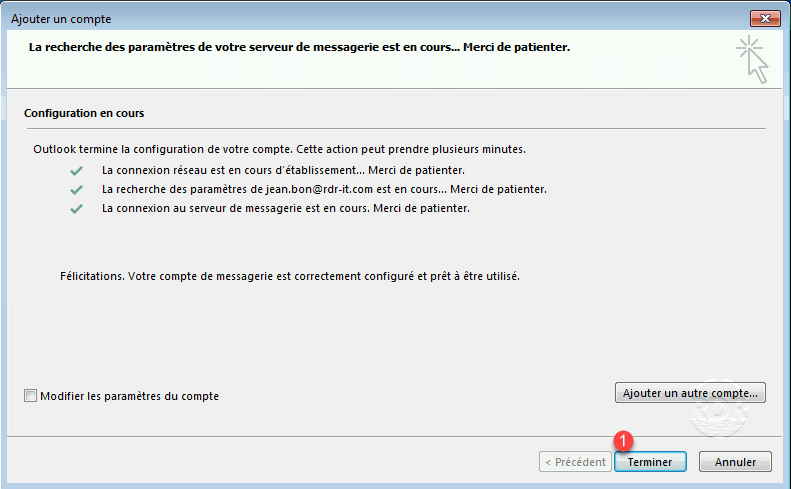
7. Wait while opening Outlook.

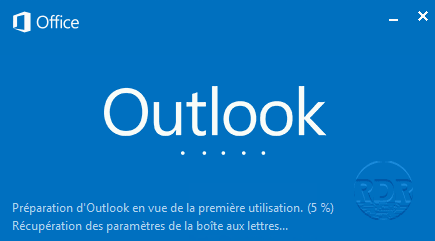
8. The box is open.

Verify the connection with Exchange 2016
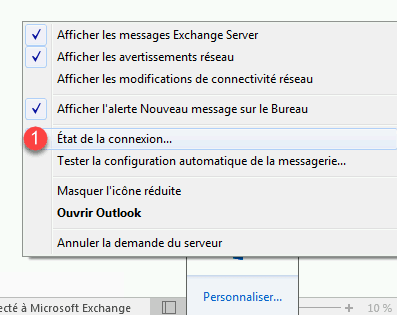
1. In the notification area, right-click on the Outlook icon by holding down the Ctrl key and clicking Connection Status 1 .
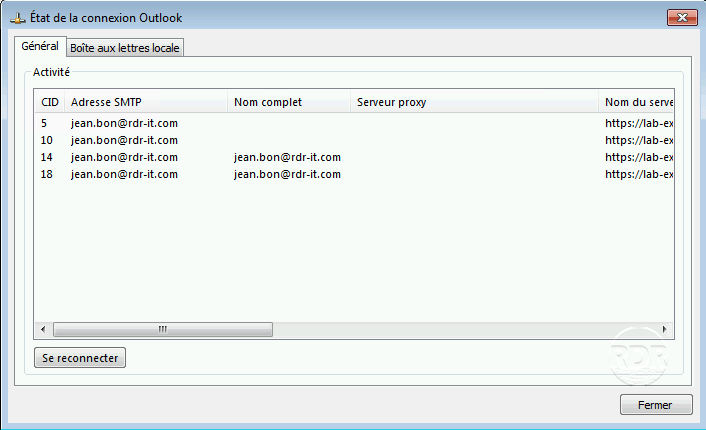
2. We see the connections to the Exchange 2016 server.
Conclusion
The tutorial stops here, your Exchange 2016 server is now operational but the configuration is far from finished (more tutorials will follow and I’ll put the links here).
In order to use your server here is what remains to be done at least:
- Change the MX record of your domain to your public IP
- Add an SPF record on your domain with the public IP output from the Exchange server on port 25.
- Configure an SSL certificate (it is possible to use a certificat Let’s encryt).
- Configure incoming flows
- …
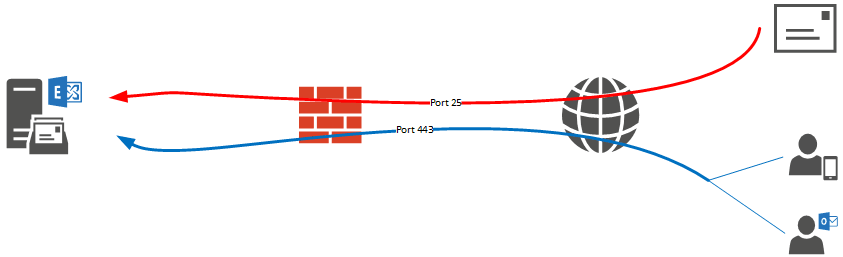
If you are migrating internally, ask your ISP before if port 25 is open, Orange by default blocks it.