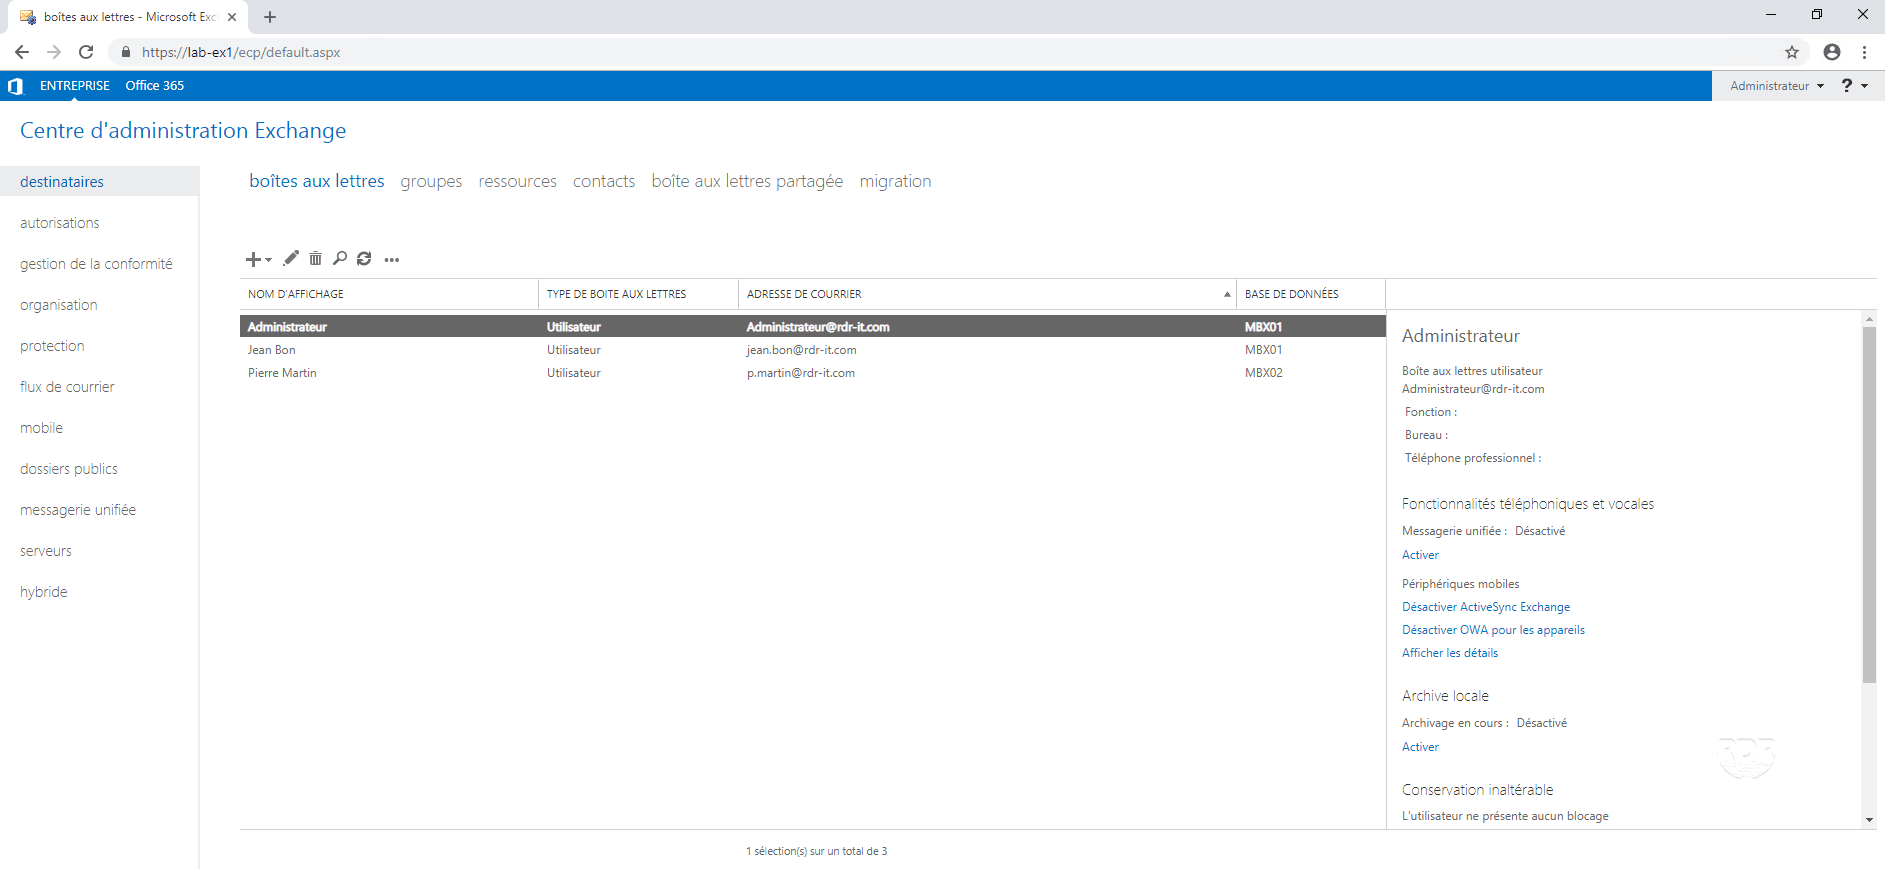
Exchange Email Administration
Administration – add a mailbox – example 1
In this first example, we will see how to add a mailbox to an existing user, without having yet changed the mail address policy.
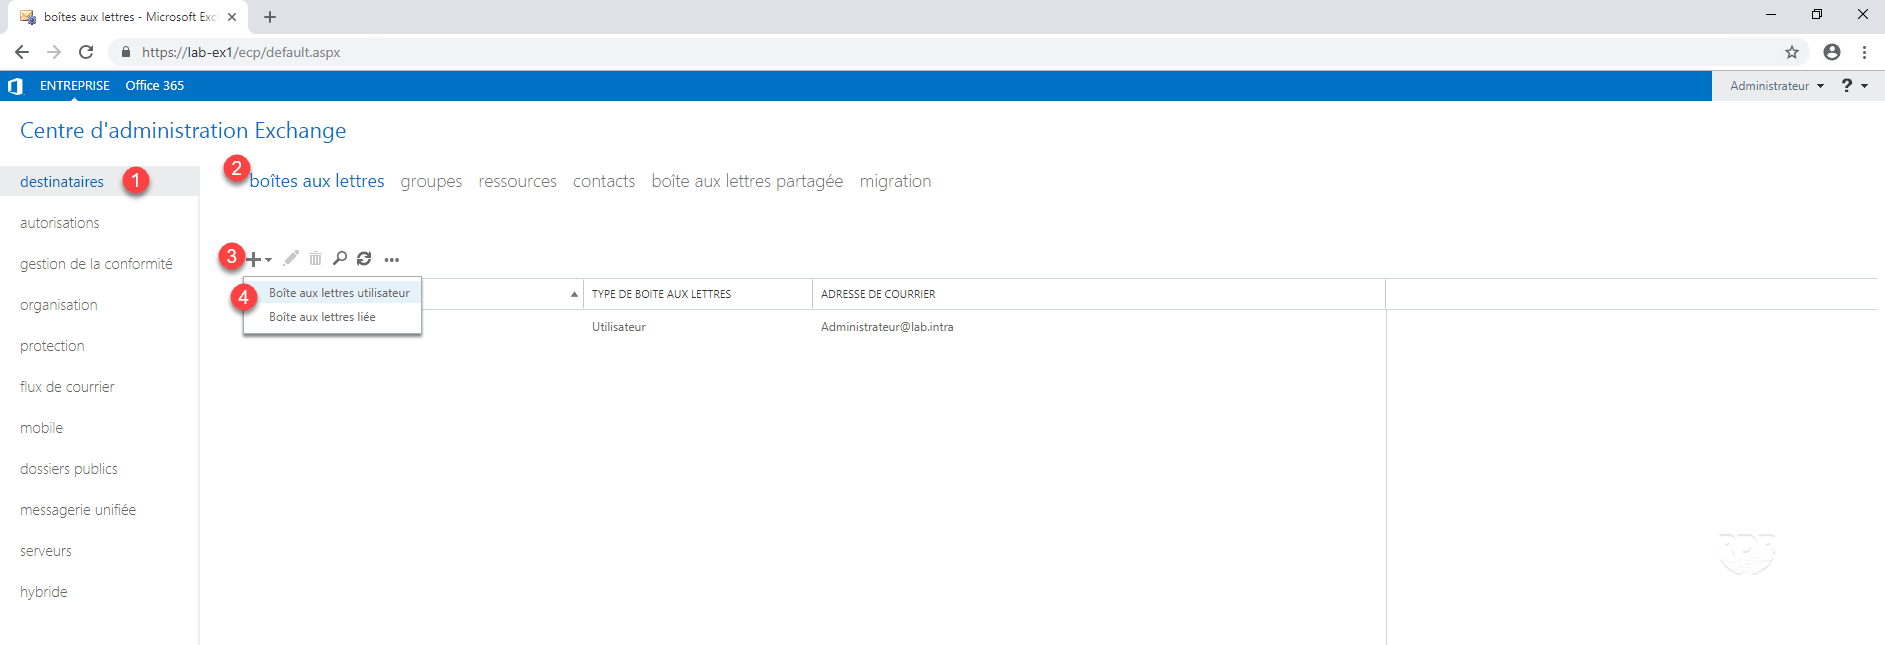
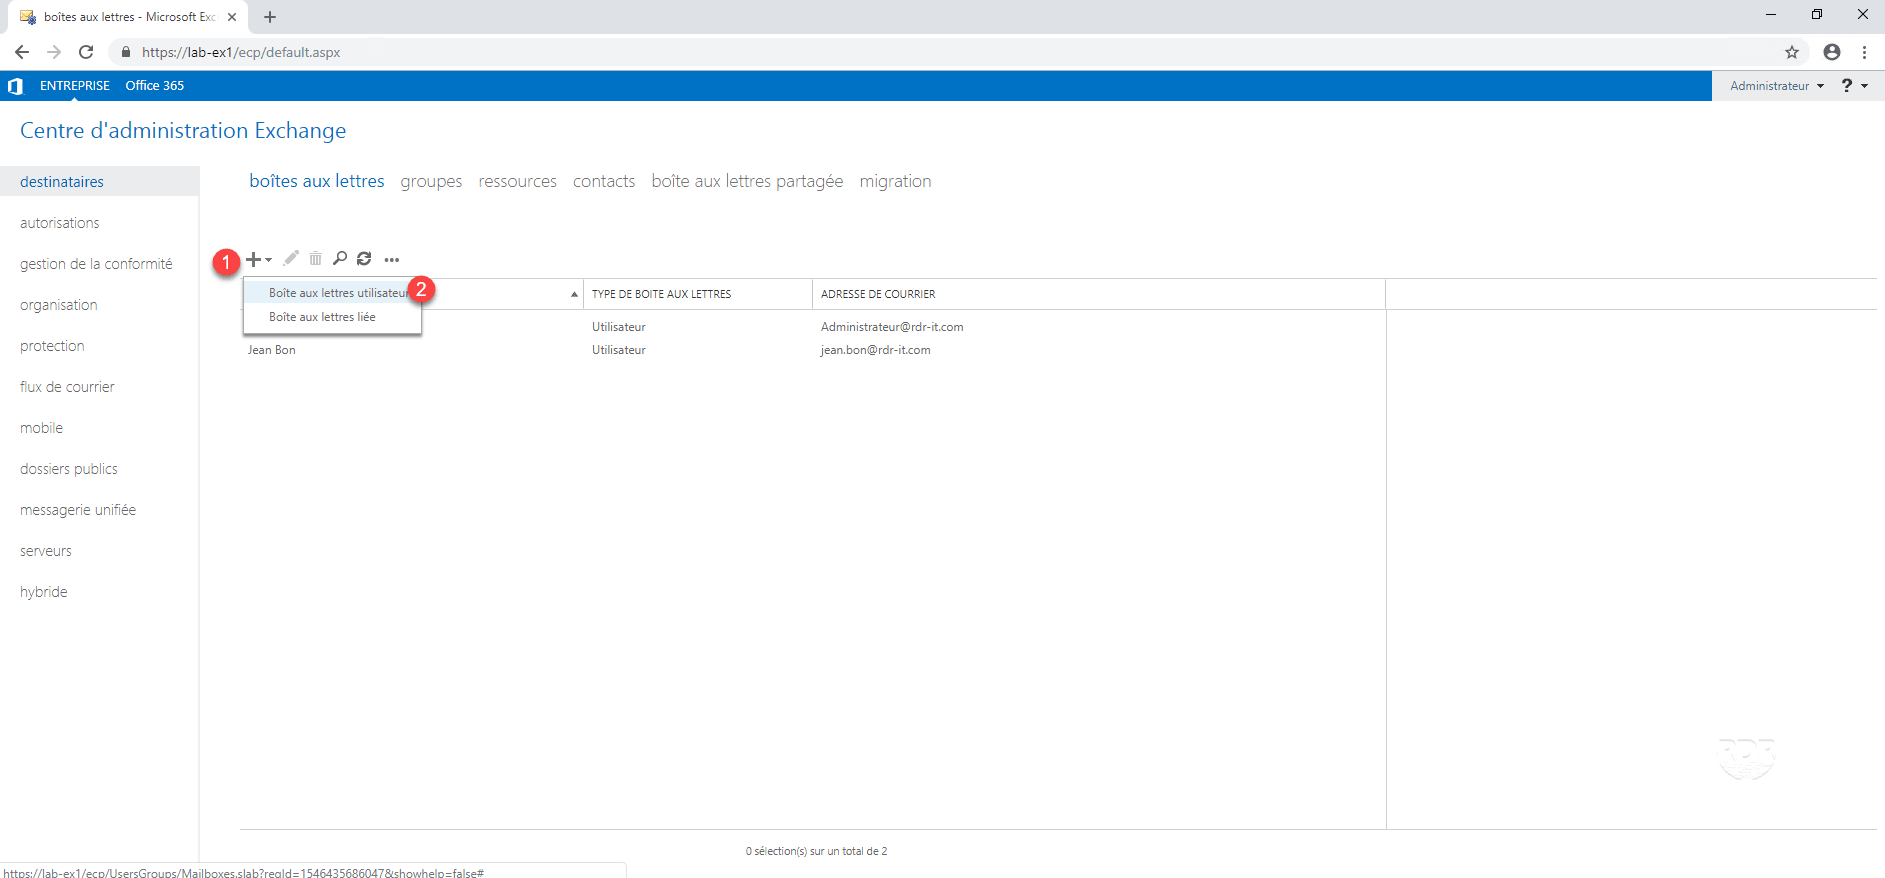
1. From the ECP interface, go to recipients 1 / mailbox 2 , click on the add icon 3 then user mailbox 4 .
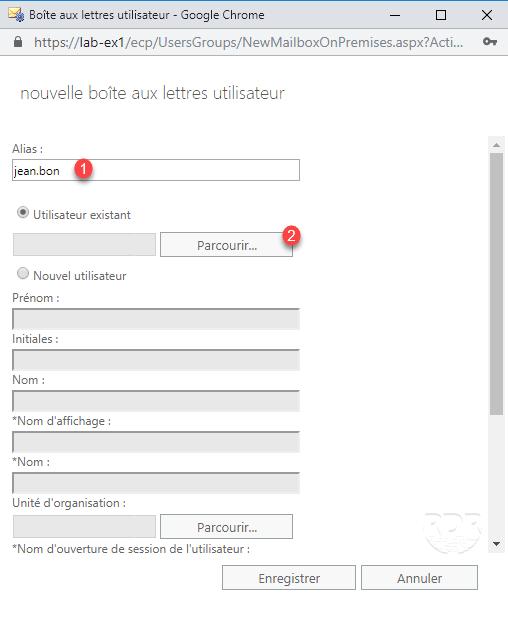
2. Enter the alias (part before the domain) of the user 1 and click on 2.
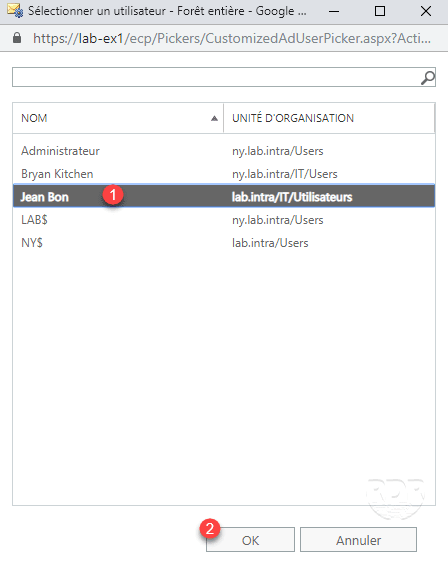
3. Select the corresponding AD user 1 and click OK 2 .
4. Click Save 1 to create the mailbox.

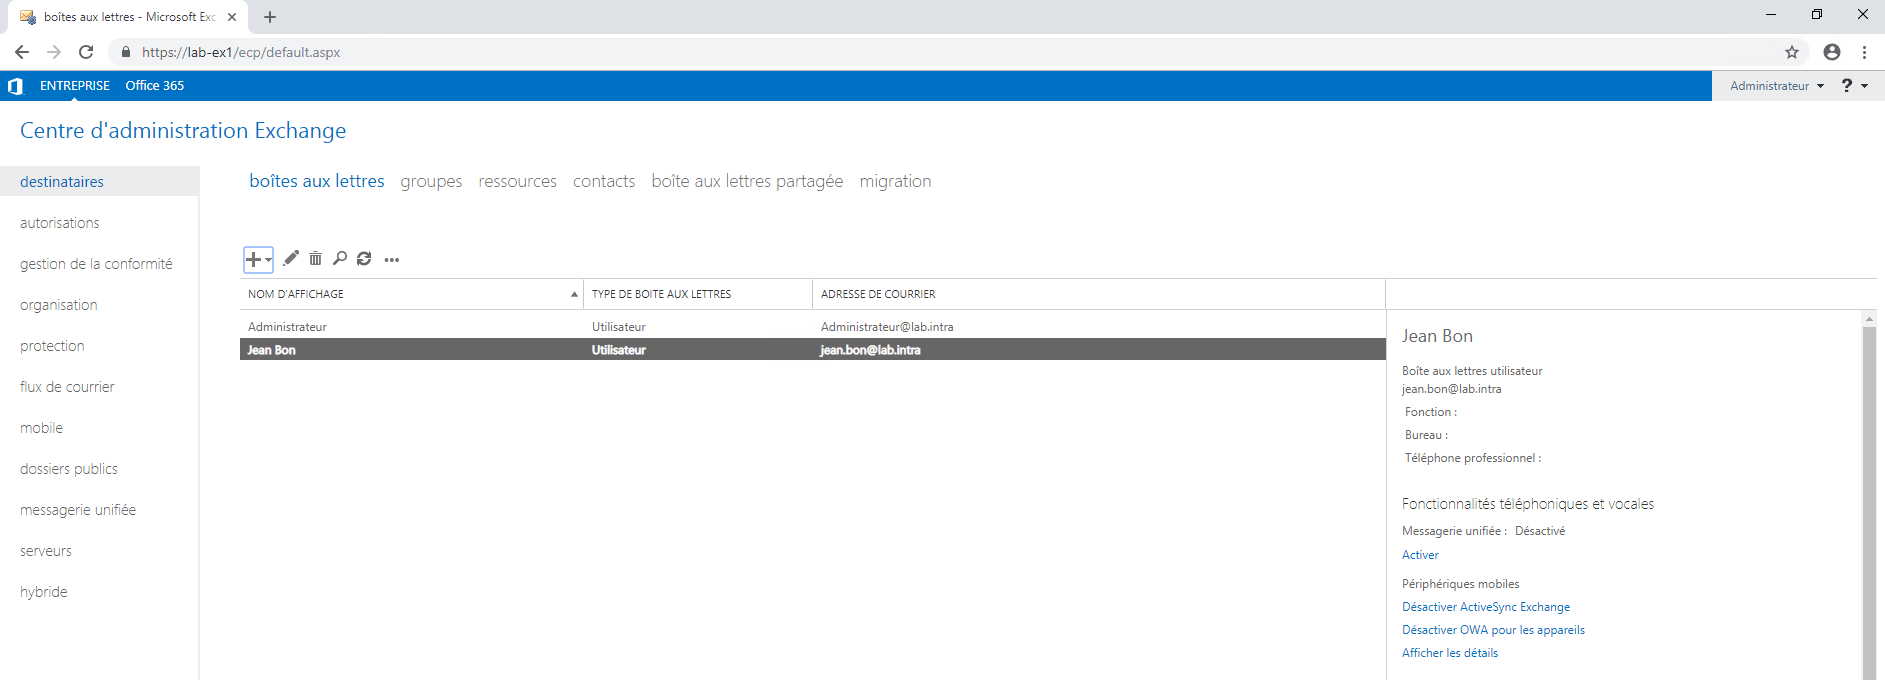
5. The mailbox is created, but on the old default domain.
The following is optional, I will just use this configuration to show you how to add an alias.
6. Select mailbox 1 , click on the edit icon 2 . On the new window, click on mail address 3 and on + 4 .
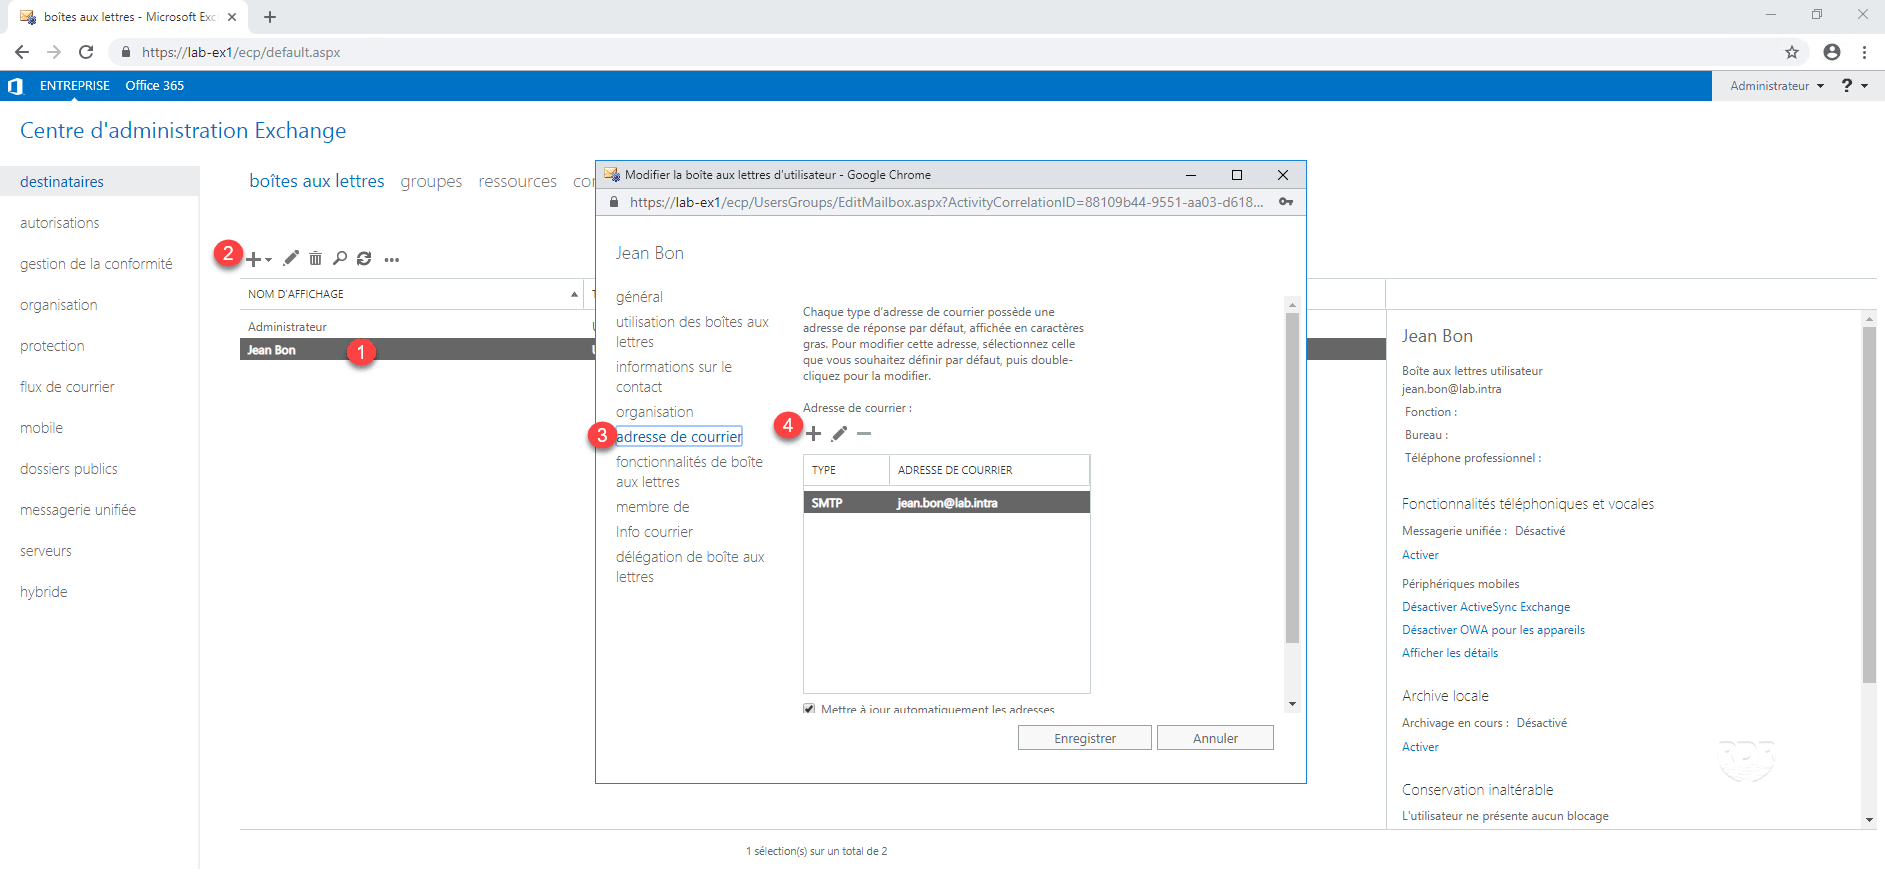
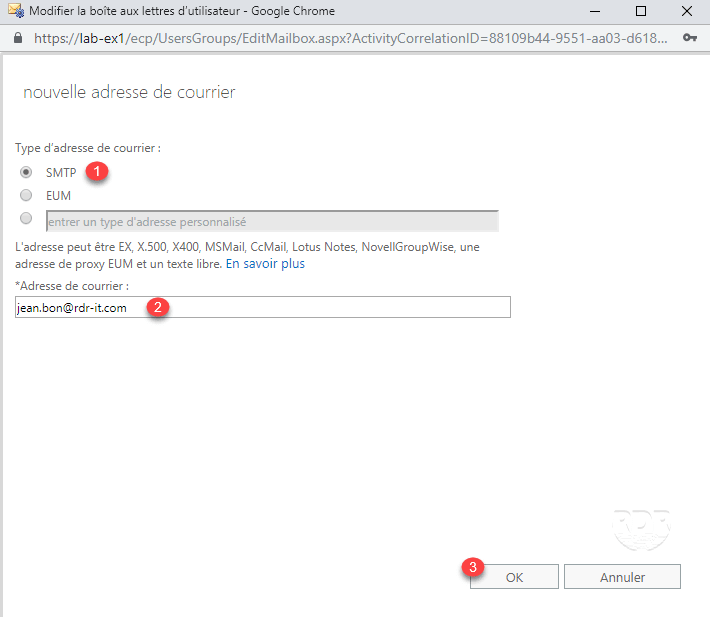
7. Address type, select SMTP 1 , enter address 2 and click OK 3 .
8. The address is added 1 , click on Save 2 .
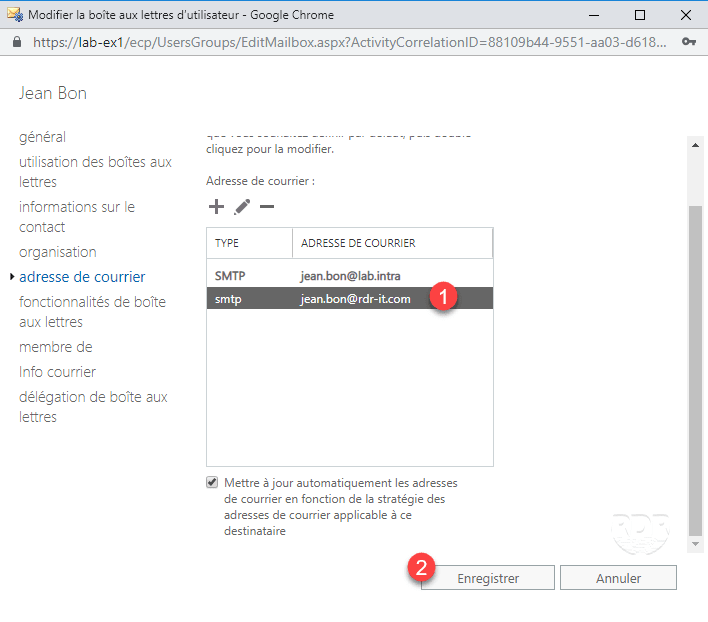
The address with the SMTP type is the main address.
If you do not want address policies enforced for a mailbox, you must clear the Automatically update mail addresses check box depending on the mail address policy that applies to that recipient.
Administration – add a mailbox – example 2
In this example, we will add a new user mailbox, directly creating the user using the ECP interface of Exchange 2016. This mailbox will be assigned to the database created in the previous point.
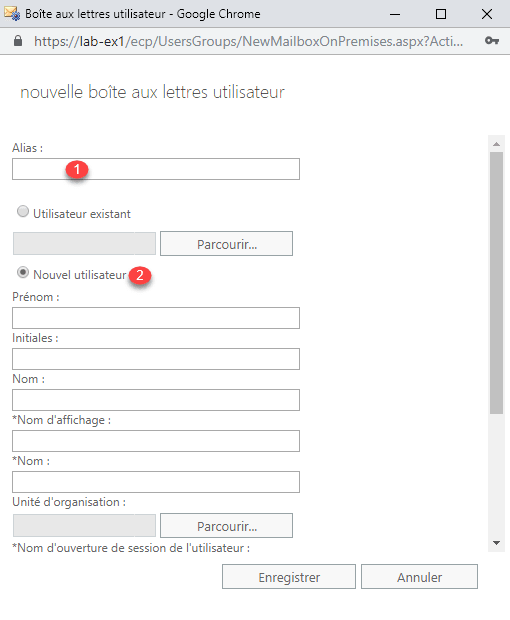
1. From the user interface, go to the mailboxes list, click on the + 1 and then on User mailboxes 2 .
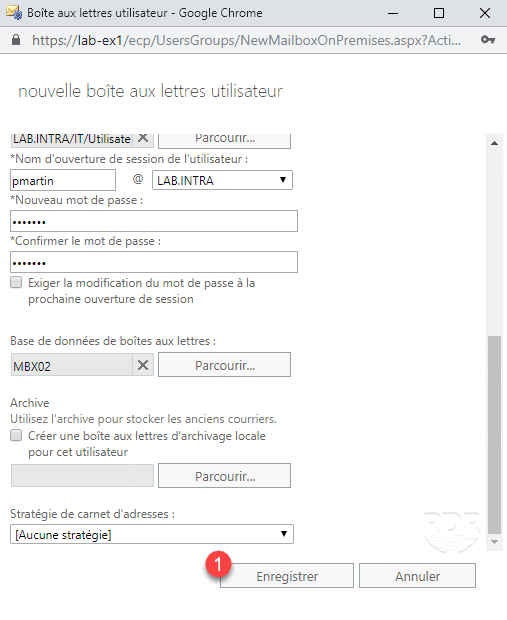
2. Enter the user alias 1 and select New user 2 . Enter Active Directory account information 3 then click More options 4 .
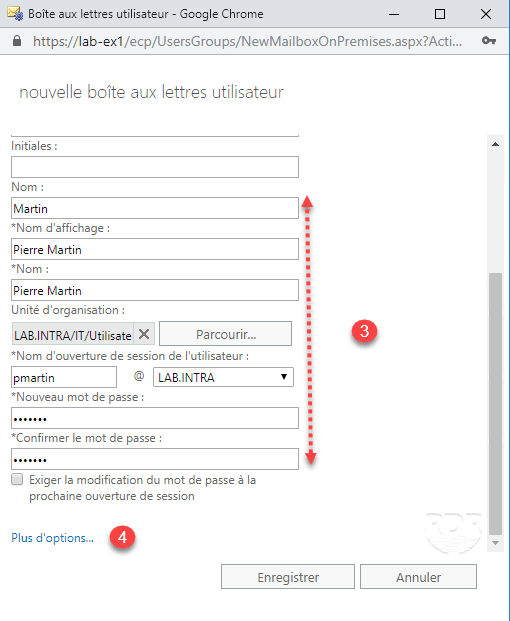
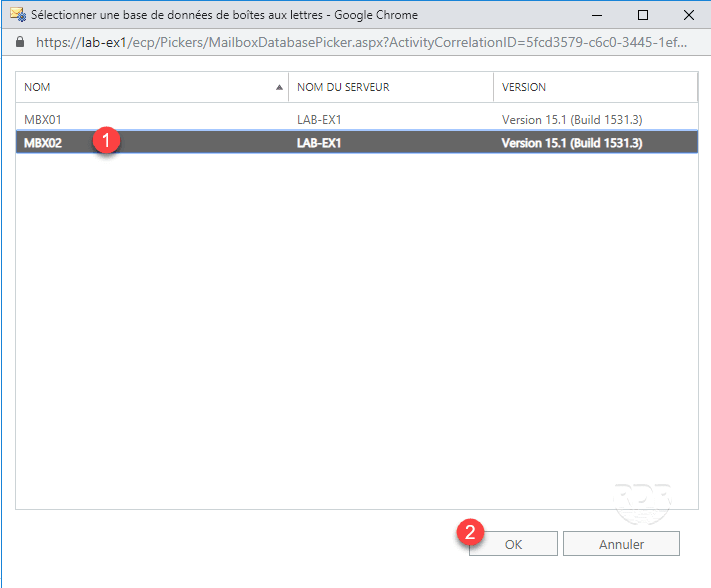
3. Click the Browse 1 button in the Mailbox Database option.
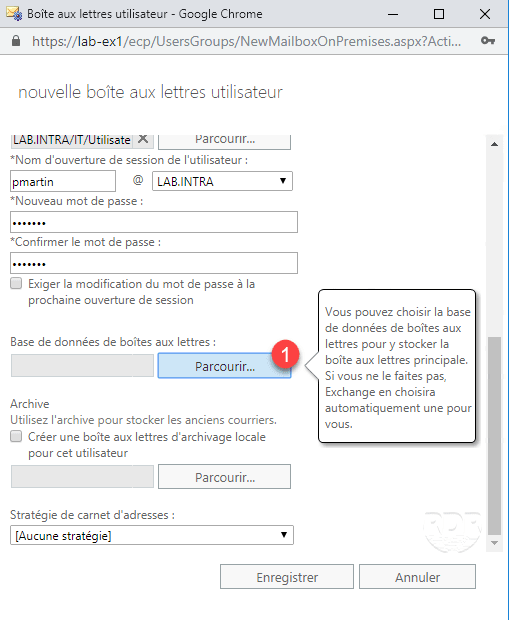
4. Choose the database 1 for the assignment of the mailbox and click OK 2 .
5. Click Save 1 to create the user in AD and the mailbox.
6. The user and the mailbox are created.
The following points are optional, I will explain how to display the database where the mailbox is located.
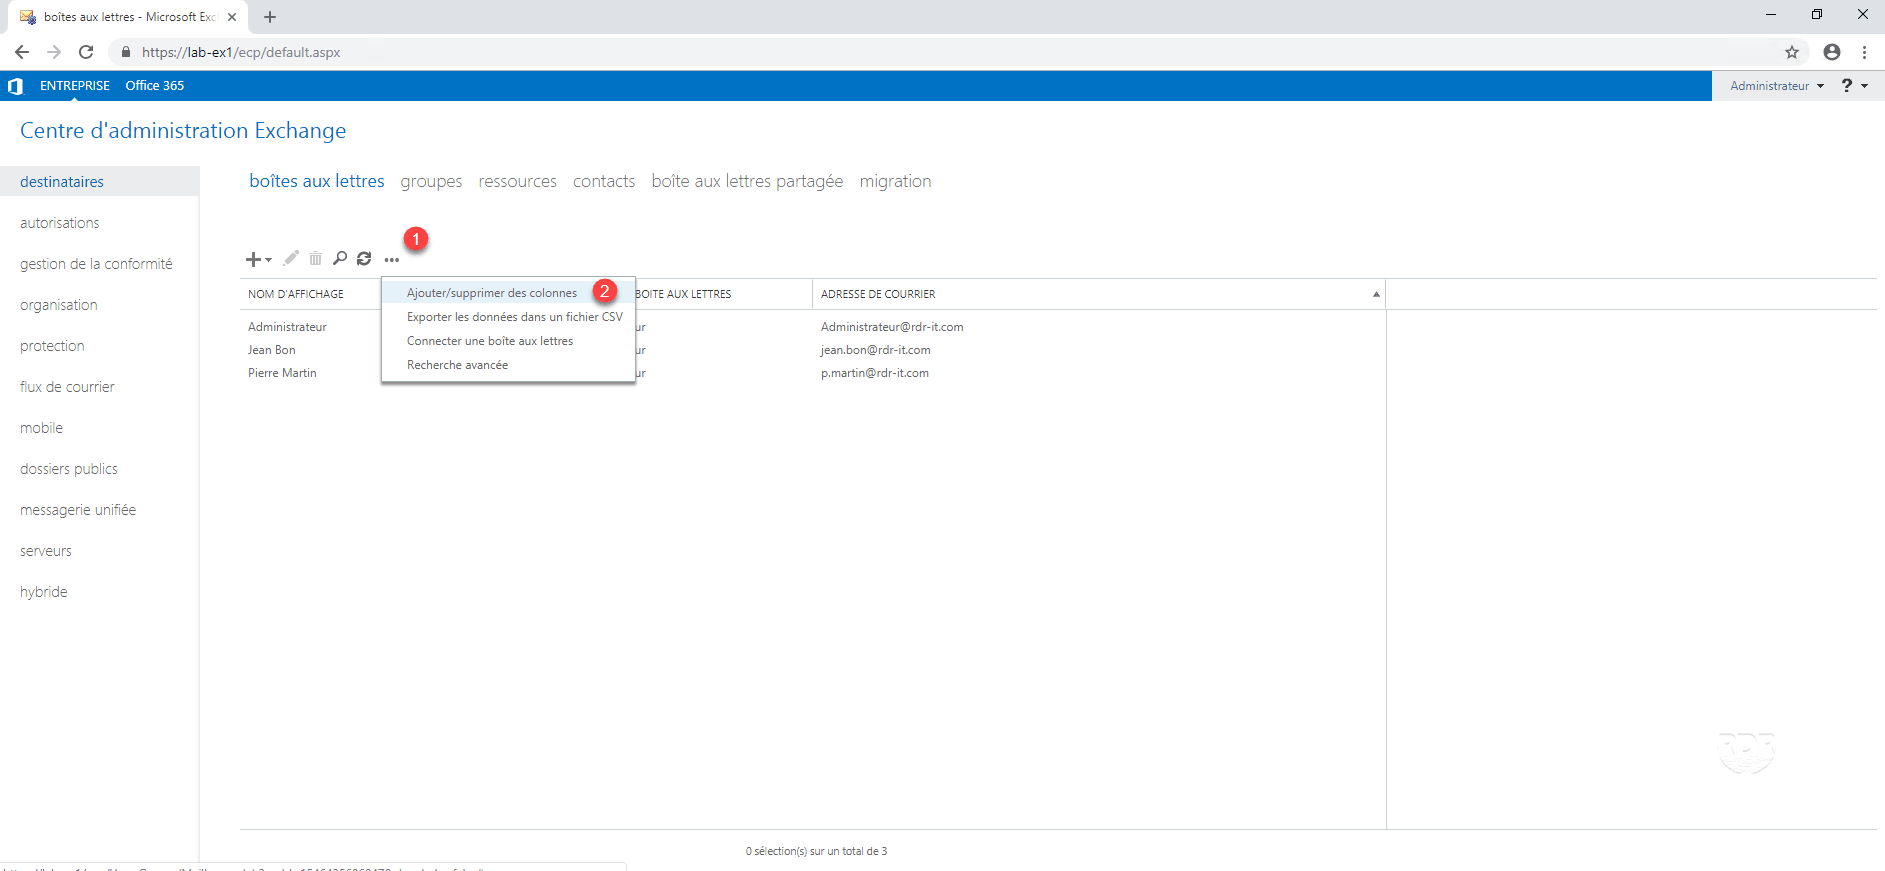
Customize the display of mailboxes
1. On the mailboxes page, click … 1 and then click Add / Remove columns 2 .
2. Check DATABASE 1 and click OK 2 .
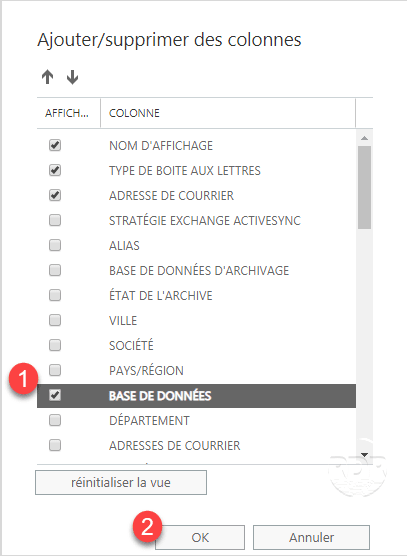
3. The database is now visible for each mailbox.
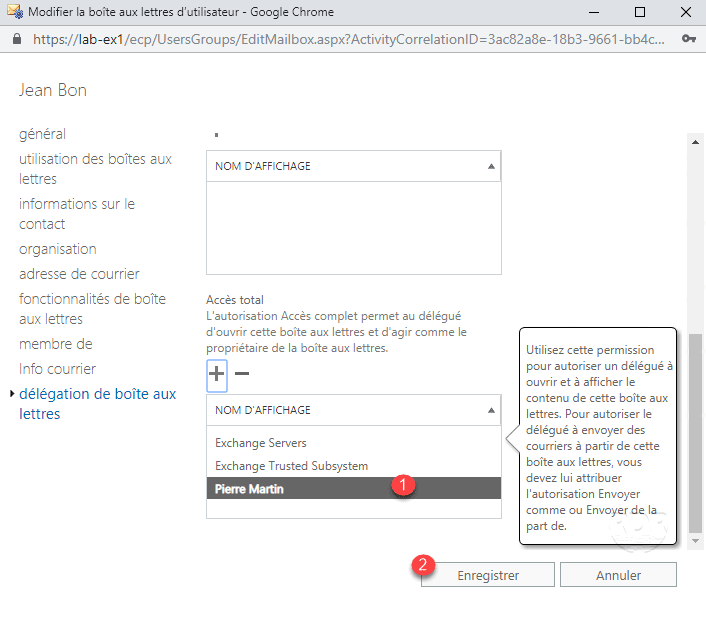
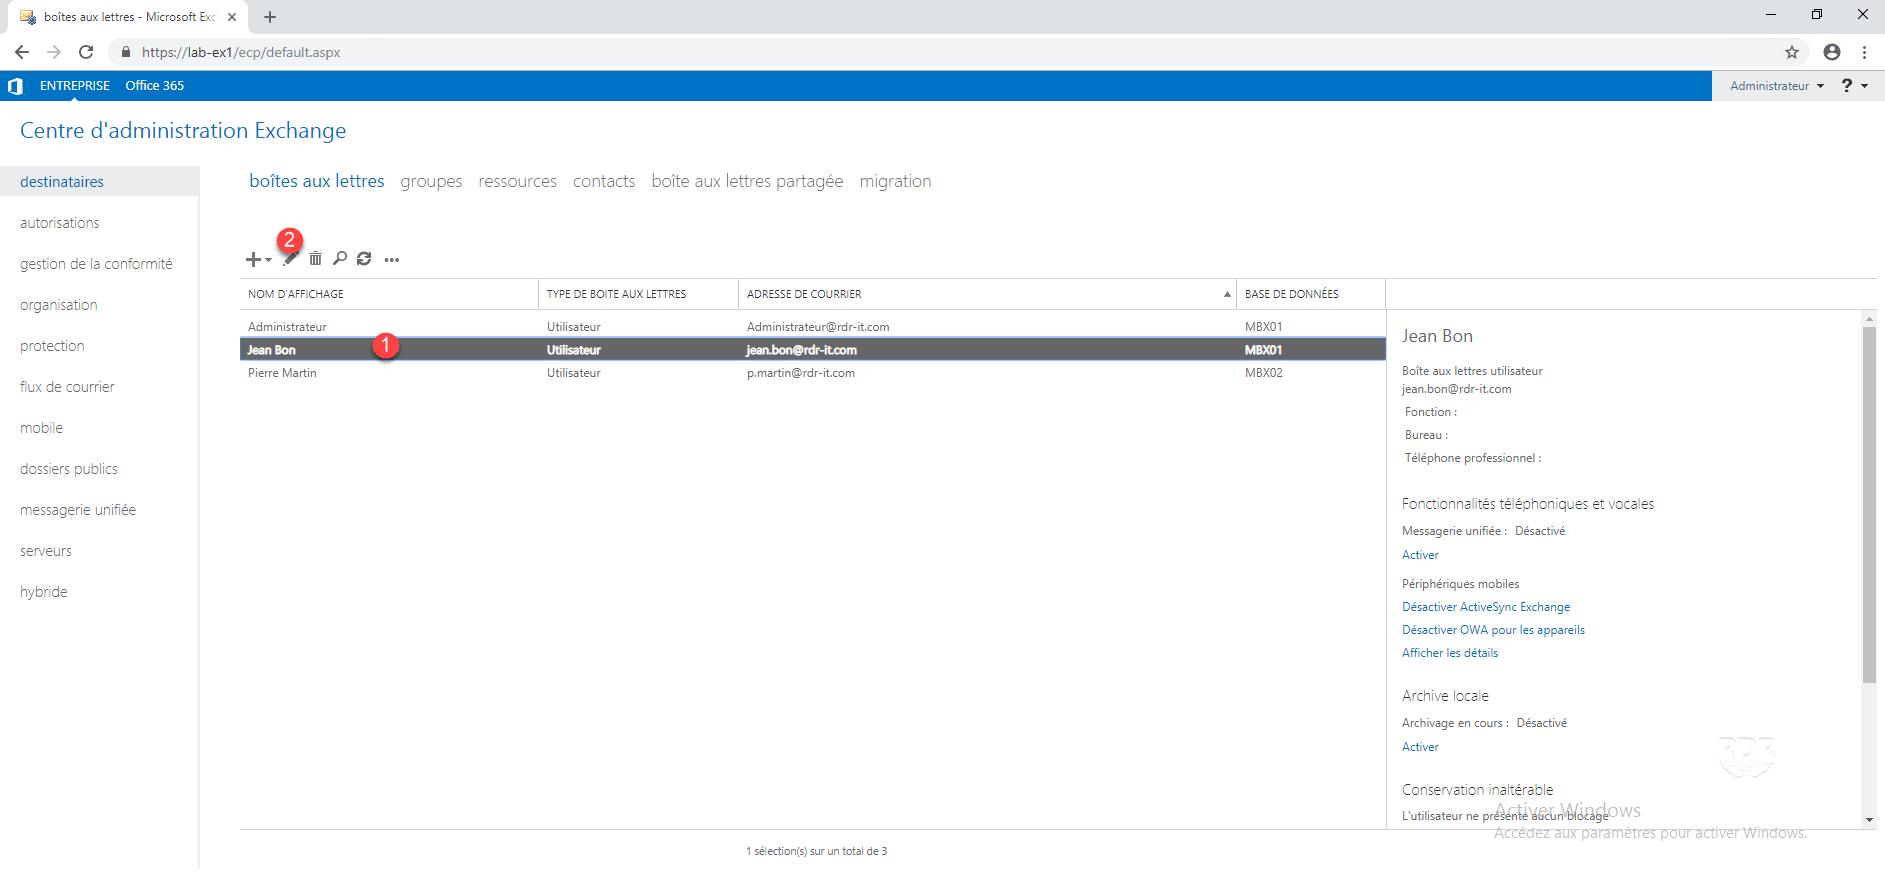
Configuration: give access to an email box for another user
Request that comes back regularly is to be able to give access to a mailbox of another user.
1. From the ECP, go to the list of mailboxes, select the box to be seen by another user 1 and click on the edit icon 2 .
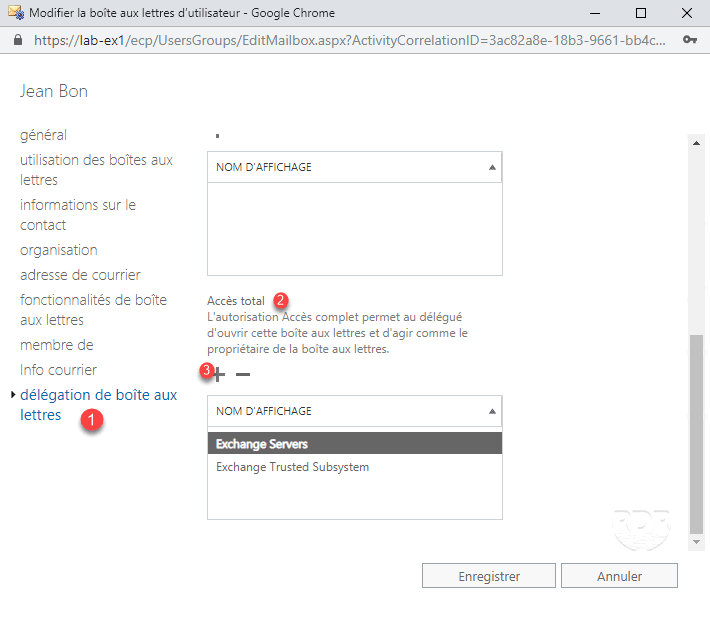
2. Go to mailbox delegation 1 then Total access 2 . Click on the + 3 .
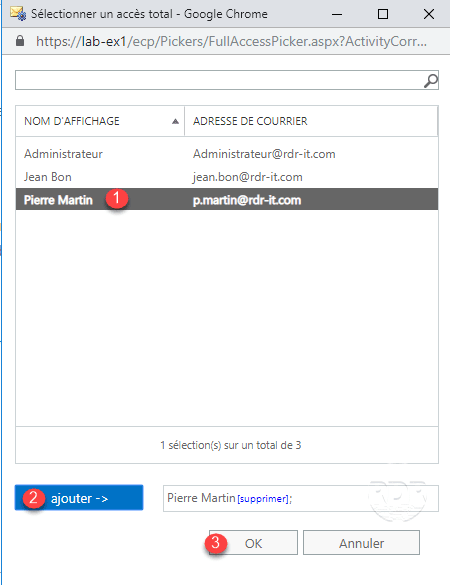
3. Select the user who must have access to box 1 , click on add -> 2 then on OK 3 .
4. The user is added to access 1 , click on Save 2 .