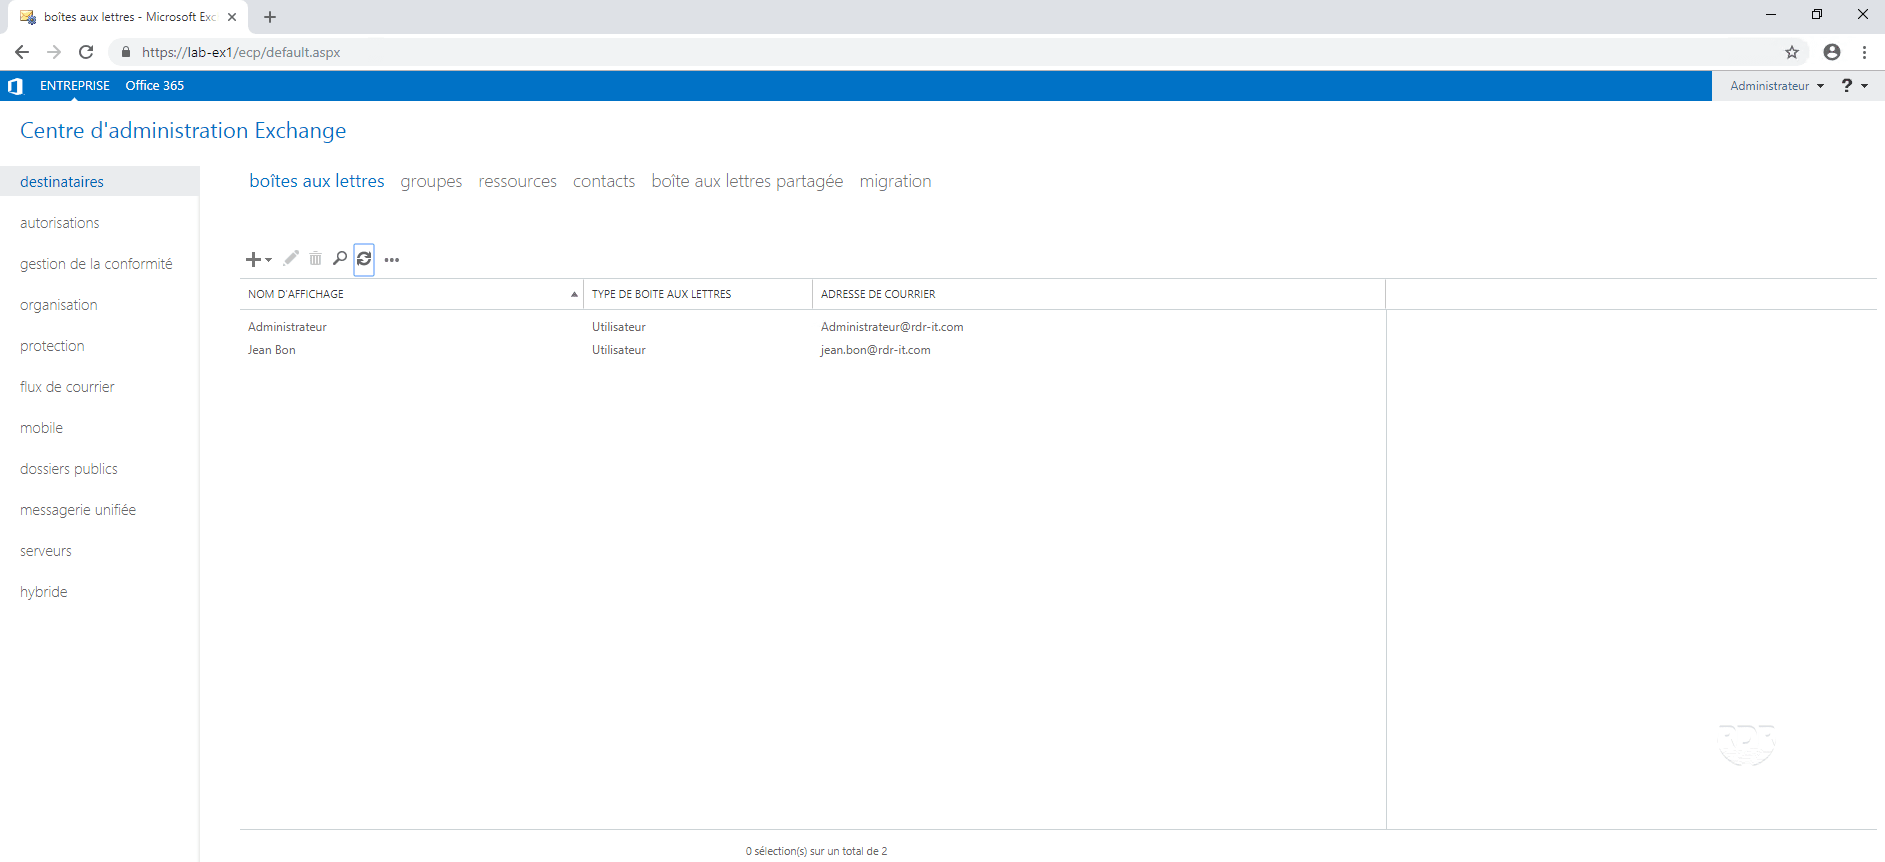
Basic configuration of Exchange Server
Configuration: rename the default database
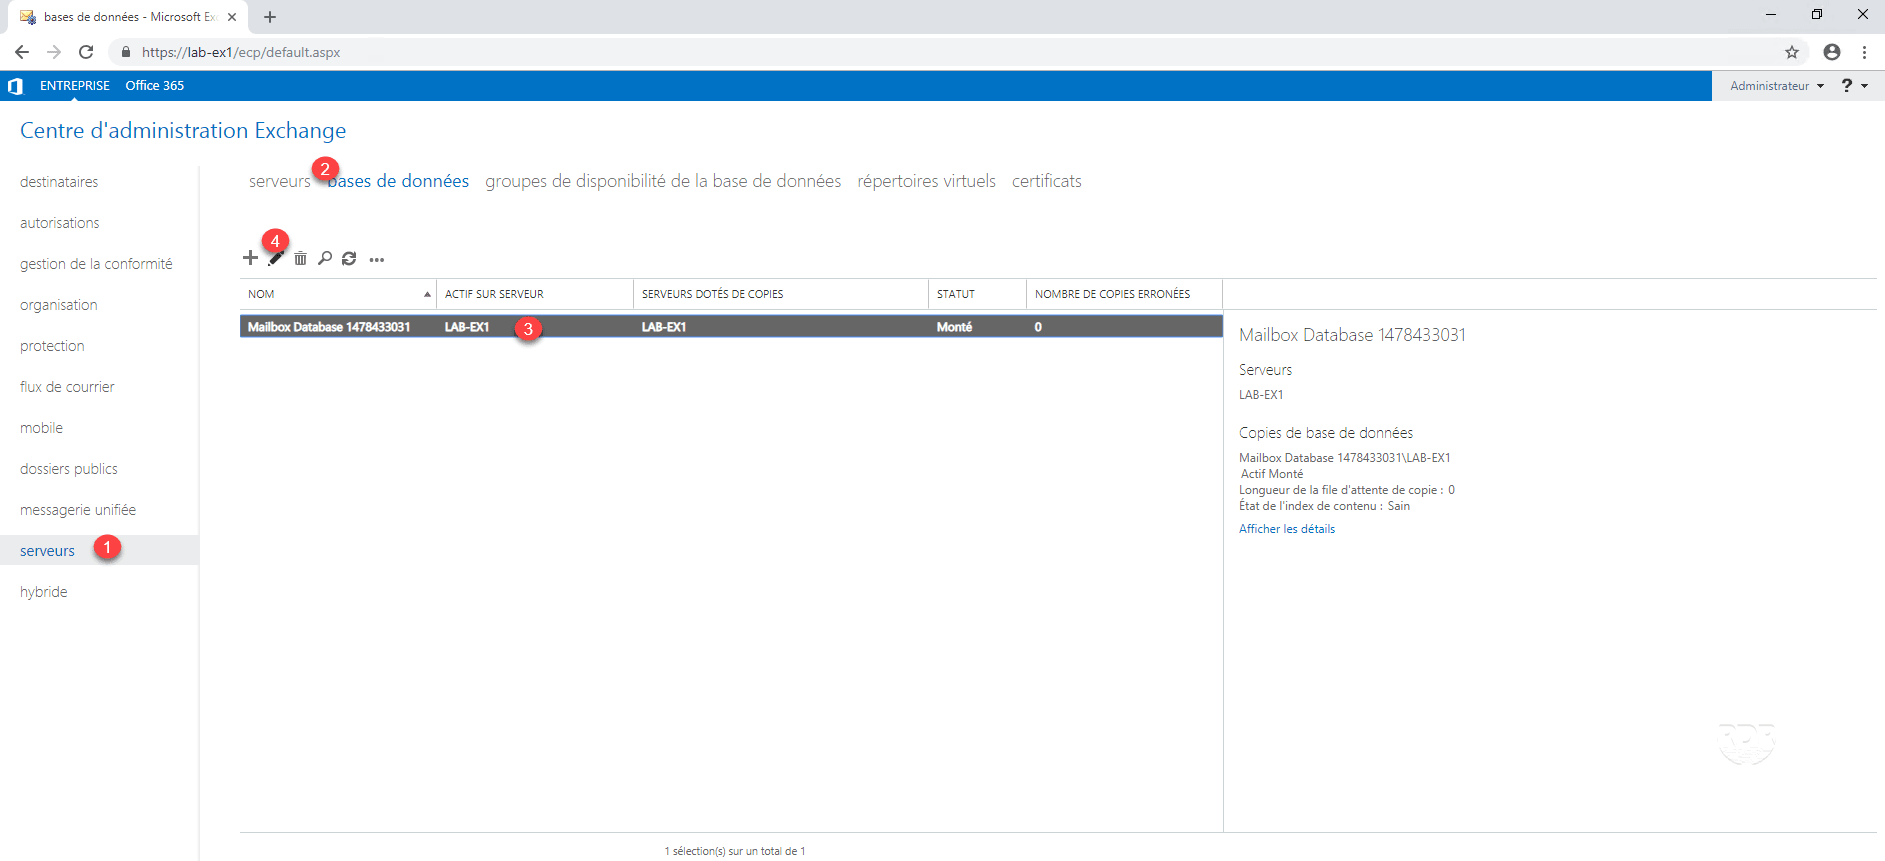
By default, when you install Exchange, a database is created with a name of type: Mailbox Database 123456789. Here’s how to rename the database.
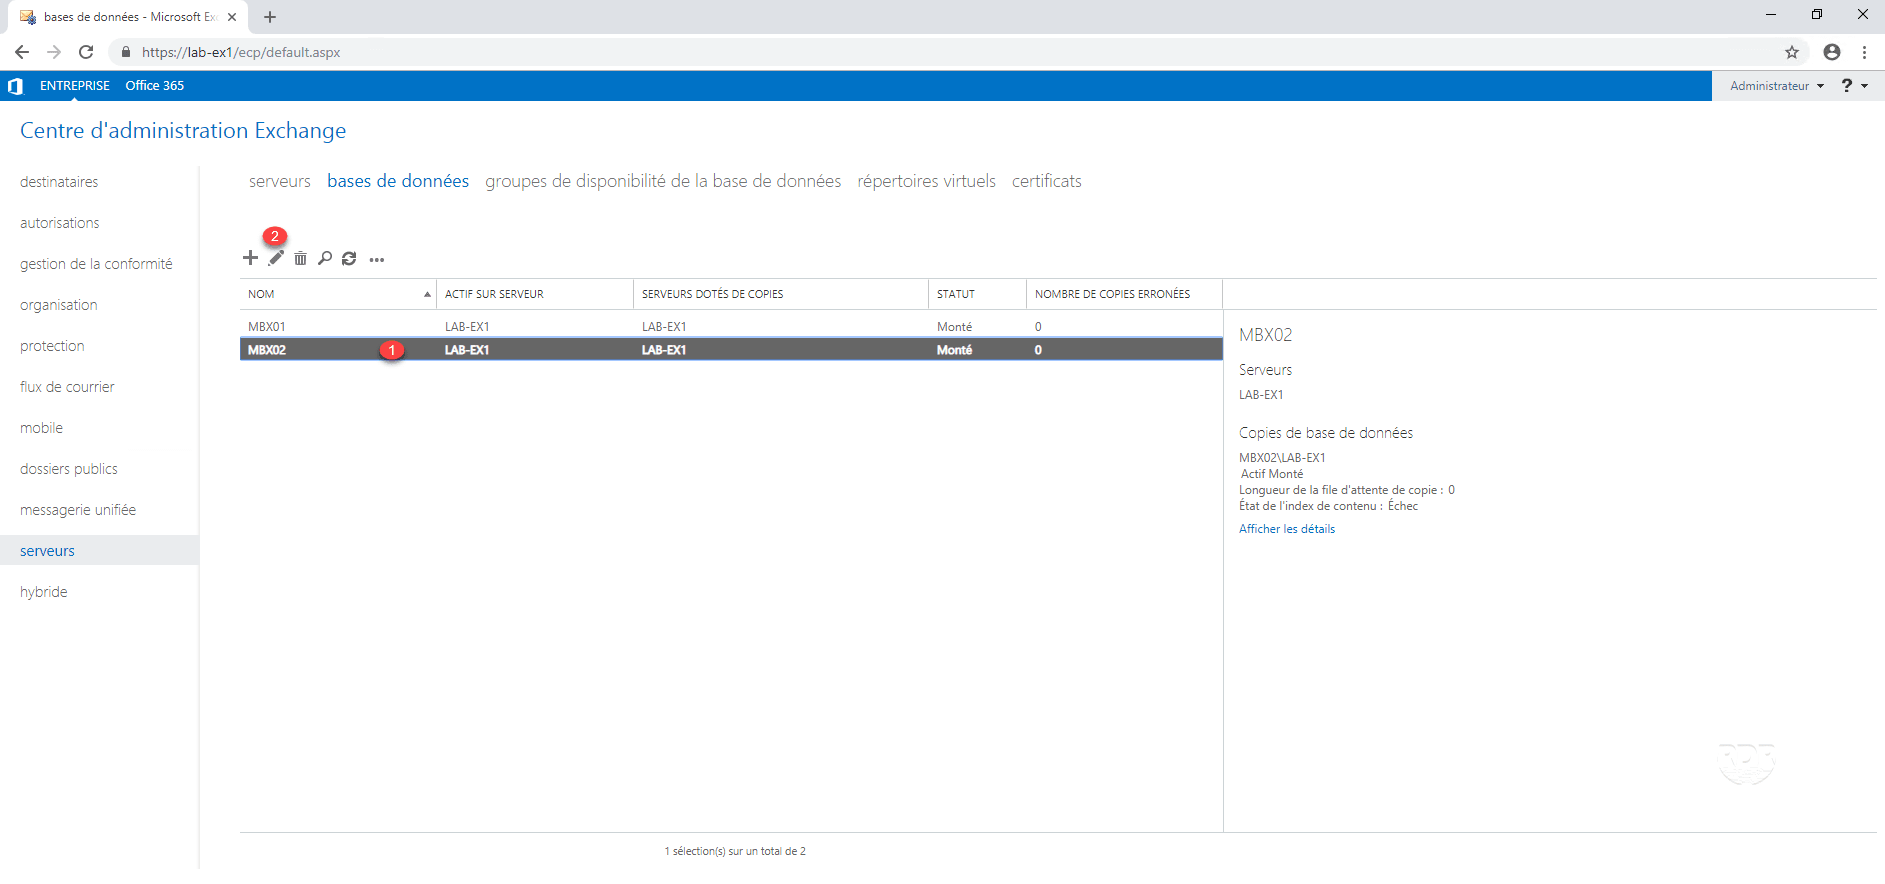
1. From the ECP interface, go to servers 1 / databases 2 . Select the default database 3 and click on the modification icon 4 .
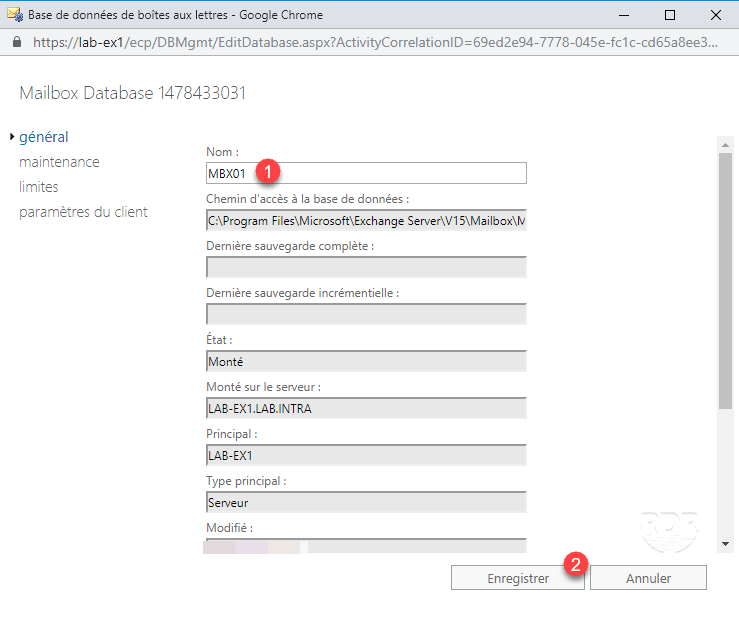
2. Rename base 1 and click Save 2 .
3. The base is renamed in the ECP interface.

Configuration: move the default database
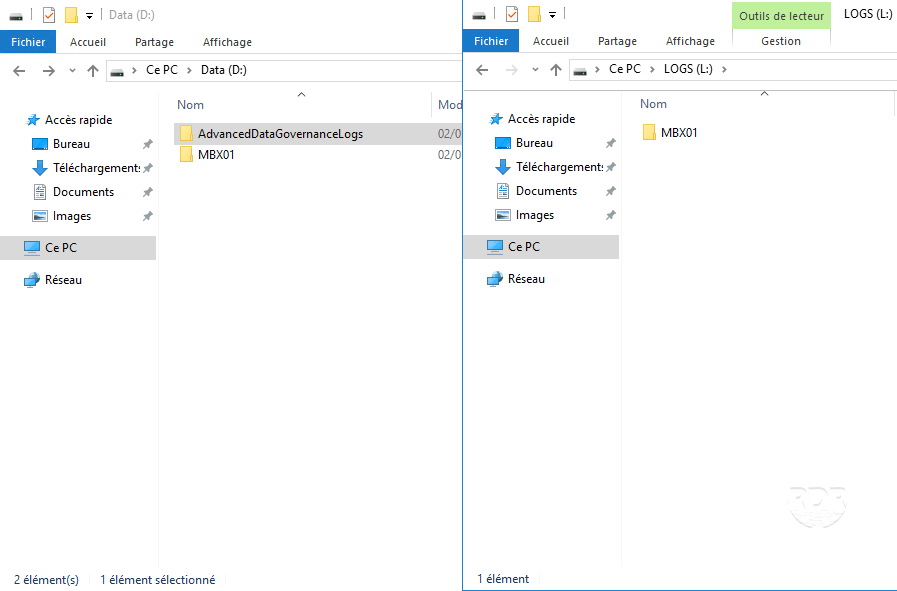
Now that the database is renamed, let’s see how to move it. By default, the database is created in the Exchange installation folder. At the beginning of this tutorial, in the prerequisites, the server has been configured with 3 disks / partitions, one for the databases and the other for the logs.
1. On the disks, create at the root a folder MBX01 (base name).
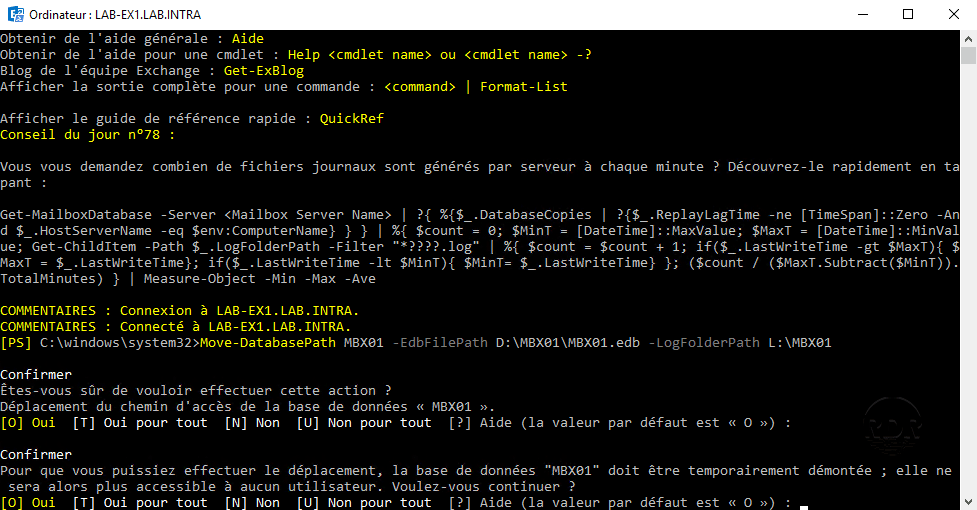
2. Open the Exchange Management Shell and enter the following command to adapt based on your configuration:
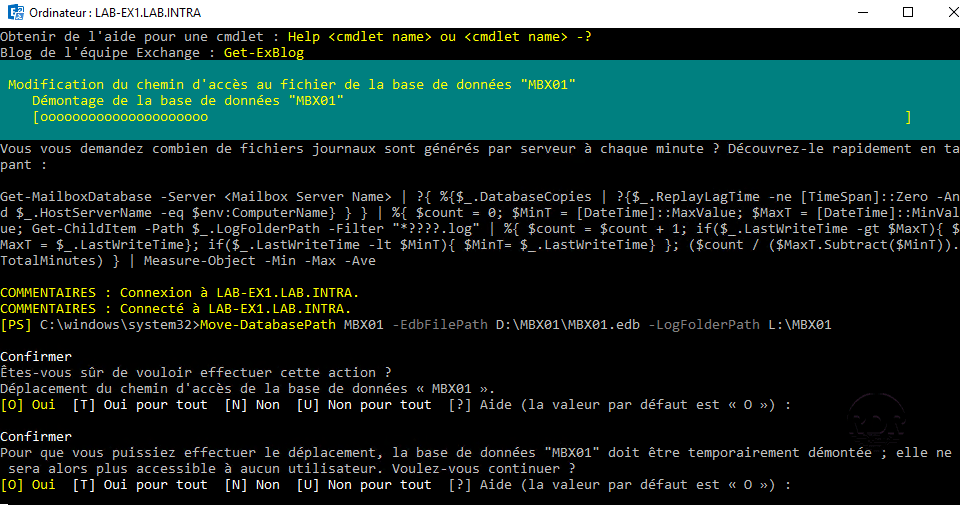
Move-Databasepath MBX01 -EdbFilePath D:\MBX01\MBX01.edb -LogFolderPath L:\MBX01
3. Confirm the removal and disassembly of the database.
4. Wait while moving …
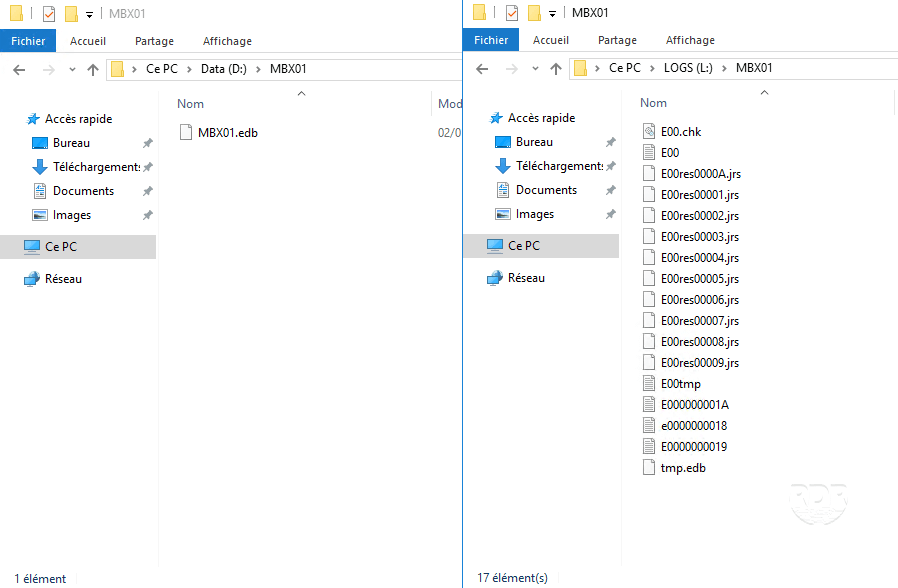
5. The base is moved, check in the explorer for moving files.
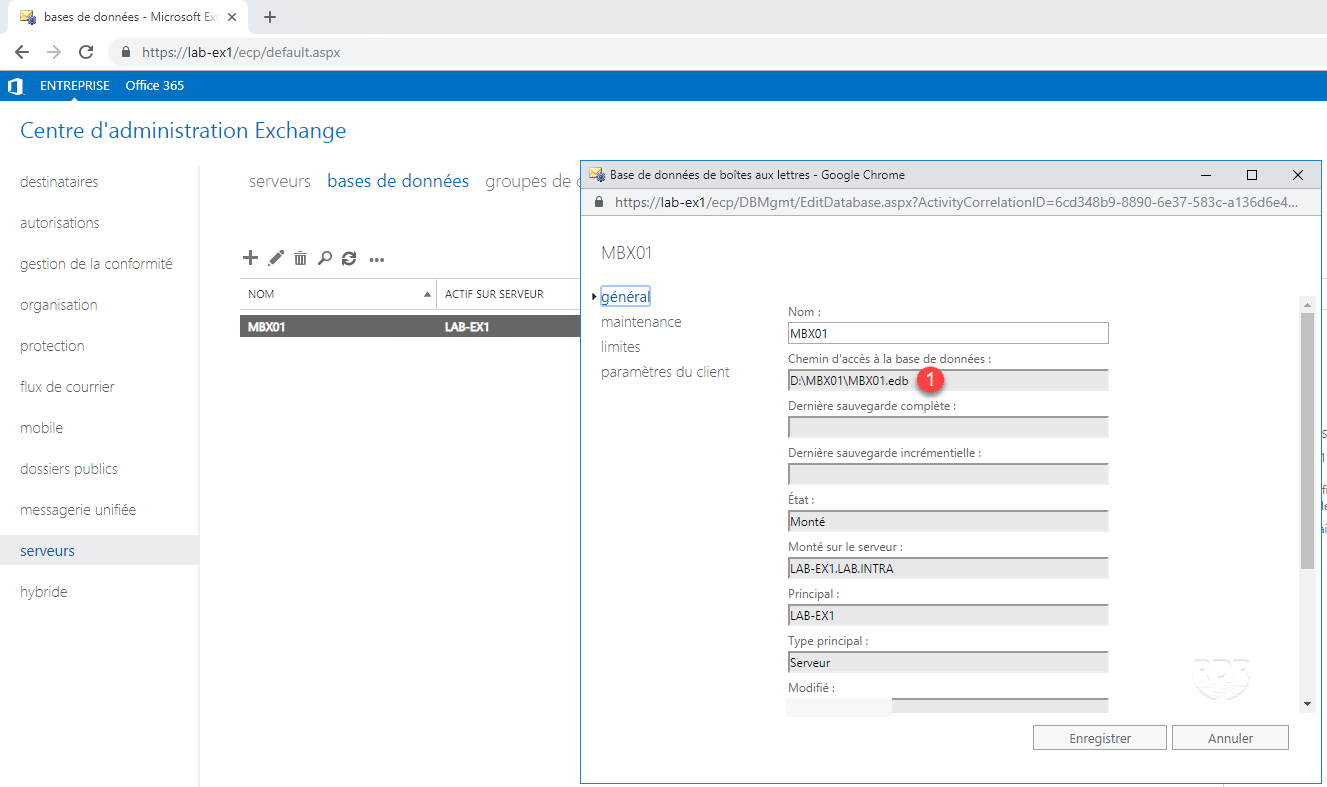
6. In the ECP, it is also possible to check the path 1 to the base in the properties.
You can use the Move-Databasepath command to later change a location database.
Configuration: Enable Circular Logging
Circular logging allows Microsoft Exchange to replace transaction log files after the data is saved and committed to the database.
If you plan to have the database in high availability (DAG), enable logging after it is put into the dag.
Log truncation can also be provided by backup software (Veeam / BackupExec …).
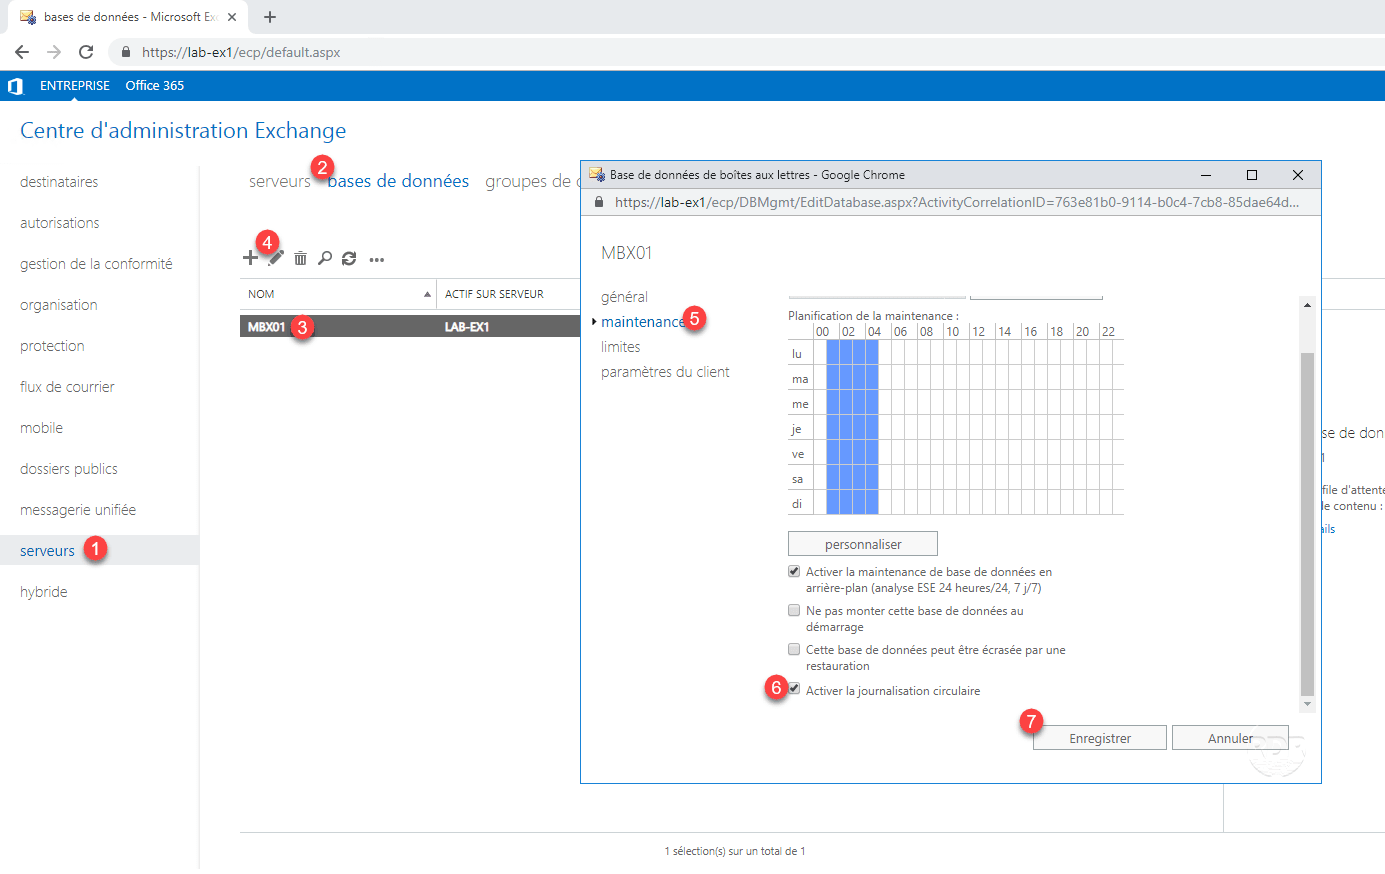
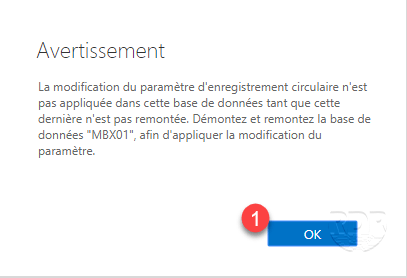
1. From the ECP interface, go to servers 1 / databases 2 . Select base 3 then click on the modification icon 4 . Go to the maintenance section 5 , check the box Enable circular logging 6 and click on Save 7 .
2. To apply the parameters, it is necessary to disassemble / reassemble the base, close the warning by clicking on OK 1 .
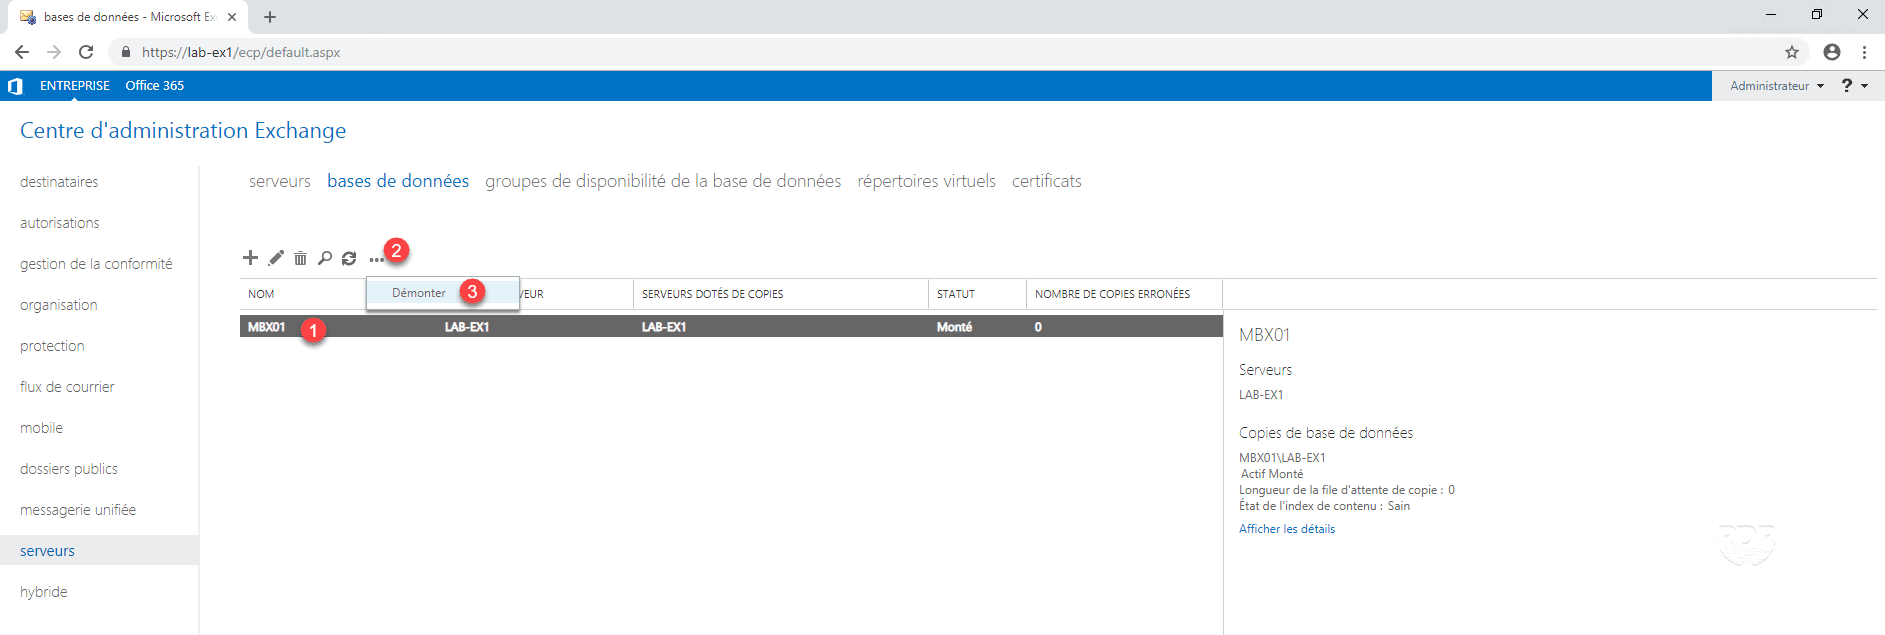
3. Select base 1 , click on 2 / Disassemble 3 .
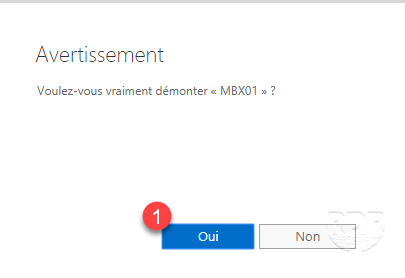
4. Confirm by clicking Yes 1
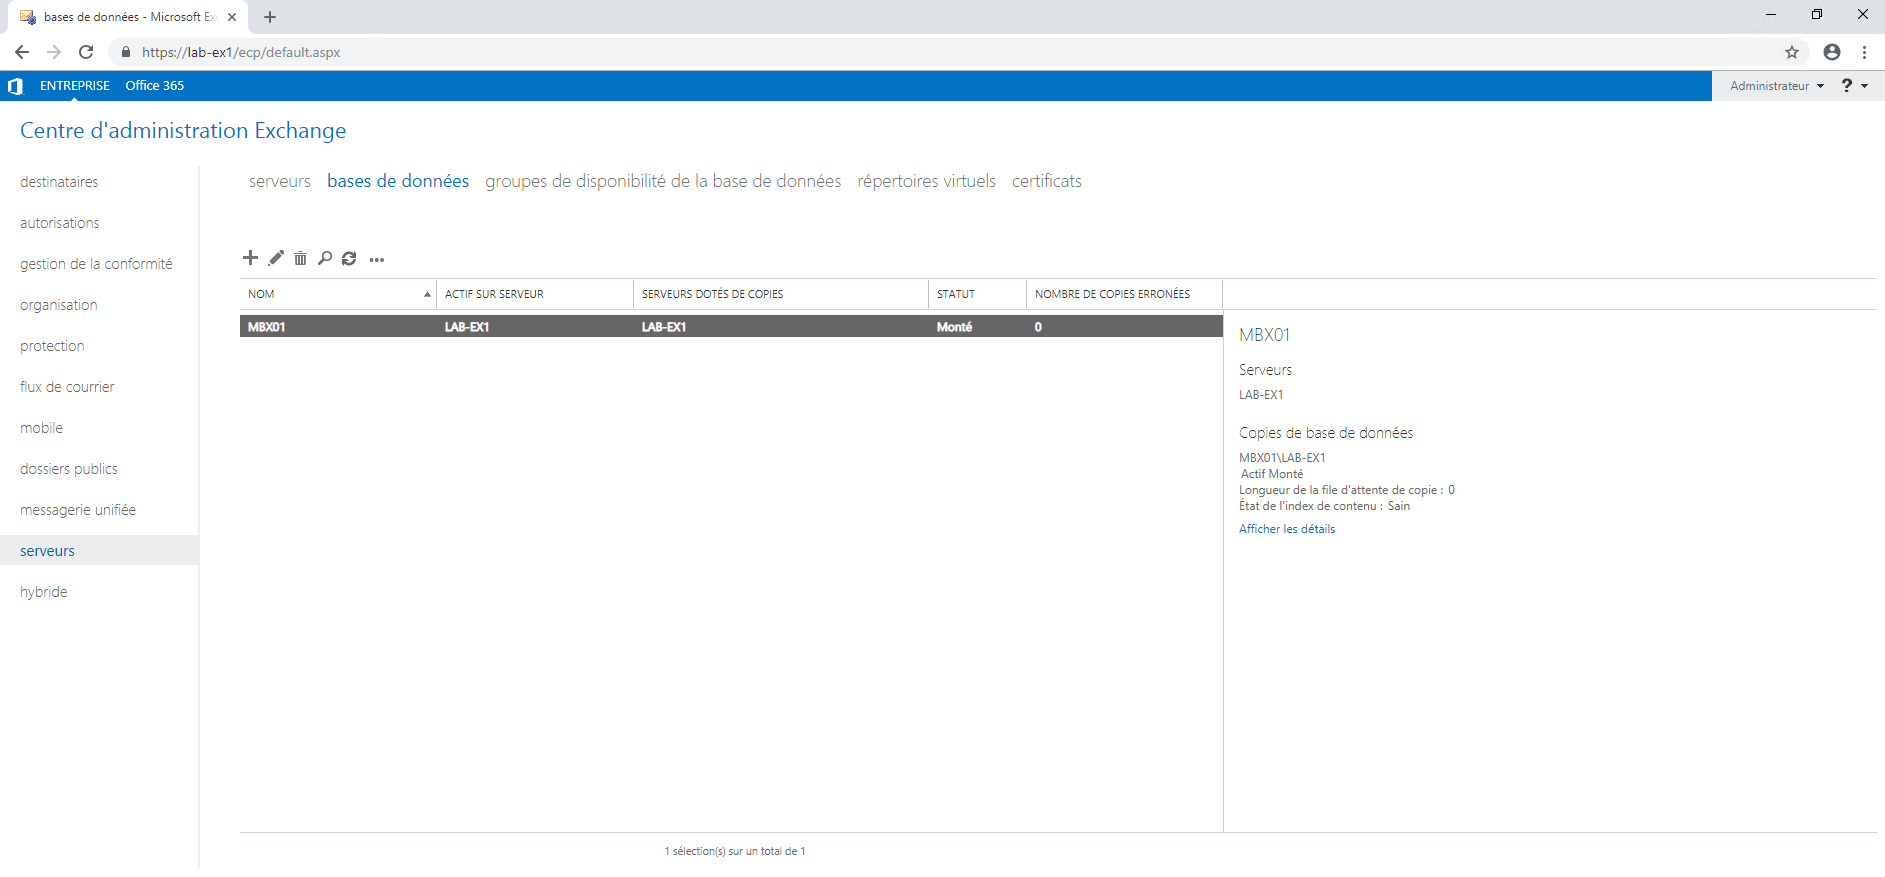
5. The base is unmounter, select the base 1 again, click on 2 then on 3 .

6. The database is mounted.
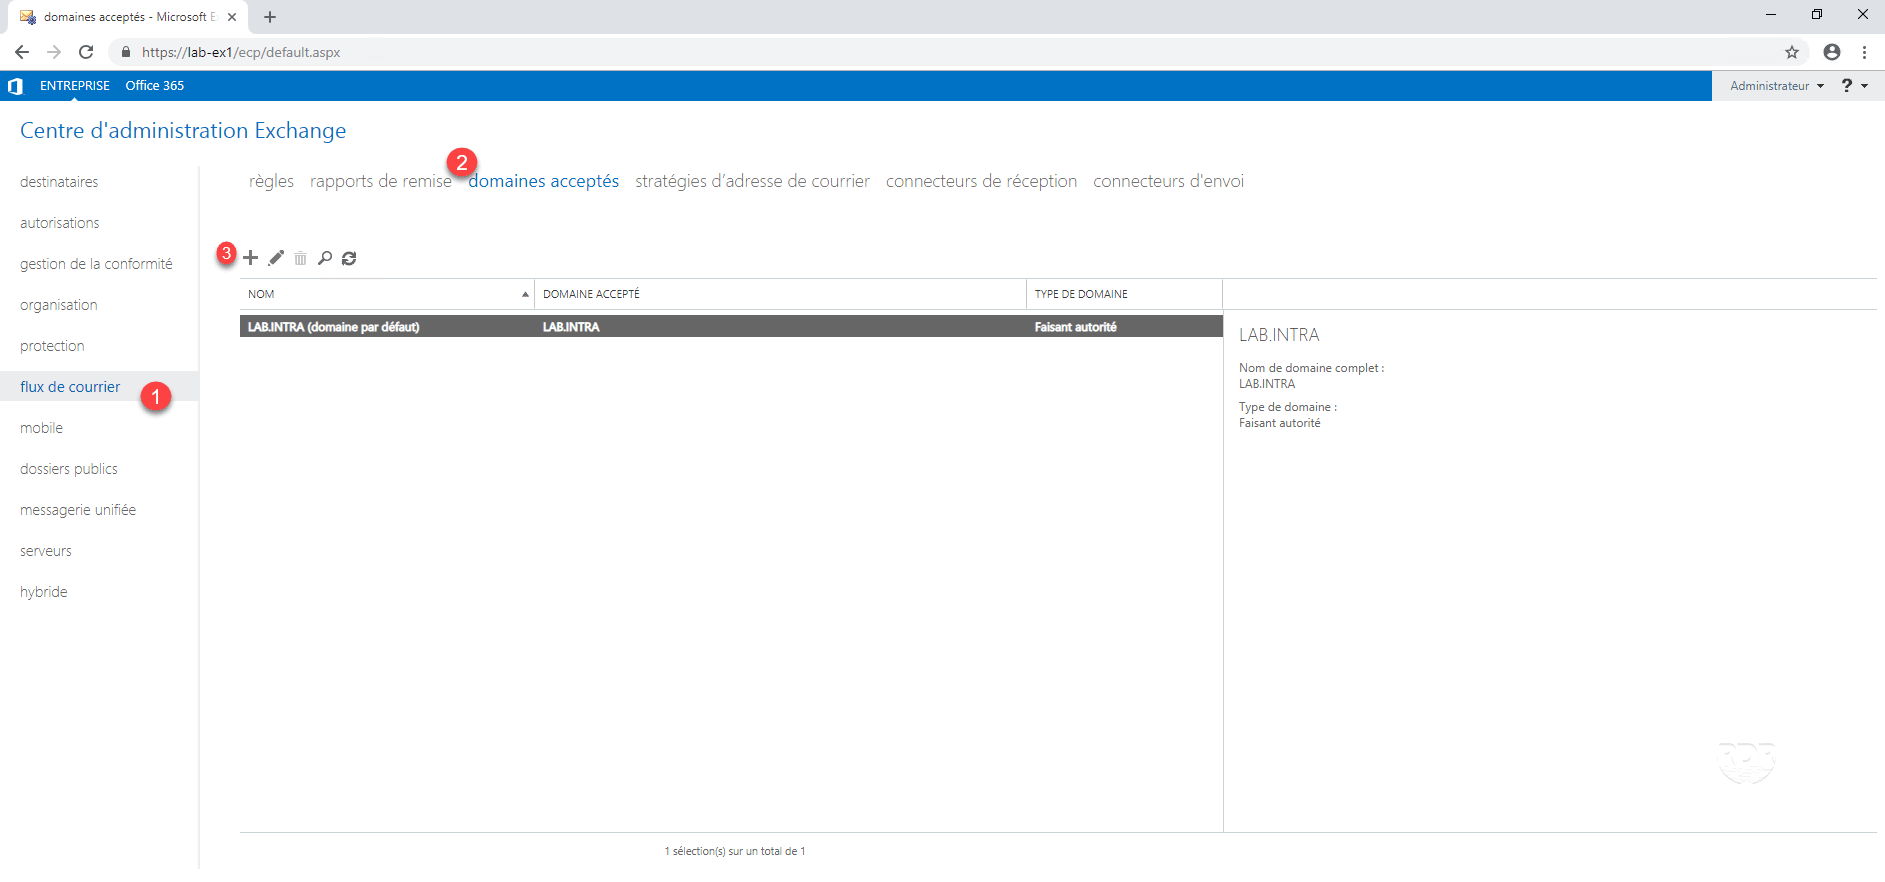
Configuration: add a domain
During installation, the default domain in Exchange is this one from your Active Directory domain. If this is not the mail domain, we will see how to add a domain.
1. From the ECP interface, click mail flow 1 / accepted domains 2 to view the domains managed by Exchange. Click on + 3 to add a domain.
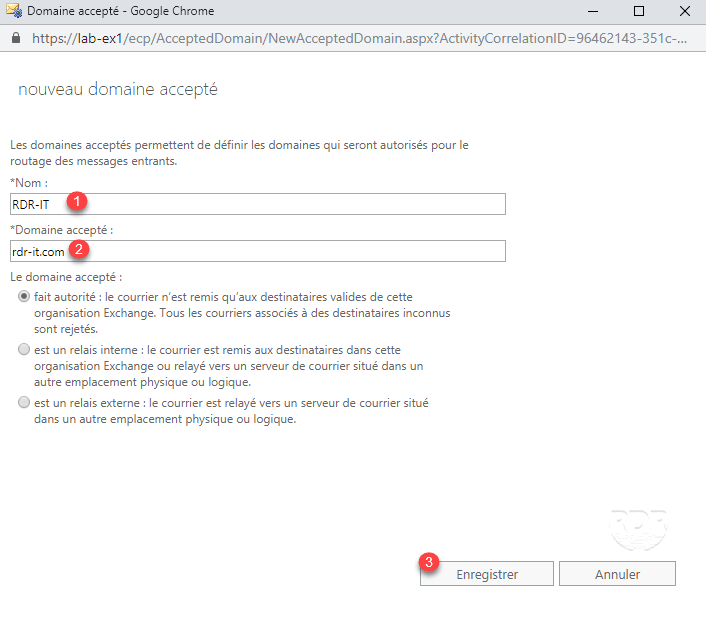
2. Enter a name to identify the domain 1 then the domain name 2 and click Save 3 .
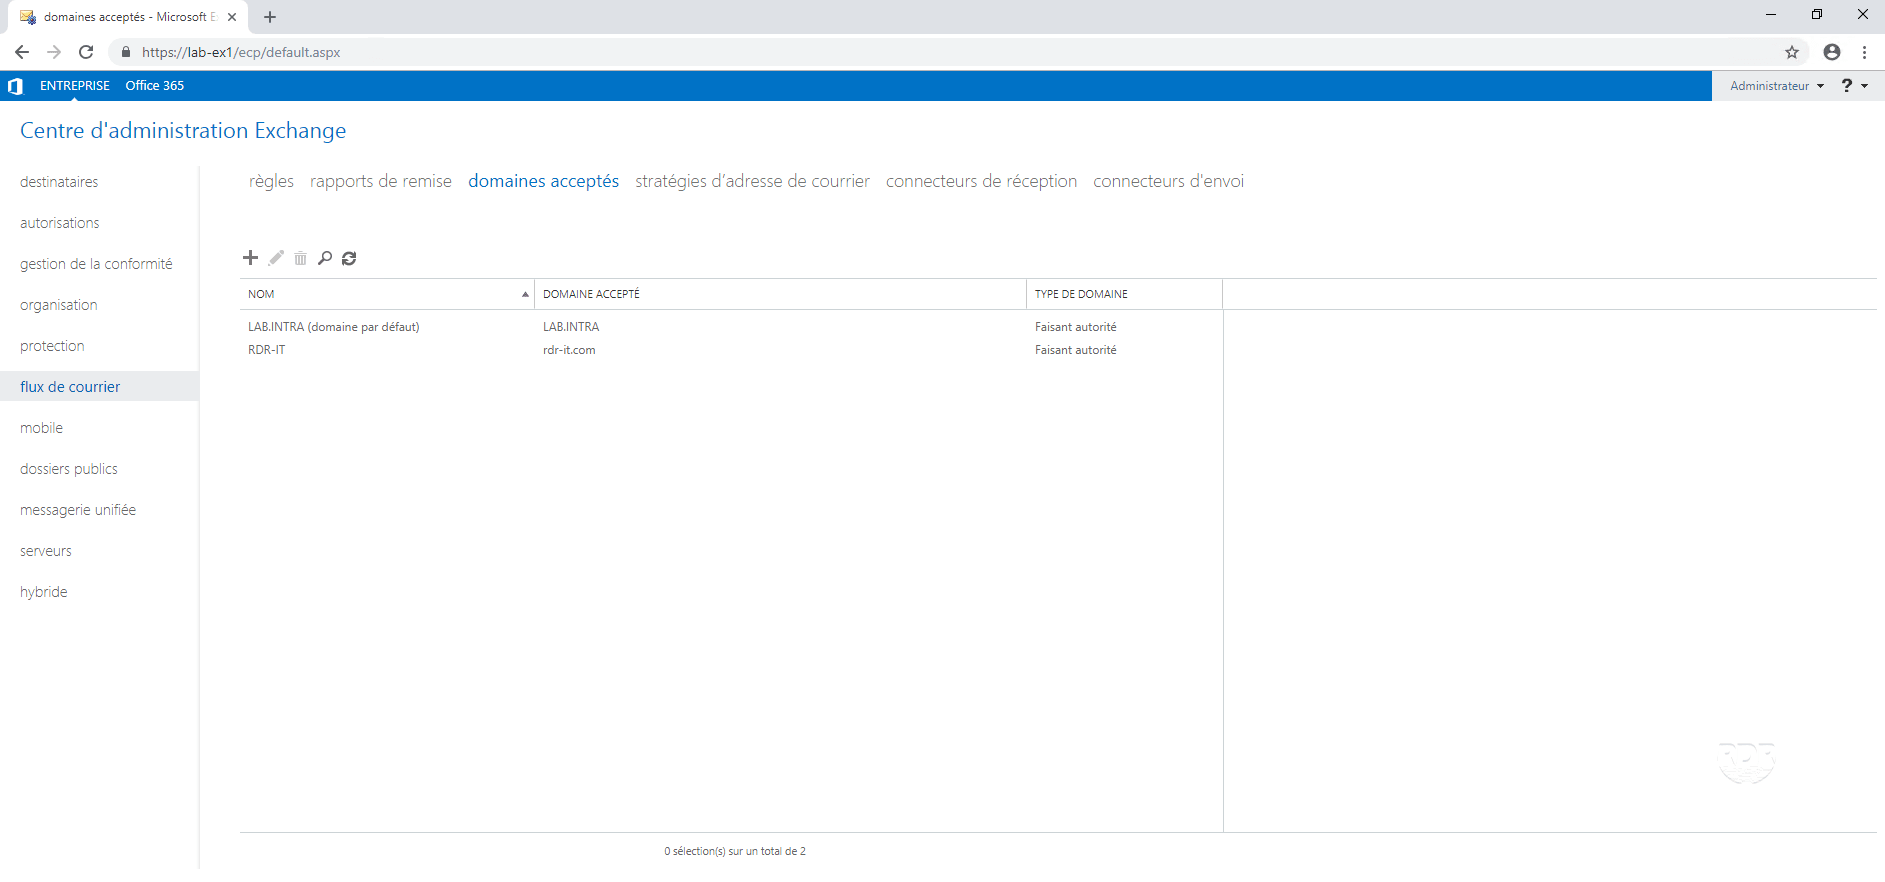
3. The domain is added.
4. Skip the default domain: select the domain 1 , click on the edit icon 2 , check the box Define this domain as default domain 3 and click Save 4 .
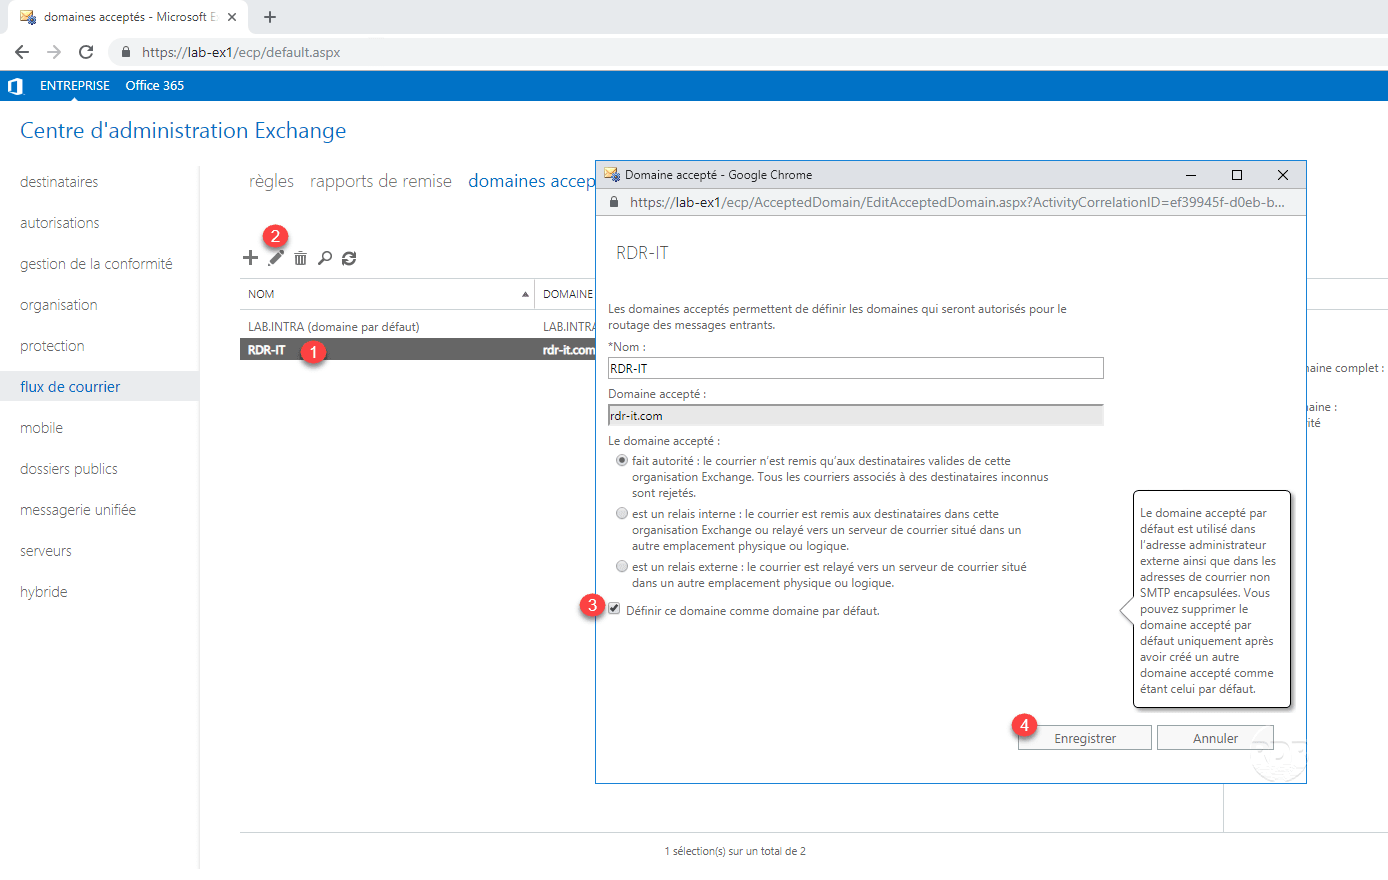
This manipulation does not make the domain for mailboxes by default, for this you have to modify the mail address strategy.
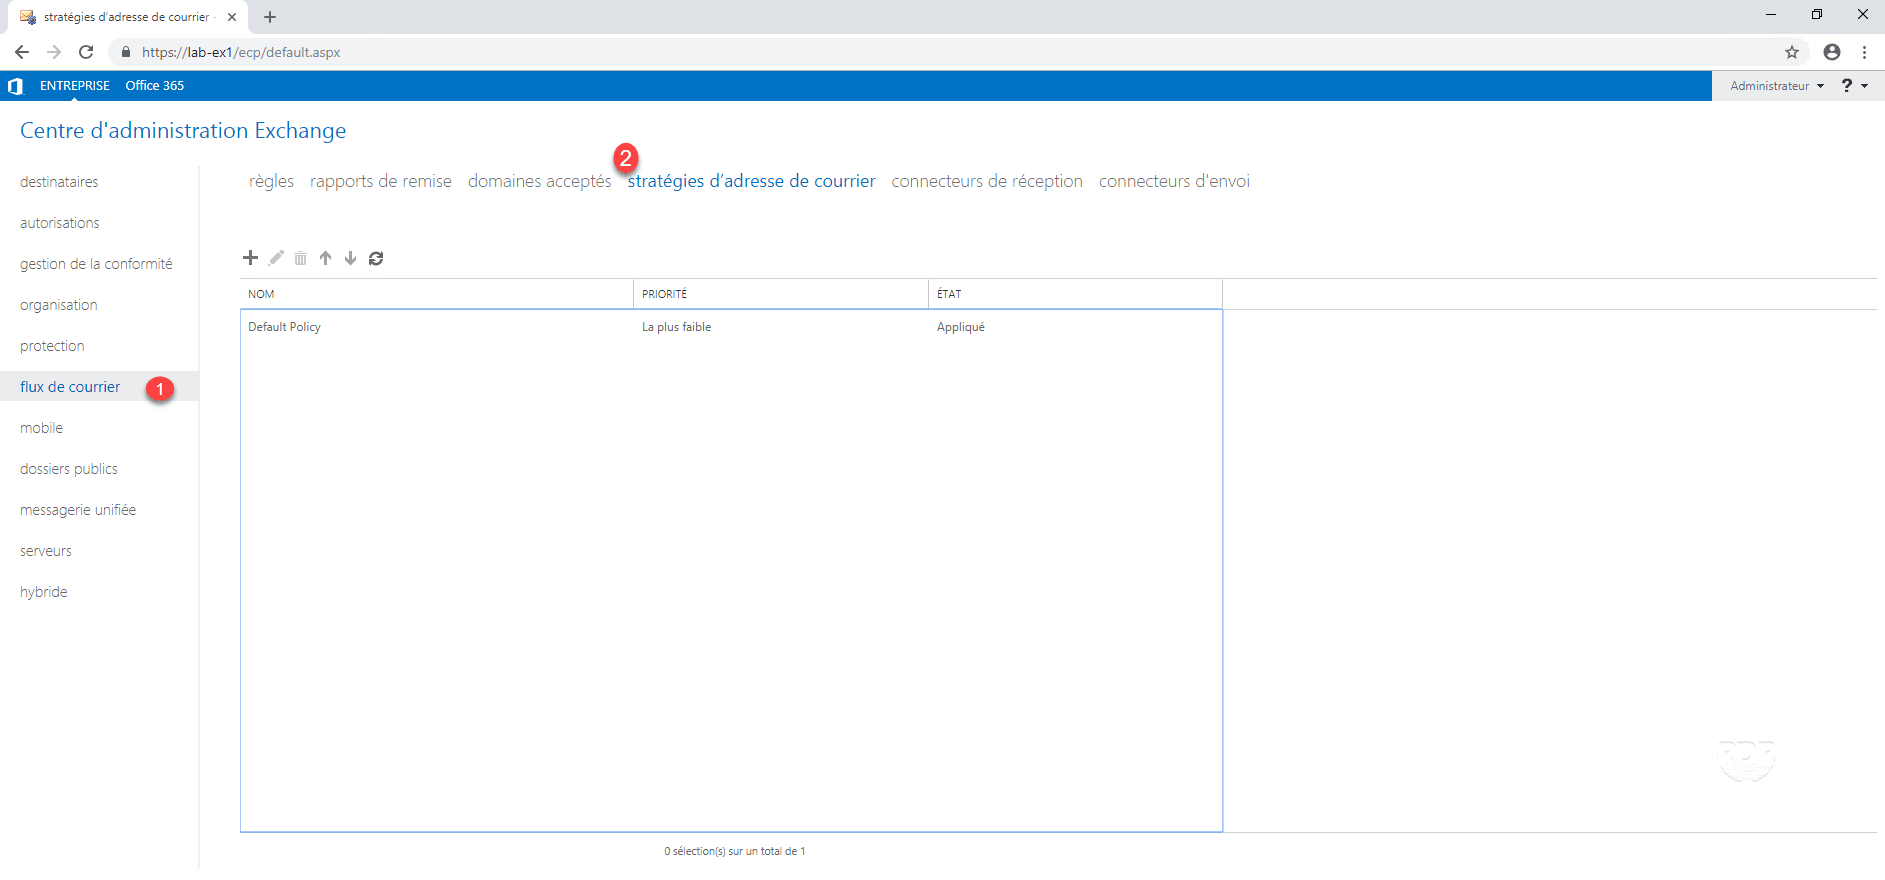
Configuration: Mail Address Strategies
A mail address policy, allows when creating a mailbox to automatically apply aliases for the same domain or add another domain …
In continuation of this tutorial, we will make sure to change the default policy so that the main address of users is [email protected].
1. From the ECP interface, go to mail flow 1 / mail address strategies 2 .
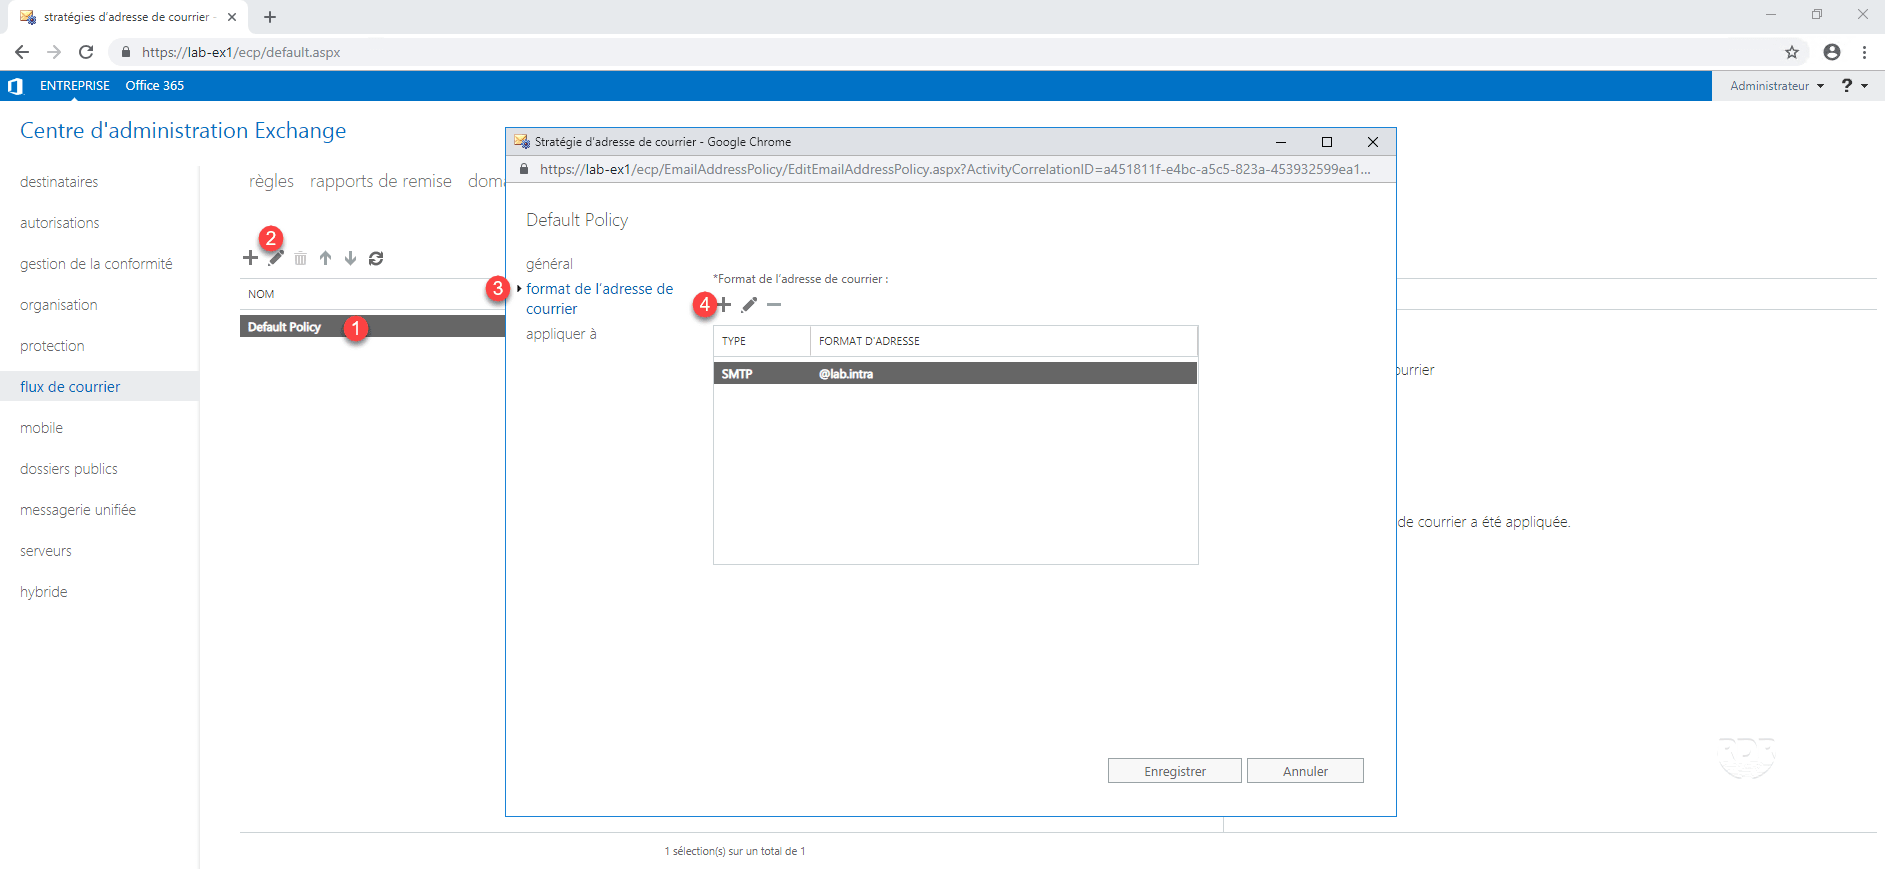
2. Select the default strategy 1 , click on the edit icon 2 , in the new window go to format of the mail address 3 and click on + < <4 .
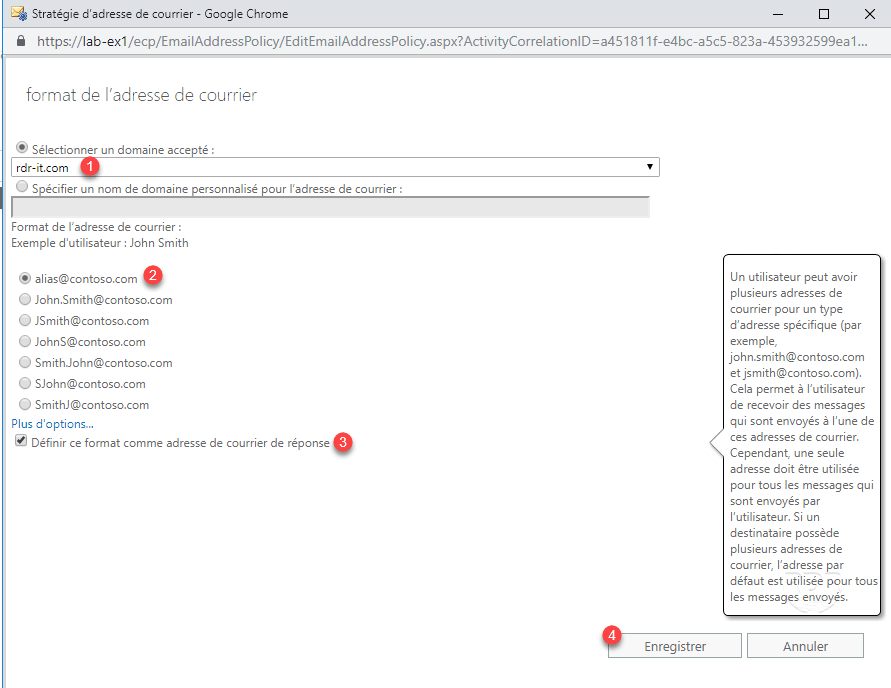
3. Select domain 1 and address format 2 , check the box Define this format as response mail address 3 to set the new format as the main address and click on Save 4 .
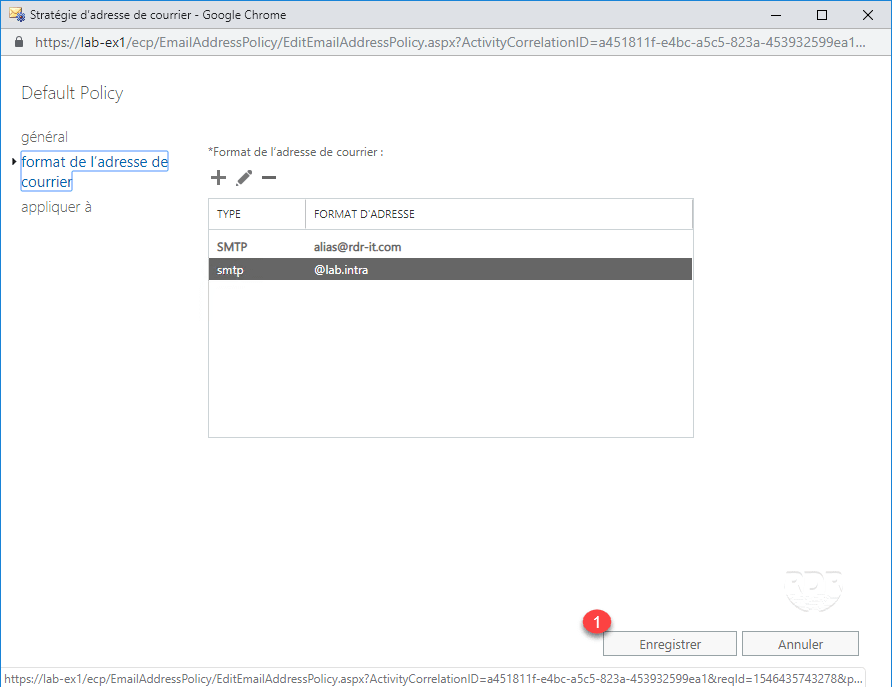
4. The format is added, click Save 1 .
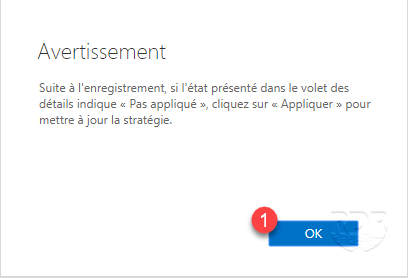
5. Close the warning message by clicking OK 1 .
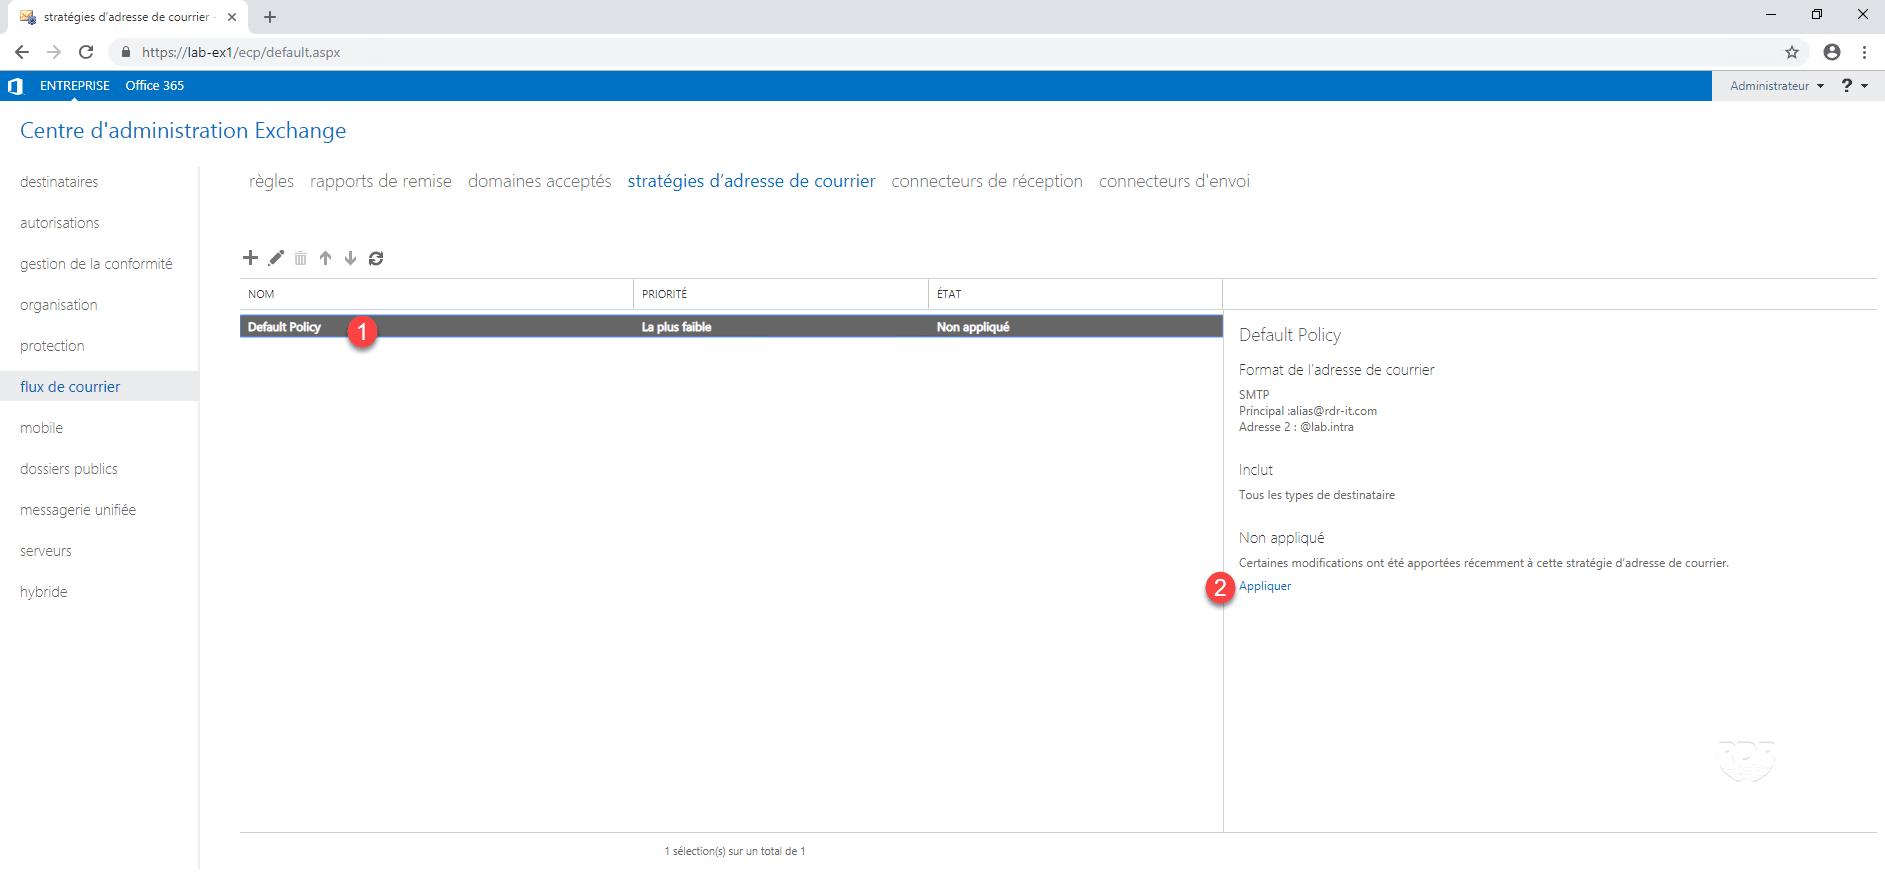
6. Select strategy 1 and click Apply 2 .
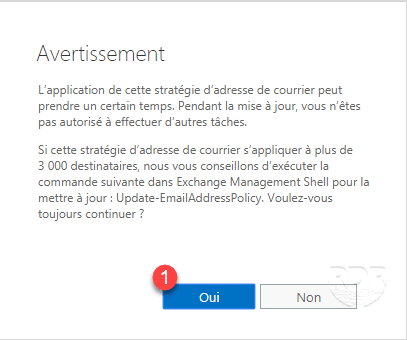
7. Click Yes 1 to apply the strategy.
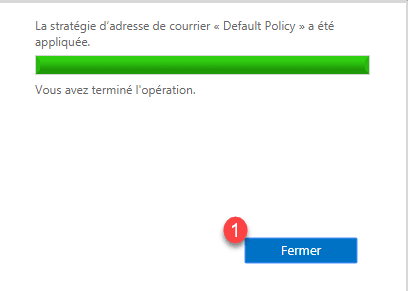
8. The strategy is applied, click Close 1 .
9. Go back to the list of mailboxes and check that the default mail address is [email protected].
If the addresses have not changed, refresh the list.
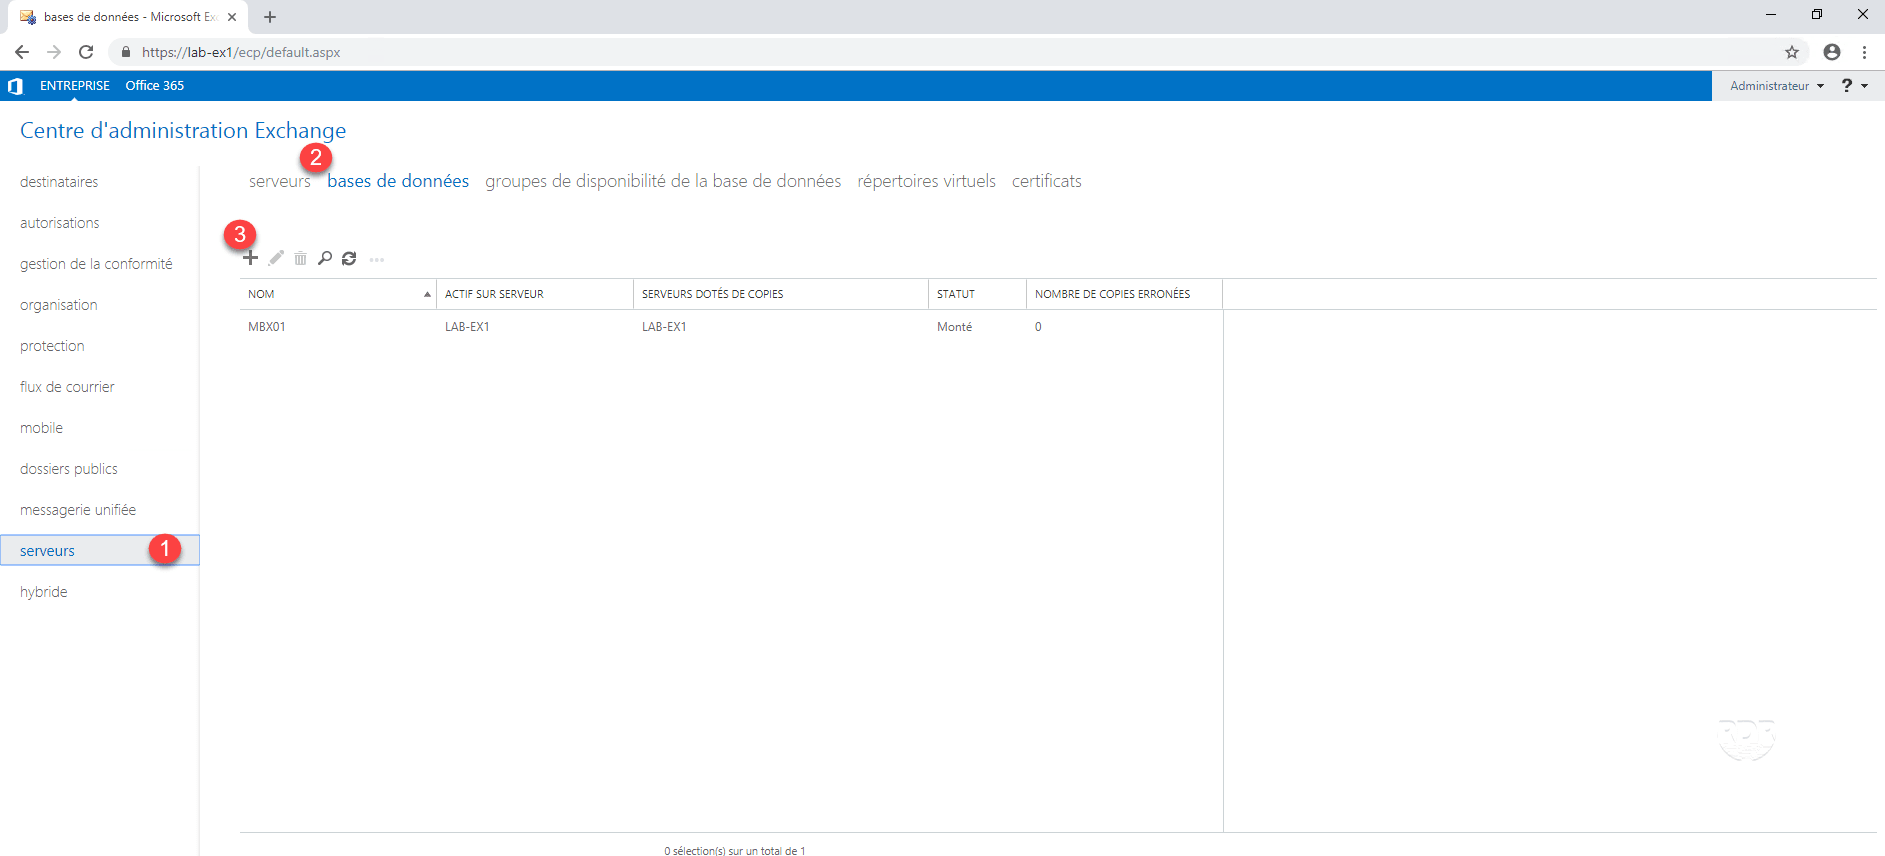
Configuration: add a database
In Exchange 2016, databases are a group of mailboxes that share the same volumetric setting.
Depending on your type of Exchange 2016 license, the number of active mailboxes varies:
- 5 for the standard version
- unlimited for the enterprise version
1. From the ECP interface, go to servers 1 / databases 2 and click on + 3 .
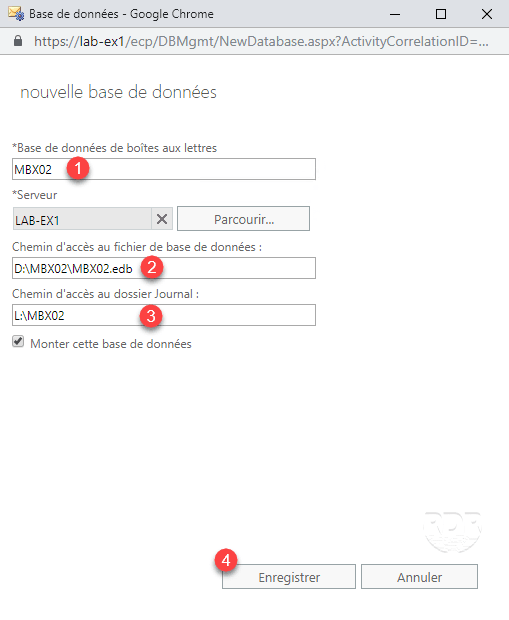
2. Enter the database name 1 , the file location 2 and logs 3 and click Save 4 .
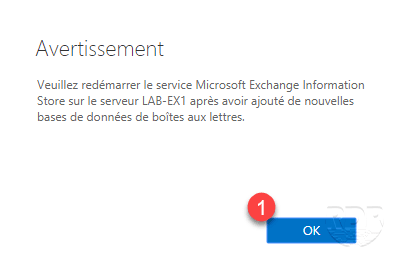
3. Click OK 1 to close the warning message.
4. The new database, select 1 then click on the edit icon 2 .
5. Go to 1 limits and configure them as needed 2 then click on Save 3 .

6. Restart the Microsoft Exchange Information Store service.
FYI: the limits applied by a database can be circumvented by directly modifying the same limits at the level of the box.
Configuration: Define Access URLs for Exchange 2016
For the moment, the Exchange 2016 server is configured to send the fqdn.lab.intra url to the client. With this configuration, it is not possible to access Exchange with Outlook from outside.
It is necessary first to define the address that will be used to access the server from outside.
To illustrate the tutorial, I will use the address mail.rdr-it.com
Editing directories by ECP
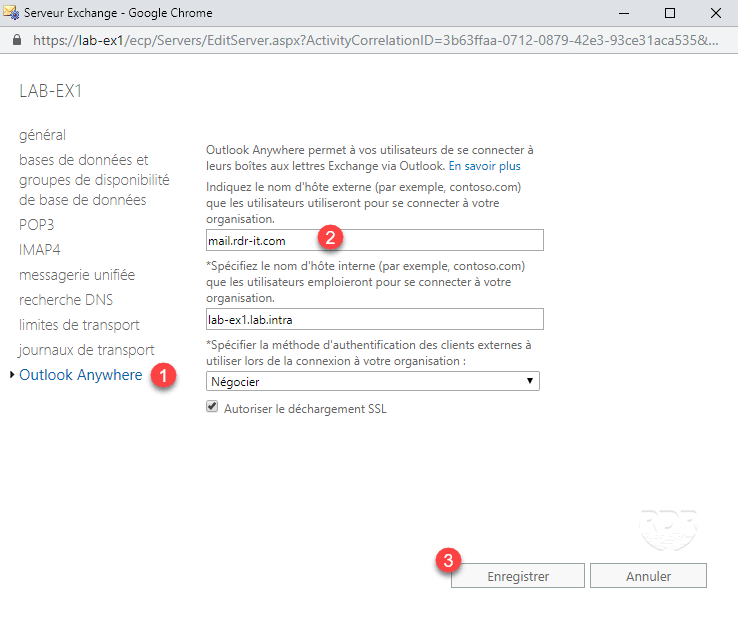
Outlook AnyWere
Outlook Anywhere allows your users to connect to their Exchange mailboxes through Outlook.
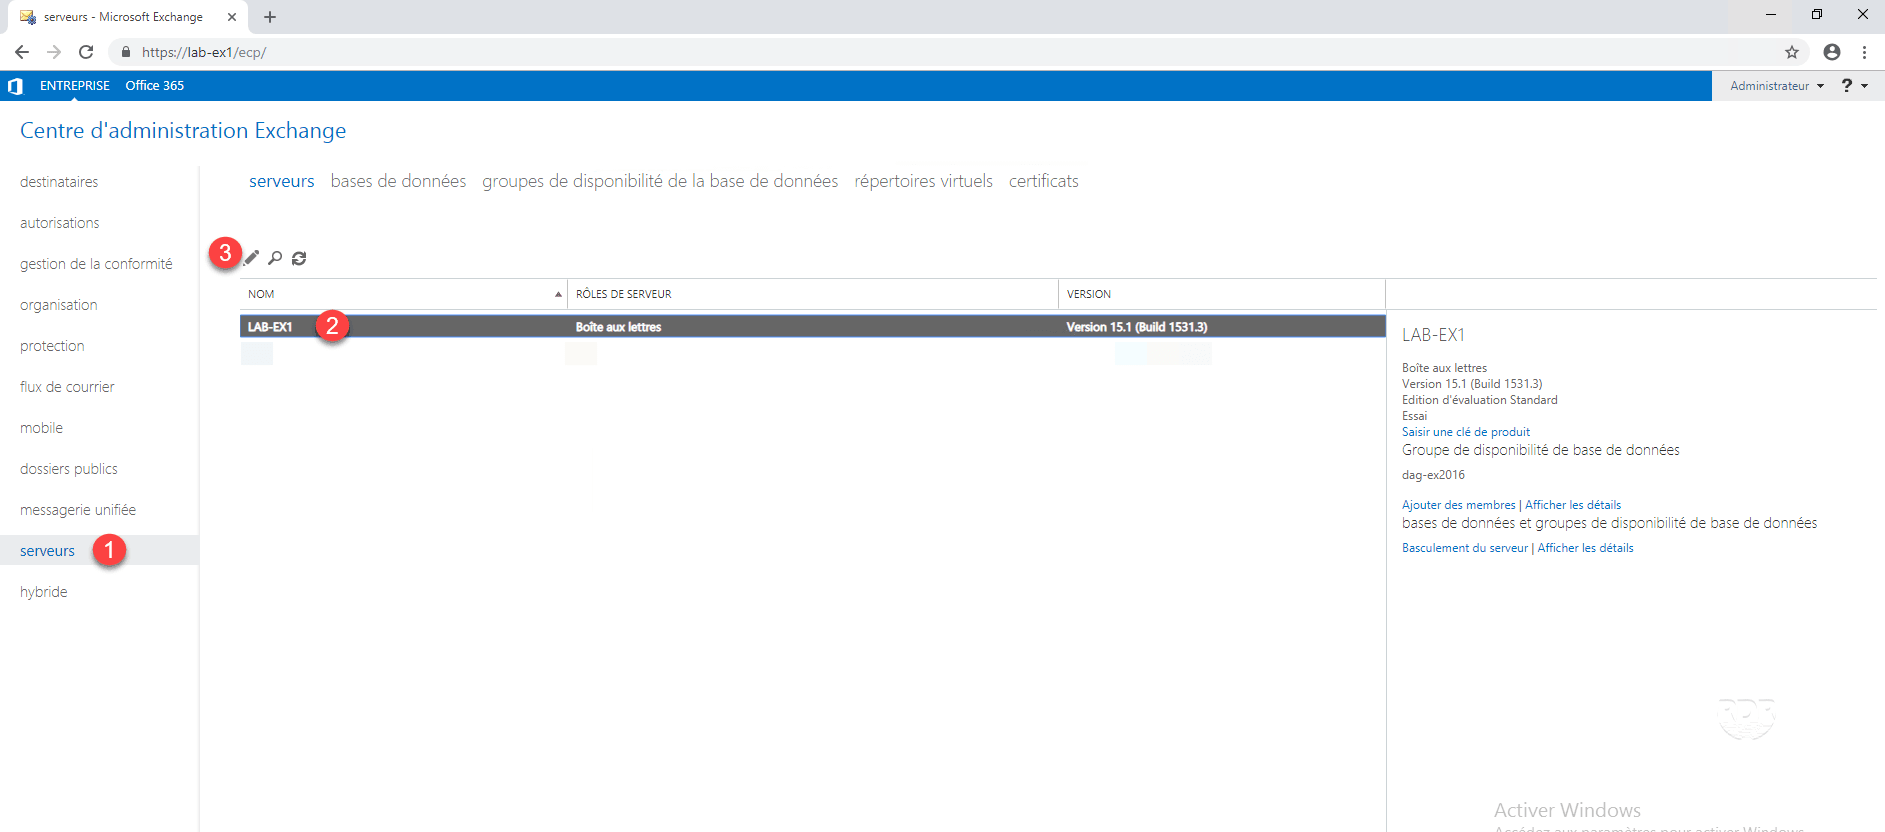
1. From the ECP interface, go to servers 1 , select the server in the list 2 and click on the edition icon 3 .
2. Go to the Outlook AnyWhere 1 section and enter the external address 2 then Save 3 .
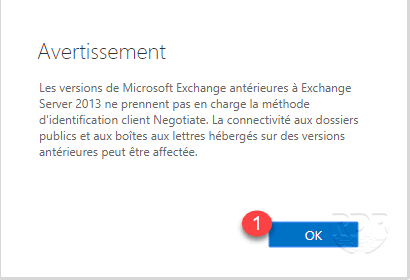
3. Close the warning by clicking OK 1 .
Virtual Directories
1. From the ECP interface, go to servers 1 then virtual directories 2 .
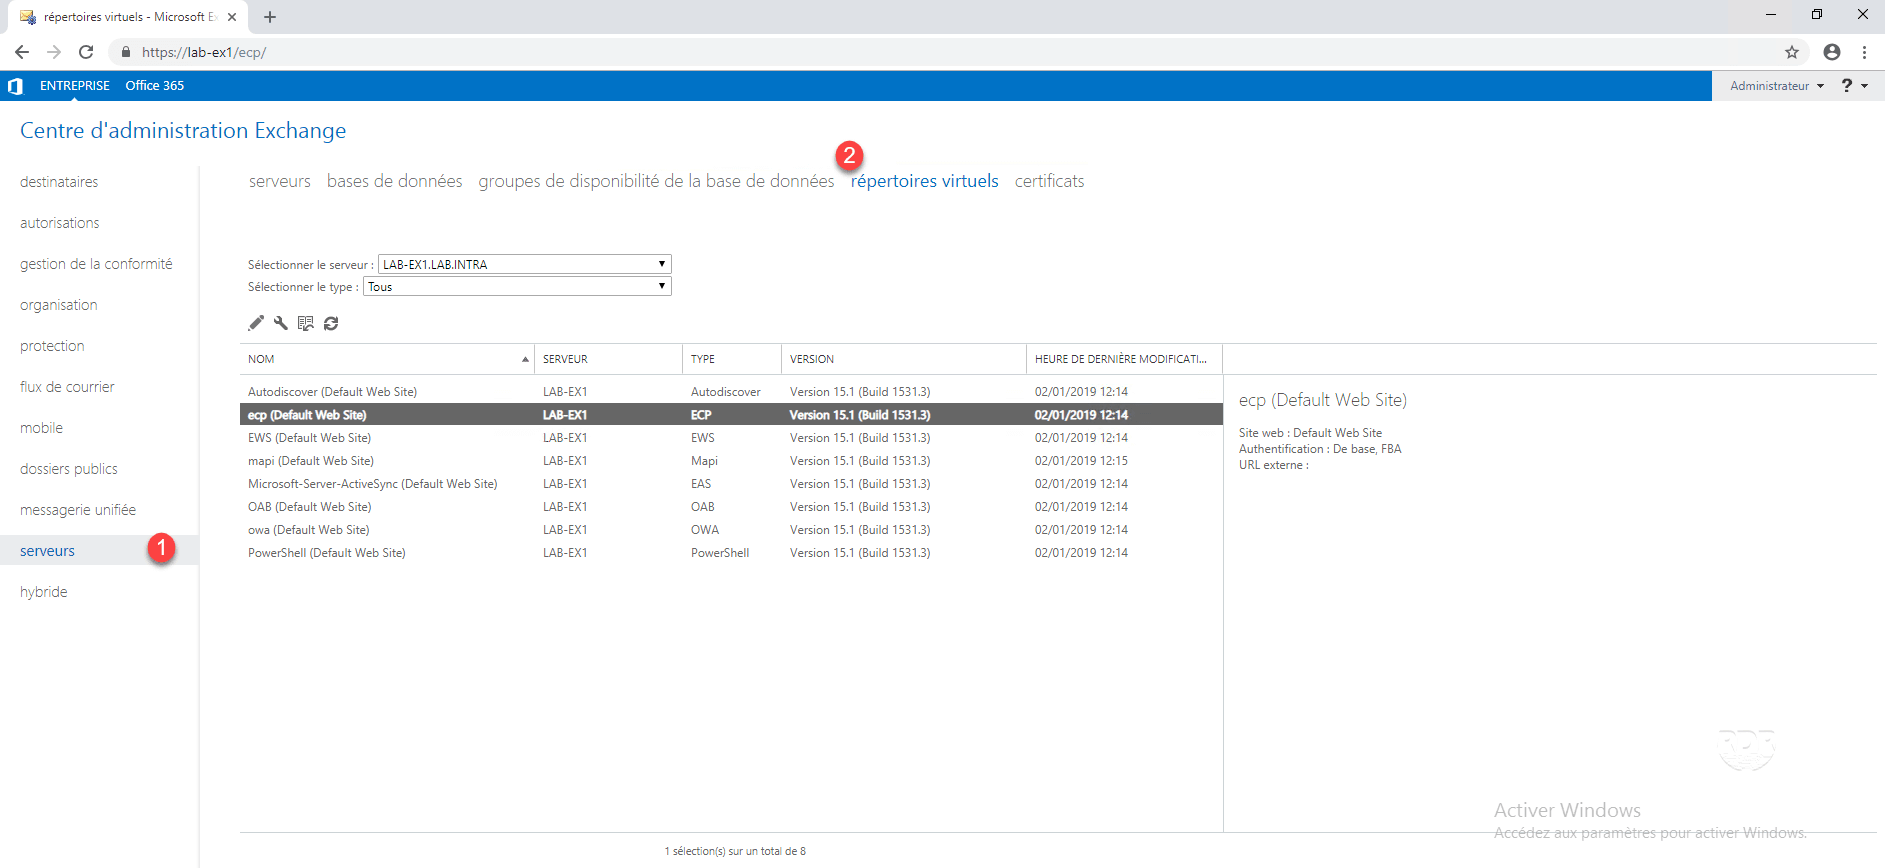
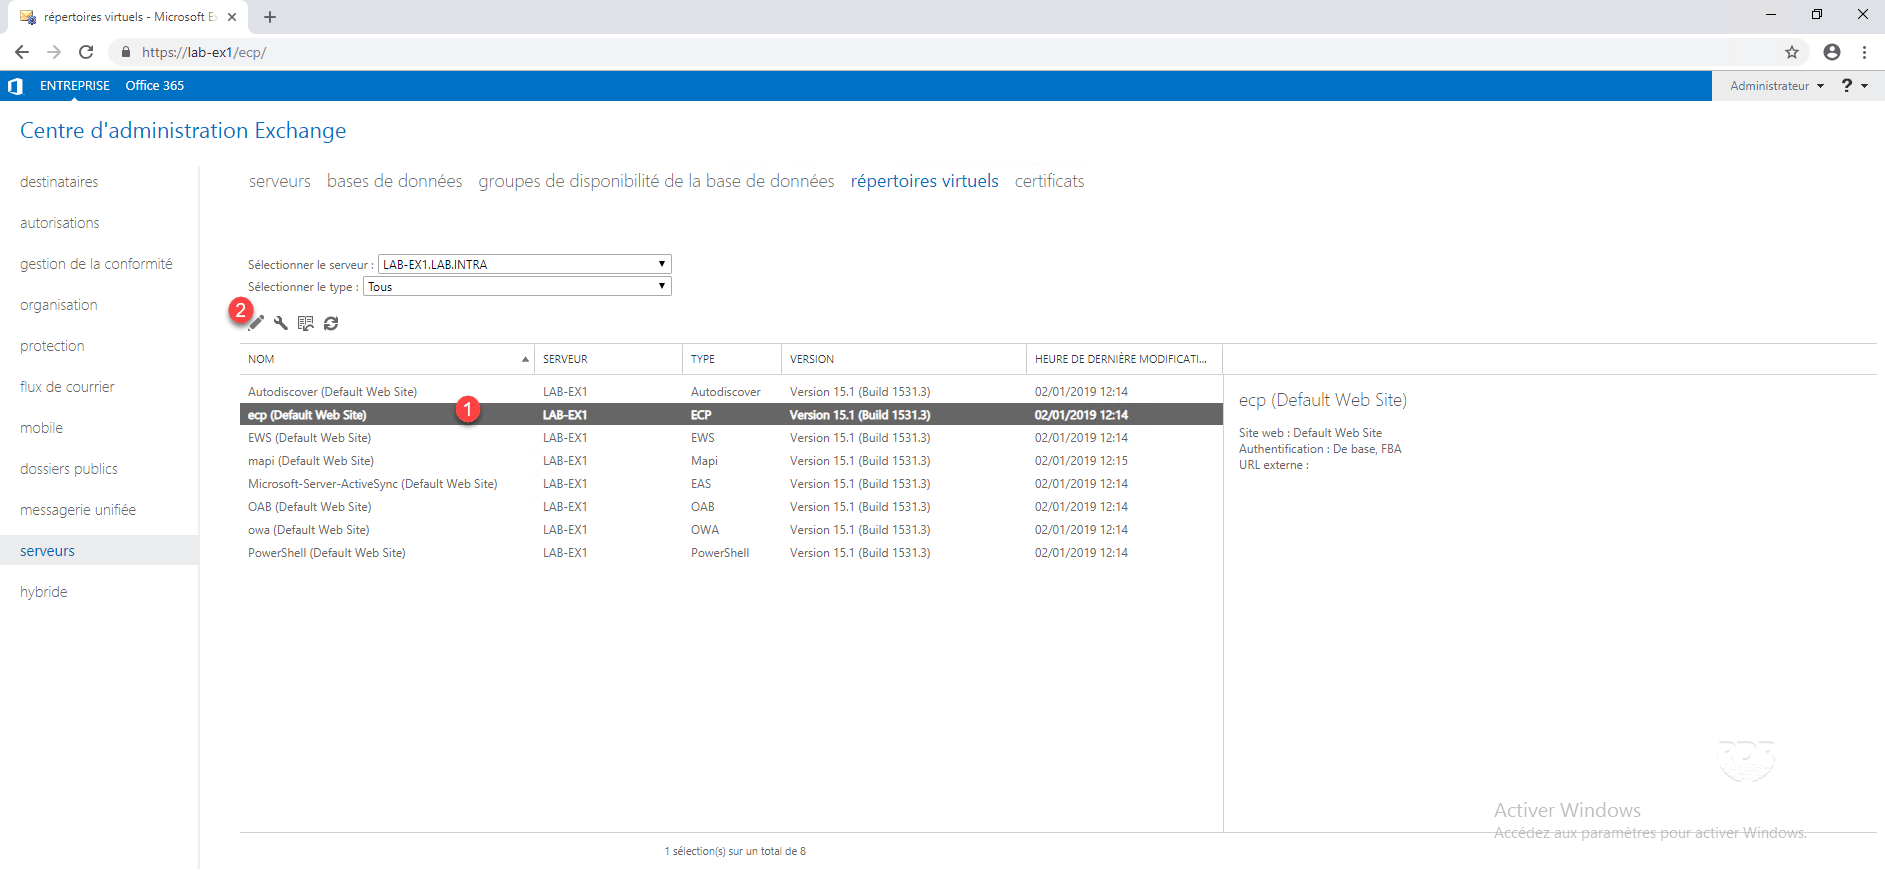
2. Select the ECP directory 1 and click on the edit icon 2 .
3. Configure External Url 1 then click Save 2 .
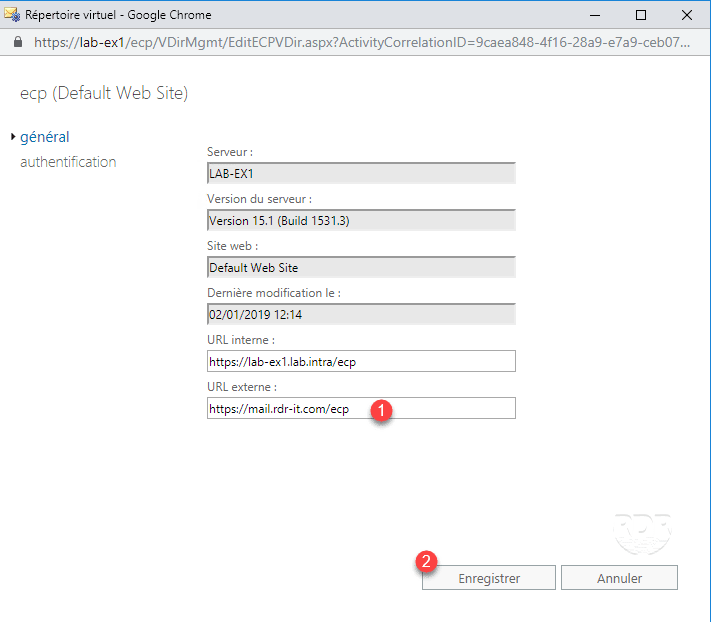
Make a copy / paste of the internal URL in the external and replace the name fqdn of the server by the external url by keeping the parameters of the url.
4. Close the warning message by clicking OK 1 .
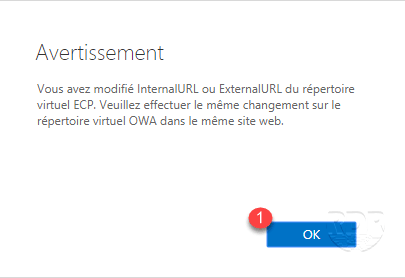
5. Repeat for all directories except the Autodiscover.
Editing Directories by Scripts
There is a script, which allows to make the changes by a powershell script.
1. Download the script on the Exchange 2016 server.
2. Open the Exchange Management Shell and go to the folder where the script is located.
3. Run the script:
.\ConfigureExchangeURLs.ps1 -Server LAB-EX1 -InternalURL lab-ex1.lab.intra -ExternalURL mail.rdr-it.comConfiguration: add a send connector
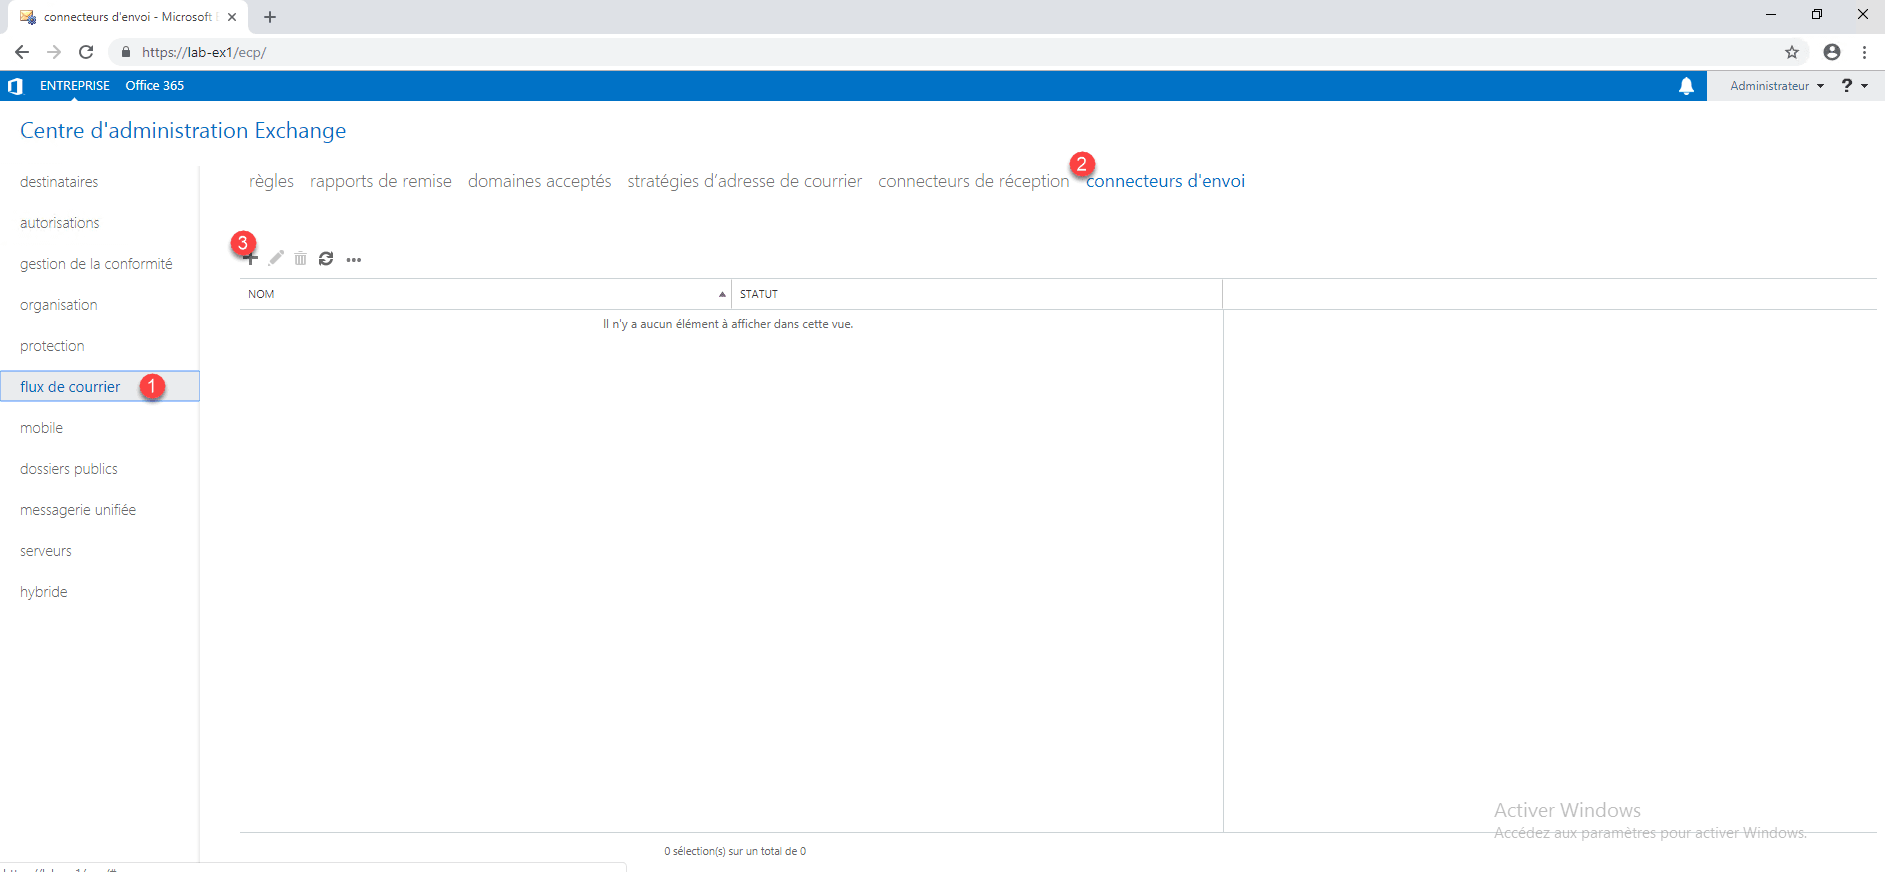
To send e-mails to the outside (Internet), you have to configure an SMTP send connector.
1. From the ECP, go to mail flow 1 / send connector 2 and click on + 3 to add a new connector.
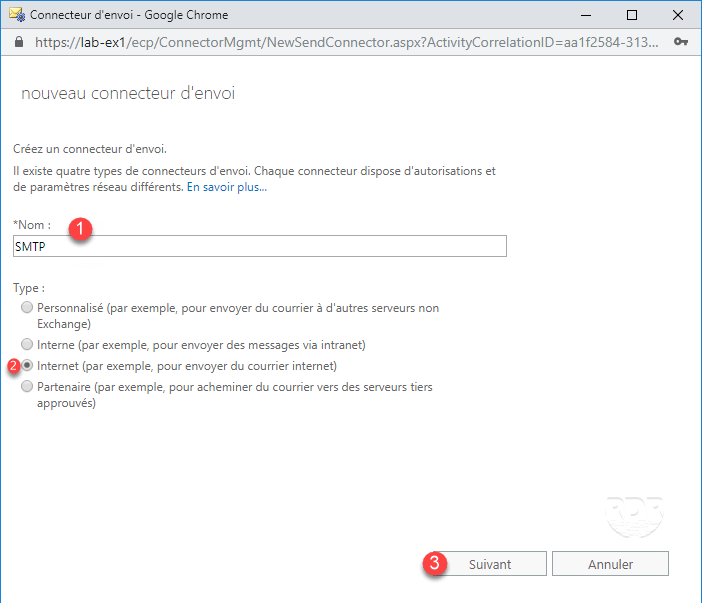
2. Enter the connector name 1 , choose type: Internet 2 and click Next 3 .
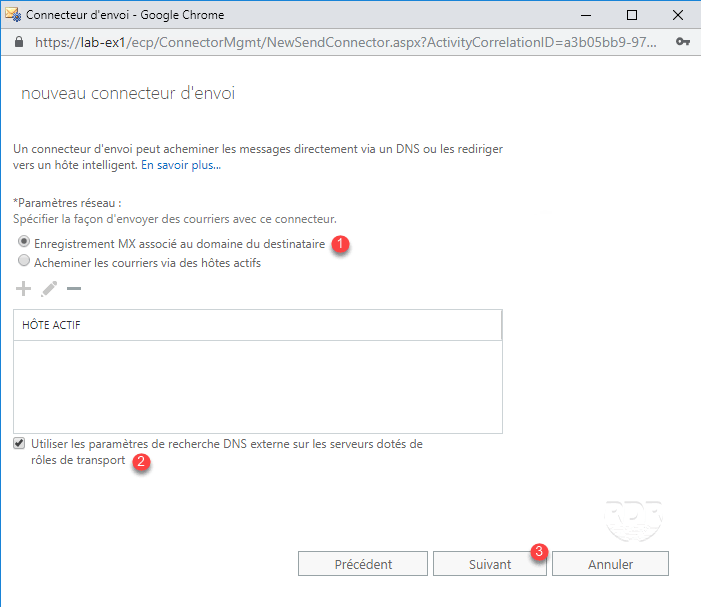
3. Select MX record associated with recipient’s domain 1 , check the box Use external DNS search settings on servers with transport roles 2 and click Next 3 .
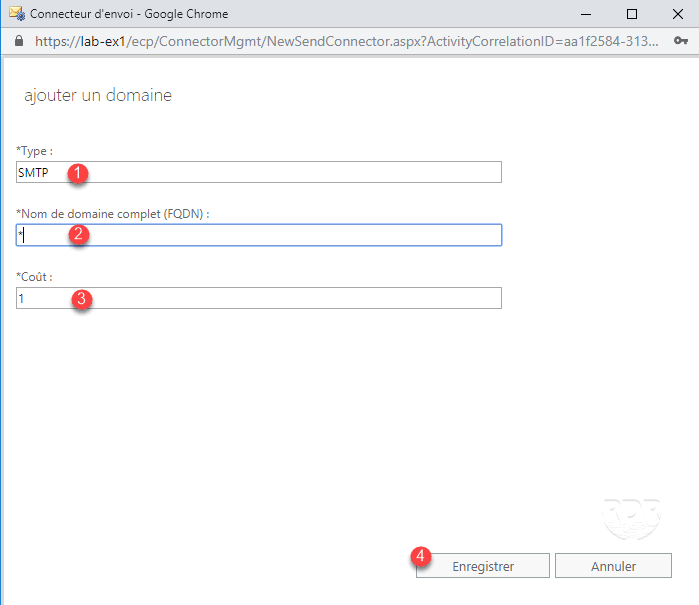
4. Click on + 1 .
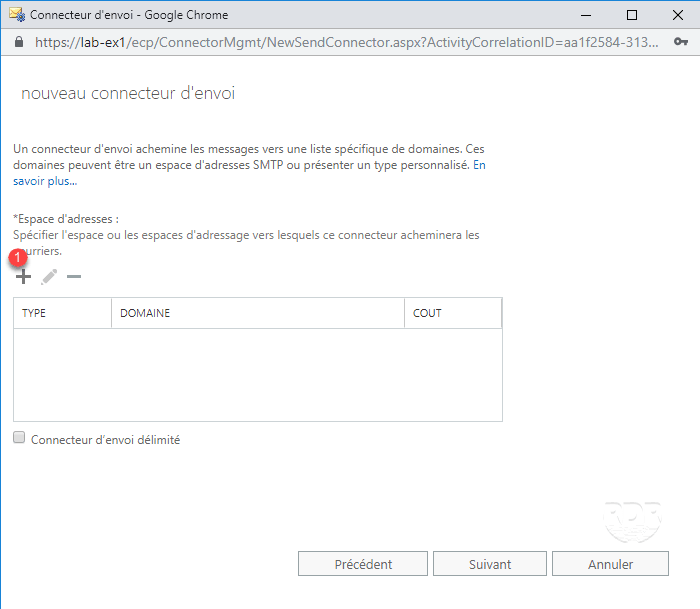
5. Type: SMTP 1 / Fully Qualified Domain Name (FQDN): * 2 / Cost: 1 3 and click Save 4 .
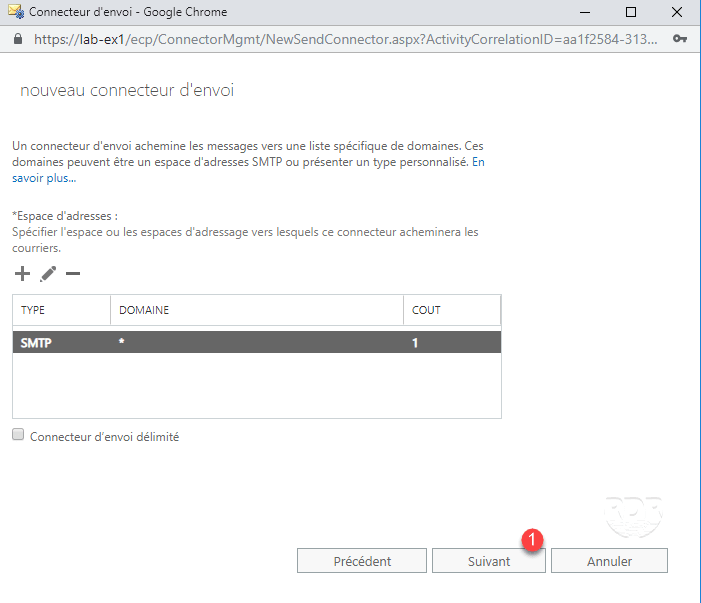
6. Click Next 1 .
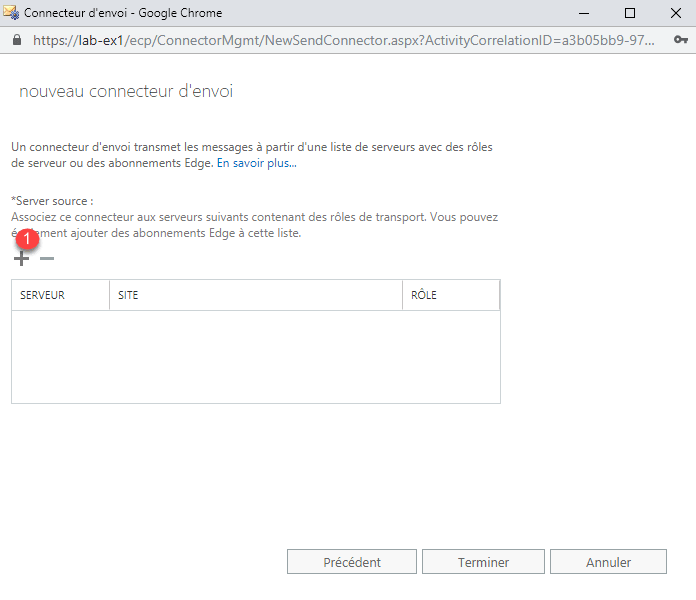
7. Click on the + 1 .
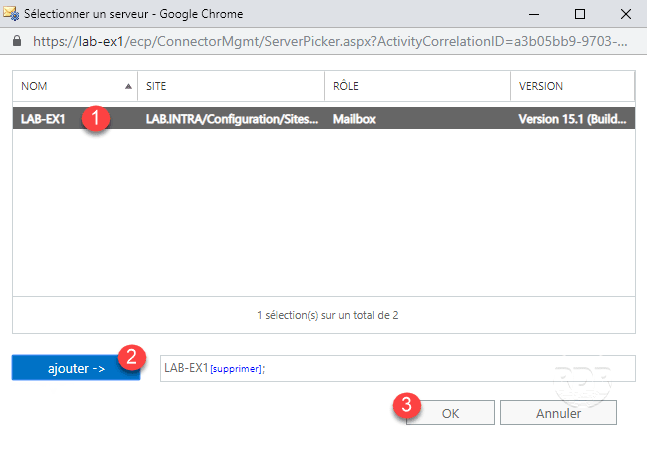
8. Select server 1 , click on add -> 2 then on OK 3 .
9. Click Finish 1 to create the Send connector.
