In this tutorial, I will explain how to change a mailbox database in Exchange 2016/2019 using PowerShell and the Cmdlet New-MoveRequest.
If you don’t like command lines, it’s always possible to do it from the graphical user interface (ECP): Exchange: change a database mailbox.
Personally, I prefer to do it in PowerShell which requires less manipulation.
The main reason you may have to move a database mailbox is quota management.
From an Exchange 2016/2019 server, open Exchange management Shell.
To move the database mailbox, you must use the Cmdlet New-MoveRequest by indicating 2 parameters, the first the identity of the mailbox and the second parameter is the target database.
Example :
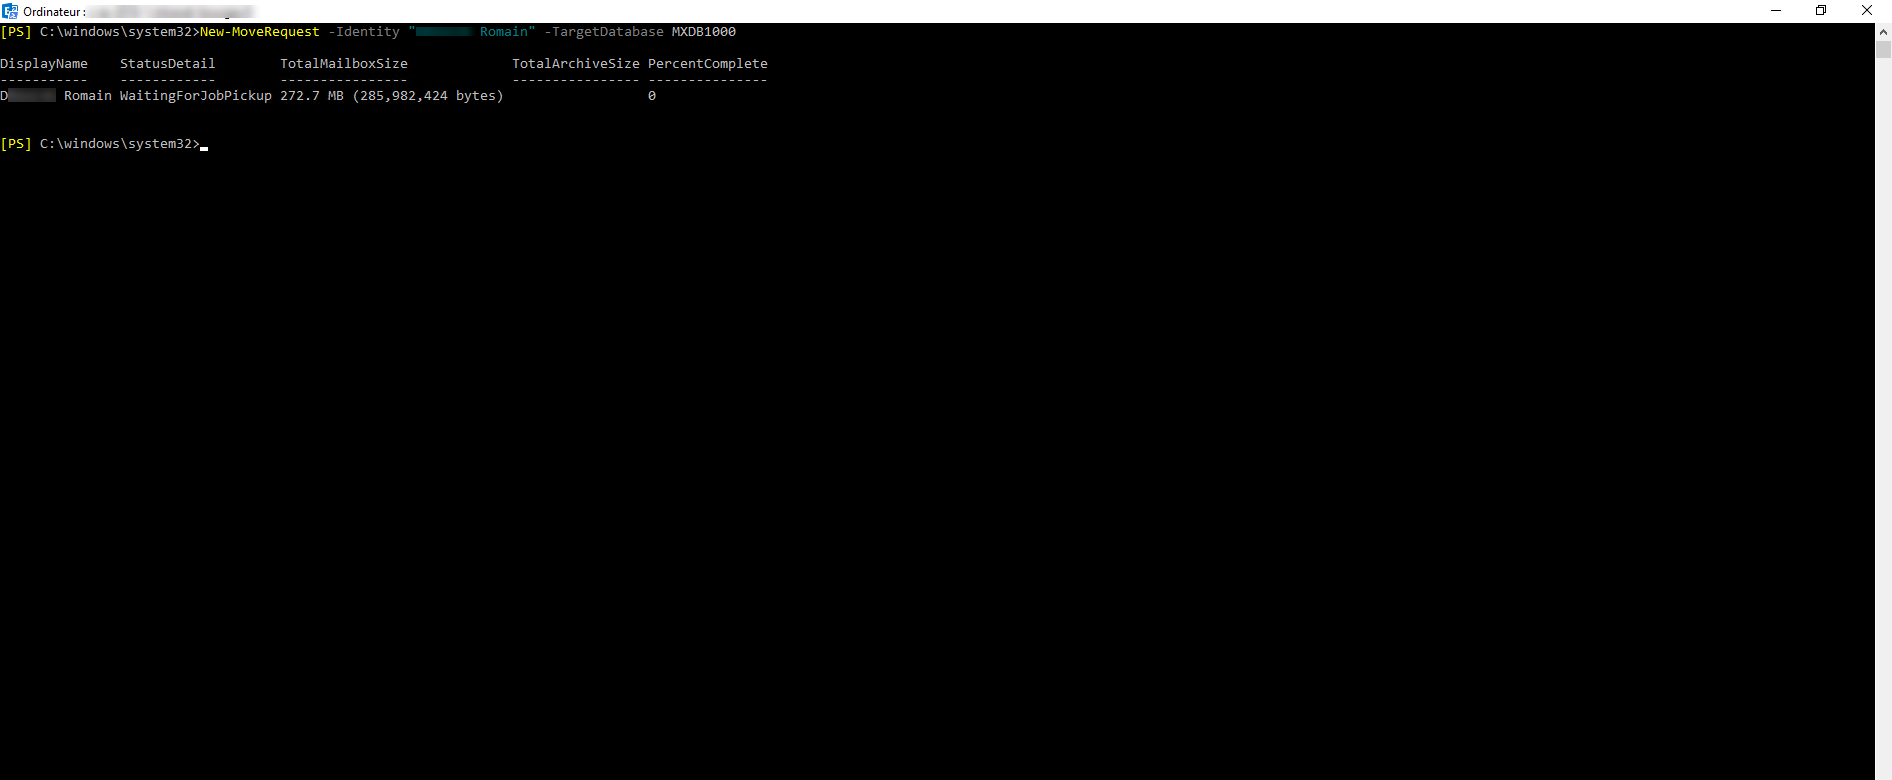
New-MoveRequest -Identity "NOM Prenom" -TargetDatabase DBNAMEhere is an example :
New-MoveRequest -Identity "D**** Romain" -TargetDatabase MXDB1000The command returns the list of requested moves:
To display move requests, use the Cmdlet:
Get-MoveRequest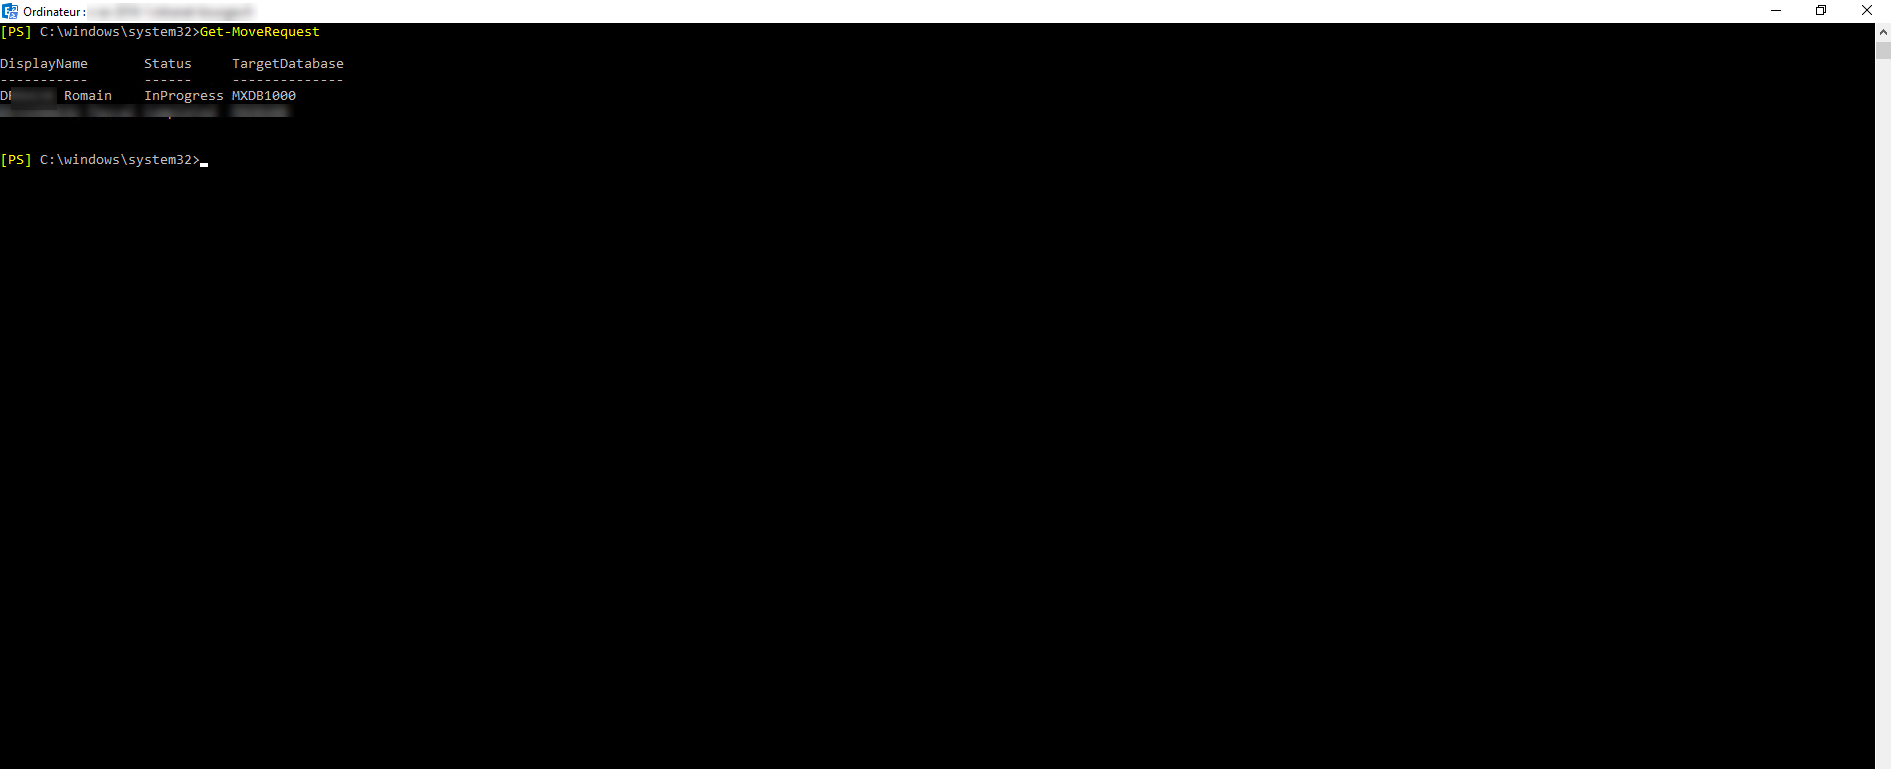
For more information on the move use the Cmdlet below:
Get-MoveRequest | Get-MoveRequestStatistics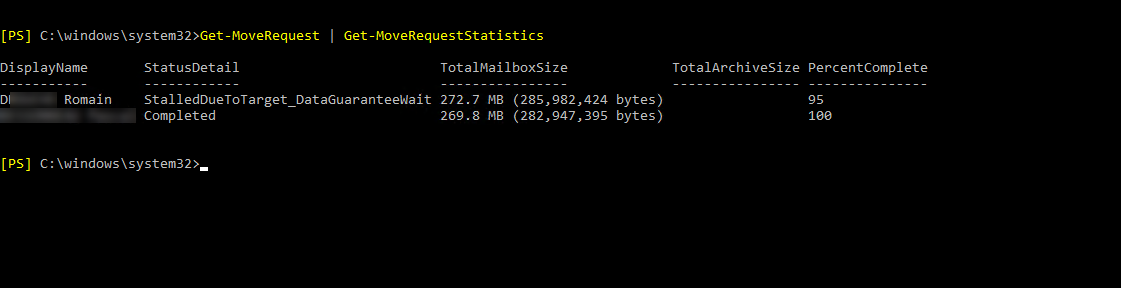
With this command, we have the percentage of the displacement carried out.
Une fois le ou les déplacement terminée, on va voit comment les supprimer, car comme vous pouvez le voir avec la cmdlet ci-dessous, les demandes restent :
Get-MoveRequest -MoveStatus Completed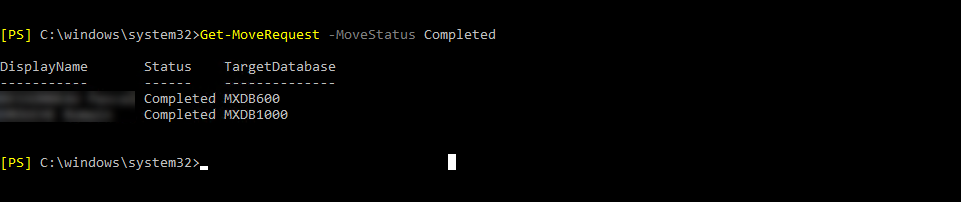
Here we have the list of completed travel requests.
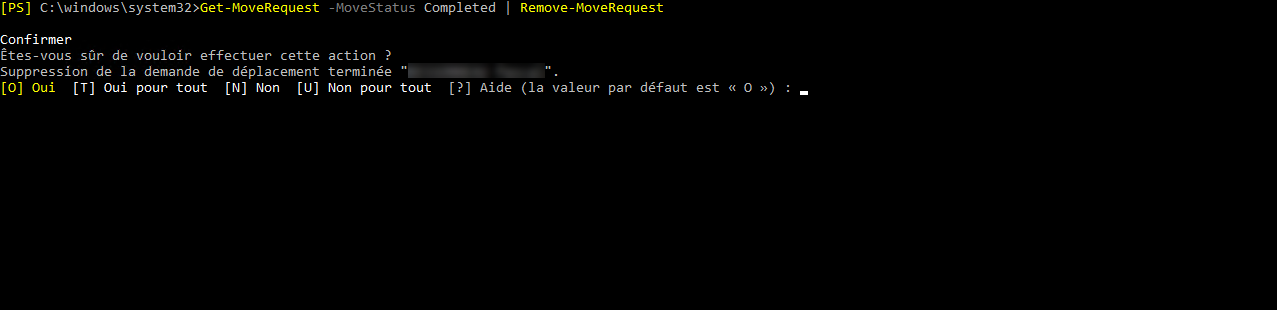
To remove requests, we used Remove-MoveRequest. Which gives us to delete completed mailbox move requests:
Get-MoveRequest -MoveStatus Completed | Remove-MoveRequestThe command asks for confirmation for each move request deletion, it is possible to answer yes for everything if you have several.
You now know how to change a mailbox database on Exchange 2016/2019 in PowerShell.