

Introduction
In this tutorial, I will explain to you how to install Docker on Ubuntu and then through a concrete example how and why to use Docker.
At the time of writing this tutorial (in 2021) as SysAdmin, I was having a hard time finding a concrete use for containers including Docker (so I’ll let you imagine Kubernetes).
This is not necessarily true, in a PROD environment, I have a few examples, but nothing to thrill the planet …
Most of the tutorials, which can be found on the Internet, explain how to install Docker and then create one or more containers to use a LAMP server, something that is done very well without container and just as quickly …
I’m not saying the tutorials aren’t good, just the lack of interest …
Wishing to put in place a forum type solution for RDR-IT, I found a discourse that allows me to link a forum and comments for my various WordPress sites.
After a local test on a dedicated VM, I validate the solution, I love it, then comes the time to think about how to put it into production … I currently have two VPS (one dedicated to web hosting with Cyberpanel and another where I only run my gitlab server).
I don’t want to install the Disourse prerequisites on the Web server, because Discourse needs a lot of things (Web server, PostgreSQL, Redis, Ruby …), on the server at Gitlab is working, I’m a little afraid, because Gitlab and Discourse use the same components … I’m starting to think I need a third server … and I’m starting to backtrack because it’s extra money and my various attempts to setting up a forum have been failures every time.
A light comes on, Gitlab and Discourse both offer Docker containers … and I’m thinking maybe now is the time to test that and I’m finally starting to find a container app and I’m making up my mind so to test this solution in lab (local), which would allow me to run my Gitlab and discourse on the same server.
There remains one problem to be solved which is the use by the two applications of a Web server and their use of port 80 and 443, to solve this problem, I will use Nginx as a reverse proxy installed locally on the server (I could also have used the Nginx container for that …).
In this tutorial I will be using a virtual machine on Ubuntu Server 20.04
Installation of prerequisites
Before launching into the Docker installation, we will first install a few packages:
- Cockpit : which is a web graphical interface that will allow us to administer our Ubuntu server and containers
- Nginx : which will be used as a reverse proxy to publish the Gitlab and Discourse
- certbot : which will generate Let’s Encrypt certificates
Cockpit installation
Entrer la commande suivante :
sudo apt install cockpit -y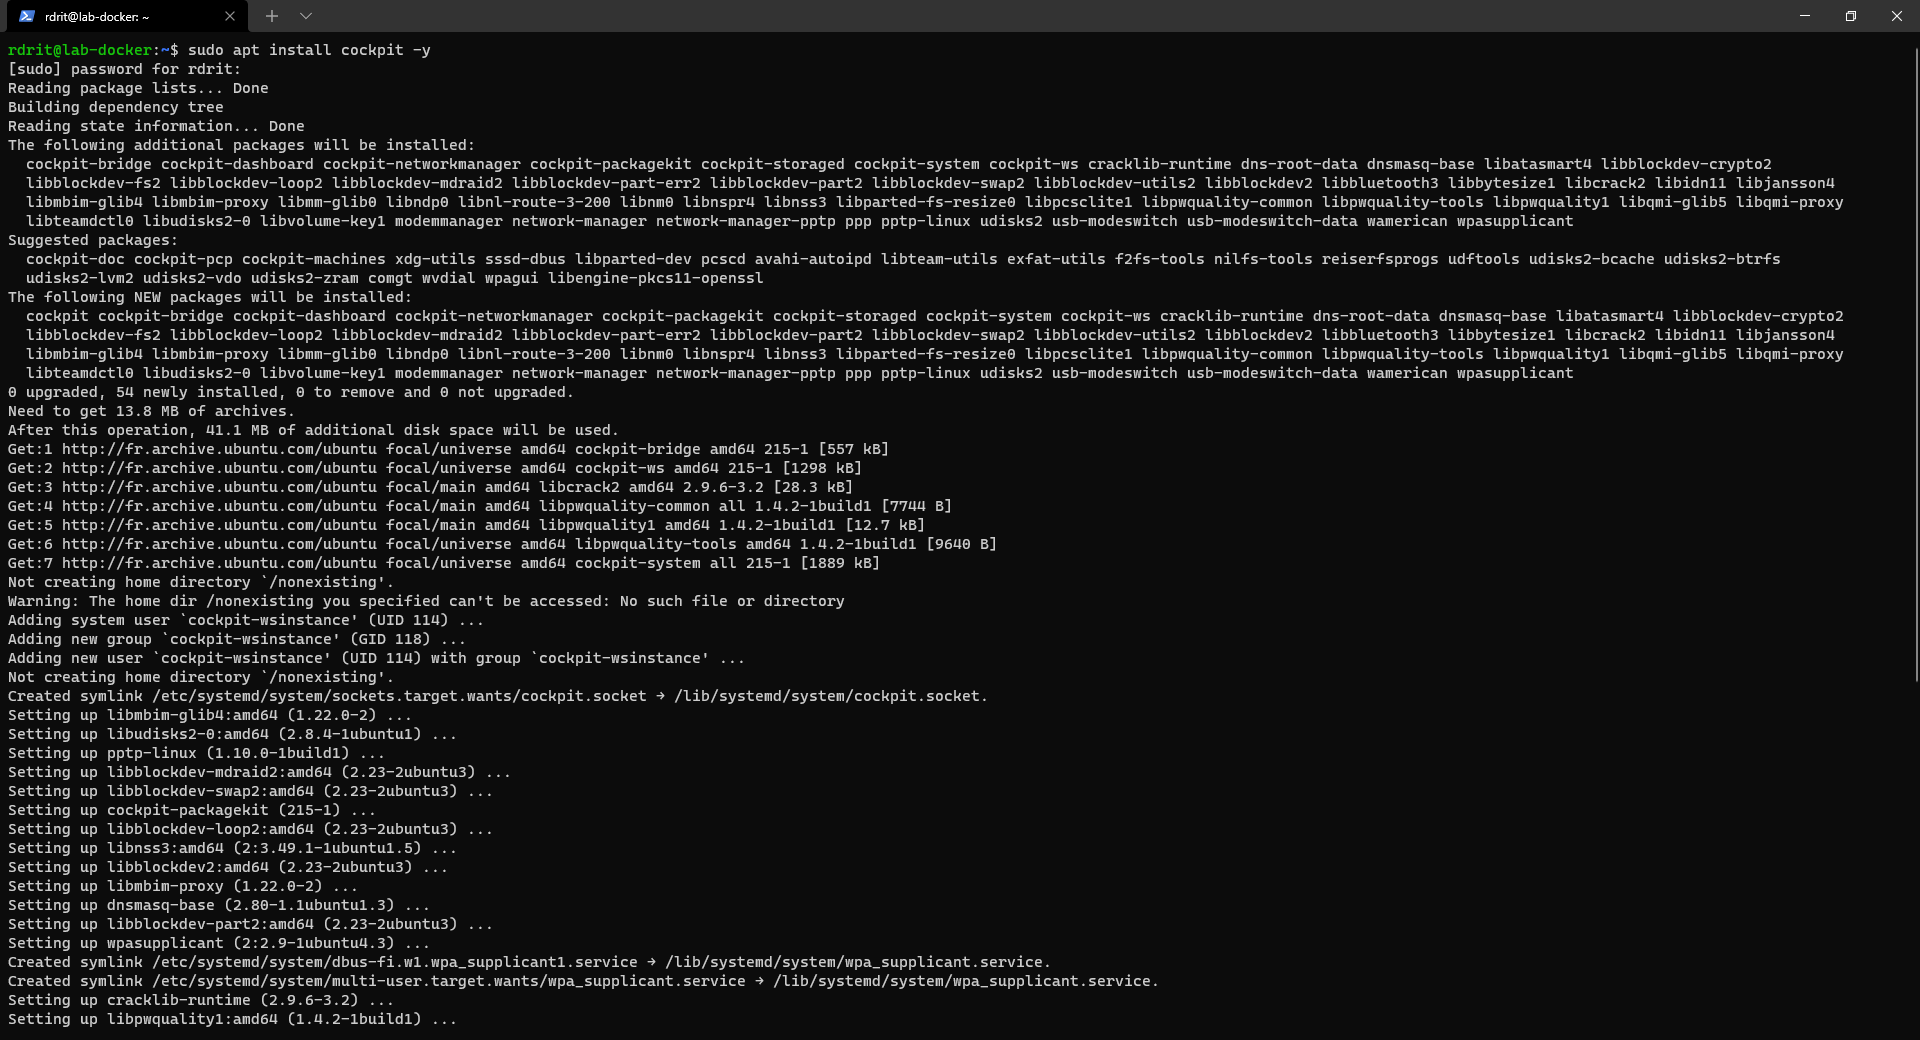
Once the cockpit is installed, it is available at the following address: https: //server_ip:9090


In order to be able to manage Docker containers, it is necessary to install an additional module.
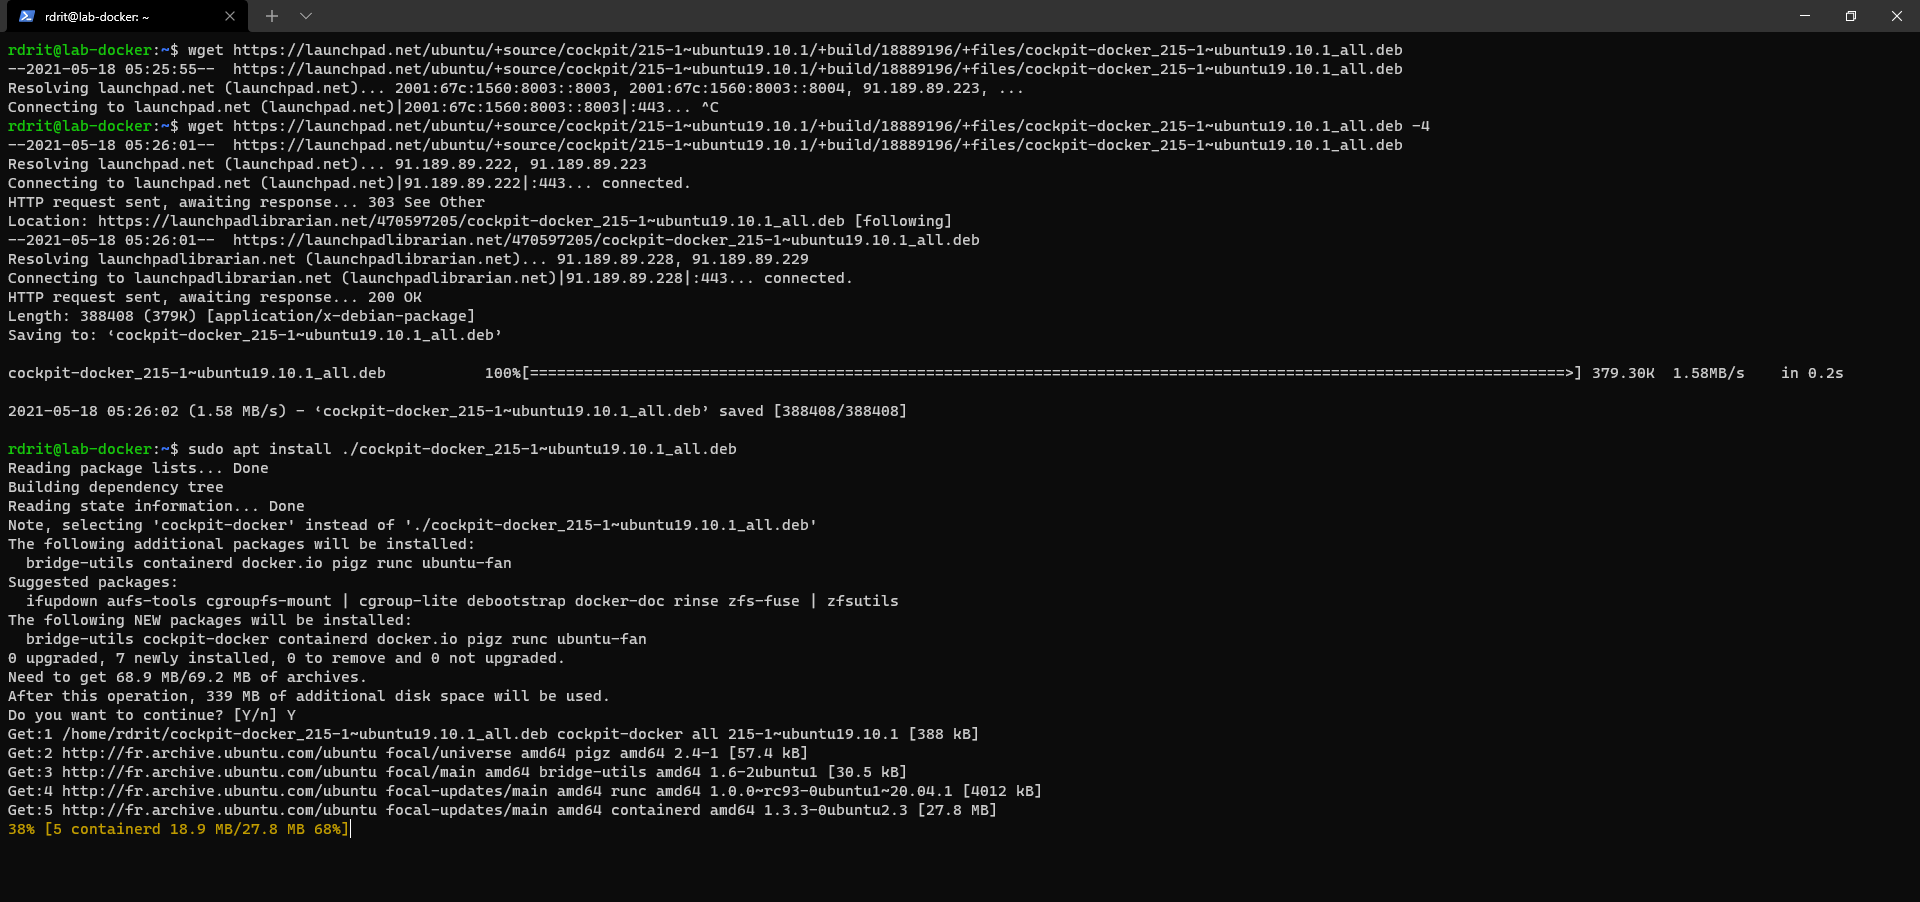
At the time of writing, the add-on is not officially available for version 20.04, but version 19.10 does work.
Download the .deb using the wget command
wget https://launchpad.net/ubuntu/+source/cockpit/215-1~ubuntu19.10.1/+build/18889196/+files/cockpit-docker_215-1~ubuntu19.10.1_all.debInstall the .deb:
sudo apt install ./cockpit-docker_215-1~ubuntu19.10.1_all.debWait during the installation:
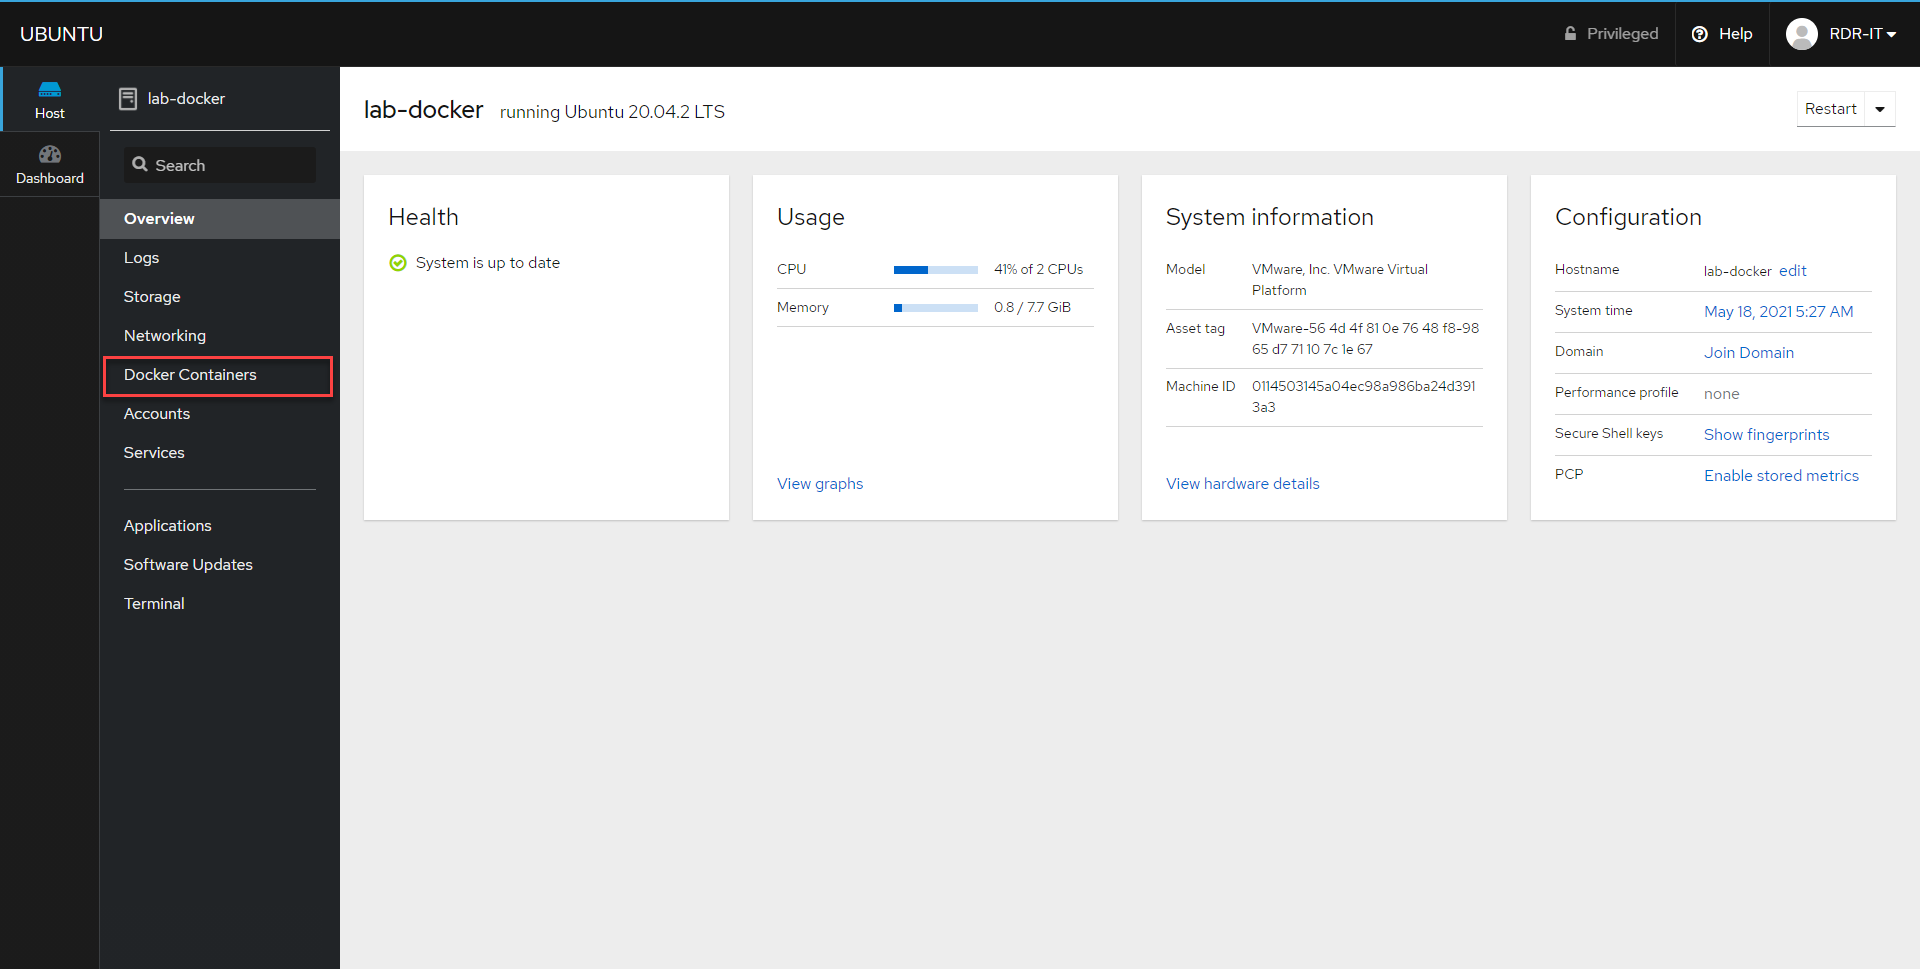
Une fois installée, retourner sur l’interface de cockpit et actualiser, le menu Docker Container est disponible.
Installing the cockpit-docker module installs the Docker package, which will be uninstalled later to use the official Docker repository.
It is also possible to install the cockpit-docker module after the installation of Docker, which avoids the uninstallation.
Installing Nginx
As several Web servers will be exposed with the containers, we will install Nginx in order to have a reverse proxy, it is also possible to use Apache2.
We could also have used the Nginx container.
Use one of the commands below to install Nginx on the server:
Installing Certbot
This installation is optional, it will make it possible to generate Let’s Encrypt certificates in order to make the various applications accessible in HTTPS.
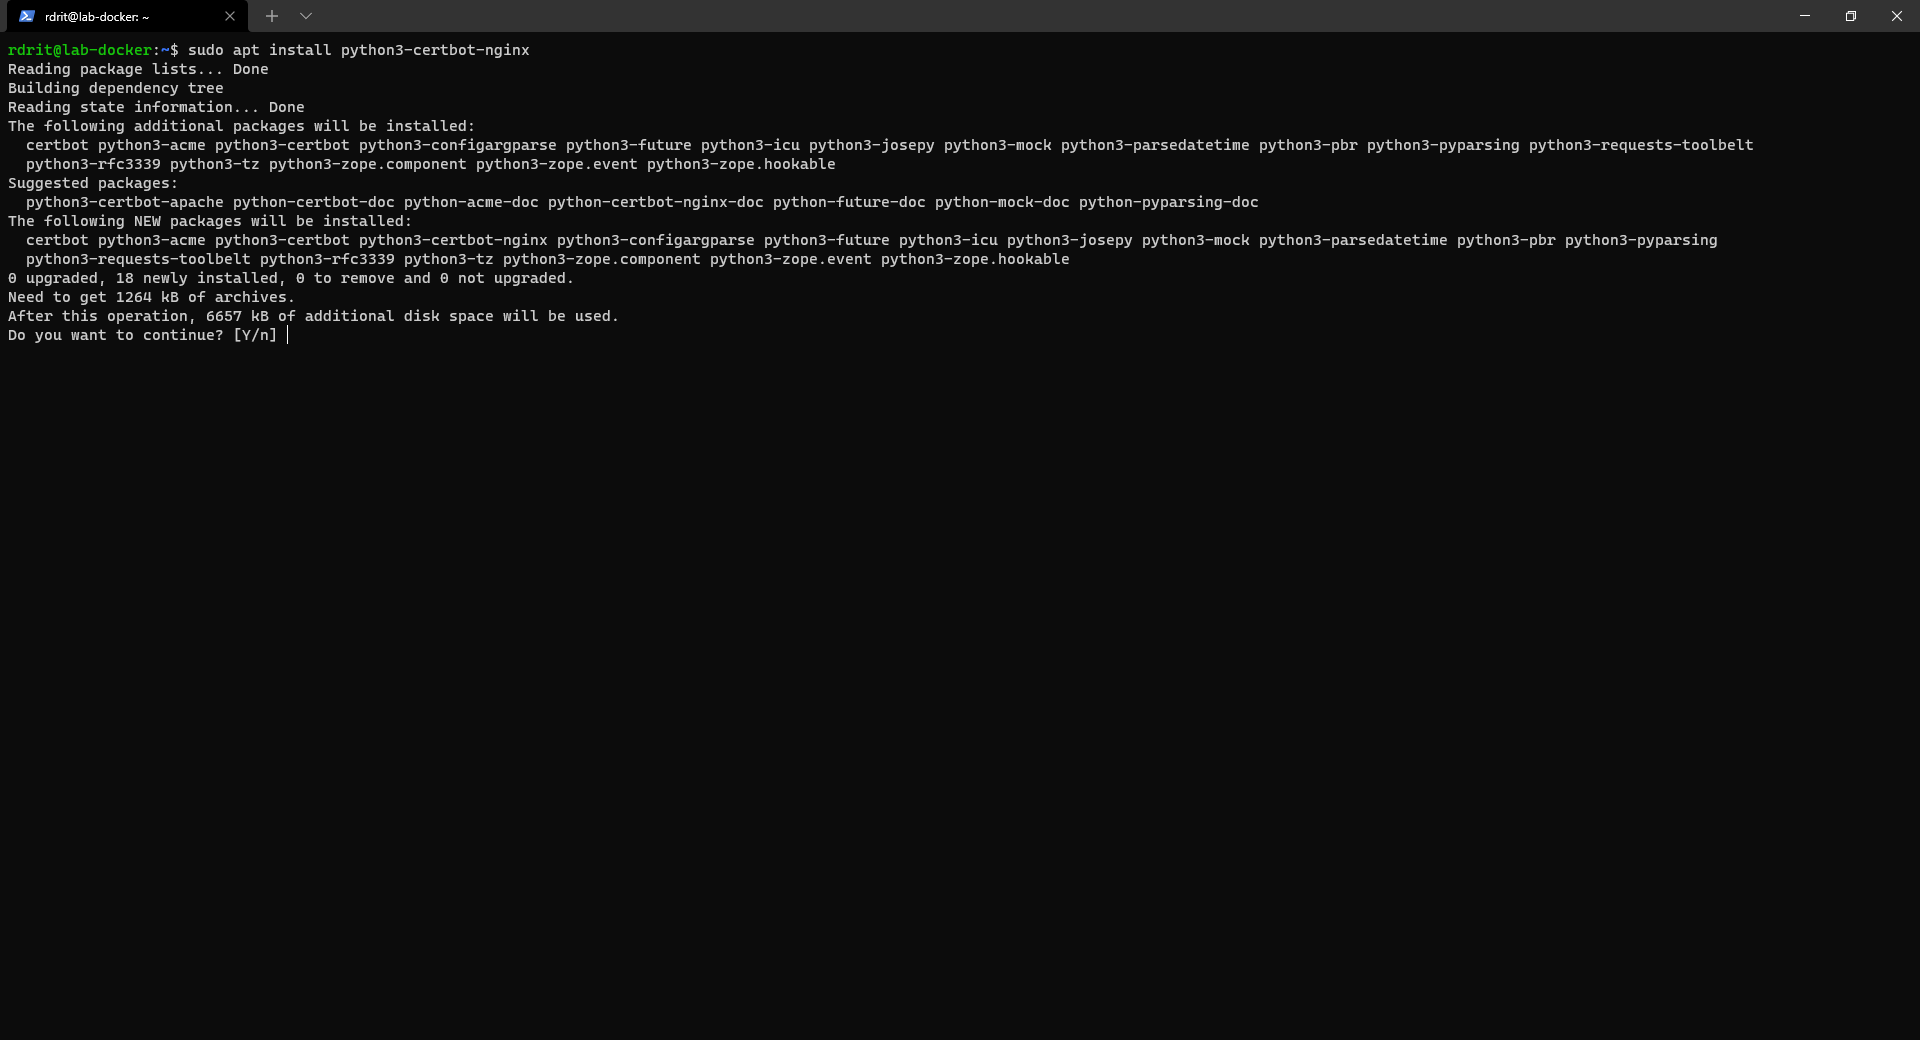
To install Certbot for Nginx enter the command:
Now that we have installed the necessary prerequisites, we will move on to installing Docker on the Ubuntu server.
Installing Docker on Ubuntu
Before we can use containers, we need to install Docker on our Ubuntu server which will manage them.
To put it simply: Docker is the container manager, what Hyper-V or VMware is to virtualization.
In addition to Docker, we will install docker-compose, which allows you to configure docker containers with files in yml format.
For this tutorial, I will be basing myself on the official Docker documentation.
Install Docker engine
This first command line is optional, we will first uninstall Docker if it is present, especially if you have installed the cockpit-docker module.
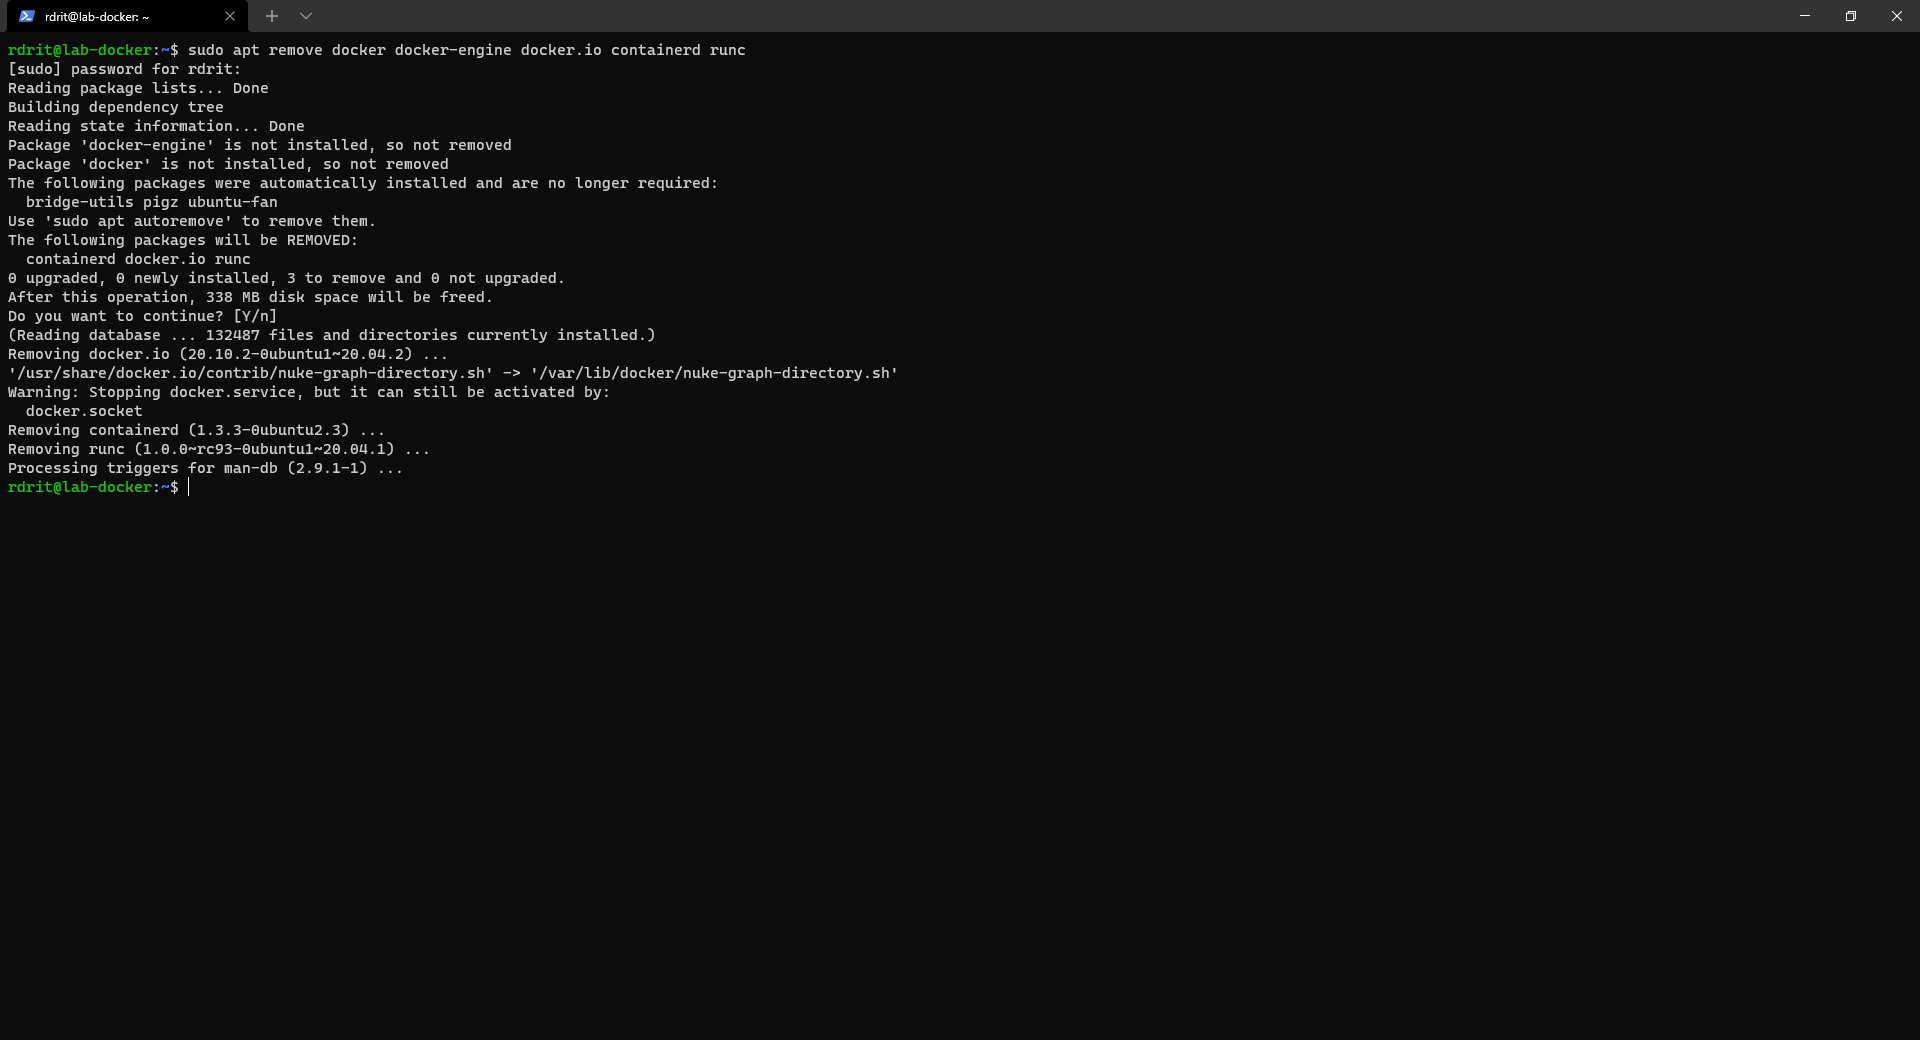
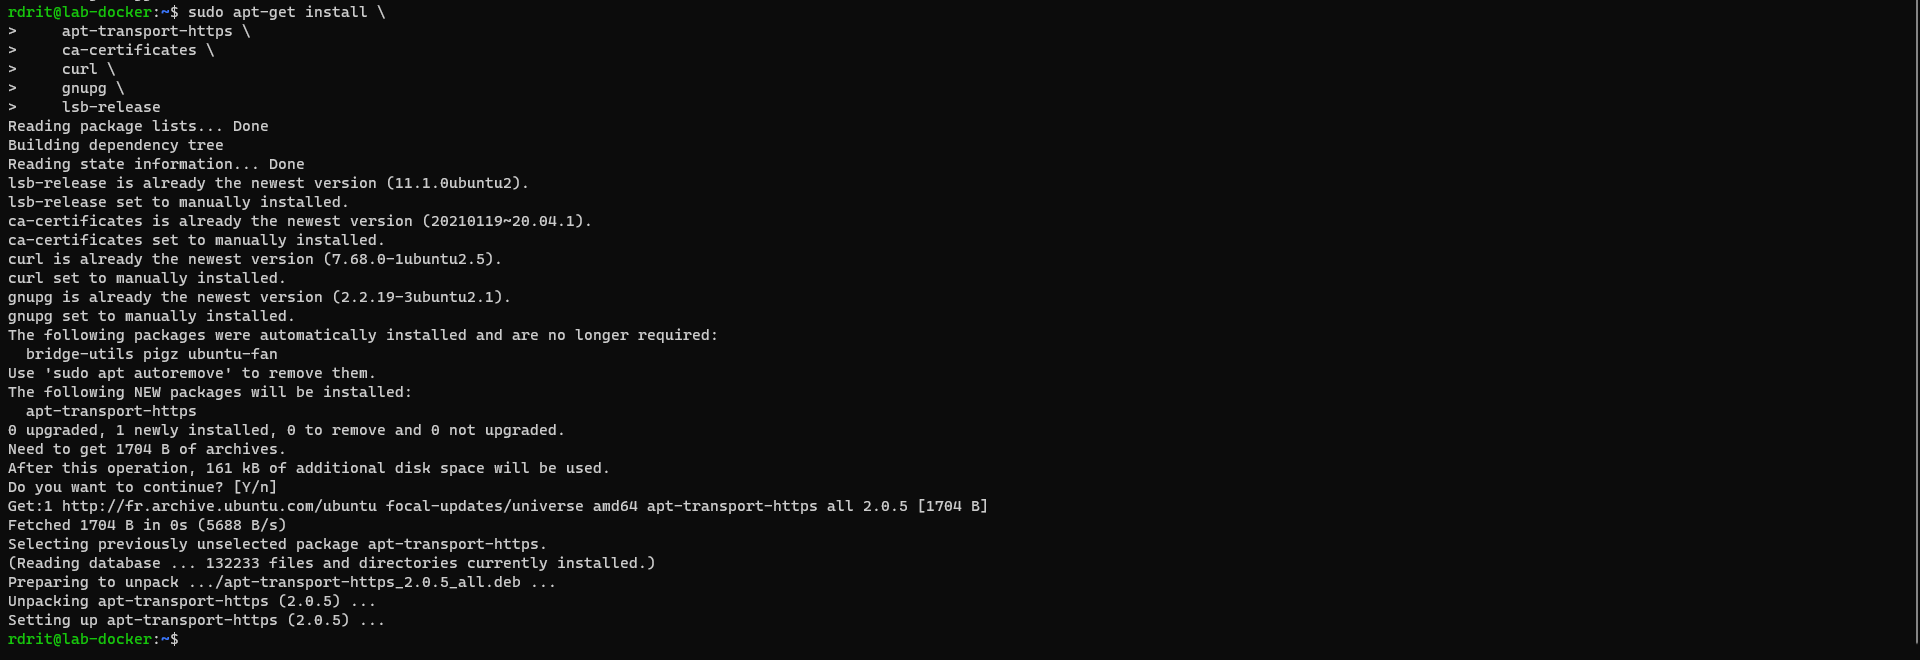
Install, the prerequisites for Docker:
Install the deposit key:
Add repository
Update the list of packages:
sudo apt update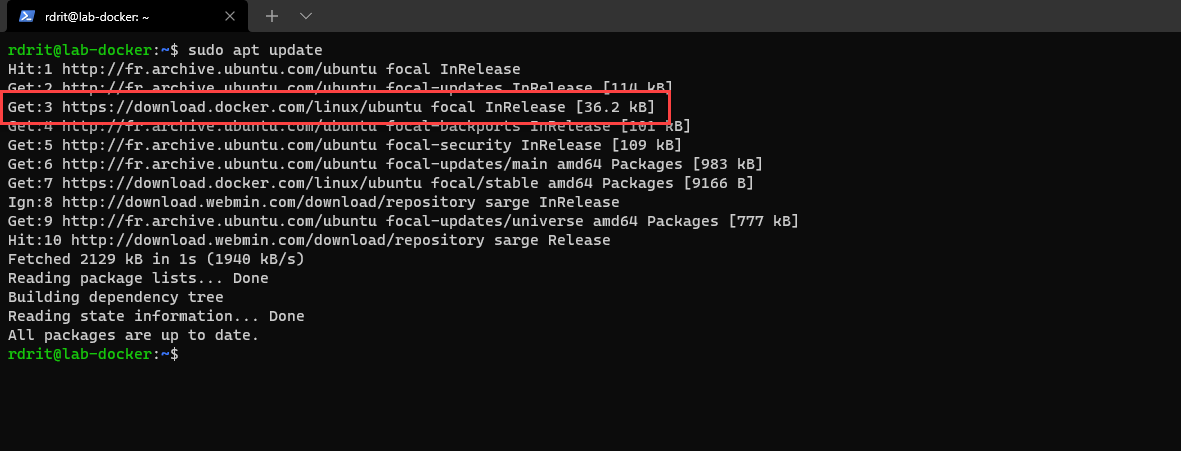
We can see that the Docker repository has been added
Install Docker:
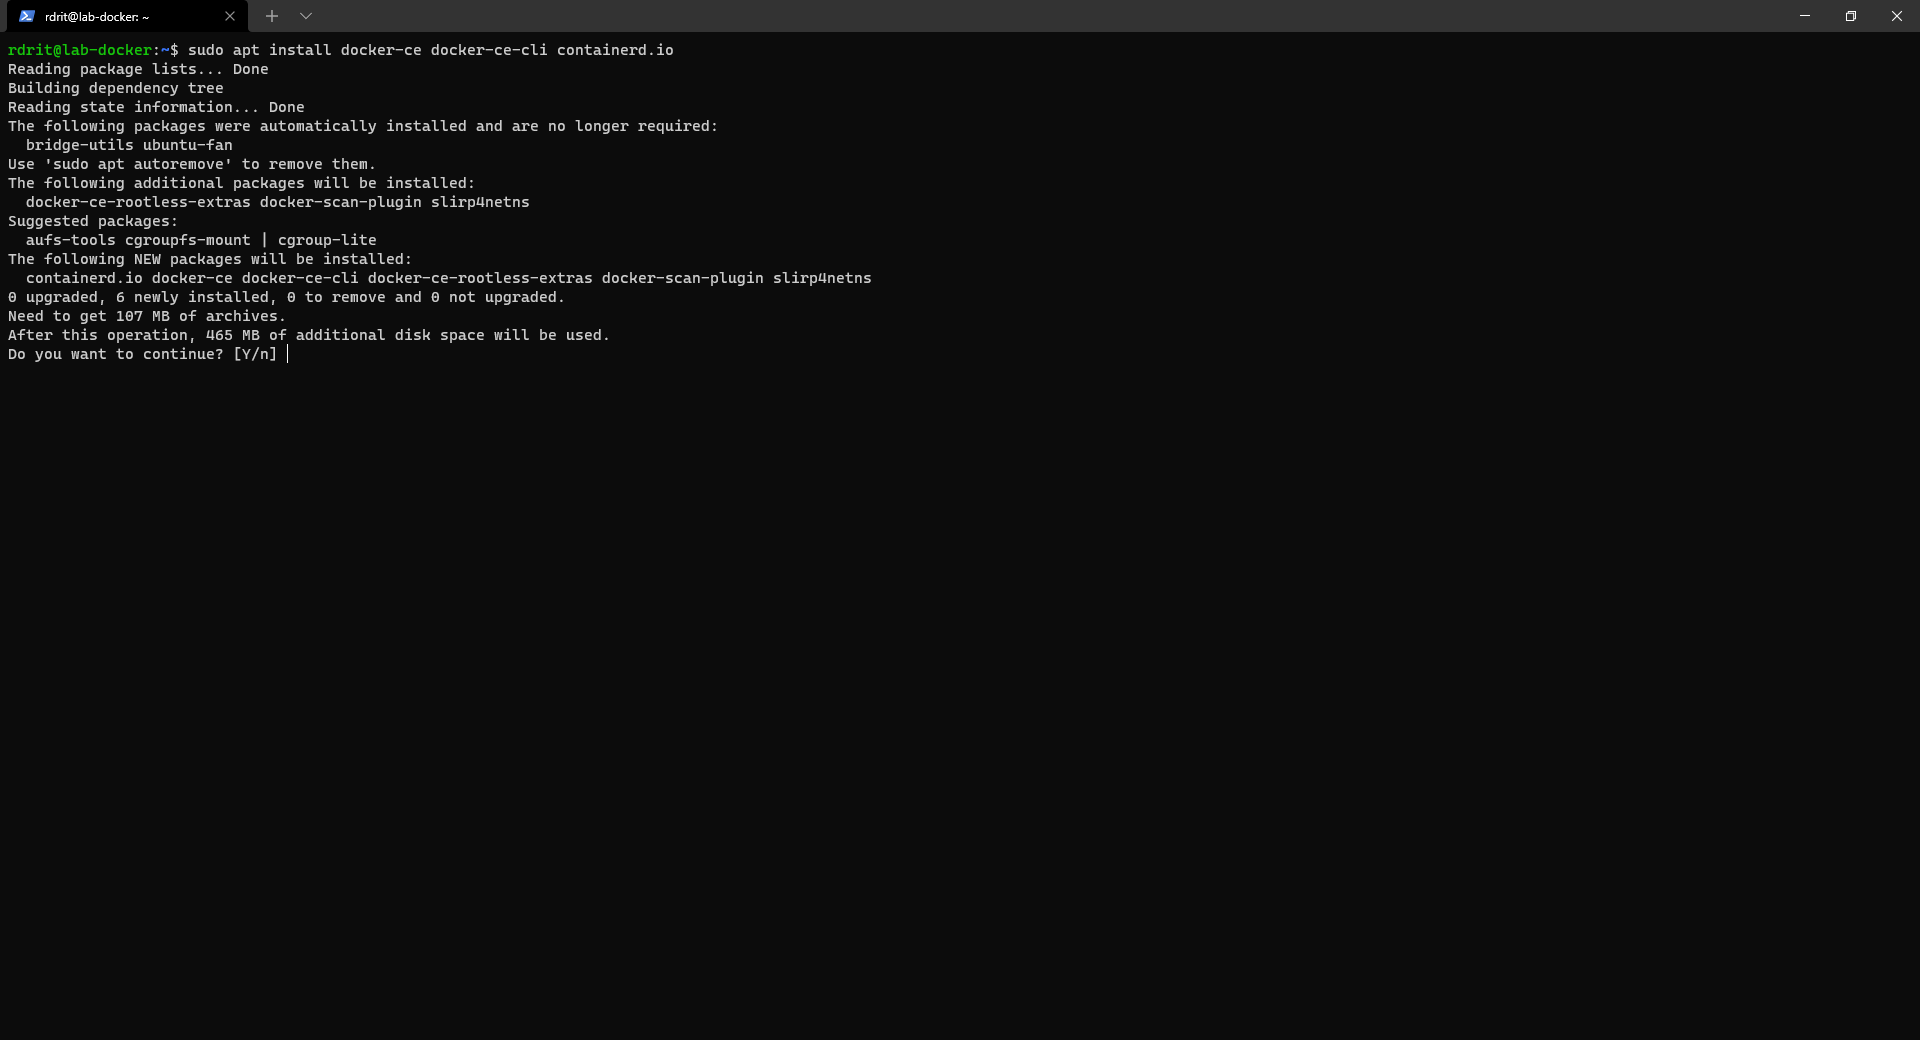
If at the end of the installation you get an error: Errors were encountered while processing: docker-ce. Restart the installation of the package.
Test that Docker is working properly using the command:
sudo systemctl status docker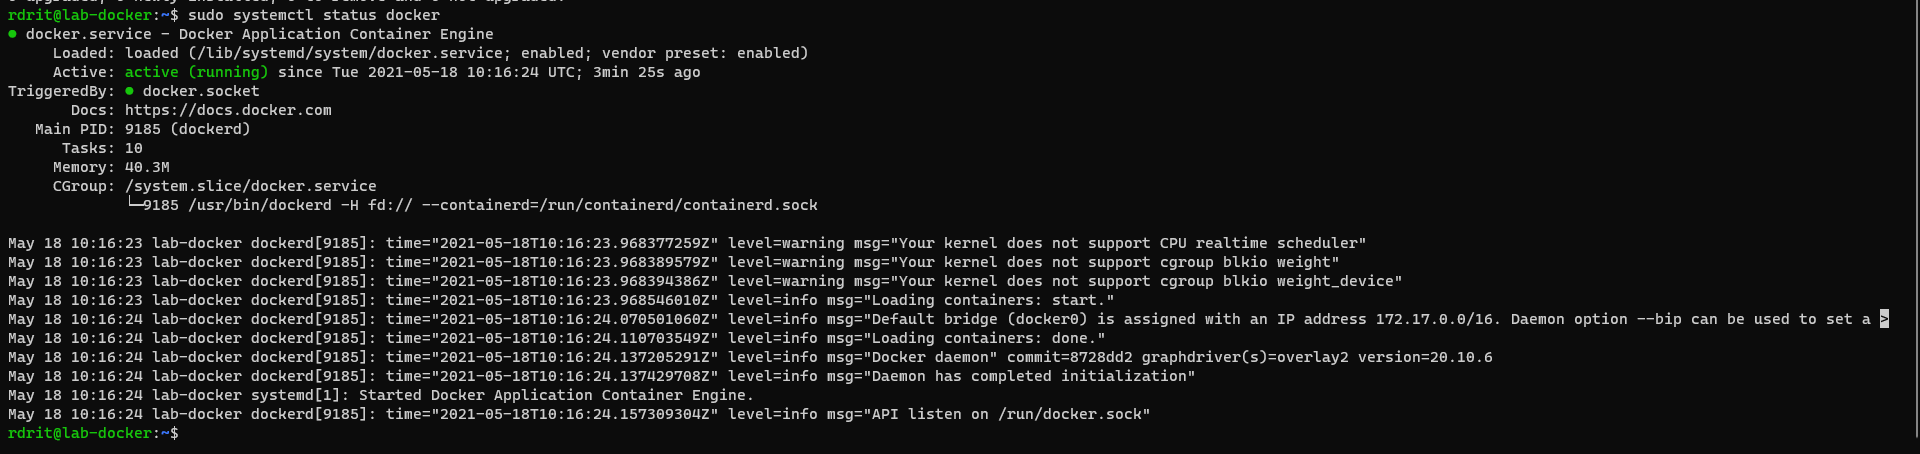
Install Docker Compose
This part is optional, as I explained to you earlier Docker Compose allows you to configure containers using a file in yml format.
Download Docker Compose:
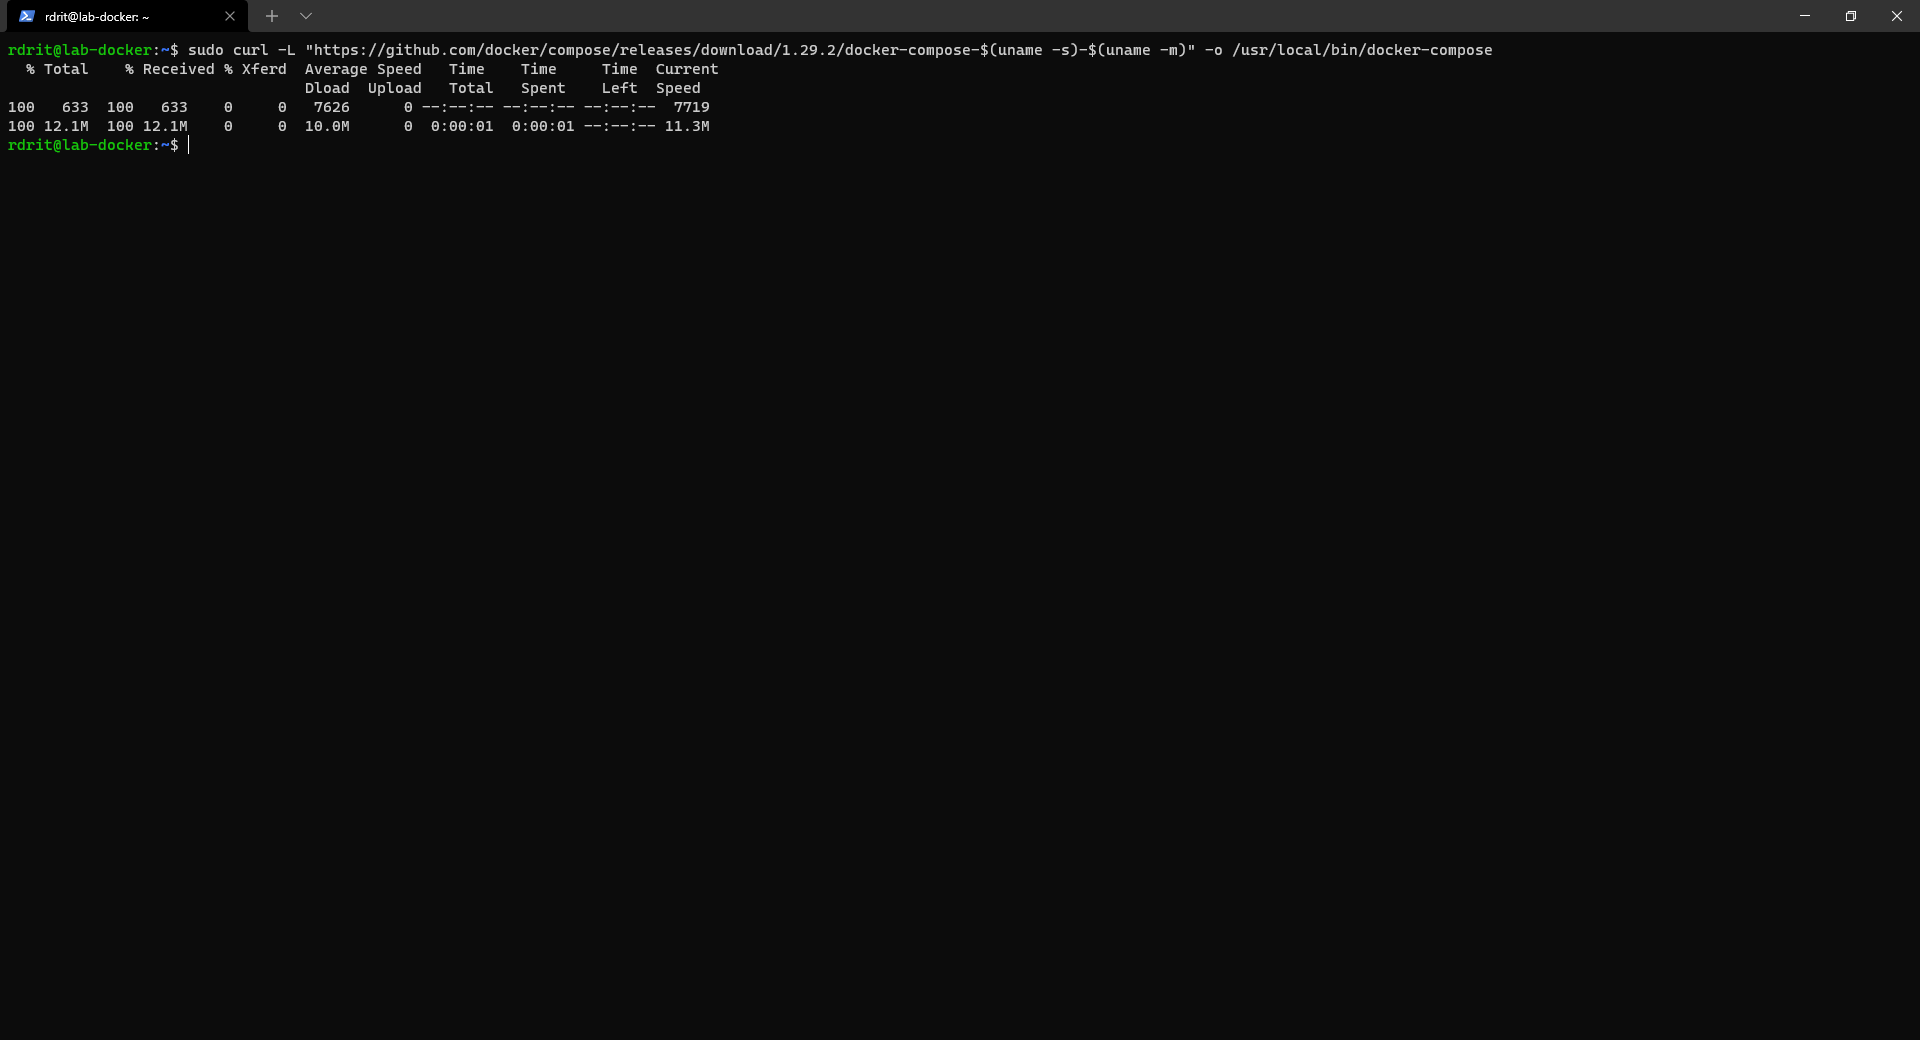
Make Docker Compose executable:
Test that it is working correctly using the following command:

Testing Docker with Hello World
We will now test our Docker installation by deploying our first Hello World container.
This container does nothing in particular, but it will allow us to ensure the proper functioning of our service.
Enter the command below to launch the hello-world container:
sudo docker run hello-world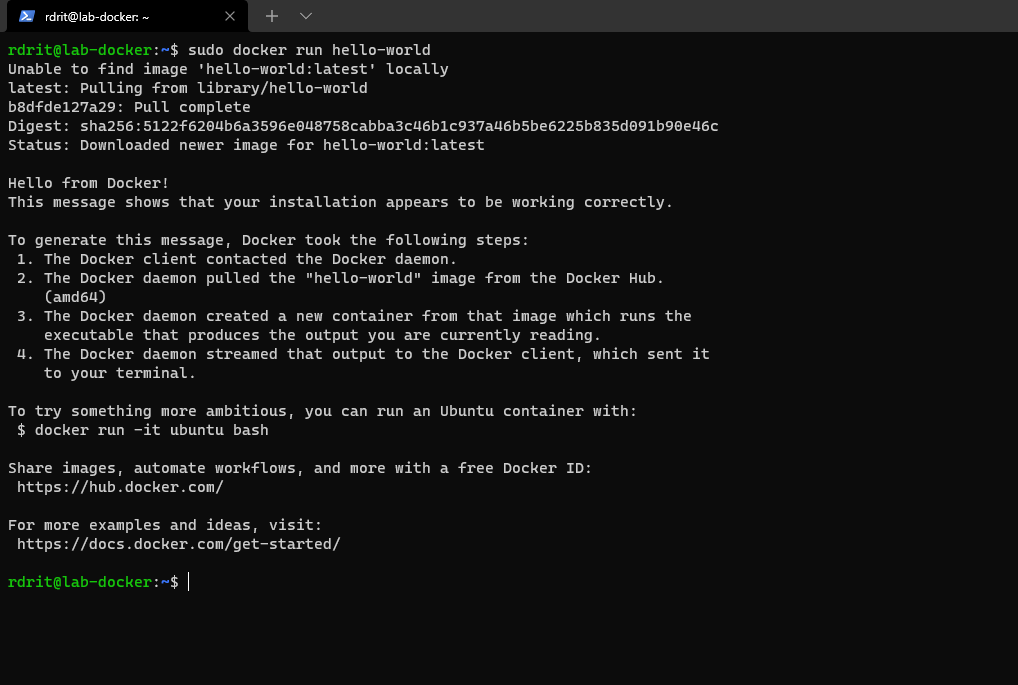
If you get the Hello from Docker! It’s all good, congratulations, you have deployed your first container.
Enter the following command to display the containers on the server and their status:
sudo docker ps -a
We can see the hello-world container.
In Cockpit, we can also see our container.
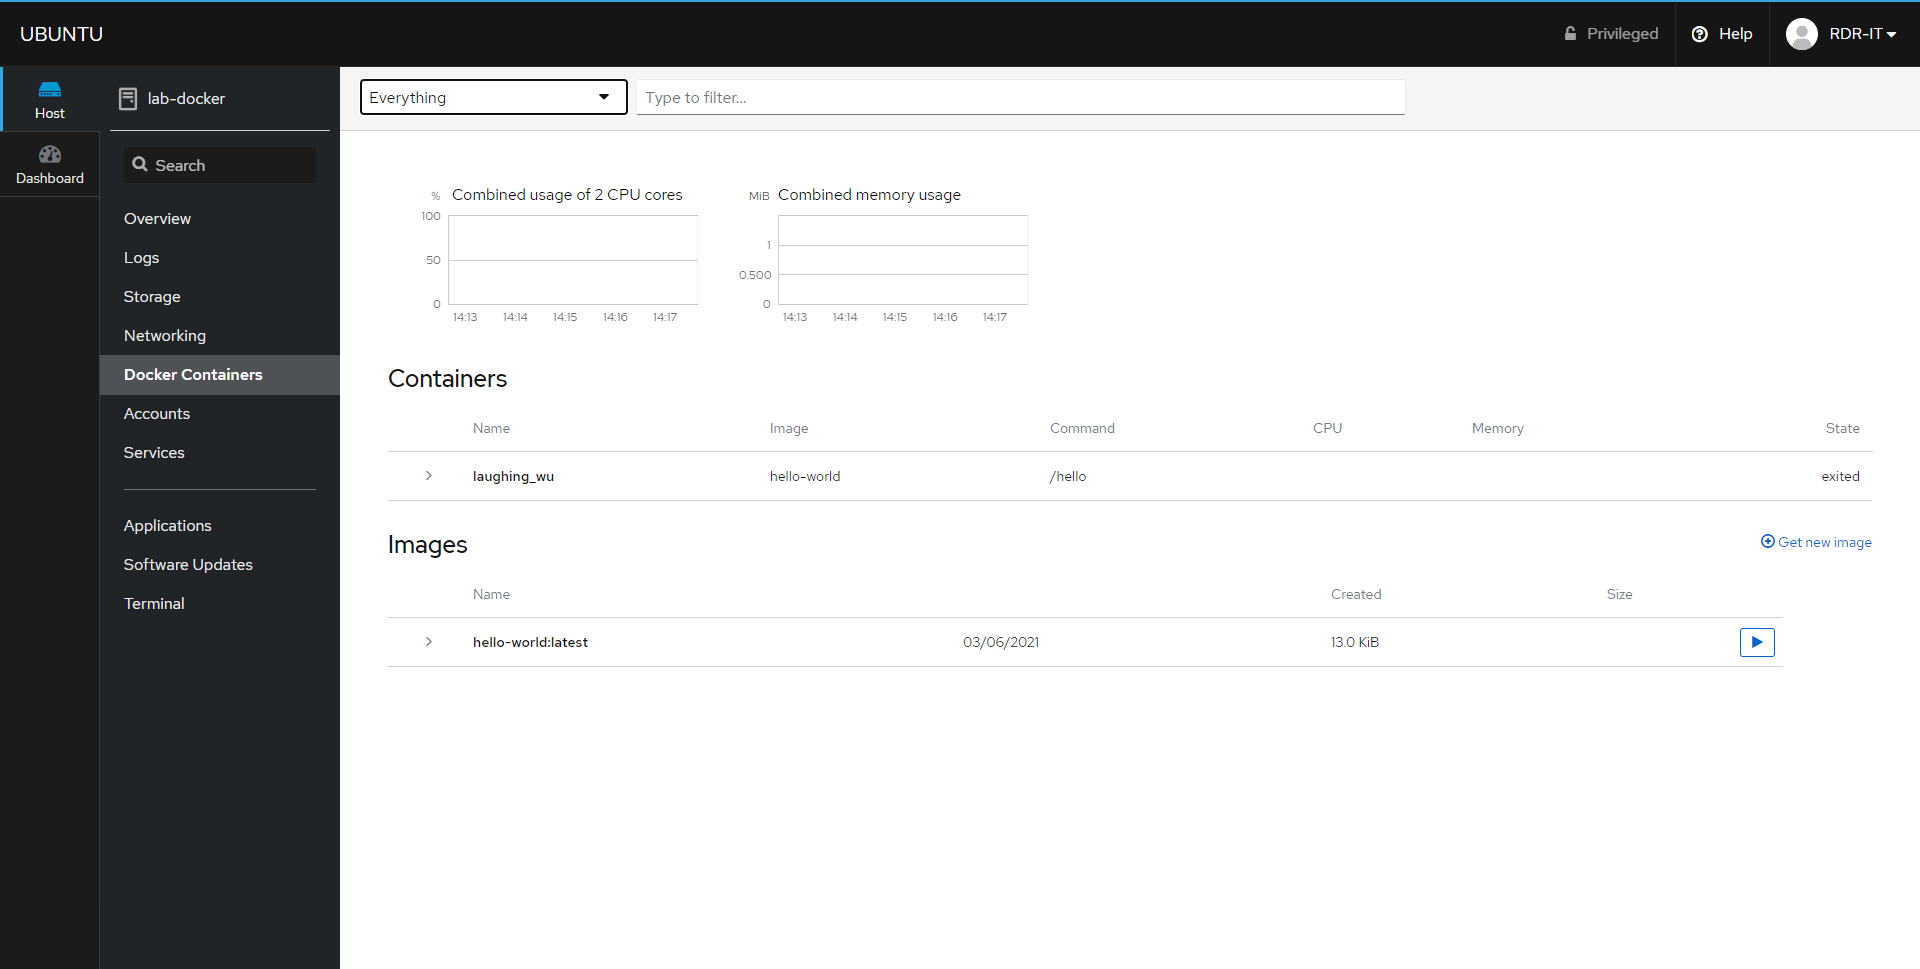
To display “off” containers select Everything at the top.
Docker is now installed and functional on the server, we will be able to move on to container deployment, before launching into container installation, I will give you some useful information before going further.
Docker: a few useful information before …
Before embarking on our deployment of containers (Gitlab and Discourse) here is some information (a little loose) to know about containers.
The network
This is what is a little confusing initially when you think about virtualization, by default the containers are not directly exposed to an IP in your LAN, it uses a NAT / PAT system to advertise the services.
It is indeed possible to have several containers using Web servers, for example we can have an Nginx and Apache2 container, but the two containers will not be able to expose port 80 for example.
This is why, as a prerequisite, we installed Nginx as a reverse proxy.
It is possible to expose a container with “its own IP” through a bridge.
More information : Networking overview | Docker Documentation
A container is persistent but be careful
The storage of a container is persistent, that is to say that the modifications are written in the image of the container, but be careful, during a rebuild of the image, update, the data will be lost .
You can stop a container without the risk of losing data.
To overcome this reconstruction / update problem, it is possible to redirect folders from the container to a folder on the host server
If we take, for example, an Apache2 container, we will redirect the / var / www folder of the container to a folder located on the host, if this has two advantages:
- To be able to access the folders and files of the web server that we publish
- Update the container without losing data.
Where to find images
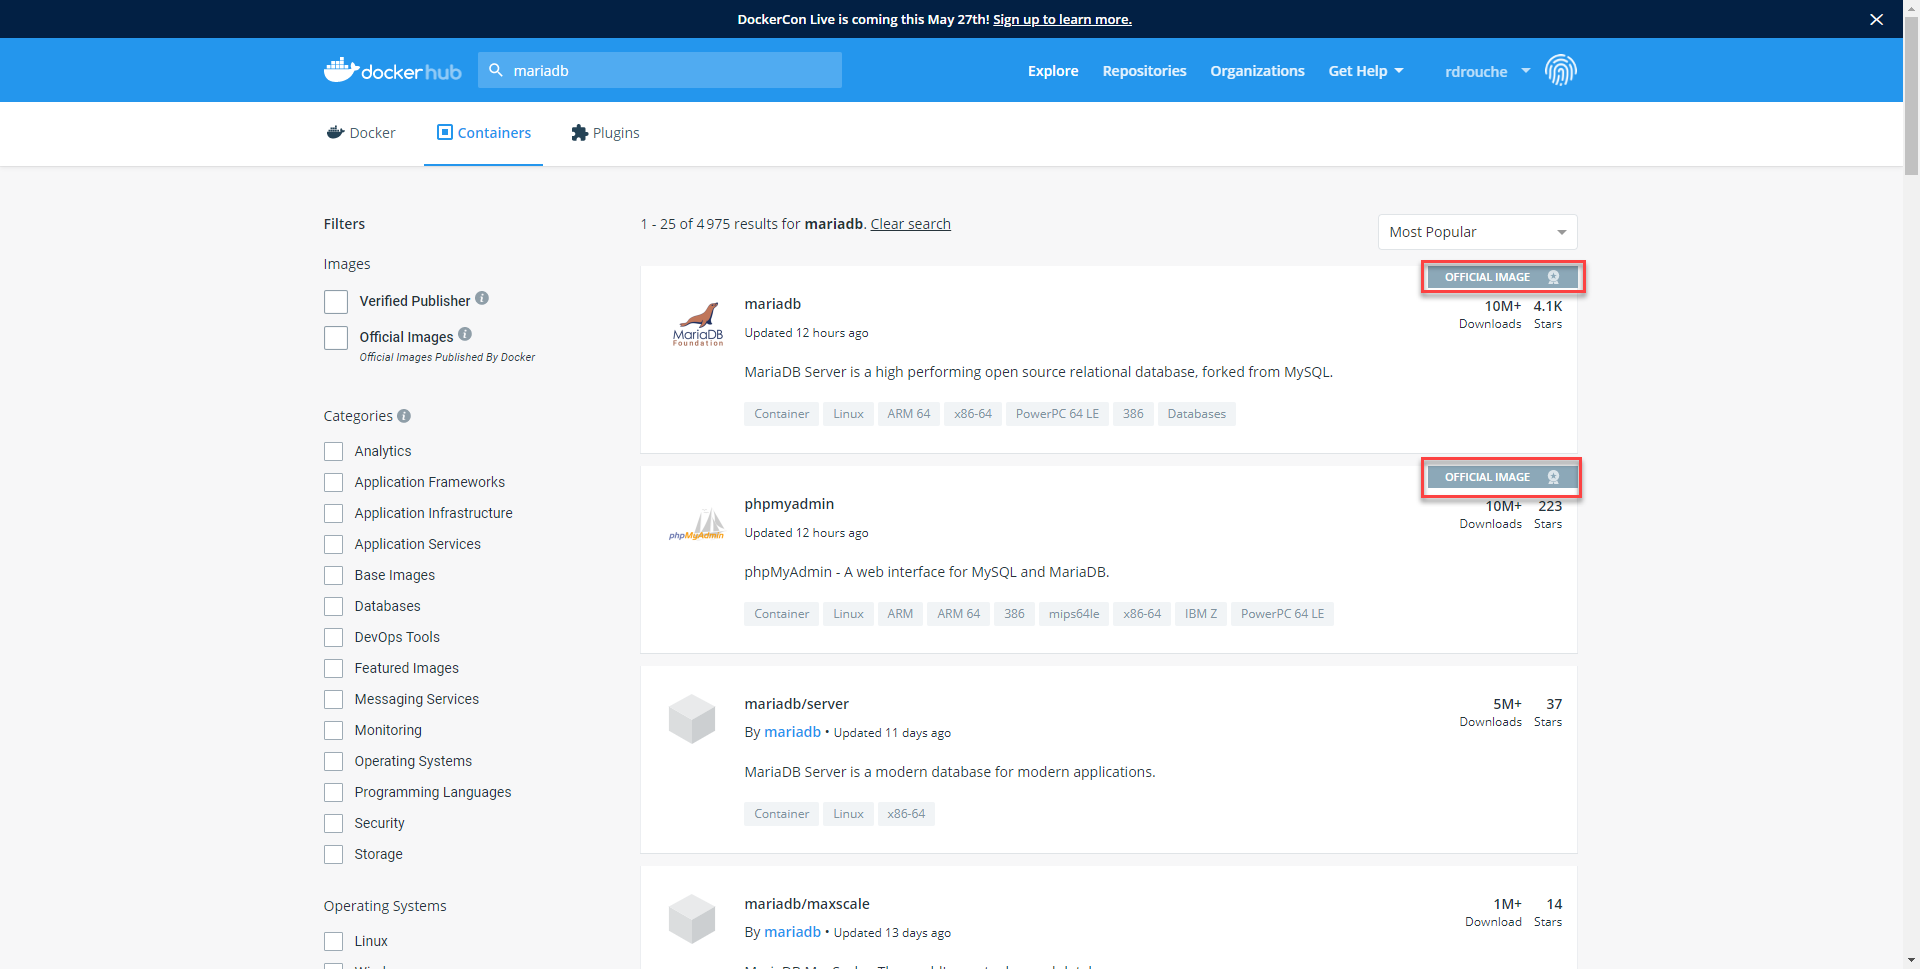
All Docker images are available here : Docker Hub
The hub being open to everyone, pay attention to the choice of images and preferably choose the Official images which are marked with a ribbon.
The latest tag
As we can see in the screenshot below, for the same image, there are several tags, often this corresponds to the version of the software that we want.
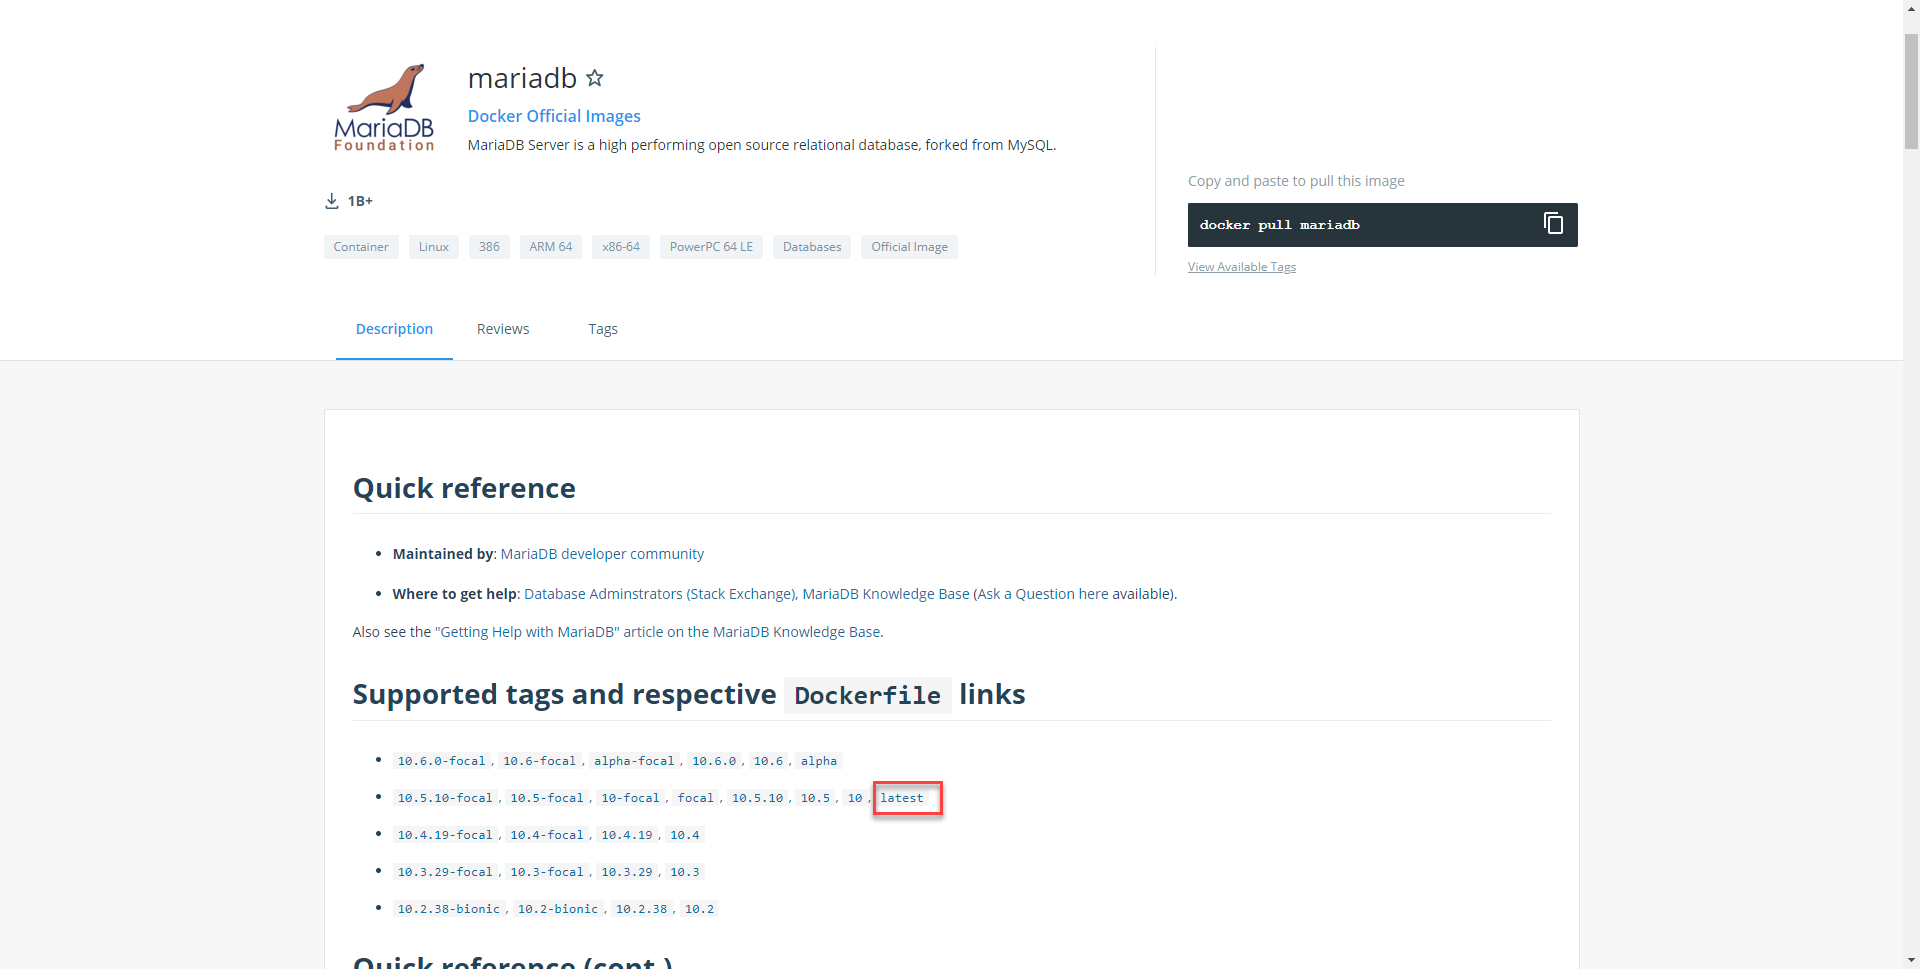
As we can see the latest tag points to version 10.5 of MariaDB.
I guess you understand what the latest tag is for, it points to the most recent stable version.
In certain situations, you should be wary of this tag, especially when you use several containers to run an application.
Let’s assume, that I want to run a web application, which needs Apache2, PHP and MariaDB 10.5
At the time of writing the tutorial, I can use the latest tag on my MariaDB container because it is on version 10.5.
After 6 months, I want to change the server and I start installing containers, my application must work with MariaDB 10.5, but since the latest tag is ported to 10.6, so my application will not work.
All that to say to be careful with Tag, for applications packaged in container like Gitlab or Discourse, the use of the latest tag allows us on the other hand to keep our application up to date.
Remember to check the versions behind latest.
Installing Gitlab with Docker
We will now get into the serious stuff of our tutorial, we will start by installing the Gitlab Docker image.
In fact, there is nothing to complicate, there is just an order to place and yes, it is the whole point of using Docker, but I will explain to you what the order does, because doing it is good, understanding is even better.
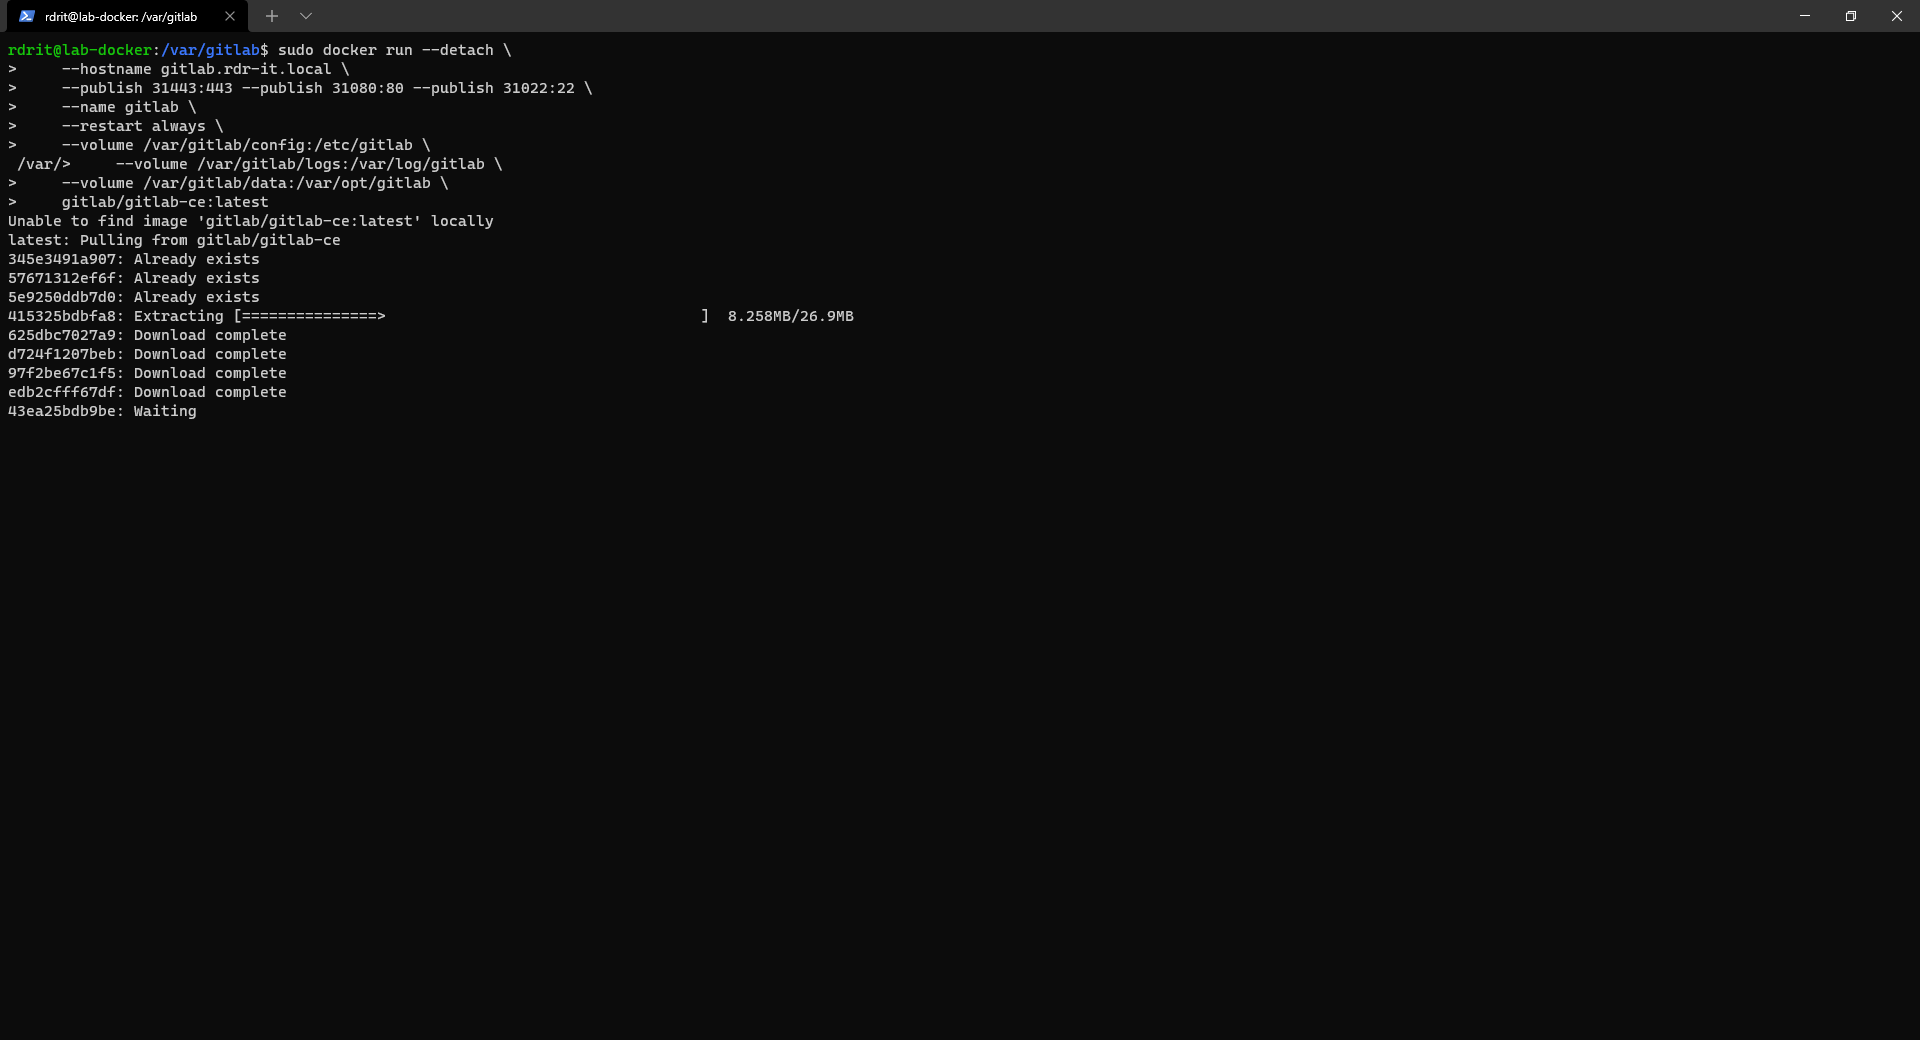
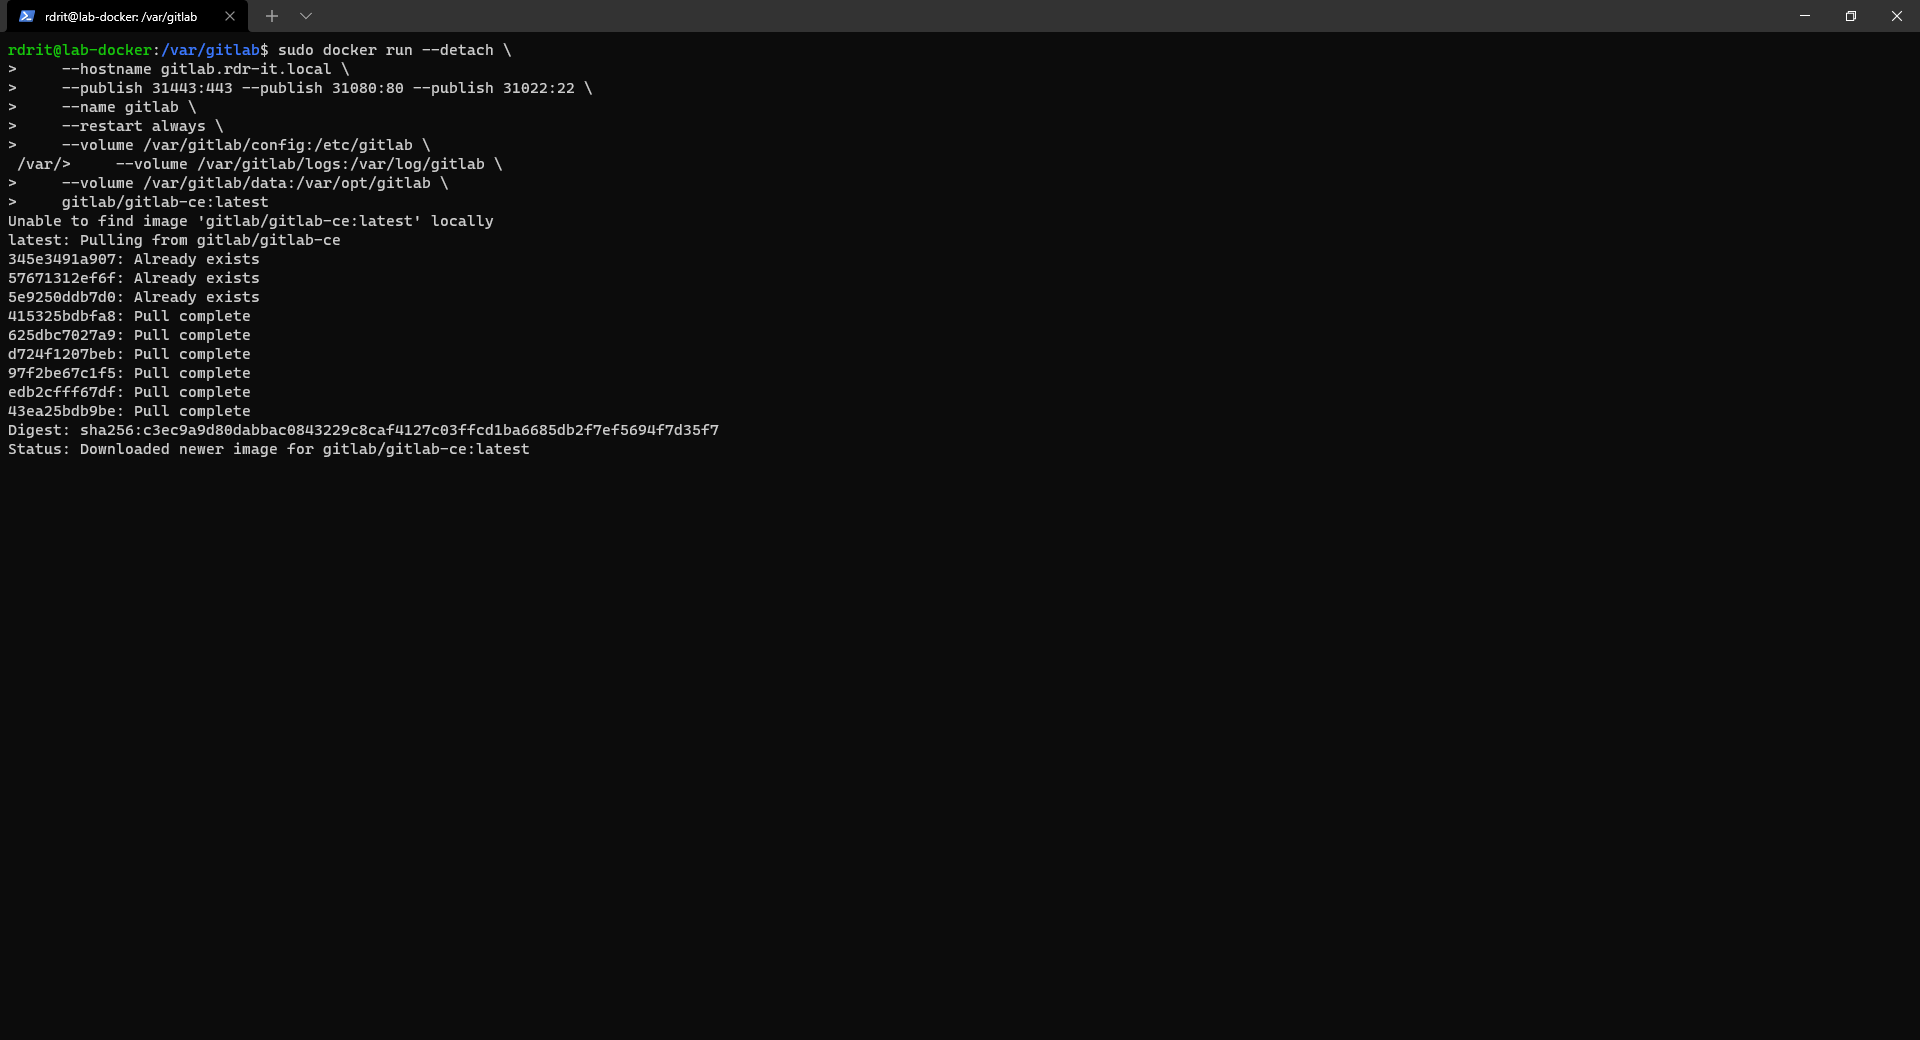
Here is the command we are going to place to install our GitLab container:
The first line starts the docker-run container and the –detach or -d parameter lets you launch in the background, without this parameter the container will be linked to the terminal and therefore stop when you close the session.
The second line allows you to specify the hostname –hostname gitlab.rdr-it.local
The third line indicates the publication of the ports with the parameters –publish or -p. In the example I am mapping port 31443 of the host (Ubuntu) to port 443 of the container and so on. In theory, I could access gitlab through https://server_ip: 31443
The fourth line with the –name parameter, indicate the name of the container at the host level.
The fifth line –restart always is used to indicate to always start the container.
From the sixth to the eighth line, we configure folder redirects using the –volume parameter. The first part corresponds to the folder on the host (Ubuntu) and the second after the: the folder of the container image.
The last line gitlab/gitlab-ce: latest is the image we want to retrieve from Docker Hub.
Now that you know what the order does, we can proceed to the installation of our container.
Before, we will create the folders on the server

Install the gitlab container, adapt to your environment:
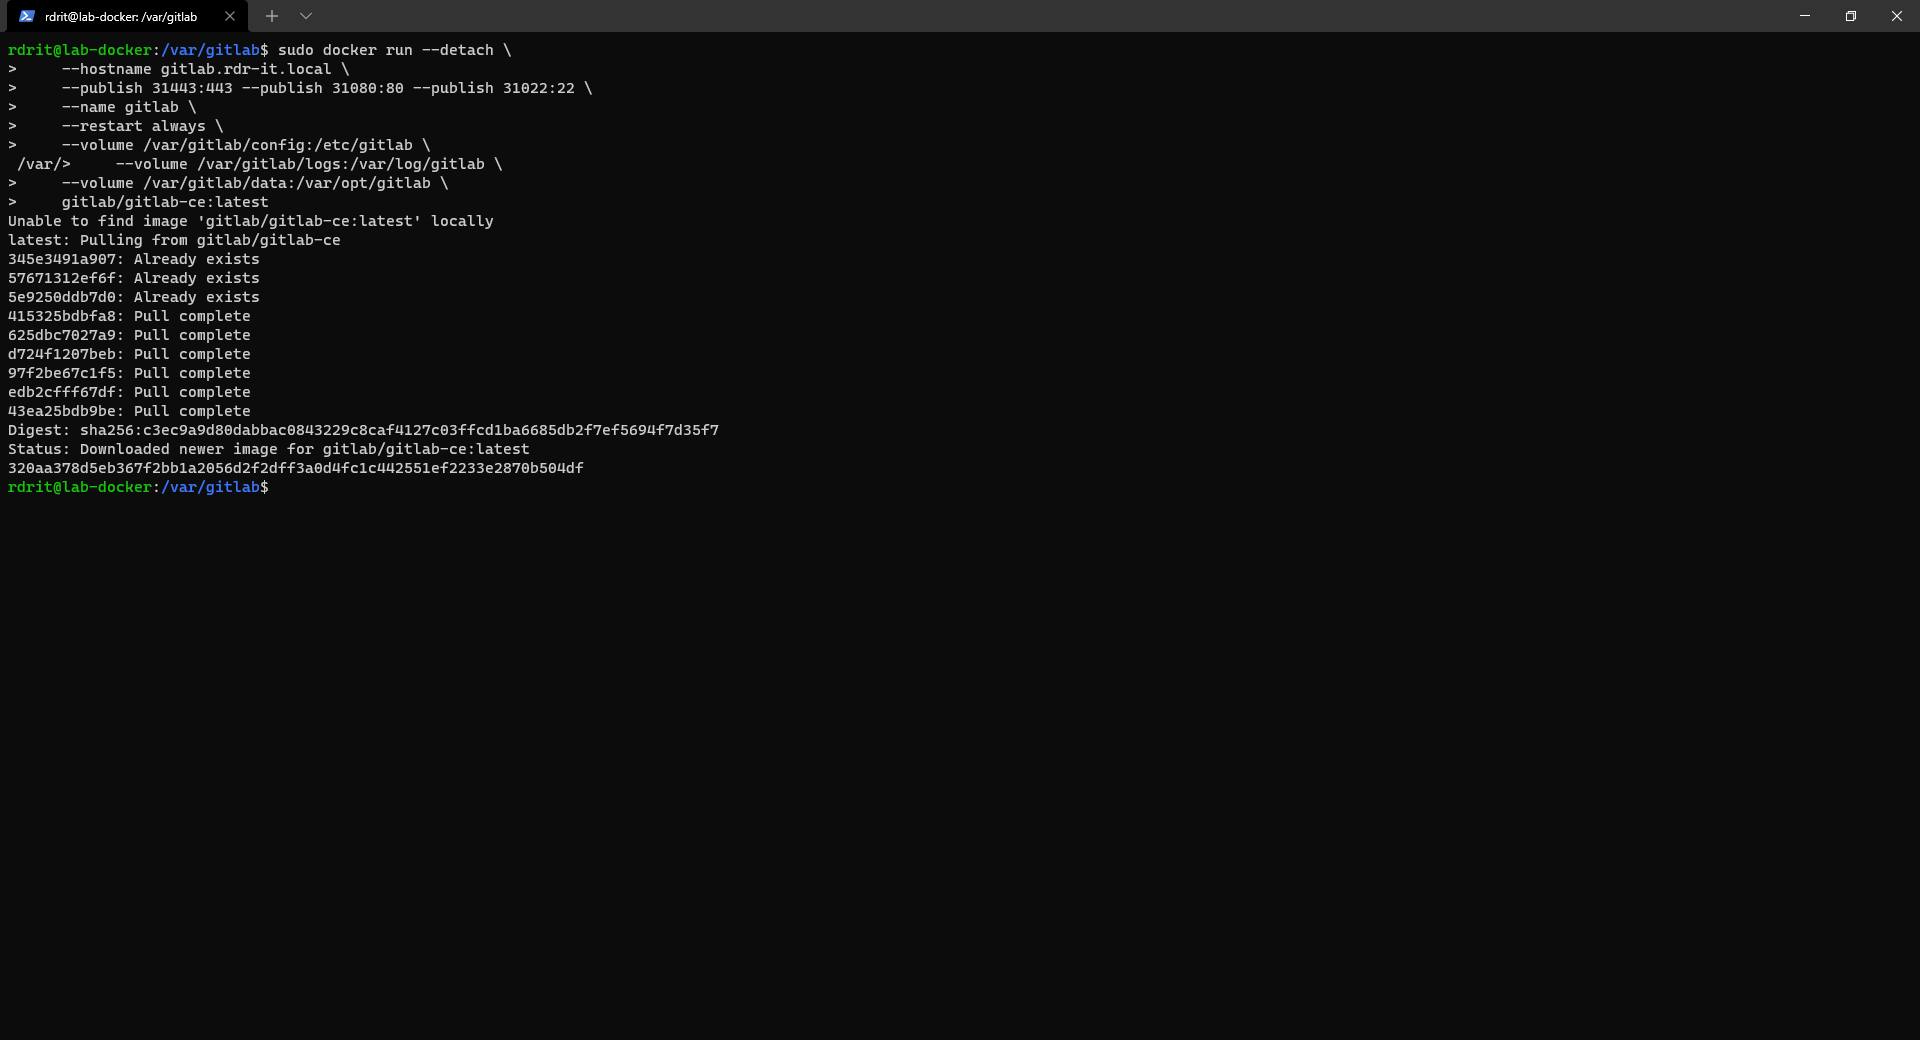
Wait while downloading and configuring the Gitlab container …
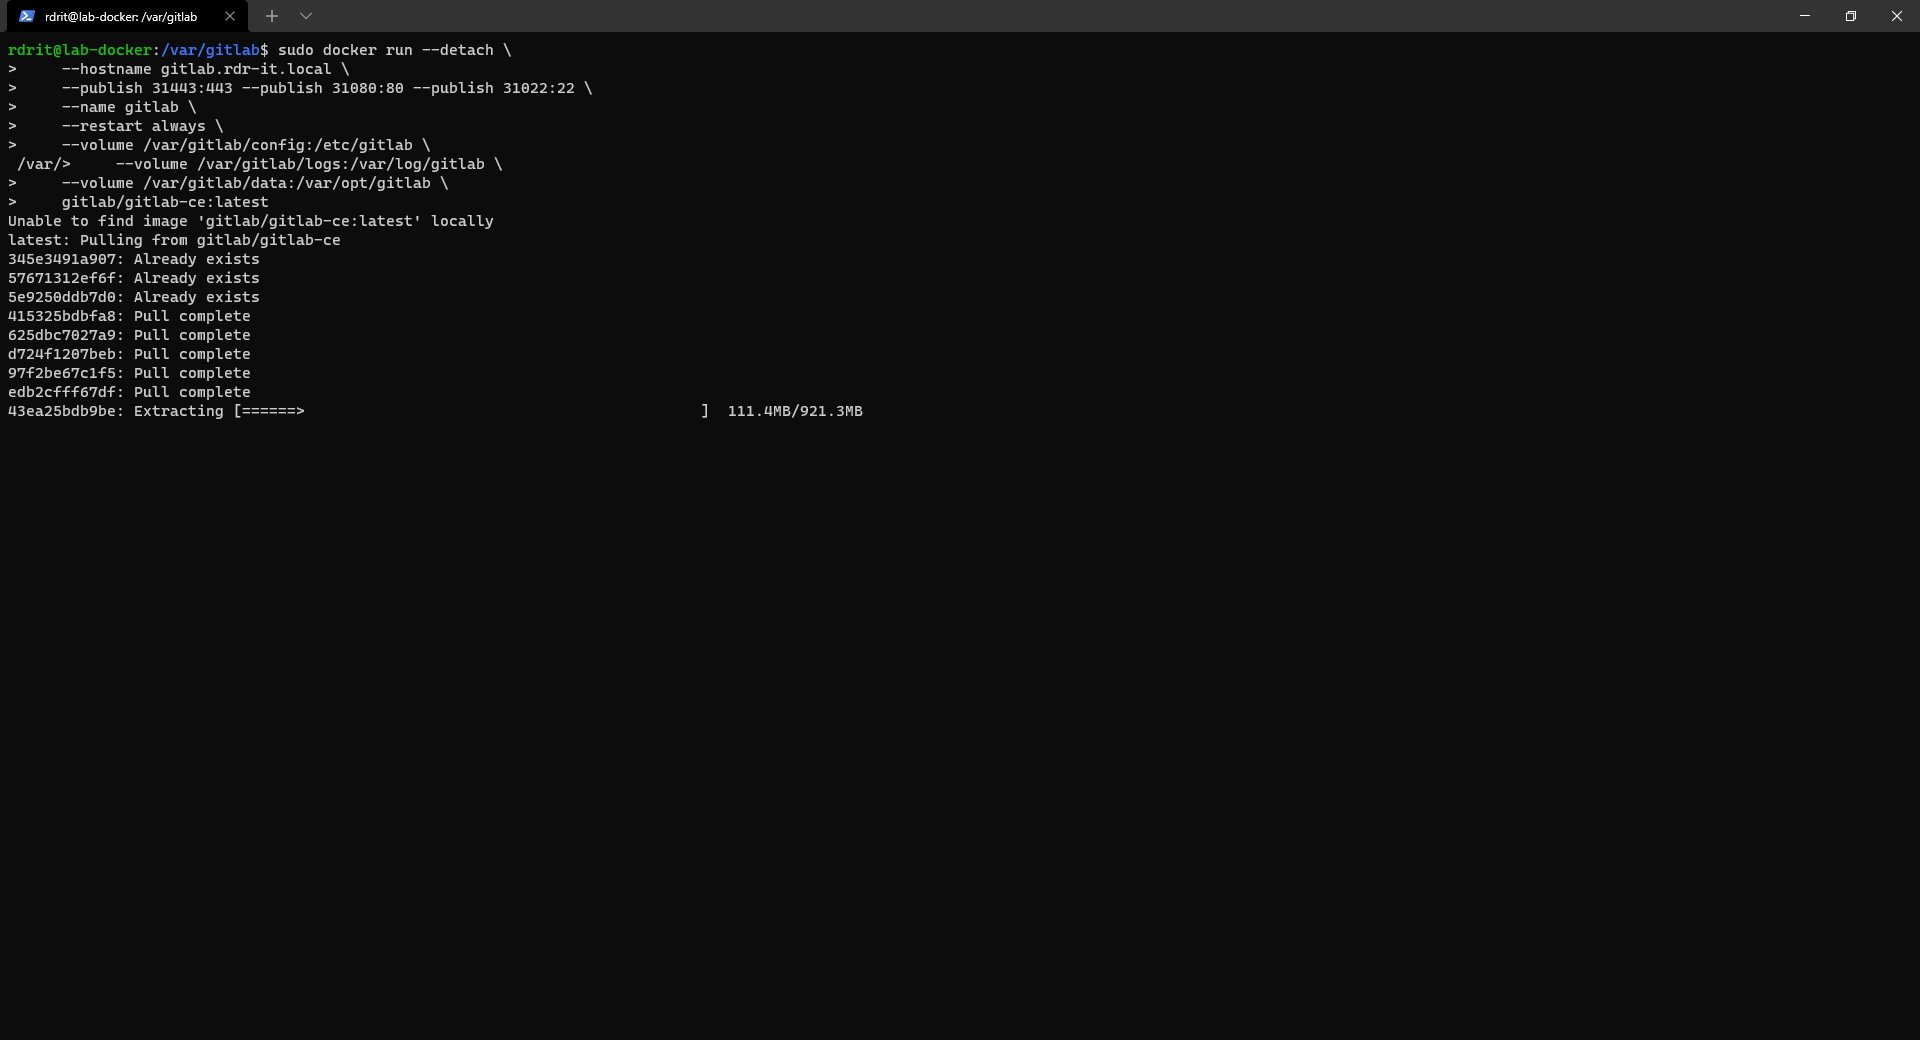
The installation of the image is finished when we recover the hand on the console.
To check that the Gitlab image works, enter the command below:
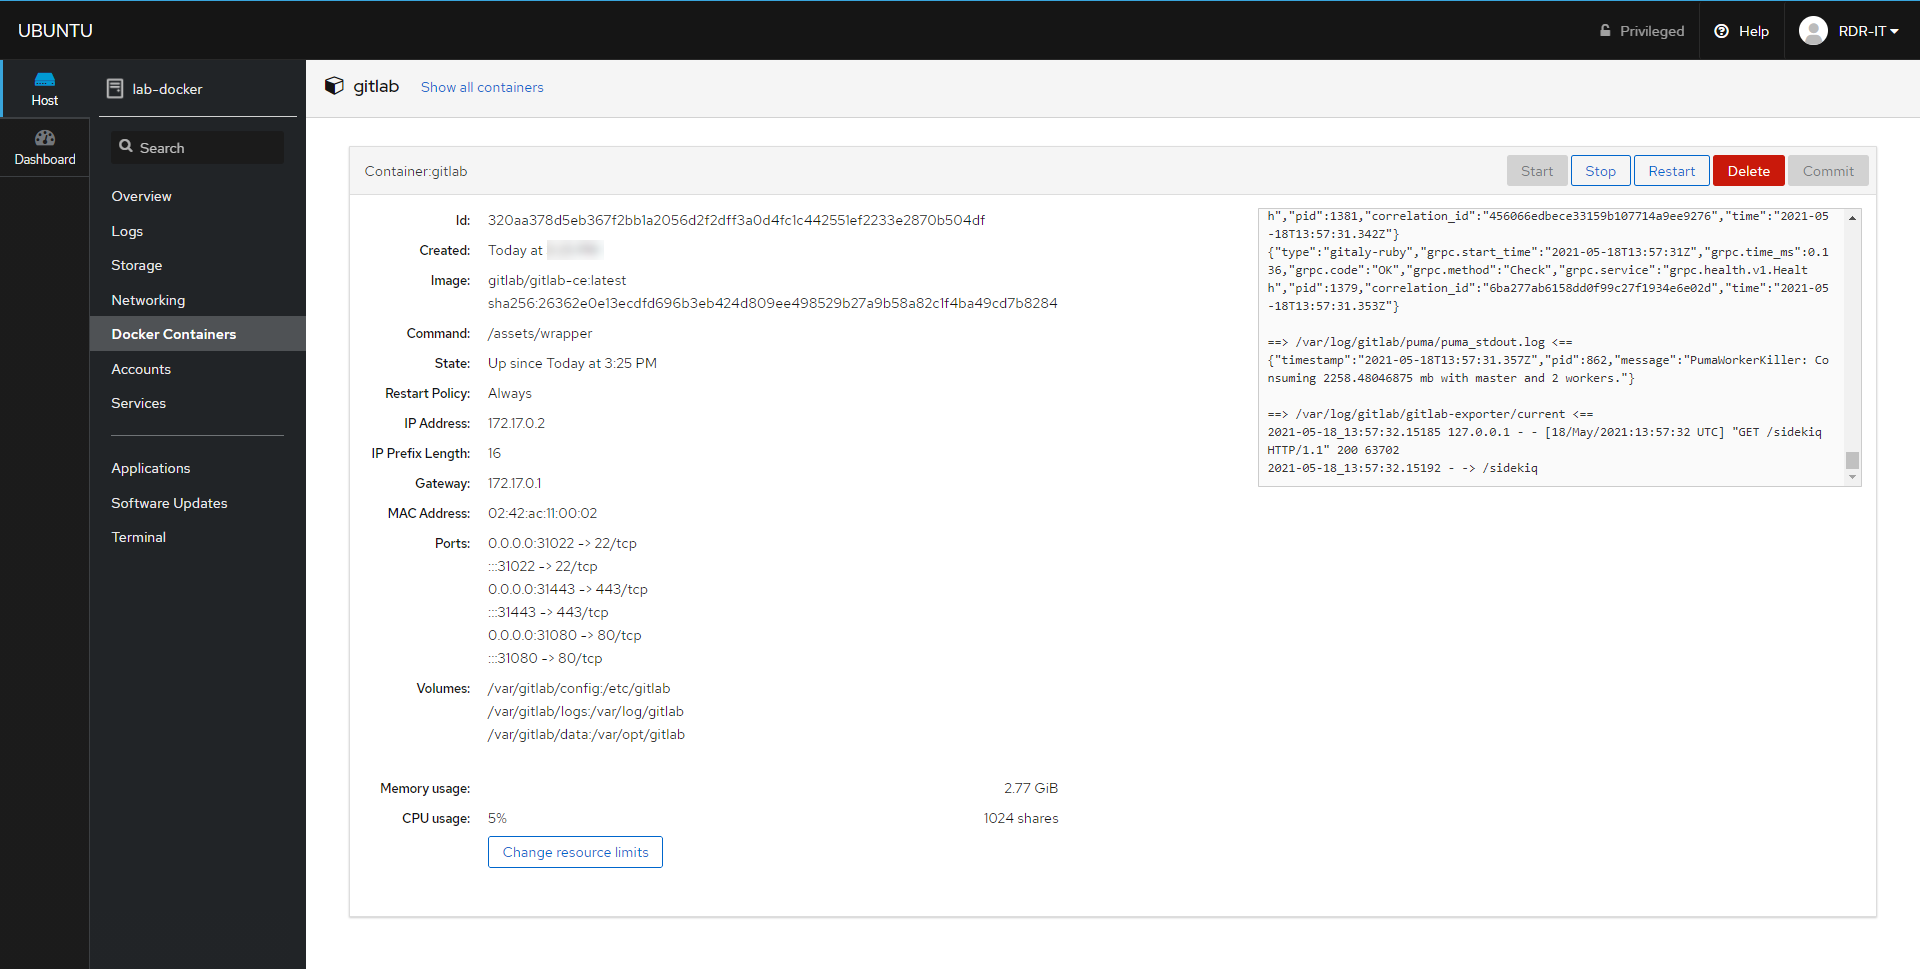
sudo docker ps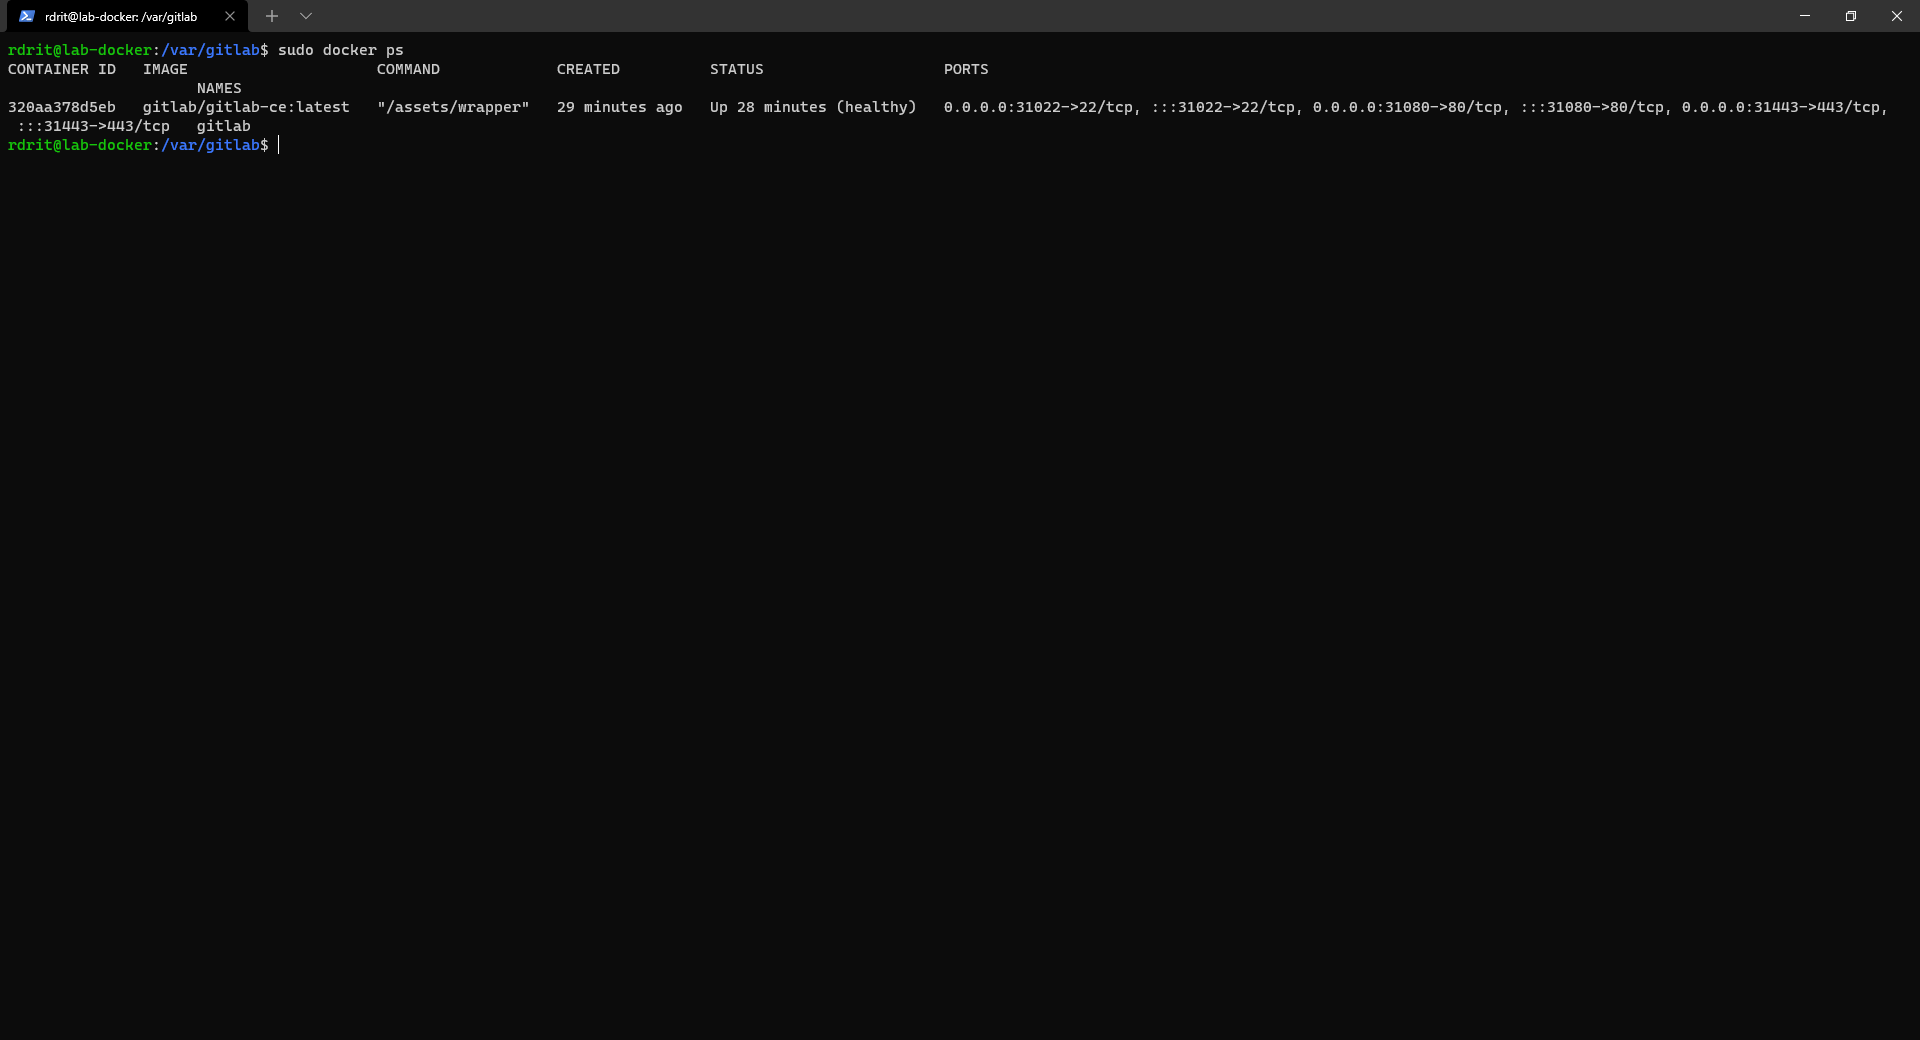
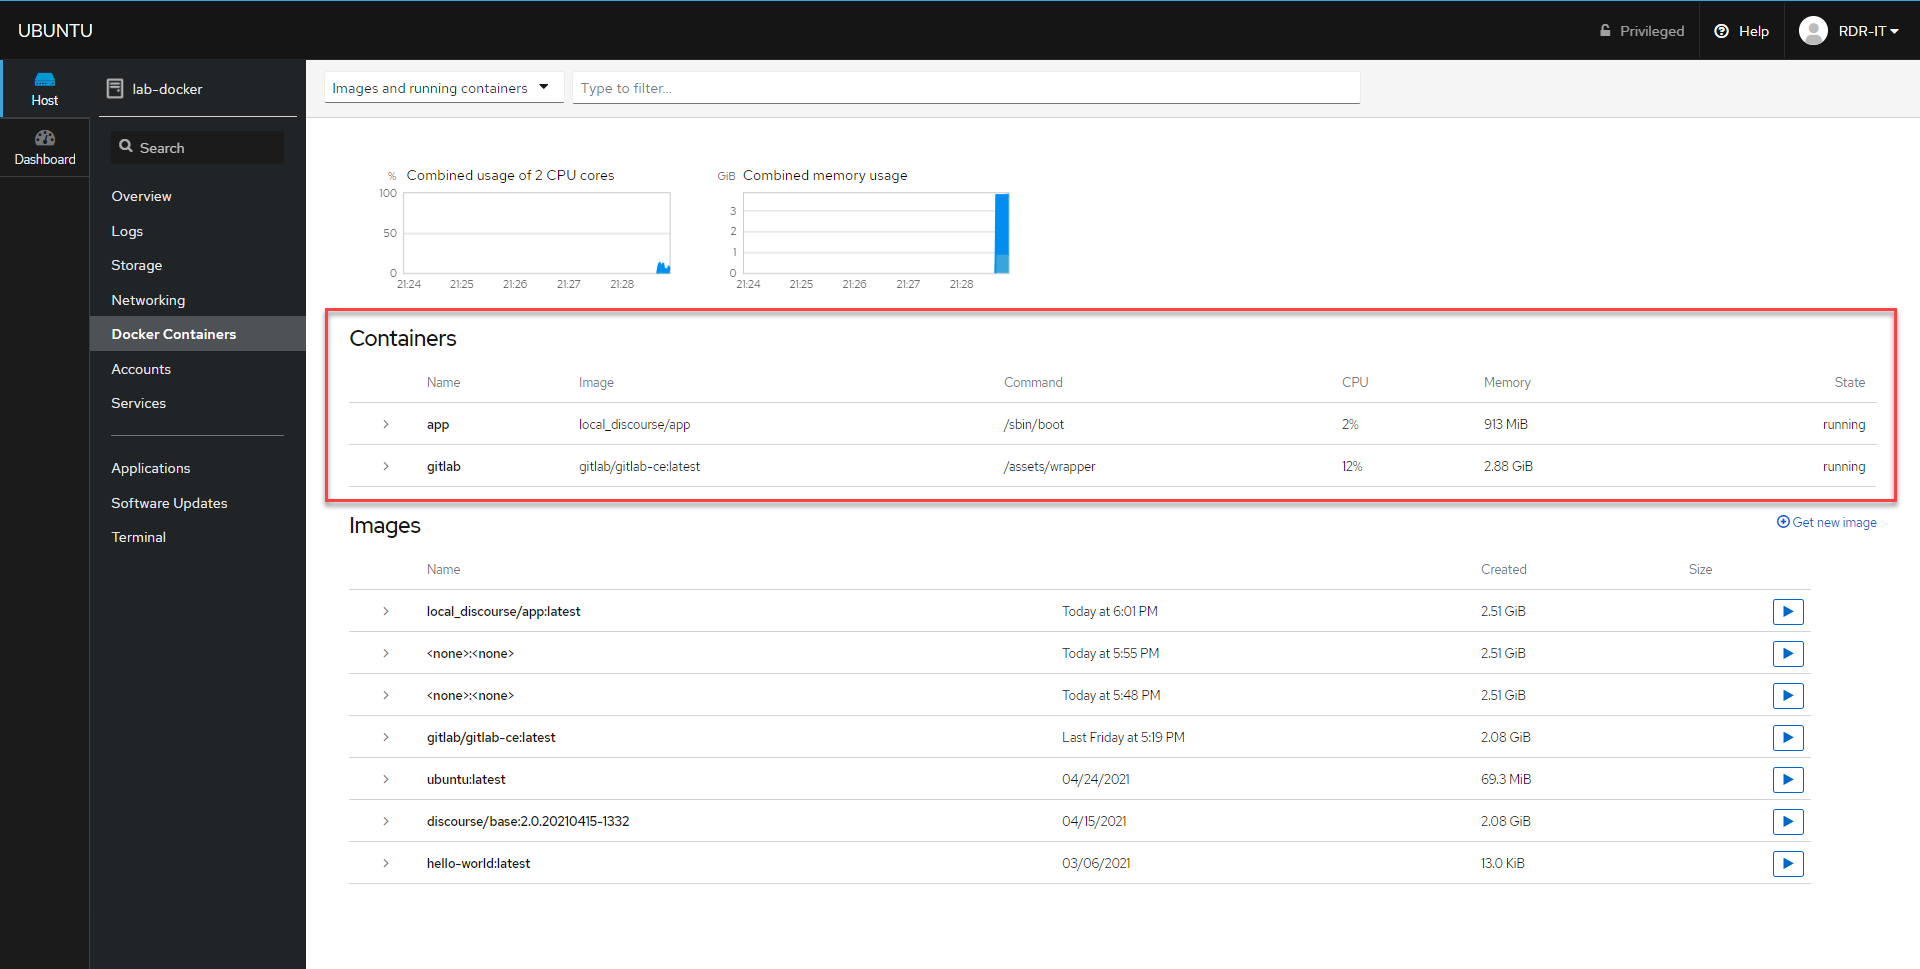
We can clearly see the container with the status UP and we can also see the port mapping.
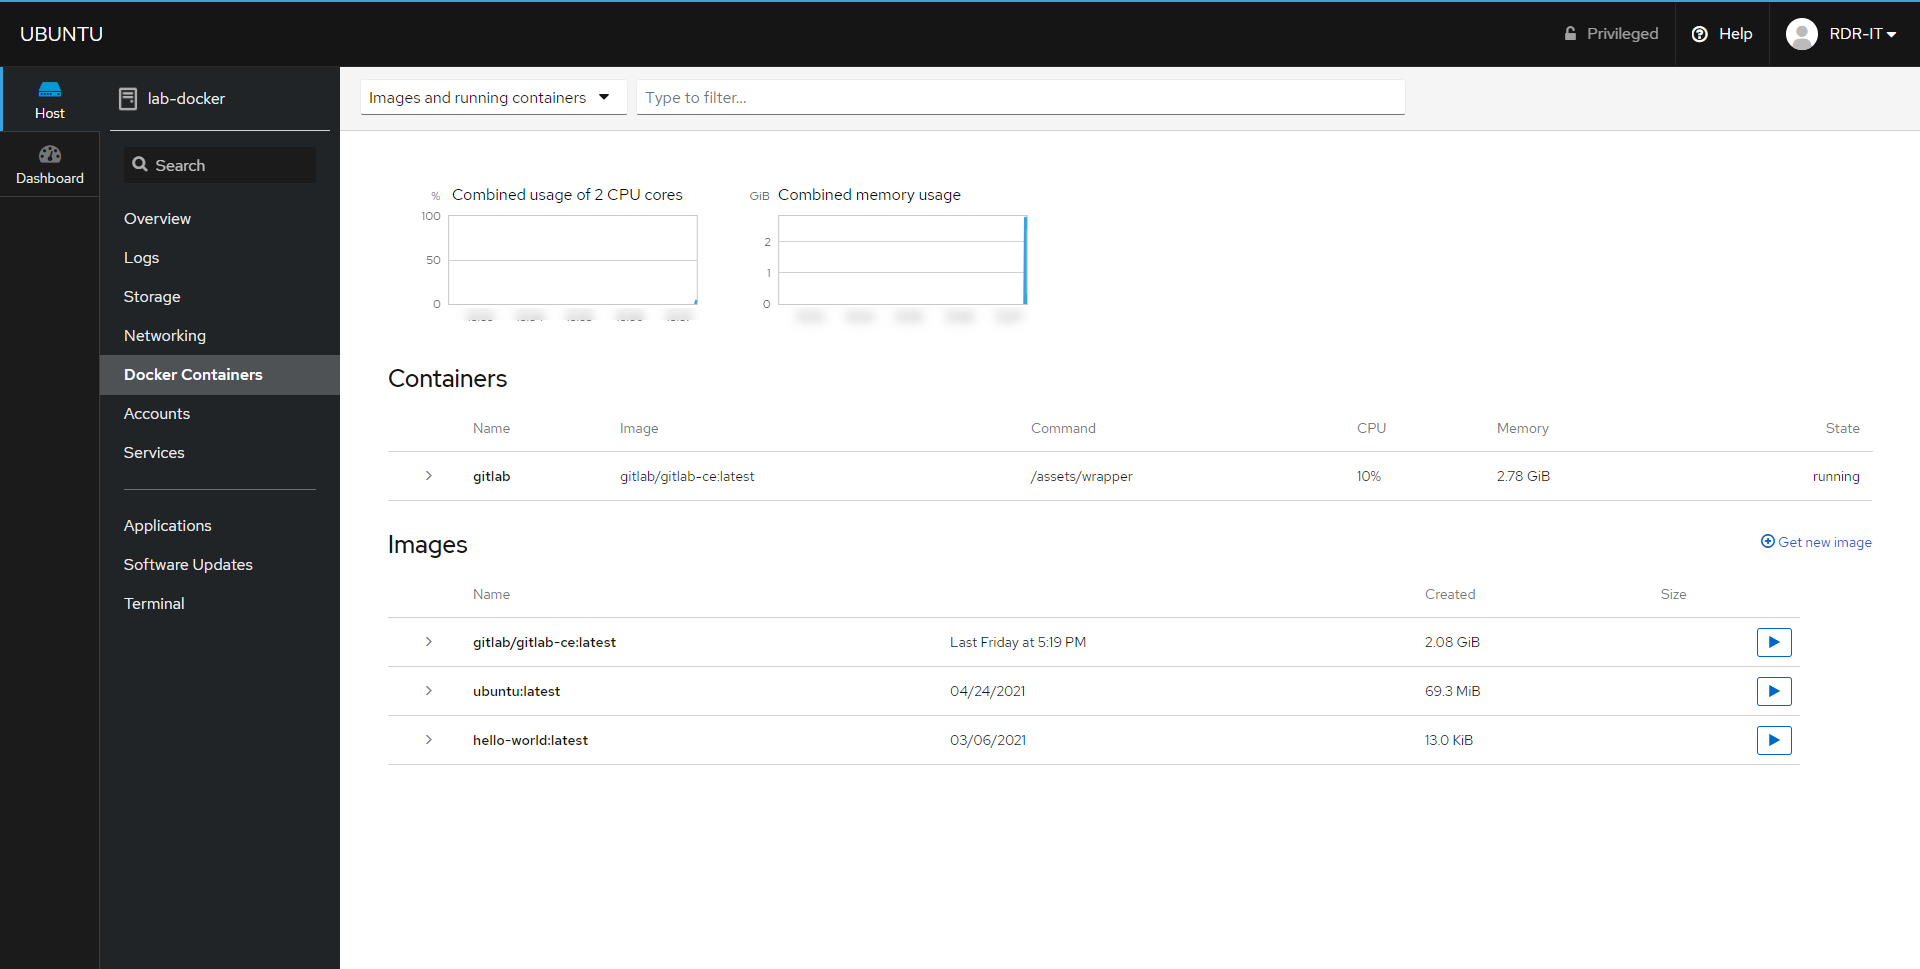
From the Cockpit interface, you can also see the status of the container.
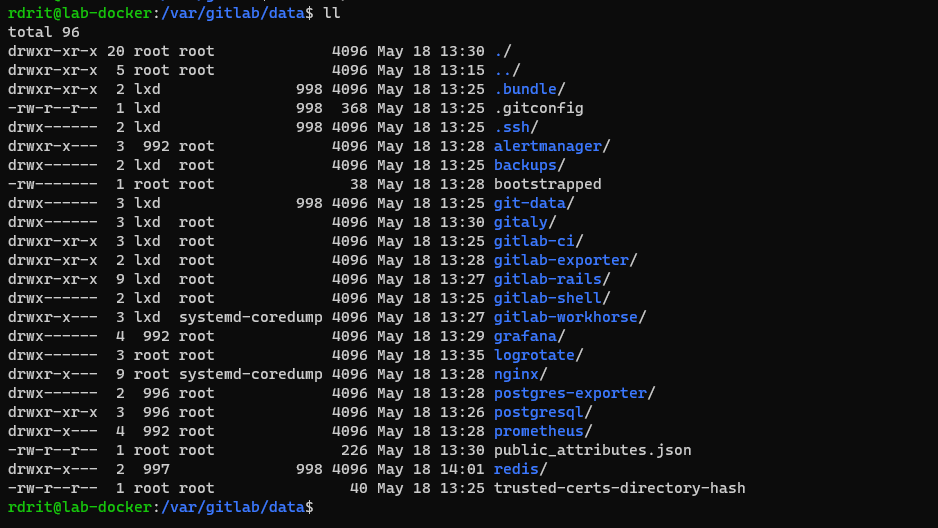
If we look in the folders we created for the volumes, we can see that files and folders have been created, so the redirect works.
Now that our image is installed, we will configure Nginx as a reverse proxy.
Normally Gitlab should be available on port 31080, but I do not recommend that you configure it through the host port.
In the / etc / nginx / sites-available folder create a nano file and use the configuration below:
Adapt line 3 to your configuration by indicating the URL for access to the application and line 6 proxy_pass by configuring the port that corresponds to your container.
Save the file.
Create a symbolic link of the file in the / etc / nginx / sites-enable / folder.
sudo ln -s /etc/nginx/sites-available/<file-name> /etc/nginx/sites-enabled/
Check the configuration of Nginx:
sudo nginx -tIf all is good, reload the configuration of nginx
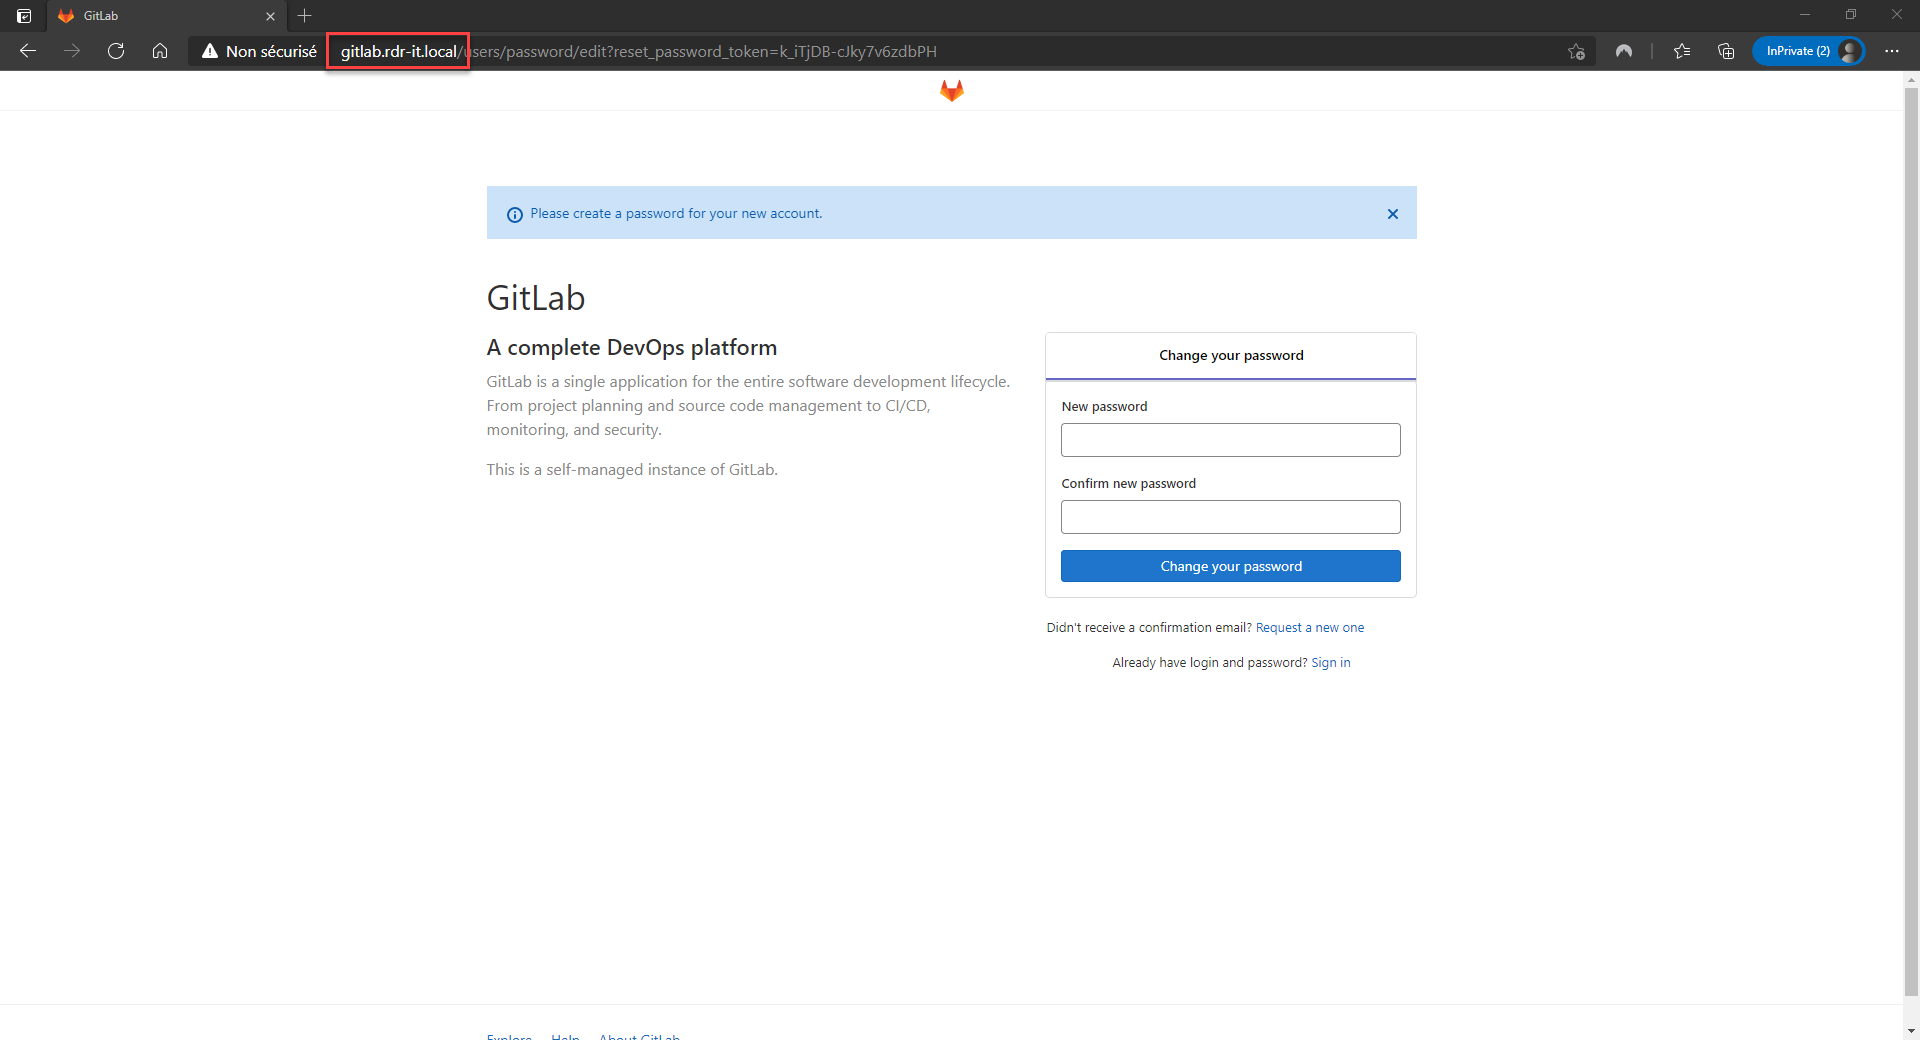
sudo systemctl reload nginxFrom a browser, going to the url configured in nginx, you should normally arrive on the Gitlab root account password configuration form.
HTTPS use case.
The first step will be to generate an SSL certificate using certbot, use the command below and follow the wizard.
sudo certbotIf all goes well, a Let’s Encrypt certificate is generated and the Nginx configuration adapted to the use of HTTPS.
To function correctly, you must modify the configuration of Gitlab to avoid “mixed content” errors. For the moment it is configured in HTTP, so you have to configure Gitlab to tell it that it is accessible in HTTPS from port 80 of its Web server.
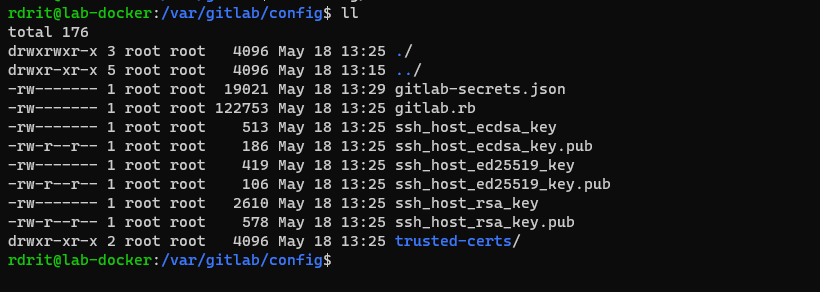
Open the gitlab.rb file located in / var / gitlab / config /.
In the file look for the configuration items below and configure them the same except for the external_url parameter.
external_url 'https://git.example.com'
nginx['listen_port'] = 80
nginx['listen_https'] = false
Relaunch the Gitlab configuration:
sudo docker exec -it gitlab gitlab-ctl reconfigureAdapt the command to your container, gitlab after -it matches the container name (–name).
I haven’t told you about it yet, the docker exec command allows you to run commands in the container.
Through this part of the tutorial, we saw how to install a container with network port and folder mapping, how to create a reverse proxy rule with Nginx and how to run a command in a container from the host.
Installing Discourse with Docker
In this second example of installing a Docker image, we will see how to install the Discourse image which is a forum and which uses almost the same server components such as:
- PostgreSQL
- Ruby
- Redis
After this installation on the same server, we will have two completely independent applications with certain “duplicate” components and without conflict.
On one server, the same server, the cohabitation of Discourse and Gitlab is not easy to do, even impossible, in fact I have not tried.
For the installation of Discourse, I will not go into detail as with Gitlab, because a container management “utility” is provided.
On the server, create a folder for Discourse:
sudo mkdir /var/discourse/Clone the git repository in the folder:
sudo git clone https://github.com/discourse/discourse_docker.git /var/discourse/The configuration of Discourse and the container is done using a file, copy the standalone.yml example file in the containers folder by naming it app.yml
sudo cp /var/discourse/samples/standalone.yml /var/discourse/containers/app.ymlEdit the app.yml file using nano
sudo nano /var/discourse/containers/app.ymlIn the file, configure the expose section, indicating the ports for http / https.
expose:
  - "32080:80"   # http
  - "32443:443" # https
Configure the following environment variables:
DISCOURSE_HOSTNAME: 'discourse.rdr-it.local'DISCOURSE_DEVELOPER_EMAILS: 'your@email.com,you@example.com'Configuring a valid SMTP server is “mandatory”.
Then save the file.
If not, go to the folder /var/discourse/.
Start the generation of the container image:
sudo ./launcher bootstrap appWait while downloading and configuring the image.
Now start the container with the command:
sudo./launcher start appCheck correct operation with the command:
sudo docker ps
In Cockpit, we can also see the two containers:
As for Girtlab, we will create a virtualhost, as we have seen above, I will only put the virtualhost configuration here.
Once the virtualhost is configured, launch a browser and go to the configured url.
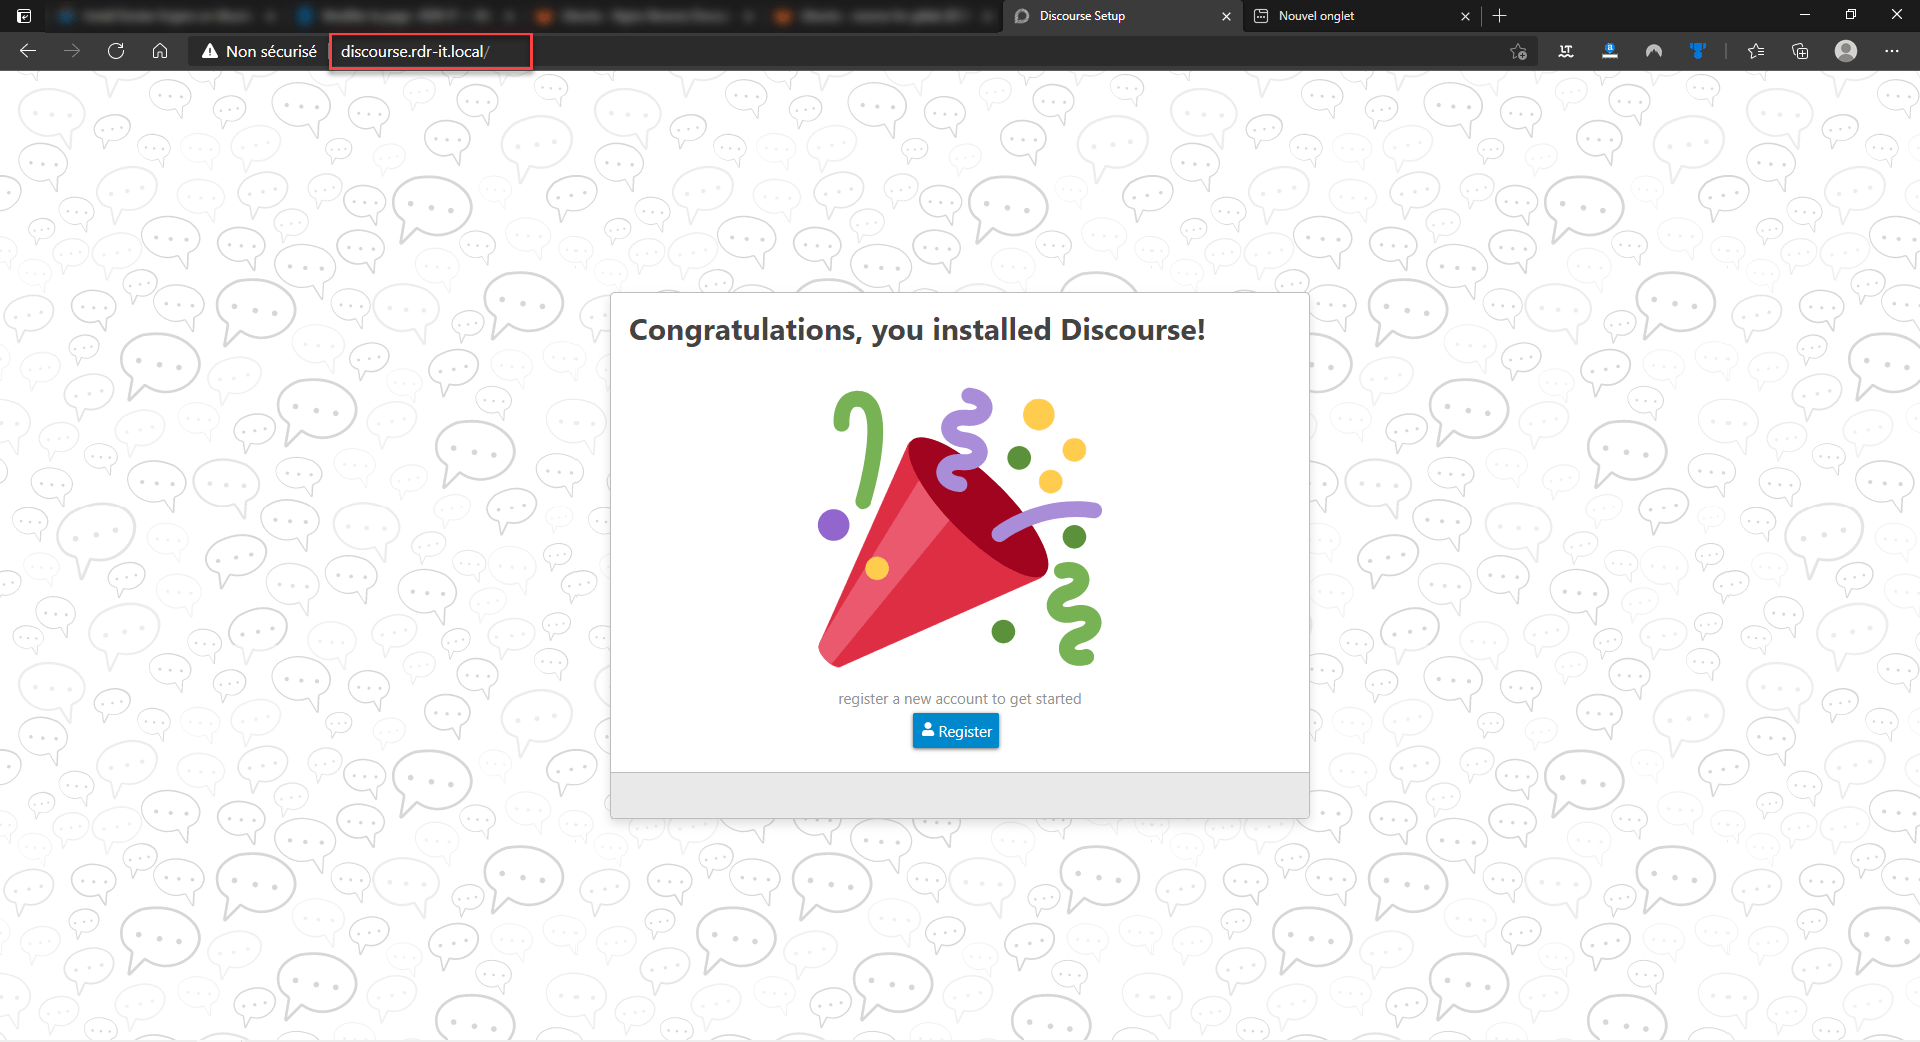
Discourse is installed and functional.
As with Gitlab, it is possible to generate a Let’s Encrypts SSL certificate.
As for Gitlab to avoid mixed content problems, you must force SSL in the configuration of Discourse
To conclude on this Docker tutorial
This first tutorial dedicated to Docker stops (others will follow) here and if I had to conclude in one word, I would say: Awesome!
For a long time, I had trouble perceiving the interest of Docker and containers, because often in the tutorial we present Docker to install a website with WordPress and this type of demonstration is limited enough to perceive the interest of containerization, because we do it just as well with virtualhosts.
I admit that this experience with installing Gitlab and Discourse in a container which presents quite complex environments opened my eyes to Docker and I think I became a fan (I am even starting to see corporate deployments …).
I hope you enjoyed this tutorial and like me, makes you want to go further Docker.