Presentation
DFS Replication allows you to set up a replication of a folder between several servers.
There are “two types of replications”.
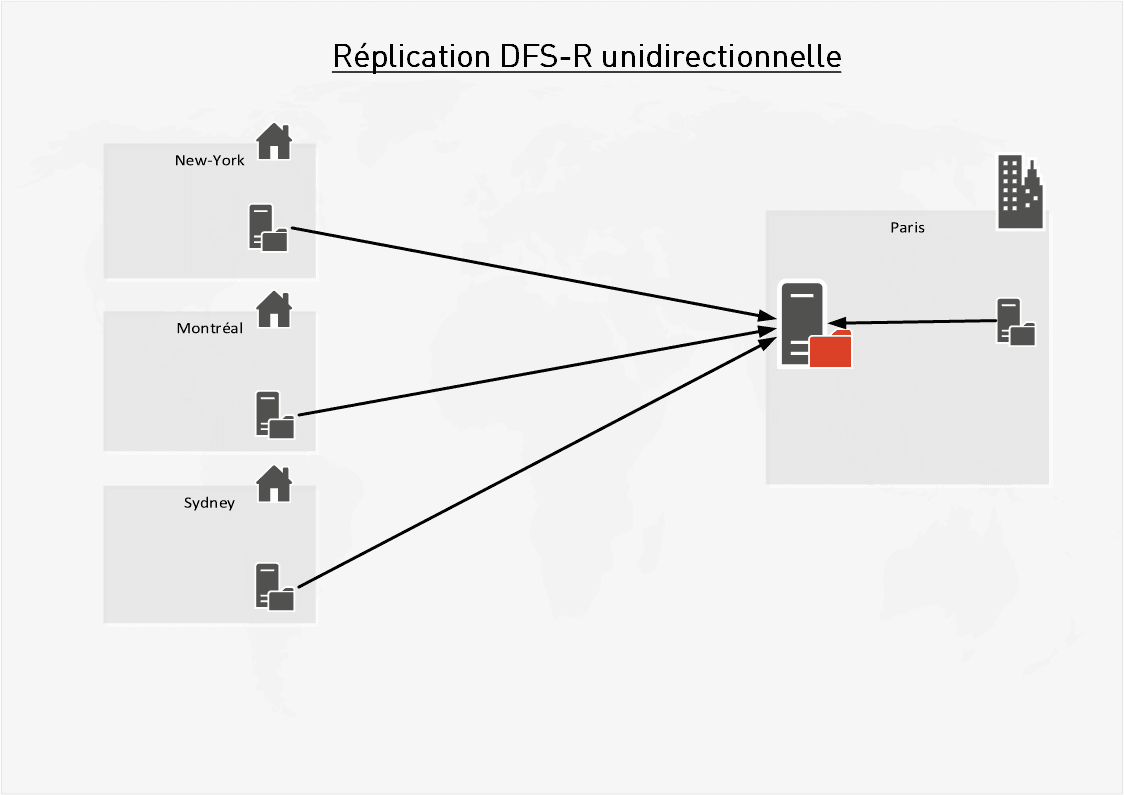
One-way replication
This type of replication is mainly used to centralize file server backups on a backup server.
Multidirectional replication
This type of replication makes it possible to have a folder with the same content on several servers at a longer or shorter interval depending on the link between the servers. This solution allows multi-site companies to have a common share replicated on all file servers.
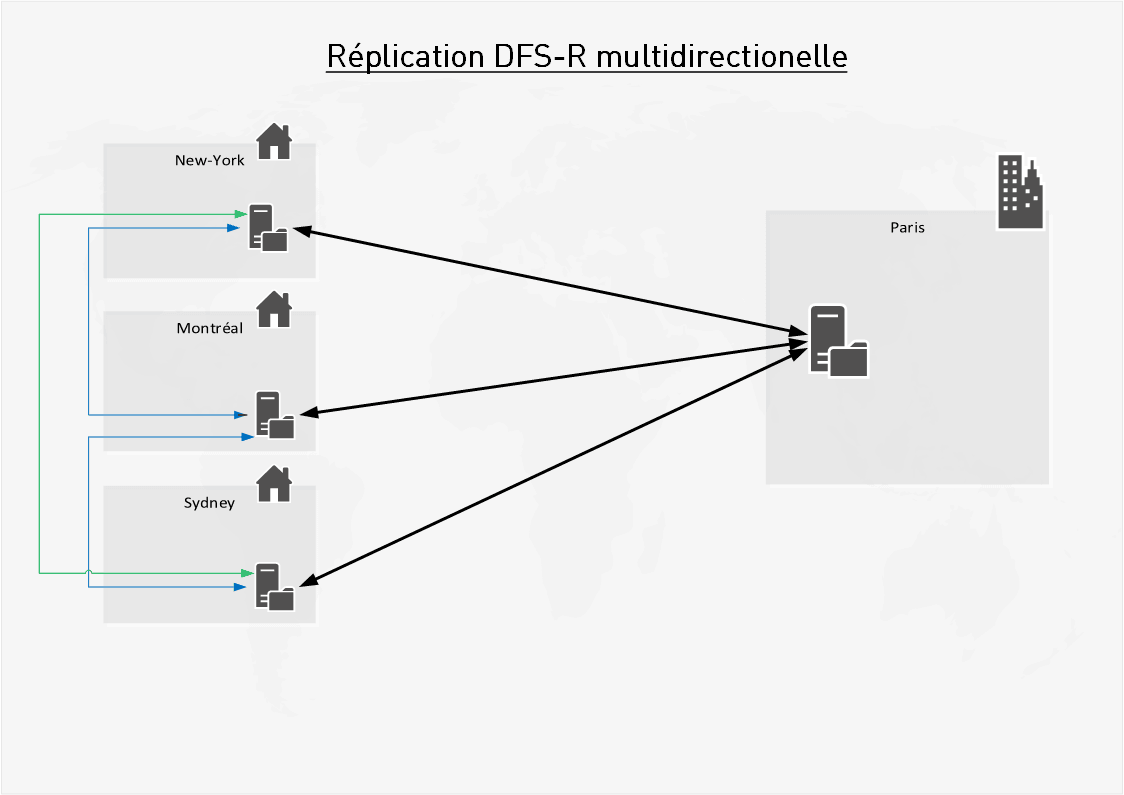
This allows the users of each site in the event of a network cut (vpn / internet) to continue to access documents and therefore to work. In addition it brings better performance because of having the files locally on the site.
Another advantage of this solution is to have one or more copies of the files on different sites and therefore in the event of a problem on a server it is possible to have access to the documents by going to another member of the group.
This topology also brings drawbacks:
- DFS-R is not a substitute for a backup solution.
- In the event of a virus (cryptolocker) on one of the sites, all the file servers will be affected.
- No locking on files. For example, the same Excel file can be opened for writing on two different servers.
- Bandwidth saturation, in case of drag / drop from one folder to another done by mistake this will be replicated on all the sites consuming bandwidth and being able to delay the replication of the modifications and generate a large number of Conflicts.
Implementing DFS Replication
Prerequisites
- Servers must be a member of the domain.
- The DFS Replication feature must be installed on all members.
Installing the DFS role
Windows 2008R2
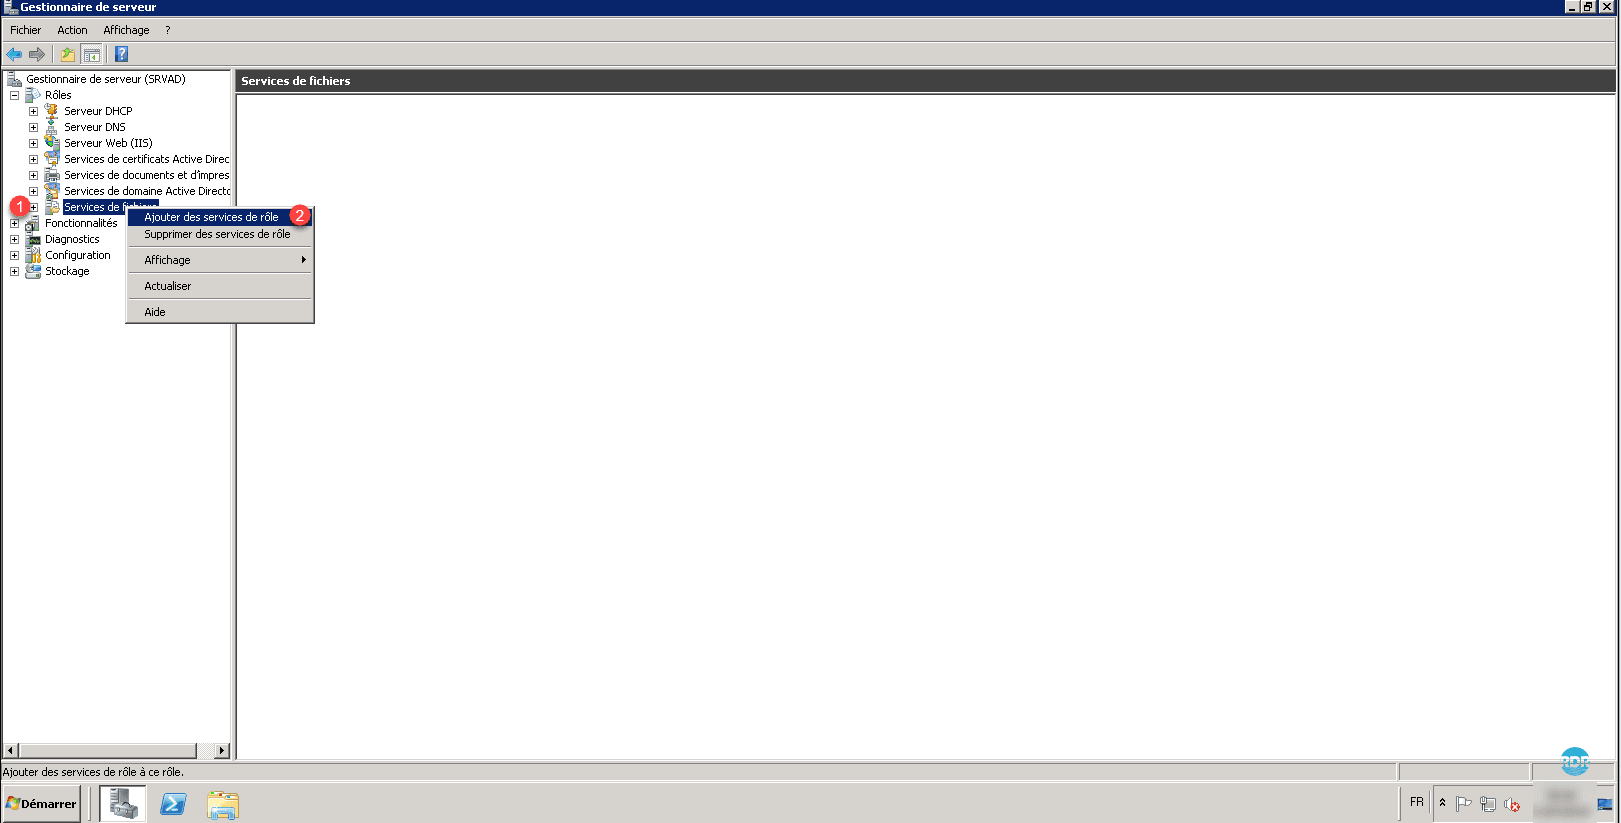
1. From the server manager, go to File services 1, right click on it and click on Add role services 2.
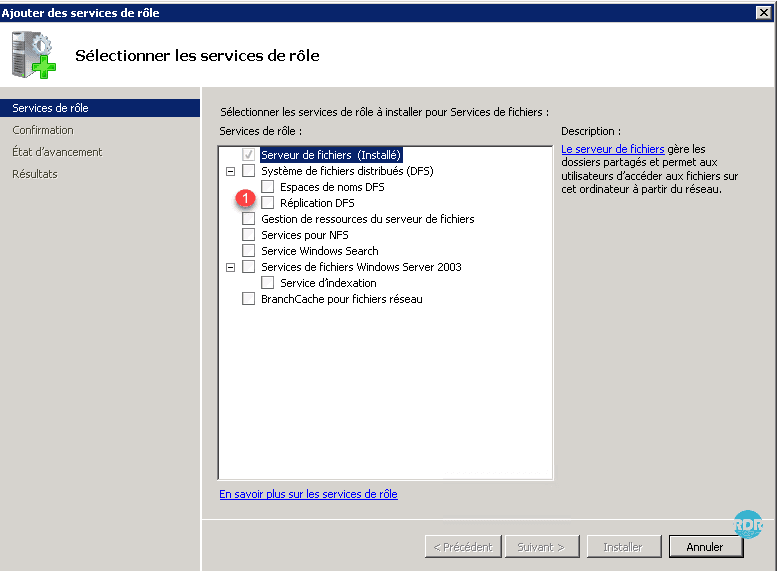
2. Select the DFS Replication service 1.
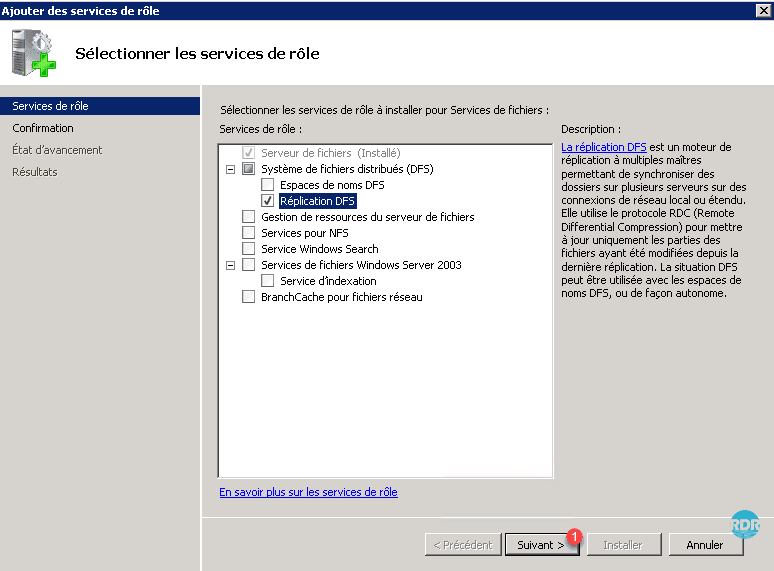
3. Click on Next> 1.
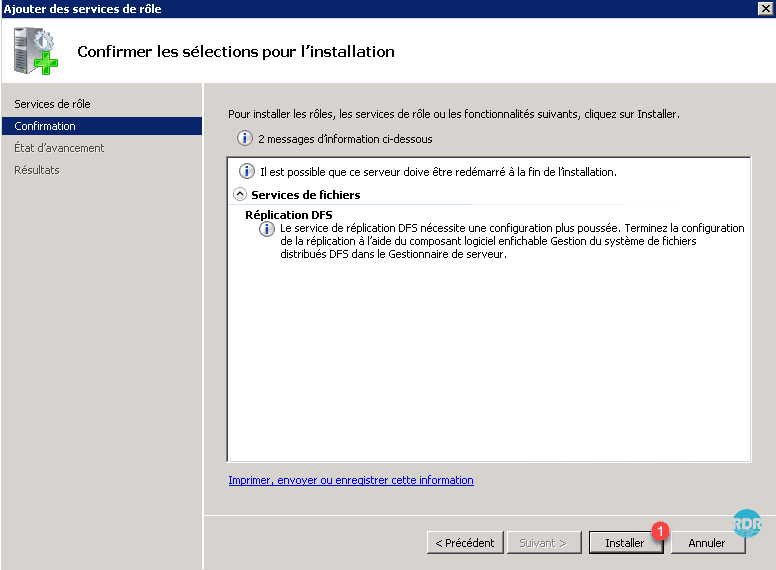
4. Click on Install 1.
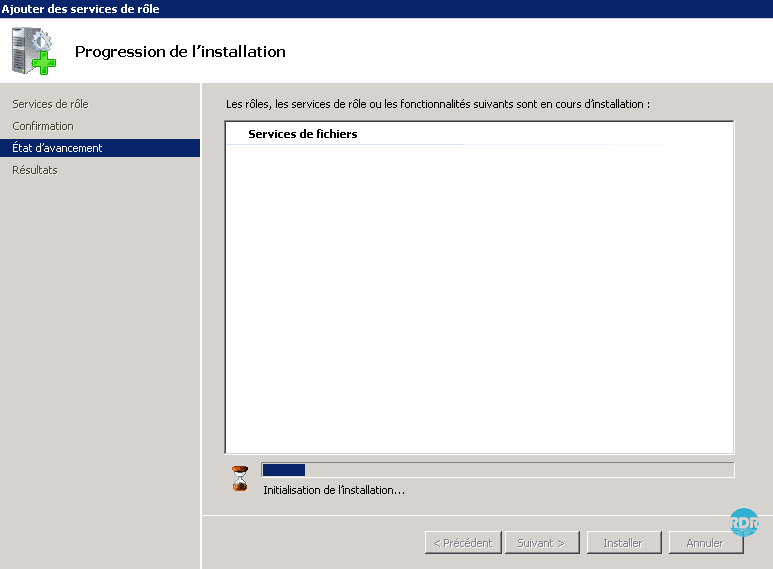
5. Wait during the installation …
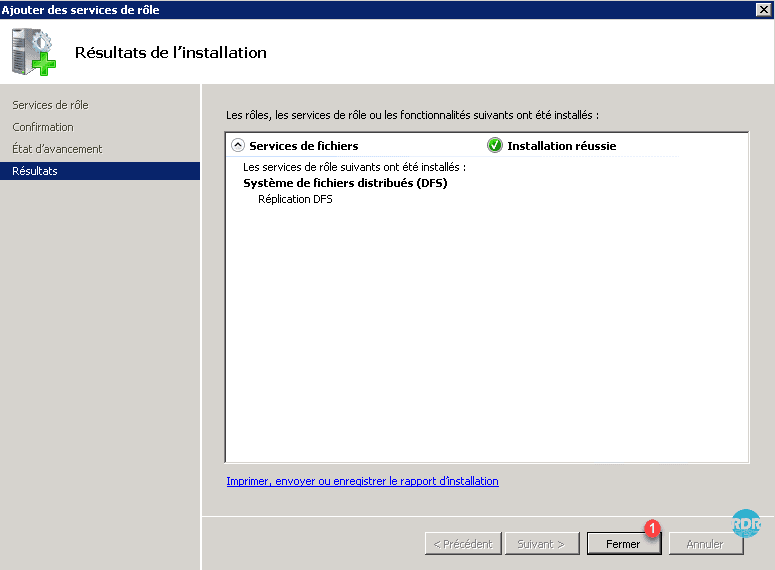
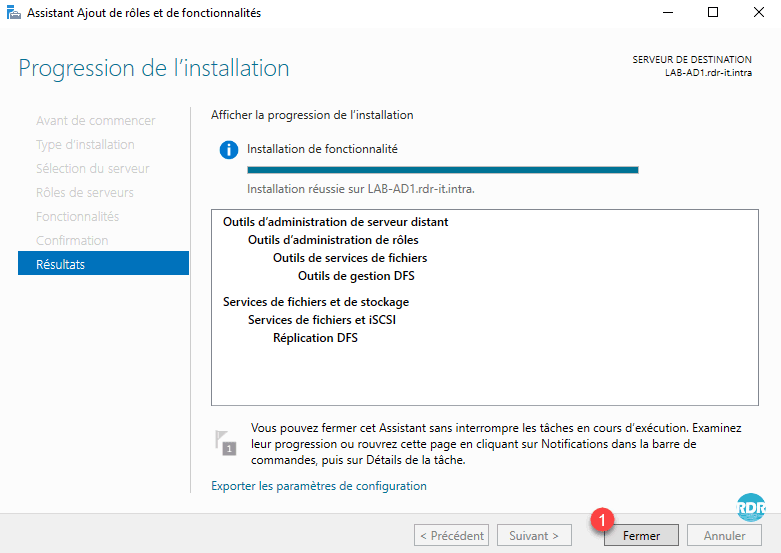
6. Once the installation is complete, click on the Close button 1.
Windows 2012R2 / 2016 / 2019
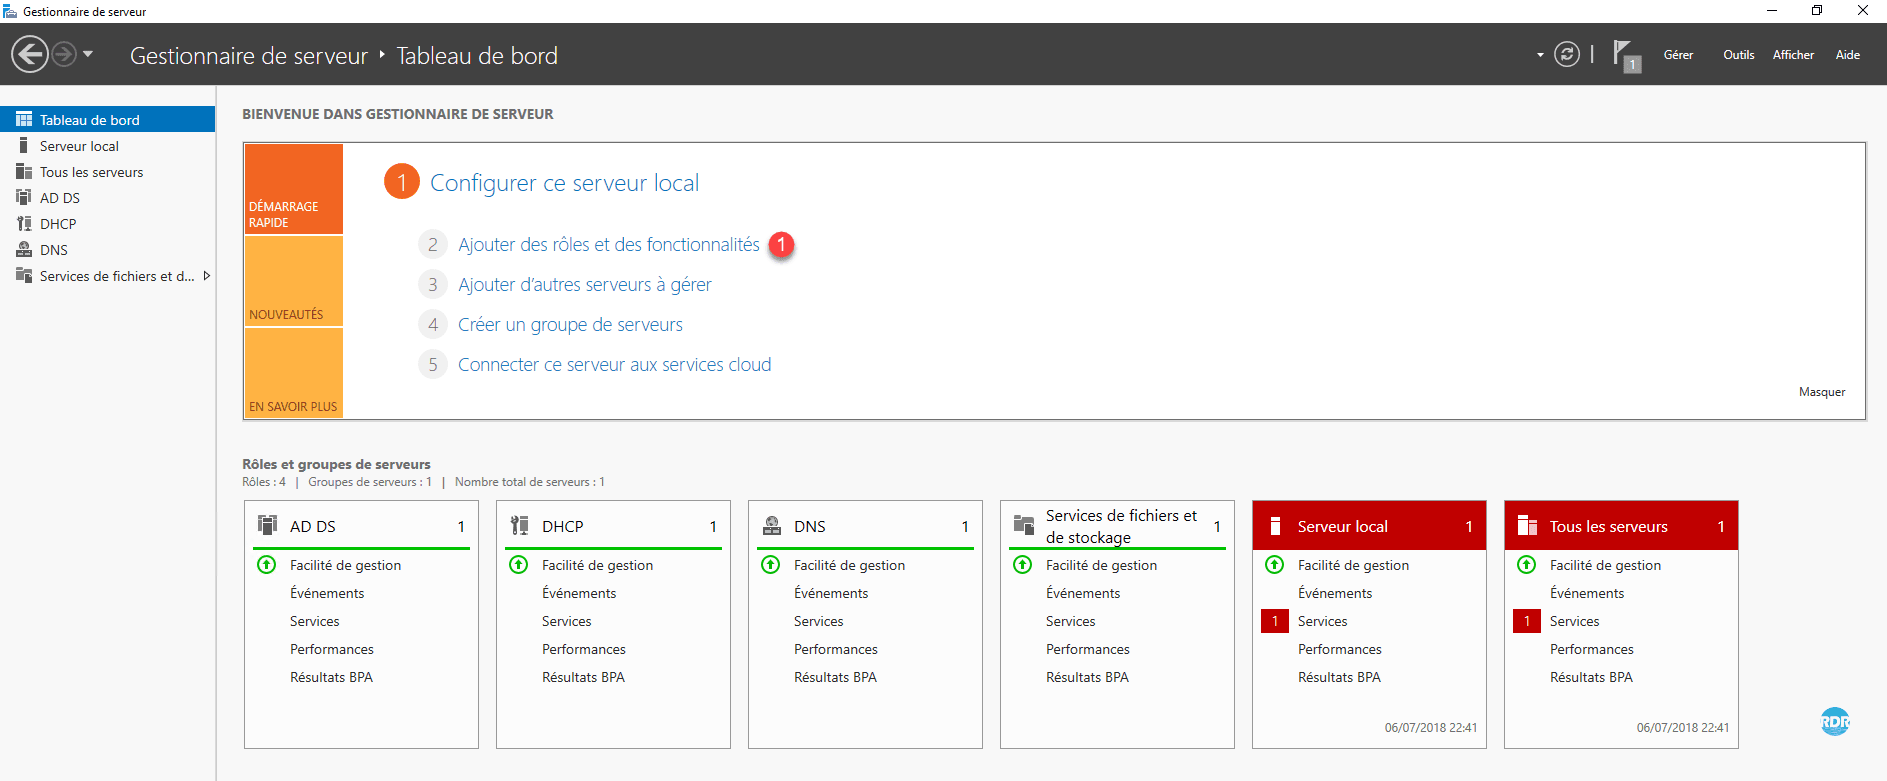
1. From the server manager, click on Add roles and features 1.
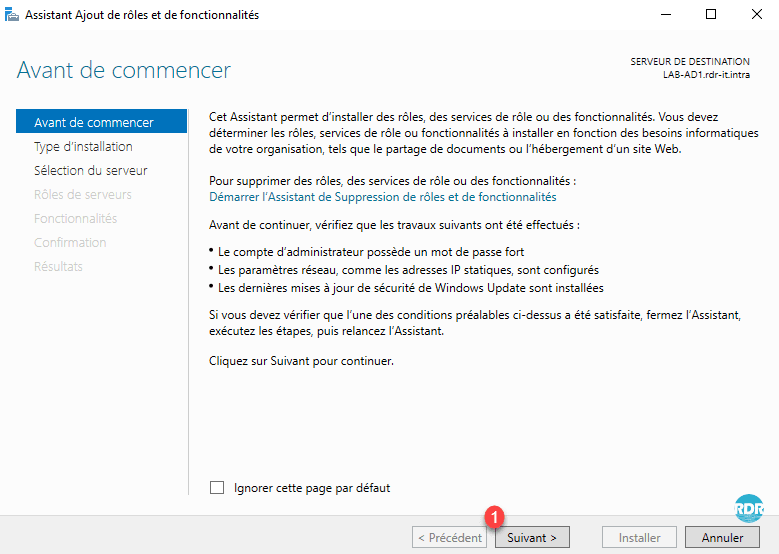
2. When the wizard opens, click Next 1.
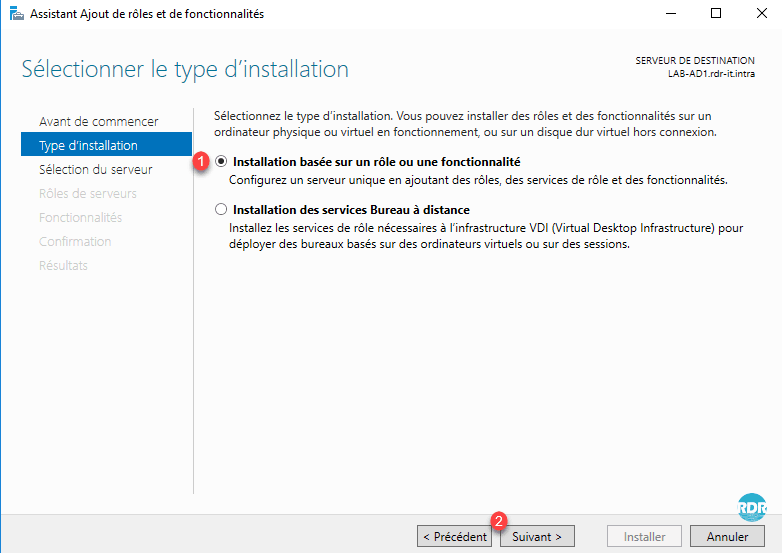
3. At the type of installation option, choose Installation based on a role or a feature 1 and click on the Next button 2.
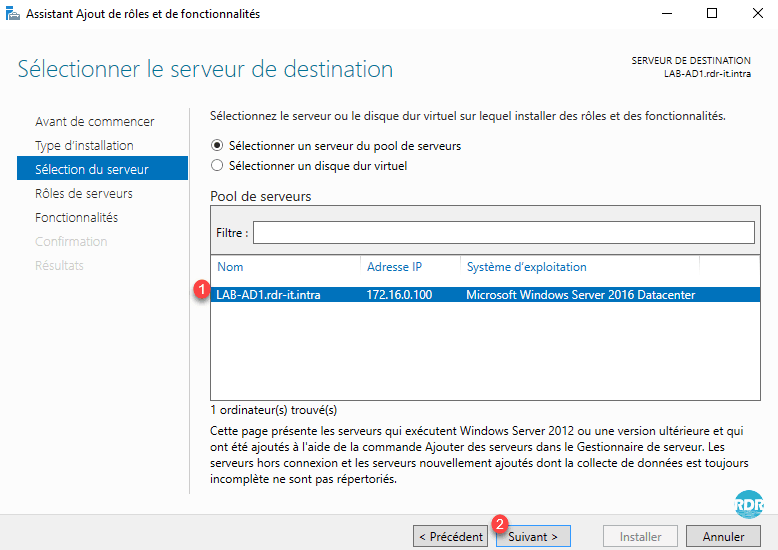
4. Select the server where the installation is to be performed 1 and click Next 2.
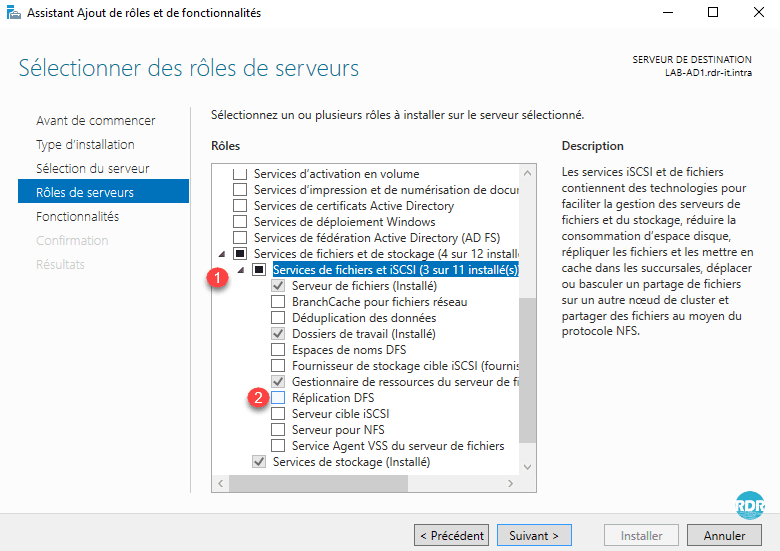
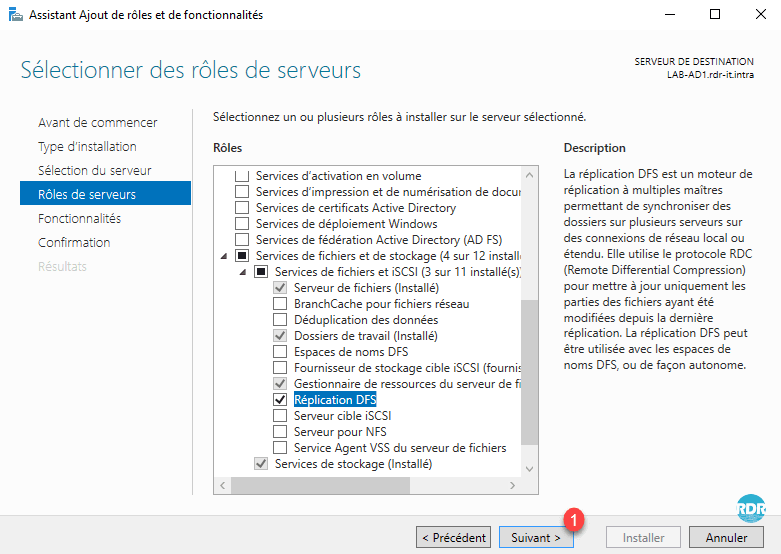
5. Go to the File and Storage Services 1 role and expand it. Check the box for DFS Replication 2.
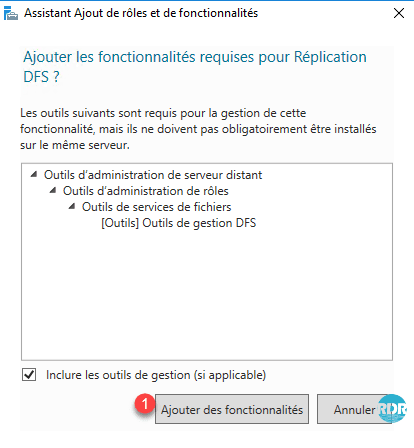
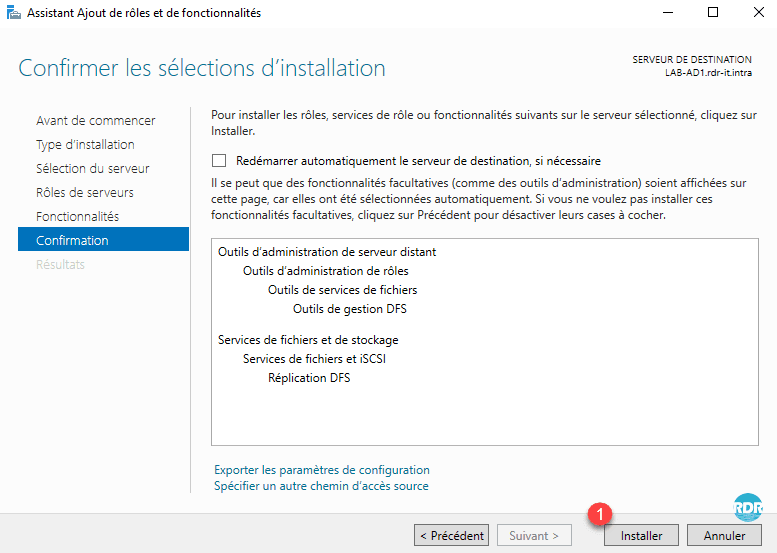
6. Validate the addition of dependencies by clicking on Add features 1.
7. In the list of roles and functions click on Next 1.
8. Click on Install 1.
9. Wait while the DFS Replication service is installed.
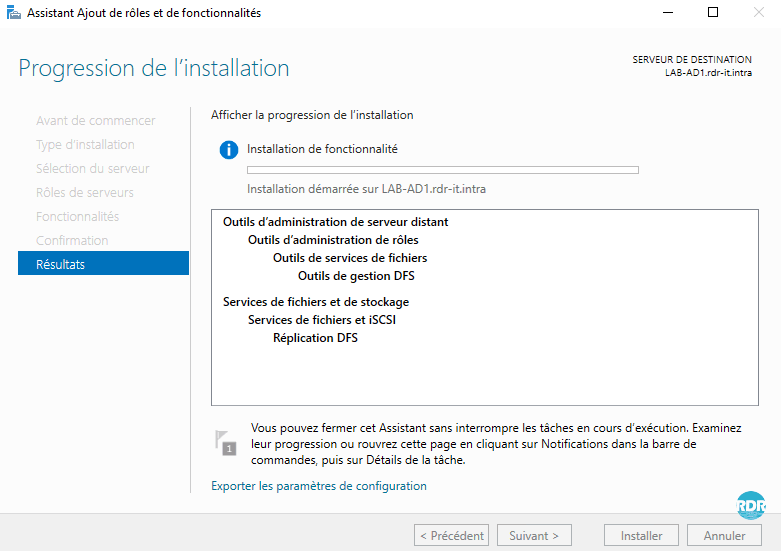
10. When the installation is complete, exit the wizard by clicking Close 1.
Configuring DFS
All configuration is performed under Windows 2012R2.
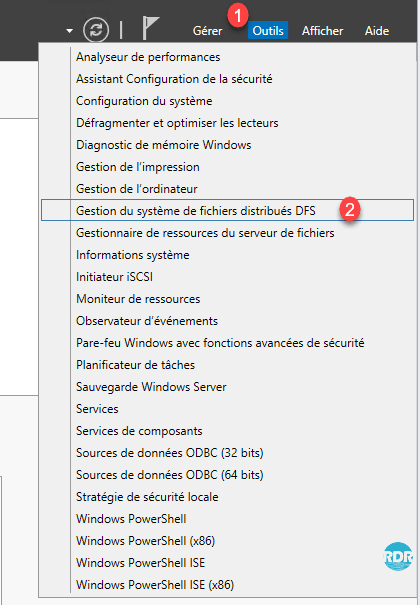
1. Open the console, from Server Manager: Tools 1 DFS Distributed File System Management 2.
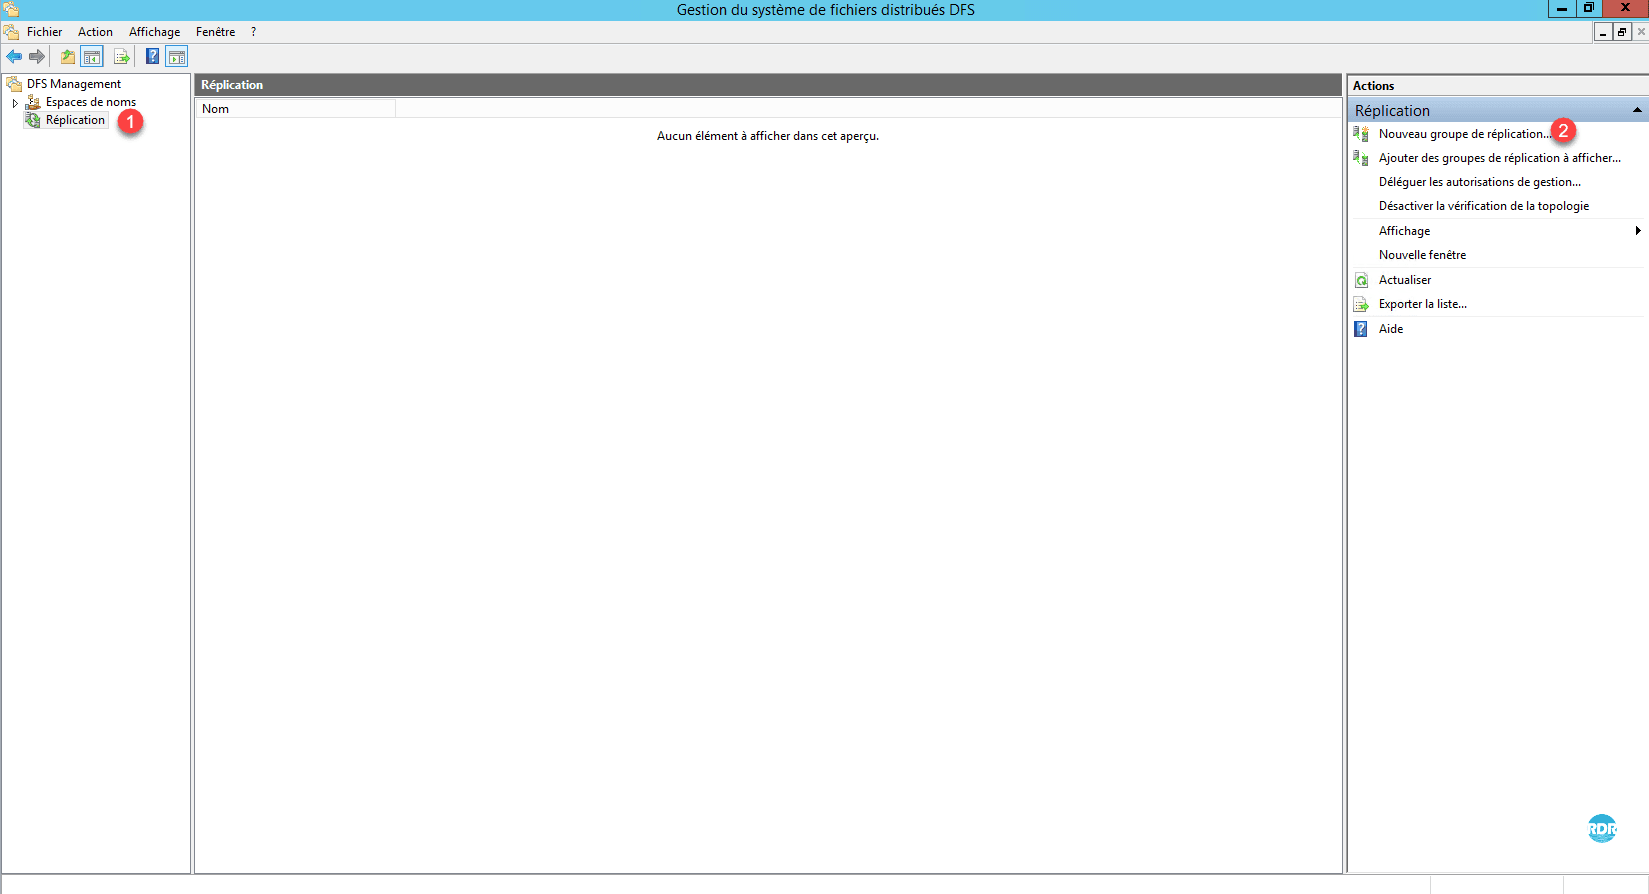
2. Go to Replication 1 and click on New Replication Group … 2 from the Actions menu.
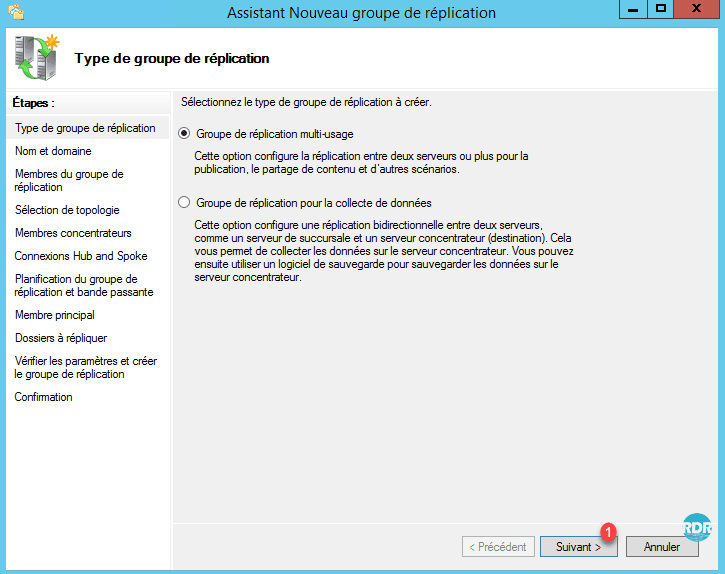
3. Select the type of group according to your needs. In the article, we will choose a multi-use replication group then click on Next 1.
4. Choose a name for group 1 and enter a description A then click Next 2.

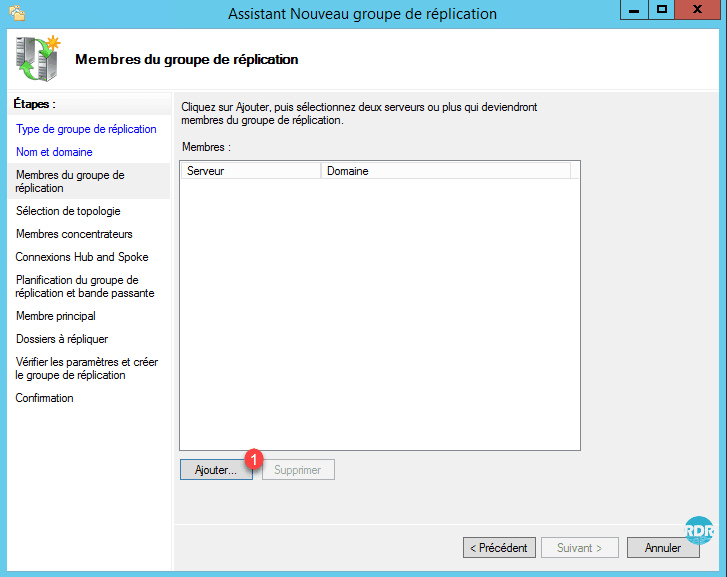
5. He now declares the member servers, clicks on Add 1 and uses the AD object explorer.
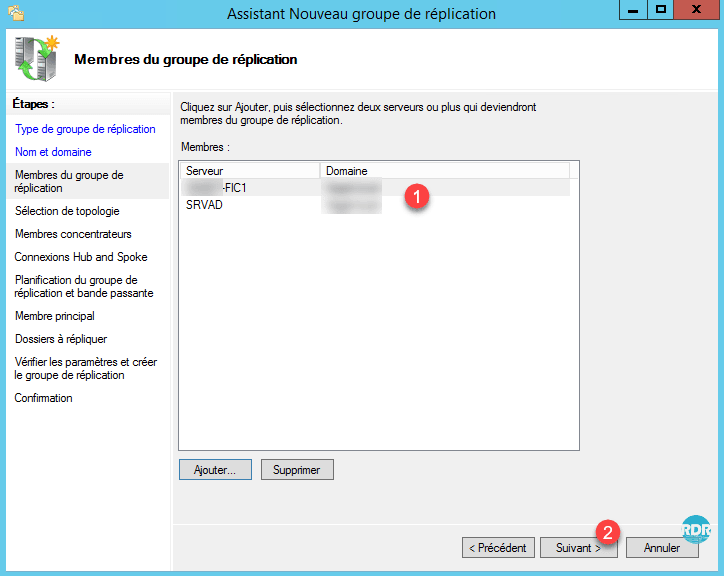
6. Once the servers have been added to replication group 1, go to the next step by clicking on the Next 2 button.
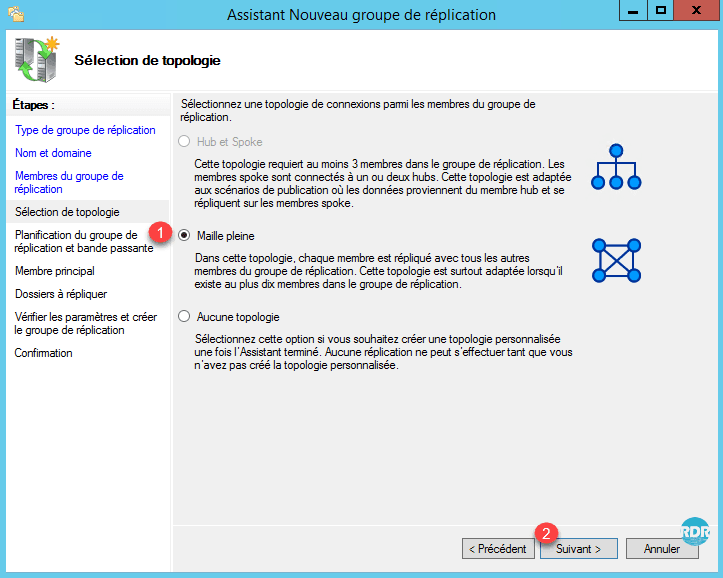
7. We will choose a full mesh topology 1, which allows replication between all the members of the group. Click on Next 2.
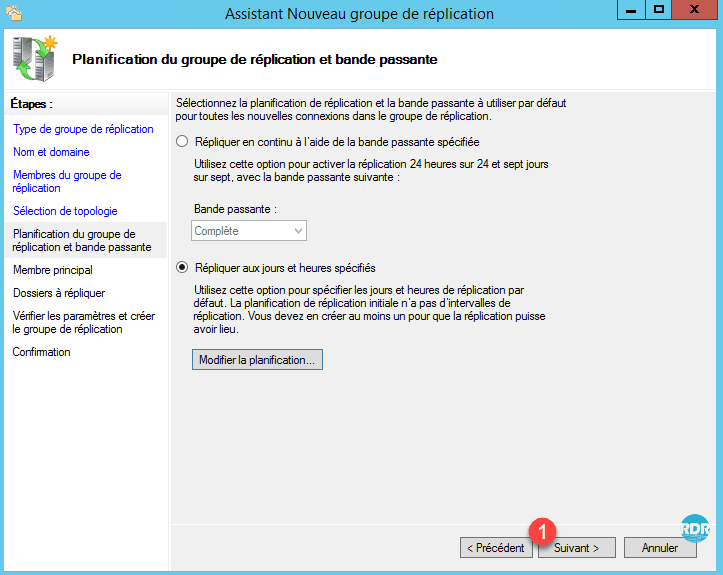
8. In case of replication between several servers physically on the same LAN and interconnected in VPN by a THD connection, leave Full Bandwidth 1 and click on Next 2. Go directly to point 9.
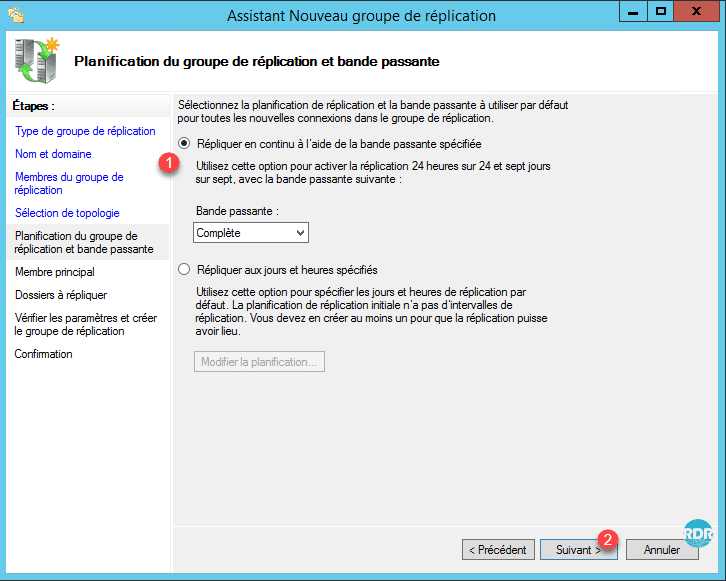
We will see how to adapt the bandwidth according to the hours and days.
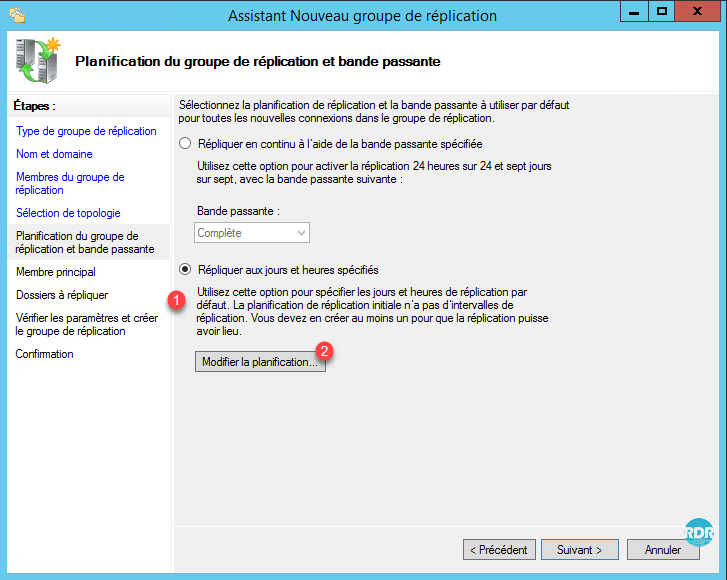
8-1. Select the Replicate on the specified days and times 1 option and click on the Modify schedule … button 2.
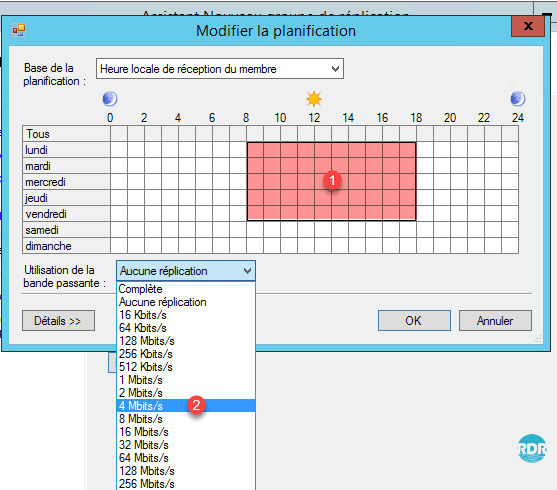
8-2. Choose a time slot / days 1 and the desired flow rate 2.
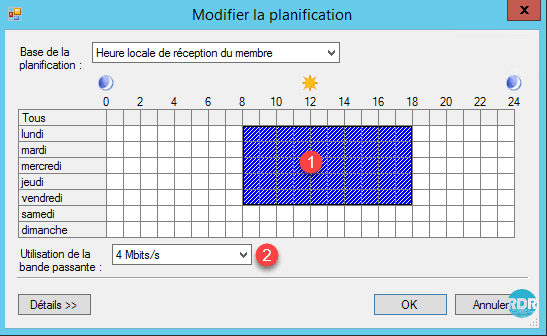
8-3. The selected range changes to blue 1 with the set flow rate 2.
8-4. The rest of range 1 will be able to use all of the bandwidth 2.
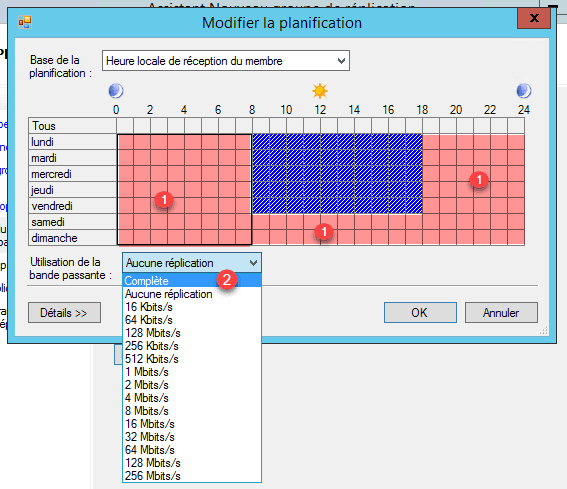
8-5. The selected range changes to blue 1 with the configured flow 2. When planning is complete click on OK 3.

8-6. Click on the Next 1 button.
9. Select the primary member of replication group 1 and click Next 2.
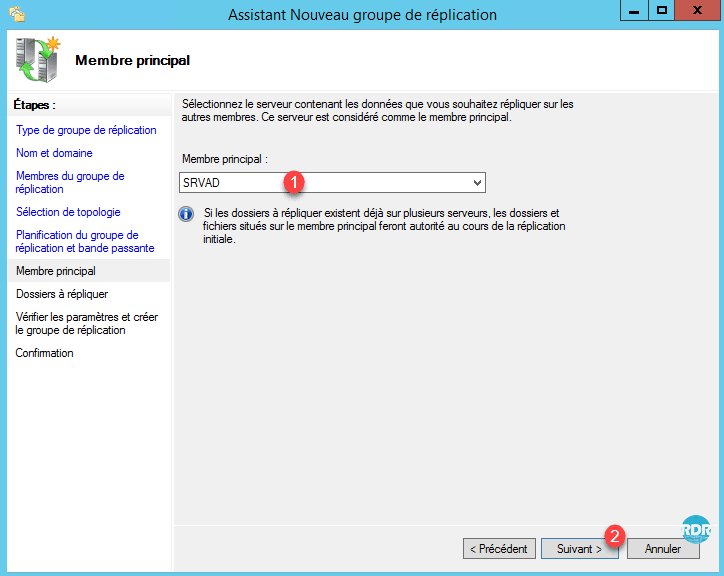
This member will be the source for the initial replication.
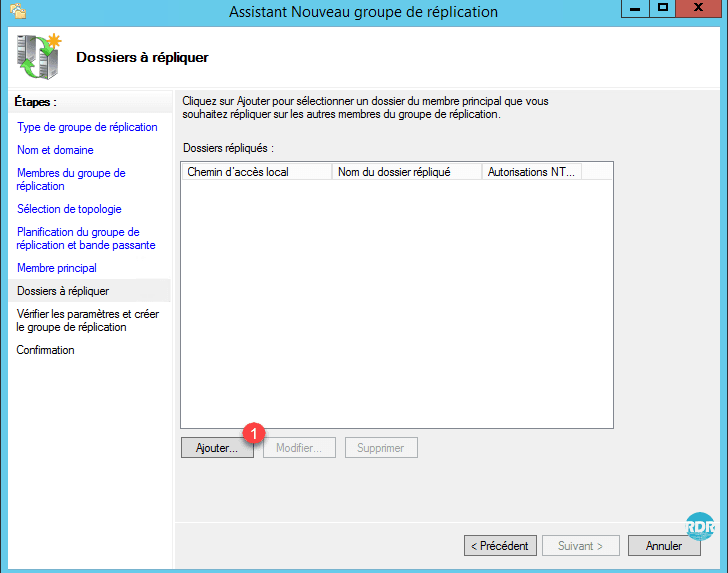
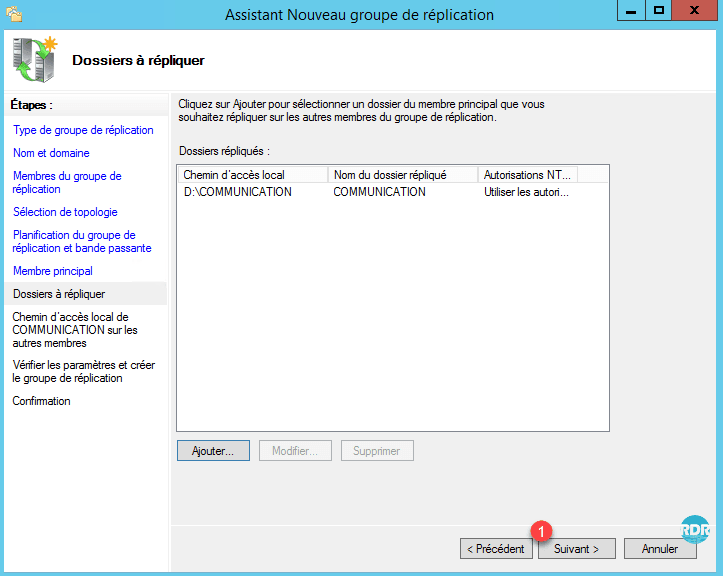
10. You must now choose the folder that will be replicated on the main member. Click on Add … 1.
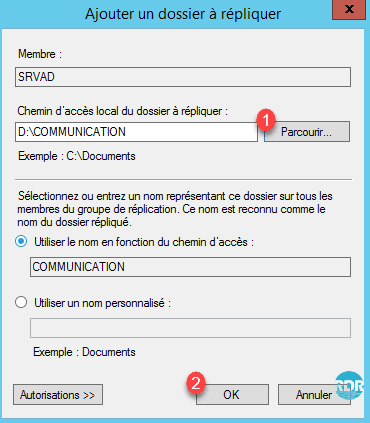
11. Enter the location of the folder or click on Browse 1 and validate with the OK button 2.
12. Click on Next 1.
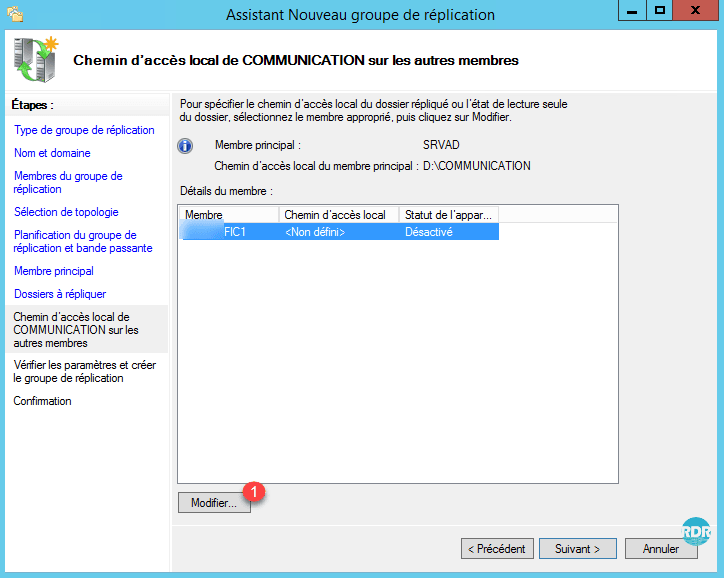
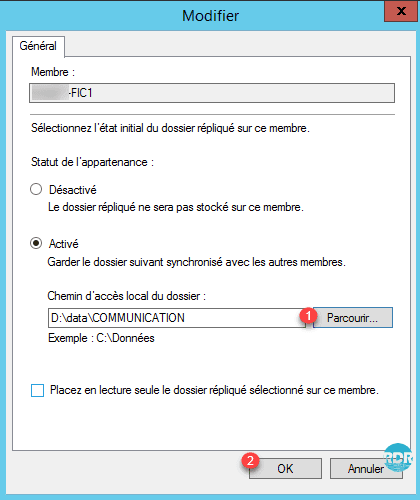
13. It is now necessary for each member of the replication group to also choose its location. Select a member and click on Modify 1.
14. Enter the path or click on Browse … 1 and validate with OK 2.
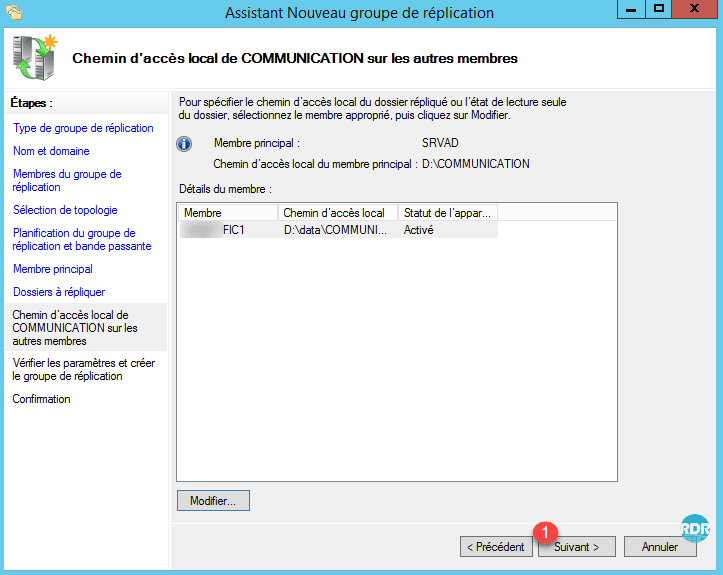
15. Once all the members have been correctly configured, go to the next step by clicking Next 1.
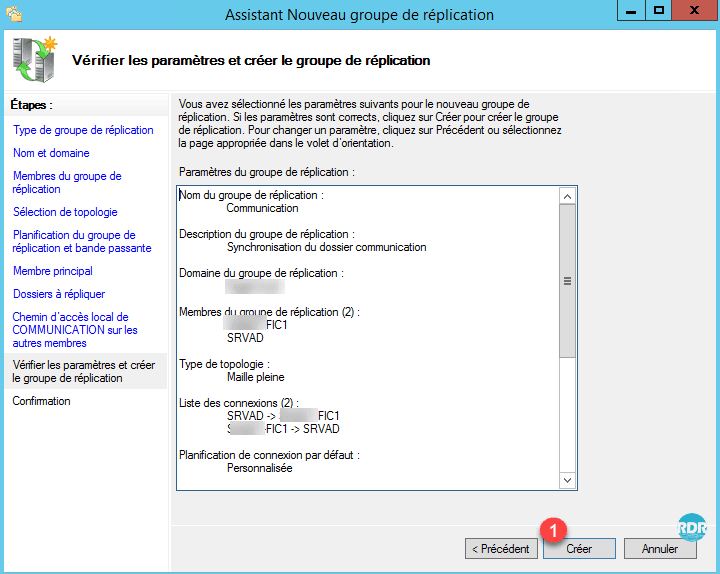
16. Click on Create 1.
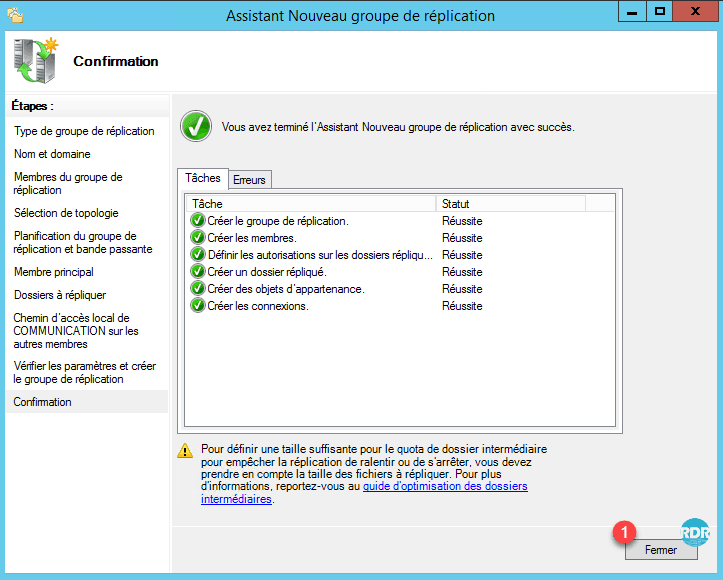
17. The replication group is built, exit the wizard by clicking on Close 1.
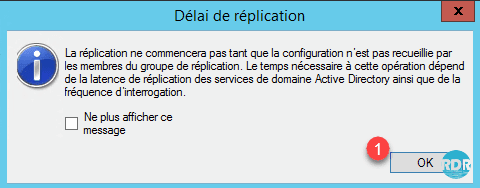
18. Click OK 1 to close the warning.
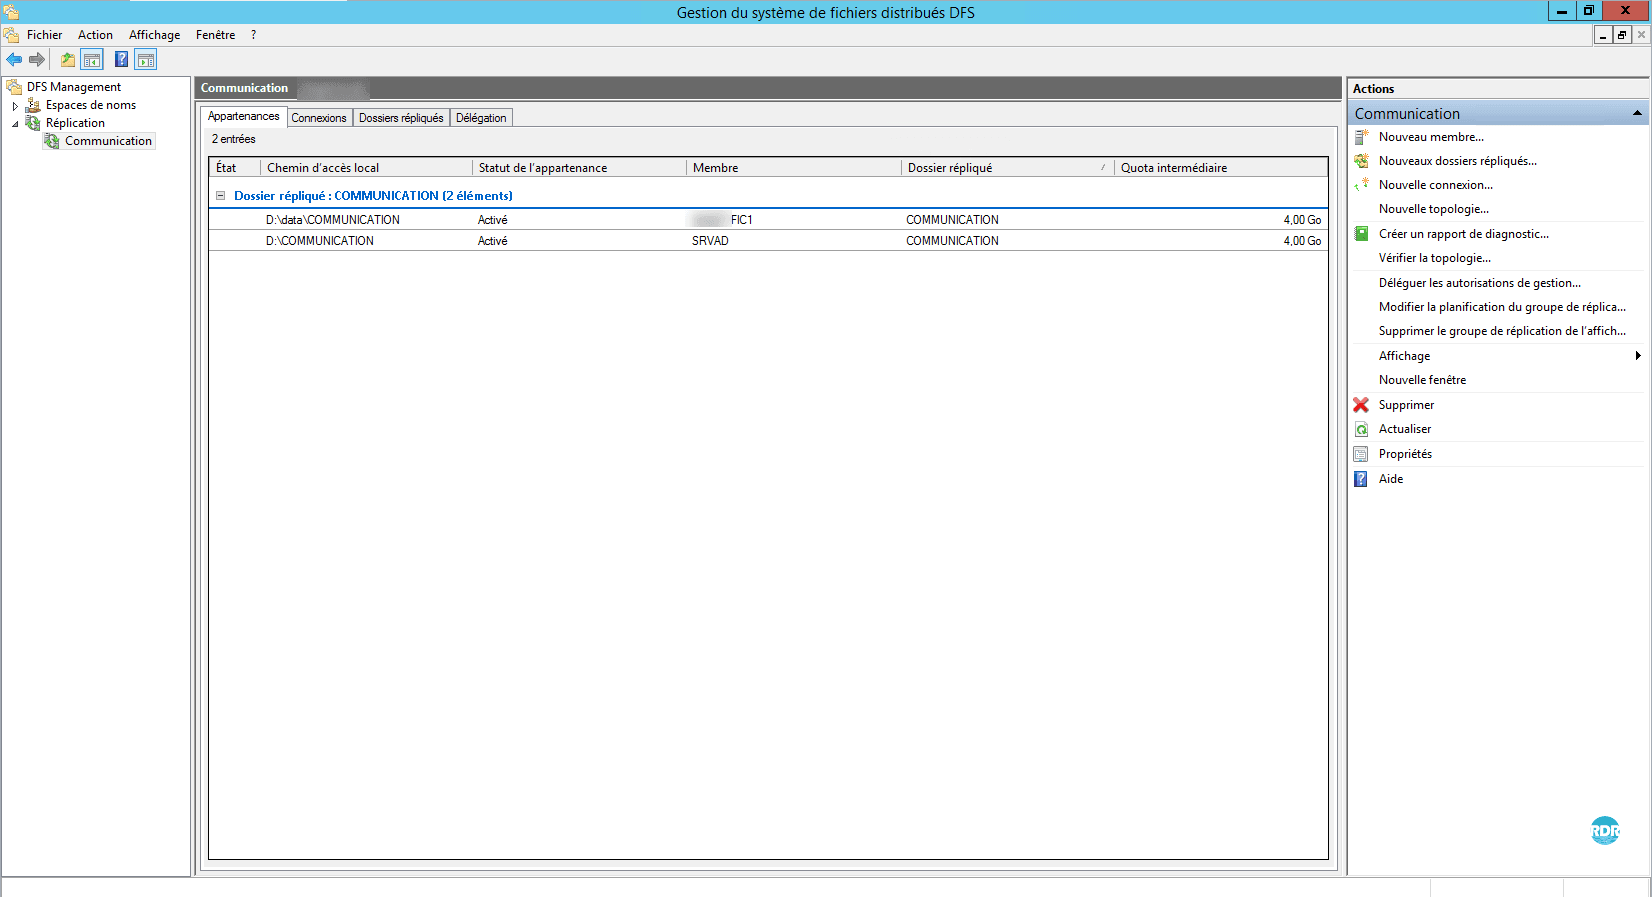
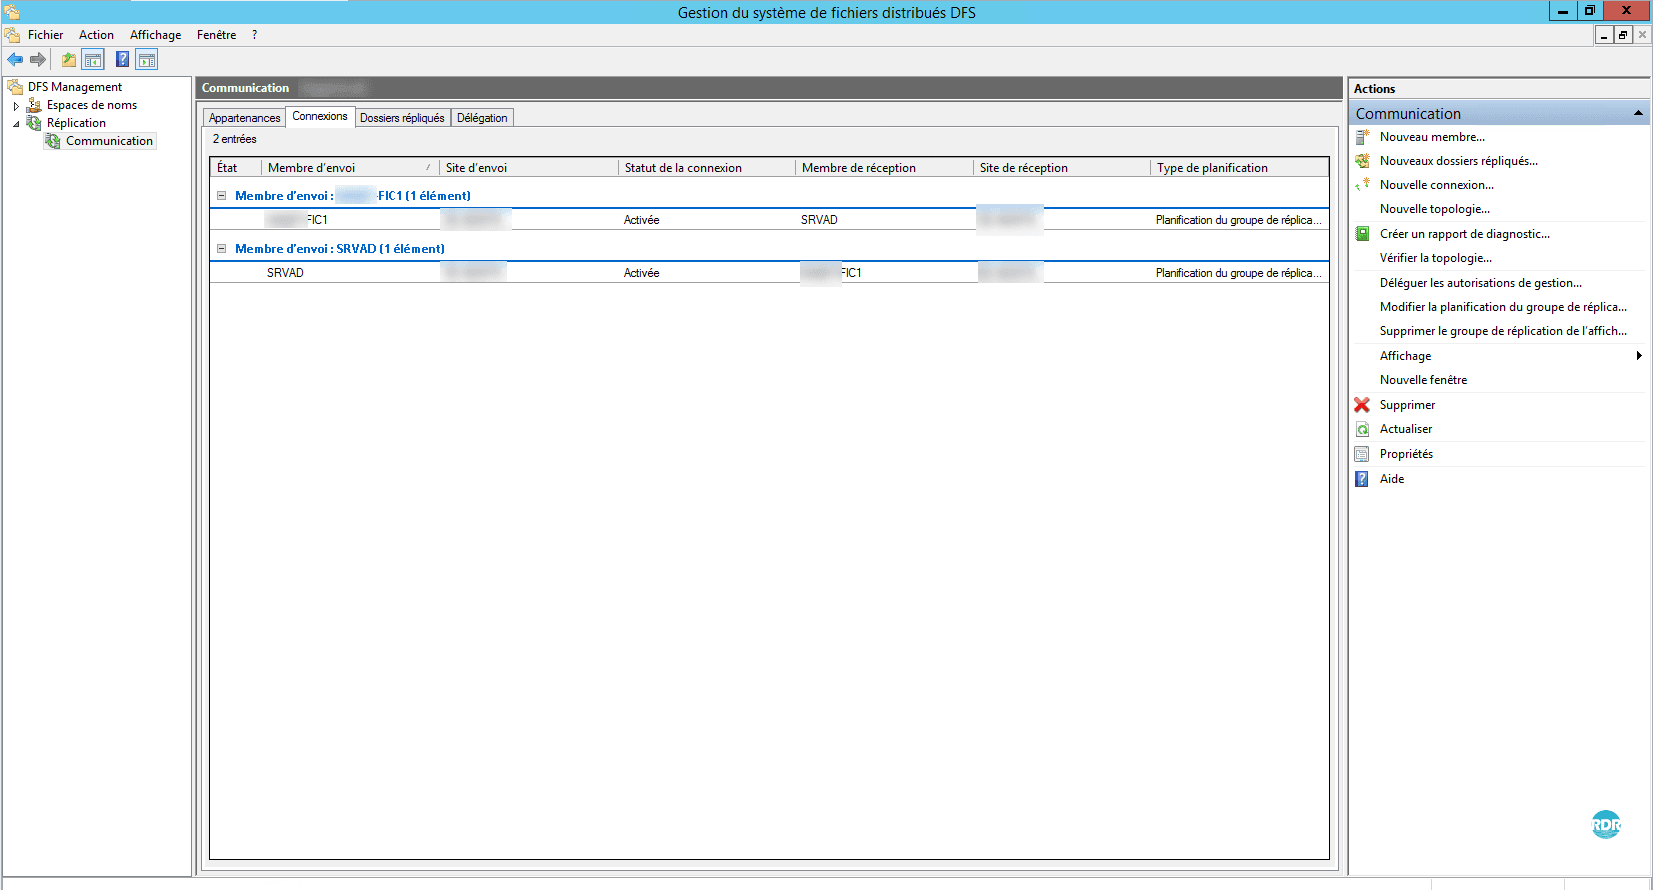
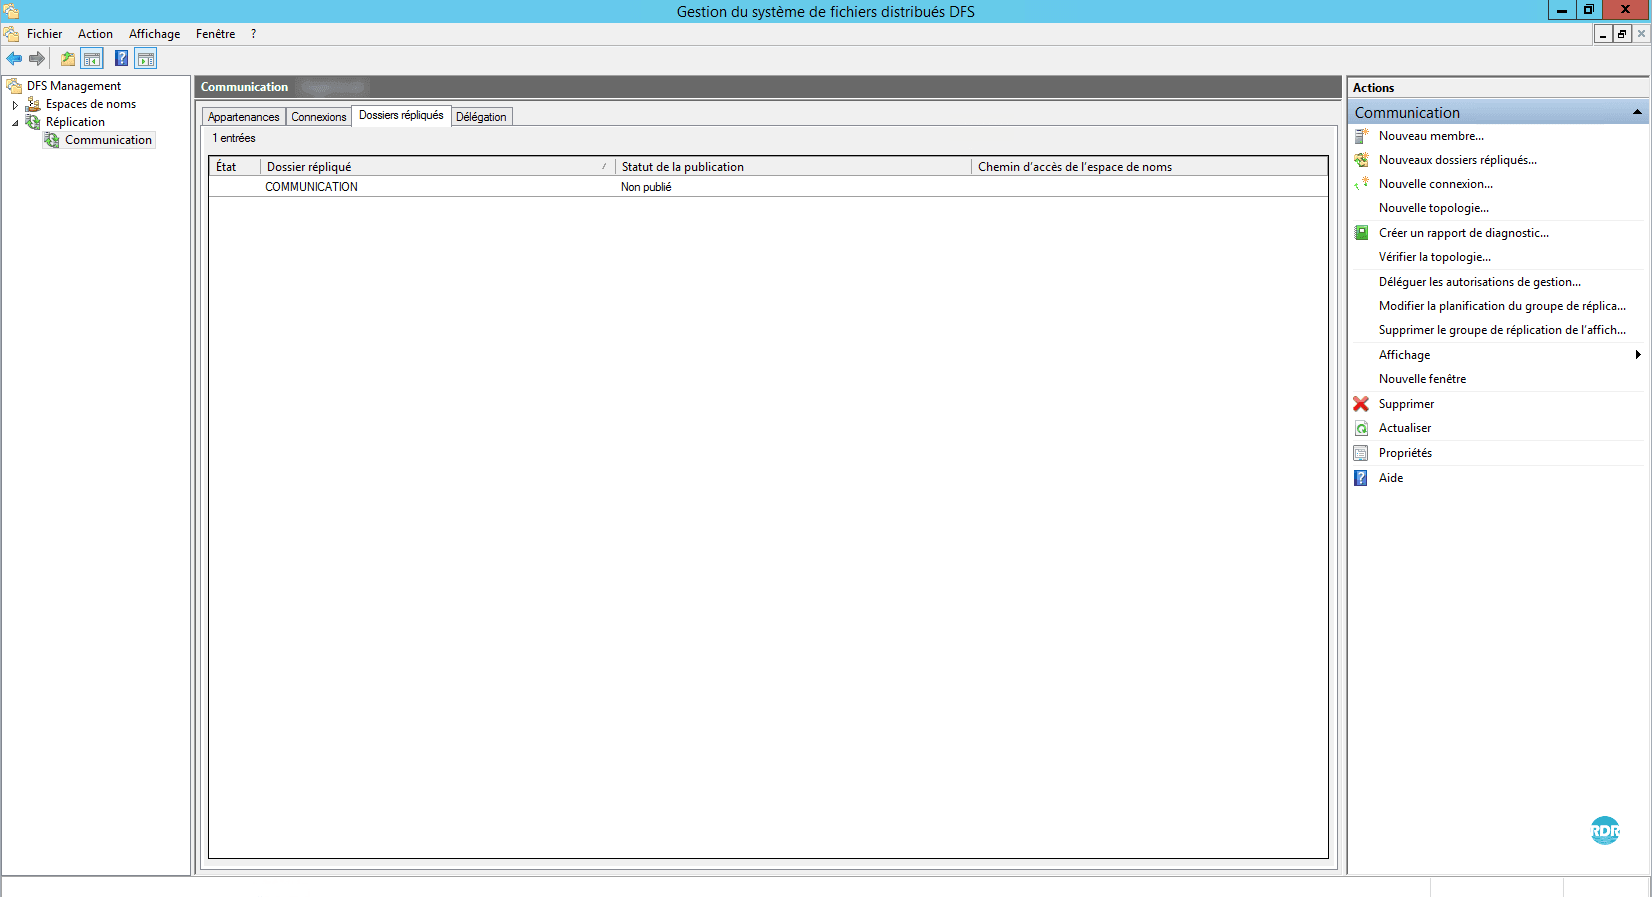
19. The replication group is available in the console:
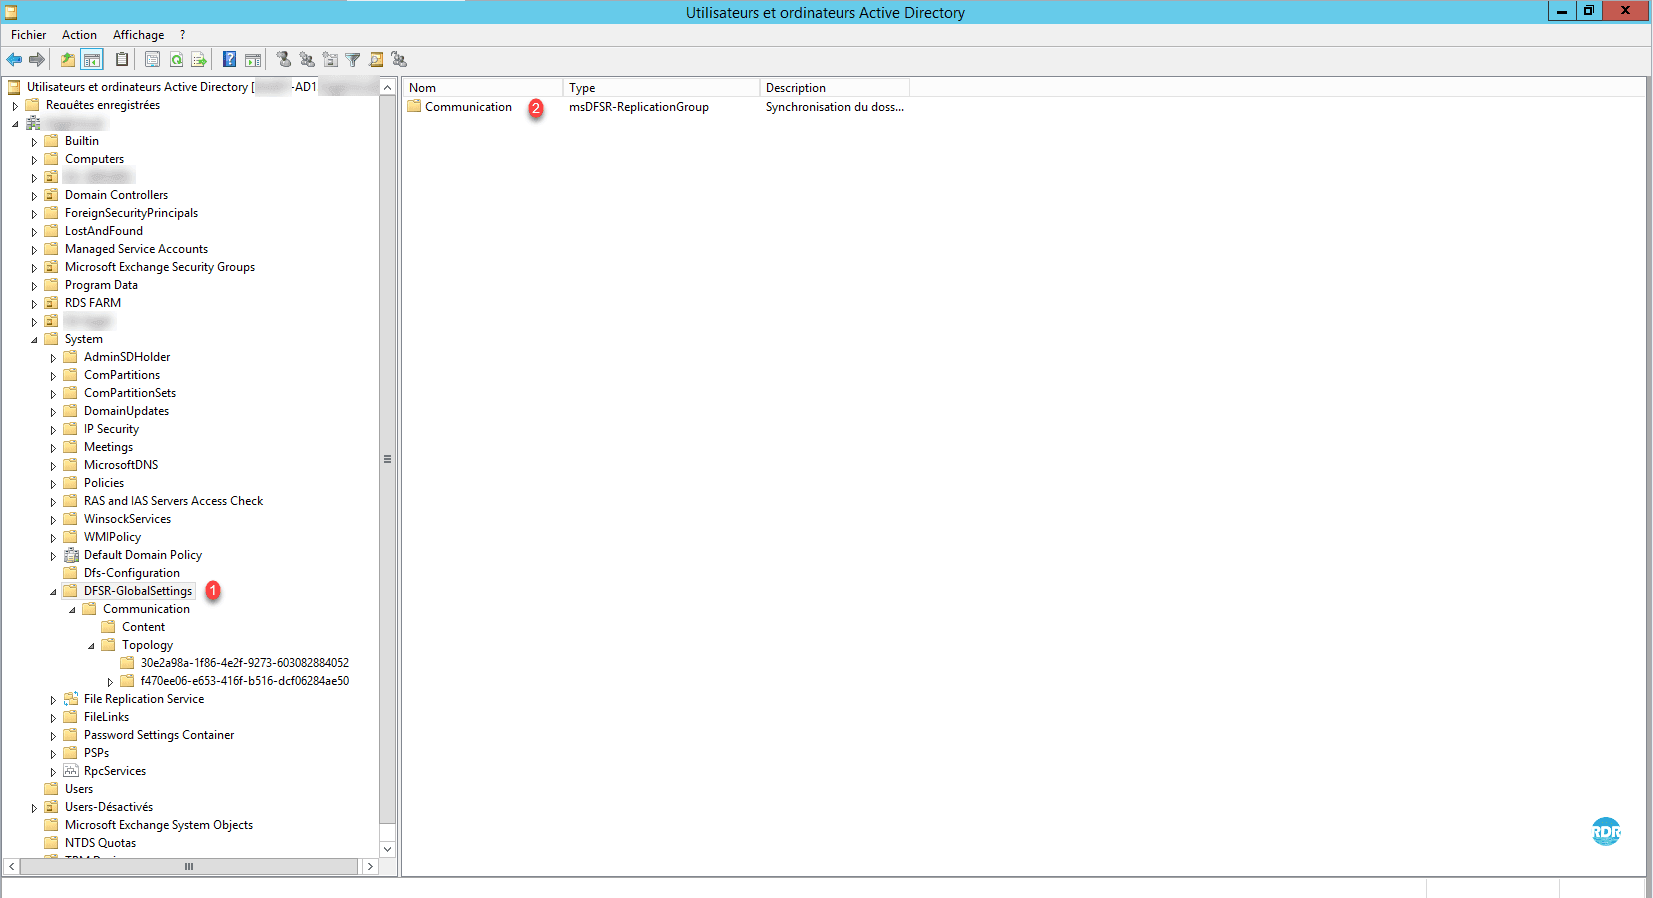
20. Open the Active Directory Users and Computer console and expand the System> DFRS-GlobalSettings folders 1. We can see the replication group that we have just configured 2.
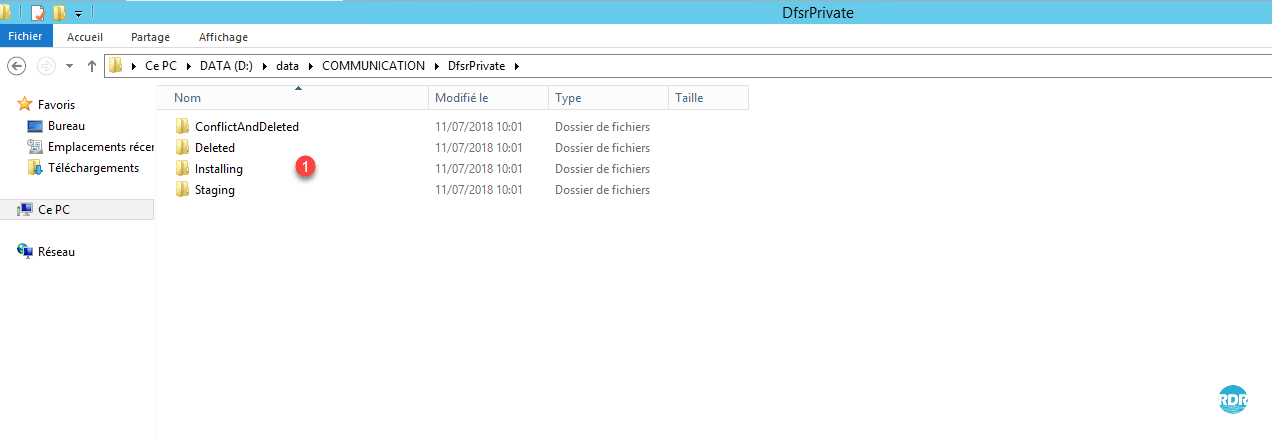
21. Go to one of the target servers of the replication group. Open the file explorer and go to the reception folder. There should be a folder (shortcut) named DfsrPrivate 1, click on it to open it.
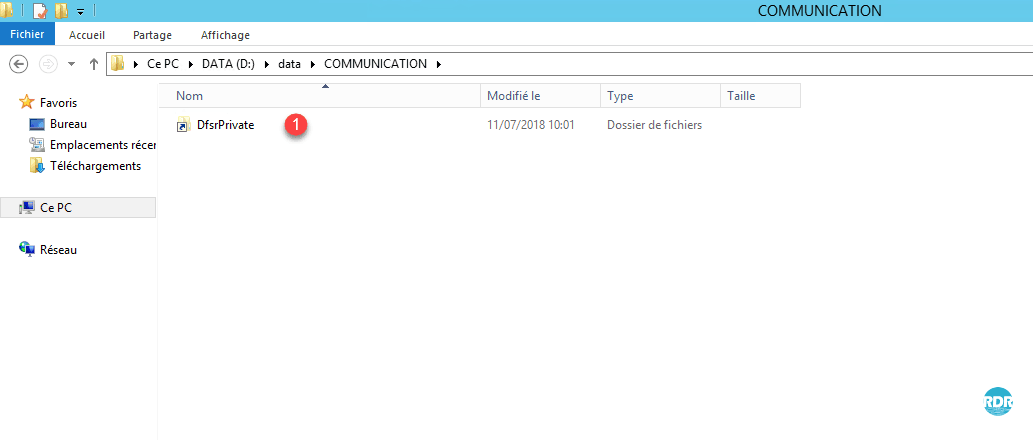
The folder may take some time to be created.
If the folder is not visible, you must show the hidden files
The folder can only be accessed with the administrator account.
22. In this folder are 4 other folders 1 which are used by the replication process as “cache” (Intermediate quota). In this folder are also the Delete files from the replication group as well as the conflicting files.
Troubleshooting
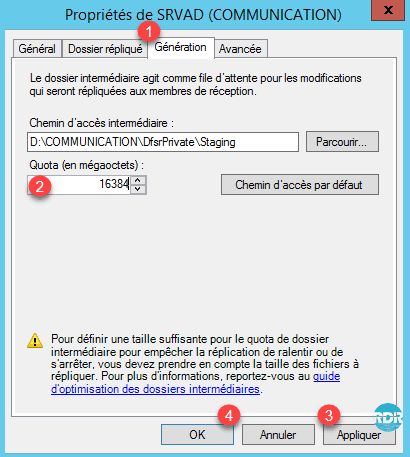
Modification of the intermediate quota
The staging quota acts as a cache for replication. Unfortunately there is no calculation rule to determine its size. It must be appropriate for each replication group. The default size is 4GB. Here are some things to consider when adjusting the quota.
- Volume of the elements that make up the replication group.
- Largest item size (if you have files larger than the quota replication may fail).
- Write rate in the group (creation / modification).
During the initial replication if your source folder is already large, it is advisable to increase the staging quota.
It is possible to use the reports to obtain information on the intermediate quota.
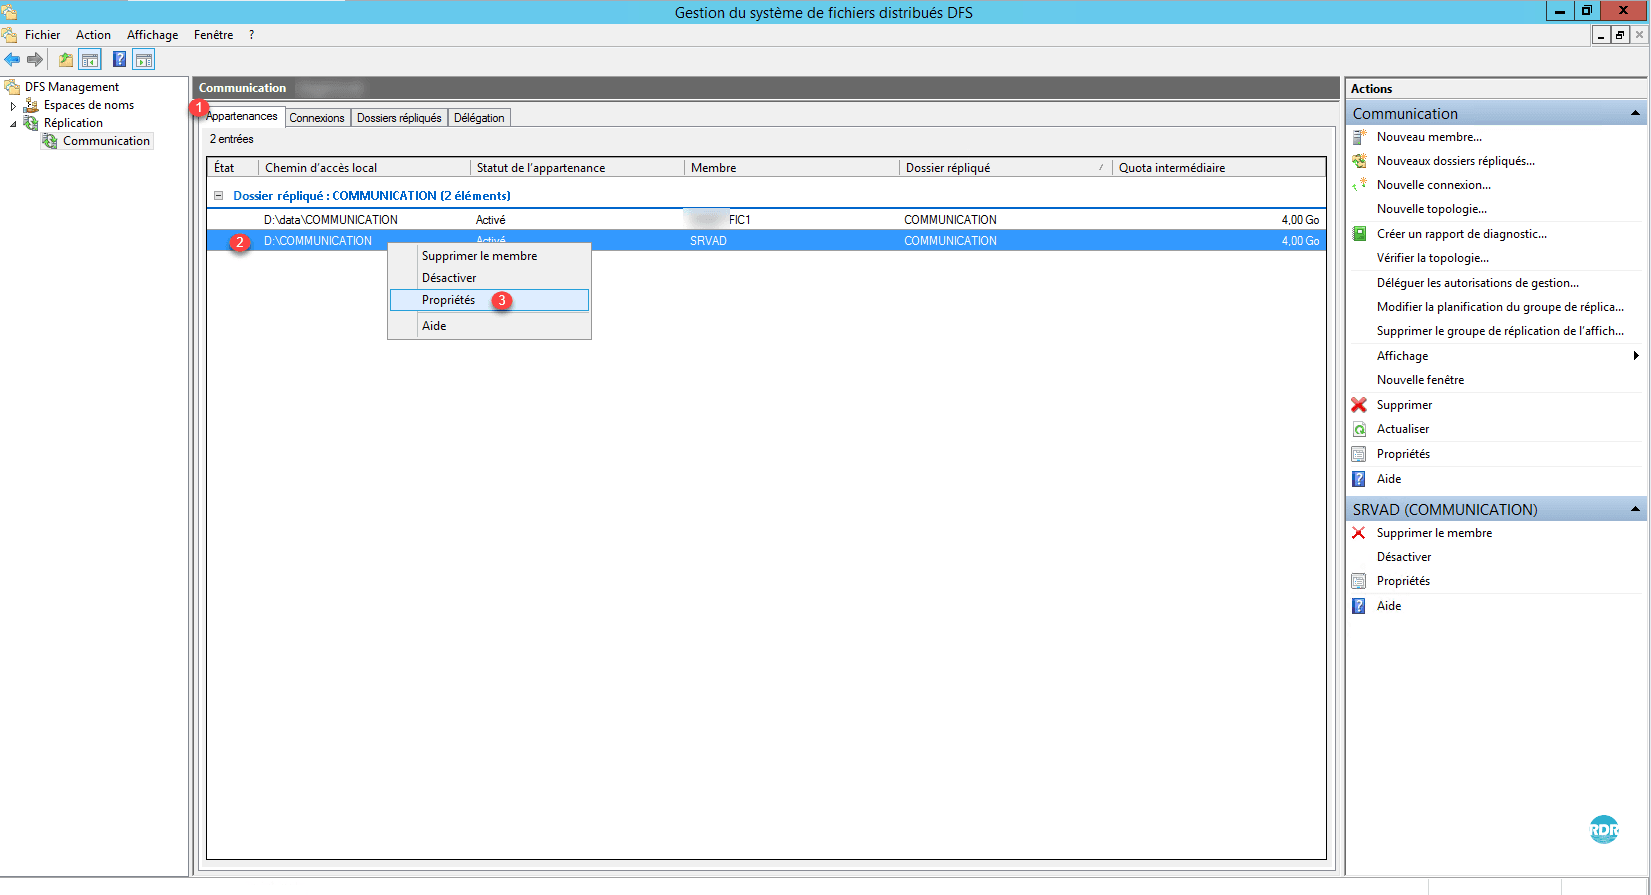
1. From the DFS-R console, go to a replication group, on the Memberships 1 tab, select a member 2, right click on it and go to Properties 3.
2. Go to the Generation 1 tab then modify the Quota 2. Click on Apply 3 and OK 4.
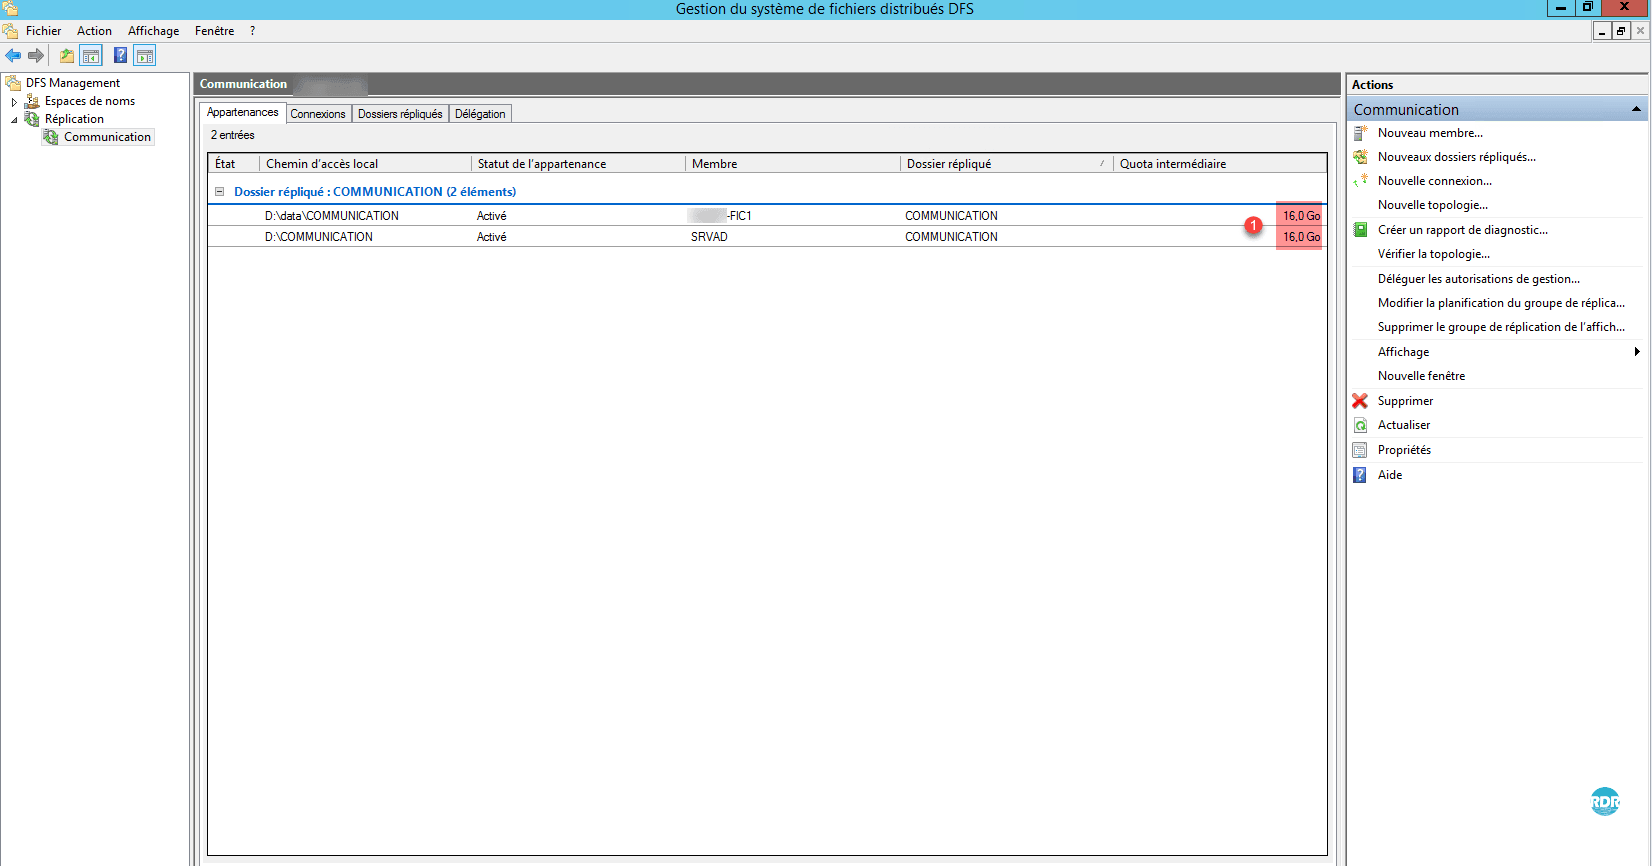
3. Do the manipulation for all the members of the group.
4. The quota has increased to 16GO 1.
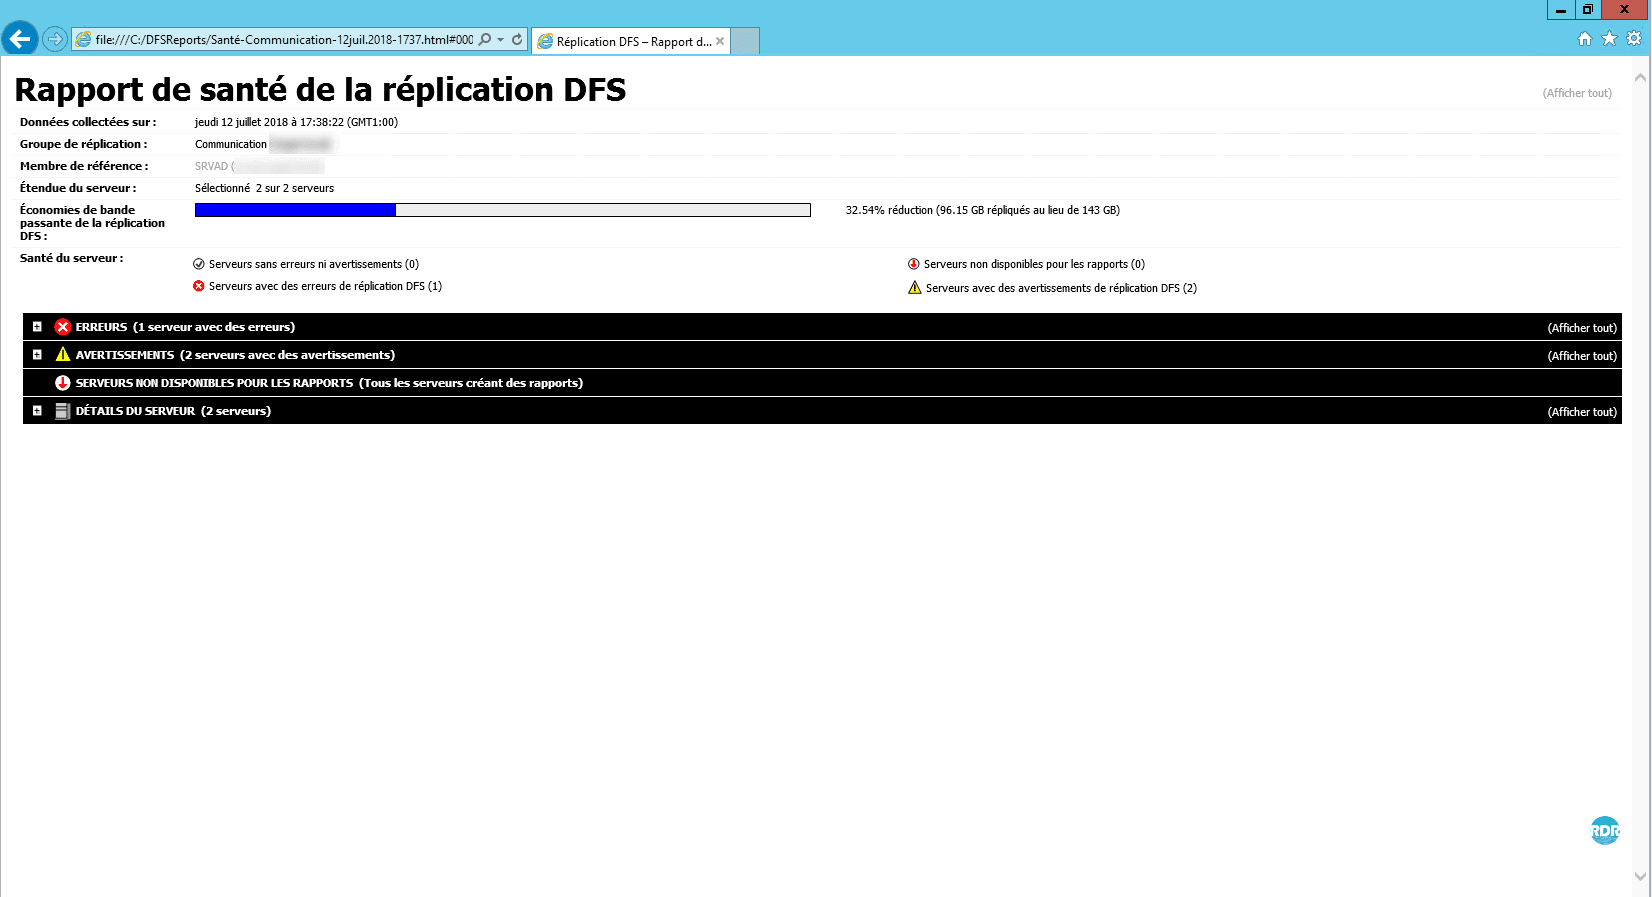
Report generation
There is no tool to monitor the status of replications, it is necessary to pass the generation of reports or by PowerShell commands.
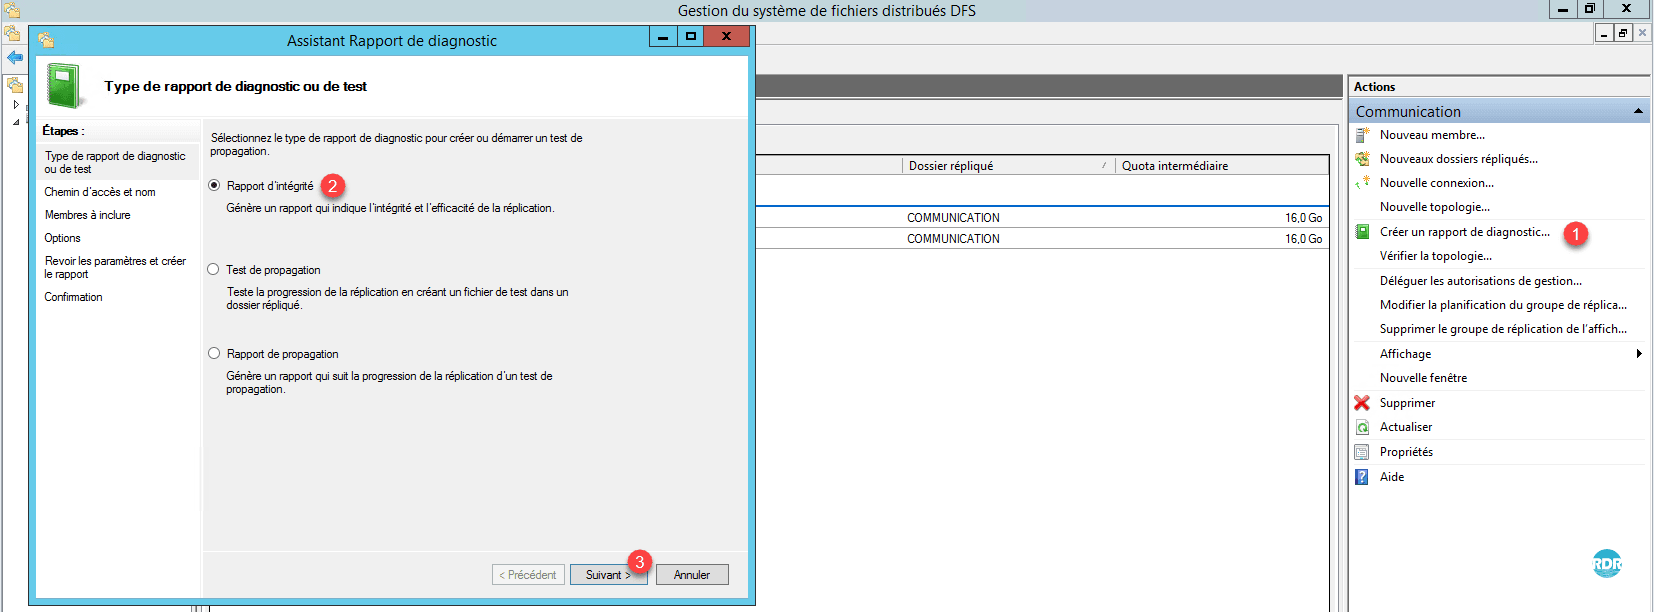
1. From the console, select a replication group, click on Create a diagnostic report … 1 in the Actions menu. Choose a report type 2 and click Next 3.
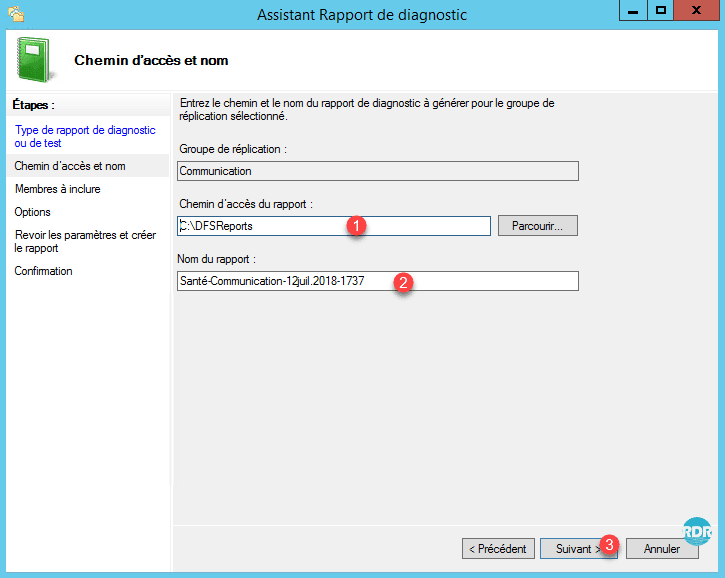
2. Choose the save location for report 1 and its name 2. Then click on Next 3.
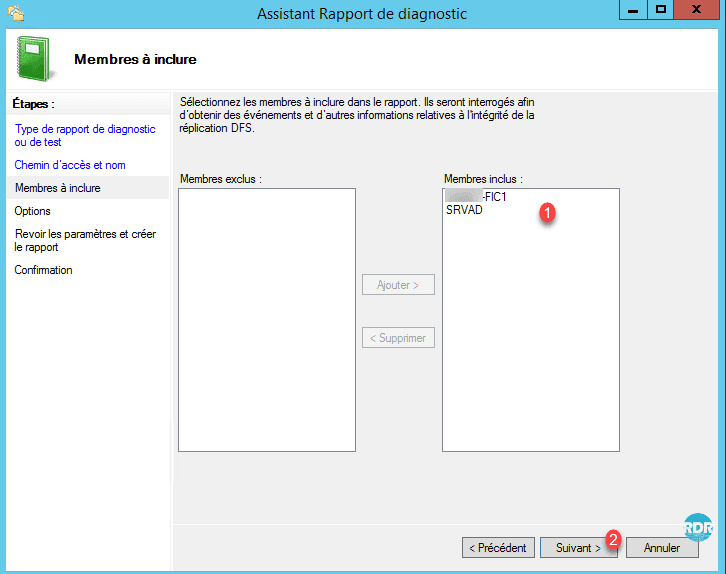
3. Select the members to put in the report 1 and click on Next 2.
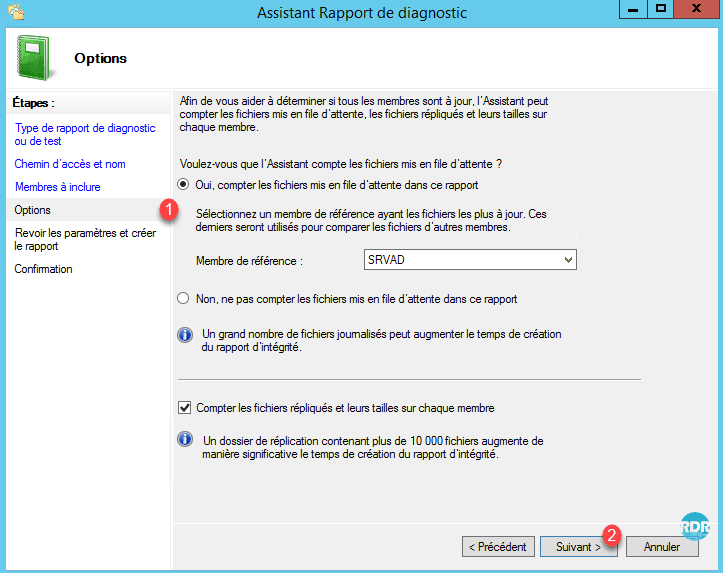
4. Configure options 1 for the report and click Next 2.
5. Click on Create 1 and wait for the generation.
6. Once generated, the report will automatically open in the internet browser.