


Introduction
In this tutorial, we will see how to set up a RDS farm in Windows 2012R2 / 2016/2019 with the following features:
- Remote Desktop Session Host (x2)
- Service broker for the distribution of connections
- Setting up a collection
- Publishing RemoteApp on a web portal
- Remote Desktop Gateway
- User Profile Disk (UPD)
To set up a complete rds farm, you need a minimum of 4 servers, not including the domain controller and file and print server. All farm servers must be members of the same Active Directory domain.
Composition :
| Name | IP | Roles |
| LAB-RDS1.rdr-it.intra | 172.16.0.184 | Remote Desktop Session Host |
| LAB-RDS2.rdr-it.intra | 172.16.0.185 | Remote Desktop Session Host |
| LAB-RDS-BRK.rdr-it.intra | 172.16.0.186 | Service Broker / License Manager |
| LAB-RDS-GW-WEB.rdr-it.intra | 172.16.0.187 | Gateway Remote Desktop / Web Access |
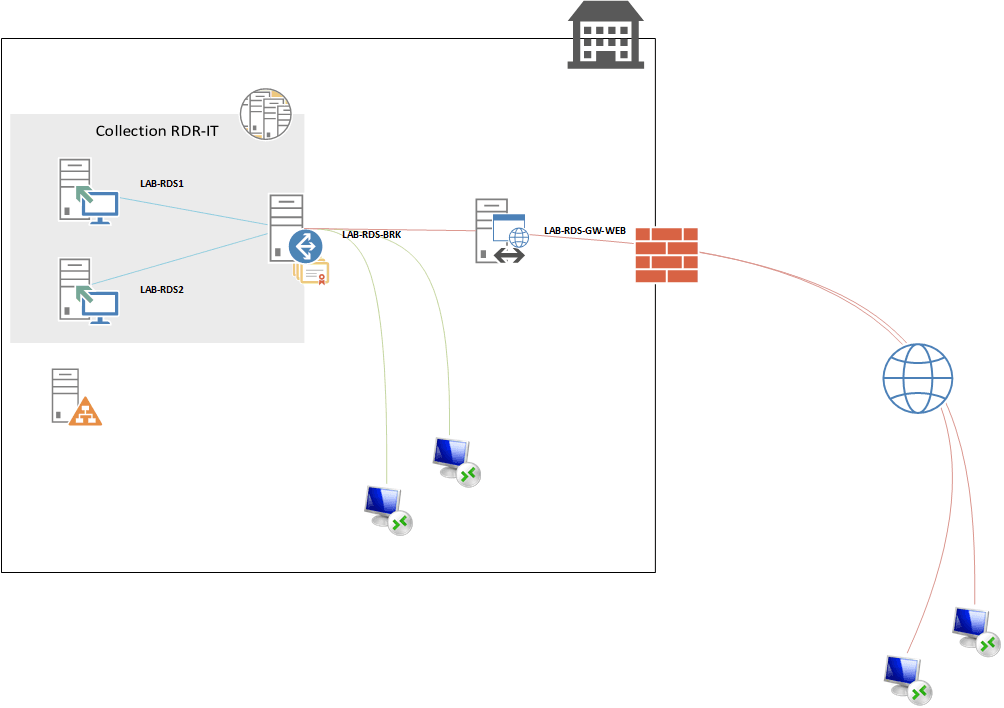
For the realization of the tutorial, I used an AD server, LAB-AD1.rdr.it.intra with the IP address 172.16.0.100. DC is used for storing UPDs.
Server role definitions that are part of an RDS farm.
Remote Desktop Session Host : On these servers, the user sessions are open and allow them to work.
Service broker : This is the circulation agent for sessions in an environment with multiple remote desktop session hosts.
Remote Desktop Gateway : Its primary role is to enable secure access to the RDS infrastructure from the Internet. It connects to the farm using HTTPS and filters connections using access policy.
Web Access : publishes a web portal that allows access to applications via RemoteApp via an Internet browser. This role is also used for RemoteApp access for Windows clients. Through this portal, it is also possible to put the password change of the users.
License Manager : This service is used for license distribution (CAL RDS).
The tutorial was made under Windows 2012R2. The deployment of an RDS farm under Windows 2016 and 2019 is almost identical.
Preparation of the environment
Before you begin deploying the different roles on the servers, you must prepare the environment.
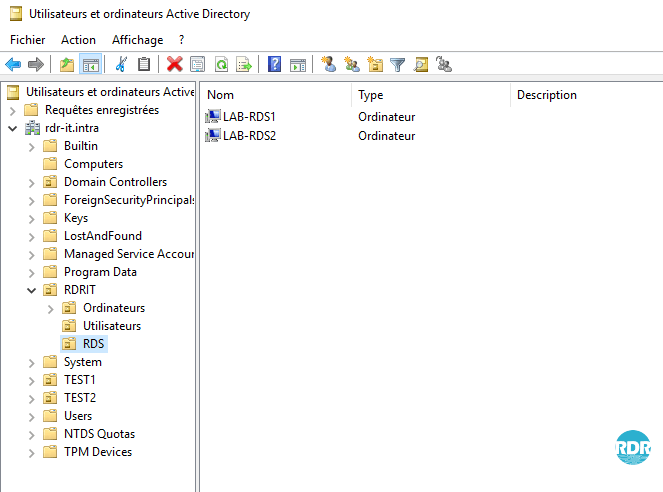
Move the Remote Desktop Session Host Servers to an OU
This operation will allow subsequently apply specific GPO at the RDS environment using a loopback policy for users parameters.
Open the Active Directory Users and Computers console, create a specific OU for the Remote Desktop Session Host servers, and move them in.

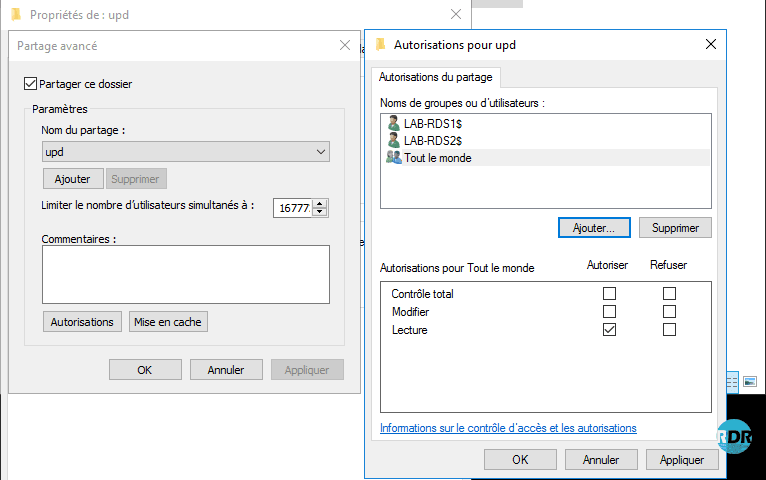
Folder for User Profile Disks – UPD
1. On a file server, create a folder for storing UPDs.

2. Share the folder, the accounts of the computers having the remote desktop session host role (LAB-RDS1 $ and LAB-RDS2 $) must have full control.
DNS records
Create a type A record with the same name that will point to the IPs of your remote desktop session host, as shown below.

The above DNS records are to be created only if you want to access the remote desktop by manually configuring the RDP client or if you are using a thin client that does not support configuring collections.
This solution is not recommended.
As part of the LAB, I added a record of type A rdsgw pointing to the IP of the server LAB-RDS-GW-WEB to be able to use the gateway internally.
In production, it will be necessary to provide a recording on a domain accessible from Internet of type A on a public IP and to set up a rule on router / firewall to authorize the traffic on the port 443.
It is also possible to access the RDS farm directly configuring the connection by the broker server. This solution involves modifying the .rdp file.
Server Manager: Add Servers in One Console
To use the Windows Deployment Tool, you must add the servers that make up the RDS environment in one console.
The following operations are to be done on the server brker (LAB-RDS-BRK.rdr-it.intra).
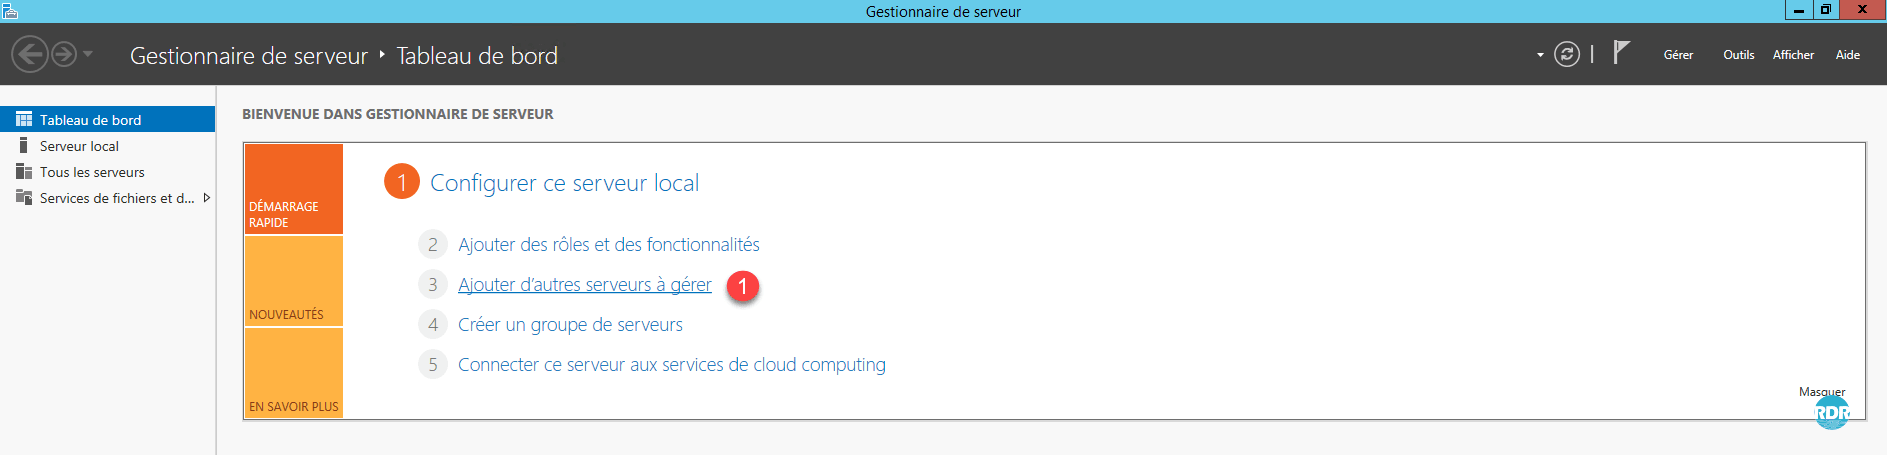
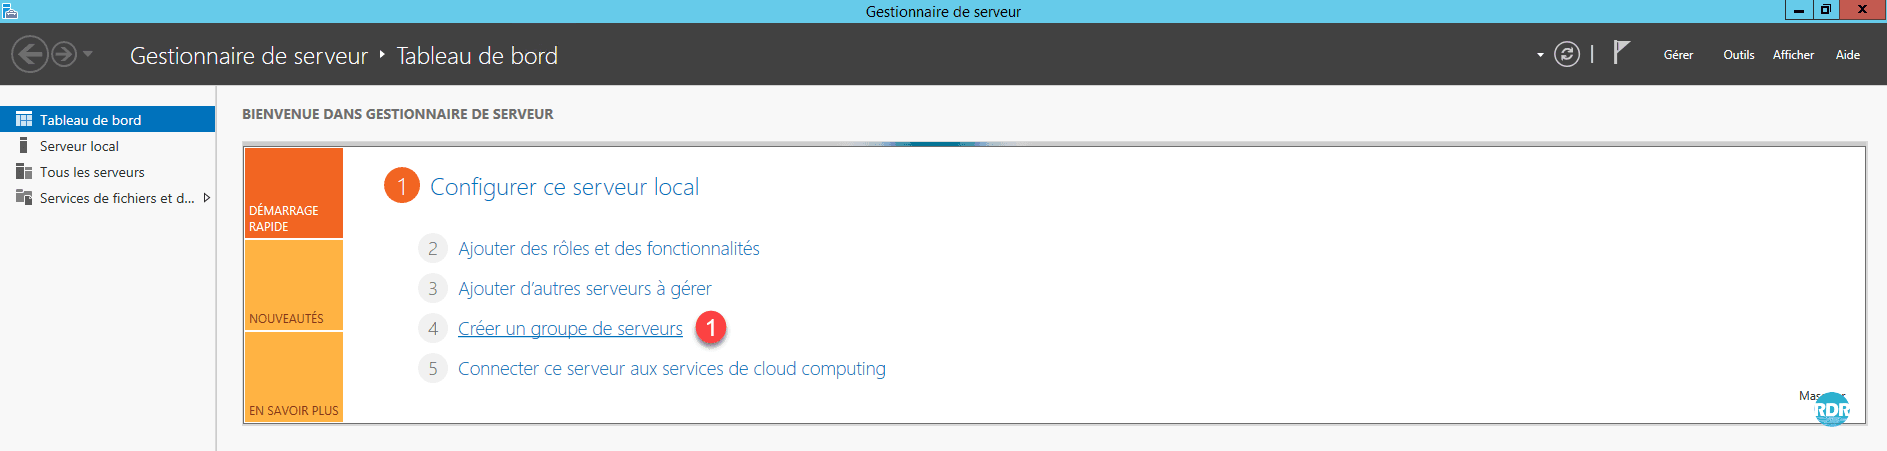
1. From the server manager, click Add more servers to manage 1 .
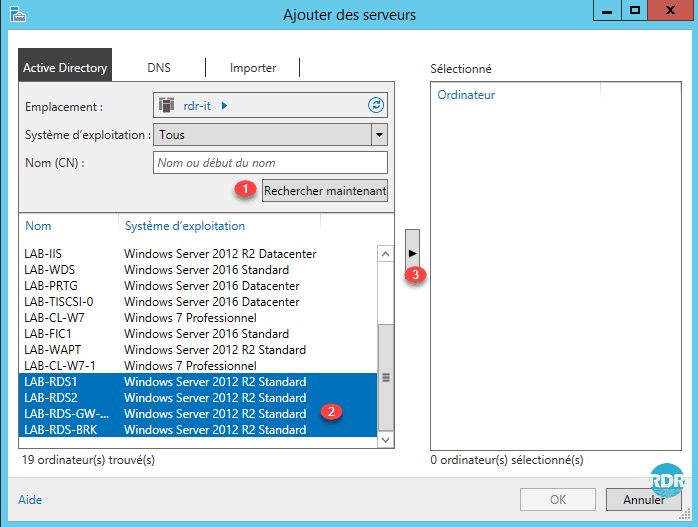
2. Launch a search 1 in the Active Directory to view the available computers. Select the computers that make up the RDS 2 infrastructure and click on the 3 arrow to add them.
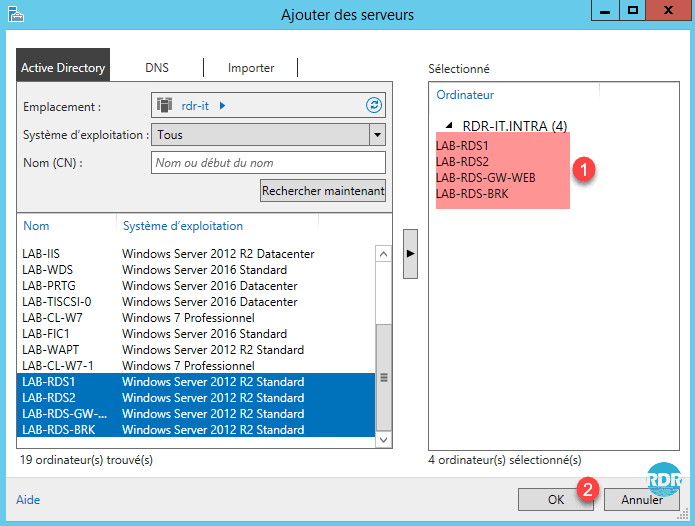
3. The servers are selected 1 , click OK 2 .
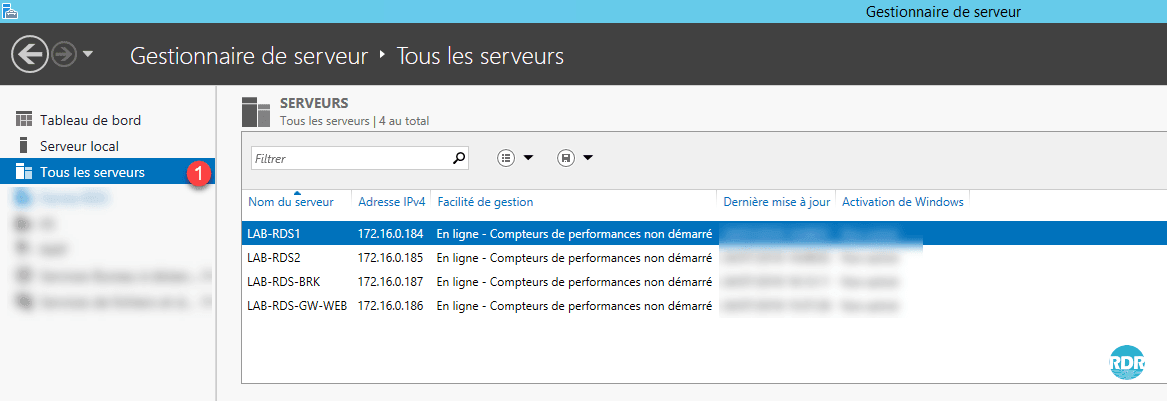
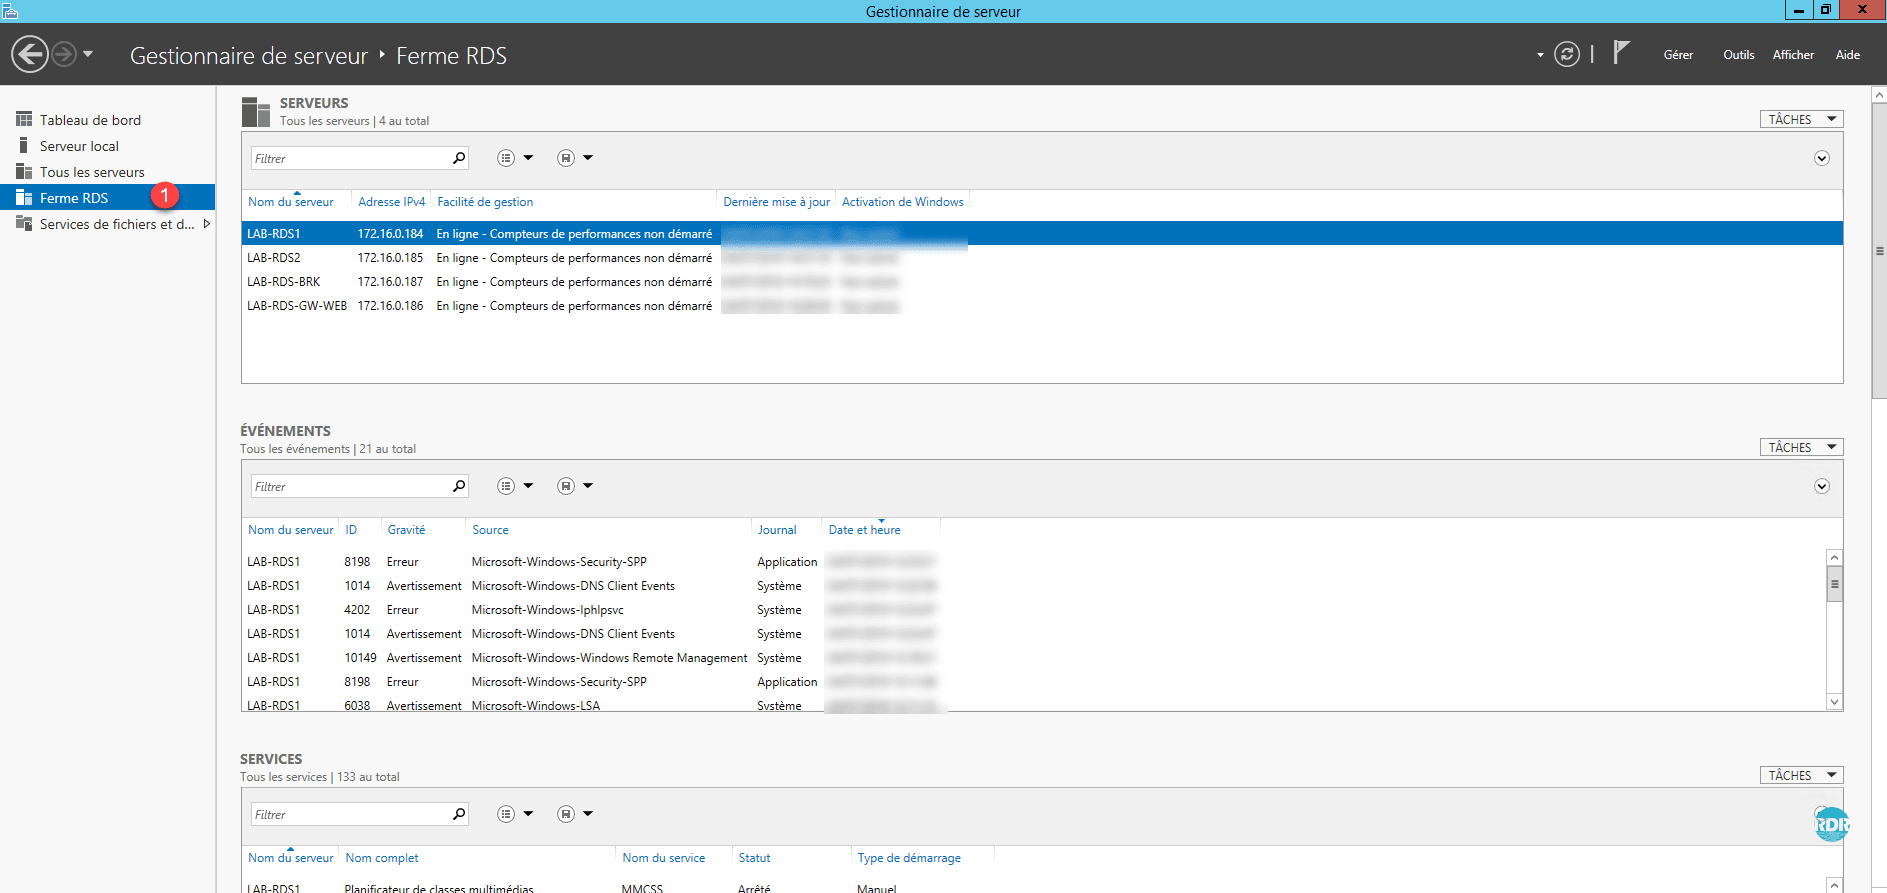
4. On the server manager go to All Servers 1 to view them.
Server Manager: Create a server group (optional)
1. From the Server Manager Dashboard, click Create Server Group 1 .
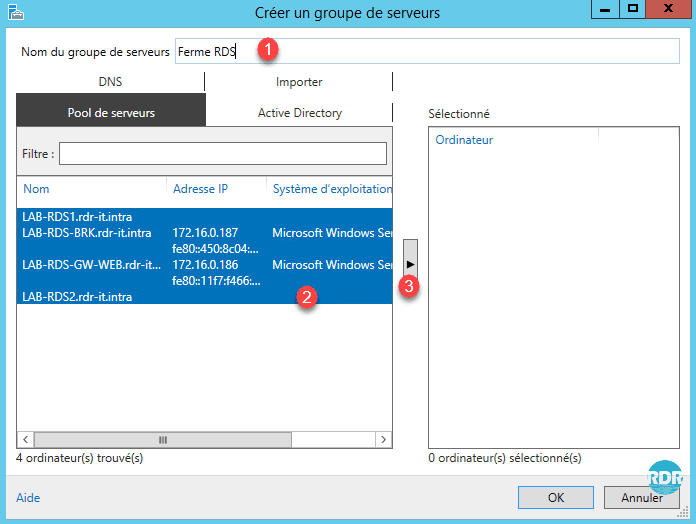
2. Name the group 1 , select the servers 2 and click on the arrow 3 to add them.
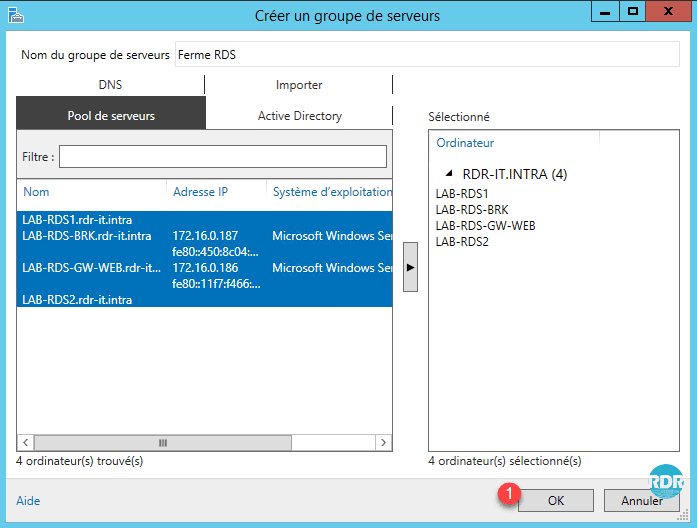
3. Confirm the creation of the group by clicking OK 1 .
4. On the server manager, the group is available in the left menu 1 . The group is found in the Roles and Server Groups section in a 2 box.
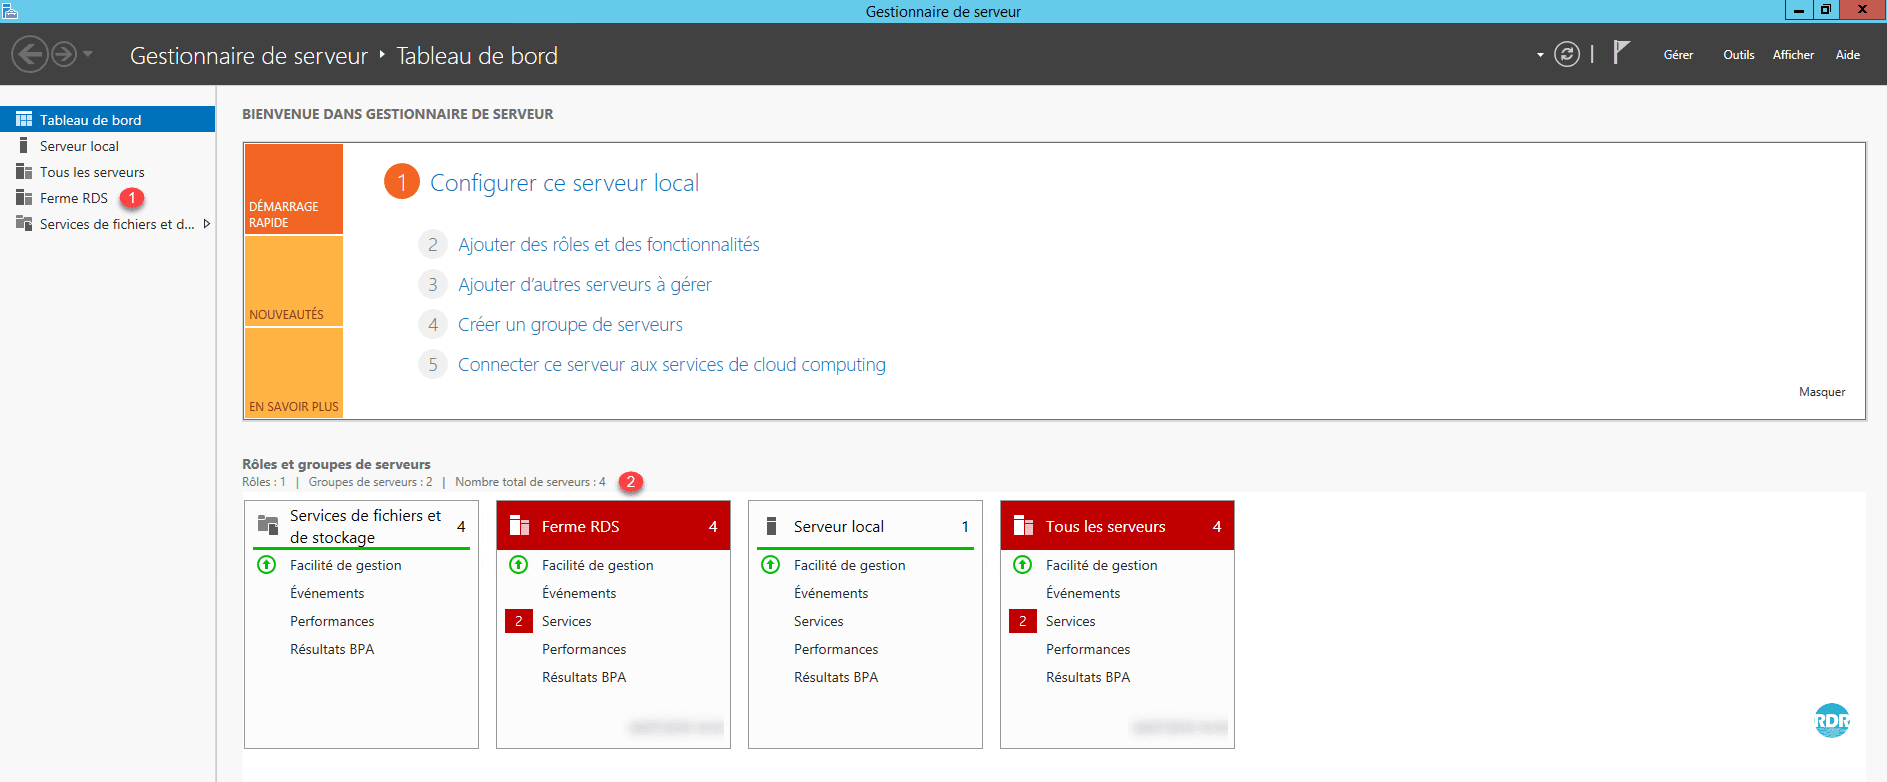
5. Click on the Firm group RDS 1 , one finds the same thing as in All the waiters limiting to the waiters which belong to the group.
Deploying roles
The deployment of an RDS infrastructure is facilitated by the tool built into the server managers, in a single manipulation the following roles will be installed:
- Remote Desktop Session Host
- Broker
- Remote Desktop Access via the Web
1. From the Server Manager, click Manage 1 / Add Roles and Features 2 .


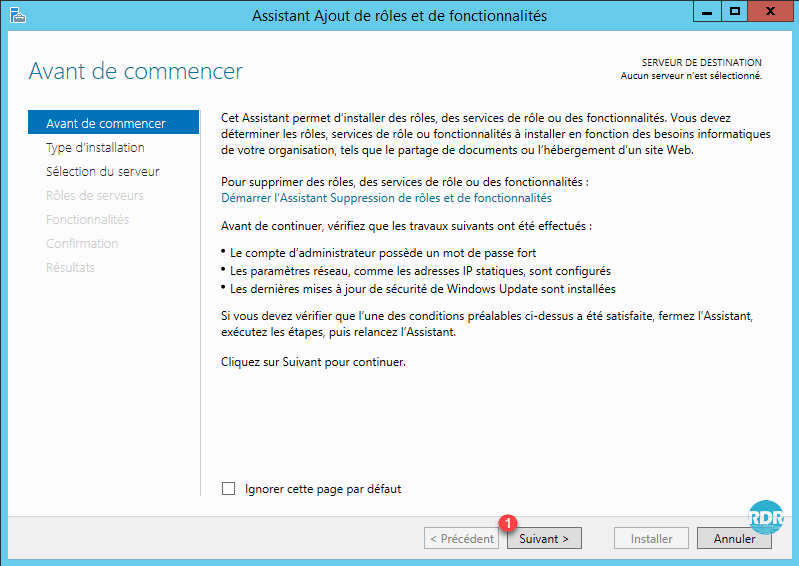
2. When launching the wizard, click Next 1 .
3. Installation Type: Select Remote Desktop Services Installation 1 and click Next 2 .

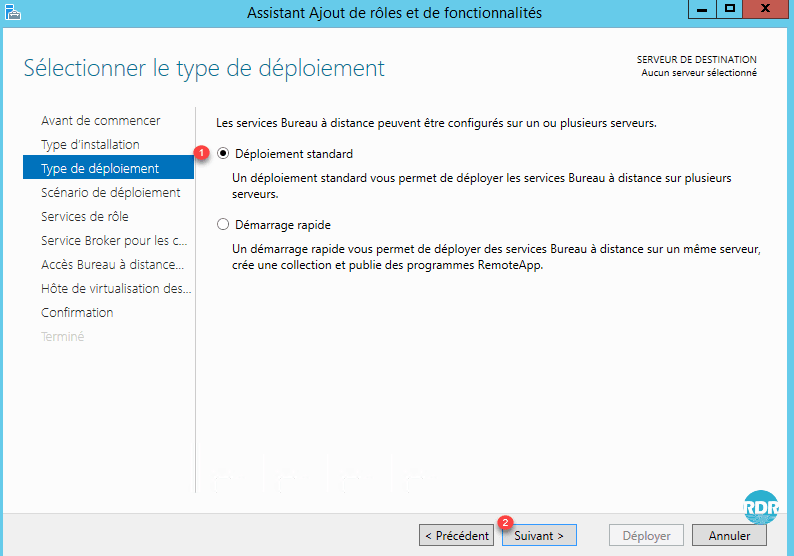
4. Deployment Type: select Standard Deployment 1 and click Next 2 .
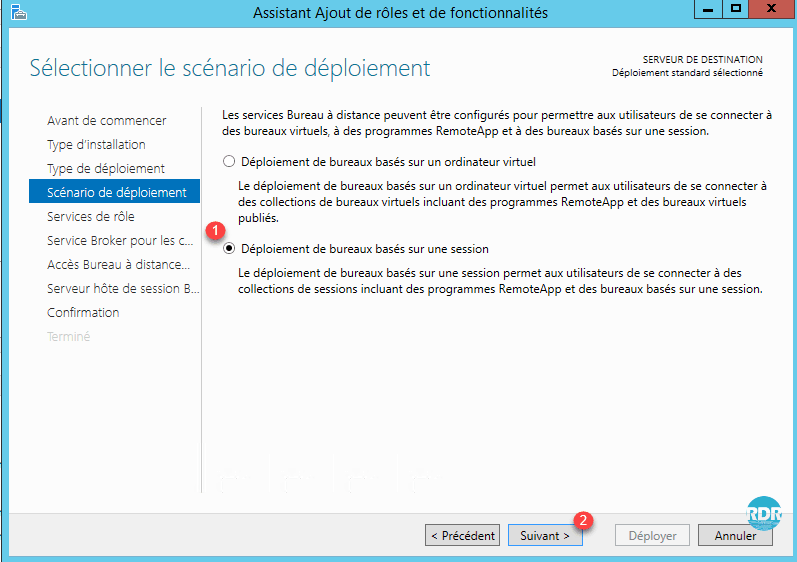
5. Deployment Scenario: Select Office Deployment Based on Session 1 and click Next 2 .
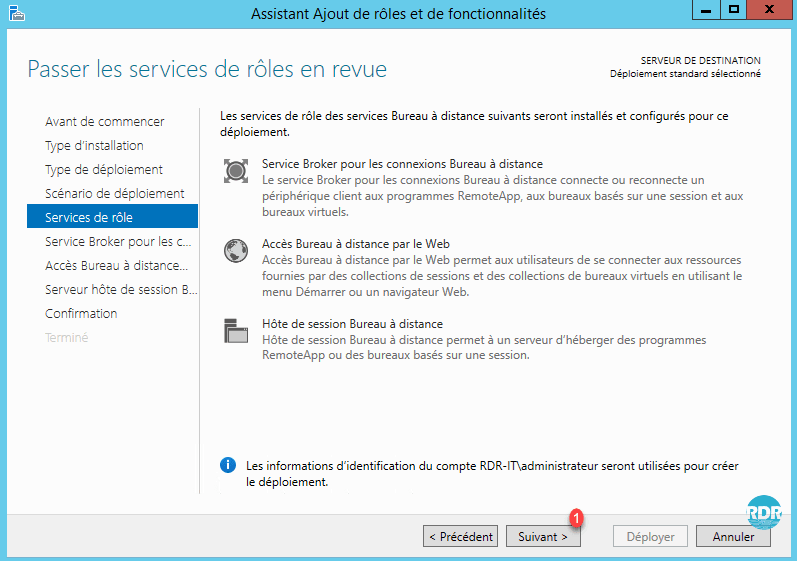
6. The wizard summarizes the roles that will be deployed. Click Next 1 .
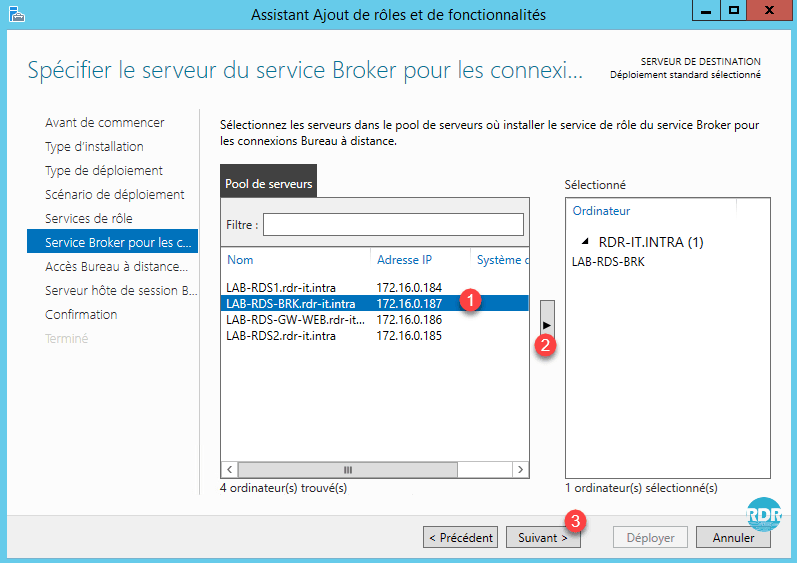
7. Service broker: select the server that will have the role 1 , click on the arrow 2 to add it to the selection and click Next 3 .
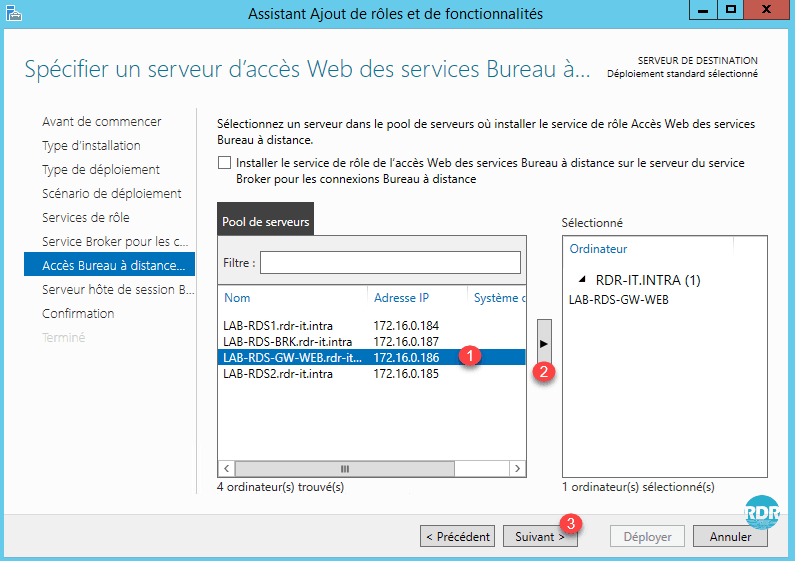
8. Remote Desktop Web Access: Select the server that will have role 1 , click the arrow 2 to add it to the selection and click Next 3 .
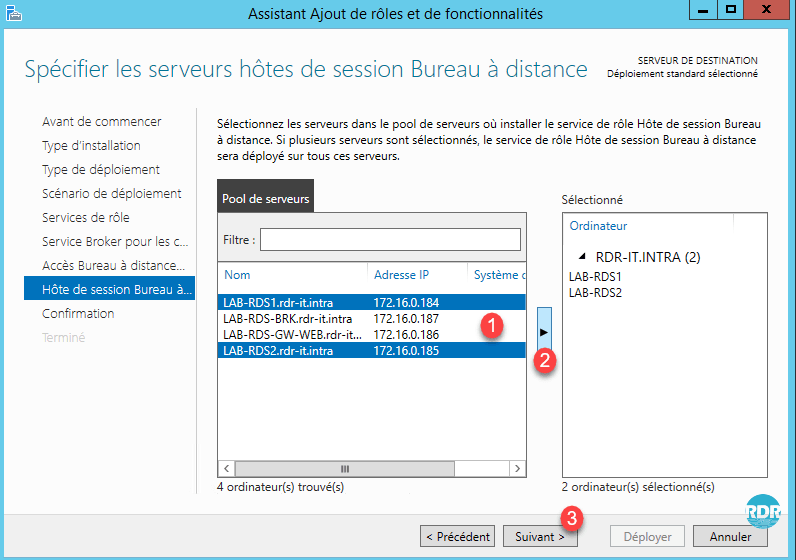
9. Remote Desktop Session Hosts: Select the servers that will have role 1 , click on the arrow 2 to add them to the selection and click Next 3 .
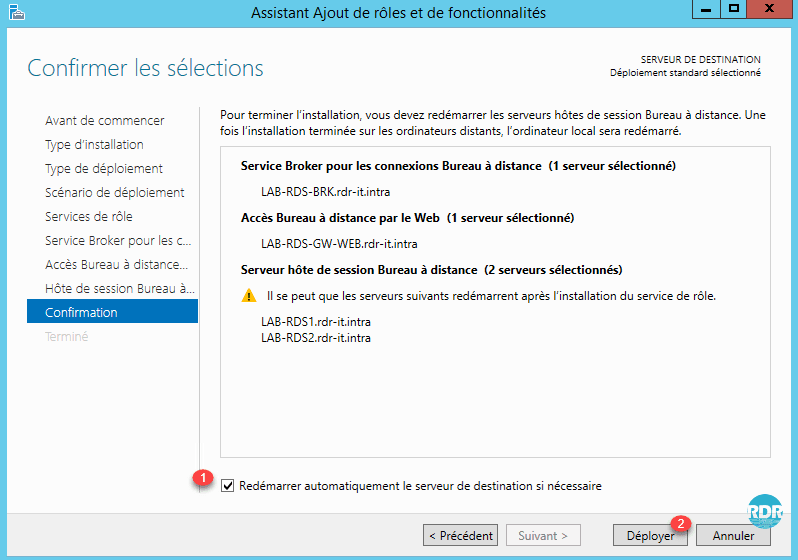
10. Check the box Automatically restart the destination server if necessary 1 then click on the button Deploy 2 .
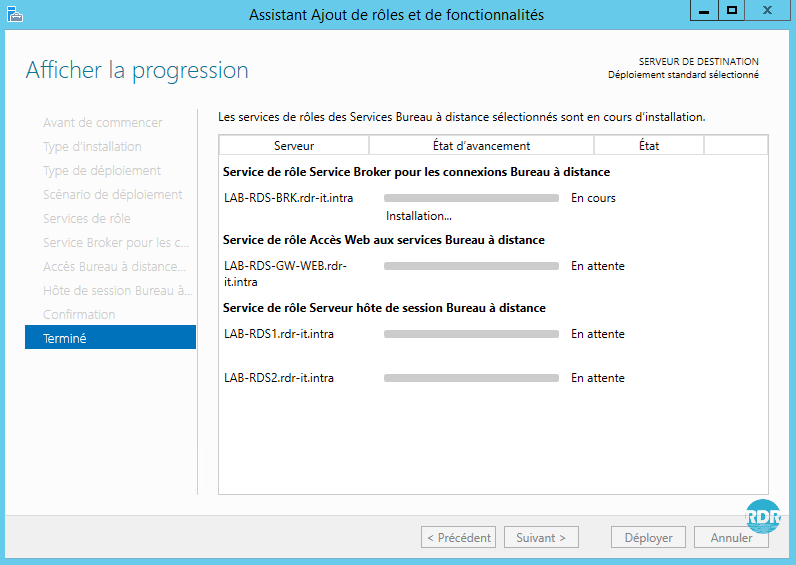
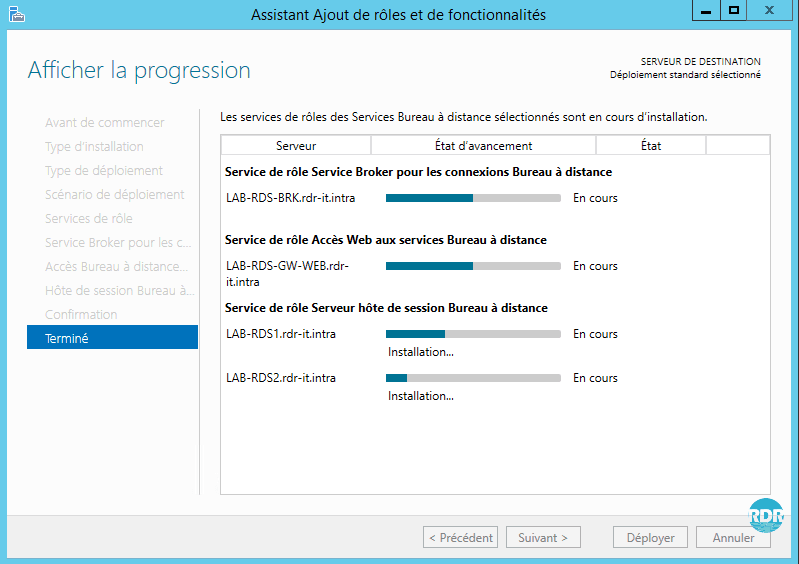
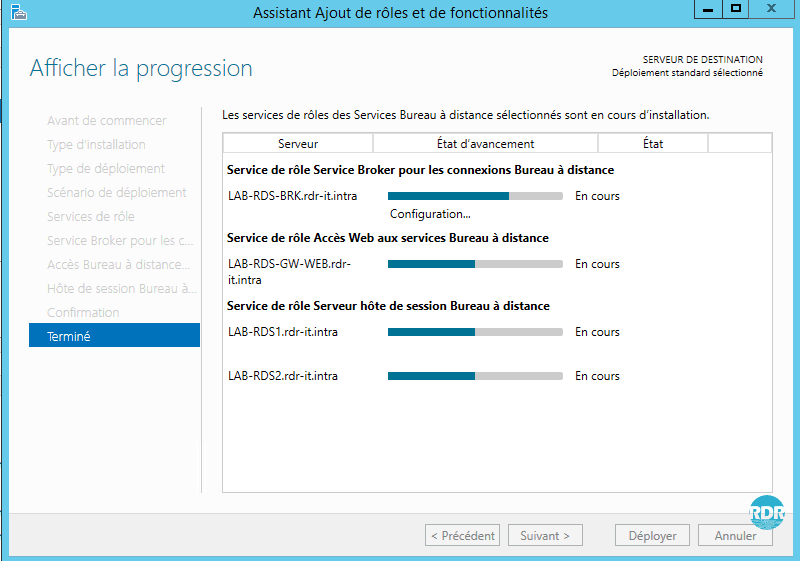
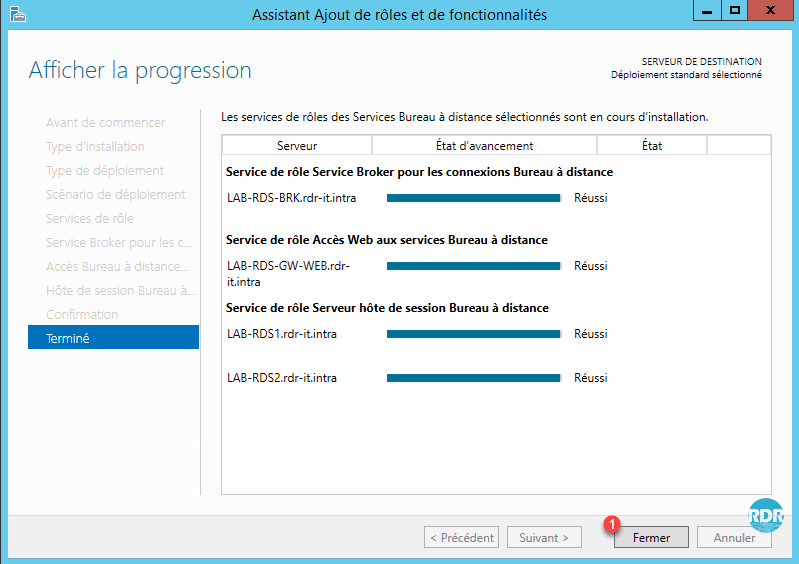
11. Wait during deployment, this step takes more or less time depending on the number of servers and the hardware infrastructure.
12. The installation is complete, click Close 1.
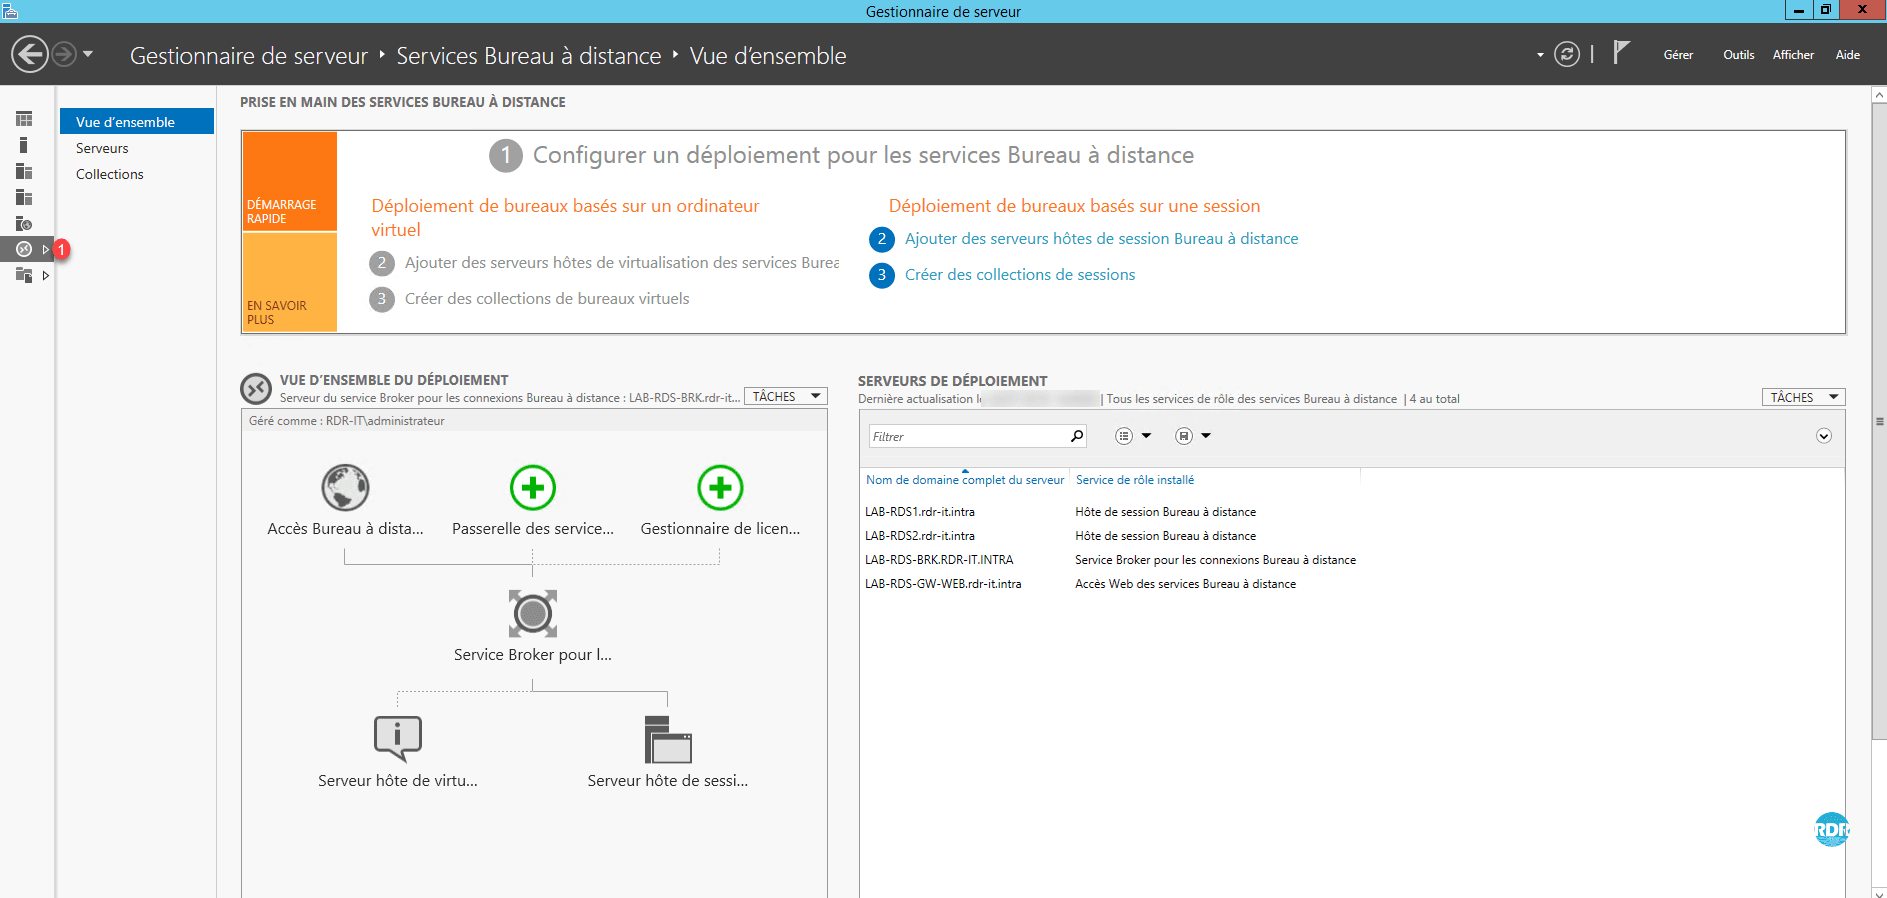
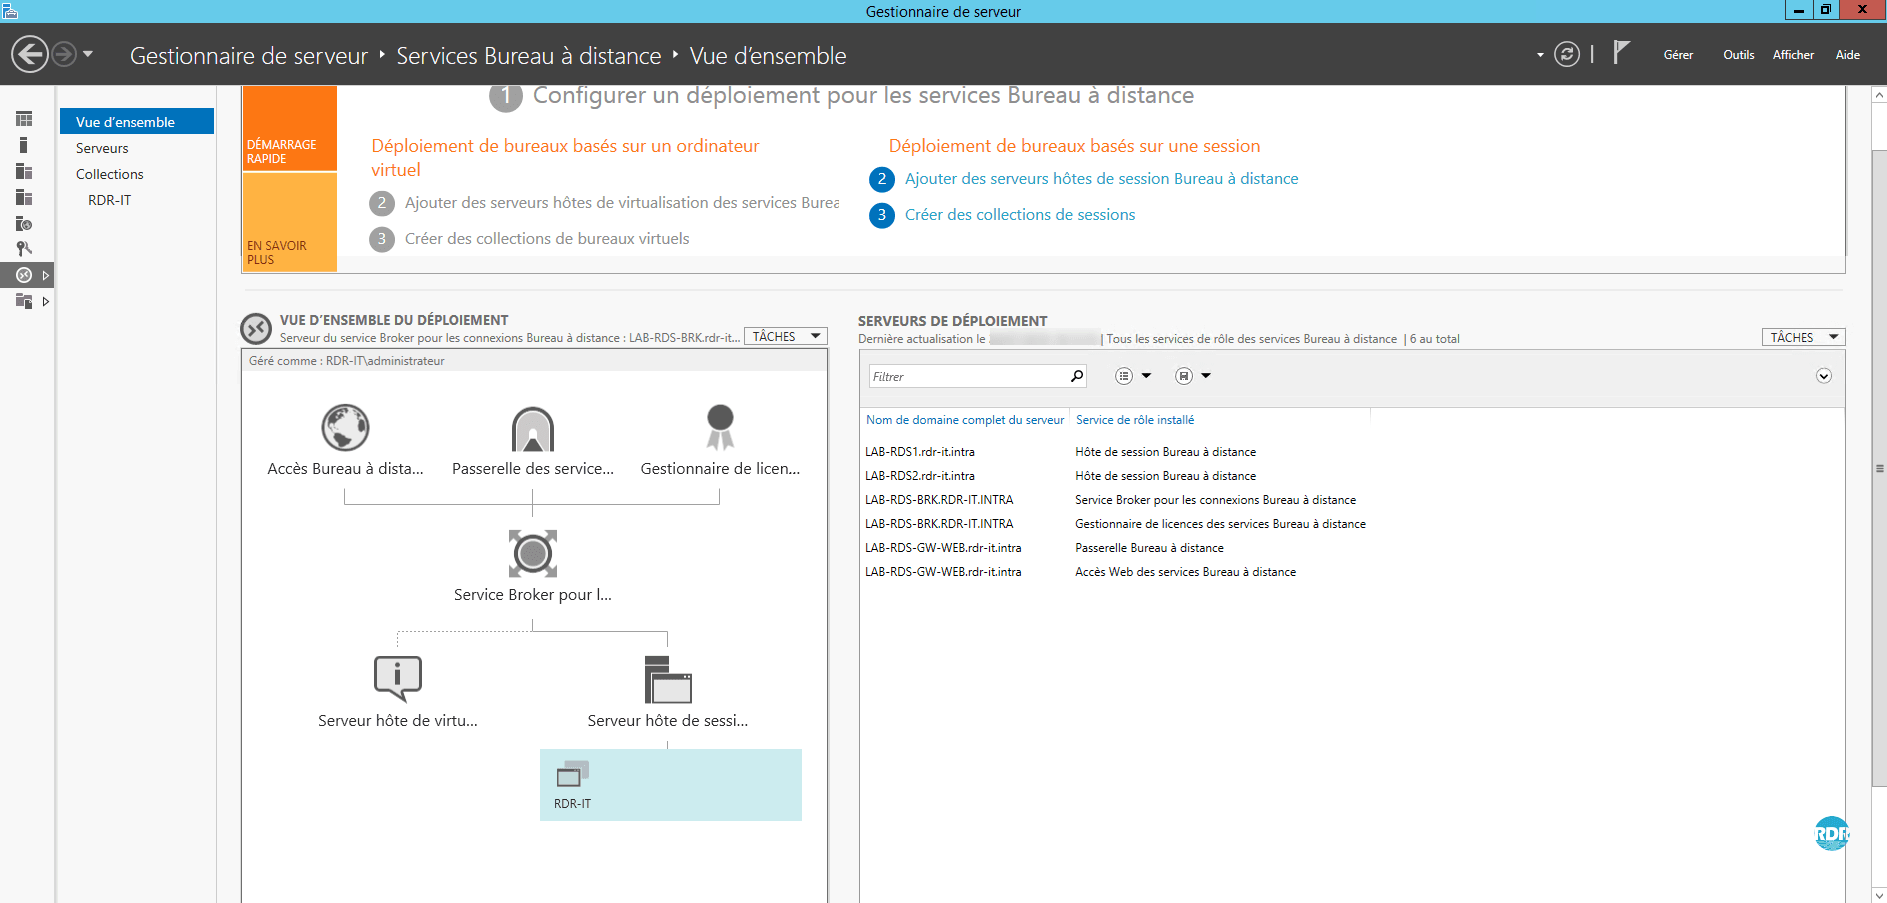
13. From the server manager, go to Remote Desktop Services 1 . From this view, an overview of the deployment is visible. The administration of the RDS infrastructure is also done from here.
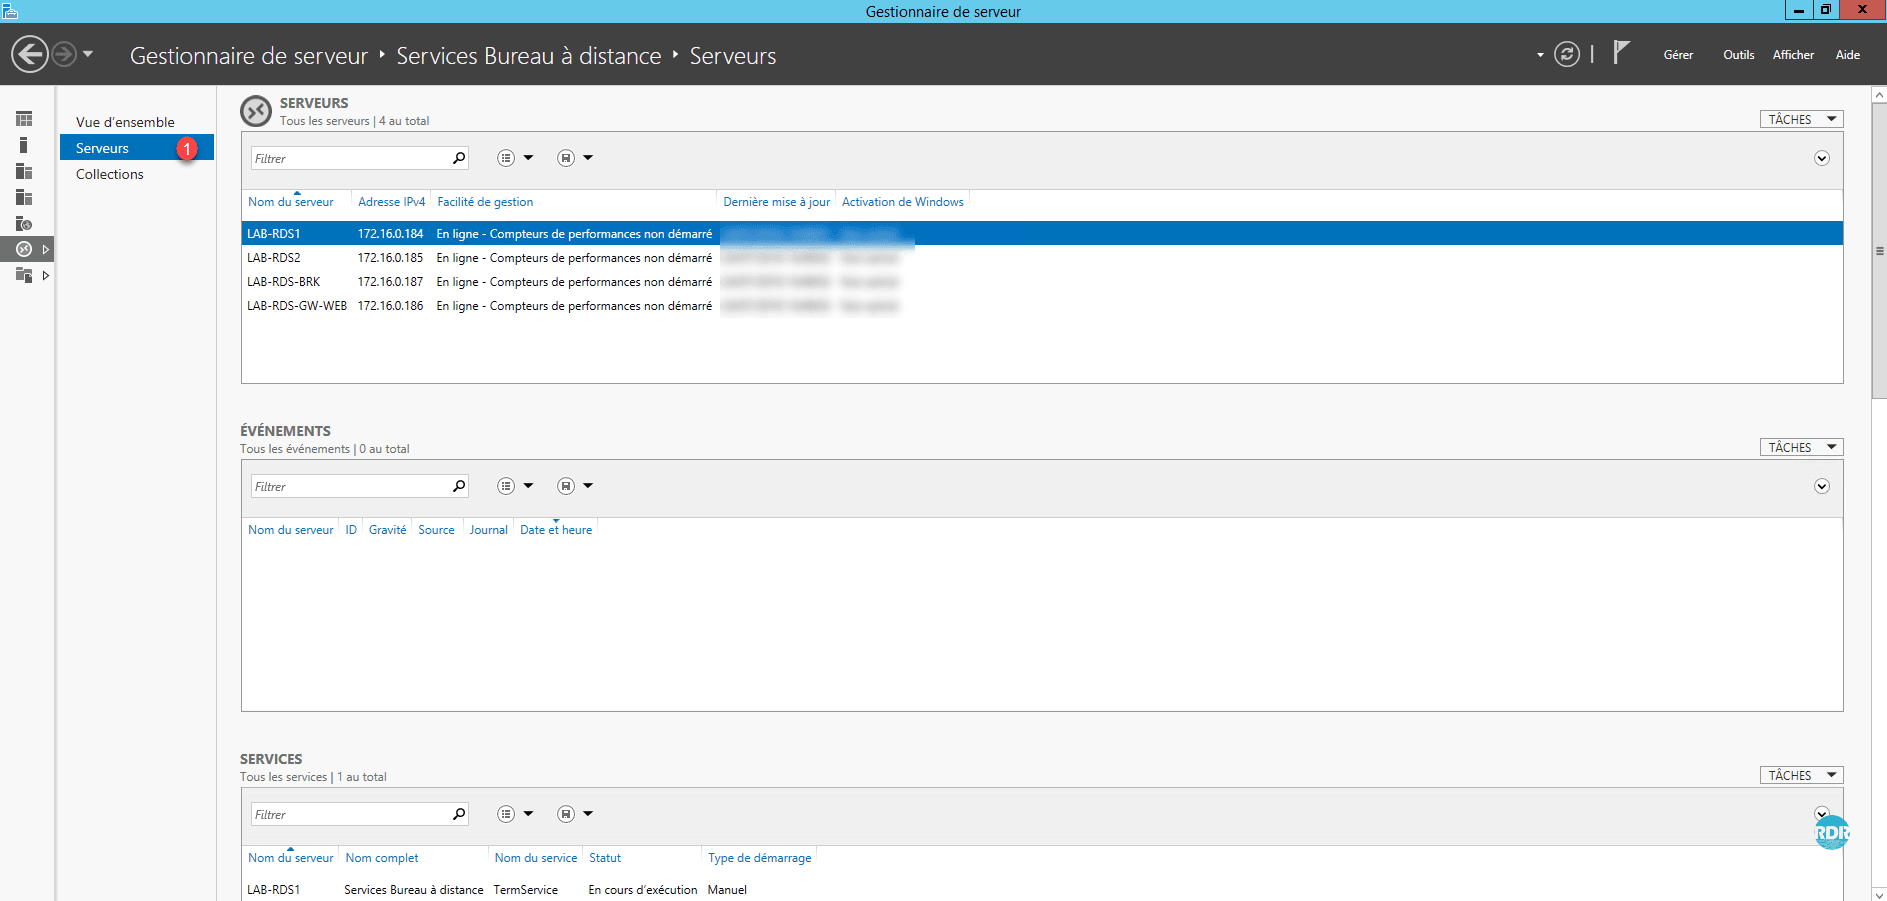
14. On Servers 1 , we find the same information as the All Servers side by limiting the result to the machines that make up the RDS environment.
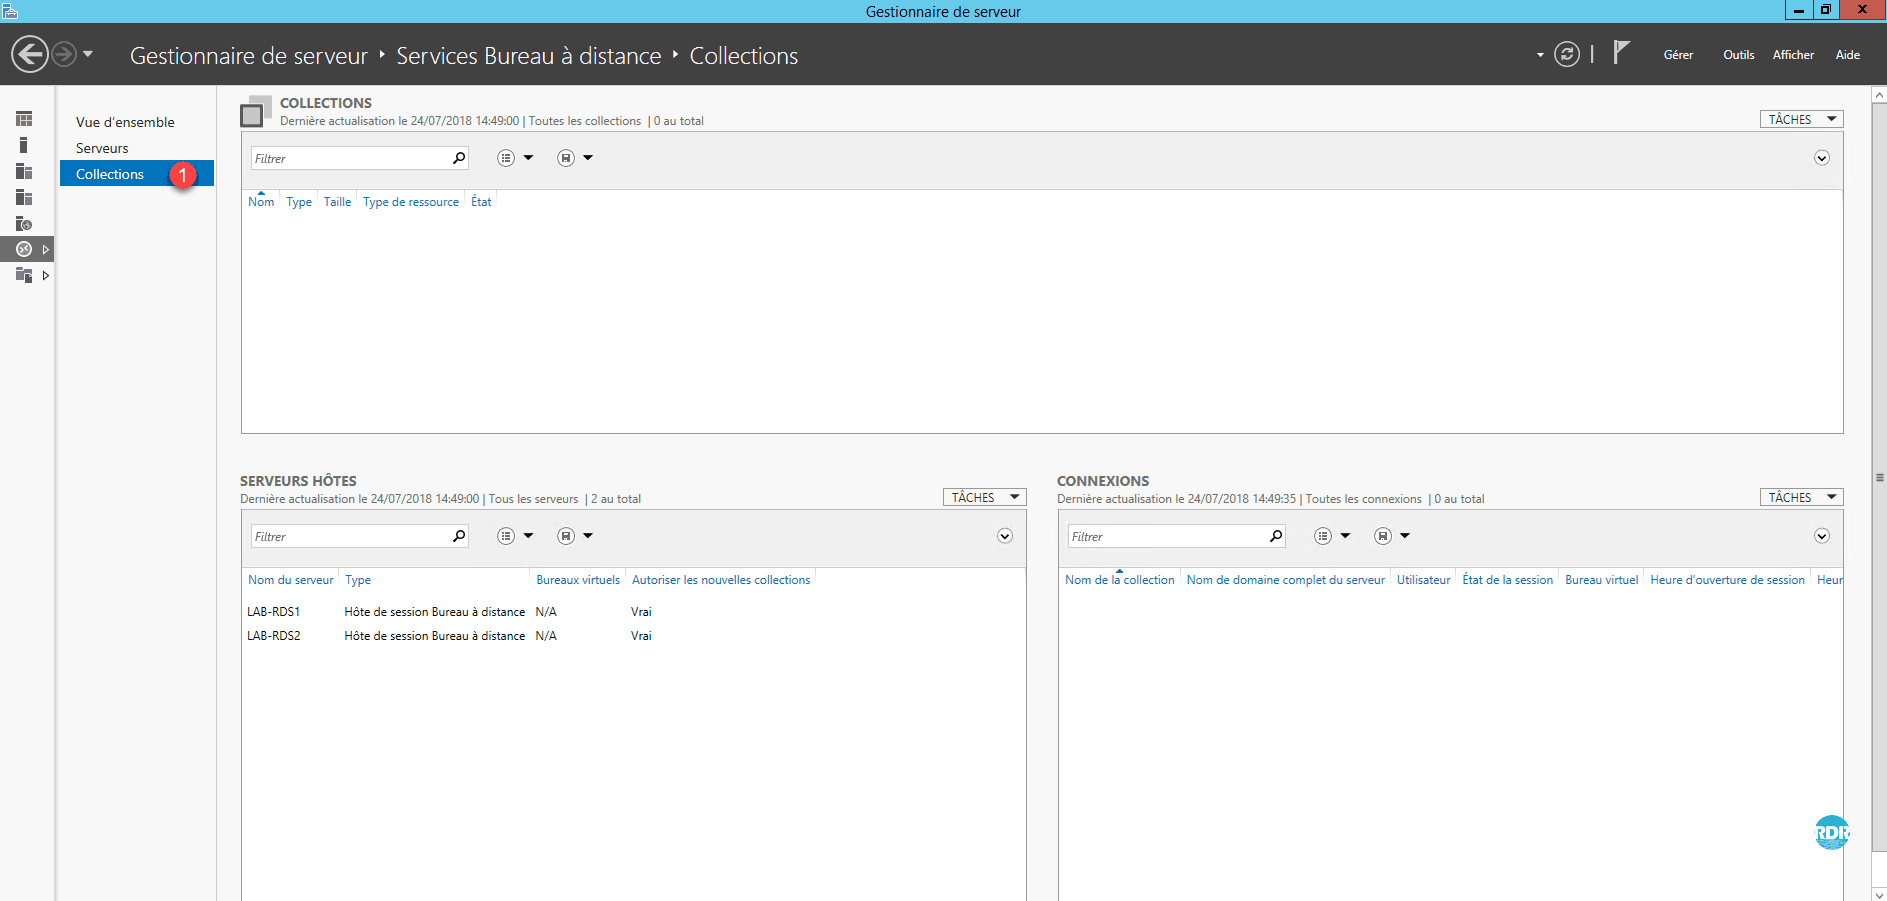
15. The Collections tab 1 allows the administration of this one and also to see the connected users. This part is for the moment empty.
Setting up a collection
Setting up a collection
A collection allows remote desktop configuration by specifying the hosts that make up the collection and who can access it.
It is at the collection level that the use of User Profile Disks (UPDs) and applications published in RemoteApp via Web Access is configured.
Create a collection
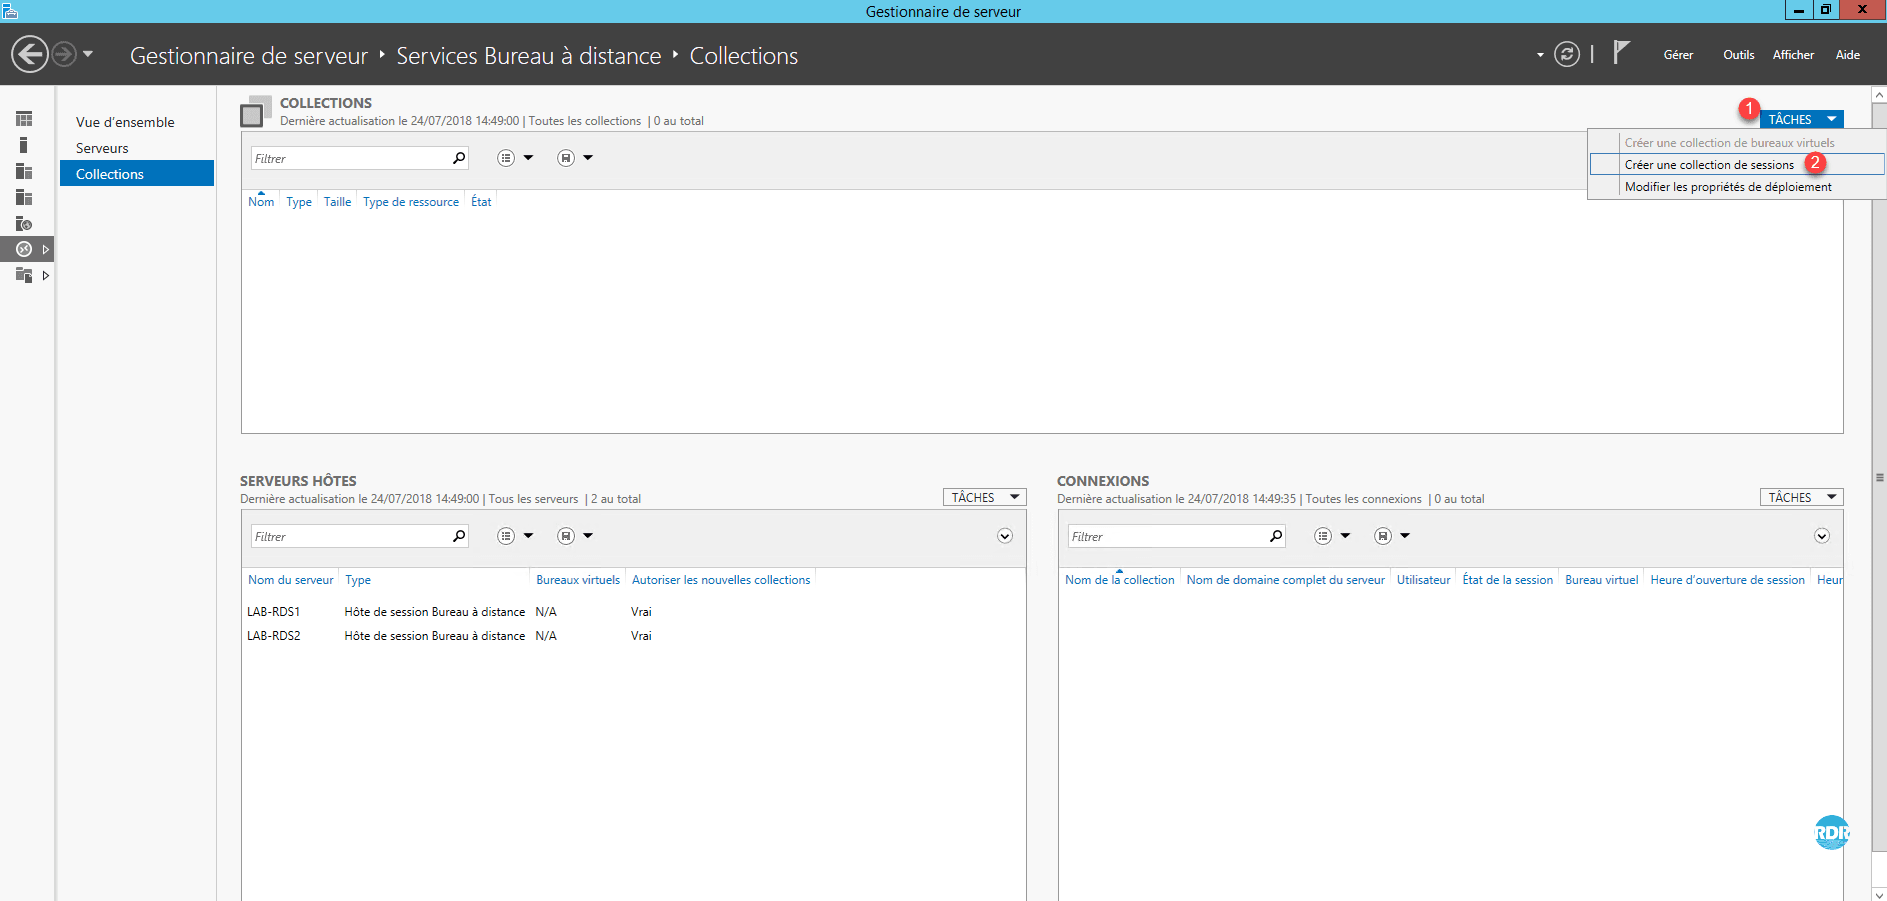
1. From the Server Manager on the collections management page, click on TASKS 1 and Create a collection of 2 sessions.
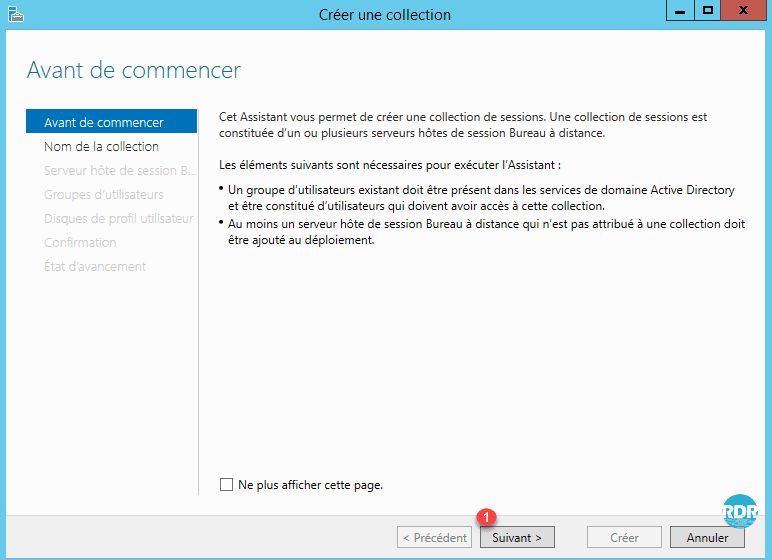
2. When starting the RDS Collection Creation wizard, click Next 1 .
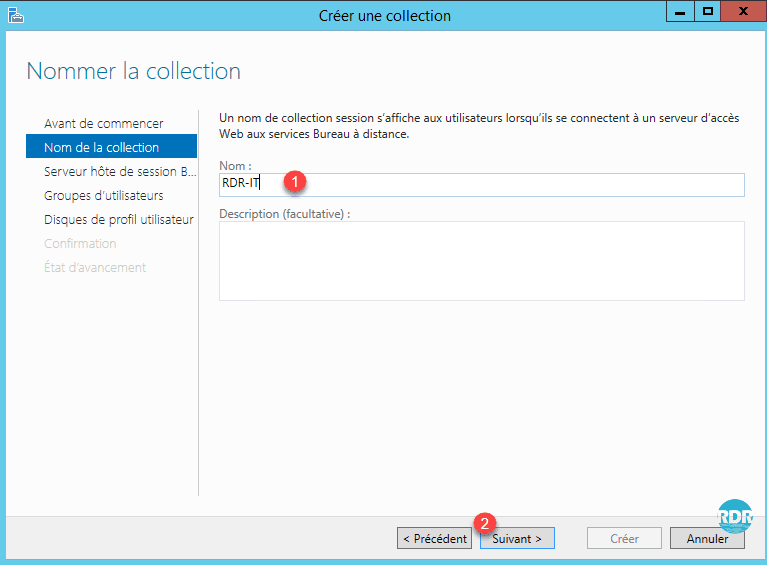
3. Enter the name of the collection 1 and click Next 2 .
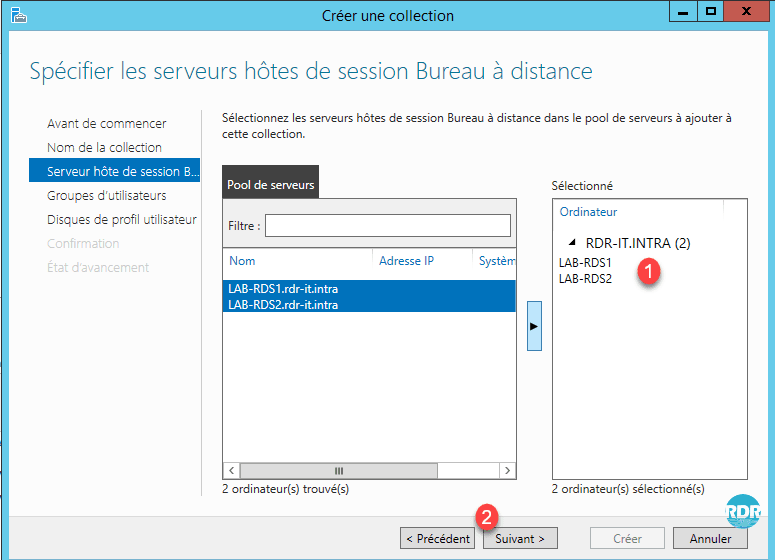
4. Add the Remote Desktop Session Host servers from the 1 collection and click Next 2 .
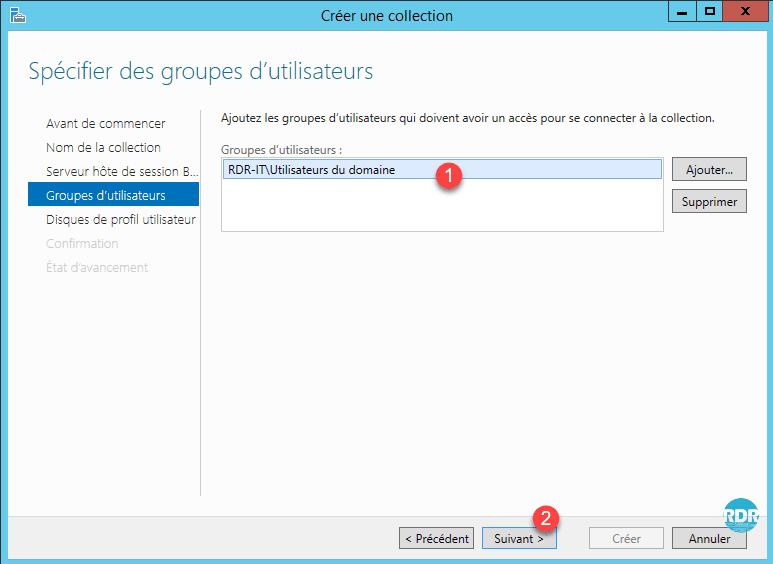
5. Specify the allowed user group (s) 1 to connect to the collection and click Next 2 .
6. Check the Enable user profile disks 1 box, specify the share for storing UPD 2 , enter the maximum size of a disk 3 and click Next 4.
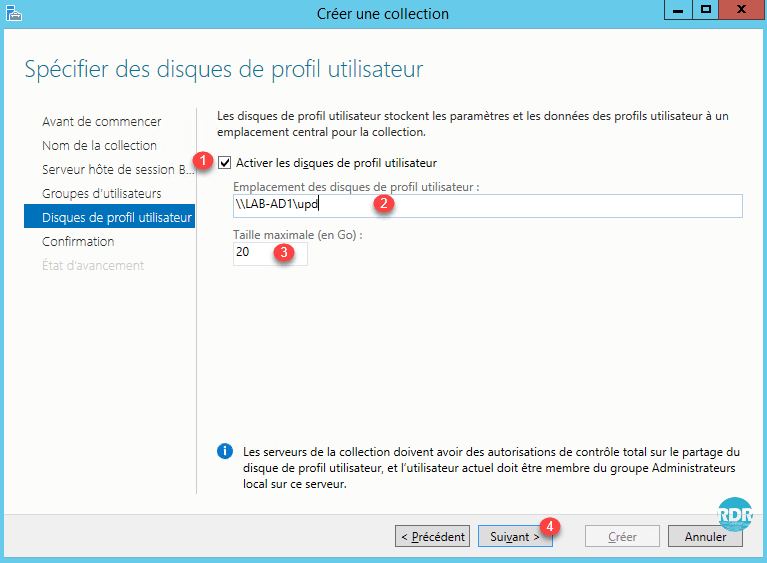
By default, user disks store the entire profile (appdata / desktop / documents / …).
It is important to evaluate the size to configure.
Once the disk is created (log on to the collection), resizing the vhd is “complicated”.
Changing the size will only affect new disks created after applying the setting.
I invite you to read this article on my feedback from the UPD.
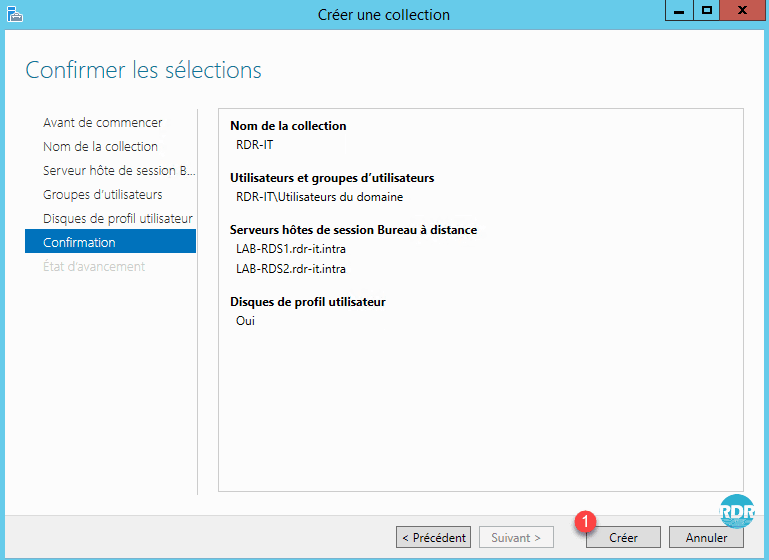
7. Click Create 1 .
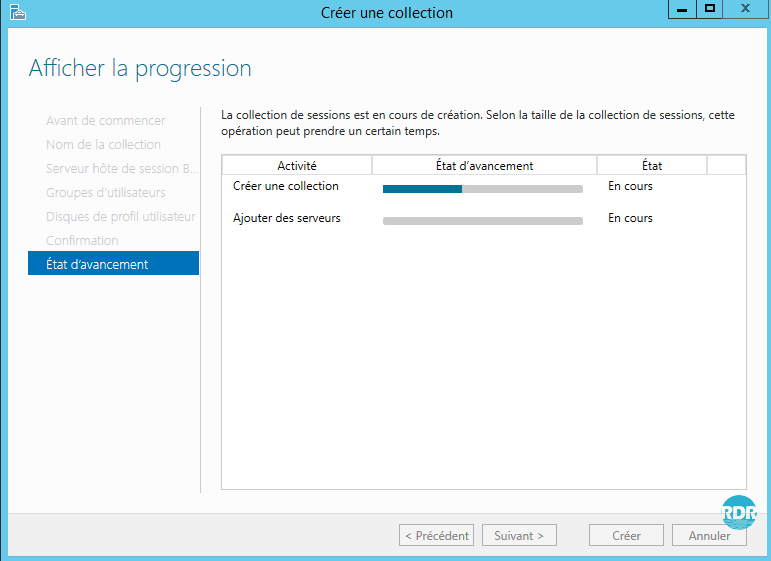
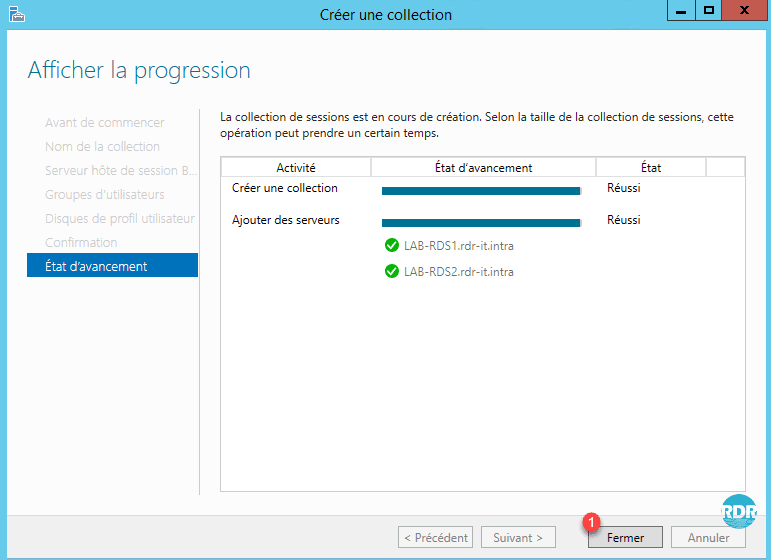
8. Wait while creating the collection …
9. The collection is ready, click on Close 1 .
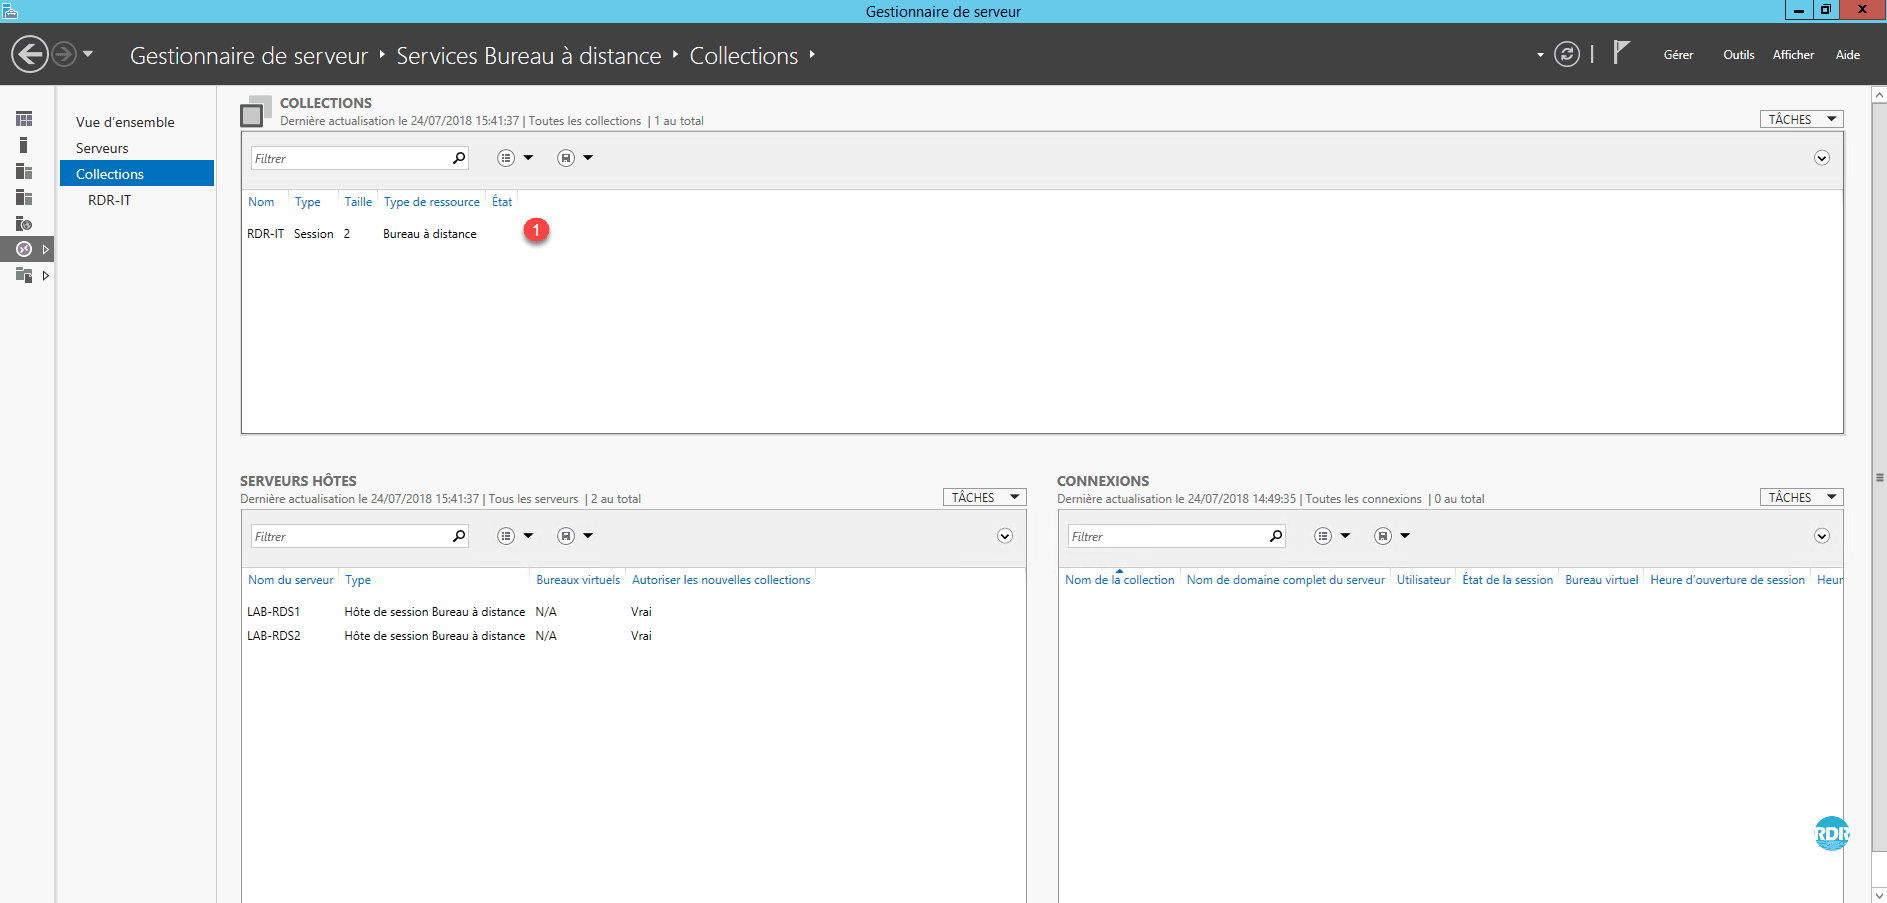
10. On the Server Manager, the collection is visible 1 .
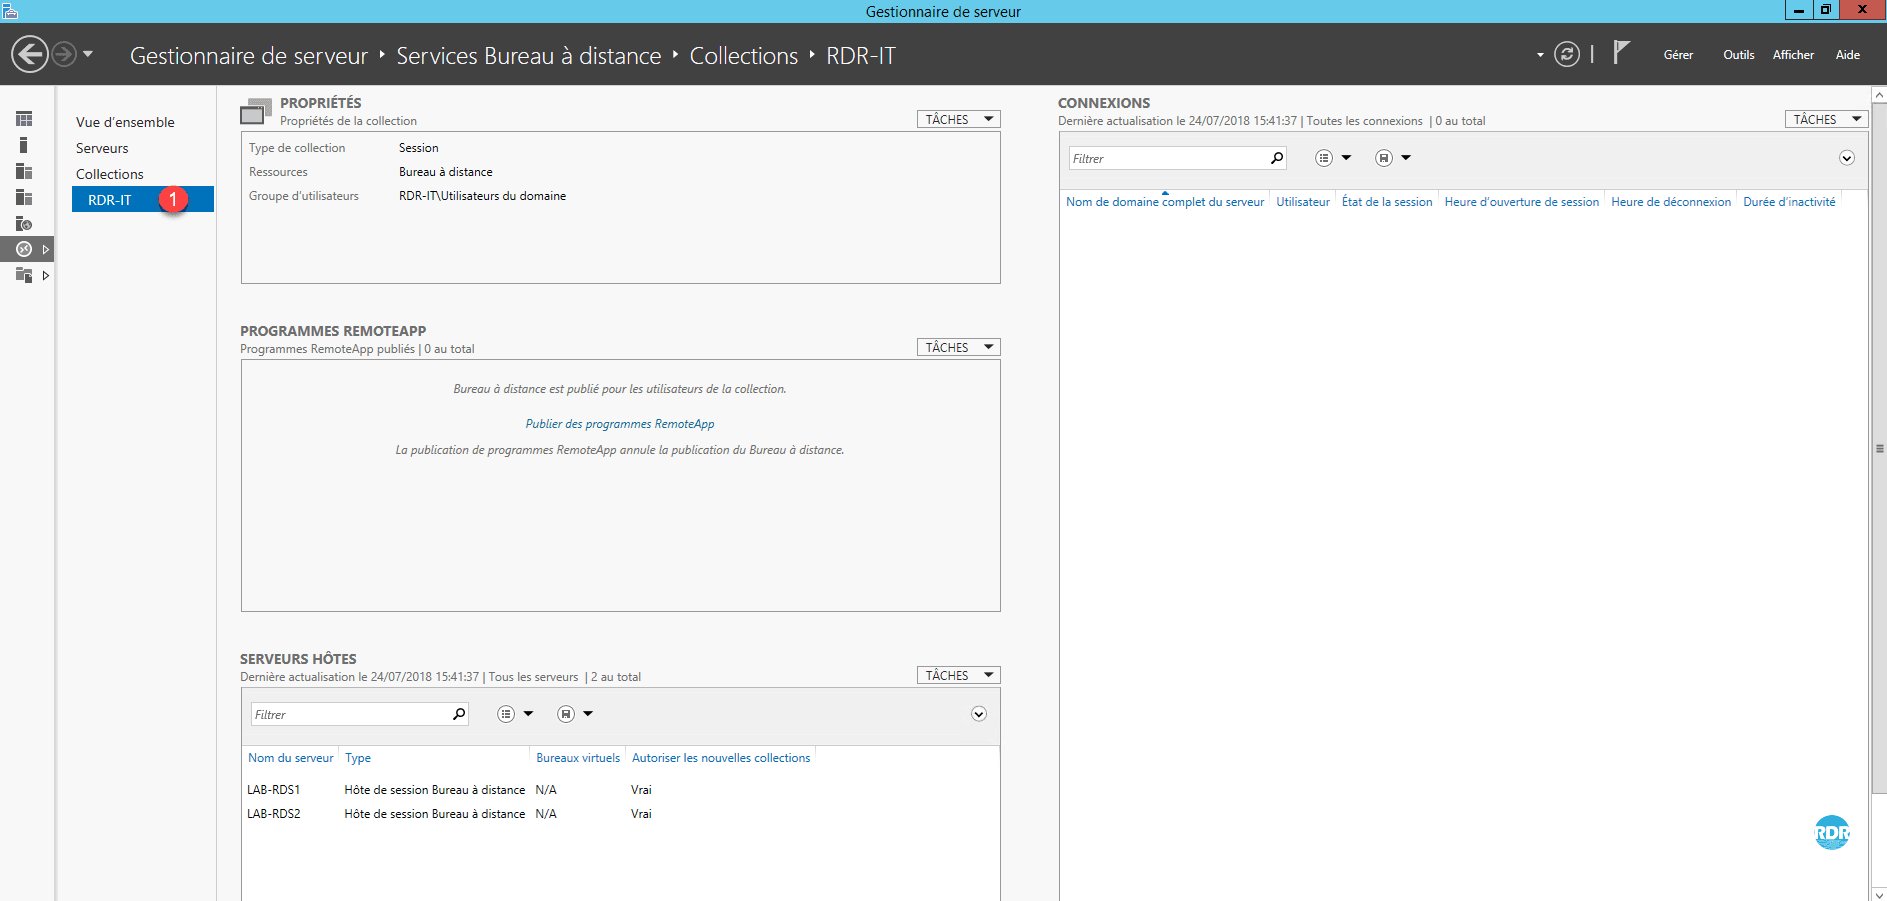
11. Click on the name of the 1 collection to access the details.
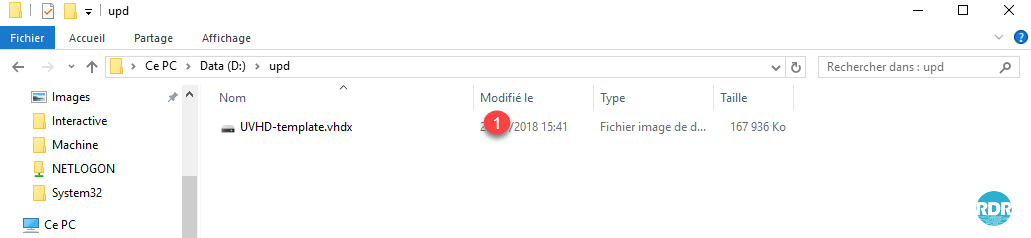
12. Open the parameter folder for storing upd, a disk named UVHD-template.vhdx 1 is created. It corresponds to the Default Profile folder on a computer.
Edit a collection
1. From the page of the collection, on the page PROPRIETES insert click on TASKS 1 / Modify the properties 2 .
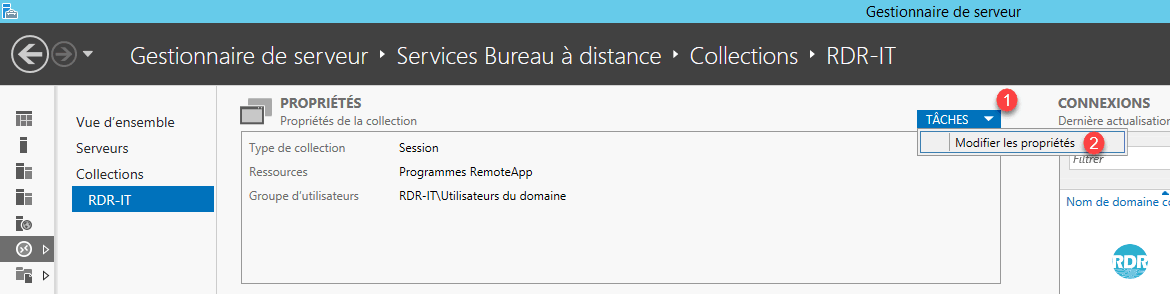
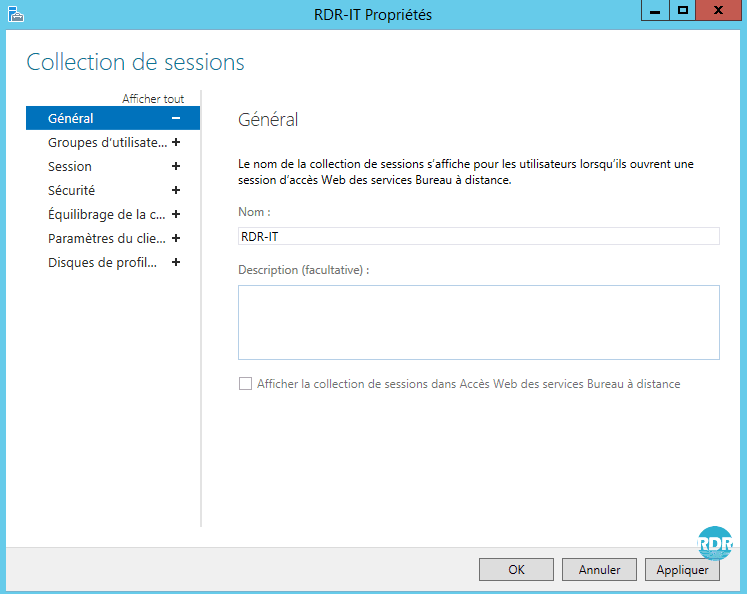
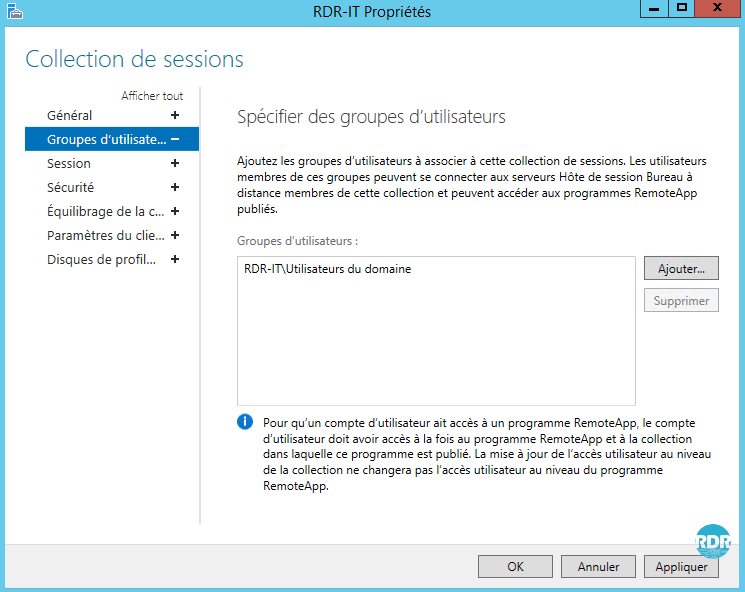
2. It is possible to change the name, the user groups allowed to connect.
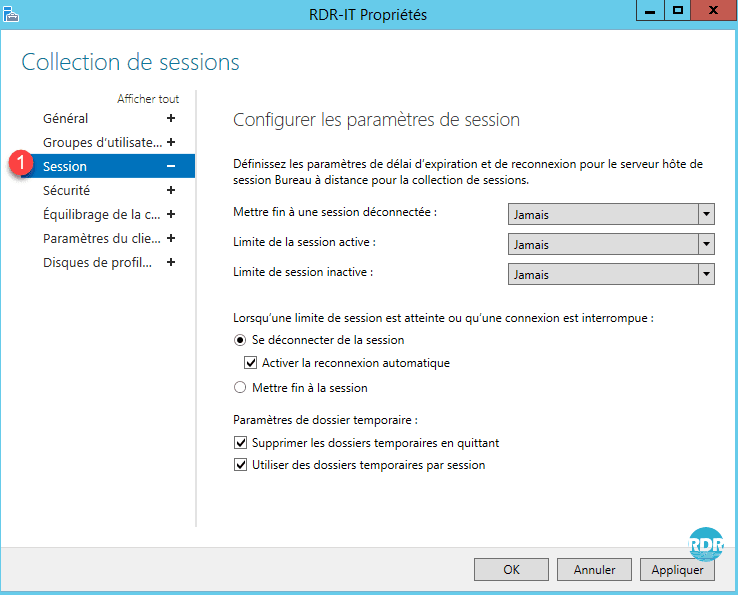
3. Session Section 1 : Setting the Expiration and Reconnection Time on Collection Hosts, Setting Temporary Folder Behavior.
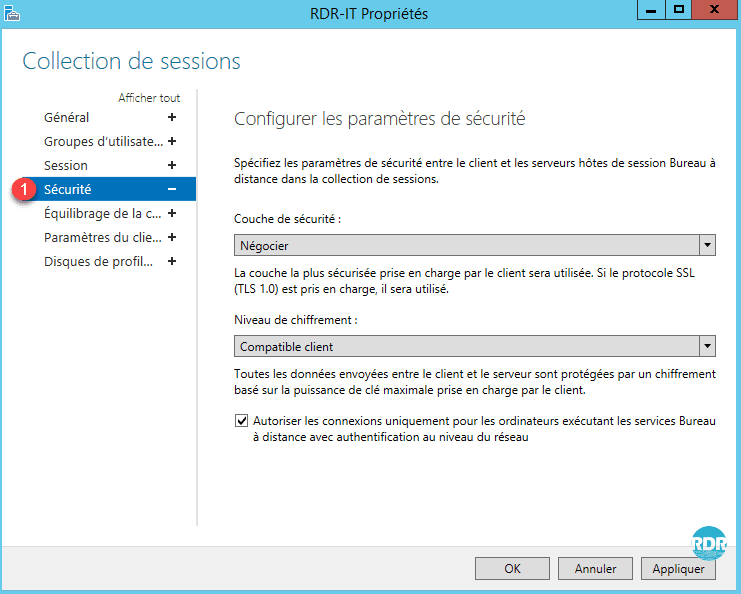
4. Security Section 1 : Configuration of security layers between the RDP client and the servers.
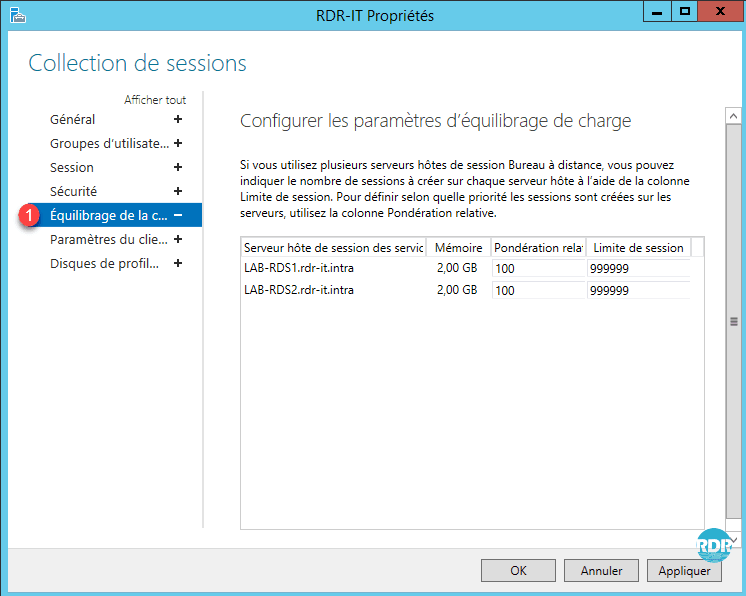
5. Load Balancing Section 1 : In case of different power server usage, it is possible to prioritize a server and set a session limit.
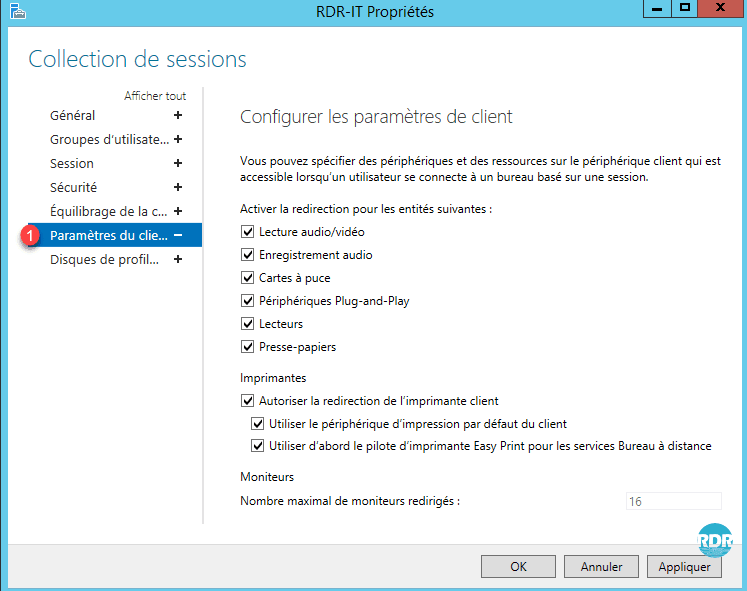
6. Client Setting Section 1 : Configuring Device and Printer Redirection.
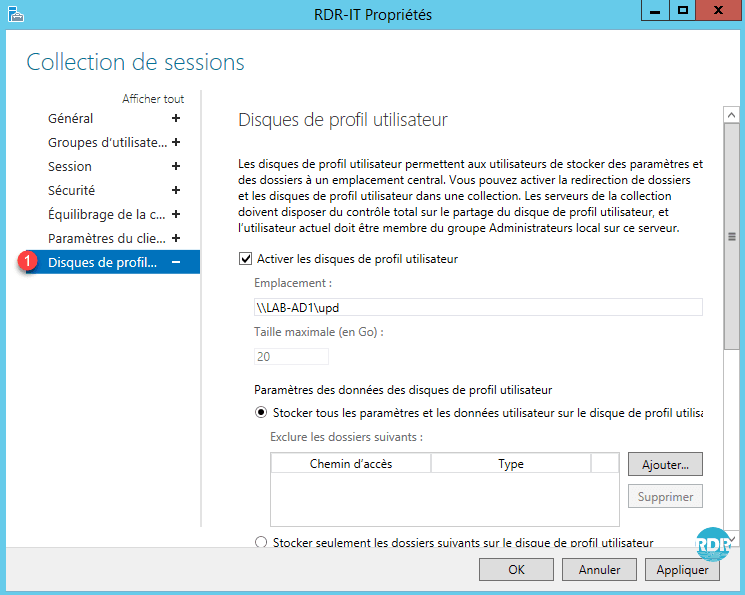
7. User Profile Discs Section 1 : Configuring UPDs (Size, Folder Exclusions, Location …).
The collections have no secrets. The RDS farm is now usable.
It is possible to deploy several collections on the same RDS deployment, which allows pooling broker services, web access. The remote desktop session hosts are dedicated to a collection.
Now we’ll see how to publish RemoteApp applications accessible through the RDS farm web access.
Publish RemoteApps
The programs published in RemoteApp allow you to launch programs from Remote Desktop Session Host servers by giving the user the impression that it is running from his or her computer. Only the program window is displayed.
This solution has the advantage of using the power of the servers and facilitates the administration by needing to update only the servers. In the context of deployment of new post, this solution avoids having to install all the software.
Using RemoteApps can confuse users if they are not well informed about the operation. If the redirection of user documents is not in place, the files saved by the application will not be available on the computer.
Before publishing a program, it must be installed on all hosts in the collection.
Program Publication
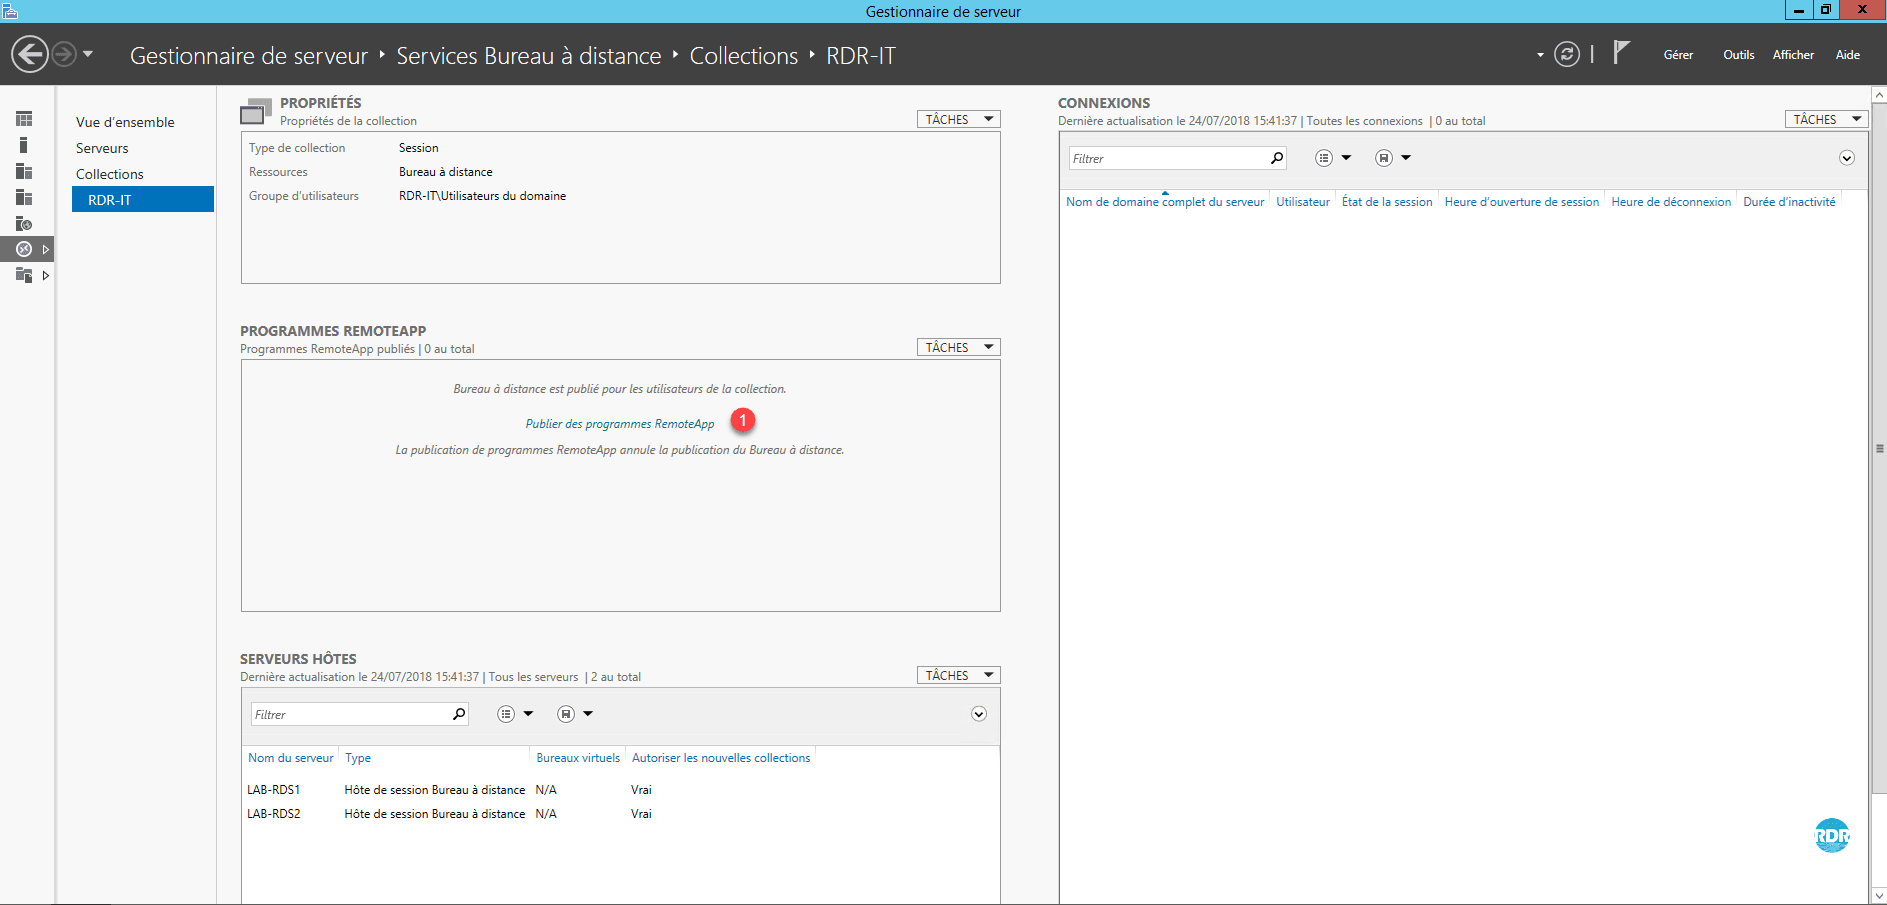
1. From the collection management page, click Publish RemoteApp Programs 1 .
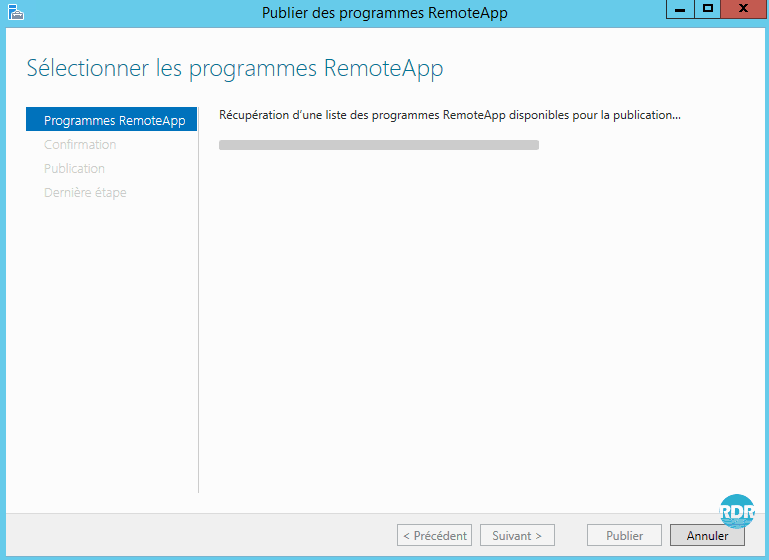
2. Waiting during the wizard collects programs available on a host.
3. Select programs to publish 1 and click Next 2 .
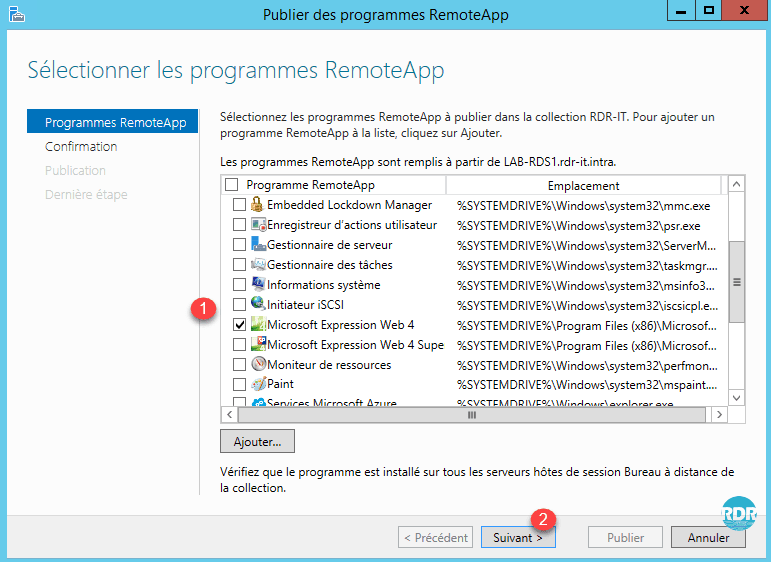
If a program is not available in the list, it can be declared manually by clicking Add ….
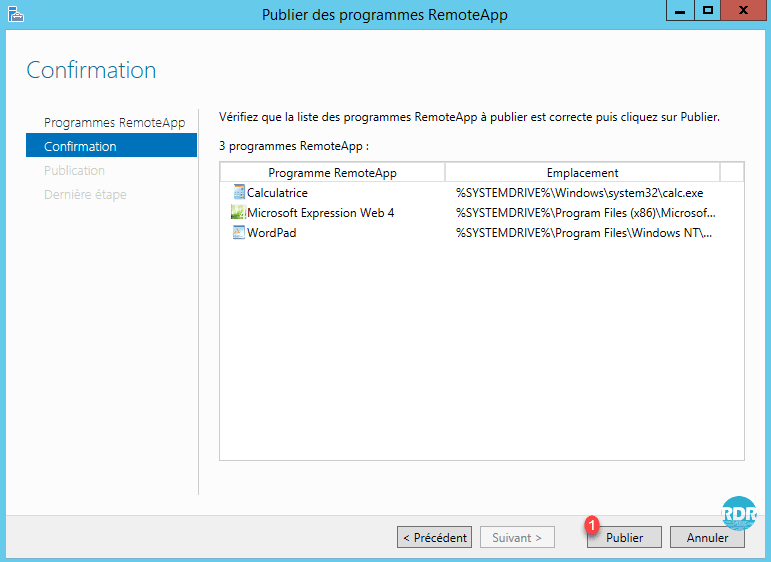
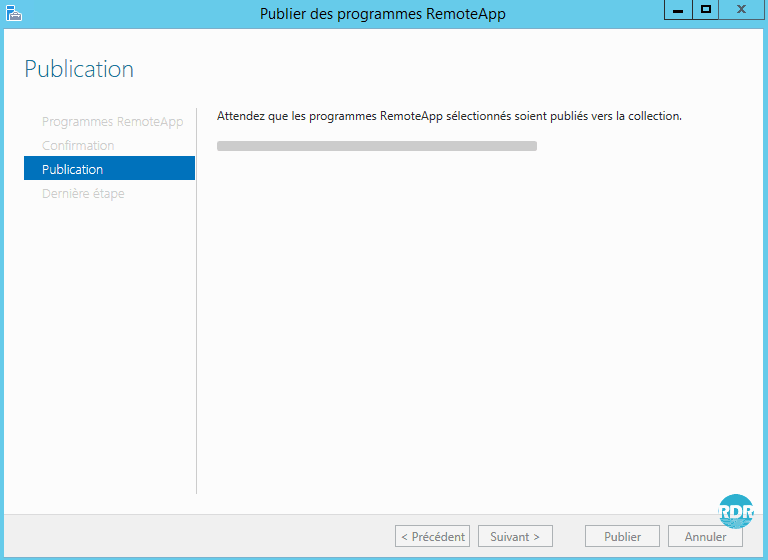
4. Click Publish 1 .
5. Wait during publication …
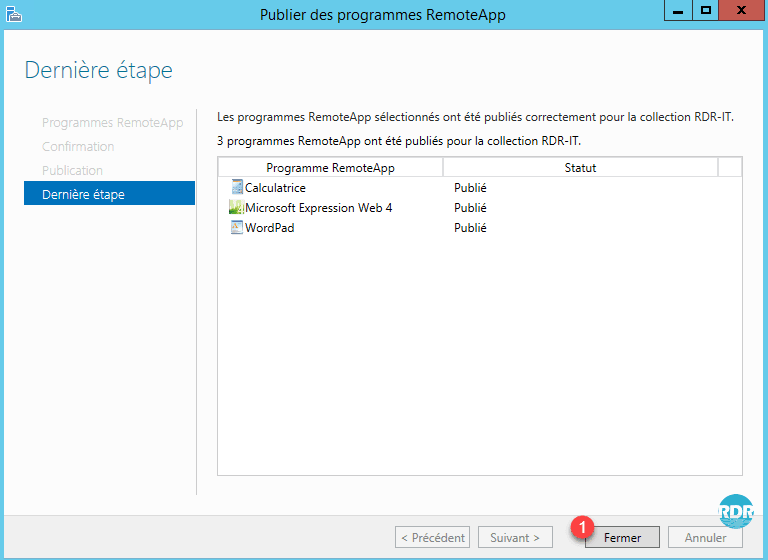
6. Programs are published, Close 1 the wizard.
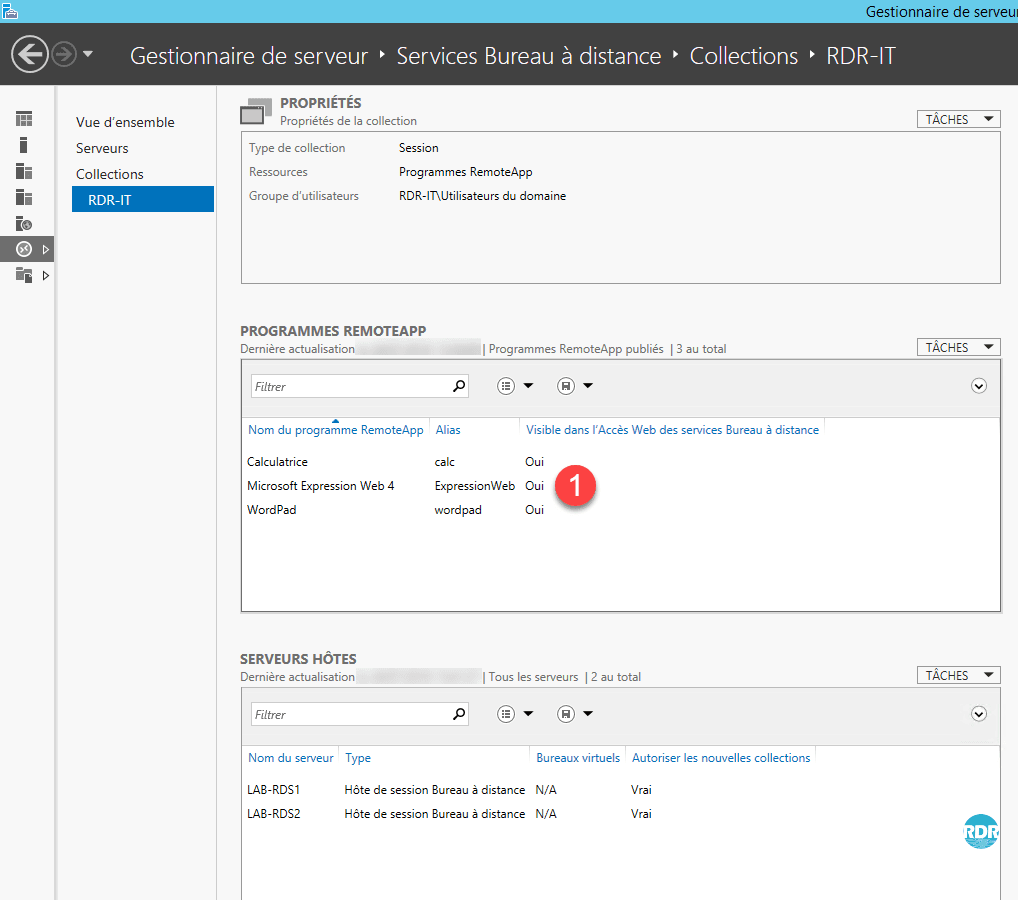
7. Applications are visible 1 from the collection administration page.
Customize a program
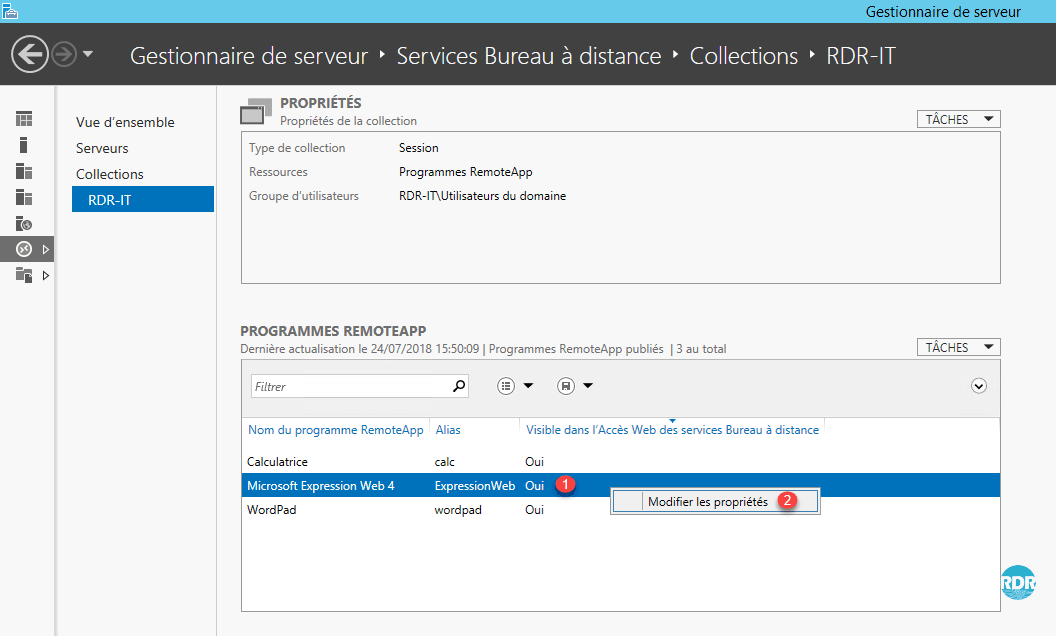
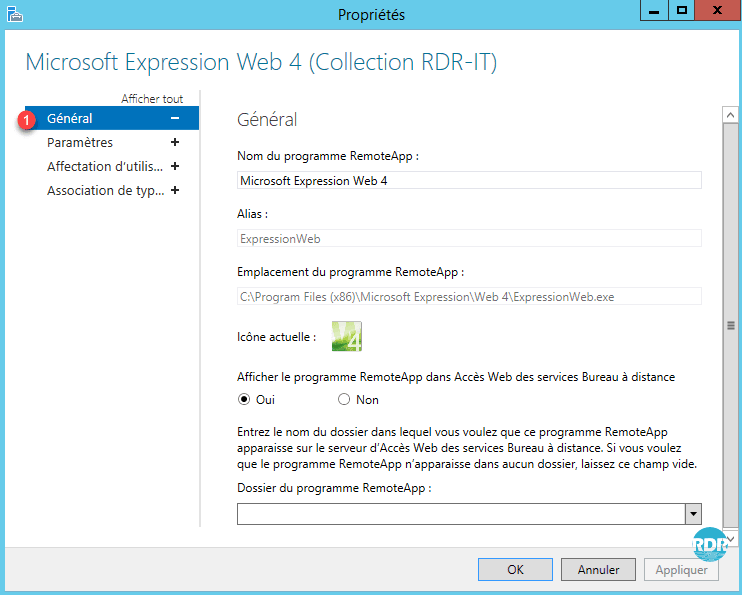
1. Right-click on program 1 and click on Edit properties 2 .
2. General section 1 : change the name of the application / hide the program on the web portal / organize in a folder.
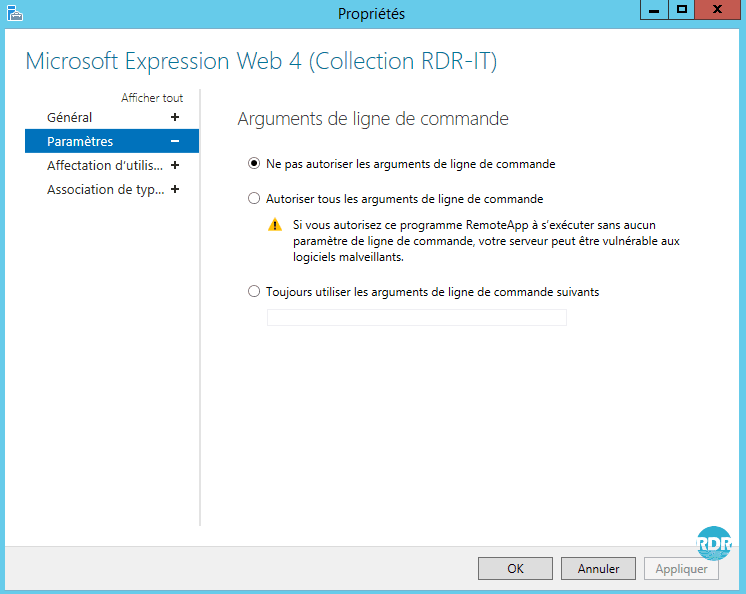
3. Parameters section 1 : allows you to define parameters on the command line.
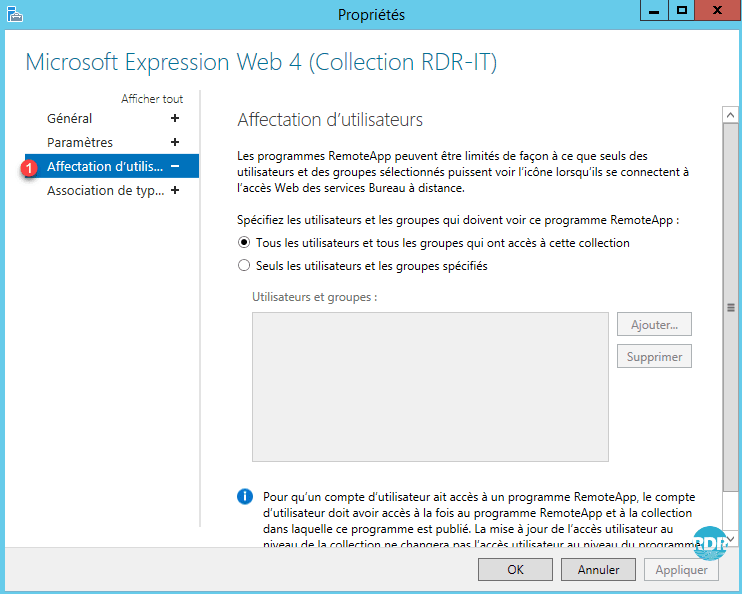
4. User Assignment Section 1 : It is possible to restrict access to the program to specific groups.
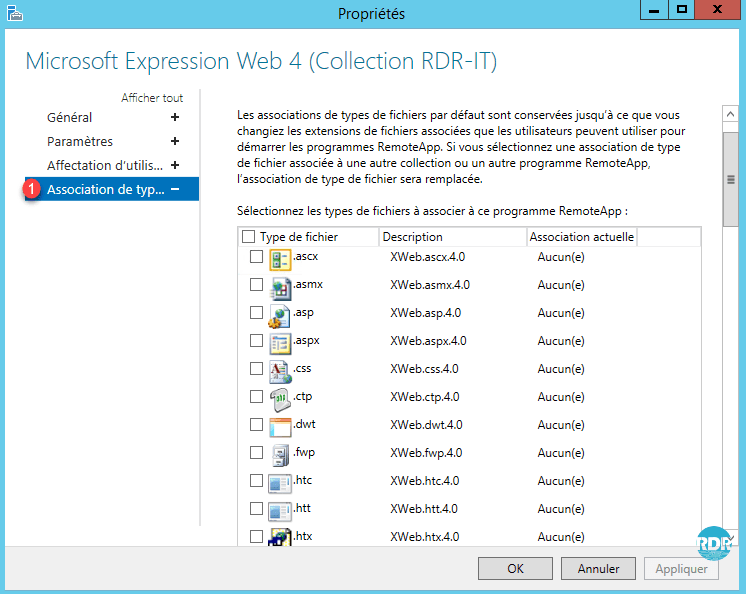
5. File Type Association Section 1 : Allows you to associate an extension with the program (Works for files accessed from a session on the collection).
Remove a program
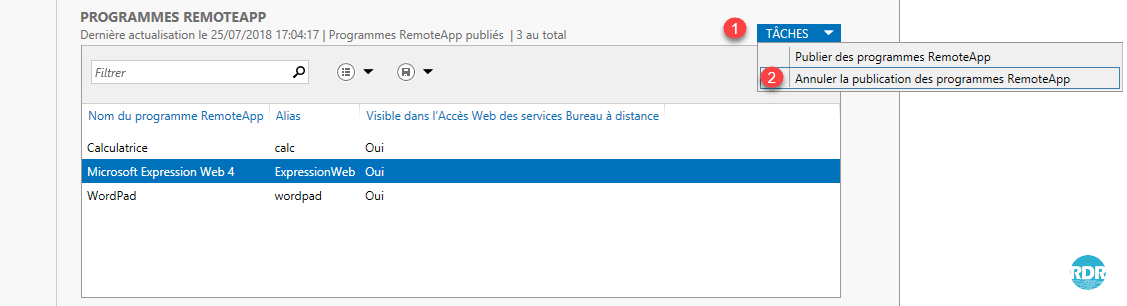
1. On the REMOTEAPP PROGRAMS section, click on TASKS 1 and then Cancel the publication of RemoteApp 2 programs.
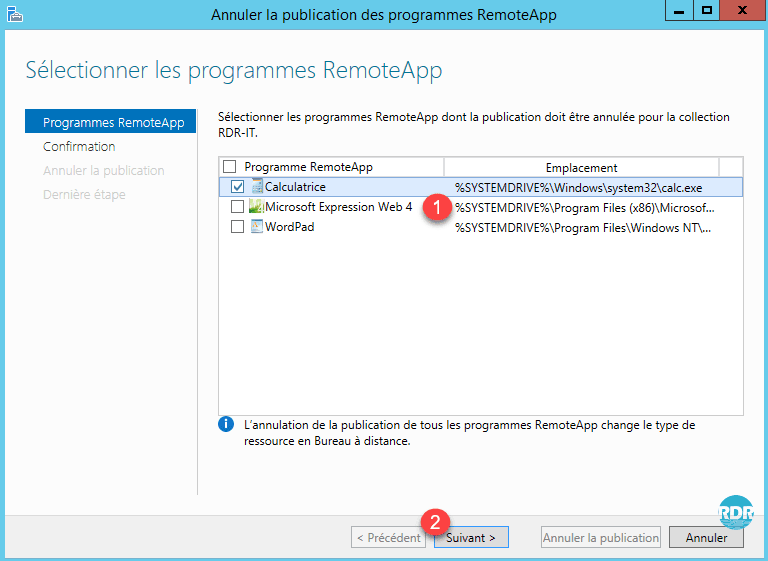
2. Check the box of program (s) 1 to remove and click Next 2 .
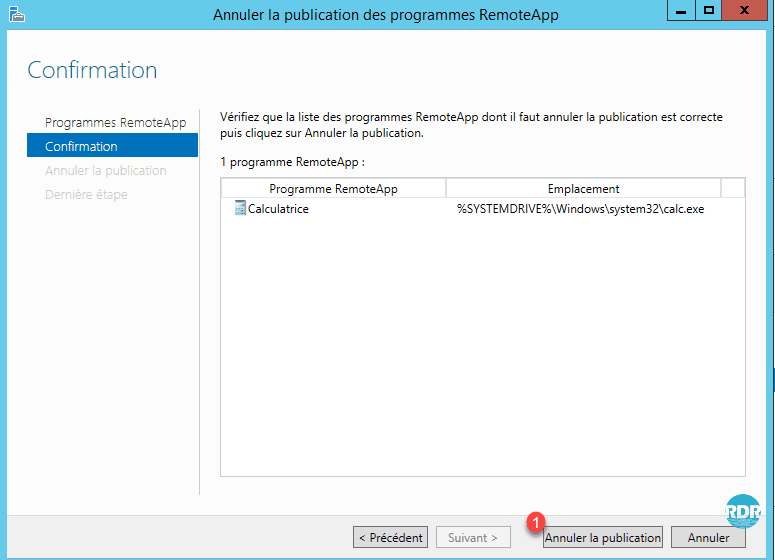
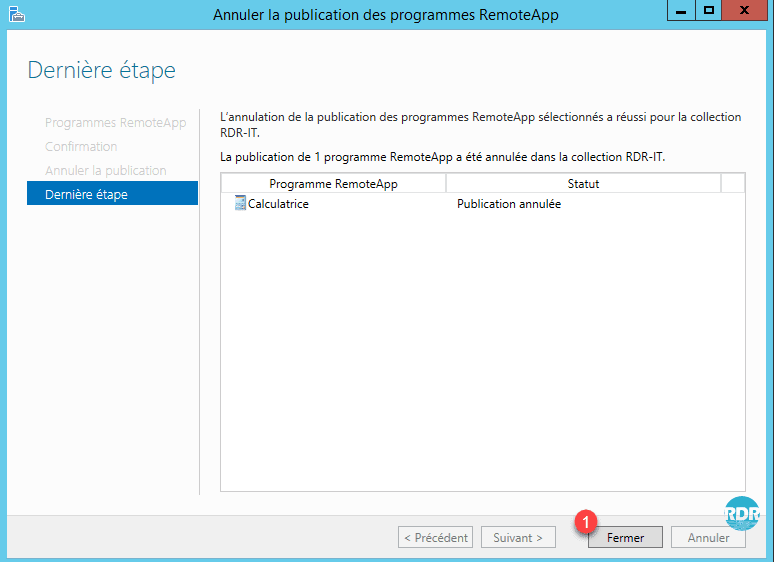
3. Click Cancel Publication 1 .
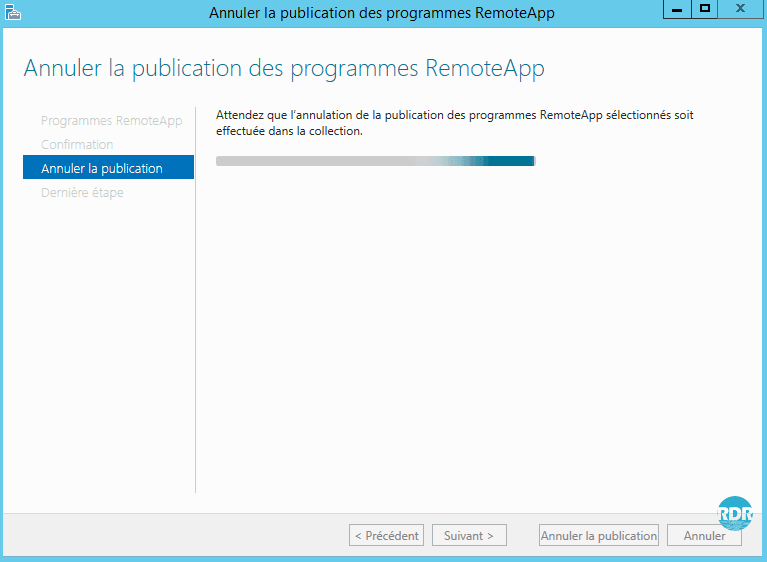
4. Waiting …
5. Click on Close 1 . The application is no longer available in RemoteApp.
Remote Desktop Gateway – Gateway RDS
To summarize, the Remote Desktop Gateway allows access to resources (servers / computers) accessible from outside the enterprise on port 443 (https) without the need to establish a VPN connection and applying security strategies.
Remote Desktop Services Gateway Installation
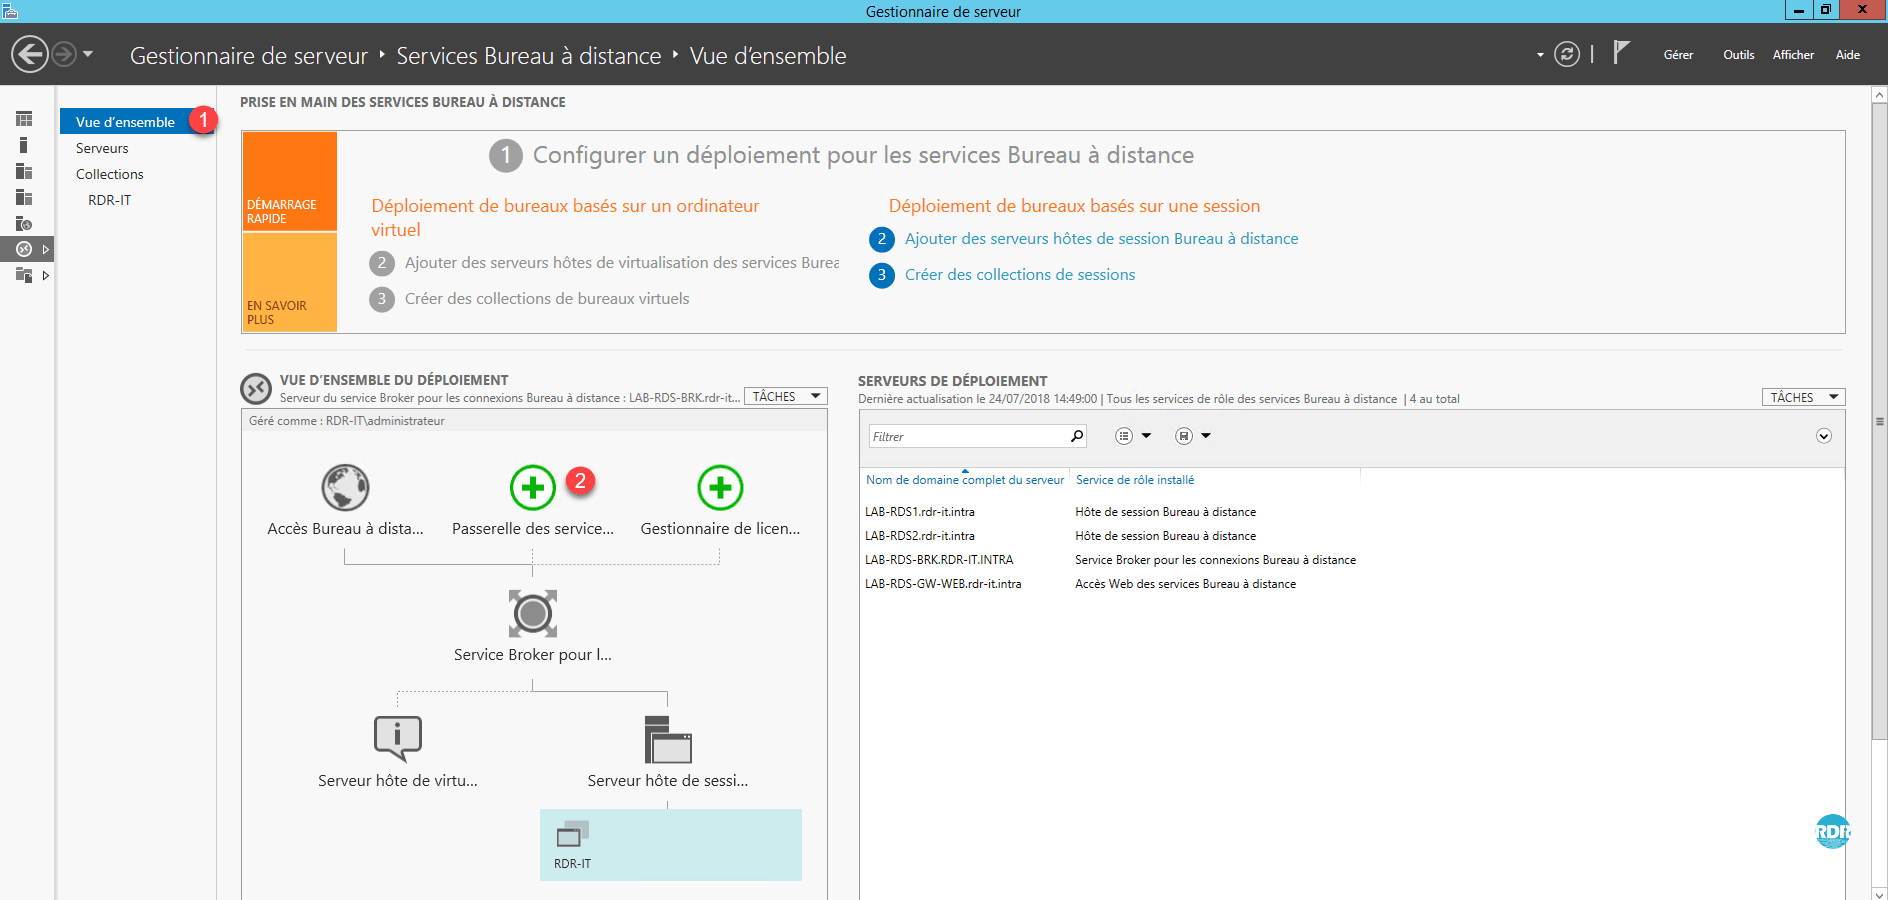
1. Go to Overview 1 of Remote Desktop Services and click on Service Gateway … 2 . This will open the role installation wizard for the RDS farm.
2. Select server 1 where the role is to be installed and click Next 2 .

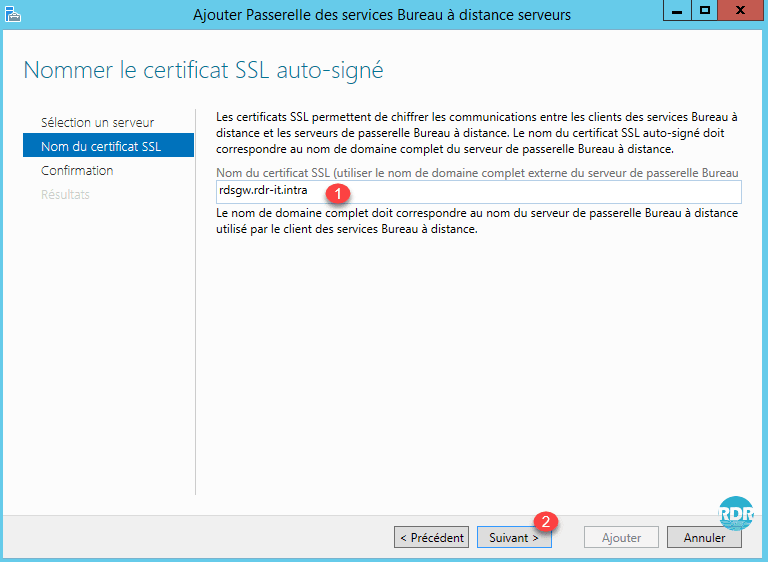
3. Enter the name of the SSL certificate 1 (usually the publication name on the internet) and click Next 2 .
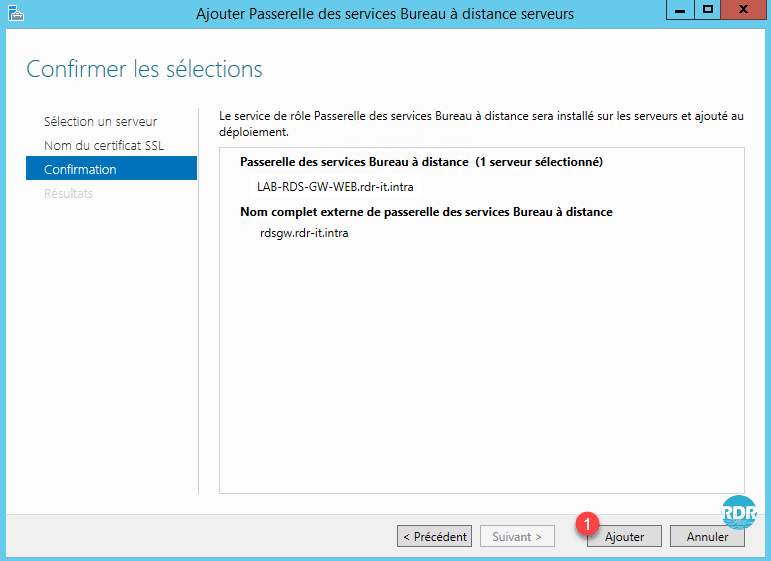
4. Click Add 1 to start the installation.
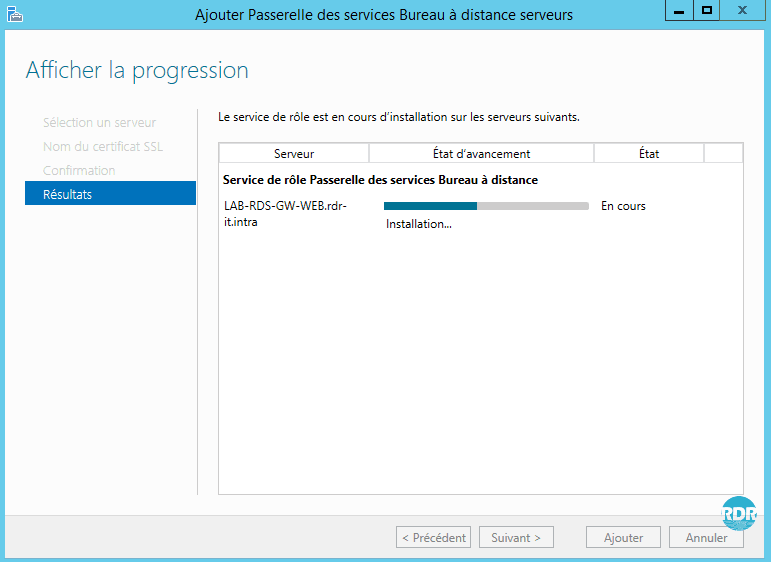
5. Wait during the installation …
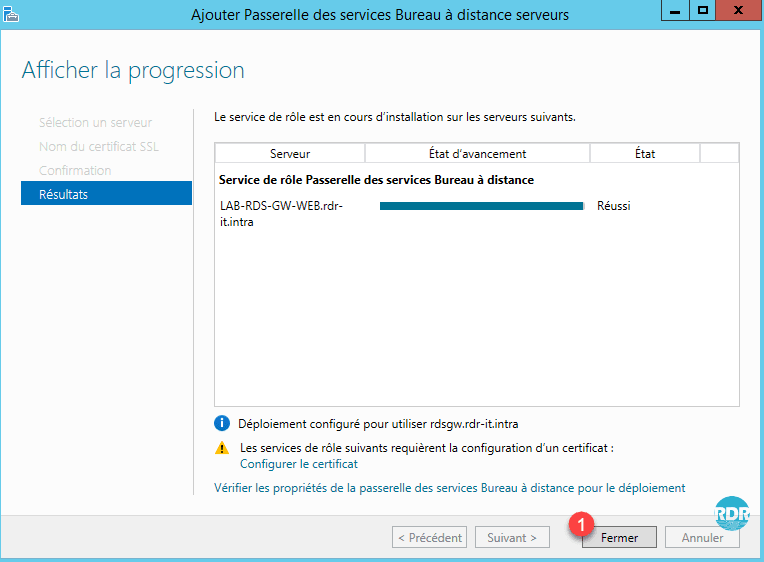
6. Installation completed, click Close 1 .
Installing RD Gateway Manager on the Broker Server
Reminder : all the manipulations are carried out from the broker server. When installing the RDS Gateway the management console was installed on the target server.
1. Open a PowerShell command prompt as an administrator.
2. Enter the following line to install the console:
Install-WindowsFeature RSAT-RDS-GATEWAYRemote Desktop Gateway role overview
To use the RDS gateway with a self-signed certificate, it must be deployed to the endpoints as a Trusted Root Certification Authority.
To work the Remote Desktop Gateway uses 2 types of policies:
- Connection authorization policies: These define who can connect to the gateway (users and extensions), which devices are redirected, and the timeout of the sessions.
- Resource Access Authorization Policies: They define who can connect to what.
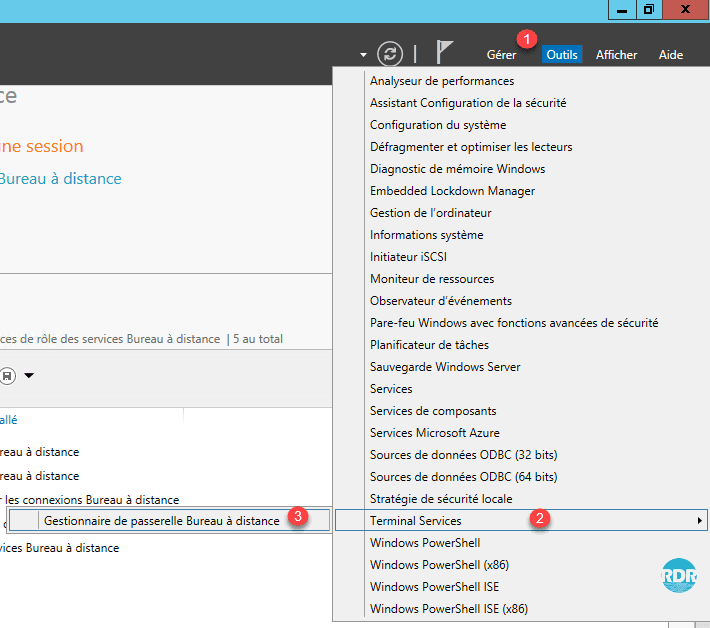
1. Open the console from Server Manager, Tools 1 / Terminal Services 2 / Remote Desktop Gateway Manager 3 .
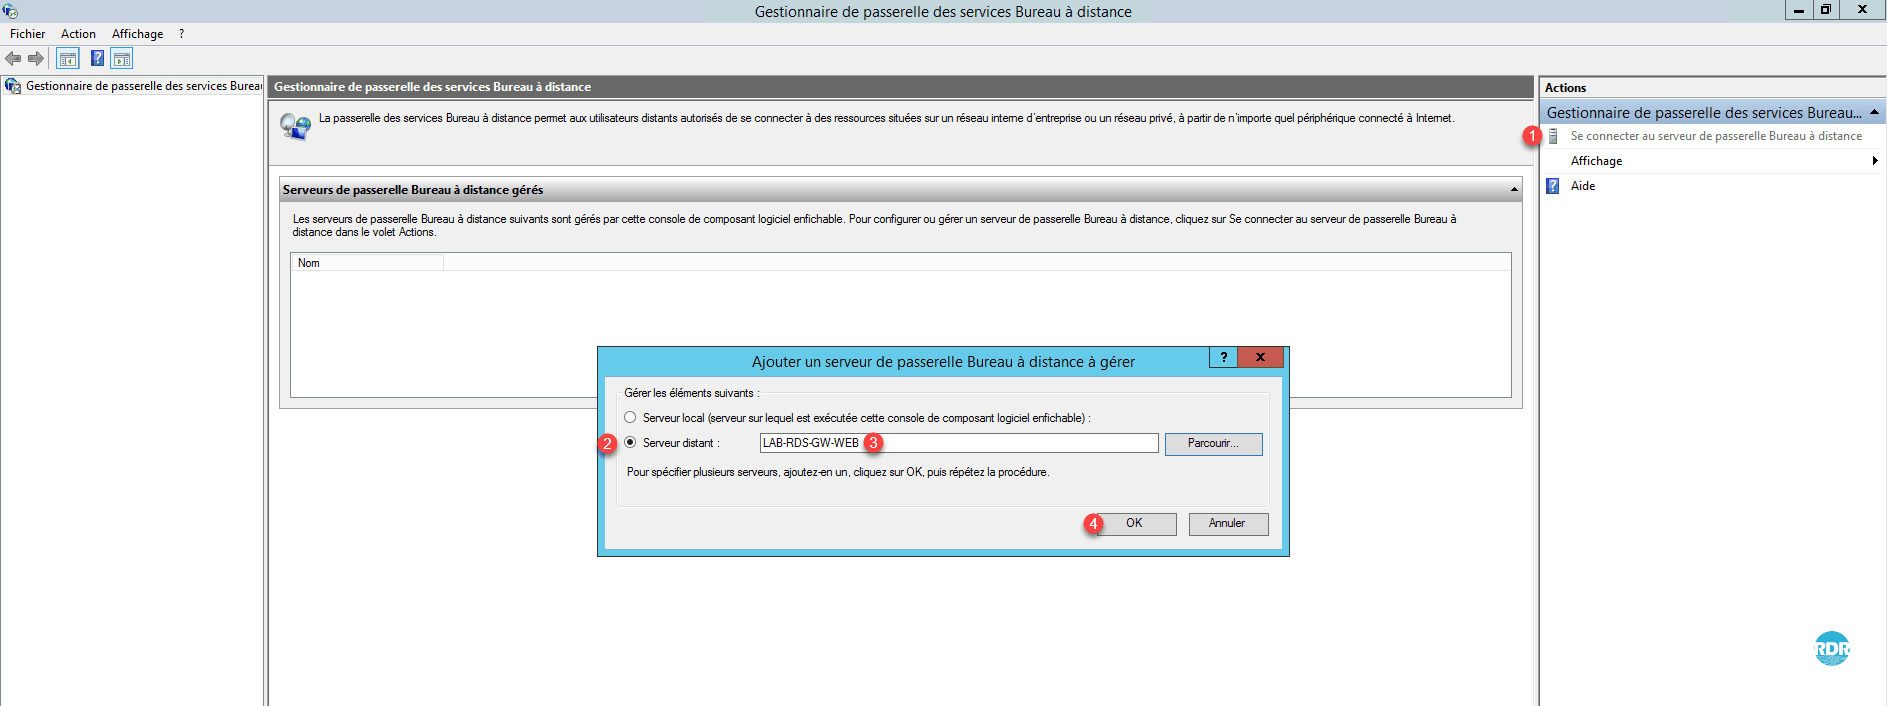
2. Click Connect to Remote Desktop Gateway Server 1 . In the new Remote Server 2 check box, enter the name of the server where the role is installed 3 and click OK 4 .
3. When installing the role, the wizard created two 1 strategies, which makes the gateway normally usable.
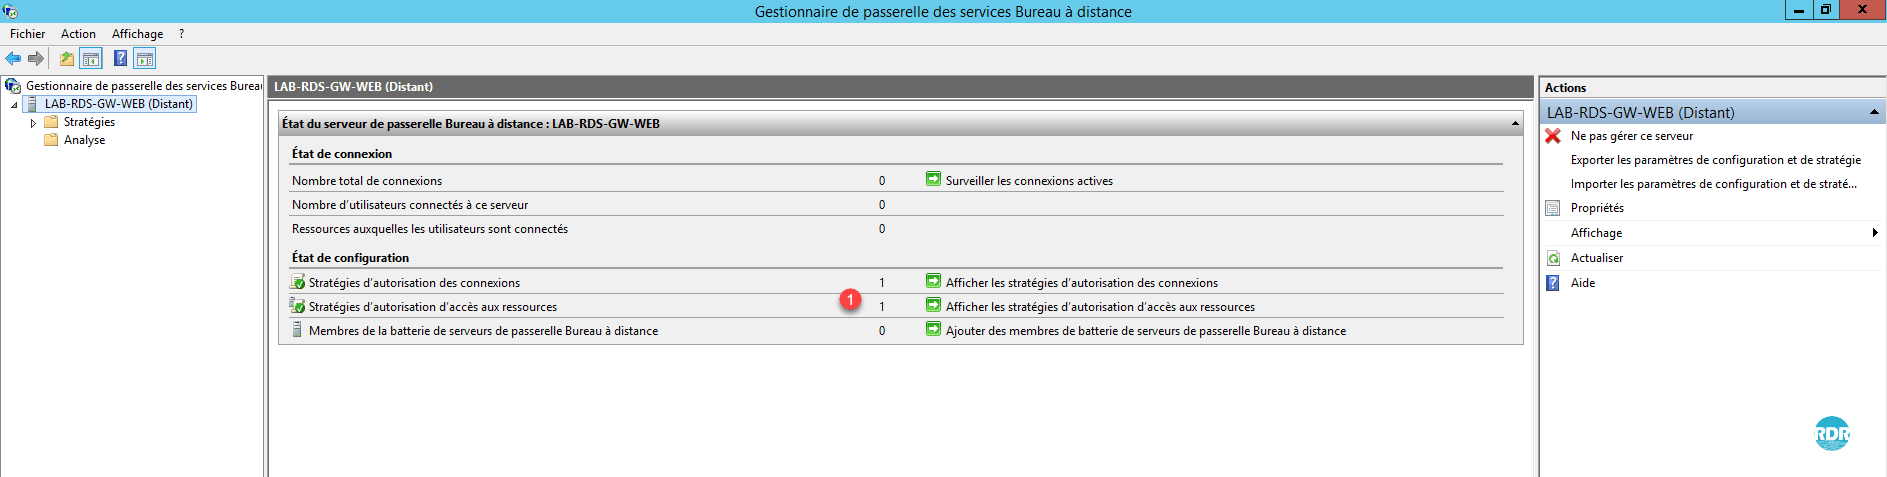
Having added a DNS record for the RDS farm (rds.rdr-it.intra) and configuring client access with this record, it is necessary to modify the resource access policy or add a computer in the Active Directory with that name.
4. In the Actions menu click Properties 1 . A window opens with different tabs available to change the options and behavior of the Remote Desktop Gateway service.
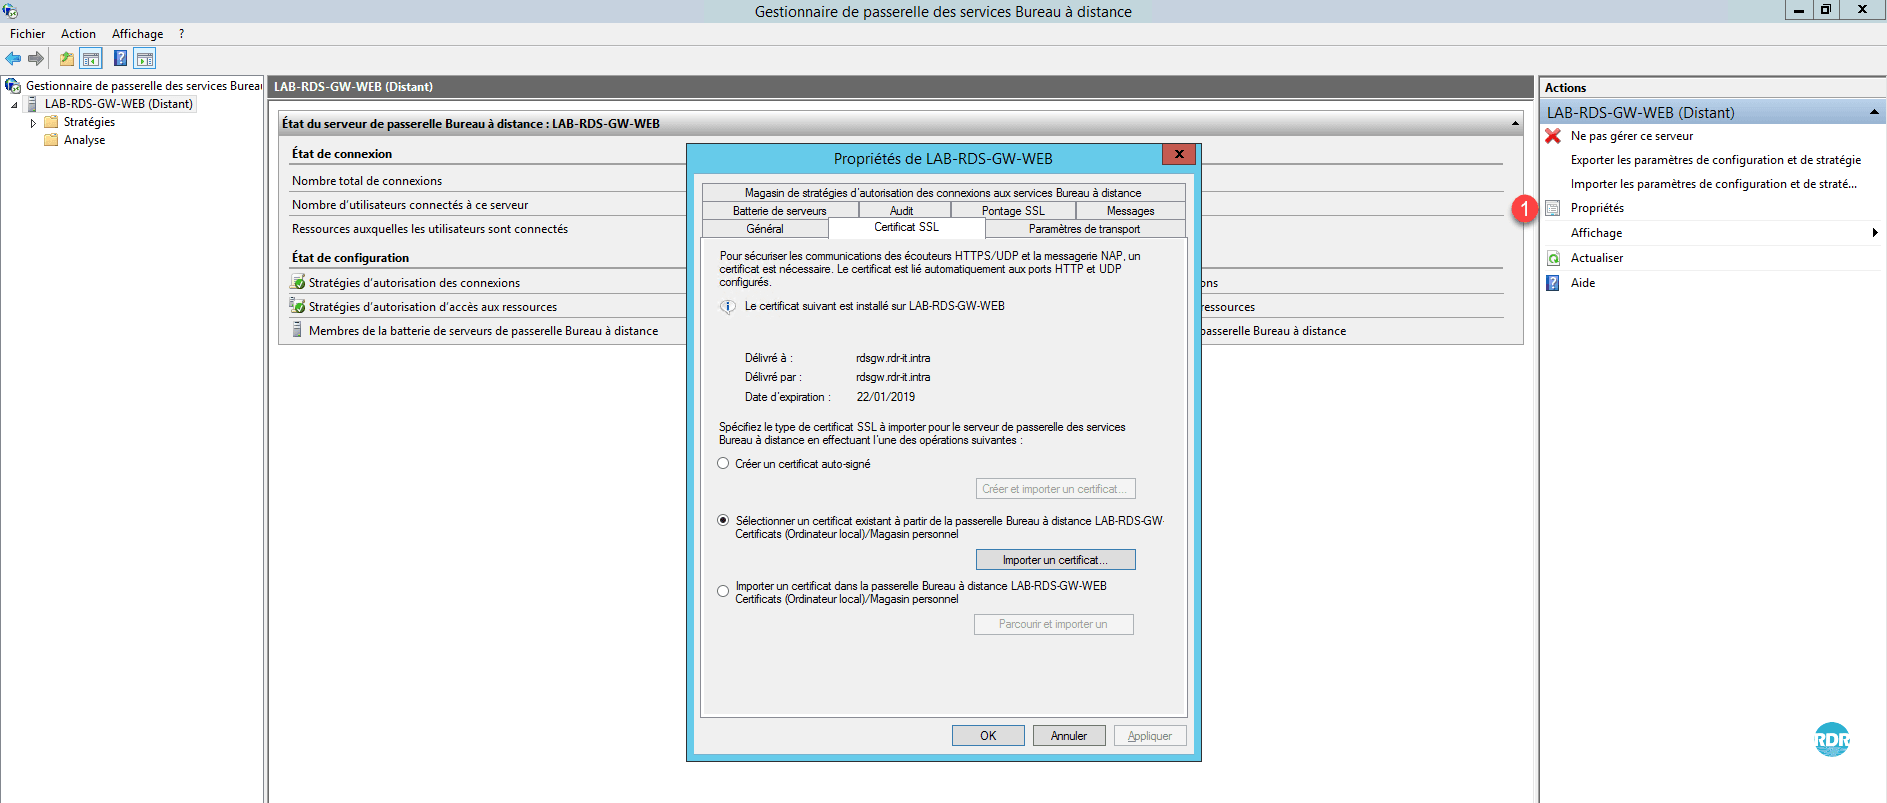
By default when installing a self-signed SSL certificate is created, it can be changed from the SSL Certificate tab or from the Server Manager in the Remote Desktop Services section.
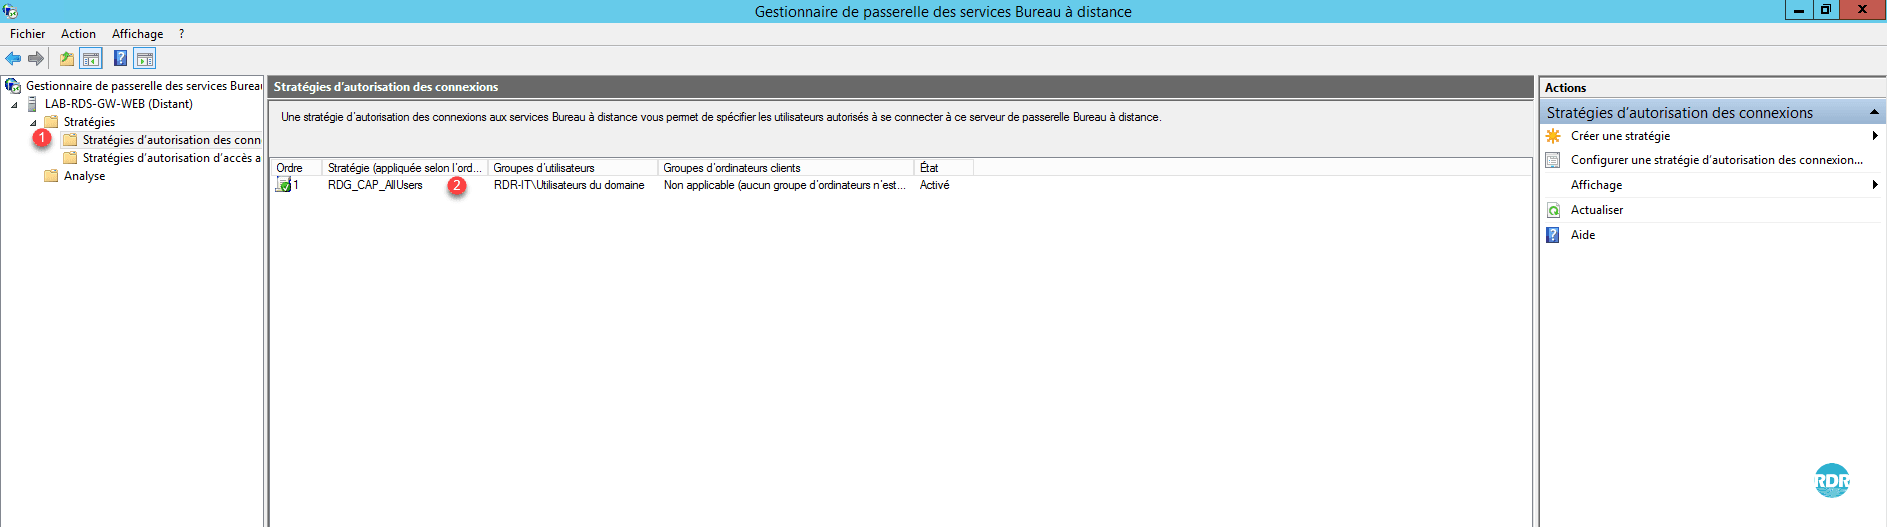
Connection Authorization Policies
1. From the left menu, go to the Connection Authorization Policy 1 folder. From here, it is possible to see and manage the strategies in place. Double click on the strategy RDG_CAP_AllUsers 2 .
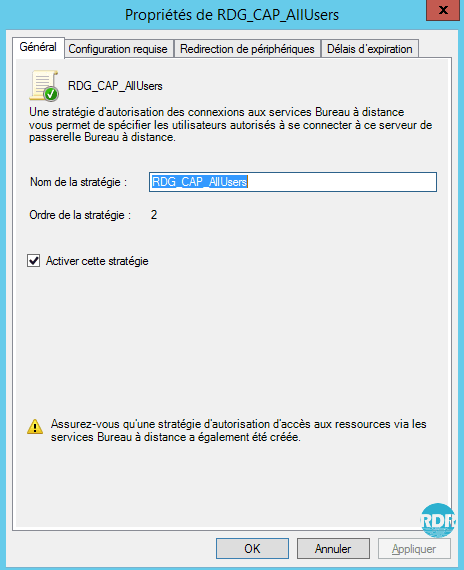
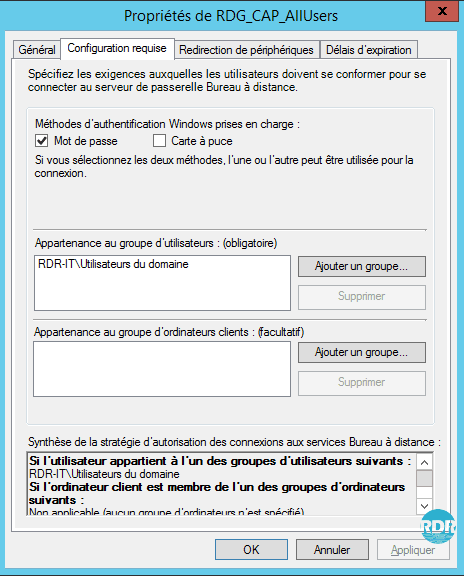
2. General tab: from here it is possible to change the name of the strategy and the activated or not by ticking the box Enable this strategy.
3. Requirements tab: Define the user configuration to connect to the gateway services. Belonging to a group for the user, this parameter is mandatory. The other optional but very useful parameter to increase the security level is the group membership for the computer. By setting this option it is possible for example to prevent an employee from logging in from his personal computer.
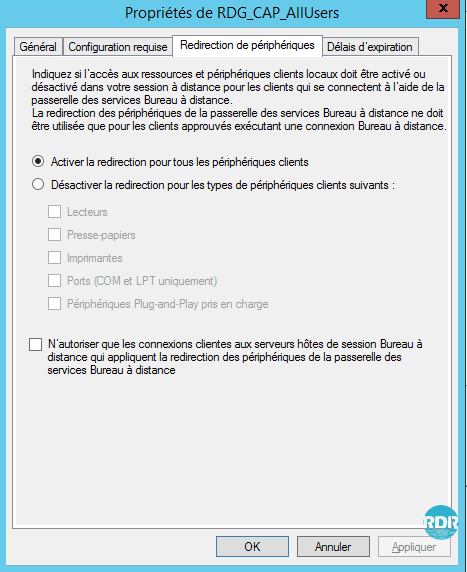
4. Device Redirection tab: How to configure the collection, it is possible to define which devices are redirected through the gateway. The settings in the policy take precedence over the settings in the collection. That is, if the printers are allowed in the collection and not allowed by the gateway, during a connection through the gateway the user will not have the printers.
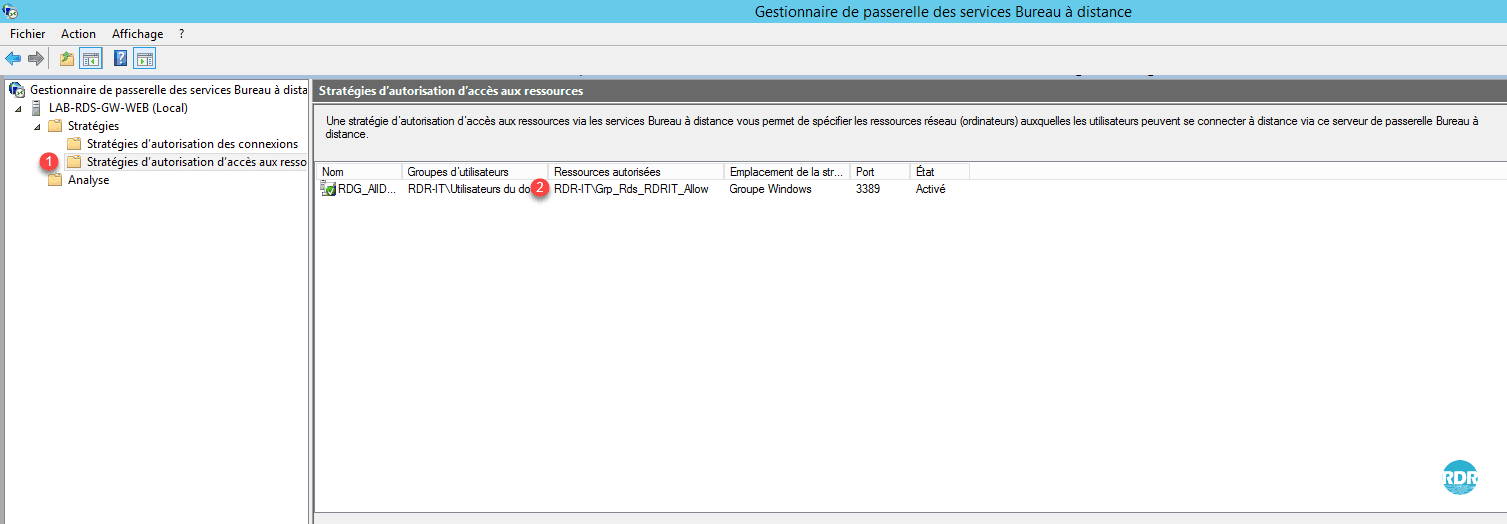
Resource Access Authorization Strategies
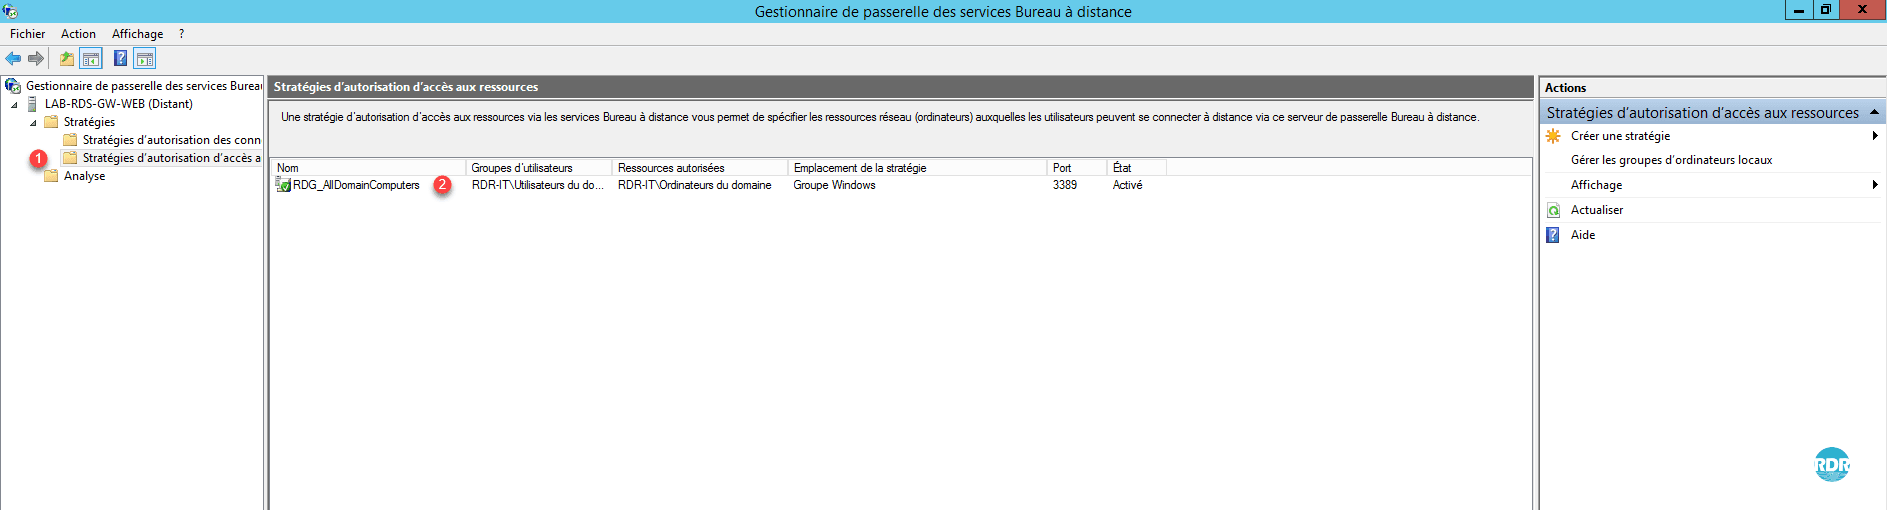
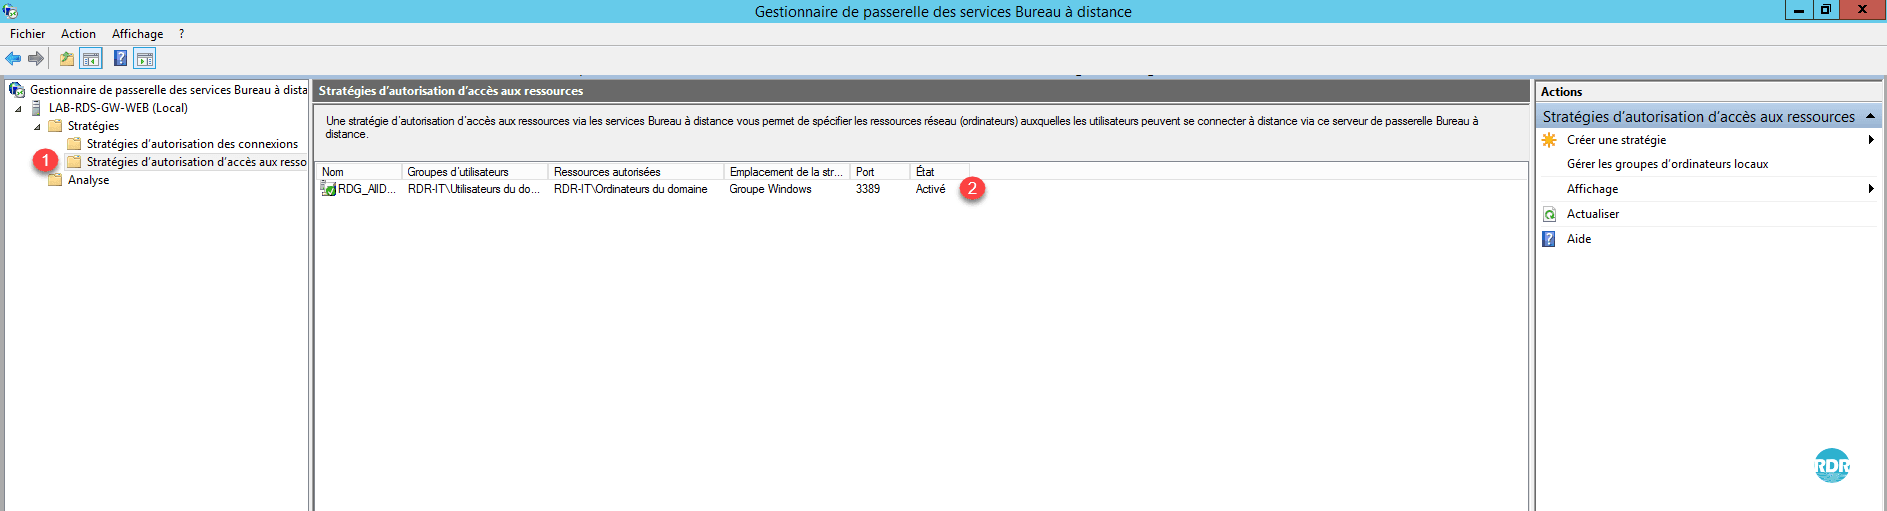
1. From the left menu, go to the Resource Access Permit Policies 1 folder. From here, it is possible to see and manage the strategies in place. Double click on the strategy RDG_AllDomainComputers 2 .
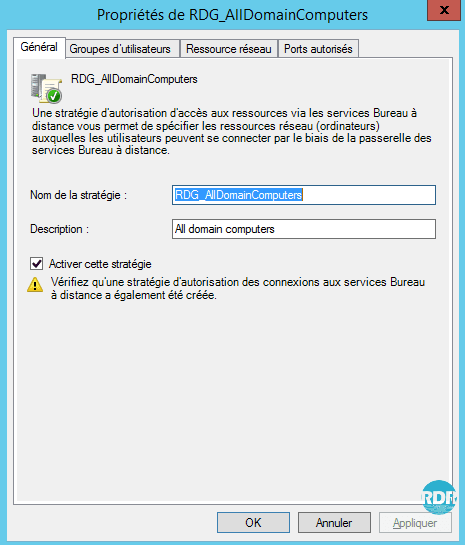
2. General tab: from here it is possible to change the name of the strategy and the activated or not by ticking the box Enable this strategy.
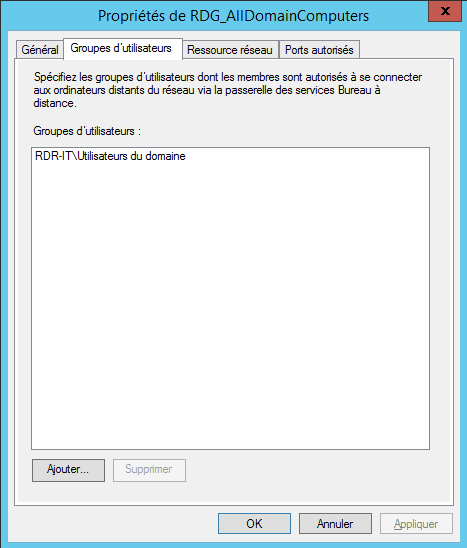
3. User Groups tab: Define who can use this policy.
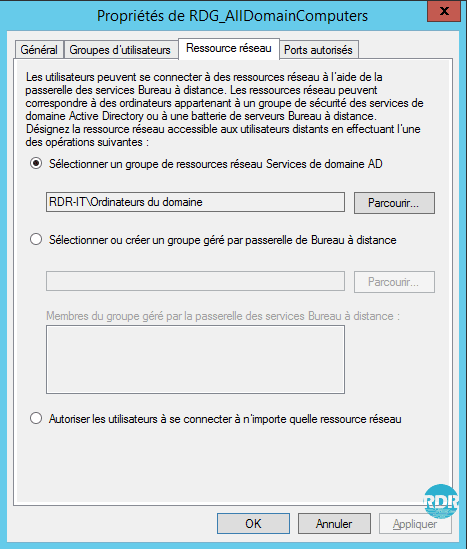
4. Network Resource tab: What this policy can access.
5. Ports Allowed tab: If remote desktop access has been configured on a port other than 3389, you must configure it here.
Configuration
In this part, we will see how to make the gateway usable for the RDS farm. Several methods and solutions are available. Choose the best solution for your environment and the desired level of security.
- Method 1 : allow access to all resources (deprecated)
- Method 2 : use the default configuration
- Method 3 : allow access to an Active Directory group limited to the RDS farm
- Method 4 : use of groups managed by the gateway
Method 1: Allow access to all resources (deprecated)
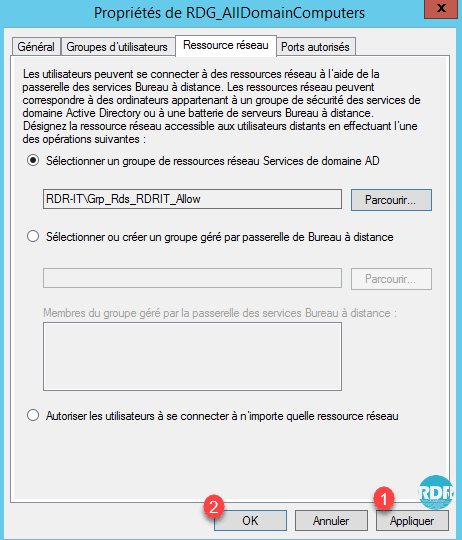
Open the RDG_AllDomainComputers strategy and go to the Network Resource 1 tab, check Allow users to connect to any 2 network resource. Click on the Apply 3 and OK 4 buttons.
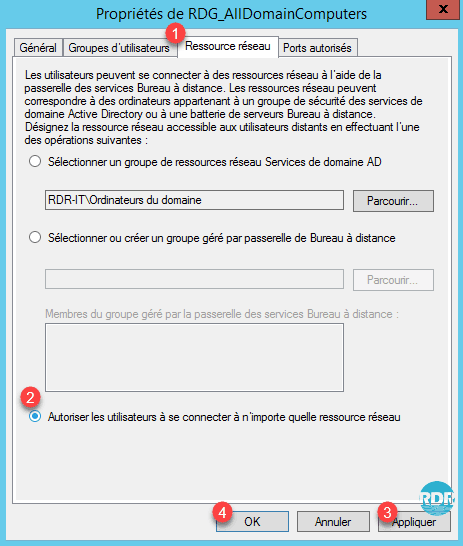
Explanation : This method allows access to all computers (even off-domain) that have Remote Desktop enabled. In production it is not advisable to use this solution.
Method 2: Use the default configuration
As explained at the beginning of this tutorial, using a DNS alias for host servers prevents the connection to the RDS shutdown because the RDS computer (AD object) does not exist.
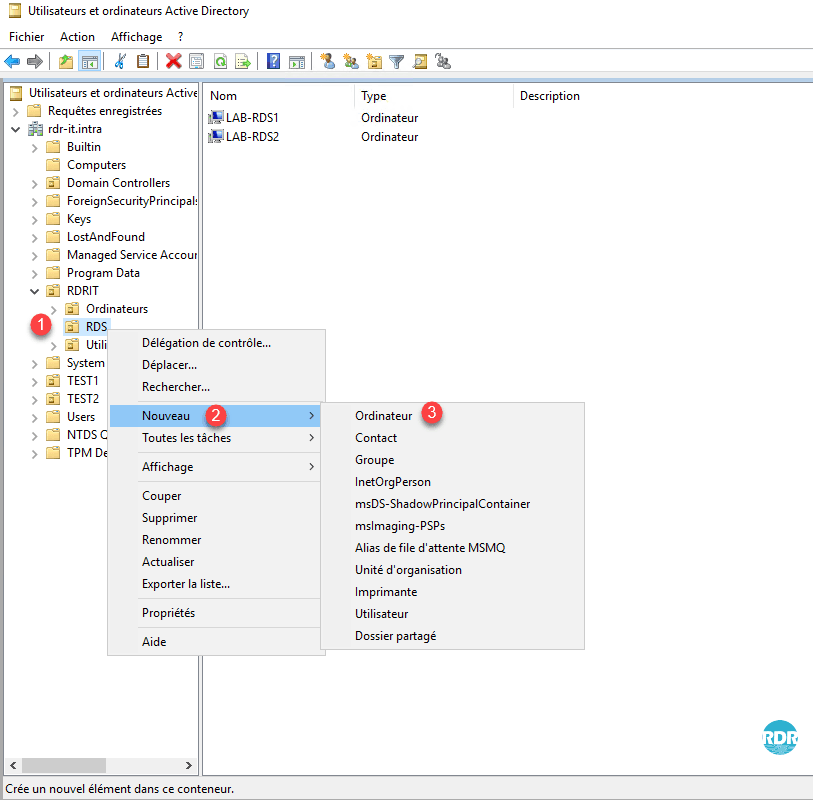
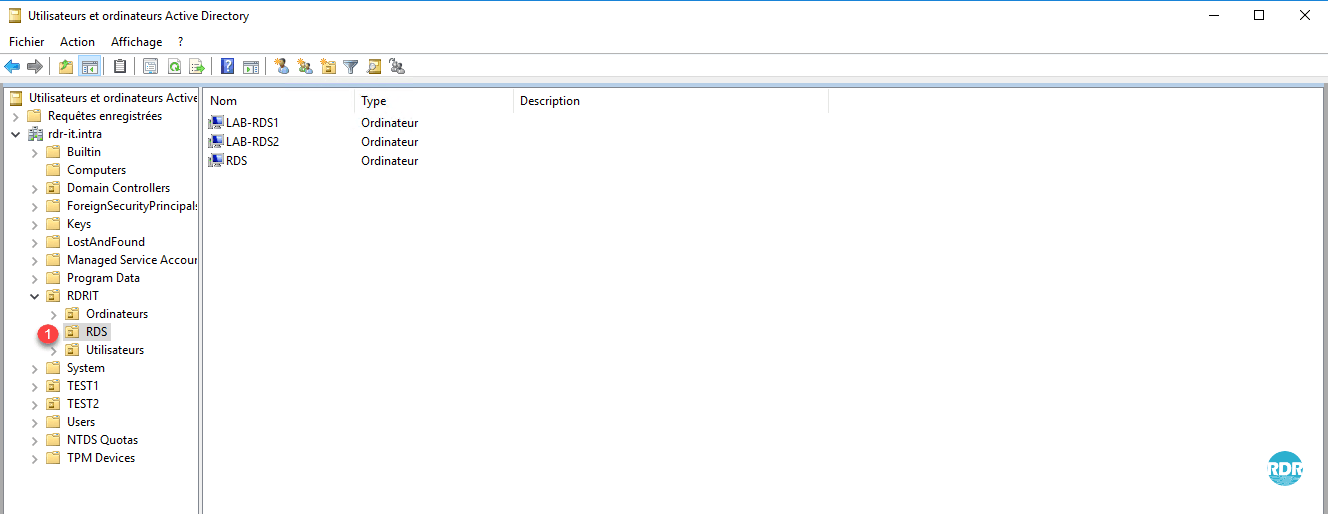
1. Go to the domain controller and open the Active Directory Users and Computers console and go to OR RDS 1 .

2. Right-click on OR 1 , go to New 2 and click on Computer 3 .
3. Enter the Computer Name 1 that corresponds to your alias and click OK 2 .
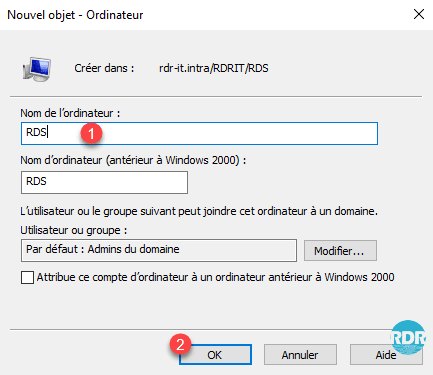
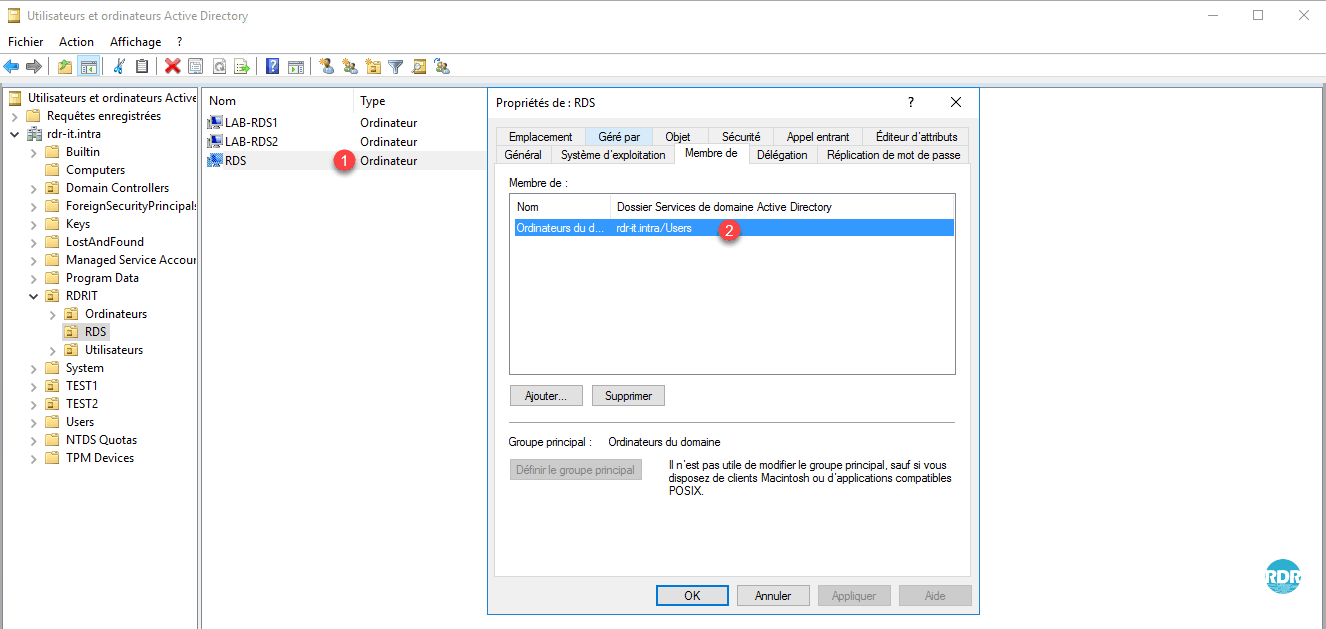
4. The computer is created 1 and is a member of the group: Computer Domain 2 .
With this method, the default rules work with the RDS farm.
Explanation : This method allows access to all computers in the domain. Adding a fictitious computer allows the gateway to validate that the rds.rdr-it.intra computer is part of the AD group and allows access.
Method 3: Allow Access to a Restricted Active Directory Group on the RDS Farm
Prerequisites: have done the method 2 procedure.
This method consists of creating a group, in which we will put the RDS servers and declare it in the resource access strategy.
1. Return to the Active Directory Users and Computers console and go to OR RDS 1 .
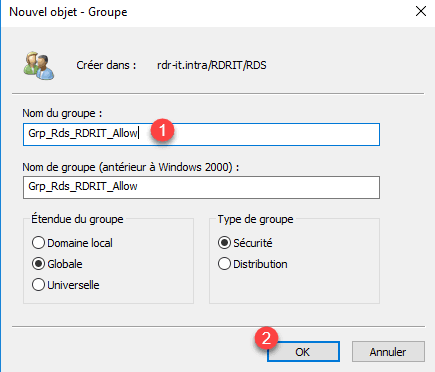
2. Click the 1 icon to create a group in the container.
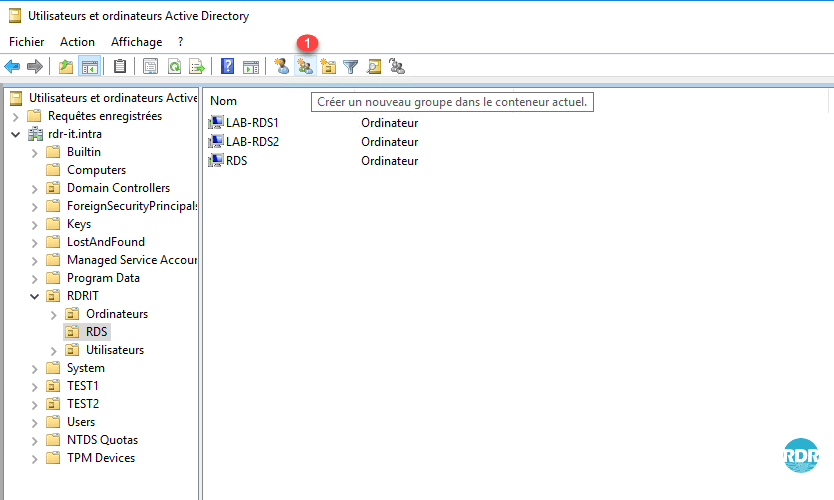
3. Enter Group Name 1 and click OK 2 .
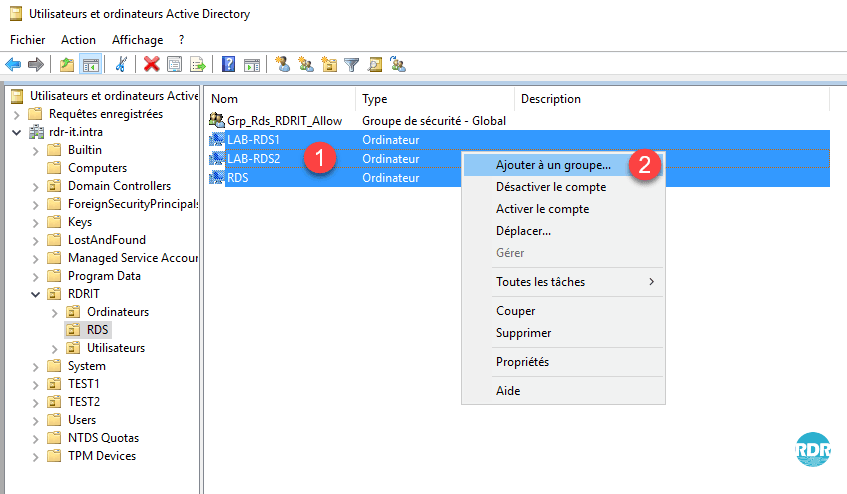
4. Select Computer objects 1 to be added to the group, right-click and click Add to a 2 group.
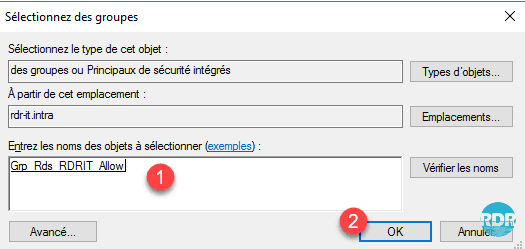
5. Enter the name of the 1 group that has just been created and click on OK 2 .
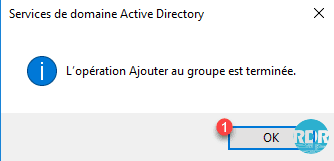
6. Click OK 1 to close the confirmation window.
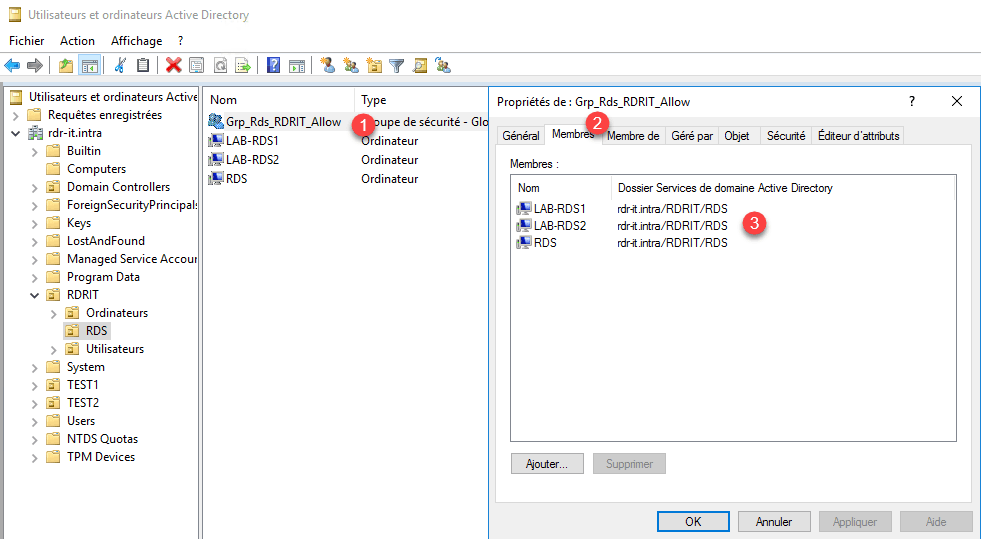
7. Double-click on group 1 , go to Members tab 2 and check that Computers 3 have been added.
8. Go back to the Gateway Management Console, go to the Resource Access Permit Policies 1 folder and double-click on the default 2 strategy.
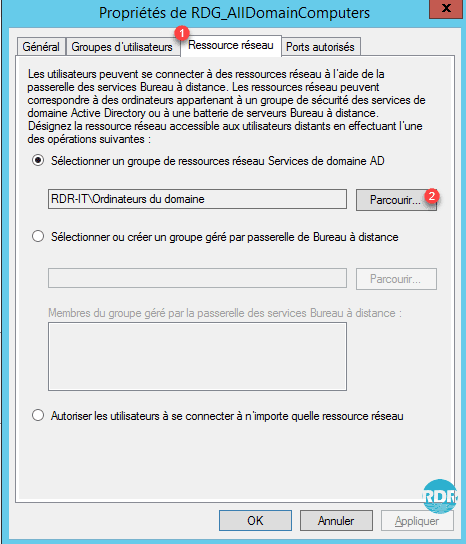
9. Go to the Network Resources 1 tab and click Browse … 2 .
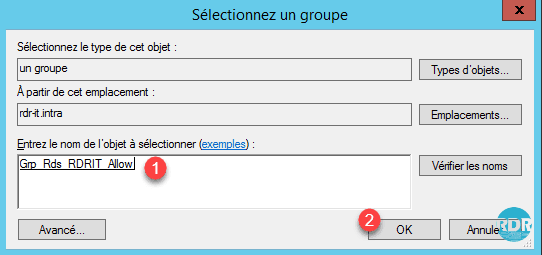
10. Enter the name of the group 1 and click OK 2 .
11. Click Apply 1 and OK 2 .
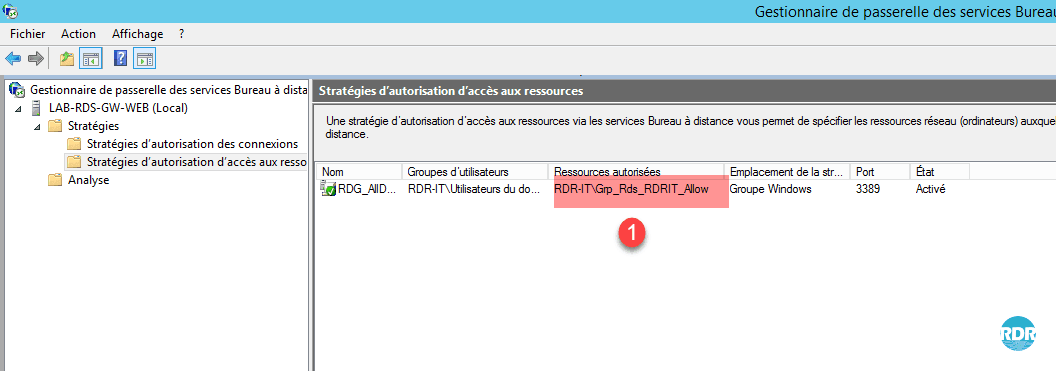
12. The group change 1 is visible in the overview of the strategy.
To use RemoteApps from outside the network (Internet), you have to add the broker server to the group.
Method 4: Using the Gateway Managed Groups
This method is equivalent to method 3 unlike the groups used for the permissions are managed directly by the gateway, which allows to add computers out of domain or another domain without approval relationship.
1. On the gateway management console, go to the Resource Access Permission Policies 1 folder and double-click on the default 2 strategy.
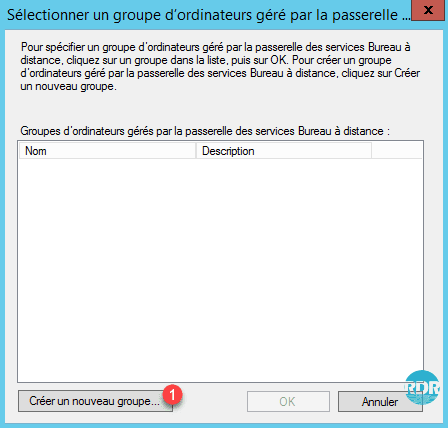
2. Go to the Network Resources 1 tab, select the option Select or create Remote Desktop Gateway managed group 2 and click Browse … 3 .
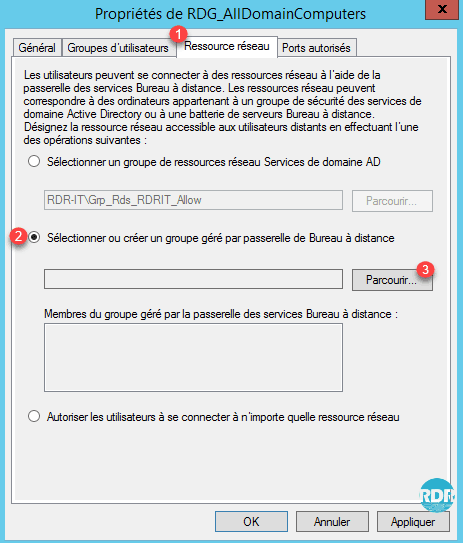
3. Click Create a new group … 1 .
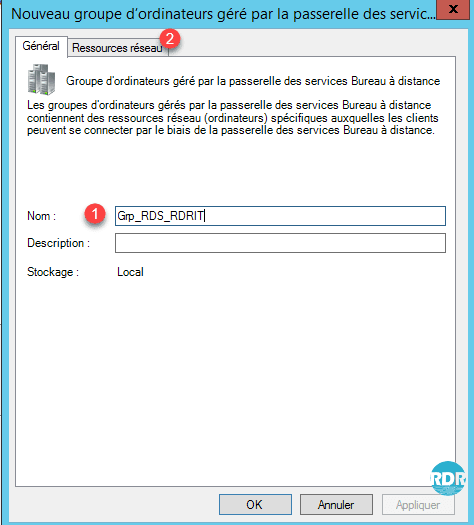
4. Enter the Group Name 1 and go to the Network Resources 2 tab.
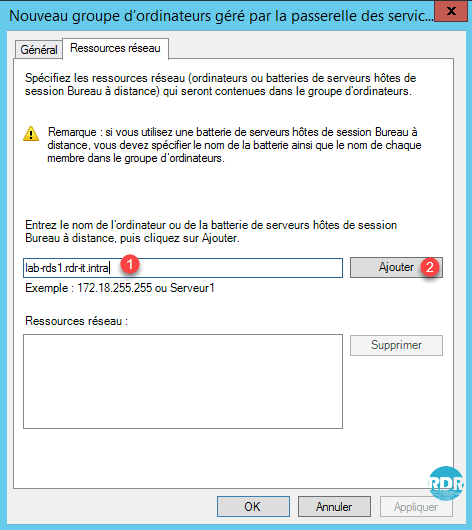
5. Enter the server fqdn server name 1 and click Add 2 .
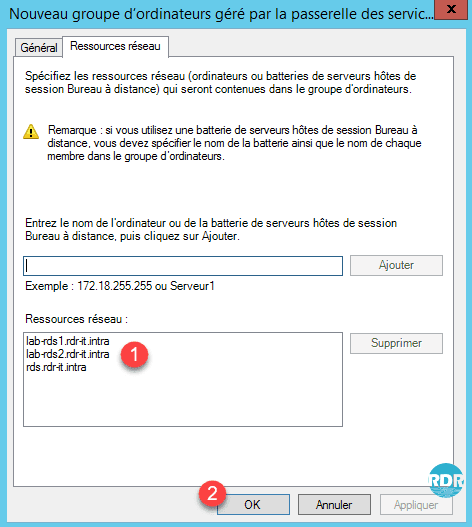
6. Add all host servers that make up the RDS farm and the alias 1 and click OK 2 .
7. Select the 1 group that has just been created and click on OK 2 .
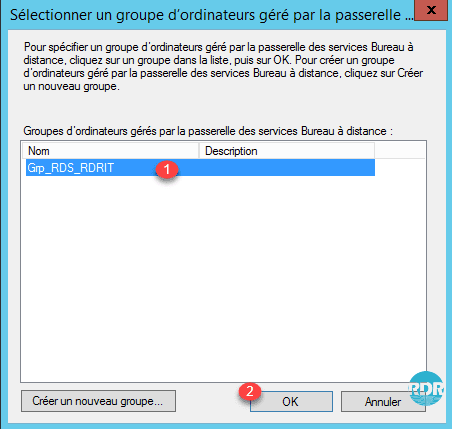
8. Check that the group is selected 1 , validate the servers that compose it 2 then click on Apply 3 and OK 4 .
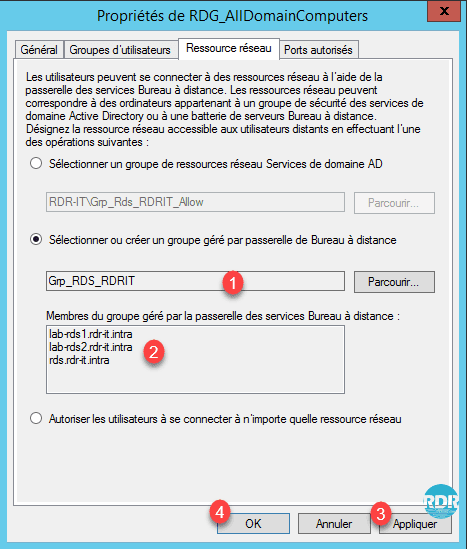
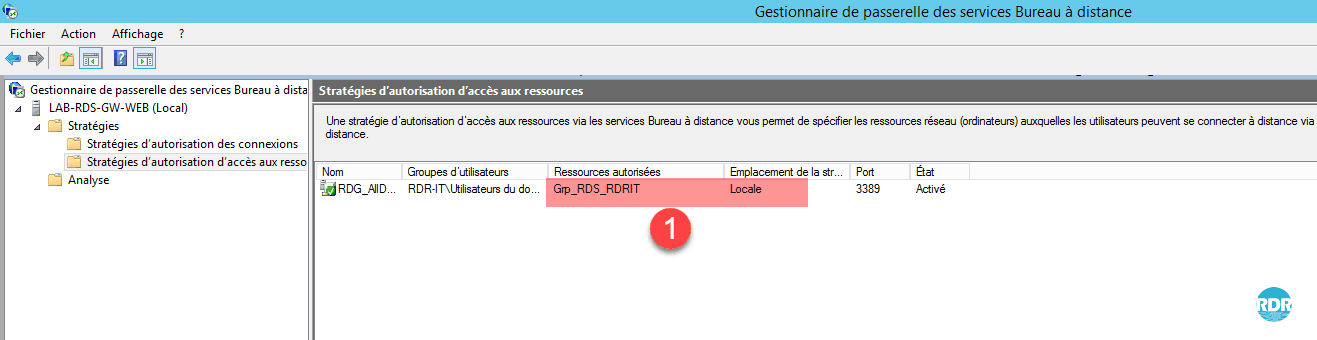
9. The group change 1 is visible in the overview of the strategy.
As for method 3, if you want to use RemoteApps from outside your network, you have to add the broker server to the group.
More with the Remote Desktop Gateway
Now we will put in place the necessary strategies to allow administrators to access all resources
For the creation of strategies, there are two methods:
- Creation using the wizard that will guide us in setting up the connections and resources strategies.
- Create the two strategies separately.
In this tutorial, we will use the wizard.
1. From the Management Console, go to Strategies 1 and click Create Authorization Policies 2 .

2. Check the first option 1 to create the two rules and click Next 2 .

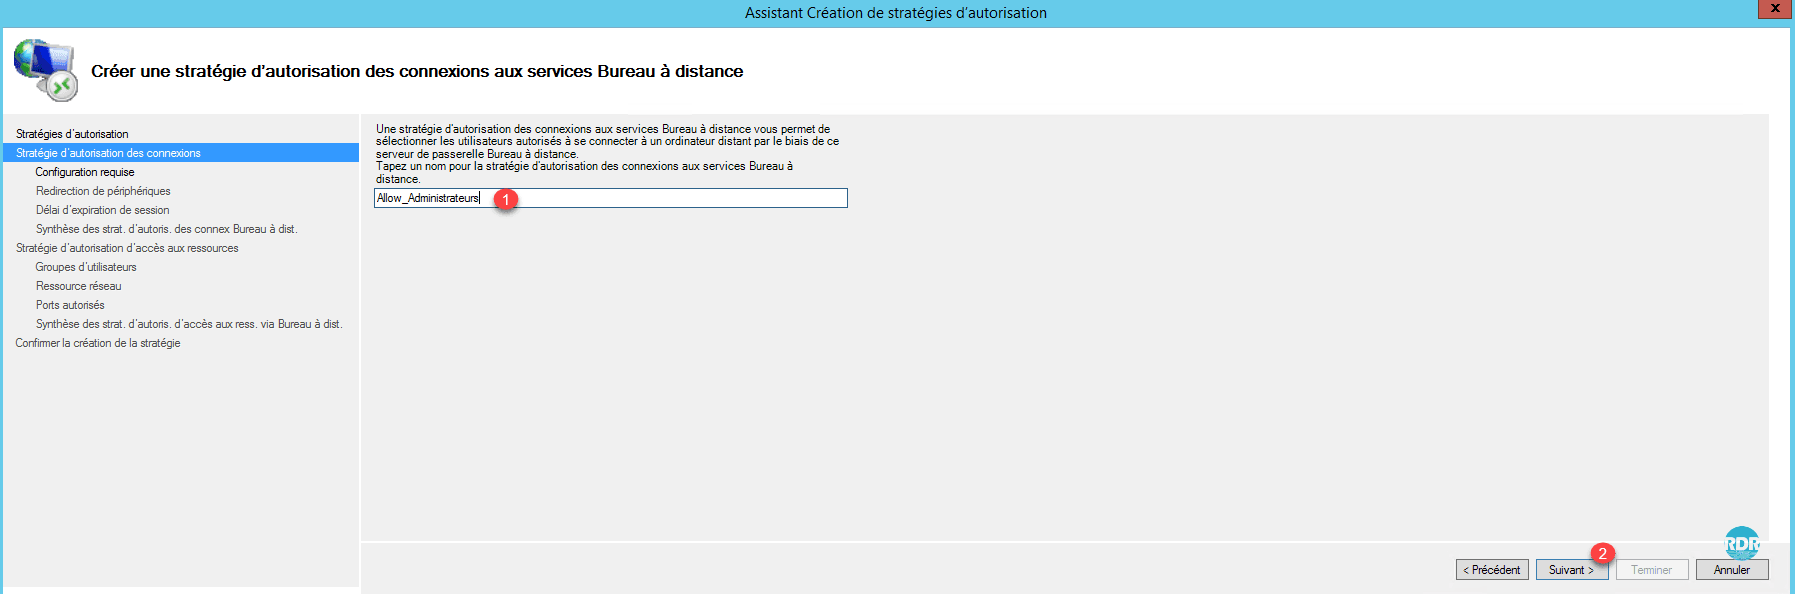
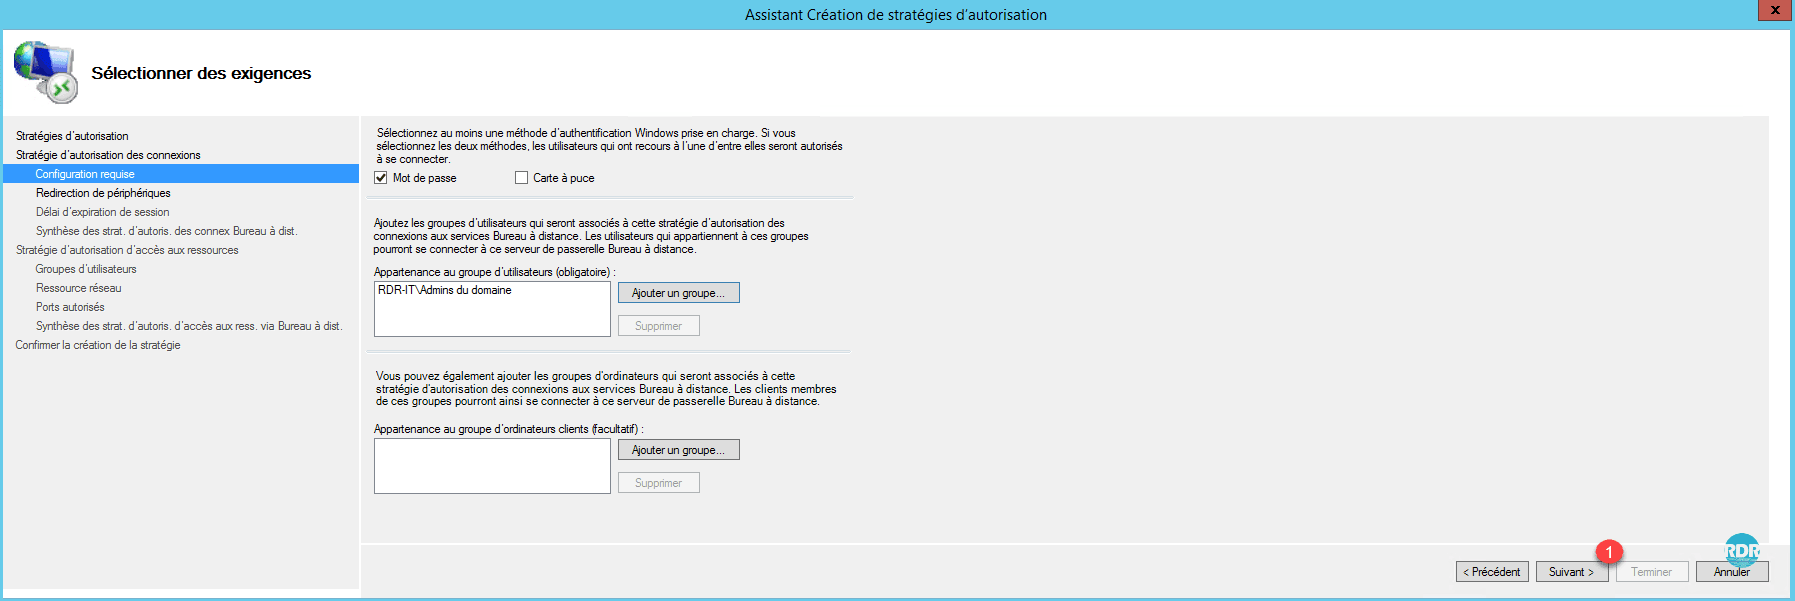
3. Give a name of 1 for the connection authorization policy and click Next 2 .
4. Click Add 1 for one group settings.
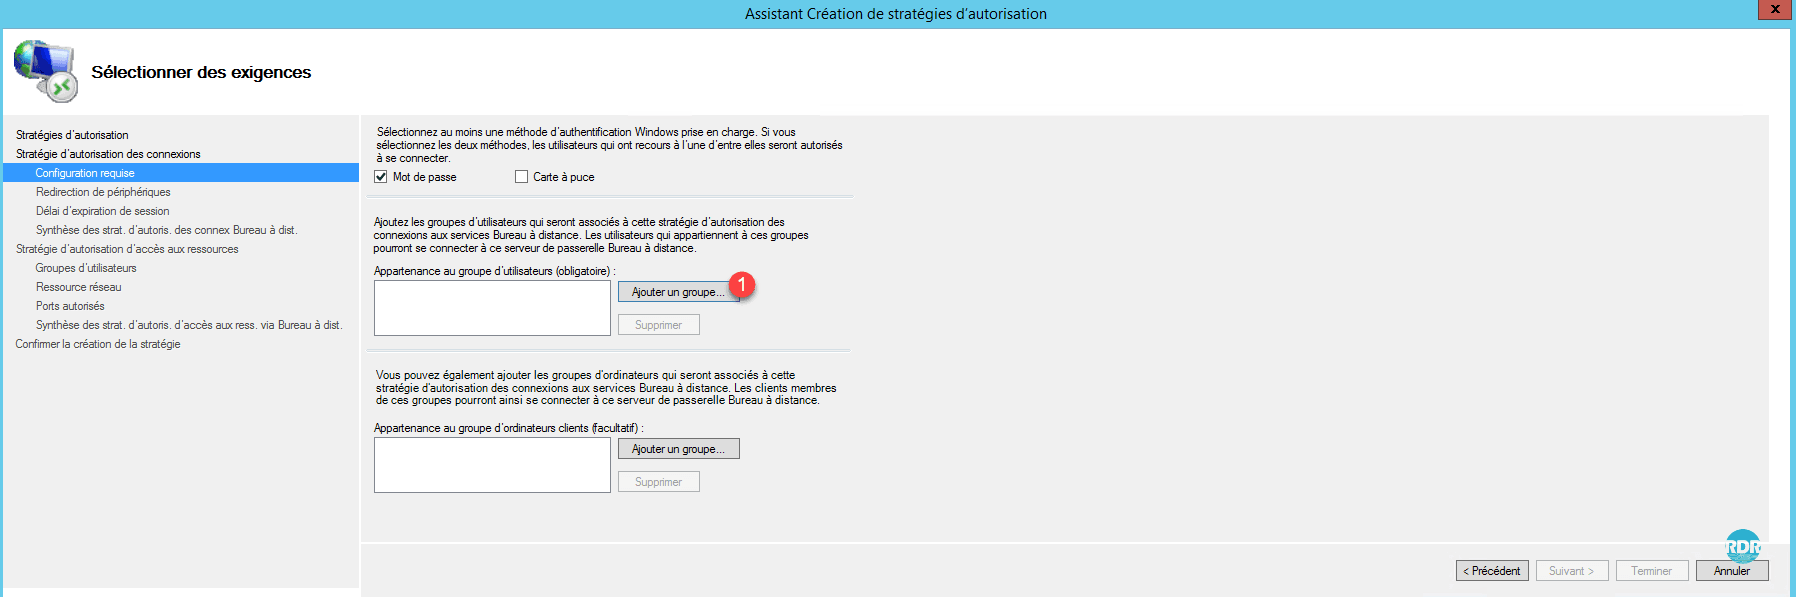
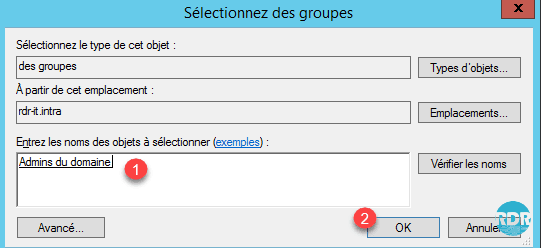
5. Select the Domain Admins group 1 and click OK 2 .
6. To increase the security level, it is possible to add a computer group. Click Next 1 .
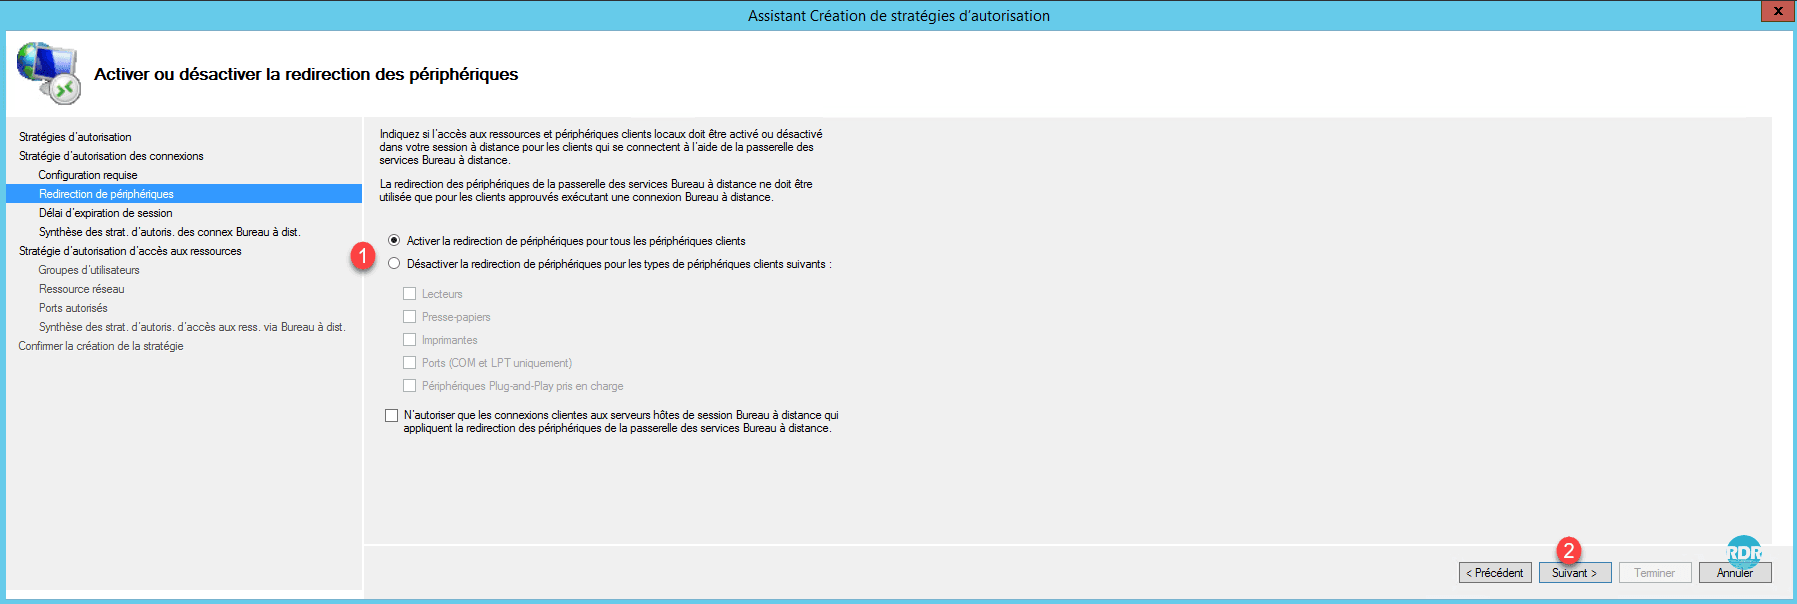
7. Enable or disable Device Redirection 1 and click Next 2 .
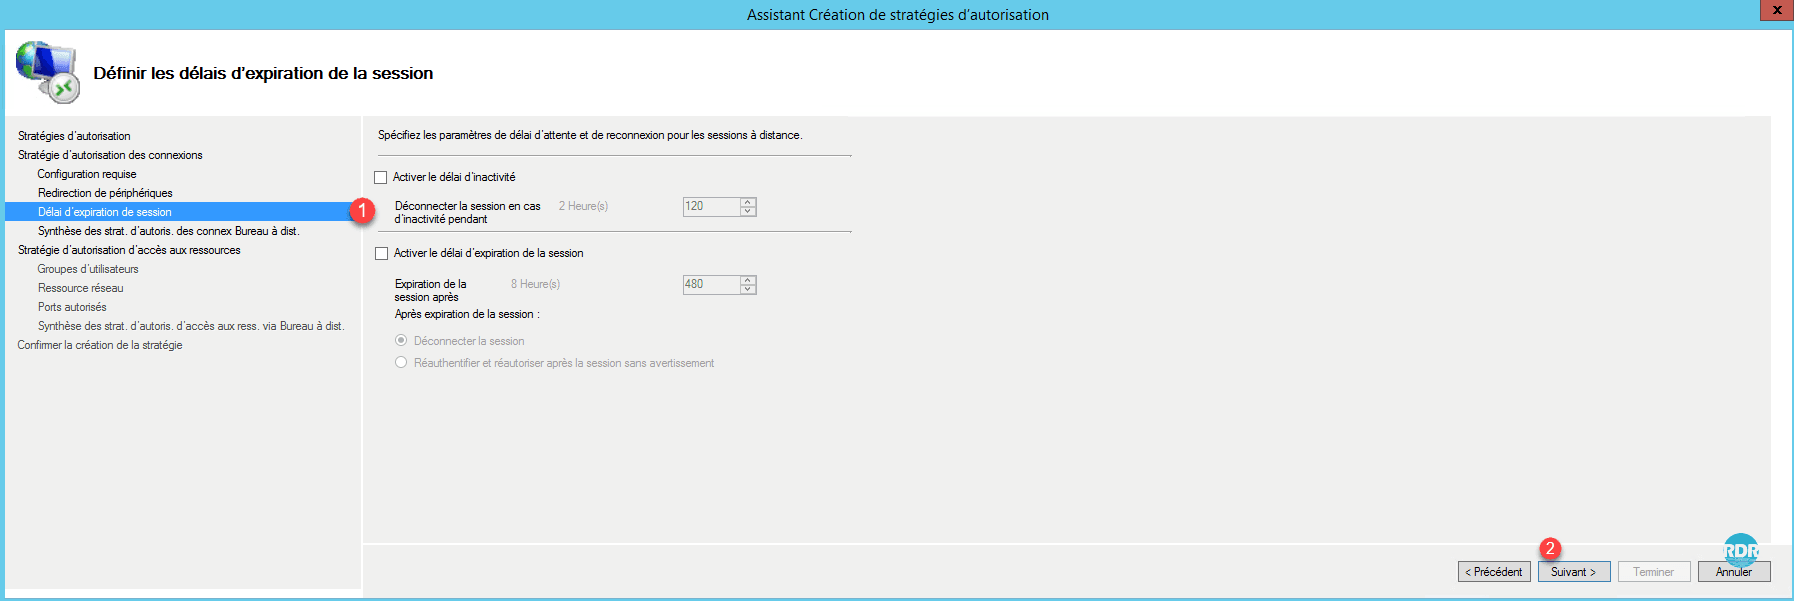
8. Set session times 1 and click Next 2 .
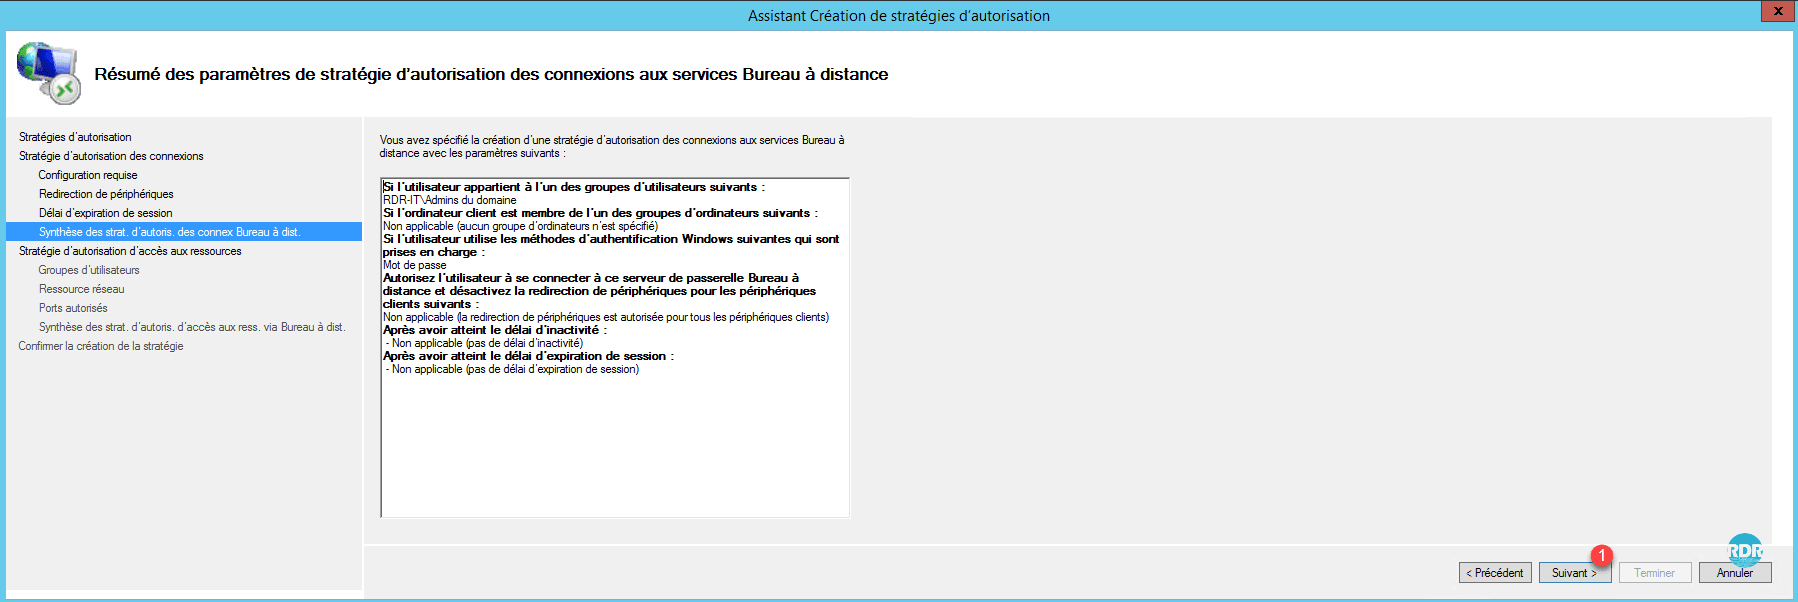
9. A summary of the strategy is displayed, click Next 1 to move to the resource access strategy.
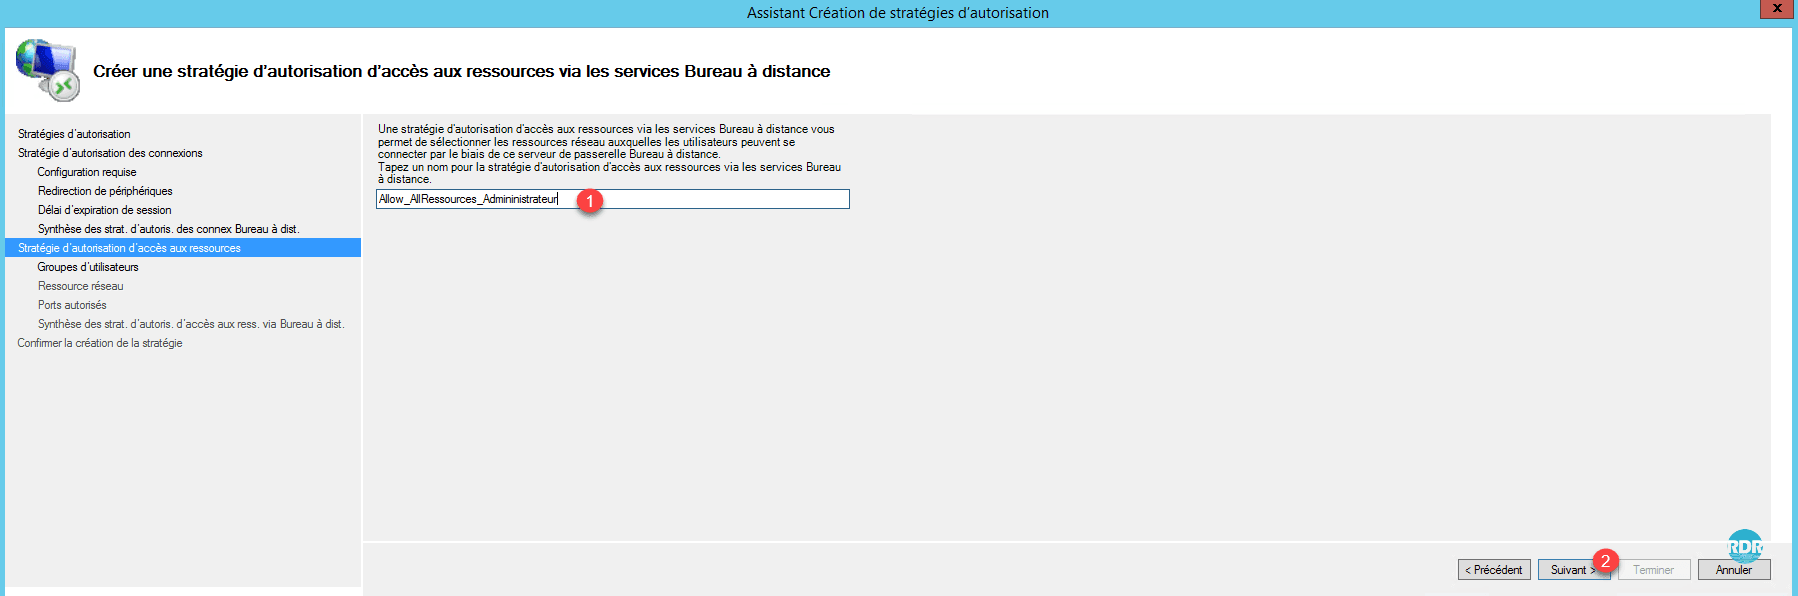
10. Name strategy 1 and click Next 2 .
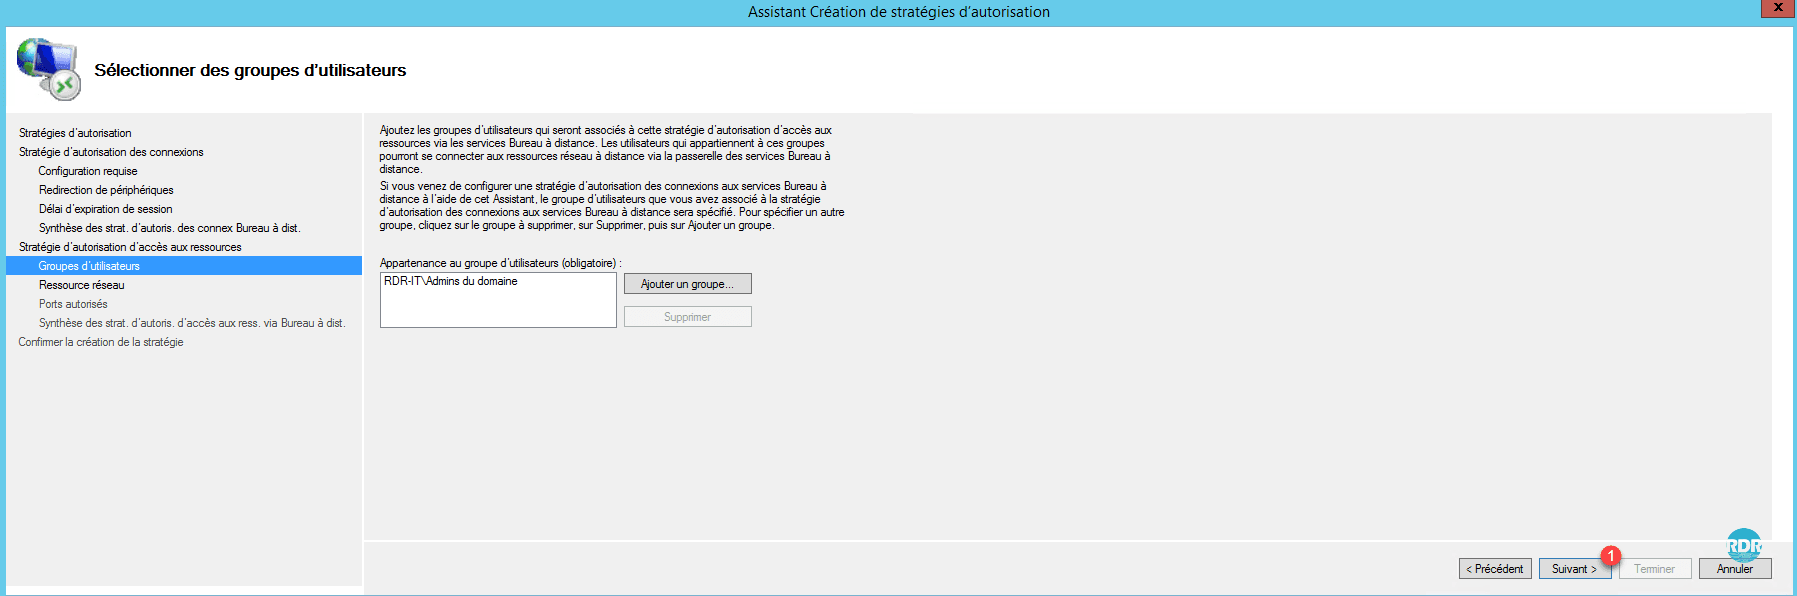
11. The home group is already defined, click Next 1 .
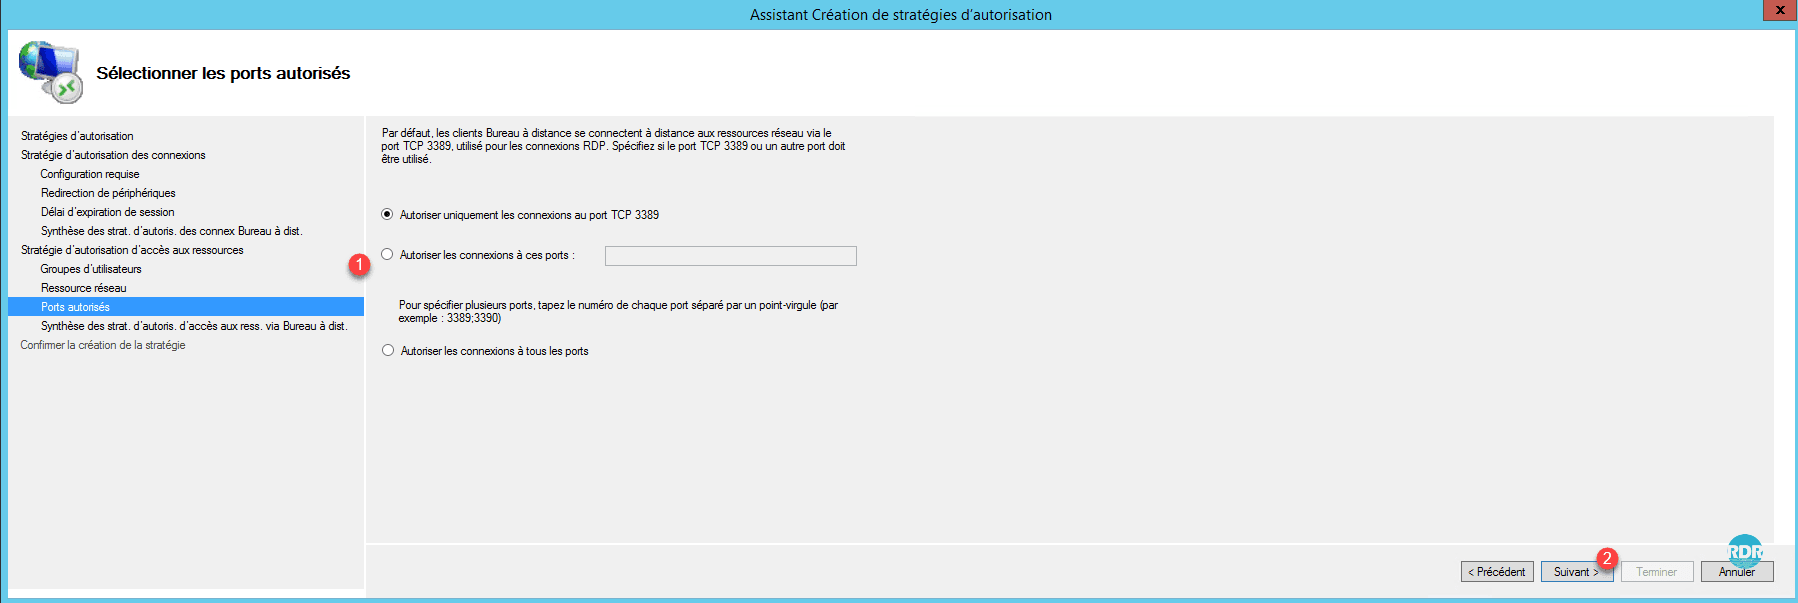
12. Select the Allow users to connect to any network resource (computer) 1 option and click Next 2 .

13. Depending on the ports used adjust the parameters 1 and click Next 2 .
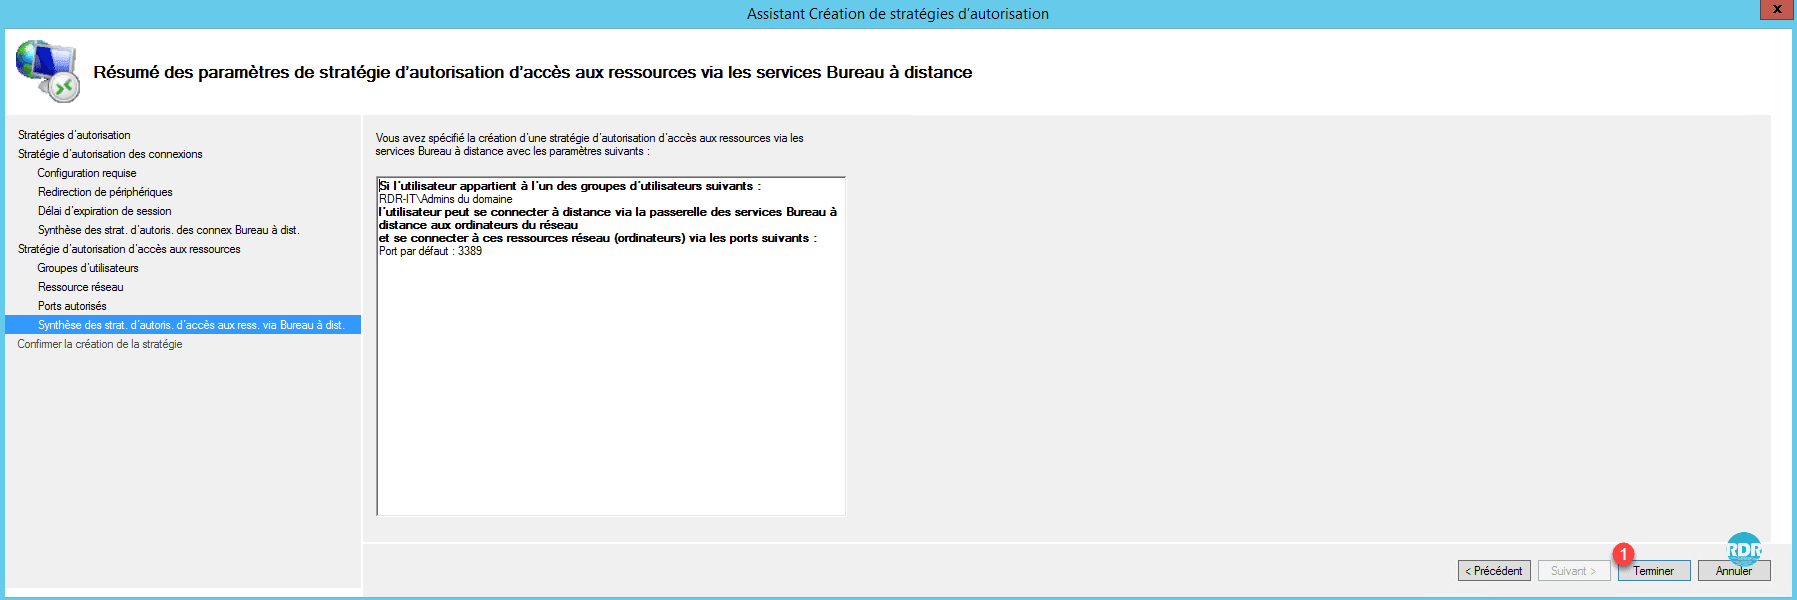
14. A summary of the strategy is displayed, click Finish 1 .
15. Strategies are created, click Close 1 .

16. Go to the folder containing the connection authorization strategies 1 and select the new strategy 2 .
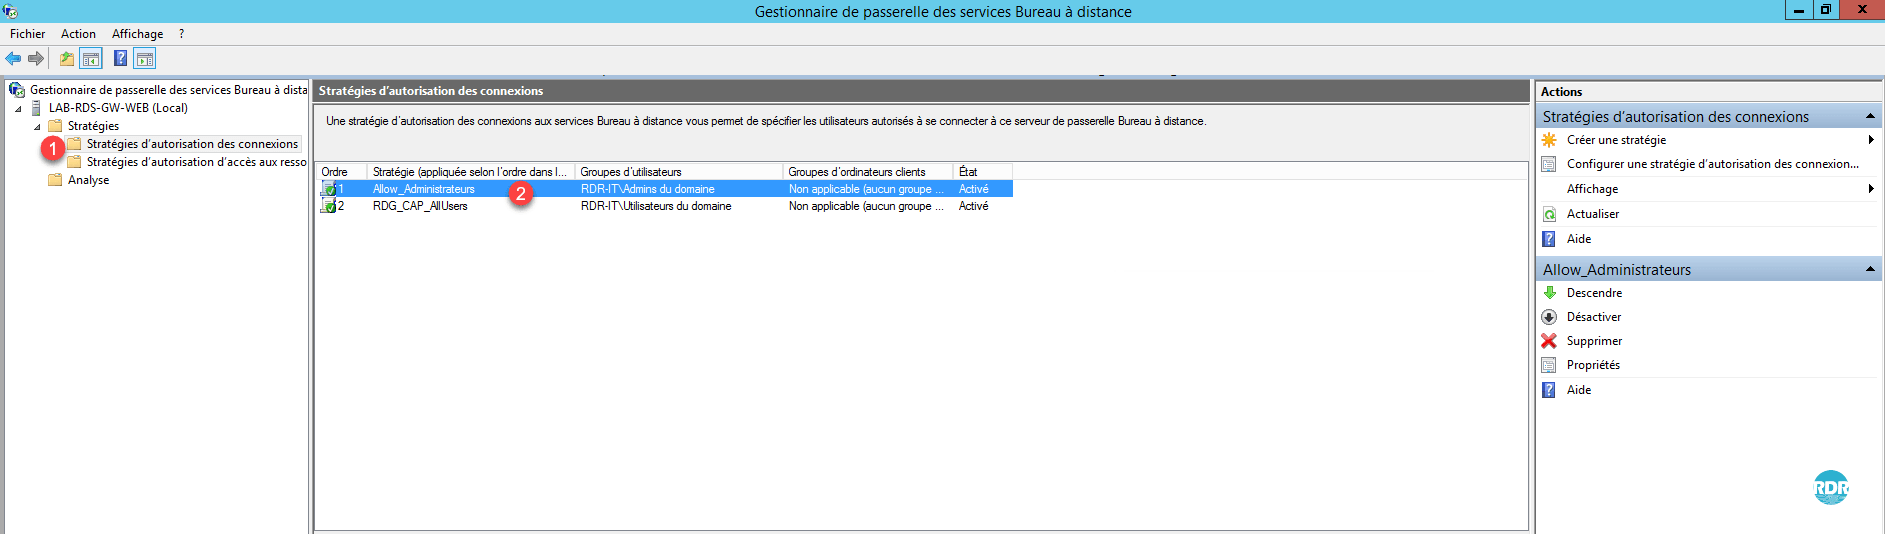
Connection policies are read as the rules of a firewall from top to bottom (Order). By selecting a strategy, it is possible to modify its order by the Actions menu on the right of the console.
We are done with the Remote Desktop Gateway role. We will now see the Remote Desktop Services License Manager.
Remote Desktop Services License Manager
The license manager allows users or devices that connect to the RDS farm to issue an access license (CAL).
Only one licensing mode for the RDS farm can be configured: users or devices. A license server can distribute several types of licenses and different versions (2008/2012 …).
Installation
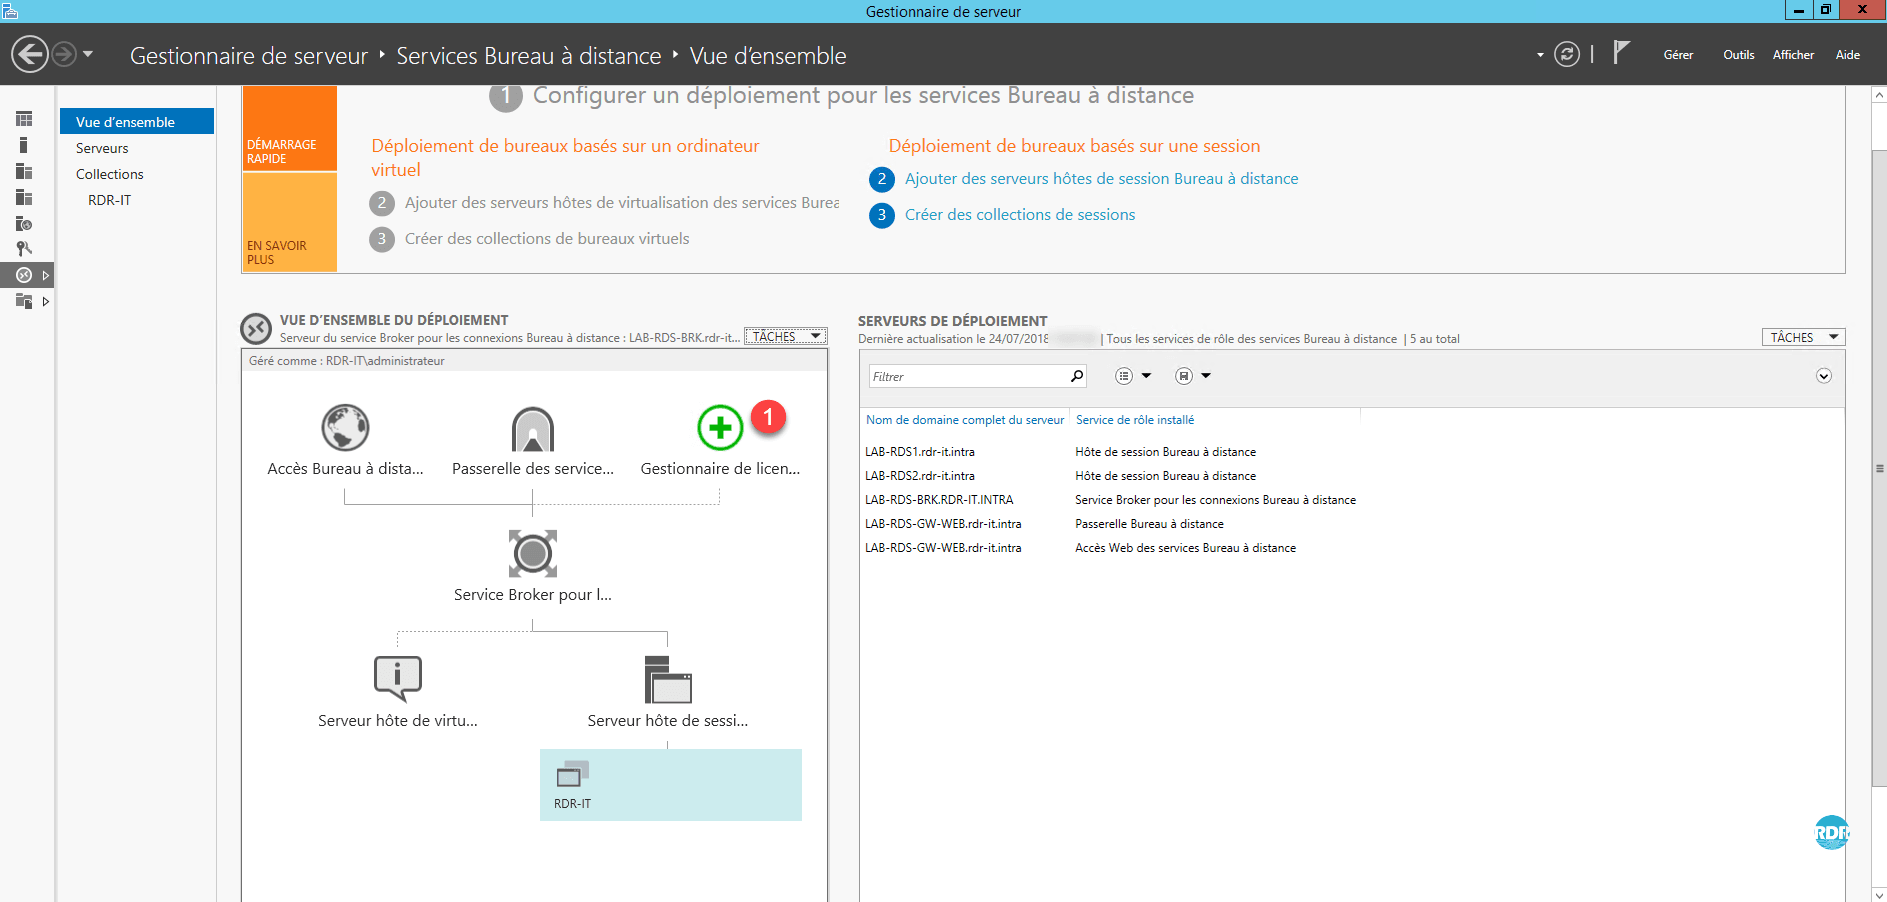
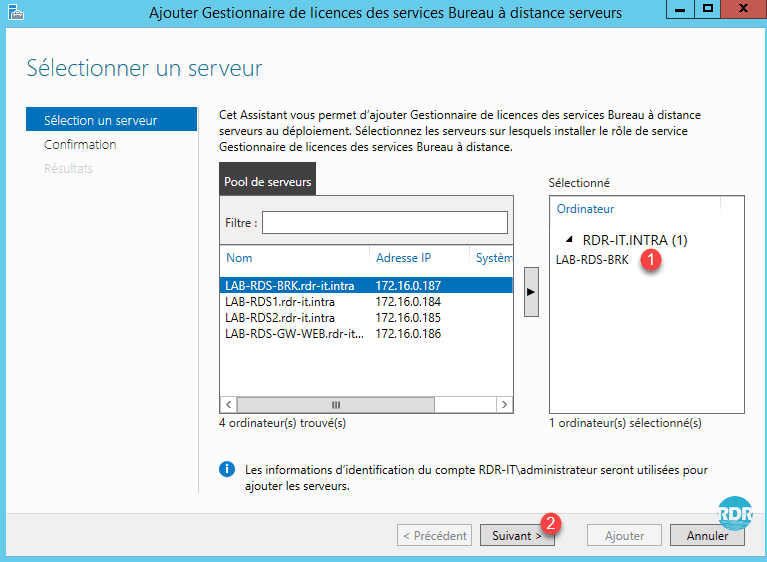
1. From Server Manager, on the RDS farm overview, click License Manager 1 to open the wizard.
2. Add the server that will receive 1 role and click Next 2 .
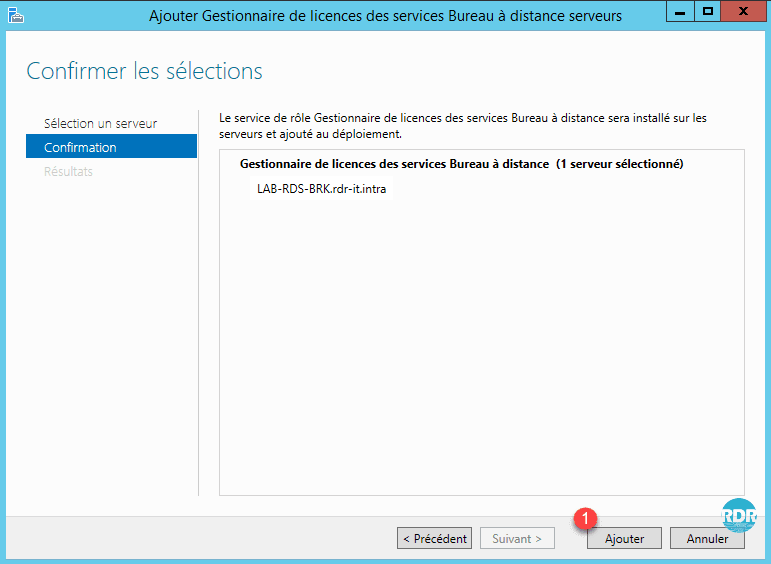
3. Click Add 1 to start the installation.
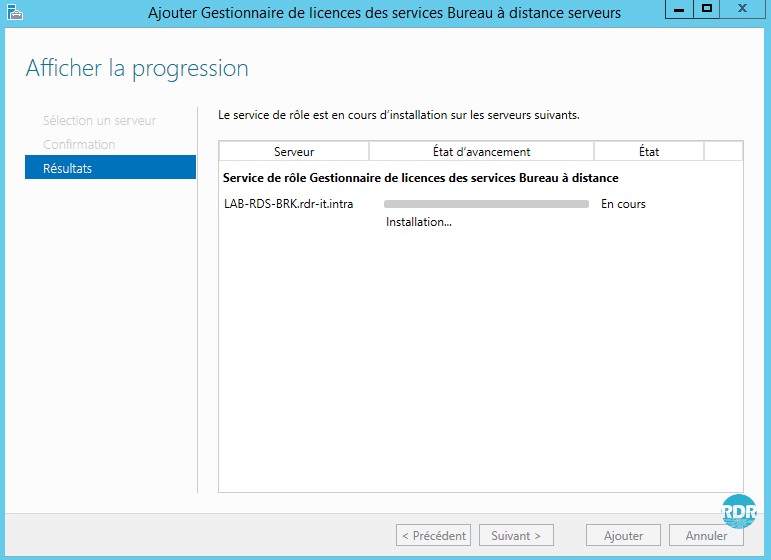
4. Wait during the installation …
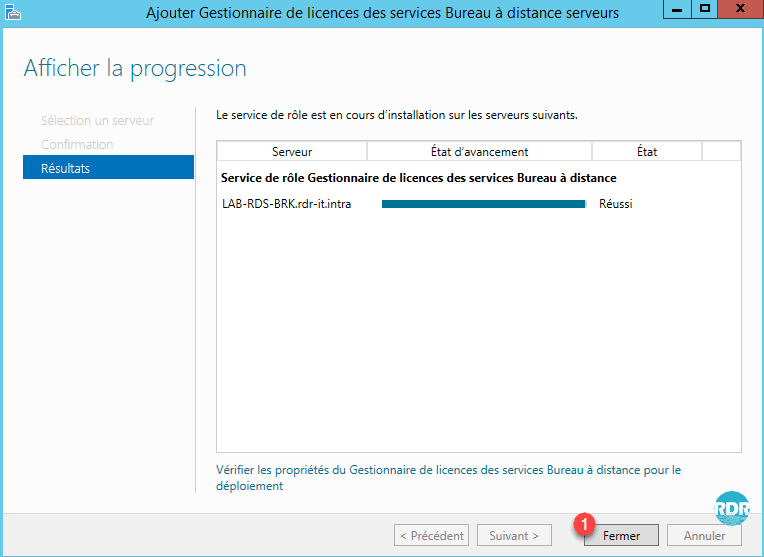
5. The installation is complete, click Close 1 to exit the wizard.
The rollout of RDS farm roles is complete. It is possible to view the location of the roles from the DEPLOYMENT SERVERS insert.
Configuring the Remote Desktop Services Licensing Mode
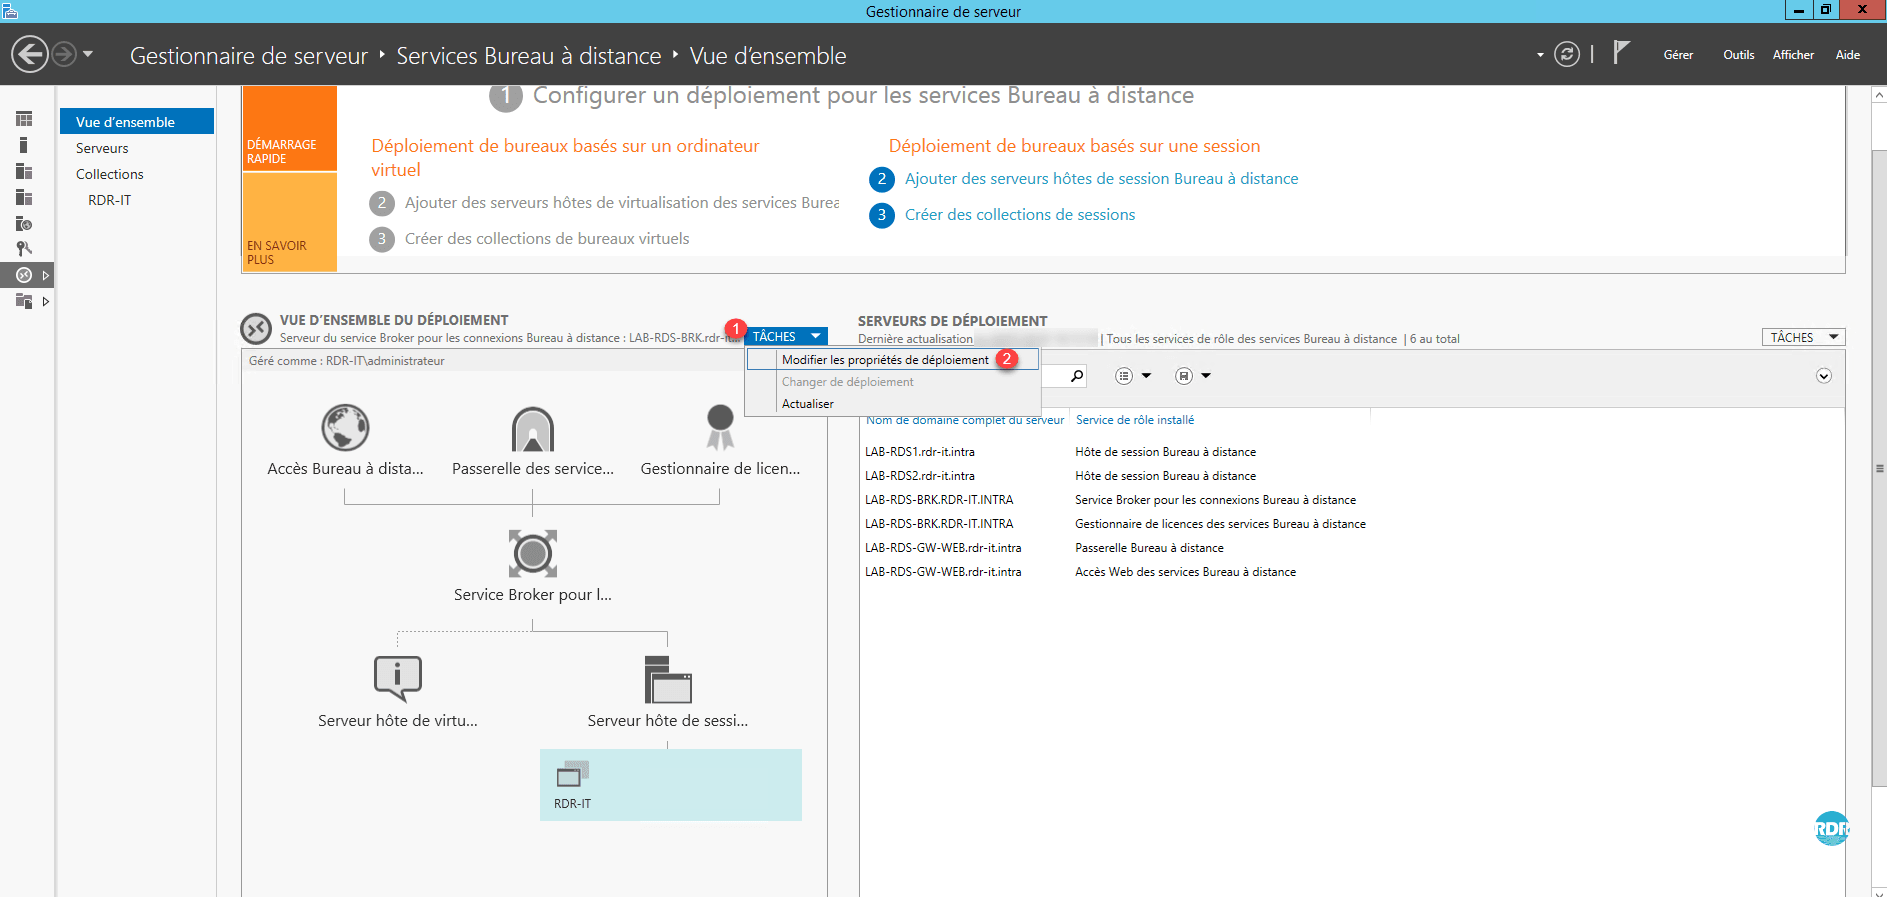
1. From the overview, deployment, click on TASKS 1 / Change Deployment Properties 2 .
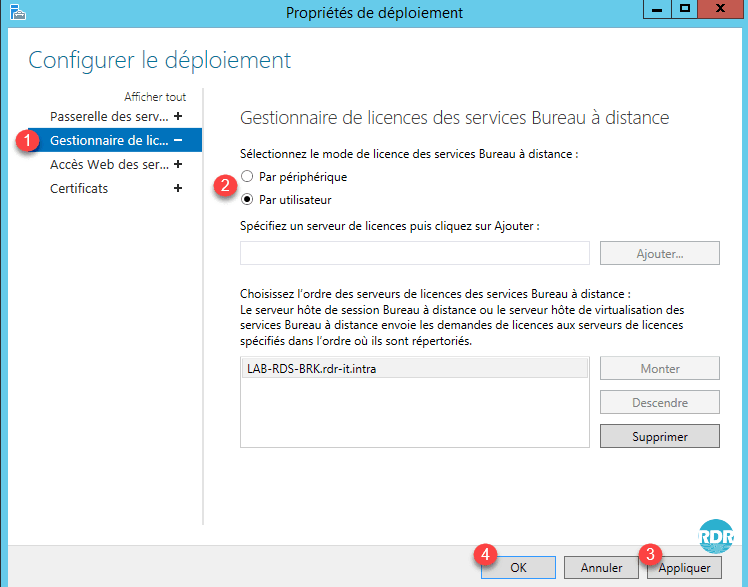
2. Go to the section License Manager 1 , select the license mode 2 then click on Apply 3 and OK 4 .
Add licenses
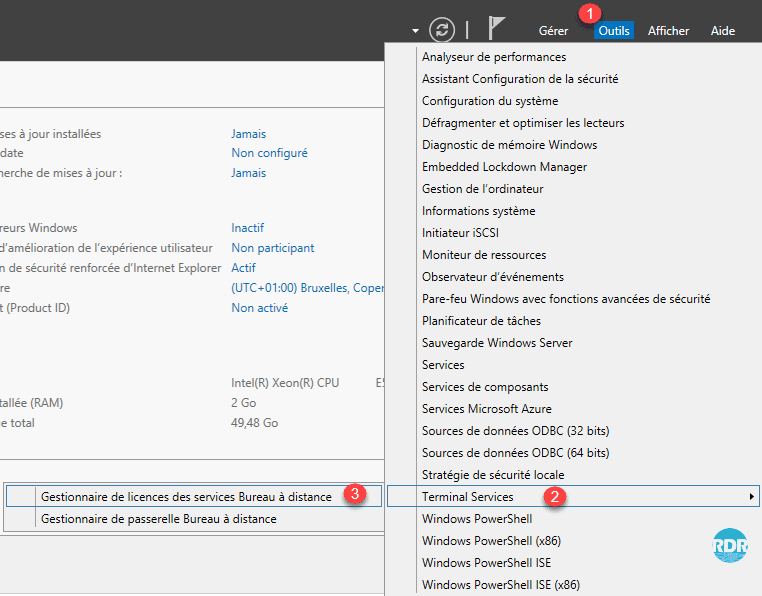
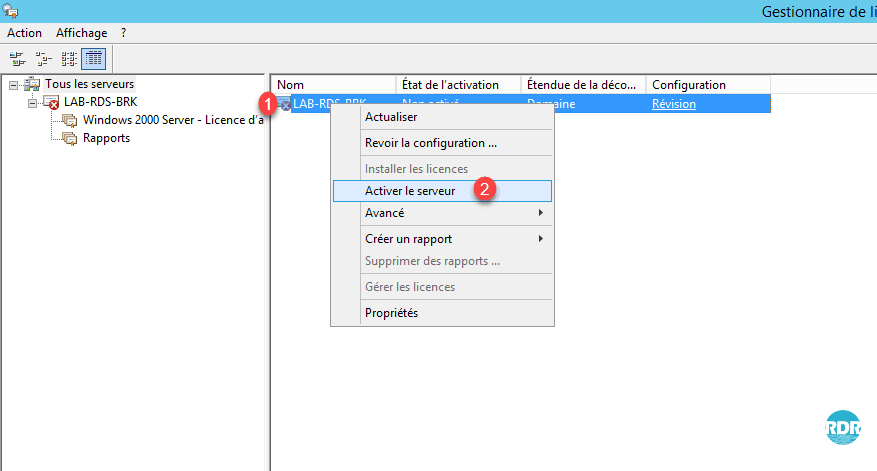
1. Open the console, from Server Manager, click Tools 1 / Terminal Services 2 / Remote Desktop Licensing Manager 3 .
2. Before adding licenses, activate the server, right click on 1 and click Activate server 2 .
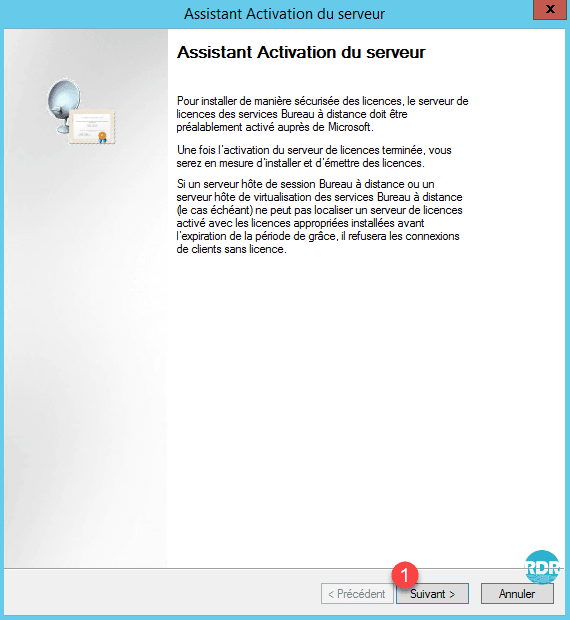
3. When launching the activation wizard, click Next 1 .
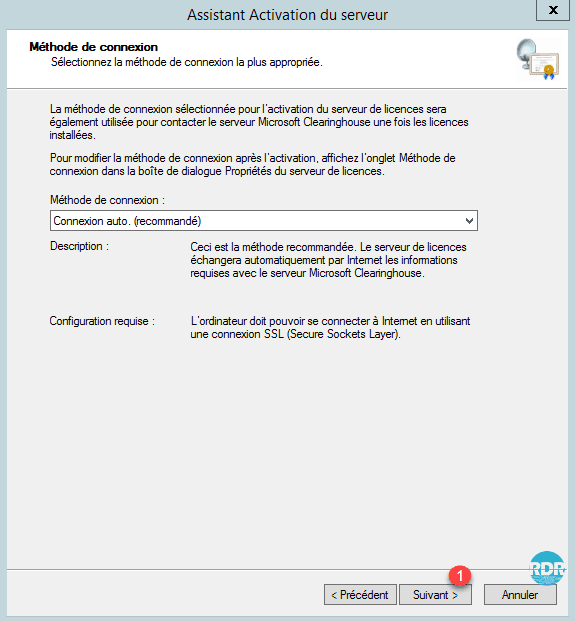
4. Leave the World of Auto Connect. Click Next 1 .
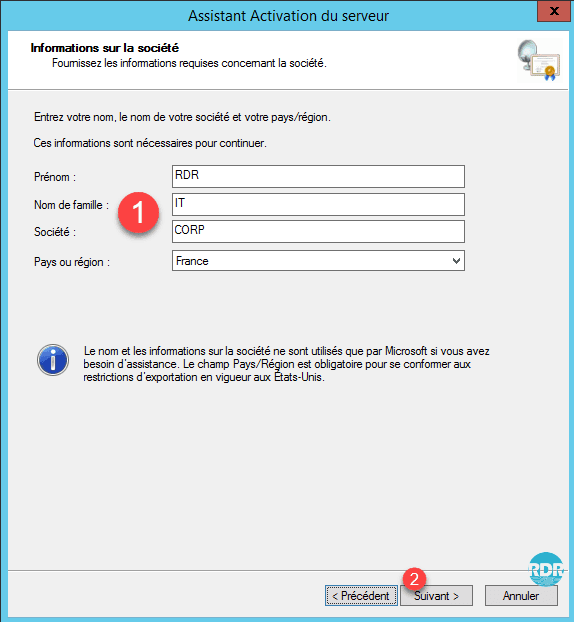
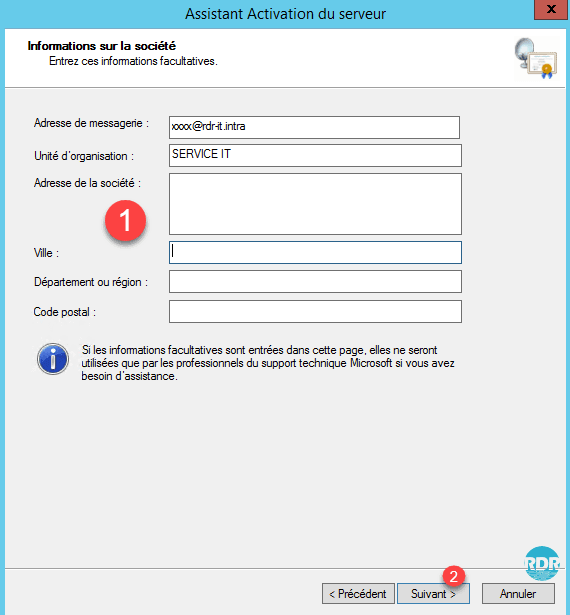
5. Enter Company Information 1 and click Next 2 .
6. Enter contact information (optional) 1 and click Next 2 .
7. The server is activated, click Next 1 , the add license wizard will launch.
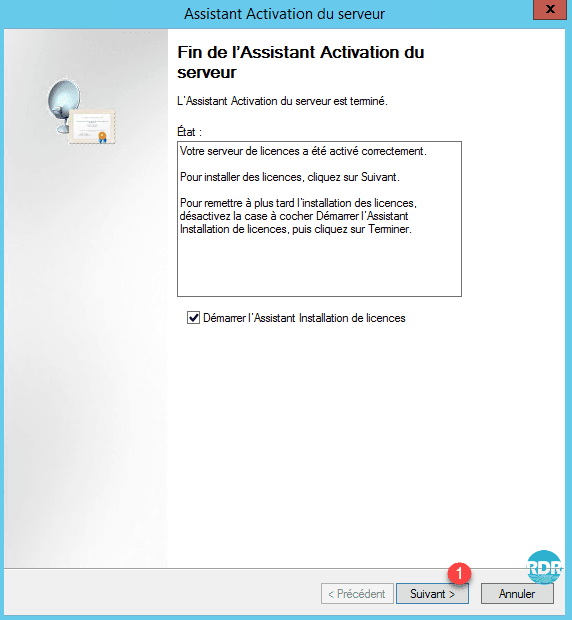
If you want to install licenses later, you have to right-click on the server from the console and click Install licenses.
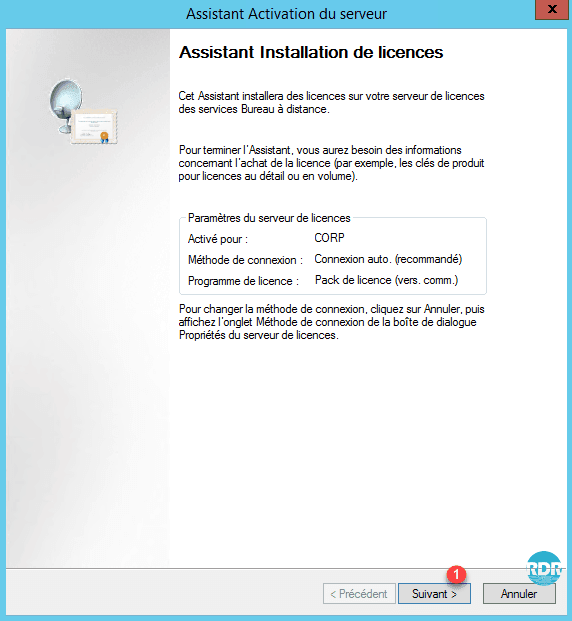
8. When launching the new wizard, click Next 1 .
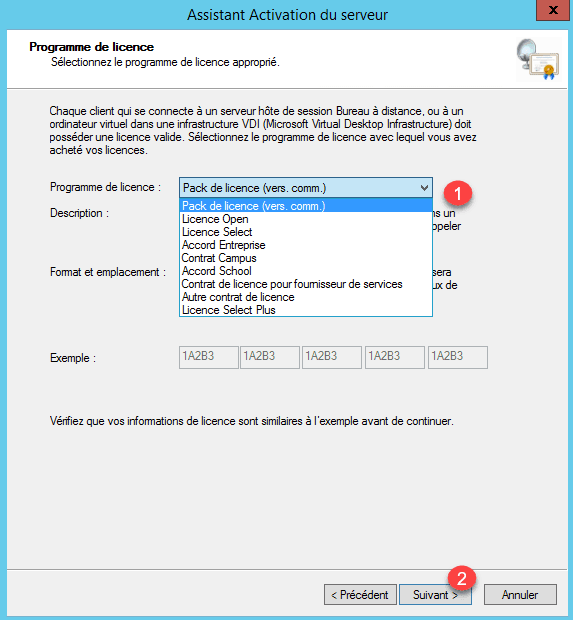
9. Select license type 1 and click Next 2 .
10. Enter the license information 1 and click Next 2 .
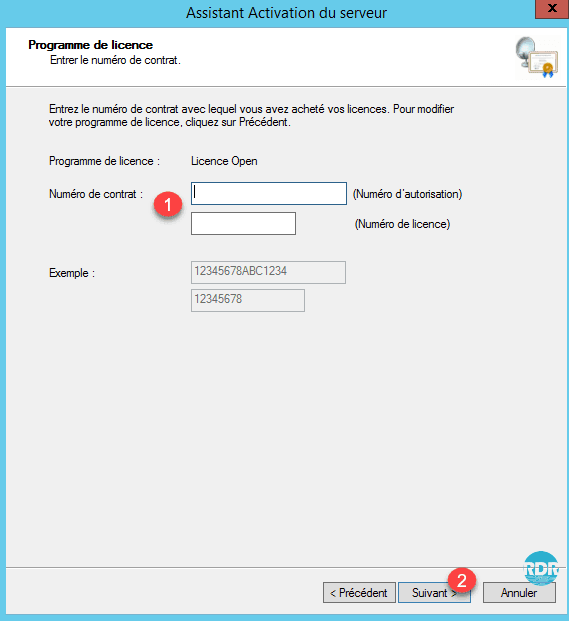
11. Select product version 1 and quantity 2 then click Next 3 .

12. Click Finish 1 to close the wizard.
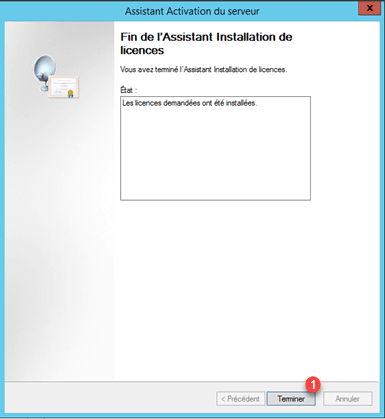
13. The licenses are visible 1 on the server.

Since the license manager, it is possible to make reports to have a license status.
The RDS farm is configured and functional, we will see the client part.
Using the RDS Farm – Client
In this part, we will see how to operate the RDS farm with a client.
During the different steps, you will have several times the following messages which will not be detailed each time:
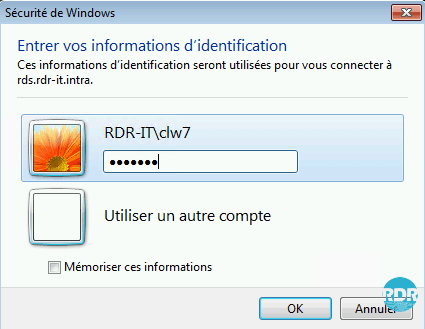
Identification : enter username and password of an authorized account to connect to the RDS collection.
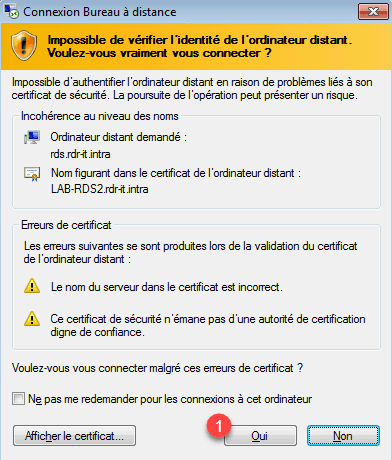
Security alert on certificates : click on Yes to pass the alert with the possibility of checking the box to no longer have the request. During a connection it is possible to have several times the message in case of switching from one host to another by the broker.
Beforehand, the Gateway certificate has been installed on the test client computer. Here you will find a tutorial for deploying a certificate using a GPO.
To install the certificate manually on a computer, once it has been exported, paste it on the client machine, double-click on it to launch the installation wizard and place it in the Trusted Root Certification Authority store on computer.
Remote desktop connection through the web portal
This solution is the preferred method, we will go to the web portal to download the RDP file which allows us to connect to the server collection.
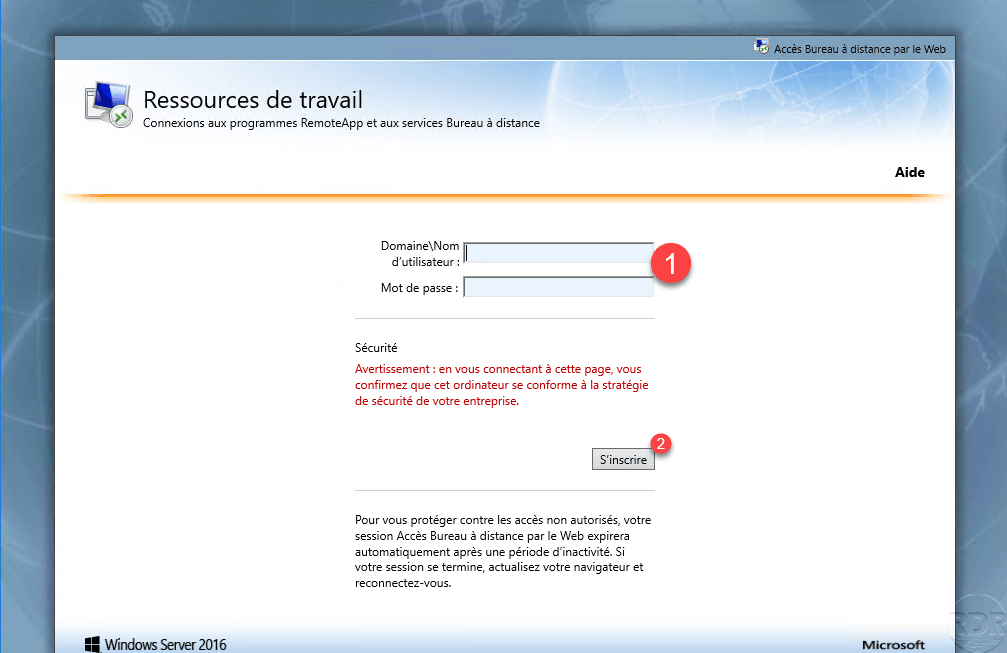
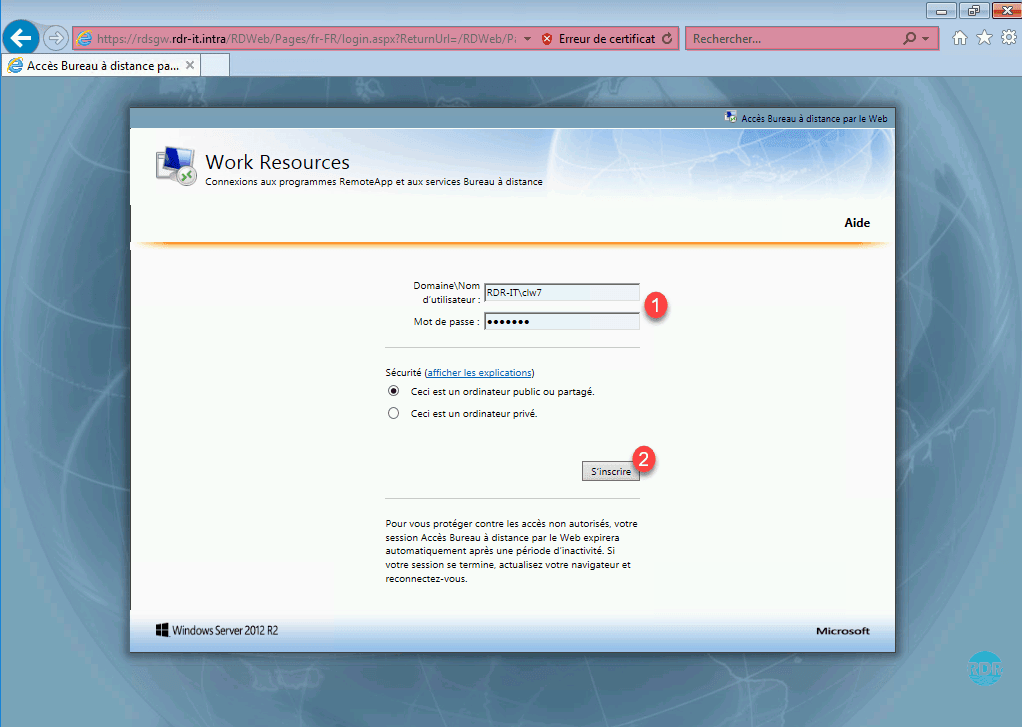
From a computer, open an Internet browser and enter the URL for web access (https: //name-fqdn.dom/rdweb). On the portal enter the identification information (user / password) 1 of an account authorized to connect and click on Register 2.
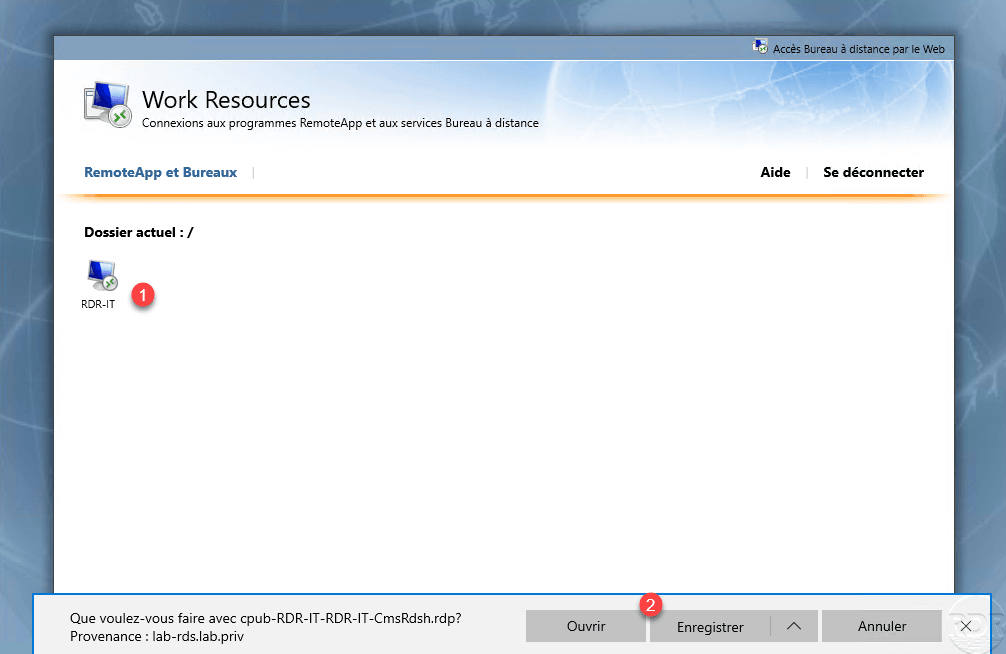
Click on the icon which represents the remote desktop 1 then, depending on the Internet browser used, Open or Save the file 2. (If the file is saved, run it).
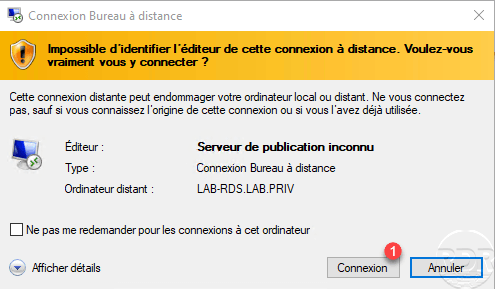
A warning message is displayed, click on Connection 1.
Enter the login credentials of a user authorized to connect and validate the security alert messages for the certificates.
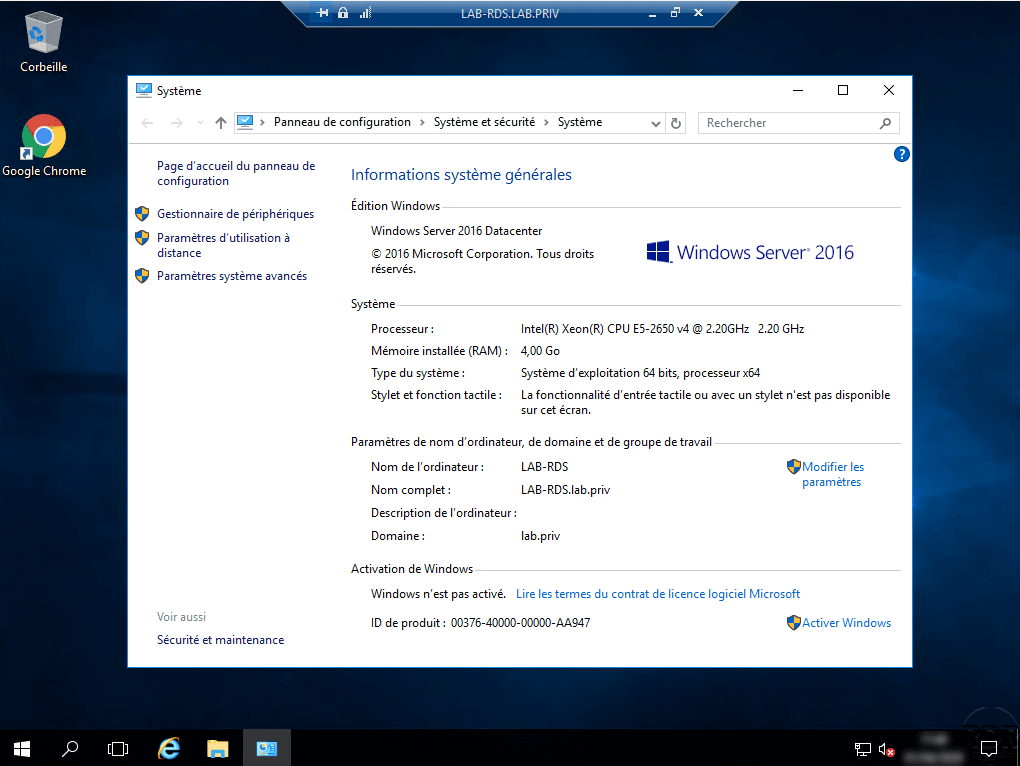
Wait while logging in …
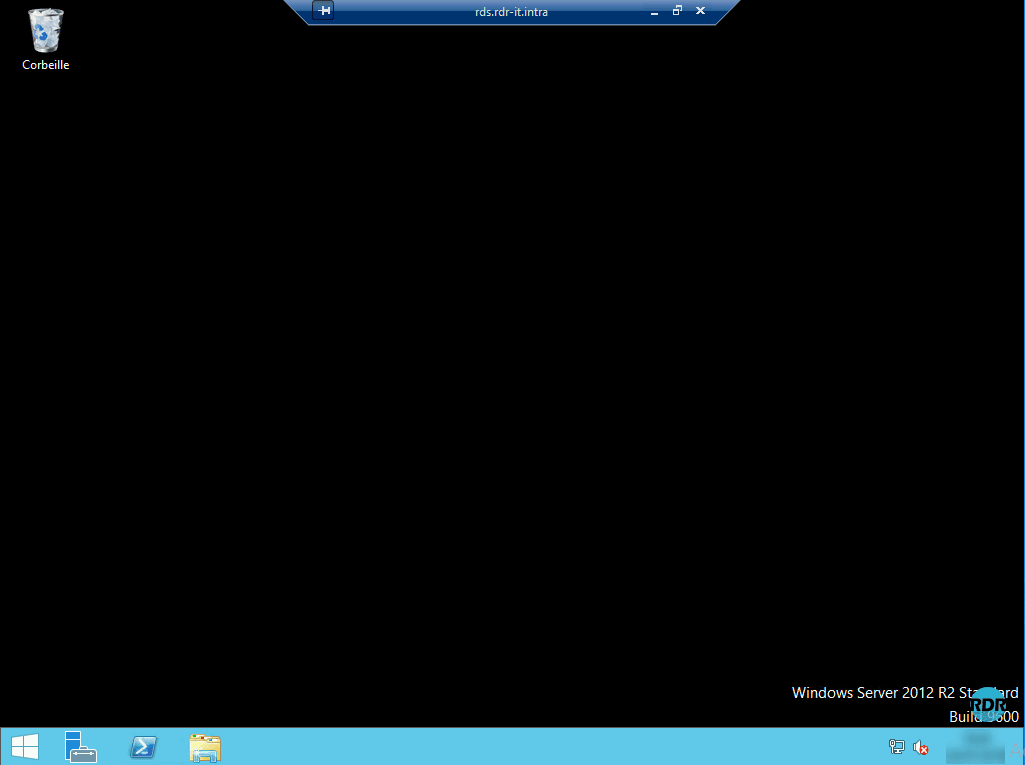
The session is opened on the server.
It is quite possible to download the RDP file, rename it and use it without having to go through the RdWeb portal. The file can be deployed to other computers using a GPO.
Connection by the RDC client of Windows
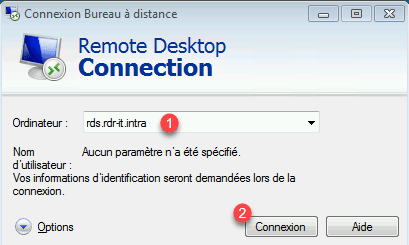
1. Start the client, enter the RDS Firm Alias 1 and click on Connection 2 .
2. Enter your password and validate the certificate requests.
3. The session is open on the collection’s host server.
Connecting the RDC Windows Client with the Gateway
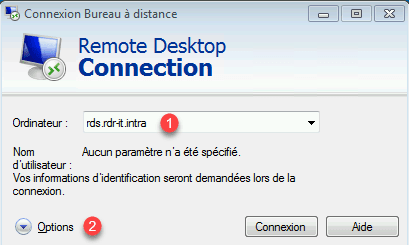
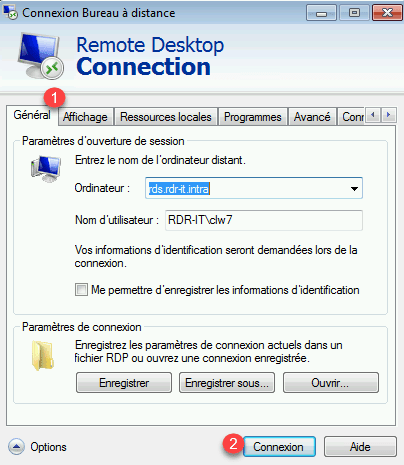
1. Start the client, enter the alias of the farm RDS 1 and click Options 2 .
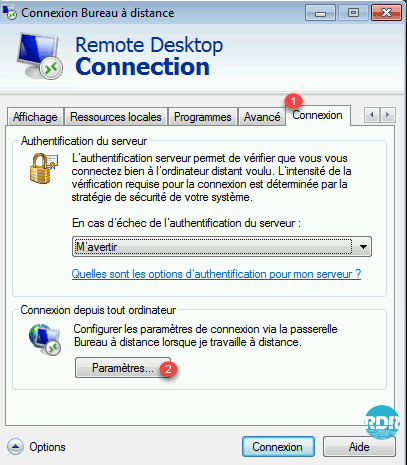
2. Go to the Connection tab 1 (if it is not visible click on the arrows) and click on Settings … 2 .
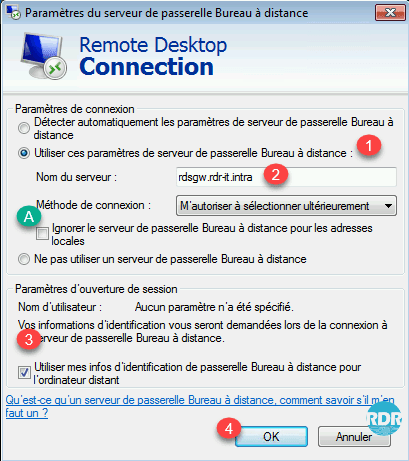
3. Check Use these remote desktop gateway server settings 1 , enter the url defined for the gateway 2 , A to force the passage through the gateway uncheck the box . Check box 3 Use my Remote Desktop Gateway ID info for the remote computer and click OK 4 .
4. Retourner sur l’onglet Général 1 et cliquer sur Connexion 2.
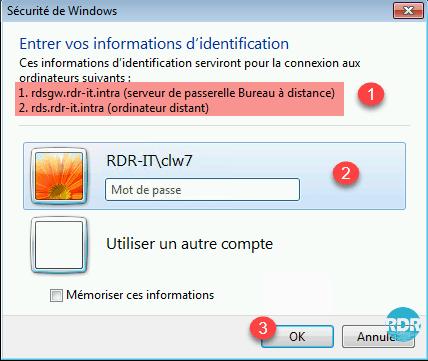
5. On the password request window, we see servers 1 where the user will be identified. Enter the identifiers 2 and click OK 3 .
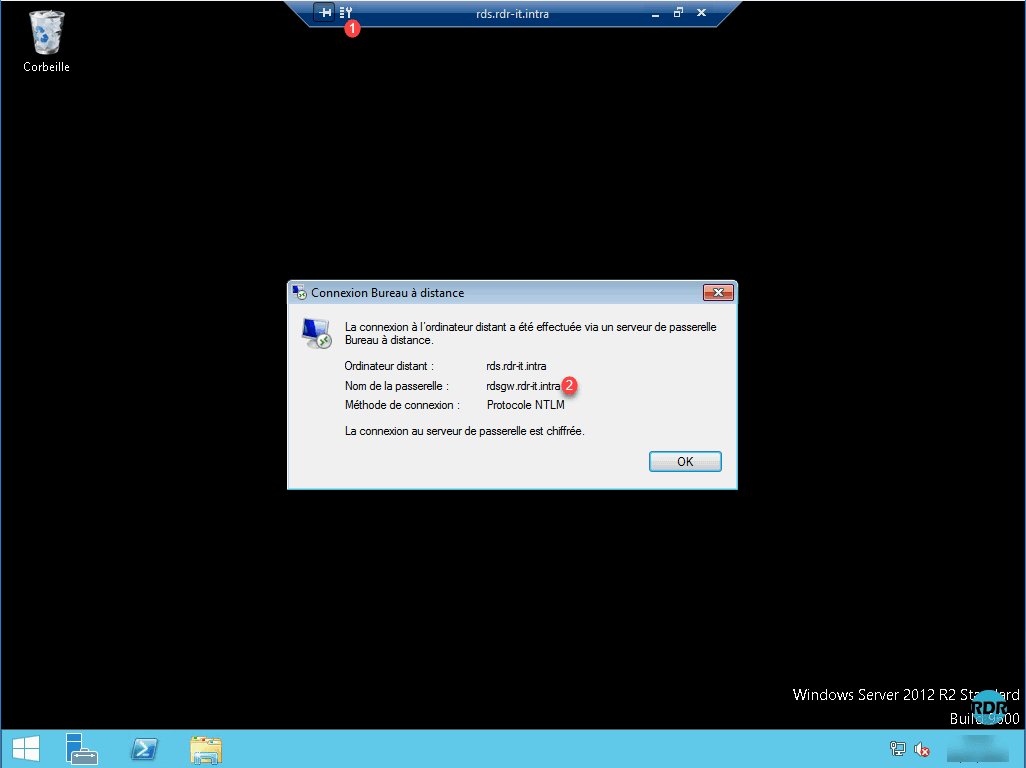
6. Once connected to the server, click on the key 1 and it is possible to check the passage through the gateway 2 .
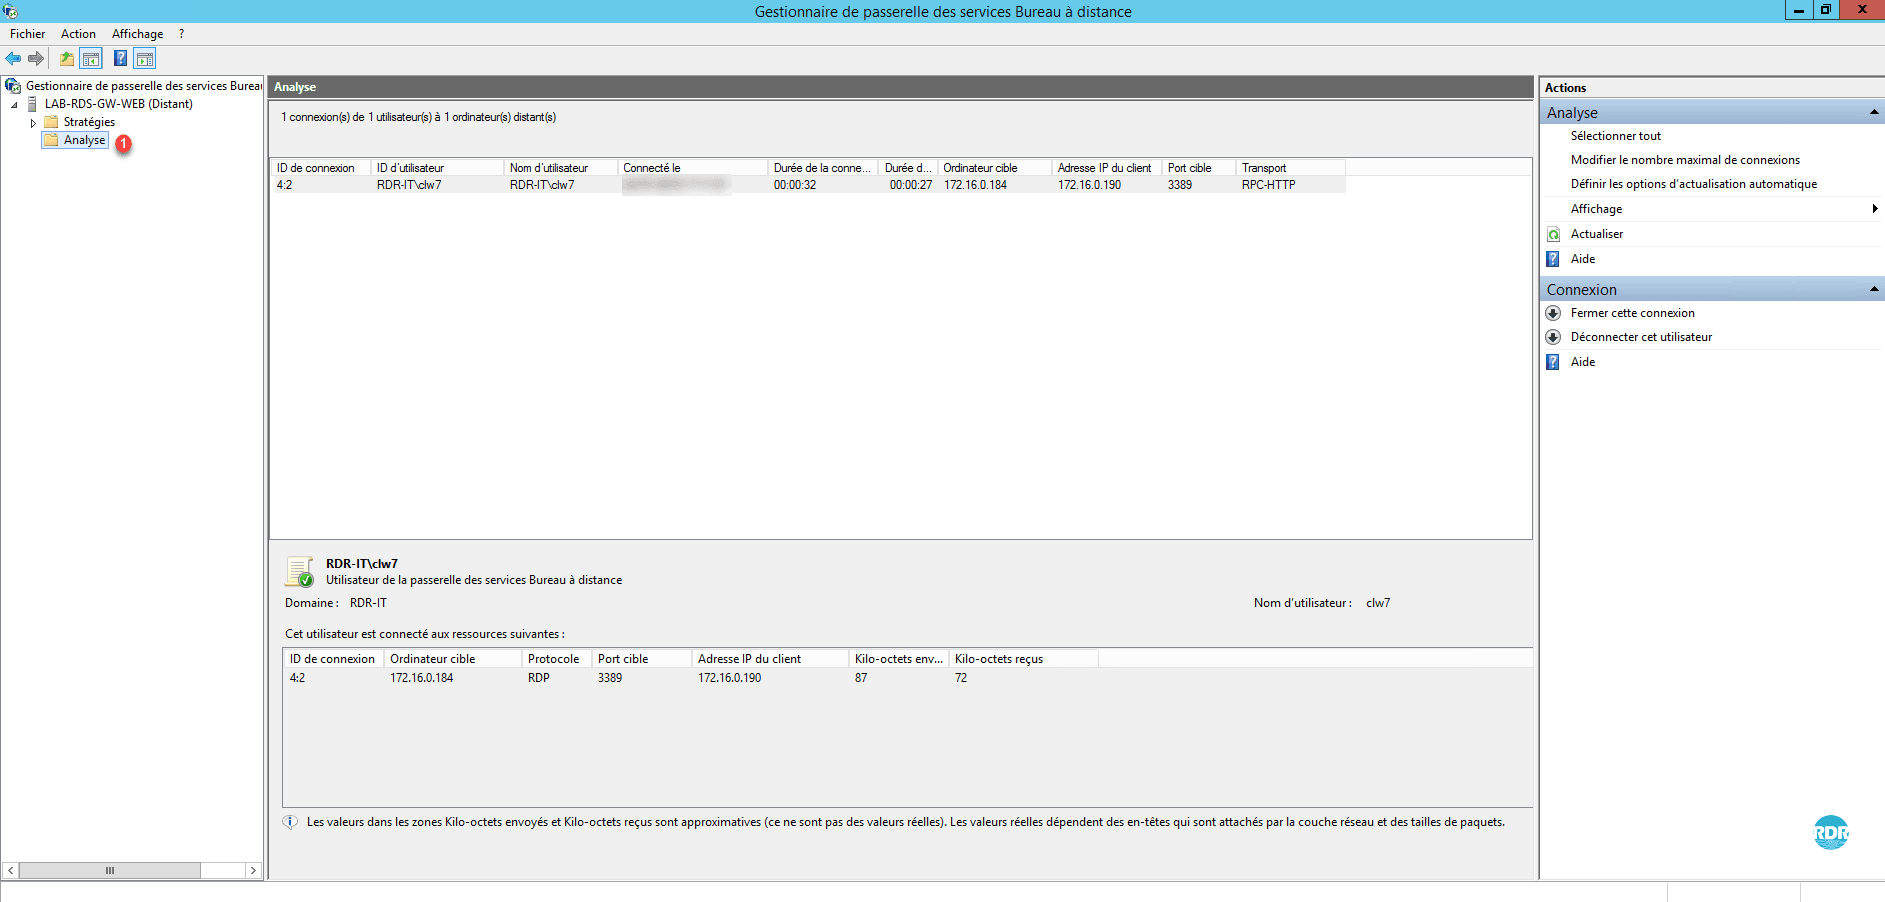
7. Return the broker server and open the administration console of the gateway, go to the folder Analysis 1 , the connection is visible.
RemoteApp by Web Access
1. From a client workstation, launch an IE preference browser and enter the https: //rdsgw.rdr-it.intra/rdweb url of web access
2. Enter credentials 1 and click Register 2 .
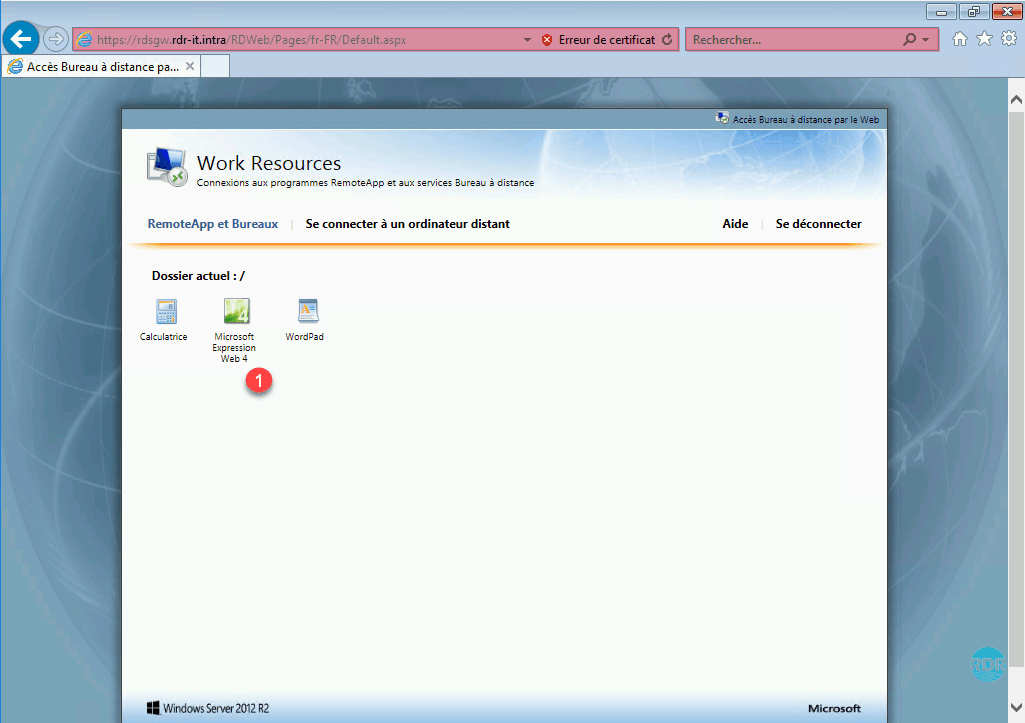
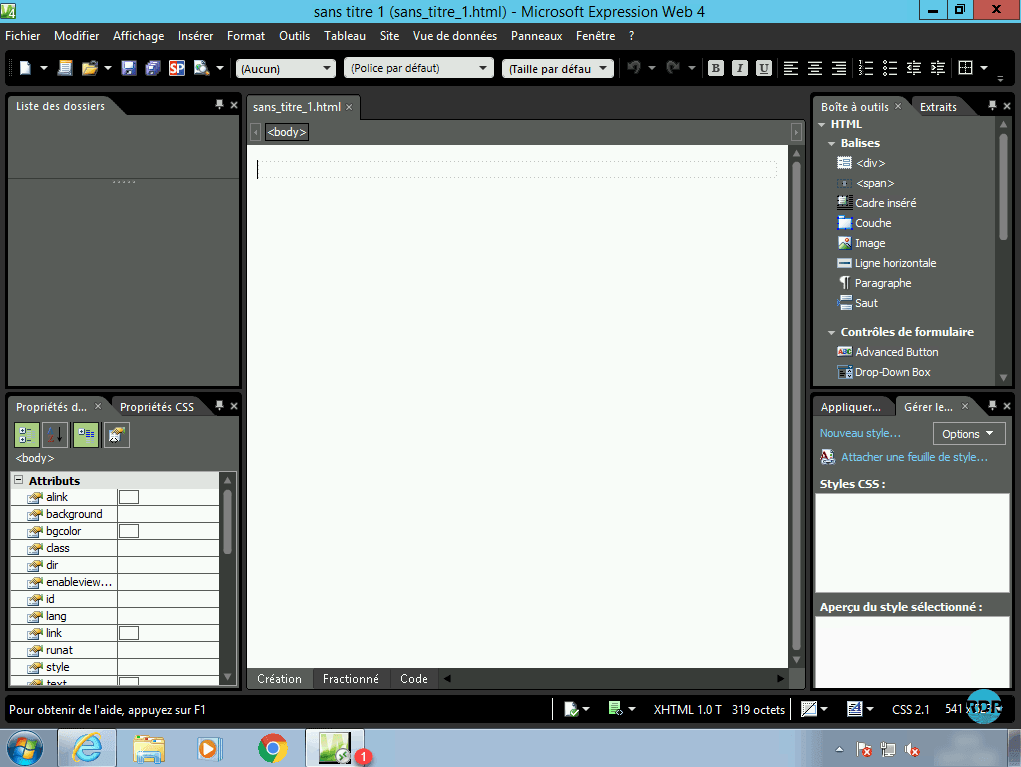
3. Once connected, a page with the available applications will be displayed 1 . Click a program to launch it (Microsoft Expression Web 4).
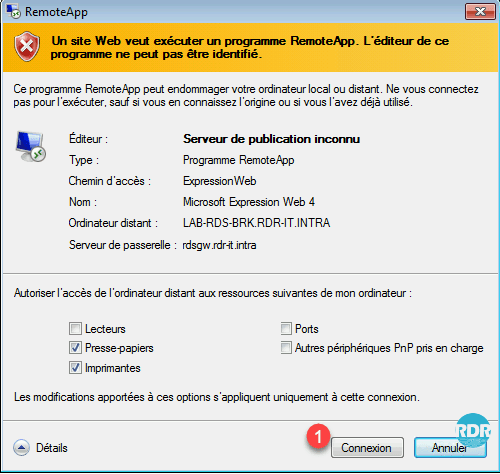
4. A security alert appears and also provides the option to choose redirected devices, click on Connection 1 .
5. Enter your credentials and validate certificate alerts.
6. The application starts with the impression that it is open directly on the computer. The 1 badge on the application visible in the taskbar identifies that it is in RemoteApp.
RemoteApp directly from Windows
It is possible in Windows, parameter access to the RemoteApp as if it is installed on the computer.
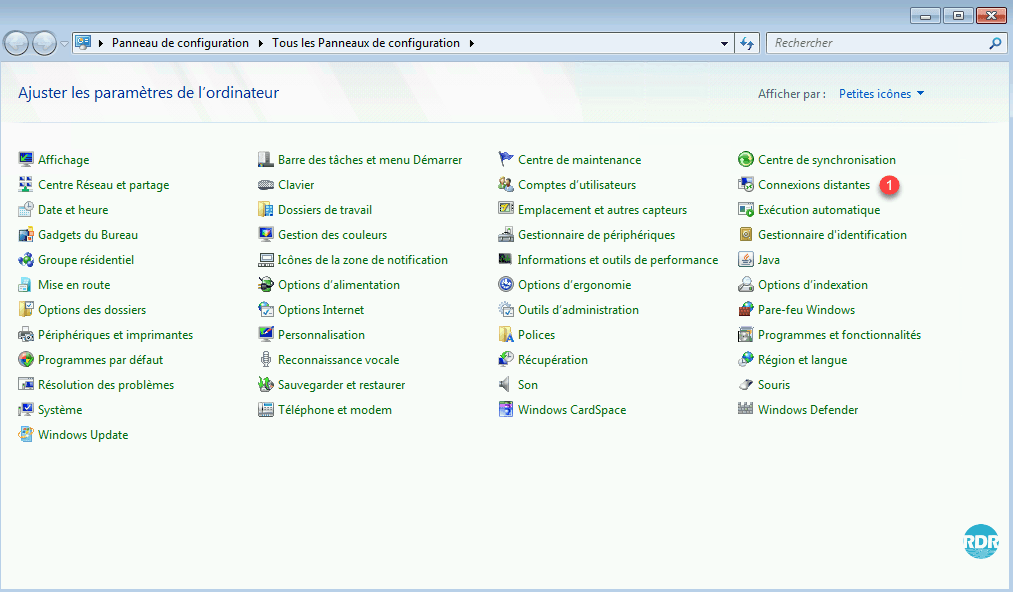
1. On the client open the Control Panel and click Remote Connections 1 or RemoteApp and Remote Desktop Connections depending on the version of Windows.
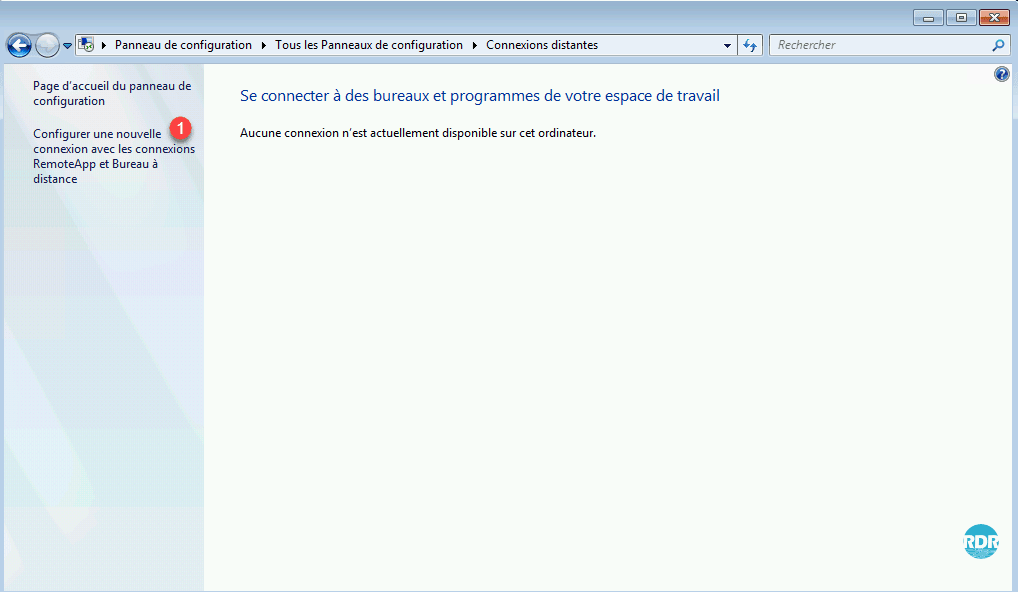
2. Click Configure a new connection with RemoteApp and Remote Desktop Connections 1 .
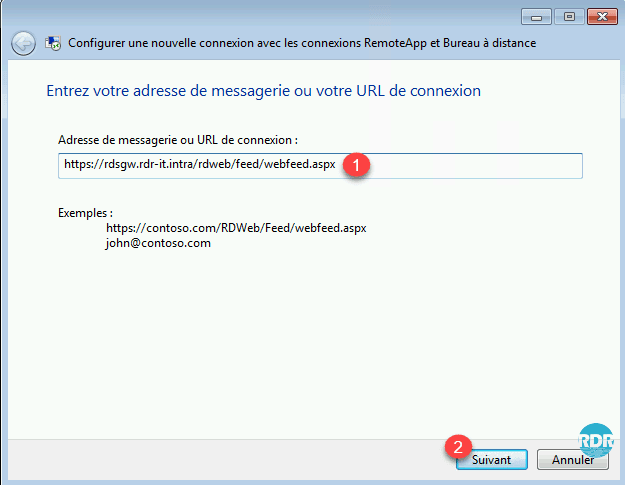
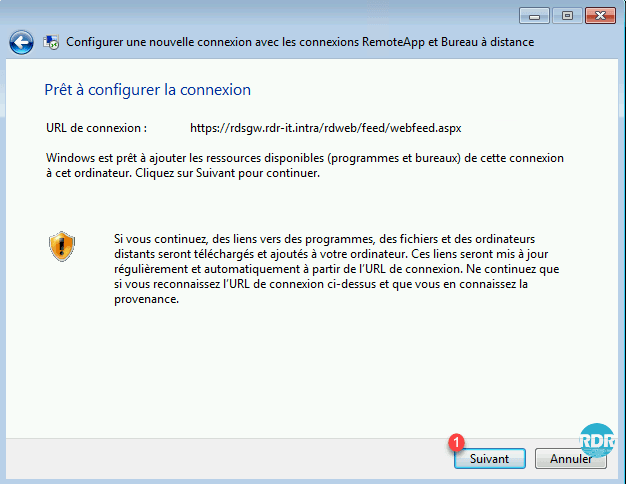
3. Enter the RemoteApp Access URL 1 as https: //url-access-web/rdweb/feed/webfeed.aspx and click Next 2 .
4. Click Next 1 to start the configuration.
5. Enter your credentials and validate certificate alerts.
6. Click Finish 1 .
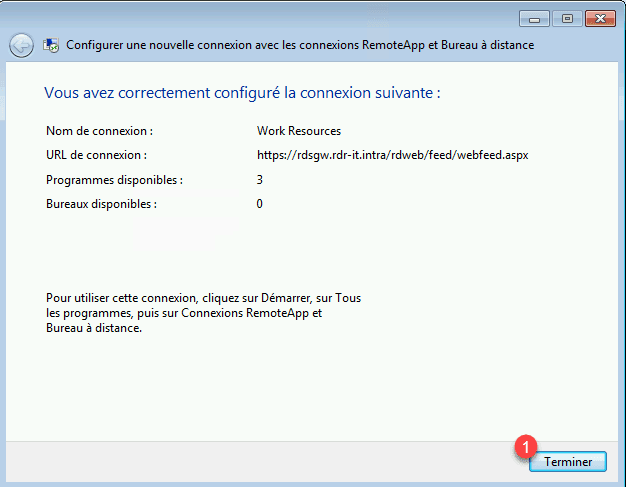
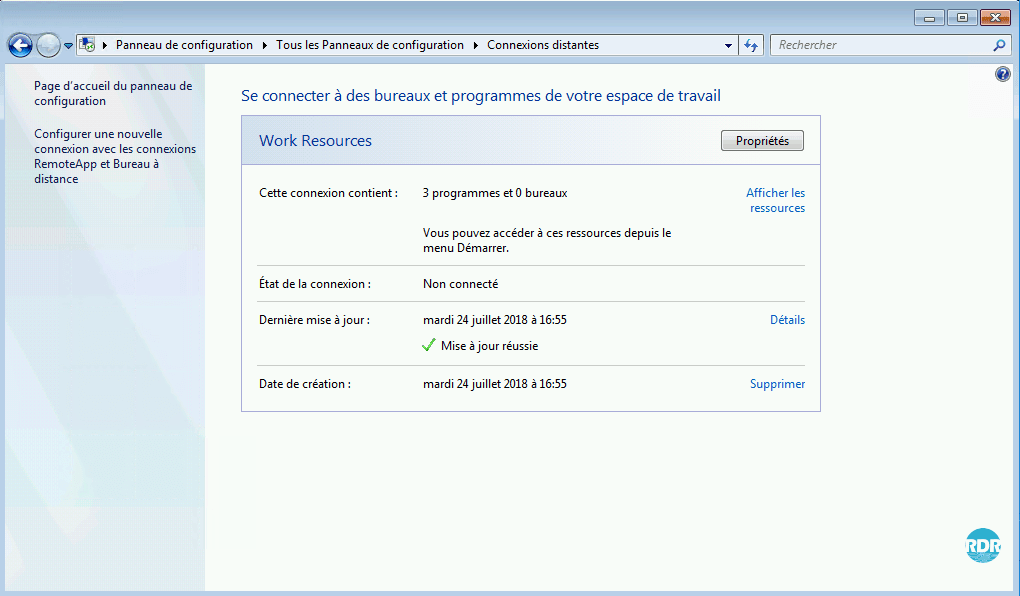
7. Programs in RemoteApp are “installed” on the computer. They are accessible either from this page of the control panel or from the start menu.
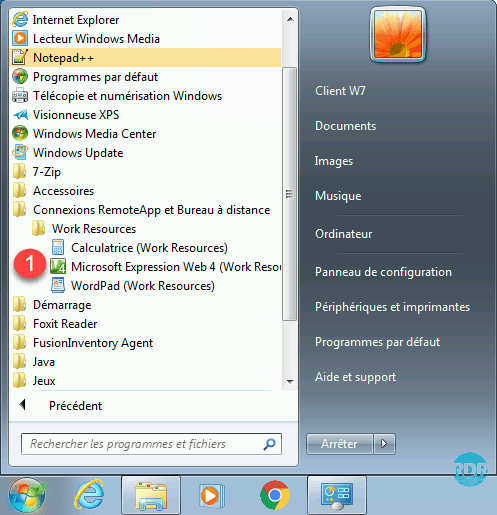
8. Programs 1 from the Start menu.
9. An icon in the notification area also allows you to manage the RemoteApps configured on the machine.
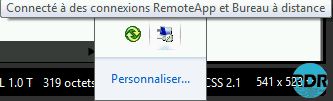
It is possible to automate the configuration of RemoteApps using a GPO.
Enable the setting and enter the URL of the Web Access server in the Specify Default Login URL setting, which is located in: User Configuration / Policies / Administrative Templates / Windows Components / Remote Desktop Services / Connections RemoteApp programs and Remote Desktop Services.

Complements :
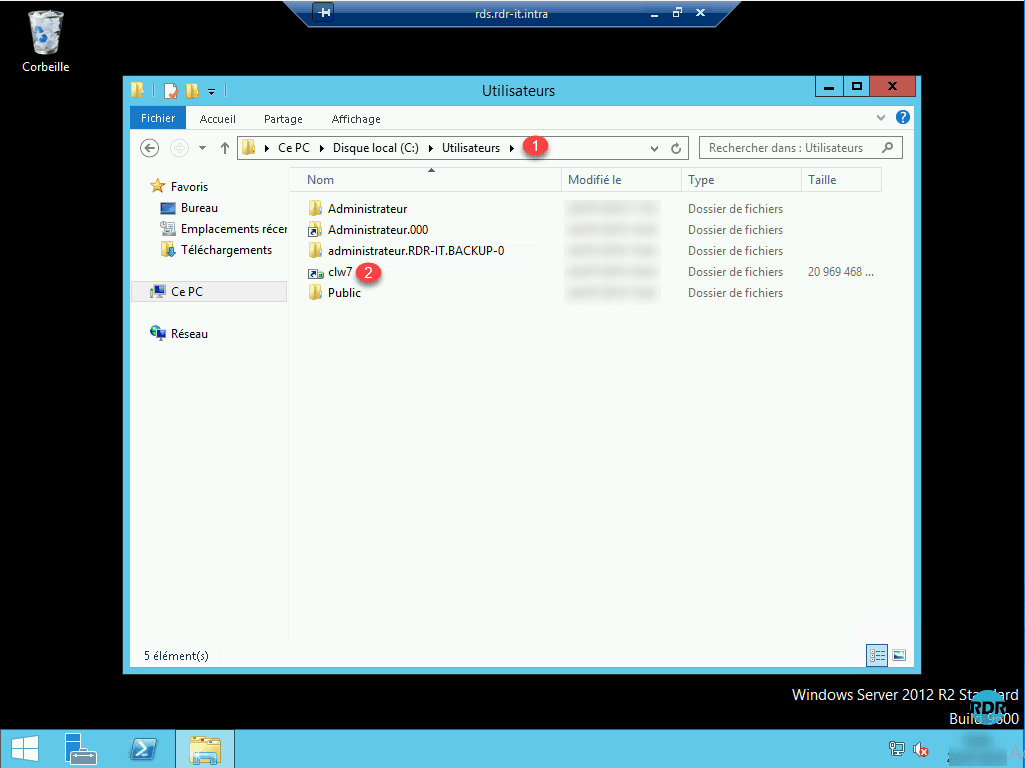
In a “desktop” environment and if the UPDs are configured, open the Windows file explorer and go to the folder C\: Users 1. The UPD of the logged-in user is mounted and has the name login of the user.
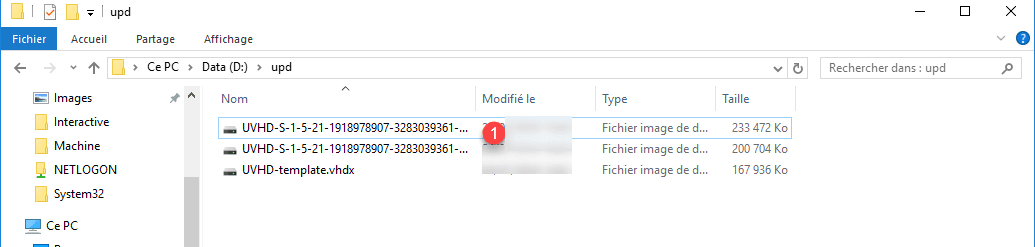
On the server, which hosts the UPDs, there are now VHDXs with the name ID 1 corresponding to the user’s.
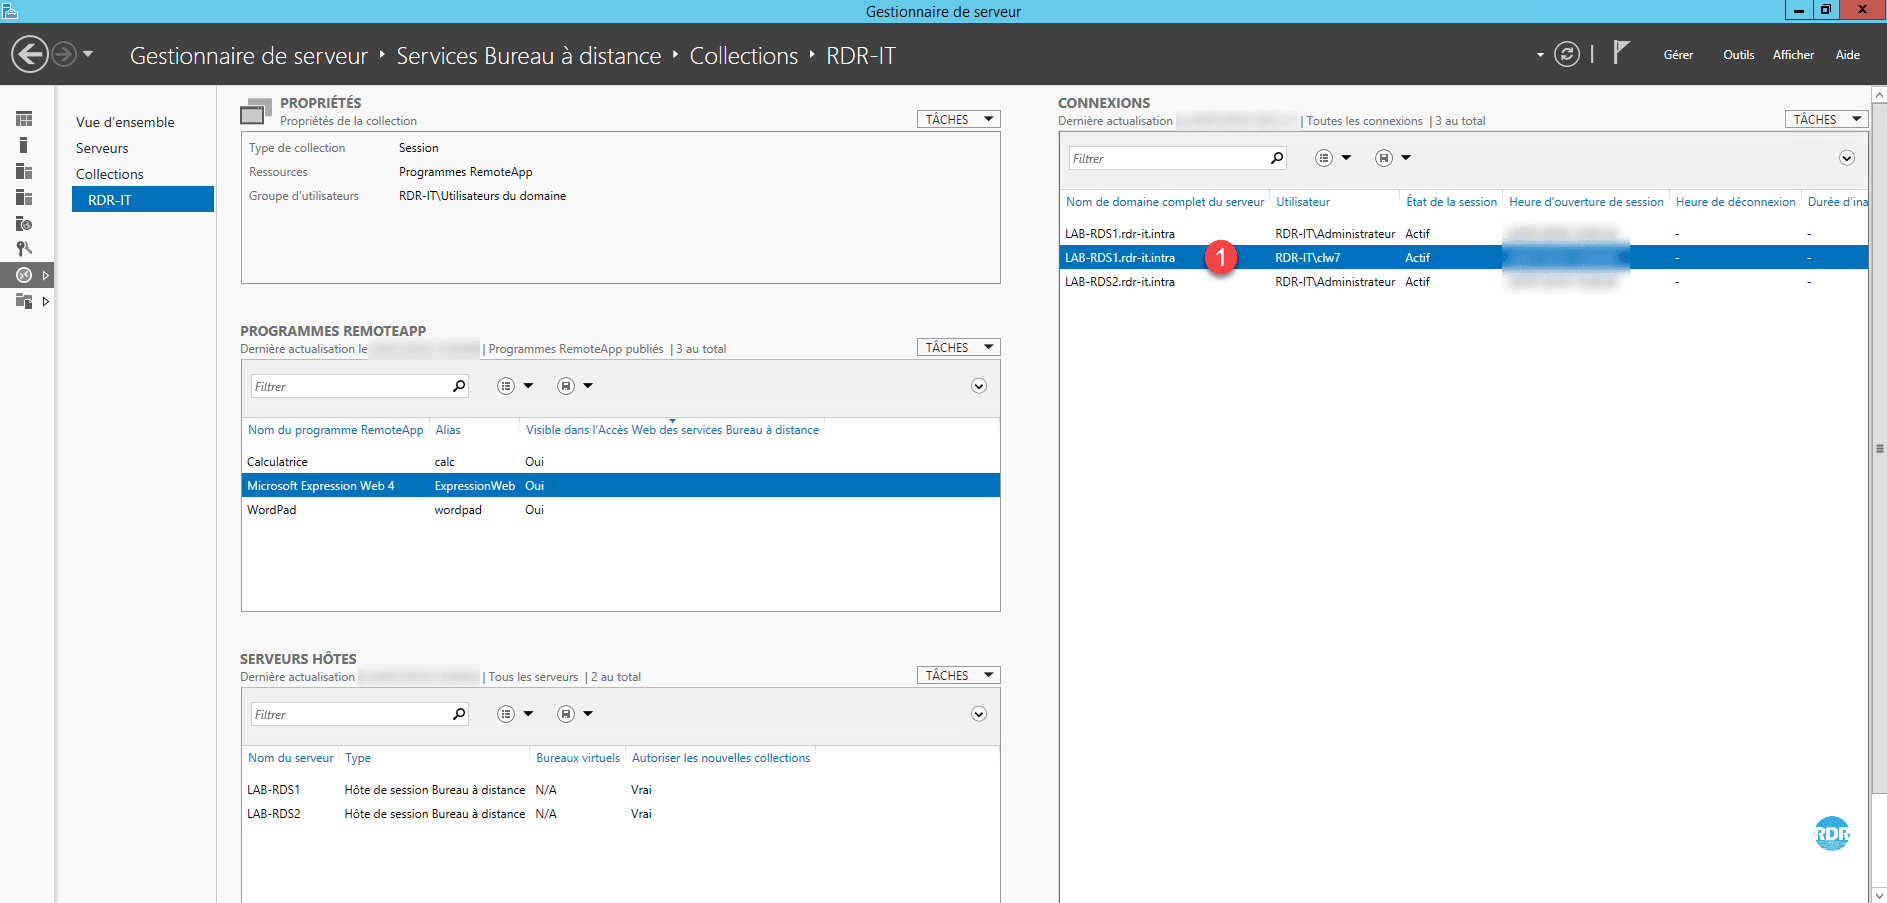
On the broker server, go to the details of the collection, in the CONNEXIONS inset we see the user who has logged in 1 . In right click on several actions are possible, including taking the hand on the session to provide support for a person in case of problems.
Manage and customize the environment RDS
Links to other articles
- Force a template for the start menu
- Allow password change from the RDWEB interface
- GPO : Loopback Processing
- GPO: Configure SSO on RDS Connections
Troubleshooting
Forcer la connexion sur hôte de session de Bureau à distance
To force the connection on a particular host and avoid being routed by the broker, you must run the RDC client in admin mode
- Open Run window
- Enter : mstsc.exe /admin
- Enter the ip or dns name of the host server, the connection will not be redirected by the broker.
Links to other articles
- UPD increase the size
- Restart an RDS server member of a farm
- Google Chrome: Error COULD NOT GET TEMP DIRECTORY
- Connecting to Remote Desktop Session Host servers by the Broker
- RDS: reduce the logon time
FAQ
Technical point of view: reduces the maintenance of the park by having to maintain only the farm RDS. Software updates are to be deployed only on the servers in the collections. The deployment of new software is also faster for the same reason. In the same vein, changing a user station is easier because its work environment is hosted on the servers. All users work on the same environment, which facilitates support.
Financial point of view: The renewal rate of positions can be extended because the computing power is provided by the servers. Thin client computers (mini-pc) are also cheaper to buy.
The theoretical answer to this question is 1. For reasons of availability and administration I advise you to put at least two hosts. It is better to put two small virtual machines with 4 CPUs and 8GB of RAM rather than a large vm with 8CPU and 16GB of RAM.
This way, if a host crash or if you need to perform maintenance, it is possible to do so without impacting production.
This question comes up regularly on the forums and unfortunately there is no ready answer.
Before setting up an RDS farm, it is necessary to carry out an audit to know:
The software environment used
What?
By who ?
How? ‘Or’ What ?
CPU / RAM consumption
Pre-requisite editor …
Software conflict
The number of simultaneous users
Once the audit has been carried out, an analysis of the information collected is to be done to find the best solution to put in place.
This question, which comes back regularly, does not have a ready answer. The answer to this question depends on the audit carried out for the establishment of the RDS farms.
The answer to this question is very simple, as much as users or devices that will use the RDS services. Licenses are awarded for a given time.
Often, people tend to be economically savvy to buy fewer licenses than users on the pretext that there are only X simultaneous connections.
If you have 20 users using the RDS farm with only 10 simultaneously, you need 20 licenses.
Yes it is possible, just consider that a remote desktop session host can not be part of multiple collections and UPDs are linked to a collection as well. It is not possible to share a user profile disk between multiple collections.
The answer to this question is multiple.
-Separation by service.
-Separation by site.
-Create specific collections by application and then present them in RemoteApp either on client computers or on remote offices.
The use of several collections makes it possible to segment the infra RDS according to the needs (performances / conflicts software …).