Ansible is open source multi-platform configuration management software (Linux, Windows, network equipment, etc.).
In other words, Ansible will allow you to manage, deploy or even execute actions on a group of computers in a “single command line”.
Actions / configuration are written to a YAML format file also called playbook.
Through this tutorial, I will explain to you, how to install Ansible, then we will see how to create our inventory (computers) and we will finish on the creation of different playbooks.
By the end of this tutorial, I hope I have convinced you to use Ansible and you will be able to create your own playbooks.
Prerequisites
For this tutorial, you will need a linux machine for installing Ansible, a Windows and Linux machine.
In order to be able to connect to the Windows computer, it is necessary to configure WinRM.
Since Windows 2012, WinRM is normally enabled, the only thing to do is to enable CredSSP authentication for domain member servers using the command below:
Enable-WSManCredSSP -Role ServerFor computers that are not a member of an Active Directory domain, you must use Basic authentication
winrm set winrm/config/client/auth '@{Basic="true"}'
winrm set winrm/config/service/auth '@{Basic="true"}'
To be as close as possible to a business use, in this tutorial, I used two Windows servers which are members of an Active Directory domain.
In addition, I invite you to read this documentation : Windows Remote Management — Ansible Documentation
Installing Ansible on Ubuntu
There are several ways to install Ansible on Linux. With Ubuntu, Ansible is available through the package manager, which makes it easy to install.
From the terminal, enter the following command to install Ansible:
sudo apt install ansible
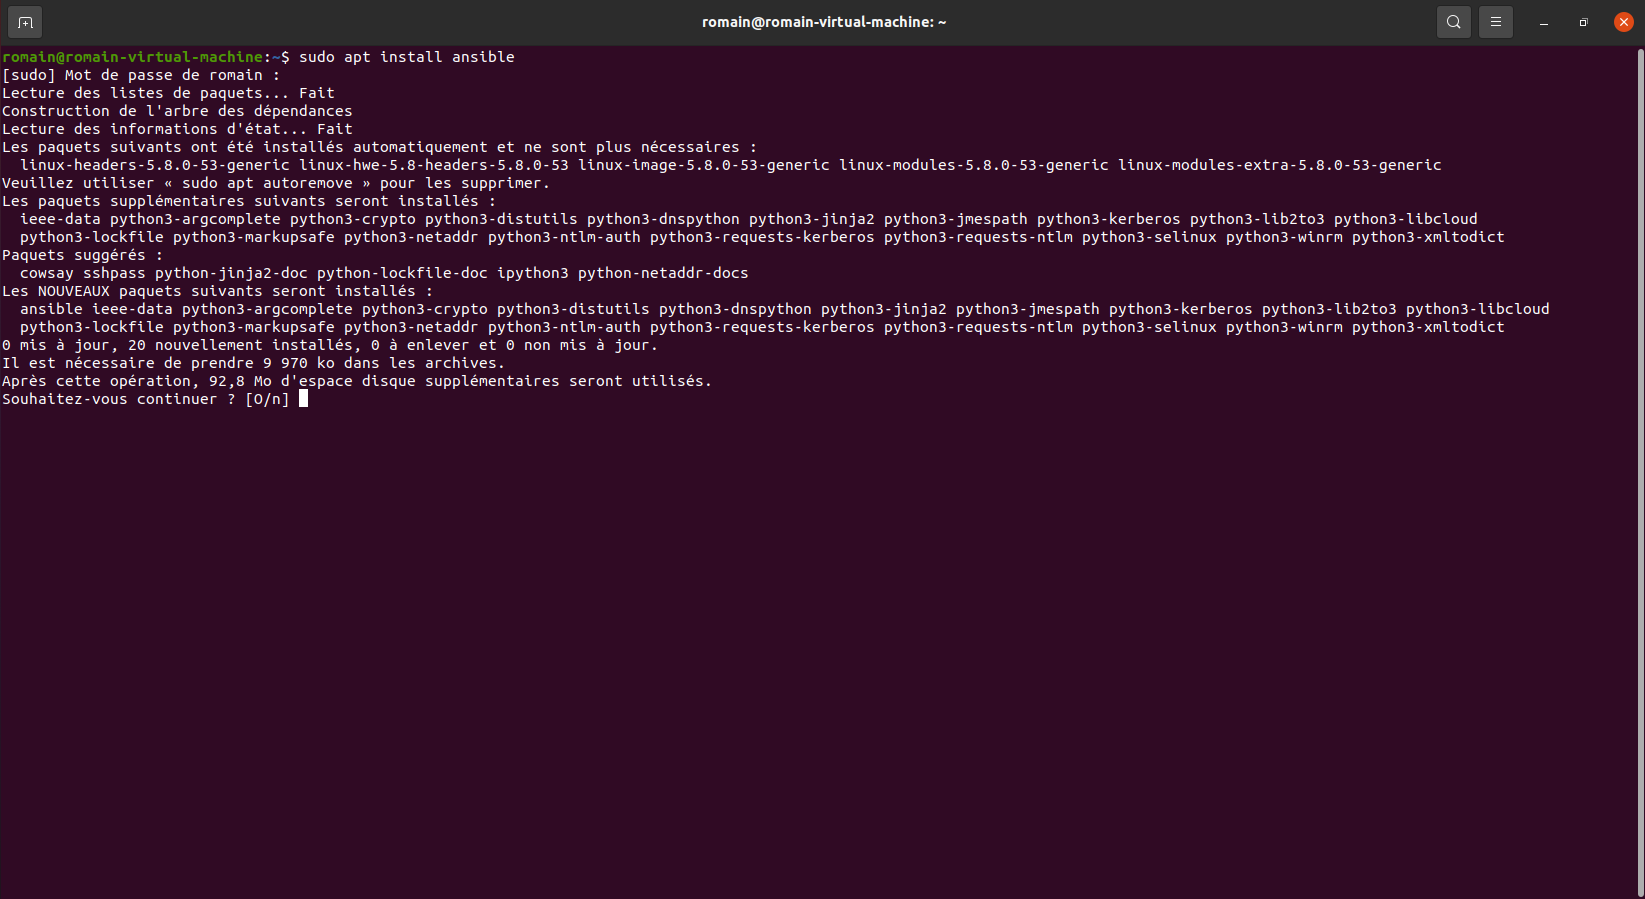
Confirm the installation of packages
Once installed, enter the command below to verify that Ansible is installed:
ansible --version
Installing additional components to manage Windows servers
To manage Windows servers that are members of an Active Directory domain, it is necessary to install additional components in order to be able to connect to the servers using credssp.
As Ansible uses Python, we will install pip and then install the python add-ins.
sudo apt install python3-pip
We will now proceed to the installation of pywinrm[credssp], which will allow us to connect to our Windows servers.
Install pywinrm[credssp]:
sudo pip install "pywinrm[credssp]"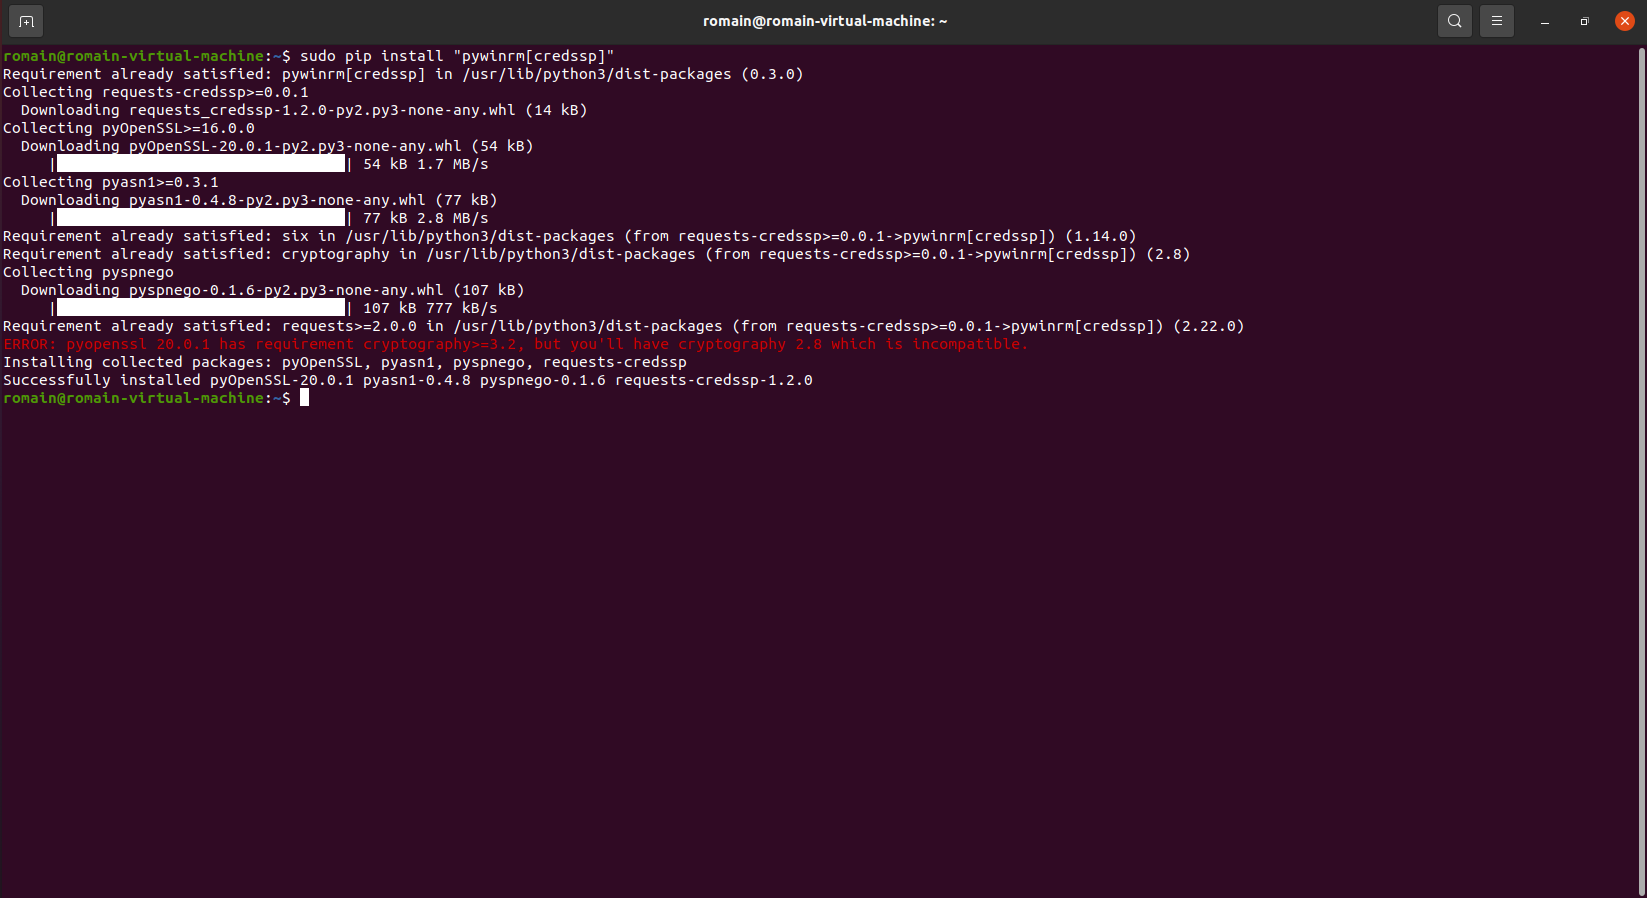
If you also have the ERROR error: pyopenssl 20.0.1 has requirement cryptography> = 3.2, but you’ll have cryptography 2.8 which is incompatible, here’s how to install the correct version of cryptography.
Enter the command below to update cryptography:
sudo pip install -U cryptography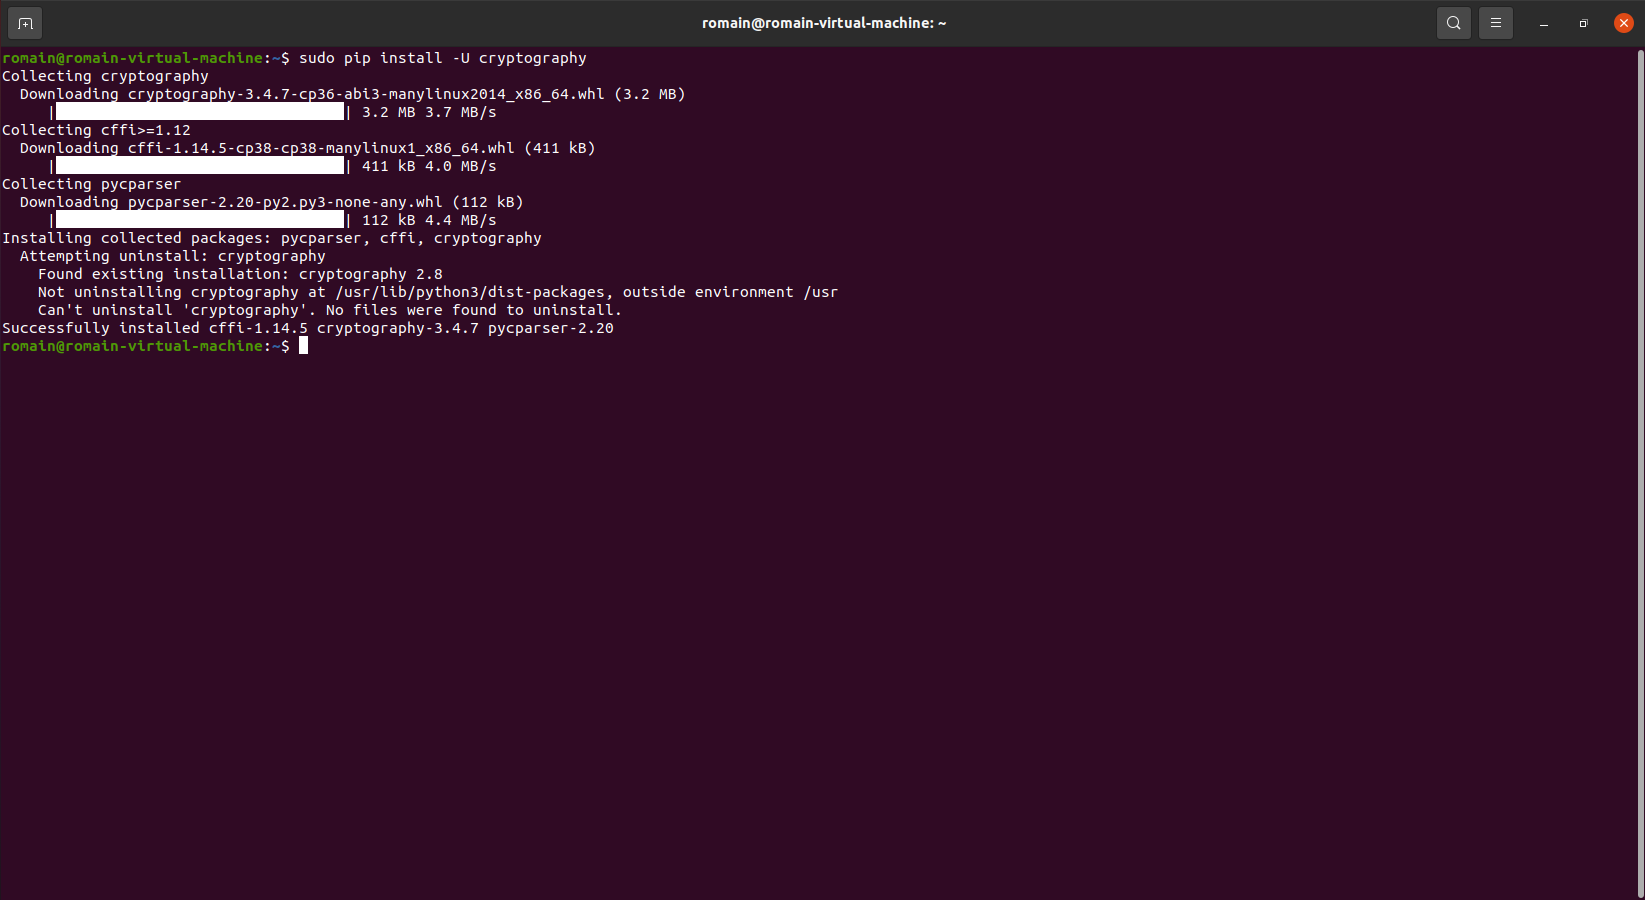
Installing SSHPASS
In order to be able to connect in SSH with a username / password pair, it is necessary to install SSHPASS.
sudo apt install sshpassOnce installed, open the file /etc/ansible/ansible.cfg.
sudo nano /etc/ansible/ansible.cfgIn the [default] section, add:
host_key_checking = FalseAnsible is installed, we will now move on to the inventory part.
Server Inventory for Ansible
Inventory in Ansible is something quite complex, in this tutorial I will explain how to get started with Inventory in Ansible, but I invite you to read the official documentation to learn more: How to build your inventory — Ansible Documentation
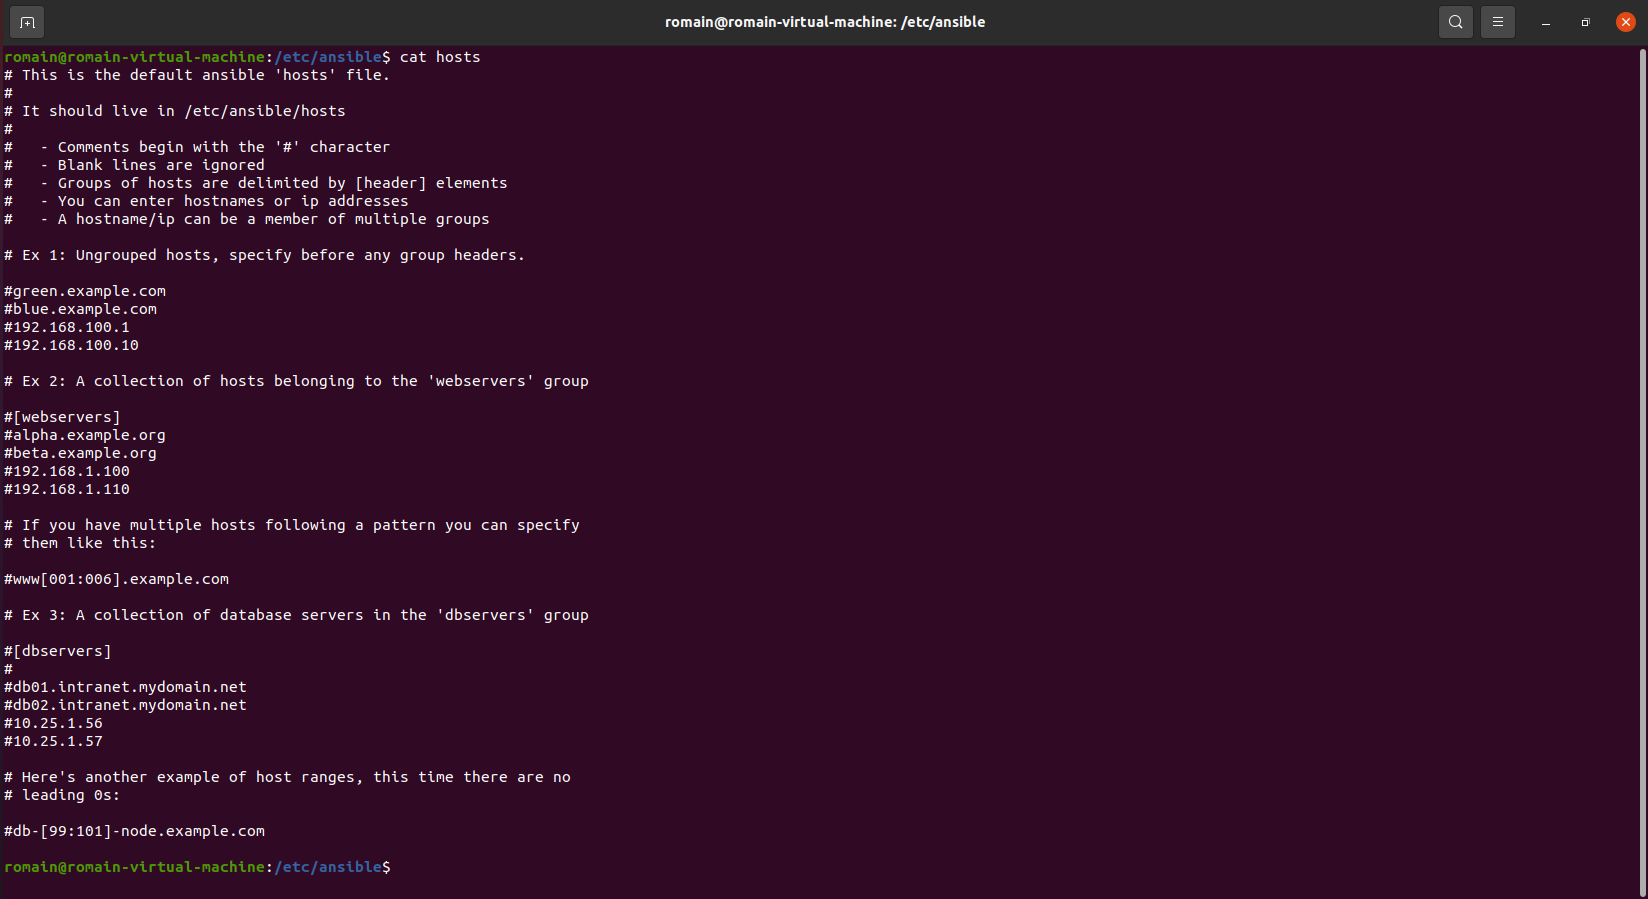
By default, the inventory in Ansible is done in the / etc / ansible / hosts file which is a file in ini format and which contains different groups in which the target servers are declared.
By default this is what the file looks like:
I will show you several solutions to manage your inventory in Ansible.
Other solutions are possible, they are explained in the documentation.
Declare computers in Ansible
We will start with the simplest method, which is to add a group and the IP addresses of the servers in it.
Here is the block that we will add to the ansible hosts file.
Open the file with nano:
sudo nano /etc/ansible/hostsAdd the text block to the file:
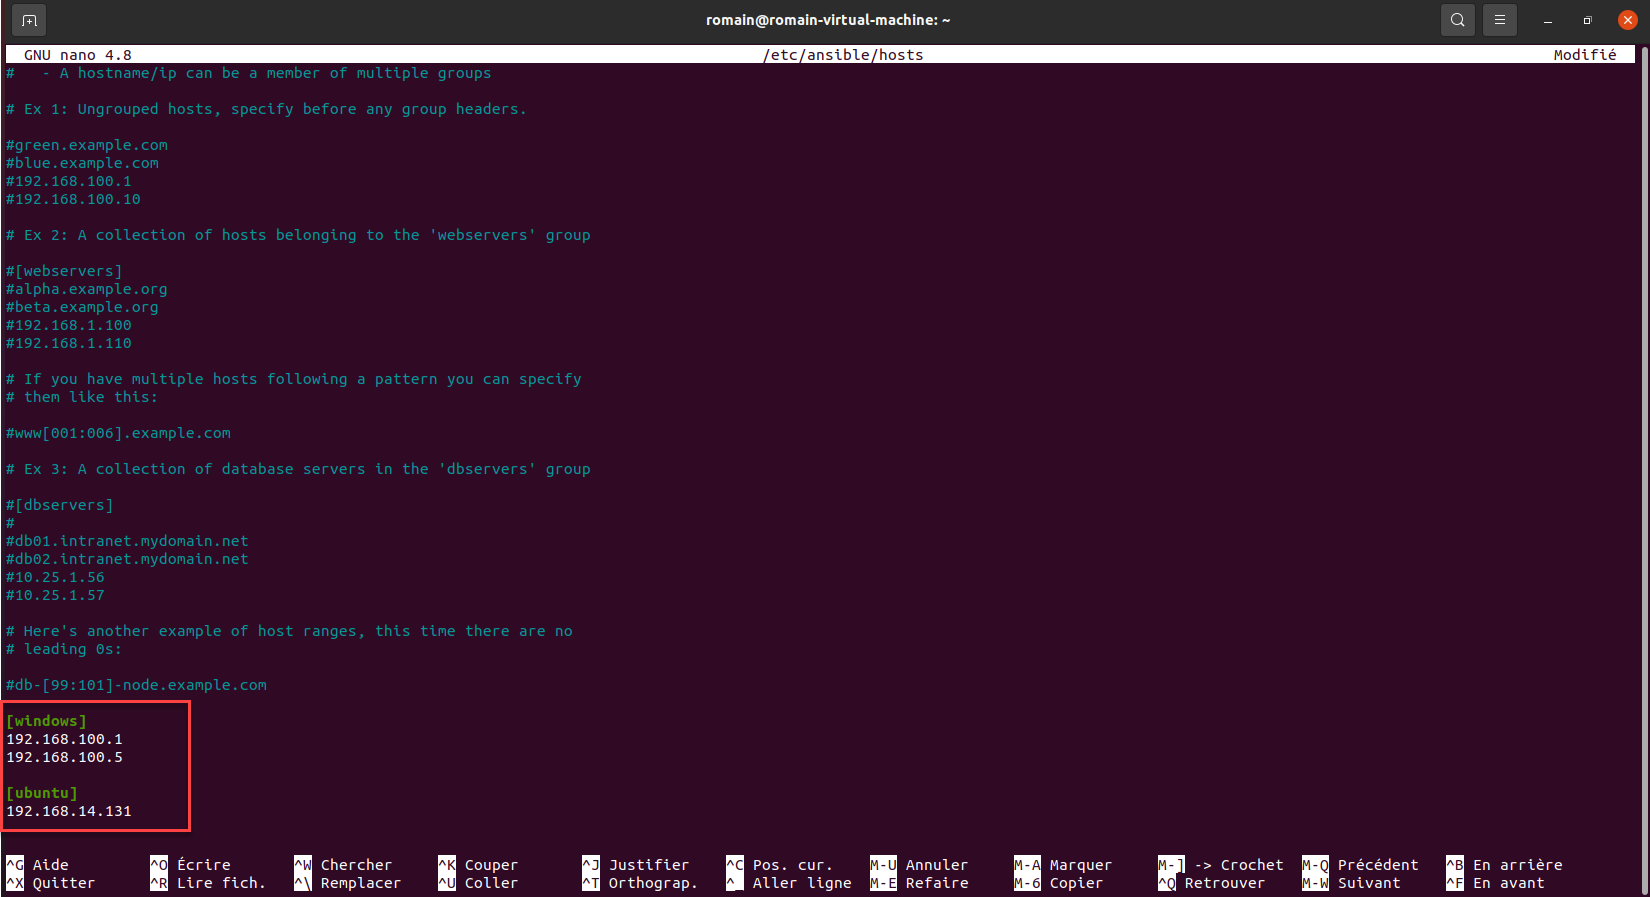
Save the file.
2 Windows computers and one computer in the ubuntu group have been added to the inventory.
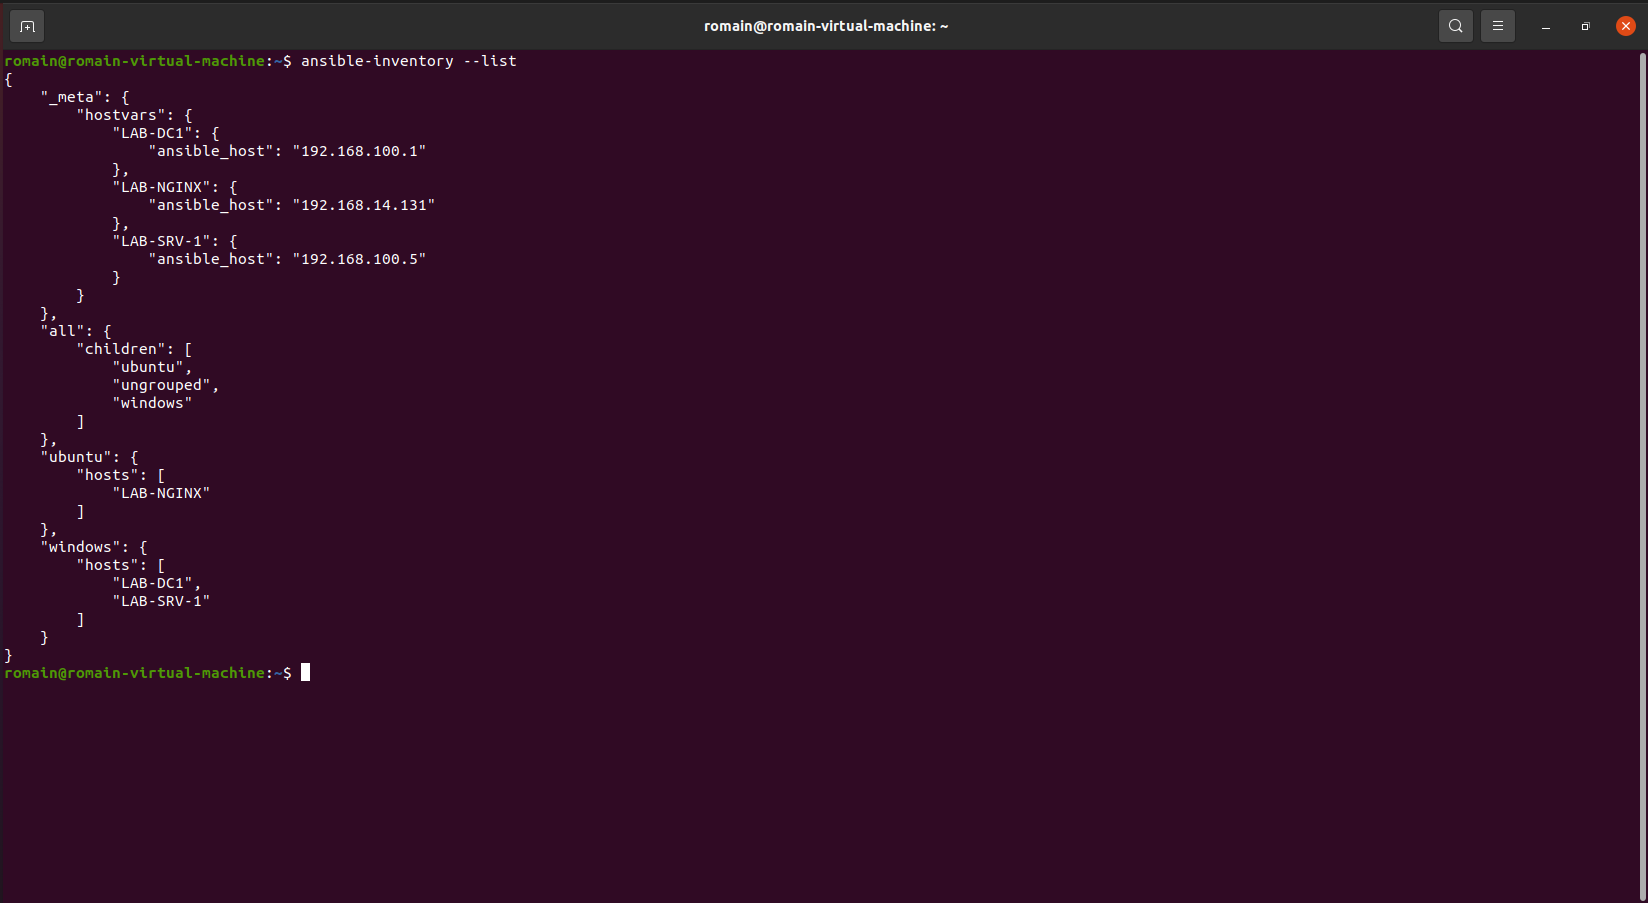
To display the inventory use the following command:
ansible-inventory --list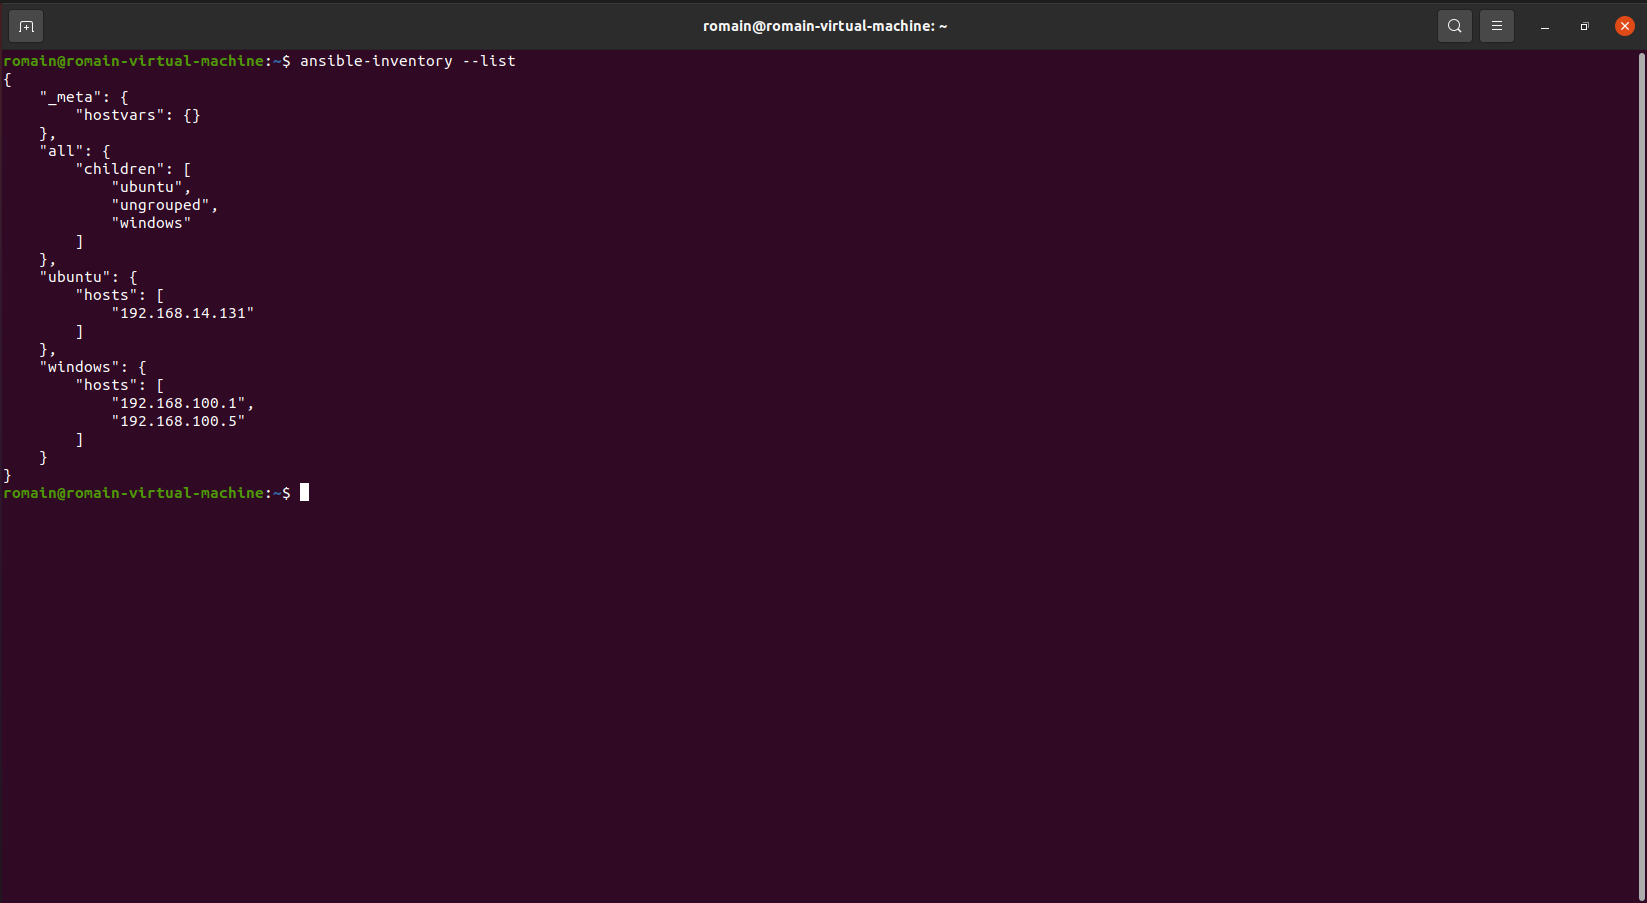
How you can see it, we find the computers that we declared in the hosts file.
This solution is not super “user-friendly”, when you have one or two servers, enter the IP addresses, but when you have dozens or hundreds of servers, it’s not great.
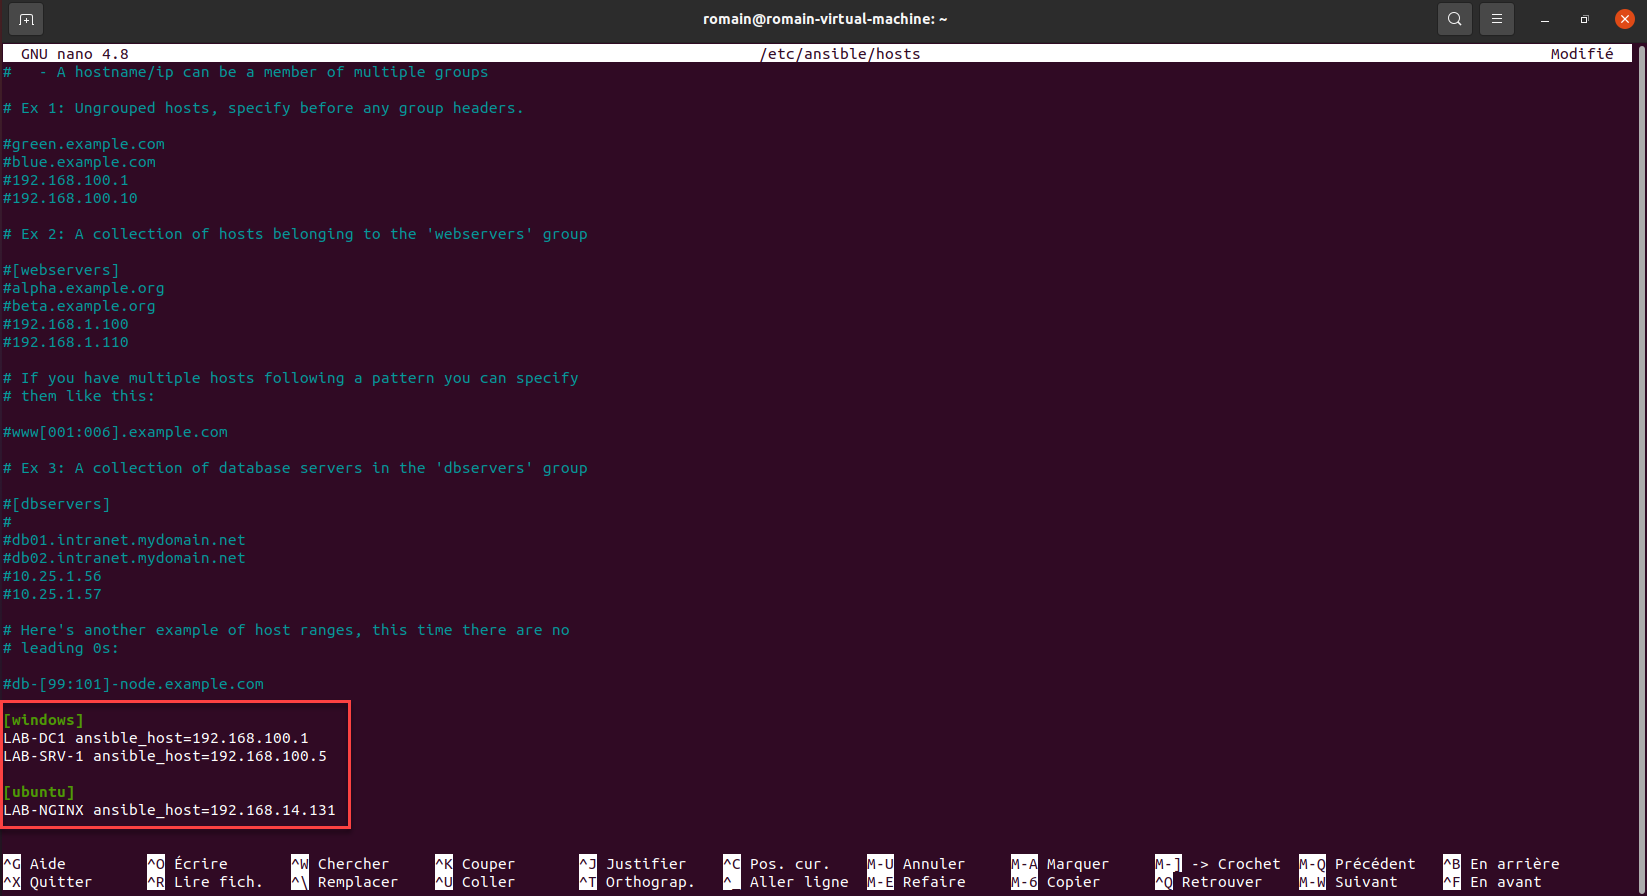
We are now going to improve that, by adding an alias in order to have the name of the computer in the inventory.
The declaration is made in this form:
alias ansible_host=0.0.0.0Which gives us for our example:
It’s more readable like that, isn’t it?
Let’s edit the / etc / ansible / hosts file again to modify the inventory:
If we list the inventory again using the ansible-inventory –list command, we arrive at a result that is easier to exploit.
It’s better like that, isn’t it?
We have declared our inventory, but we still need to configure several information such as the username / password pair and how to connect to the computers.
Configure inventory variables
By default, Ansible tries to connect to computers with the SSH protocol, which is good for the Ubuntu server, on the other hand for our Windows group, we have to tell Ansible to use WinRM.
The management of variables can be done in several ways:
- In the hosts file
- In a file dedicated to the group
I’ll show you both.
Personally, I prefer the second solution, because the hosts file quickly becomes unreadable.
Configuration of variables in the hosts file
The first solution to configure the variables is directly in the hosts file by adding the variables in INI format.
The variable block is defined this way: [group:vars].
If we continue with the starting example which gives us for the windows and ubuntu group:
As you can see, in the group of variables, we indicate several information to connect to the servers.
The more groups you have in your inventory, the more complicated the hosts file will be to track.
Configuration of variables in a file dedicated to the group
The second method that I will show you in this tutorial will allow you to store the variables in a separate file for each group.
This file must be placed in the / etc / ansible / group_vars / folder and must be named with the name of the group (winodws.yml / ubuntu.yml).
Here the format is not INI but YAML.
If the folder does not exist, create the:
sudo mkdir /etc/ansible/group_varsThen create the file with the name of the group:
sudo touch /etc/ansible/group_vars/windows.ymlEdit the file:
sudo nano/etc/ansible/group_vars/windows.ymlHere is the content for the windows.yml file:
For the ubuntu.yml file, I’ll let you do it yourself.
In order to make editing easier for you, I advise you to use vscode or notepad ++ which supports YML format.
You will find the correction here : Ansible : inventory vars #3 ($158) · Extraits de code · Extraits de code · GitLab (rdr-it.io)
Configure the variables in the host declaration
To complete this part on the variable, it is possible to indicate them directly in the host’s declaration.
In the second example I gave with the alias and then the ip, this is indicated by the ansible_host parameter. All the variables which have been declared in the group, it is possible to put them on the line of the host, which is useful to manage a particular case.
LAB-APACHE2 ansible_host=192.168.14.79 ansible_connect=ssh ansible_ssh_user=ansible ansible_ssh_pass=$€cr€Tp@$s0rD ansible_python_interpreter='/usr/bin/env python3' ansible_become_method=sudoSeparate inventory into multiple files
It is possible to have multiple inventories in Ansible.
To do this, you must create an inventories folder in the / etc / ansible / folder, then in this folder create a hosts file.
For each ansible or ansible-playbook command call, you will need to use the -i parameter to specify the inventory.
More info here : Sample Ansible setup — Ansible Documentation
Now you know how to create your inventory for Ansible, now we will go to the test and verify that everything is working.
Test the connection between Ansible and the computers in the inventory
Before performing configuration actions using playbook, we will test the correct configuration of Ansible and our configuration using a “ping”.
To test the Windows machines use the following command:
ansible group -m win_pingWhich gives for our windows group:
ansible windows -m win_ping
If everything is correctly installed and configured, the response to the ping will be pong.
For linux or other ssh connection, we will use ping:
ansible group -m pingWhich gives for the ubuntu group:
ansible ubuntu -m ping
As with Windows computers, if all is well, the answer to the ping is pong.
You have made your first interaction between ansible and your servers. We will now move on to the playbook.
Playbooks or recipe book
We will finally be able to get down to business and you will now see the full power of Ansible.
Before starting, I will explain to you “quickly”, what a playbook.
A playbook is a list of actions that we will perform on computers, it is a file in YAML format where we will describe what we want.
You will see with the examples, it will be easier to understand;)
Before launching into a playbook, we will also use Ansible Galaxy, which is a site that offers modules that will bring additional functionality to Ansible and we are going to need them in the playbooks that I am going to present to you.
Windows playbooks
Before starting to create our first playbook, which will allow us to install the SNMP functionality and configure the service, we will have to install additional modules.
To start we will install two collections:
Enter the commands below:
ansible-galaxy collection install ansible.windowsansible-galaxy collection install community.windows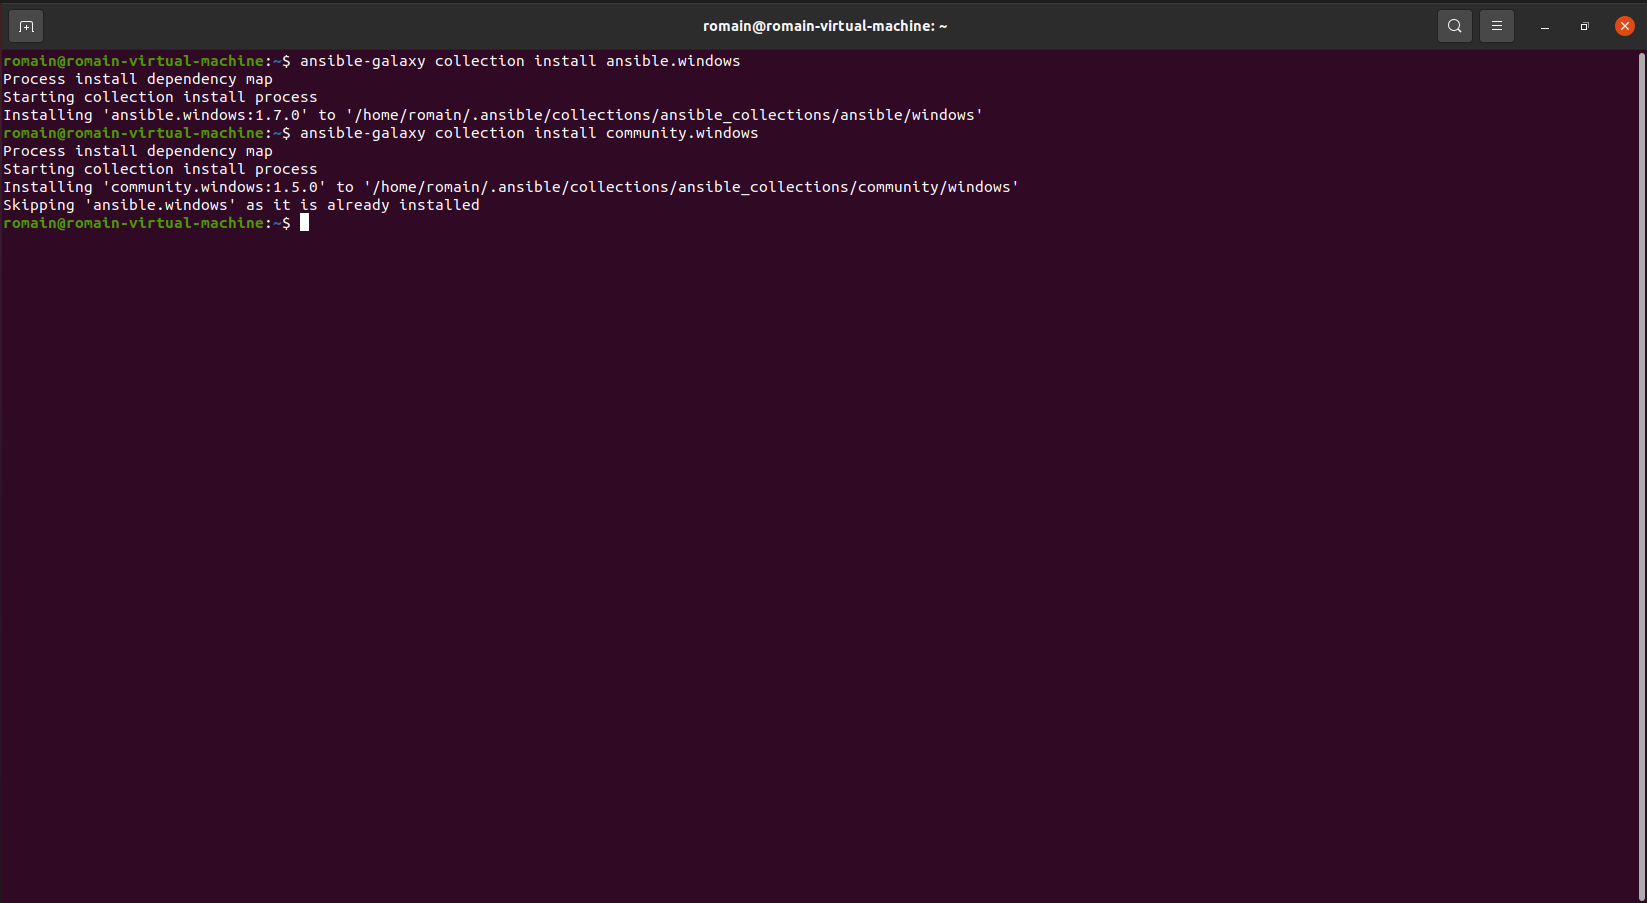
We will now move on to creating and using our first playbook.
Install and configure SNMP functionality on Windows with Ansible
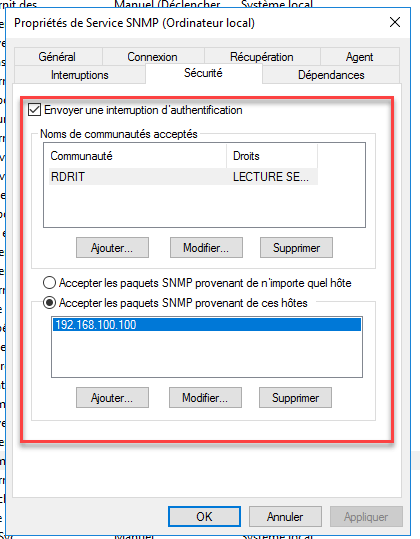
For our first example, we are going to install the SNMP functionality and configure it by creating a community and also by indicating the IP address of the monitoring server which will be authorized to query the SNMP service.
We will start by creating the file that will contain our playbook, it is not mandatory to create the file in the / etc / ansible / folder.
I’ll create it in my user’s home folder.
touch pb-windows-snmp.ymlEdit the file:
nano pb-windows-snmp.ymlCopy the content below to the playbook:
I won’t go into the details of the playbook, the YAML syntax being quite easy to understand.
What you must remember :
The line below is used to indicate to which group the playbook applies:
hosts: windows # host group to run the module onThen you have the tasks section and below you can see the different actions that will be performed:
- Installation of the SNMP-Service functionality
- Configuration of the SNMP service by indicating the community and the authorized IP address.
We will now launch the playbook:
ansible-playbook pb-windows-snmp.yml -vHere is the video of the execution:
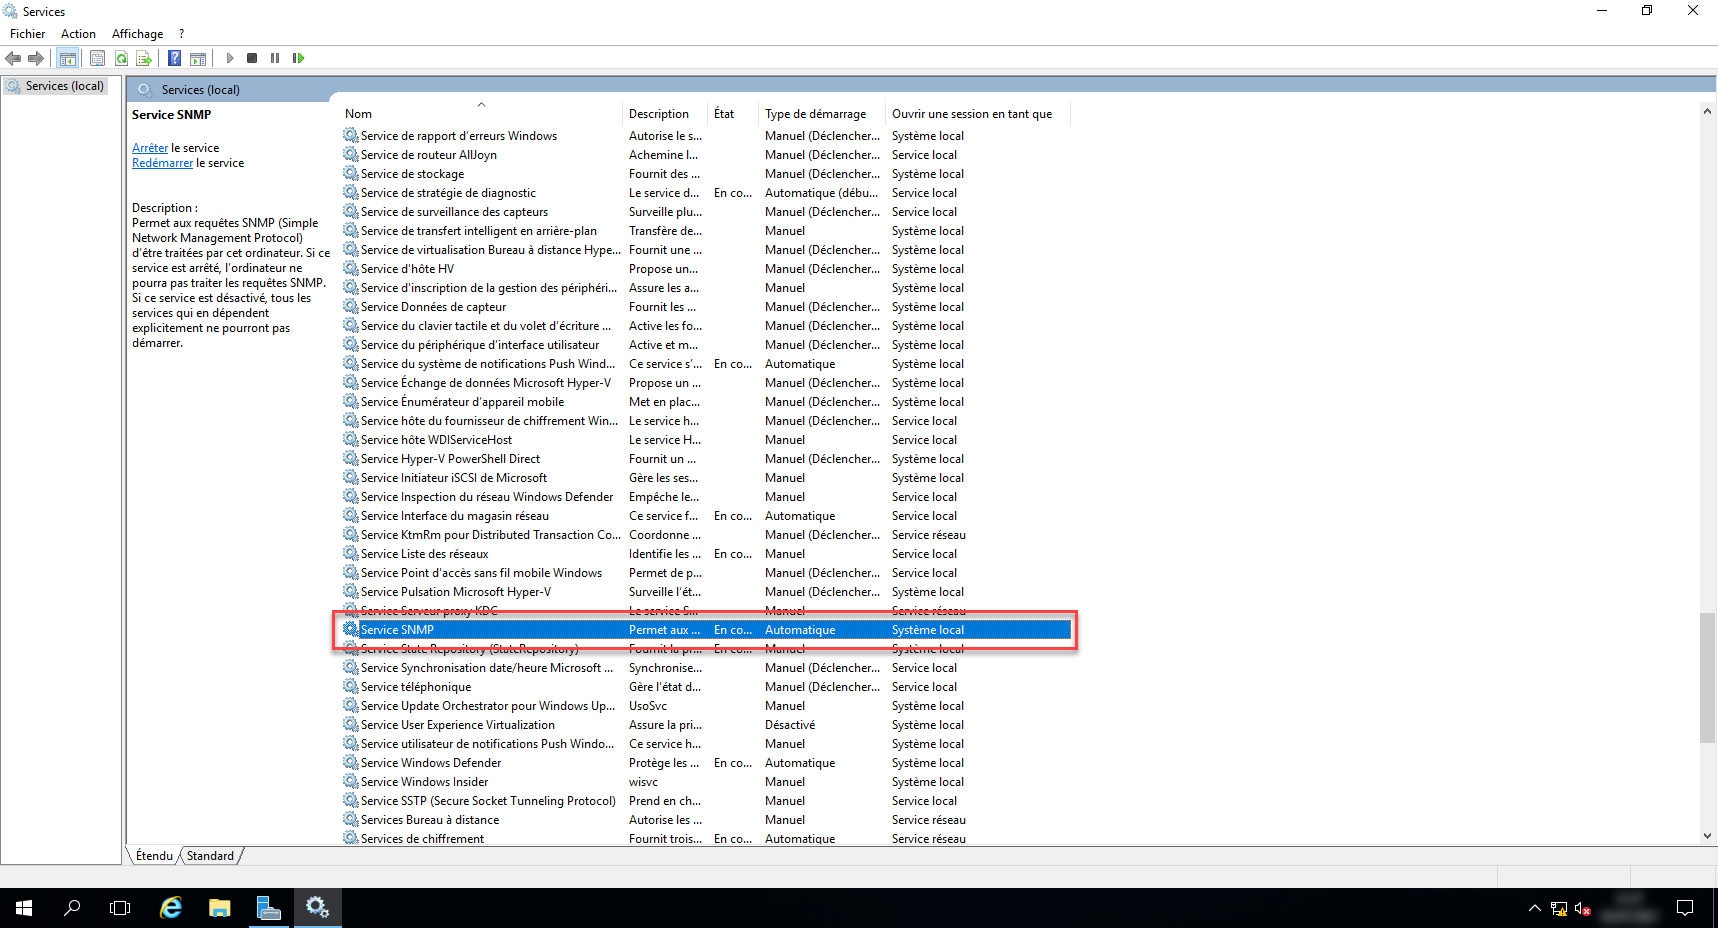
We are now going to check on a server, in the list of services, we find the SNMP service. :
And we can see in the properties that the configuration has been applied:
In less than 50 seconds, I was able to install and configure the SNMP role on 2 servers.
If you replay the playbook, it will check that the service is installed and that the SNMP configuration is correct, this ensures that you always have the correct configuration as well.
Install Windows Updates with an Ansible Playbook
The second playbook that I offer for Windows in this tutorial is to perform Windows updates.
I find it particularly interesting for servers, because it allows you to control the execution of Windows Update.
Here is the playbook:
Run the playbook to update the servers.
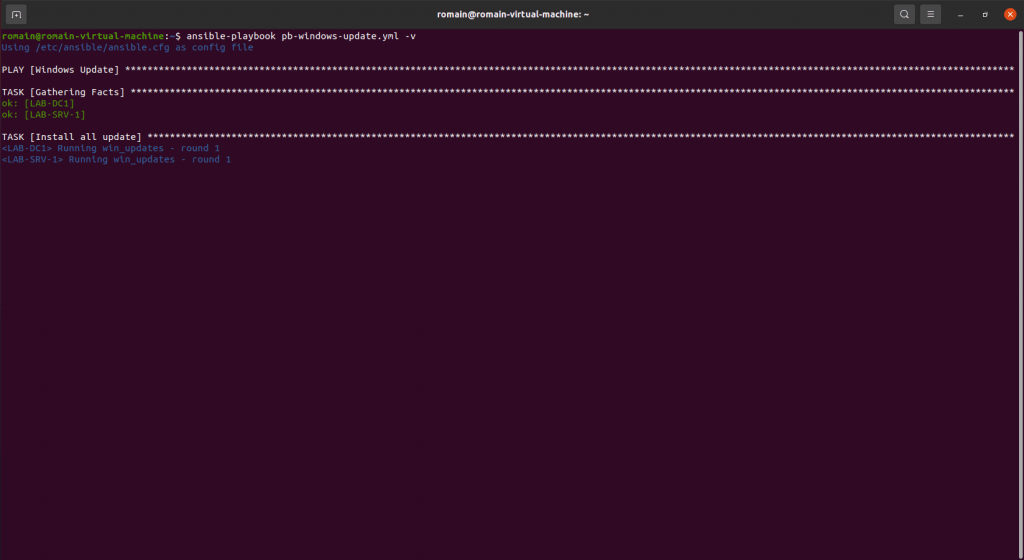
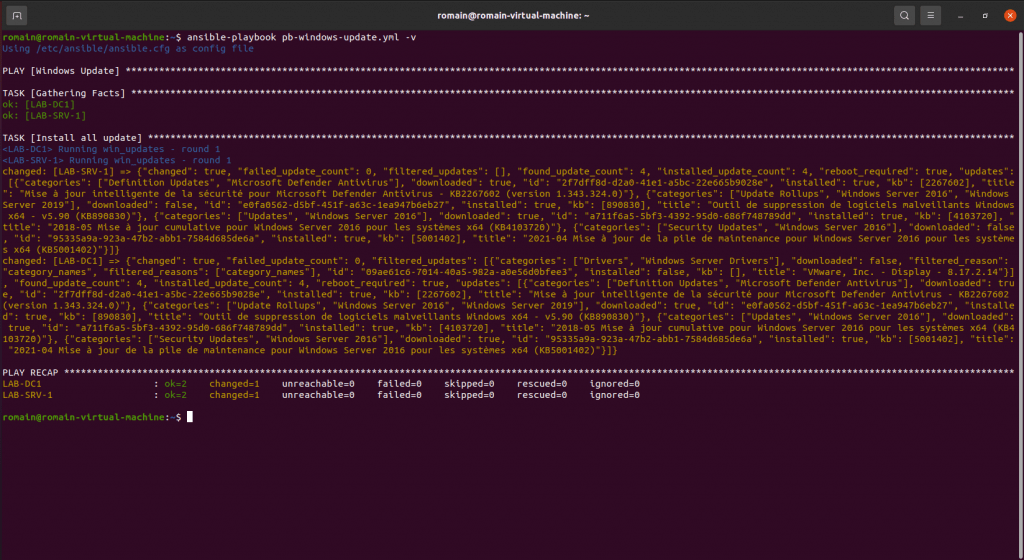
Verbose mode provides feedback on installed updates.
Linux playbook – Ubuntu
The operation for Linux is identical, as for Windows, here is a playbook which will allow you to update the servers:
Run the playbook:
ansible-playbook playbook-ubuntu-update.yml -v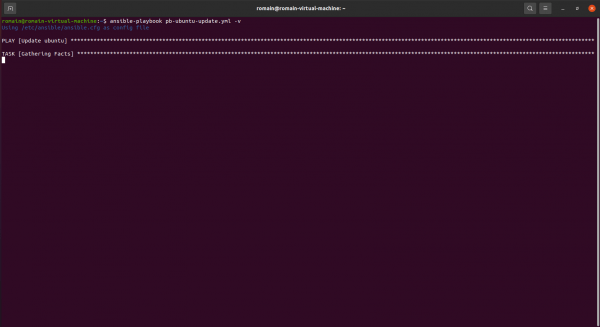
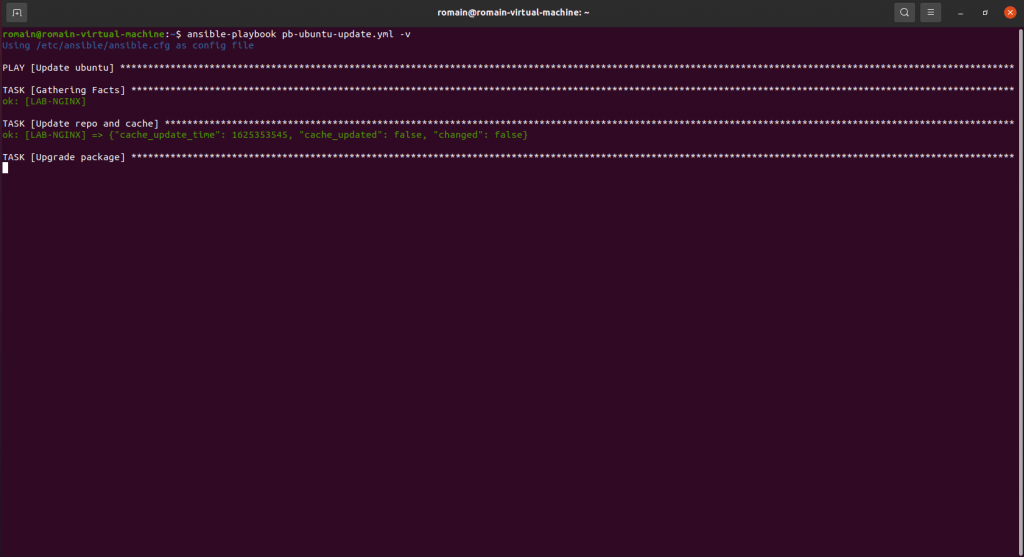

In order to be able to execute apt commands, it is necessary to configure the user account to use sudo without password request.
You now know how to create and run a playbook.
Conclusion
This tutorial ends here and I hope it has helped you understand Ansible, which will allow you to optimize the management and configuration of your servers.
Couplet to Jenkins for the execution of the playbooks, you will have the console feedback to record and you will be able to follow the application of the playbooks.
Many additional modules are available on Ansible Galaxy to allow you to manage all of your servers and equipment (switch, router, firewall, etc.).
Other tutorial on Ansible will arrive and in particular the installation and the configuration with a graphical interface (Ansible AWX / Ansible Semaphore).
I will also make available on my git different playbook : Ansible / Playbook Windows · GitLab (rdr-it.io)