

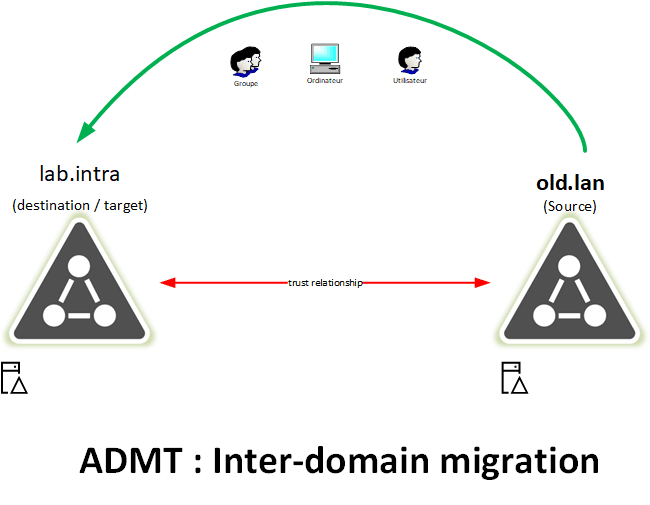
ADMT (Active Directory Migration Tool) is a free Microsoft tool that allows the migration of objects (Users, Computers, and Groups) between two Active Directory domains.
Some examples of using ADMT:
- Enterprise merge to consolidate Active Directory.
- Enterprise split to transfer the Active Directory objects to the new entity.
- Deleting a child domain.
Prerequisites
- A server dedicated to ADMT with a SQL Express database in 2008 version minimum.
- An approval relationship must be in place between the two domains.
- Use a user account in the BUILTIN \ Administrators group of both domains.
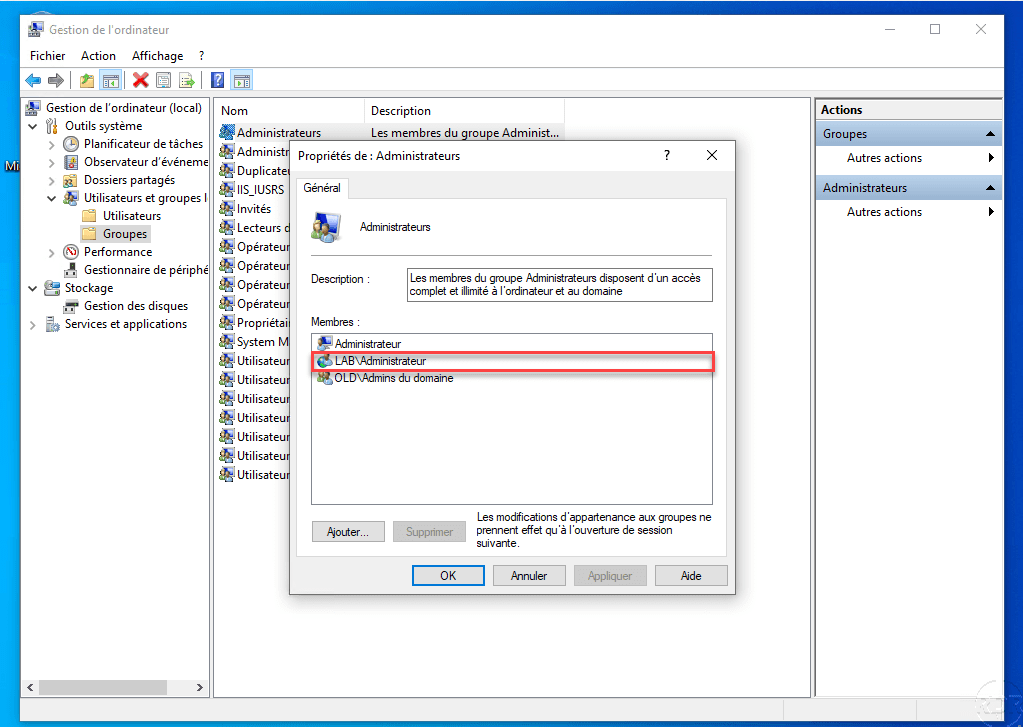
- To migrate the computers, the target domain migration user account must also be the station’s local administrator.
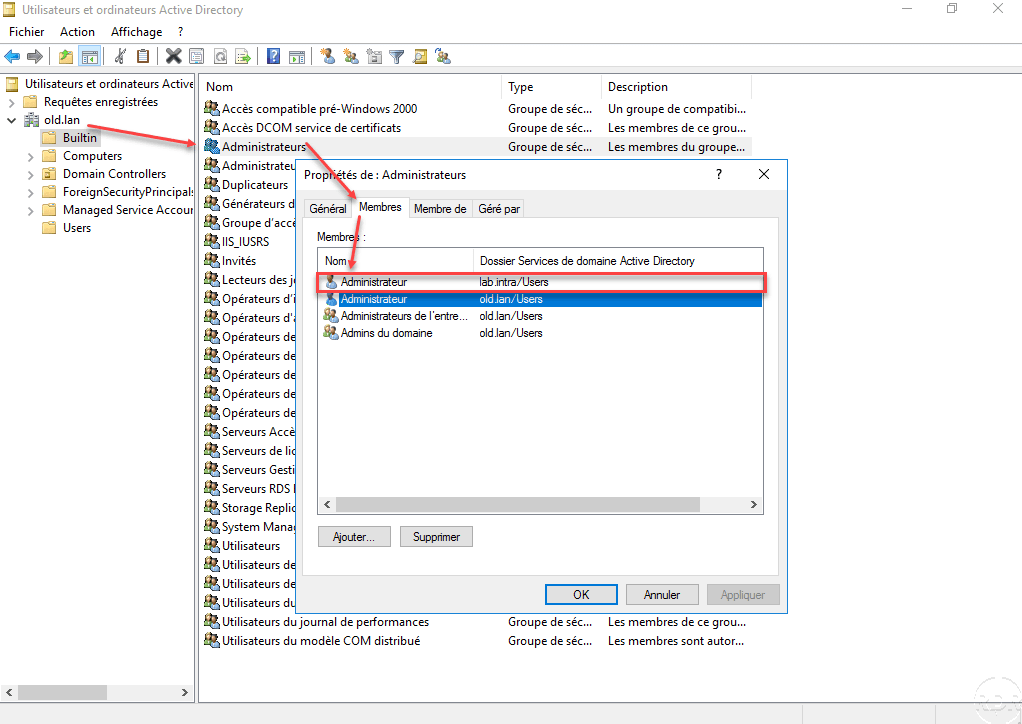
The migration account will be configured during the first object migration that will be done between the two domains. In the tutorial, I used the admin account of the destination domain. In case you want to dedicate an account to ADMT, ADMT must be a member of the Domain Admins group of the target domain and a member of the BUILT\Administrators group of the source domain.
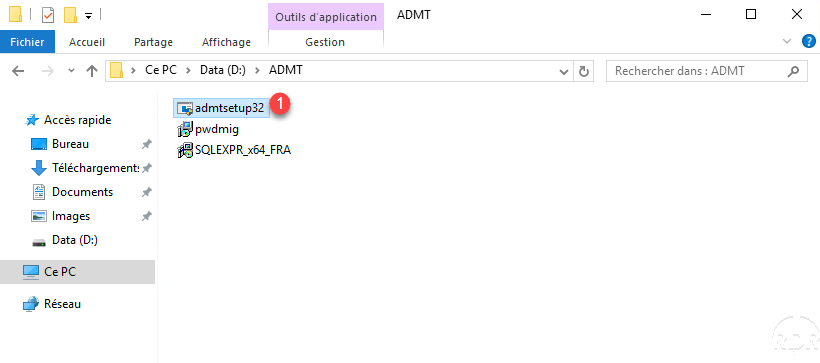
Download the necessary tools:
- ADMT 3.2
- Password Export Server (PES) which allows the migration of passwords.
ADMT installation
Start executable 1 previously downloaded.
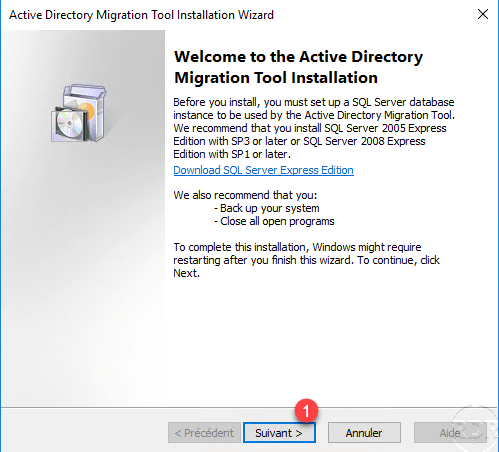
When launching the installation wizard, click Next 1 .
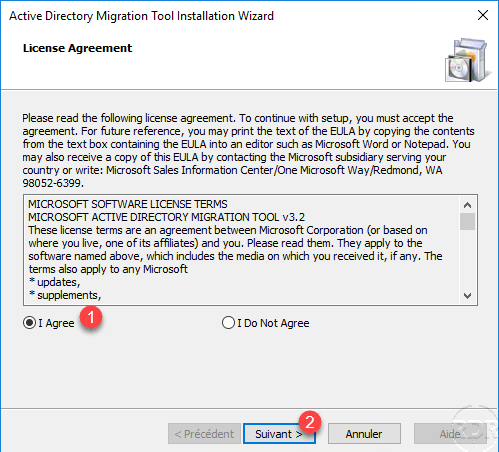
Accept the license agreement, by selecting I Agree 1 then click on Next 2.
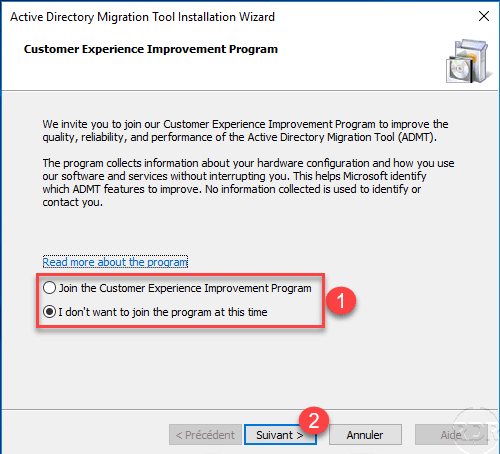
Select the option that suits you about sending information to MS 1 and click Next 2 .
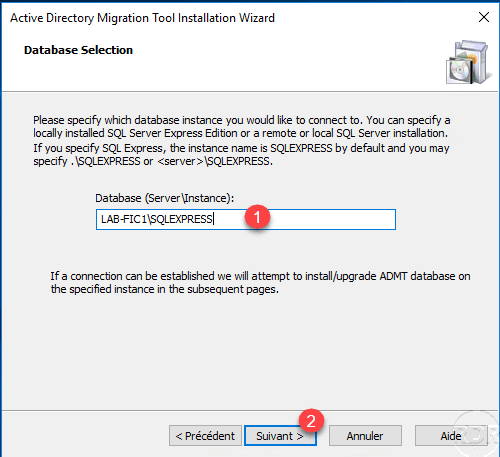
Enter the SQL Server instance information 1 and click Next 2 .
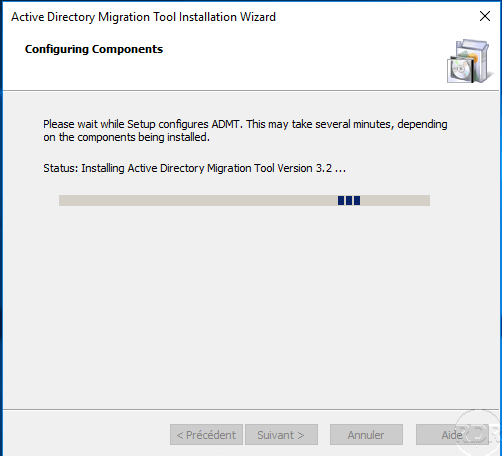
Wait during the installation …
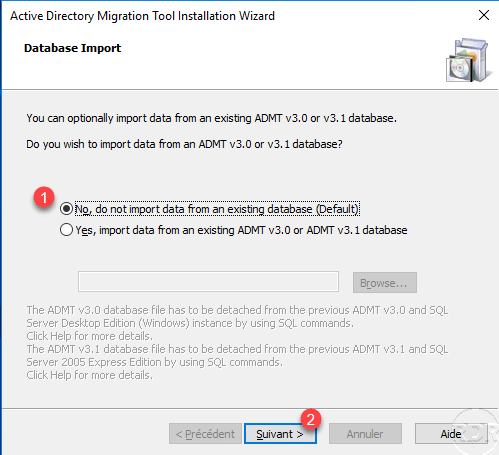
Choose No, do not import data from an existing database 1 and click Next 2 .
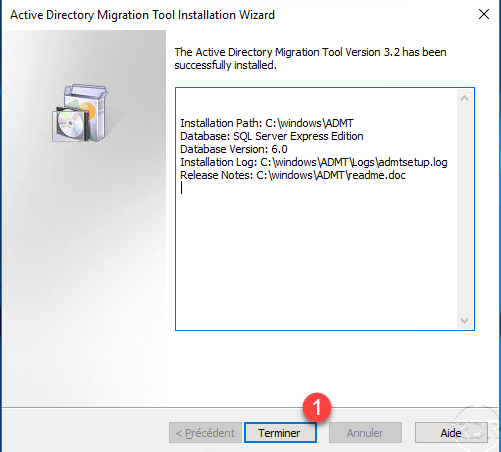
The installation is complete, close the wizard by clicking on Finish 1 .
Installation of PES
In order to migrate the passwords between the two forests, we will need to configure and install PES.
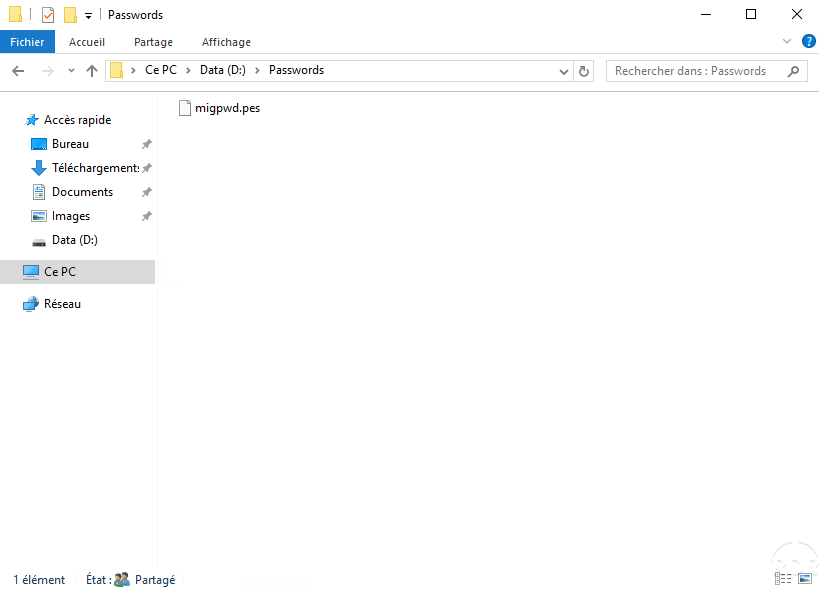
On the server where ADMT is installed, create a shared folder in which we will put the encryption key of the passwords.
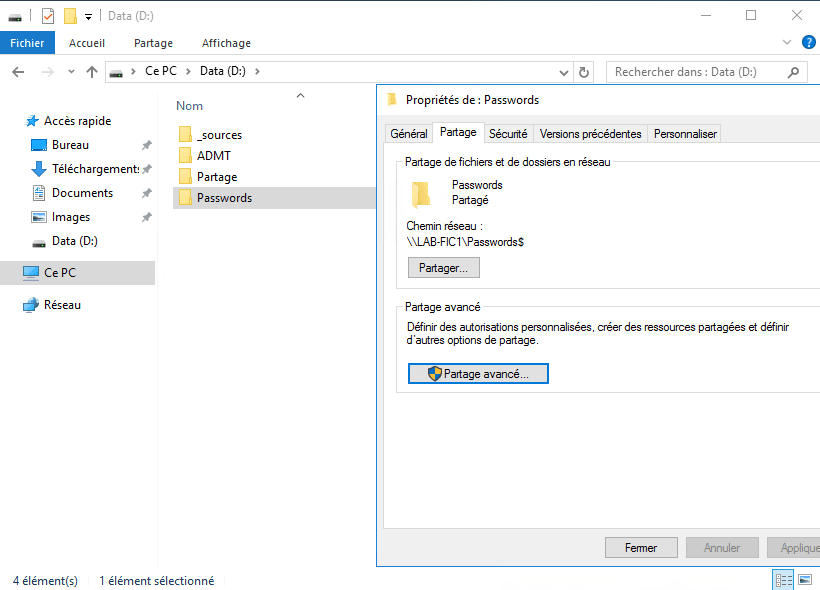
Open a command prompt in Administrator and enter the following command, adapting to your situation:
admt key /option:create /sourcedomain:old.lan /keyfile:D:\Passwords\migpwd.pes /keypassword:password
Check that the migpwd.pes is present in the output folder.
Run the pwdmig file on the source domain controller (old.lan), launch the installation wizard, click Next 1 .
Accept license 1 and click Next 2 .
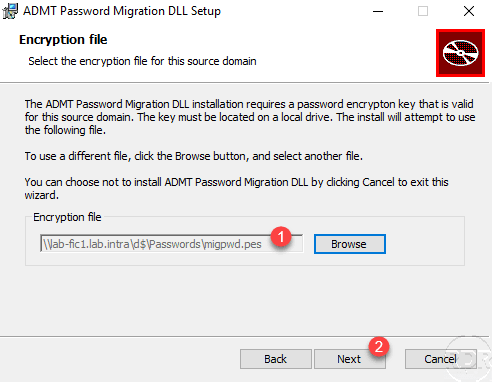
Indicate the location of the encryption key 1 and click Next 2 .
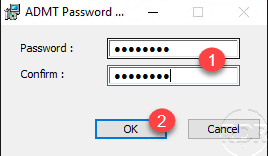
Enter the password 1 and click OK 2 .
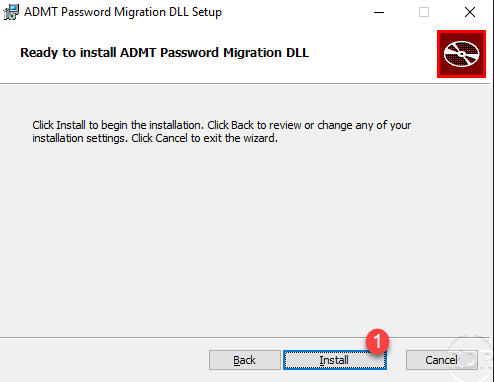
Click on Install 1 .
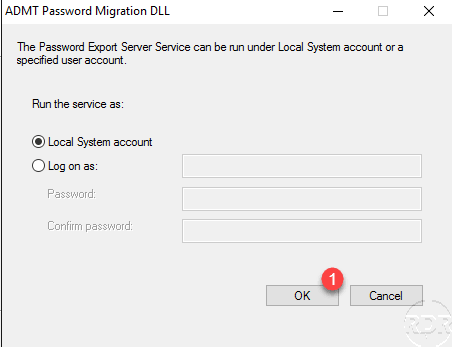
Configure the service with Local System Account 1 and click OK 2 .
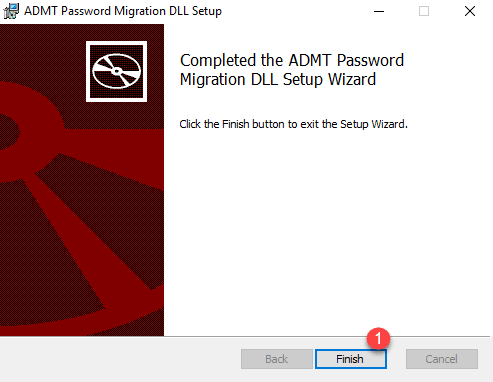
The installation is complete, close the wizard by clicking Finish 1 .
PES asks to restart, click Yes 1 .

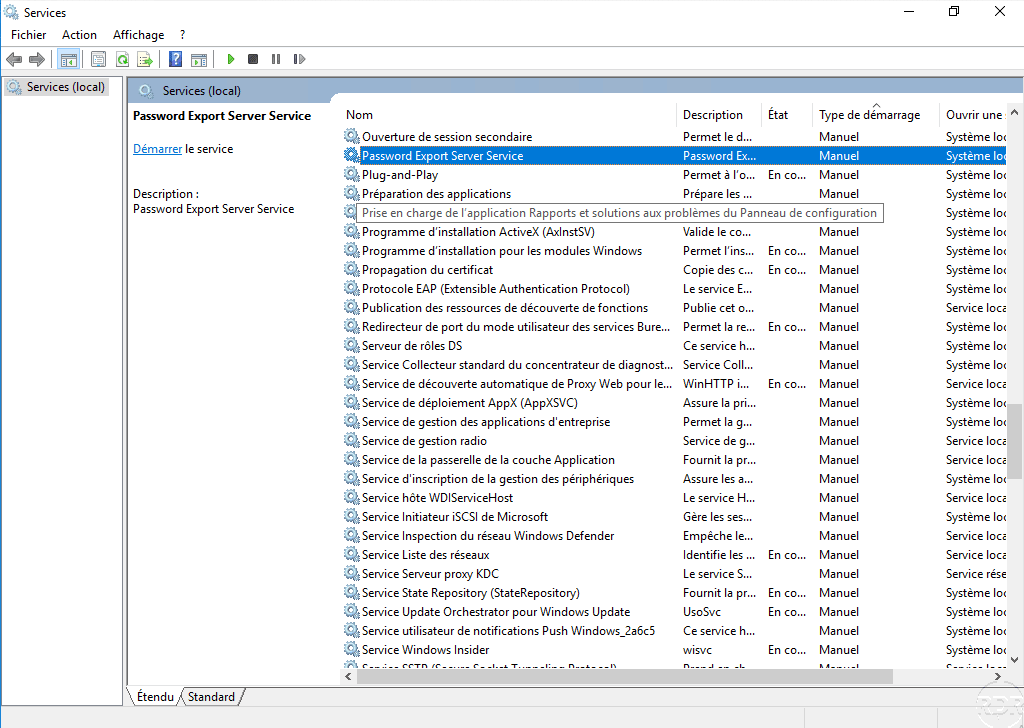
After the restart, find the Password Export Server Service service and start it.
Resolve the error during installation
It is possible that the password verification fails with the following message:
The supplied password does not match this encryption key’s password.
ADMT’s Password Migration Filter DLL will not install without a valid encryption key.

Close the installation wizard, open a command window in Administrator and enter the following command to adapt according to the location of the pwdmig.msi file:
msiexec -i C:\Apps\pwdmig.msi
Object migration: preparation
Now that ADMT and PES are installed, it is advisable at first to create an OU that will receive the objects of the source domain.
In the pages that follow we will see the migration of the following objects:
- Groups
- Users
- Computers.
In order to make sure that the migration is going well, I advise you before creating a test group and user and testing the computer migration before the production objects.
It is also necessary to provide communication at the user level of the domain change, be careful that users log on to the new domain.
During the first object migration, you will be prompted to configure the audit on the source and destination domain for SID migration so that the migrated object can access unmigrated resources.
Object migration
ADMT: Migrating a group
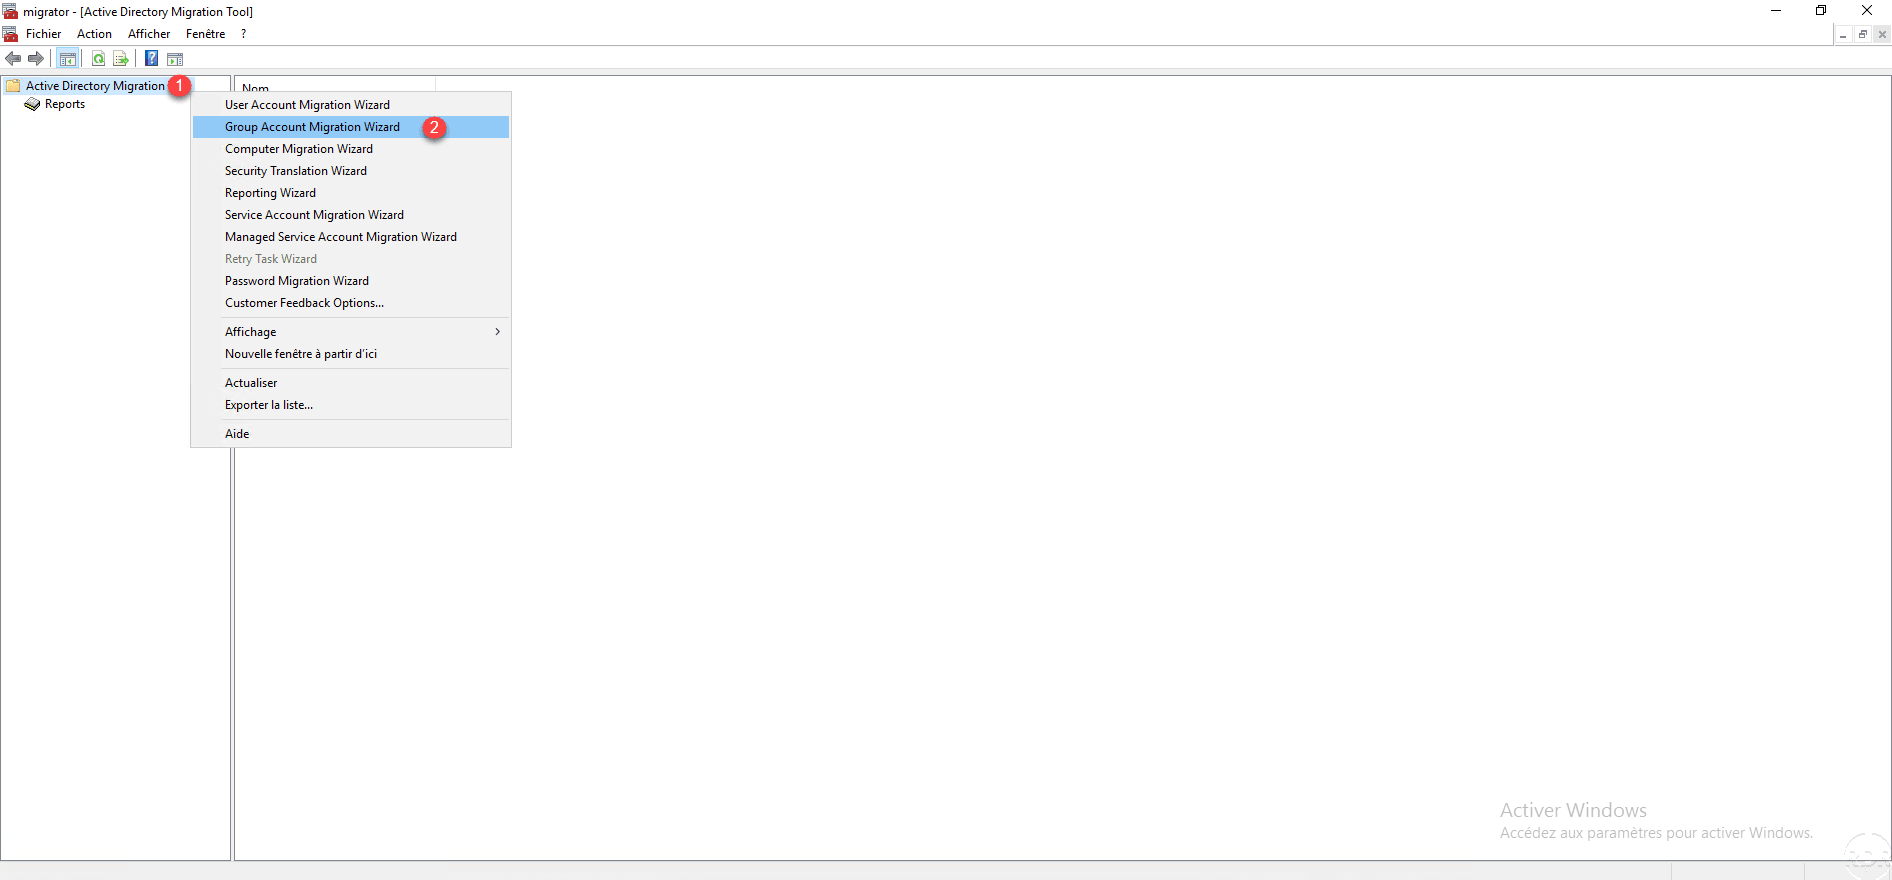
From the ADMT console, right-click Active Directory Migration Tool 1 and click Group Account Migration Wizard 2 to launch the wizard.
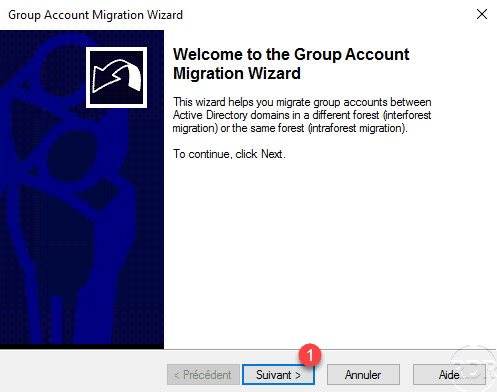
When launching the wizard, click Next 1 .
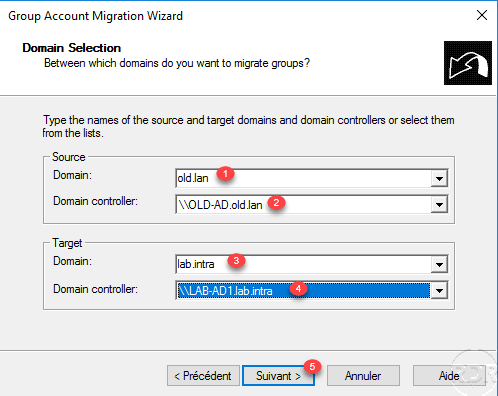
Select domain 1 and domain controller 2 source then do the same for destination domain 3 and controller 4 and click Next 5 .
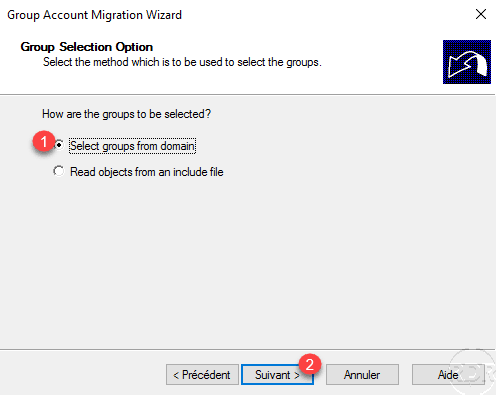
Select the Select group from domain 1 option and click Next 2 .
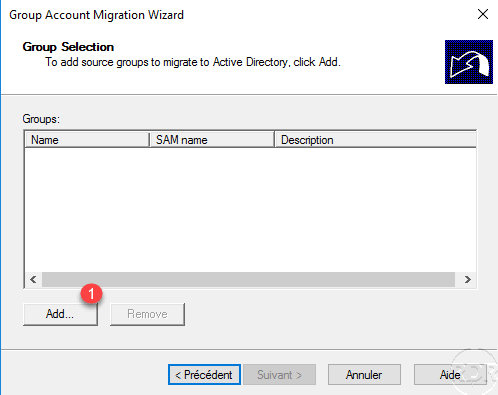
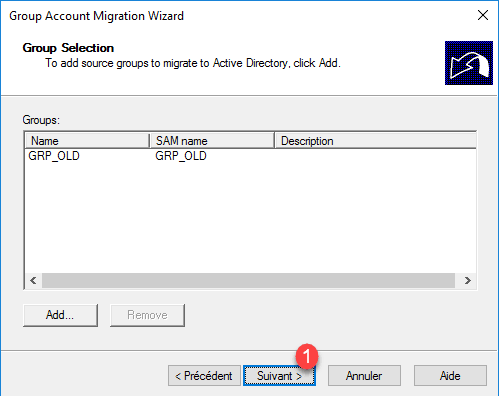
Click on Add 1 .
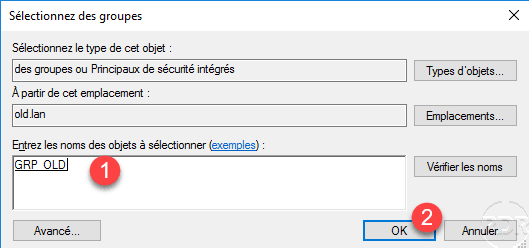
Select the group (s) to migrate 1 and click OK 2 .
Selected groups, click Next 1 .
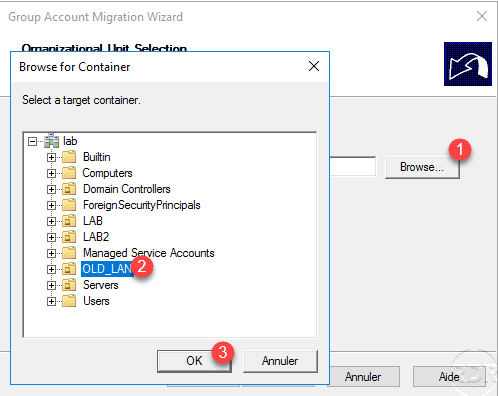
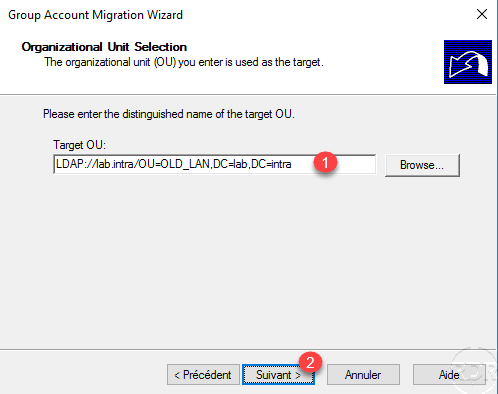
Click on Browser 1 then select destination OR 2 and click OK 3 .
The OU configured 1 , click Next 2 .
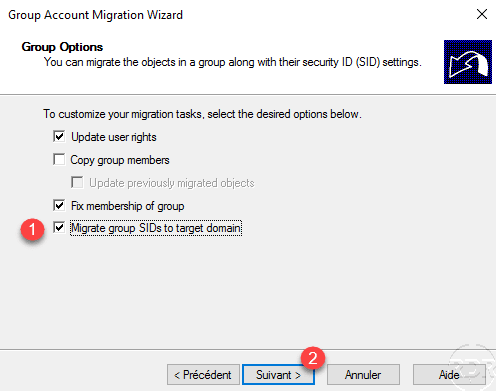
Select migration options, check Migrate group SIDs to target domain 1 and click Next 2 .
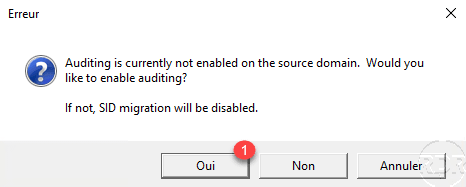
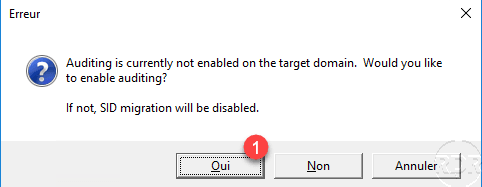
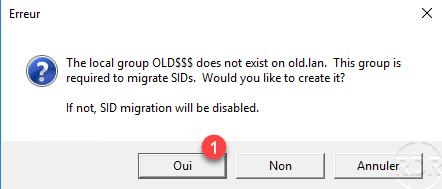
A warning message appears indicating that the audit is not configured, this is necessary for the SID migration, click Yes 1 for the 3 messages.
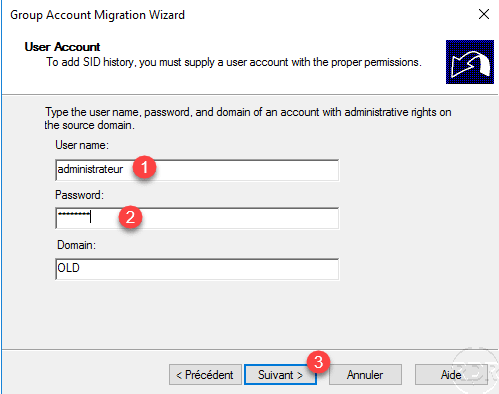
Enter the identifier 1 and the password 2 of an Administrator account of the source domain then click Next 3 .
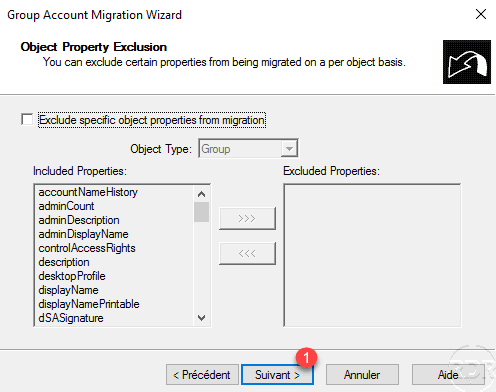
It is possible to choose the attributes to migrate on this page, by default they are all migrated to the target domain. Click Next 1 .
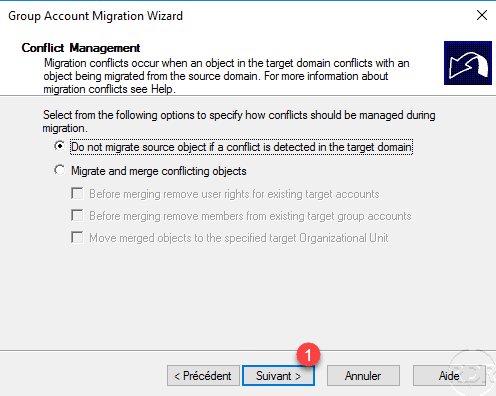
ADMT behavior configuration in case of conflict, by default if a conflict is detected the object is not migrated. Click Next 1 .
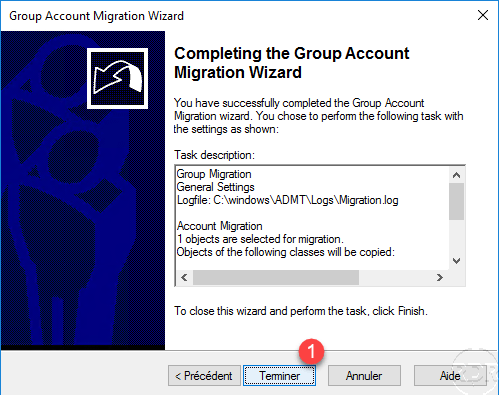
A summary displays the actions that will be performed, click Finish 1 to start the migration.
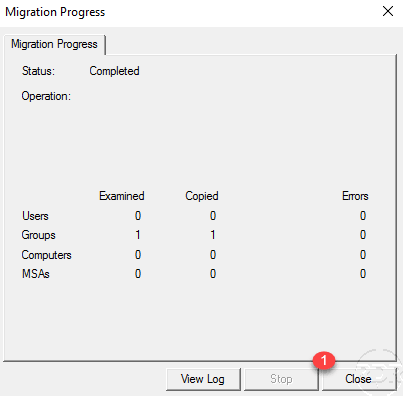
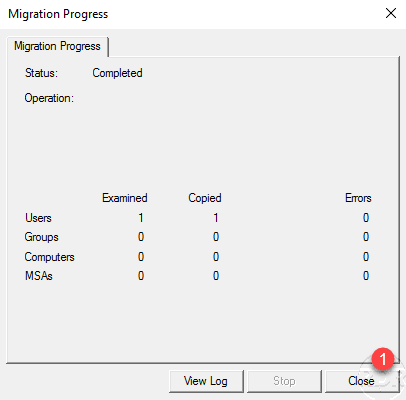
A window opens that allows you to follow the migration. Once finished it is possible to see the logs. If the migration went well, click on Close 1 .
Example of log:
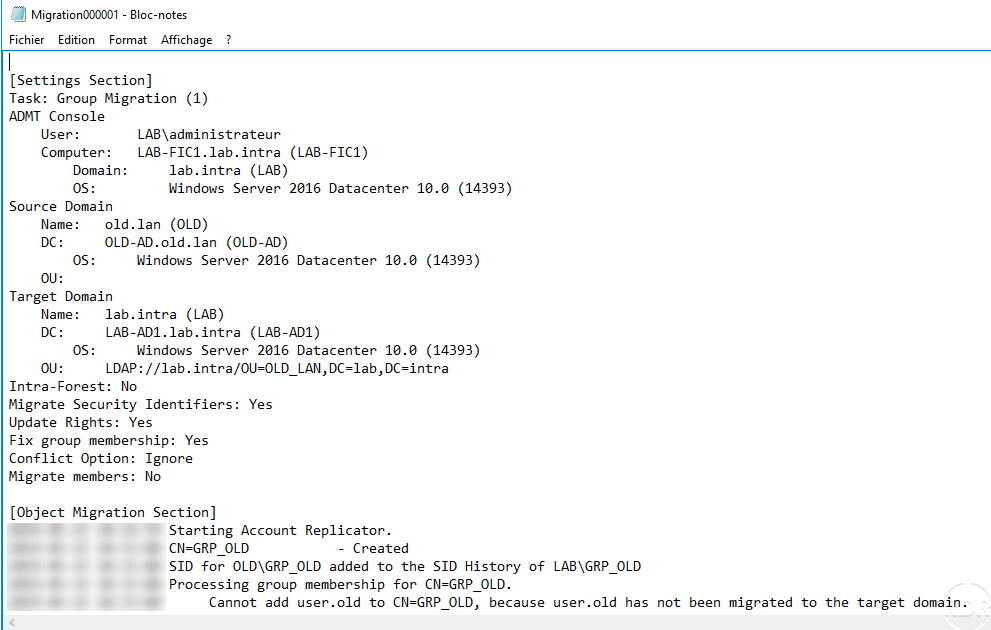
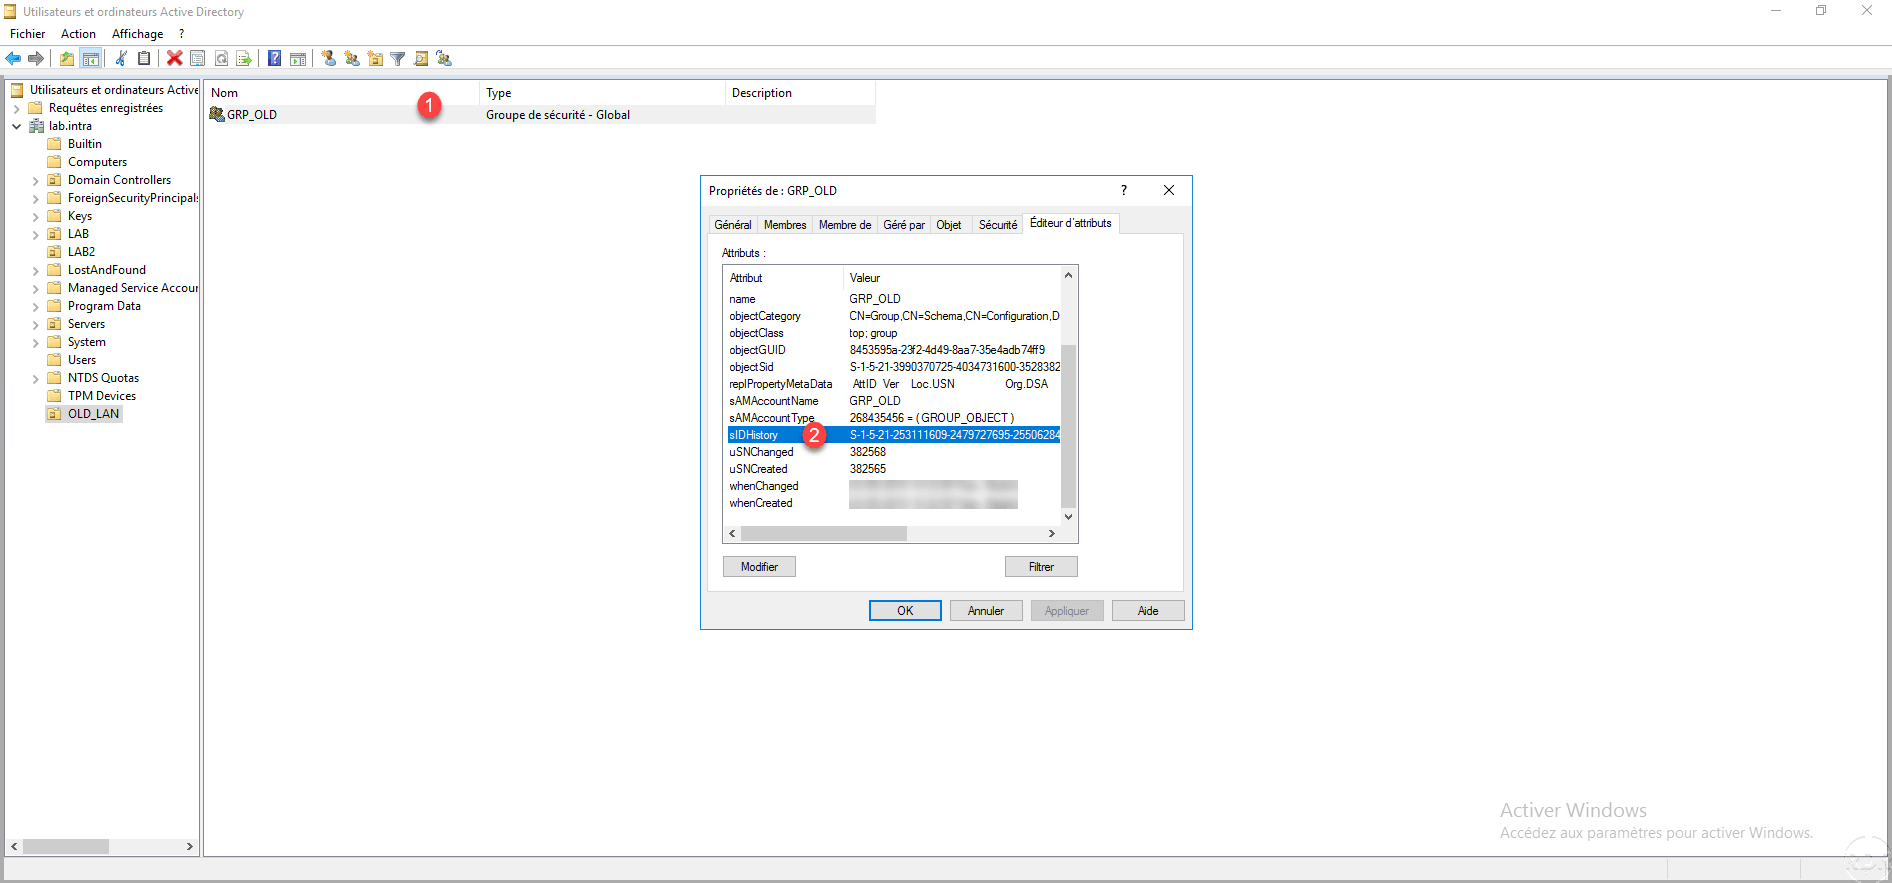
On the destination domain controller, check that group 1 is present in the OU. Also check that the attribute sIDHistory 2 is present and includes the SID of the source domain.
ADMT: Migrating a user
Now that we have seen how to migrate a group, we will migrate a user, the procedure is similar to groups.
To show you the features of ADMT, the user we are migrating is a member of the previously migrated group, after the user’s migration, the user will be a member of the group that was migrated just before.
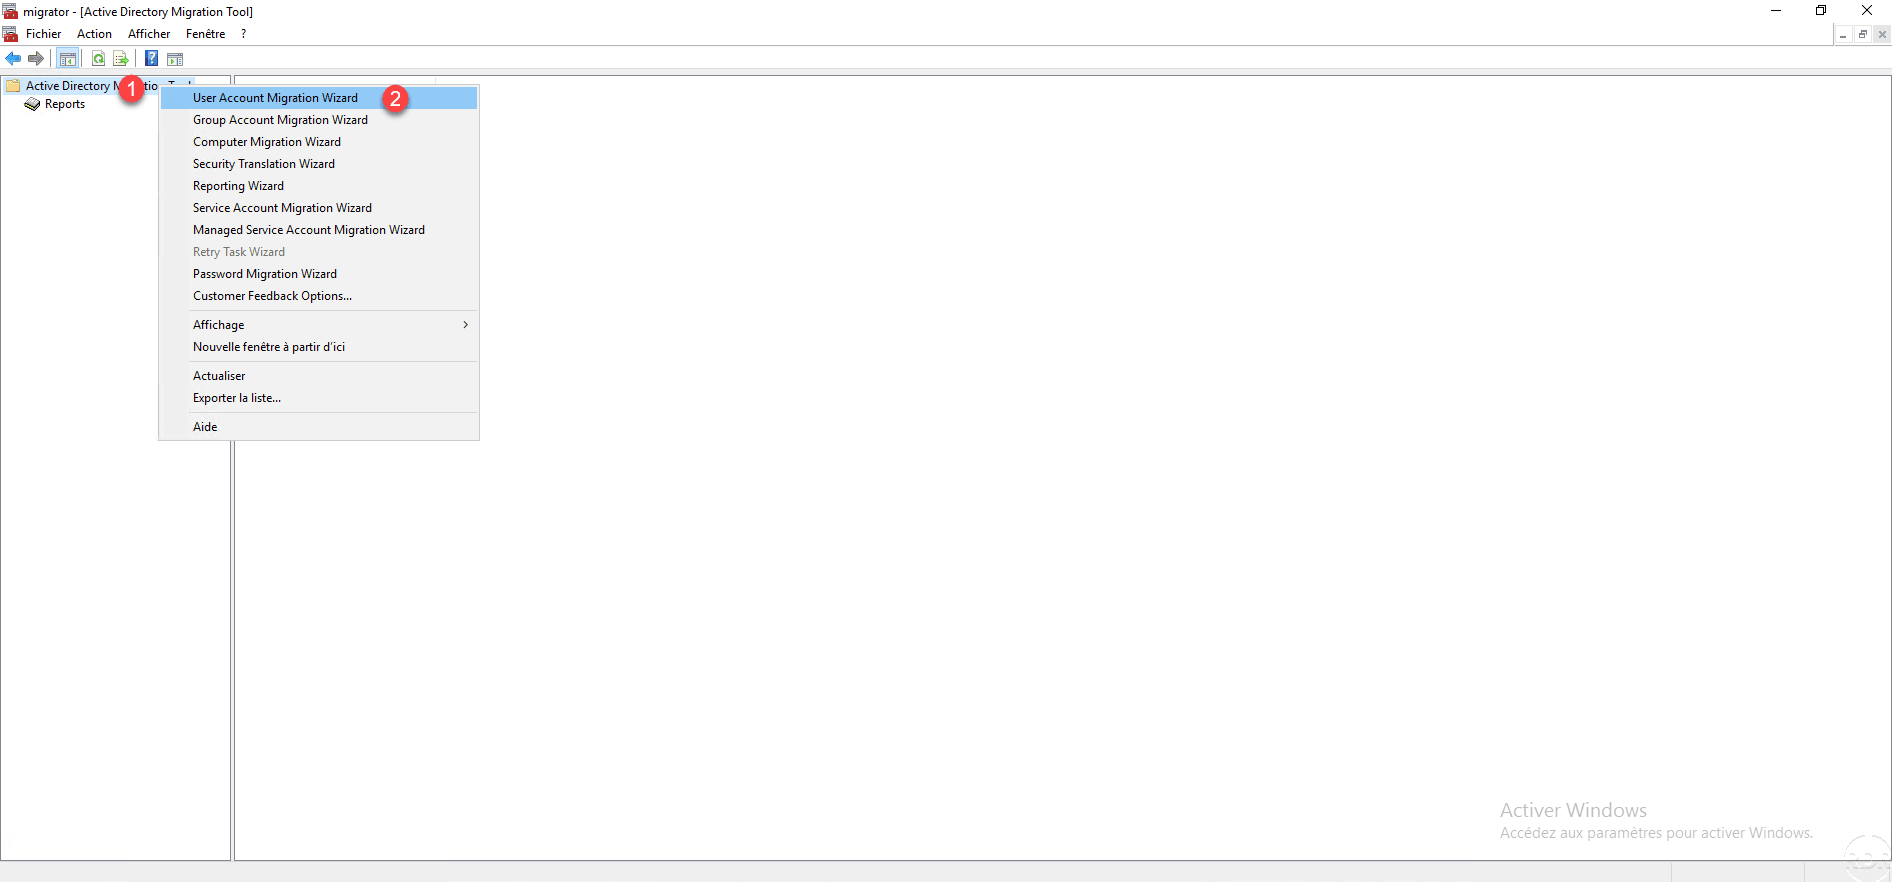
From the ADMT console, right click on Active Directory Migration Tool 1 and click on User Account Migration WIzard 2 .
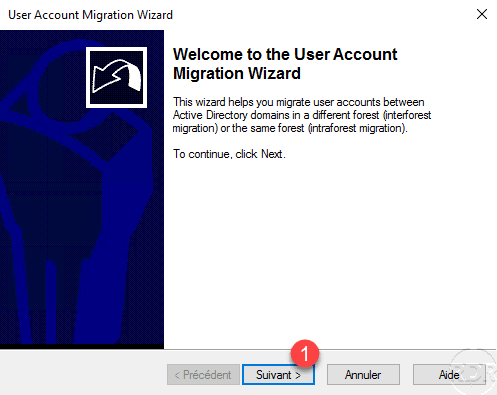
When launching the migration wizard, click Next 1 .
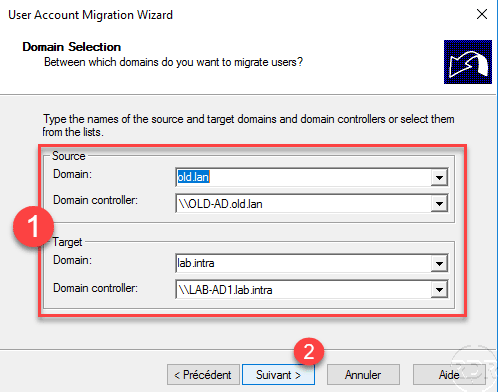
How for group migration, configure the domain and source and destination controller 1 then click Next 2 .
Choose Select users from domain 1 and click Next 2 .

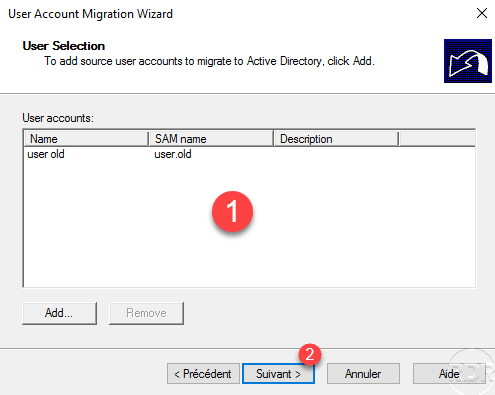
Select the user (s) to migrate 1 and click Next 2 .
Set destination OU 1 then click Next 2 .

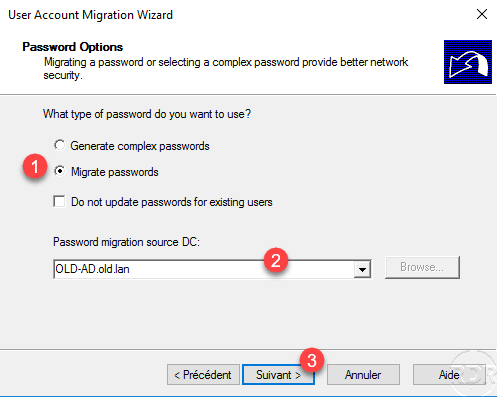
Select the option Migrate passwords 1 , indicate the source domain controller 2 and click Next 3 .
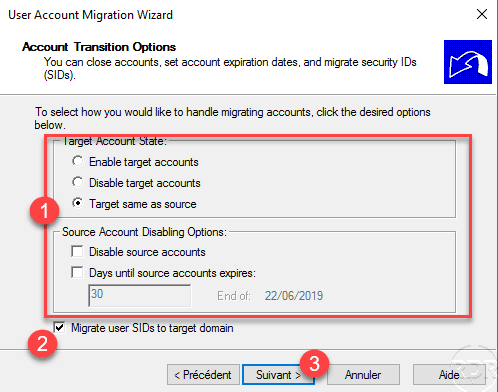
Configure the status of account 1 after the migration on the source and destination domain, check the box Migrate user SID to target domain 2 then click Next 3 .
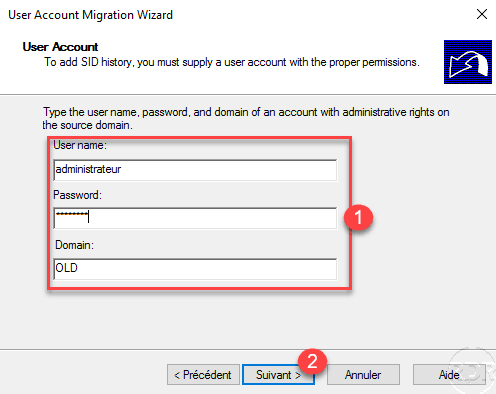
For SID migration, enter the credentials of an Administrator account from source domain 1 and click Next 2 .
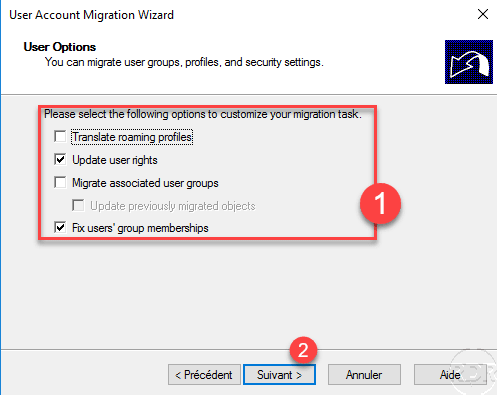
Configure migration options 1 then click Next 2 .
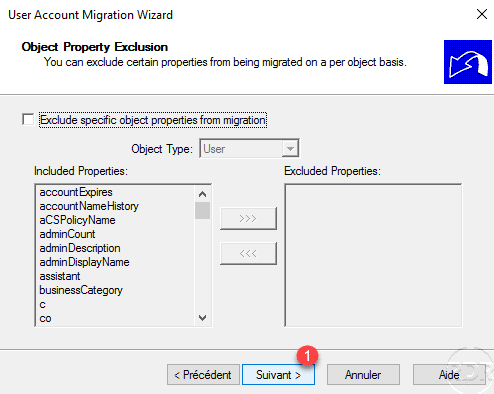
If necessary configure the attributes to exclude and click Next 1 .
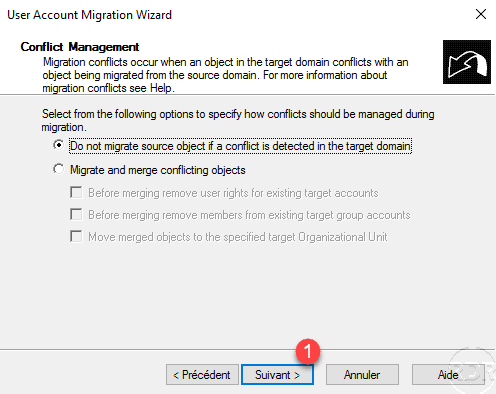
Configure conflict management and click Next 1 .
A summary of the migration settings is displayed, click Finish 1 to close the wizard and start the migration.
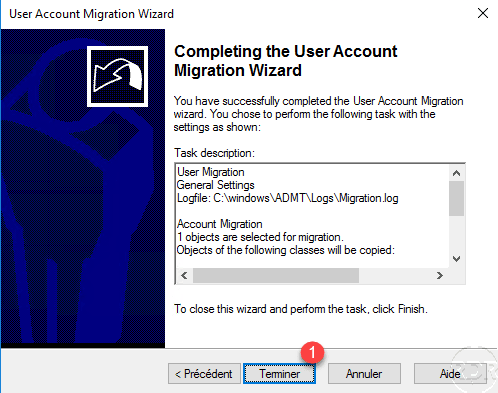
When the migration is complete, close 1 the migration window.
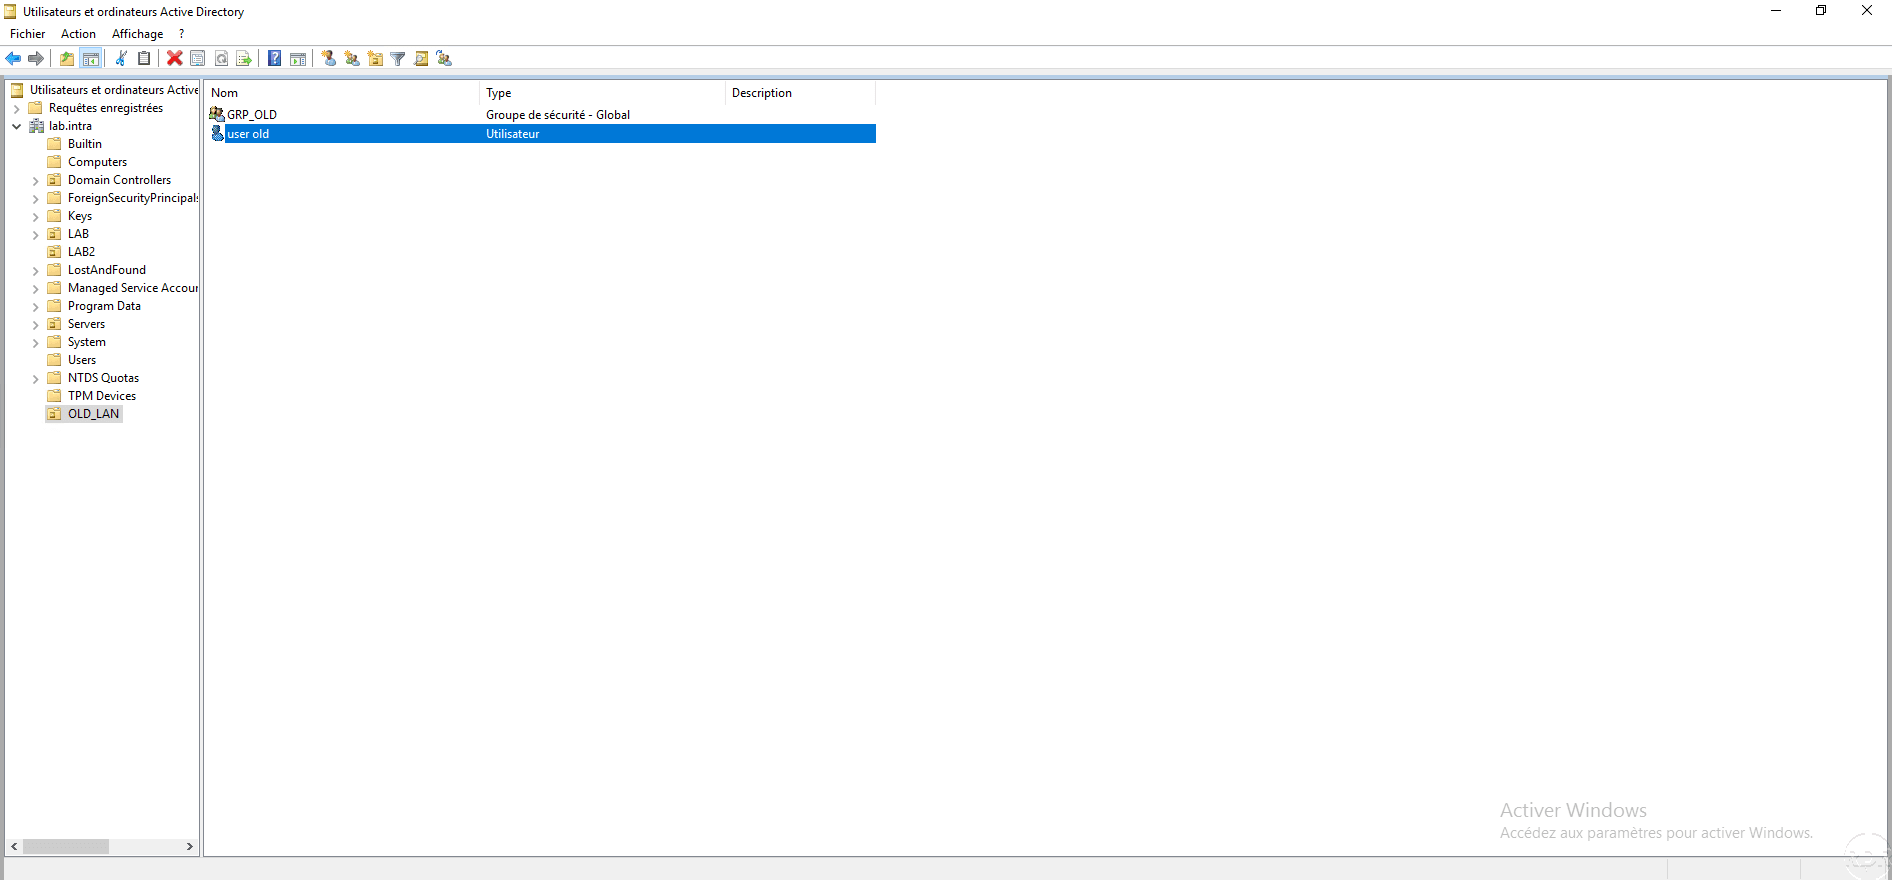
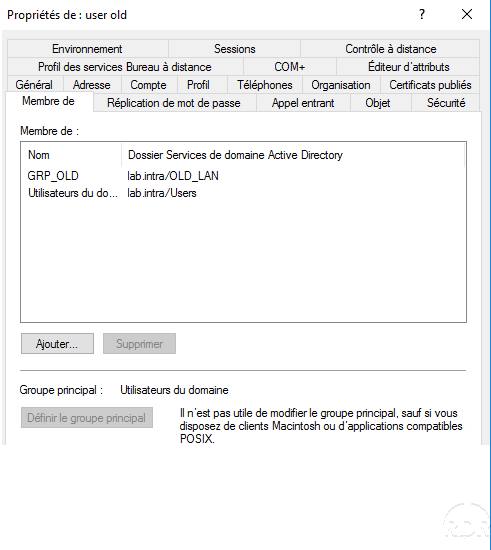
On the destination domain controller, we see that the user has been successfully migrated.
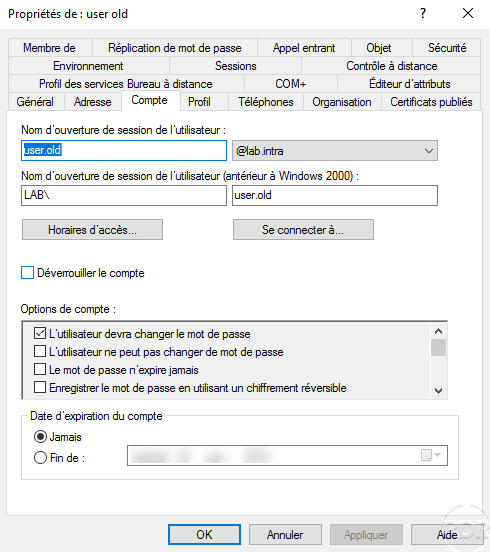
In the account properties, the password change box has been activated, which implies that the user must change his password at the next logon.
In the Member of tab, we also see that the user is a member of the previously migrated group.
ADMT: Computer Migration
ADMT also allows the migration of Computer objects, it is always possible to take the computer out of the old domain and join it in the new one. If the computer migration is available is that it brings a more how:
- Group tracking
- Processing user profiles which avoids having to redo the user profile.
The same wizard windows for migrating groups and users will be moved faster in this part.
As a reminder, the destination domain account configured for migration must be a local administrator of the extension.
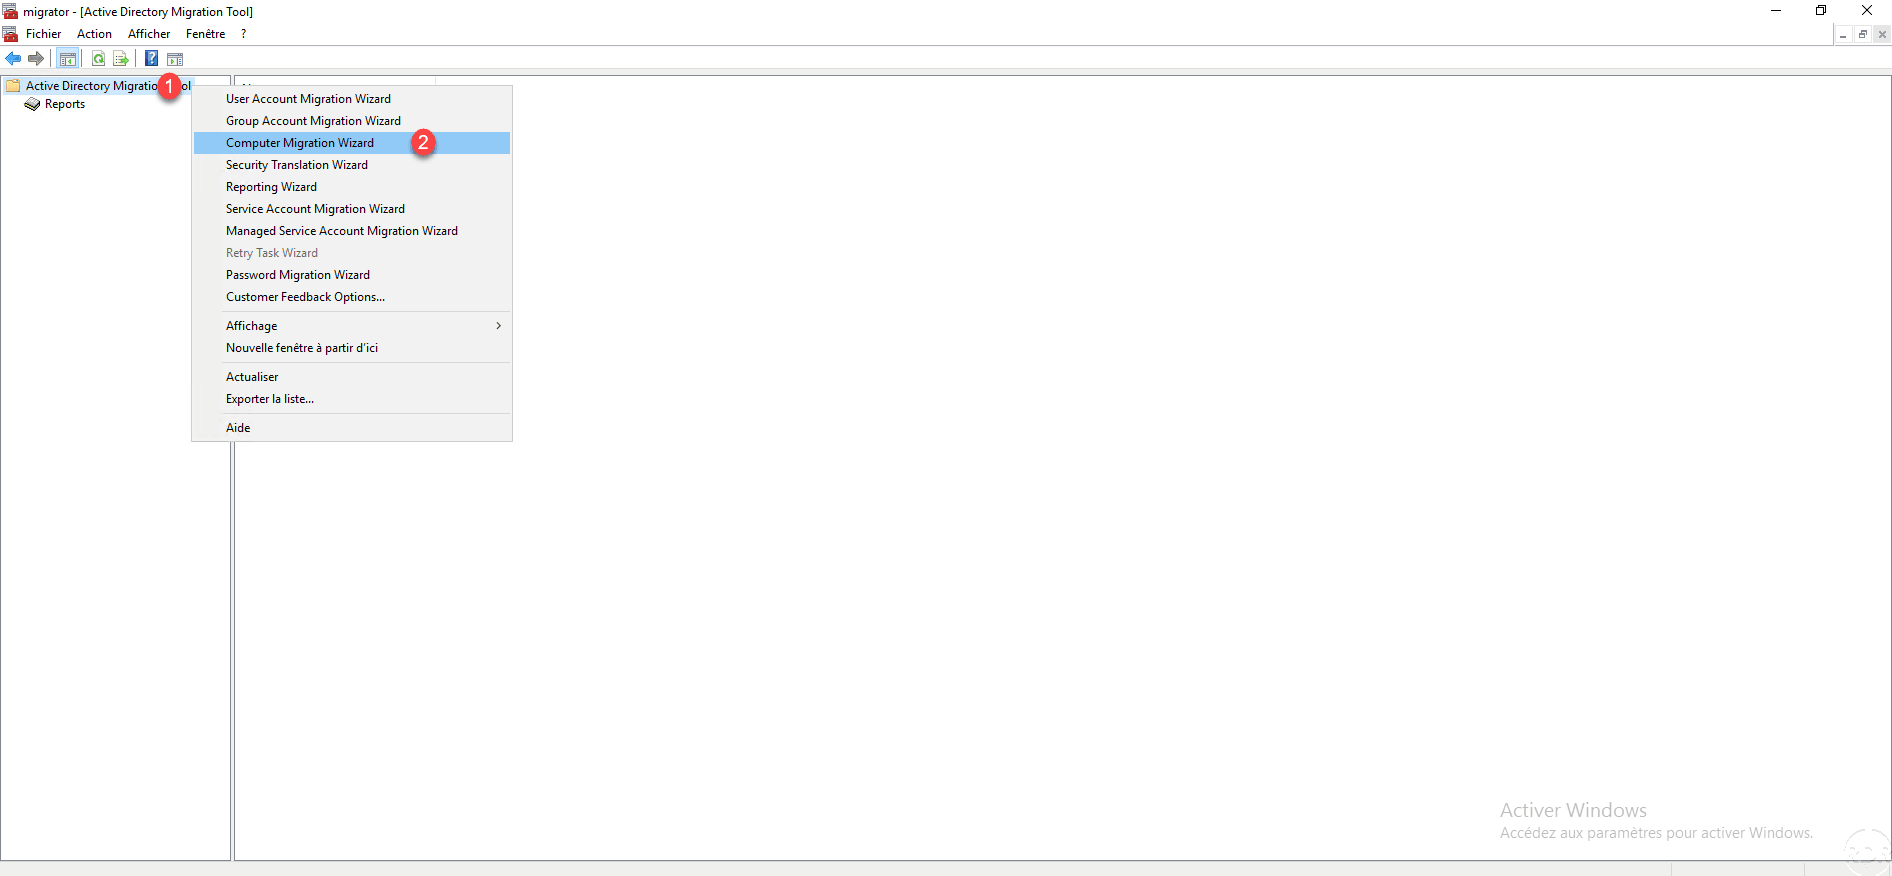
On the ADMT console, right-click on Active Directory Migration Tool 1 and click Computer Migration Wizard 2 .
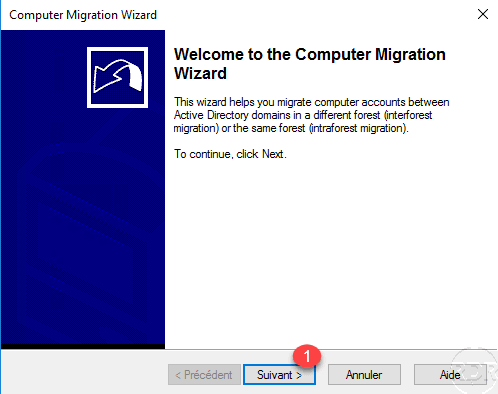
Click Next 1 .
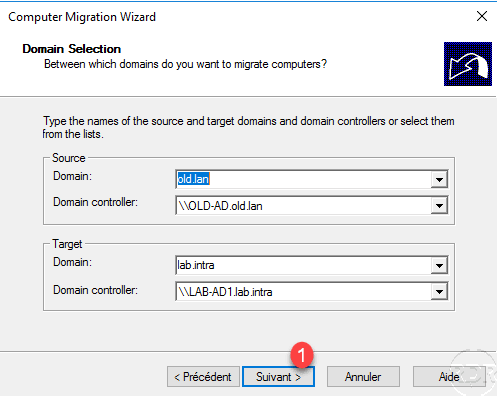
Configure the source and destination and click Next 1 .
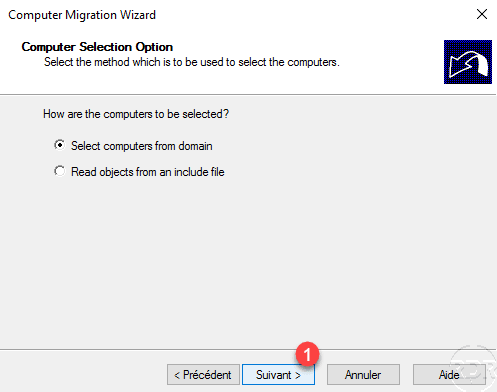
Click Next 1 on the computer selection option.
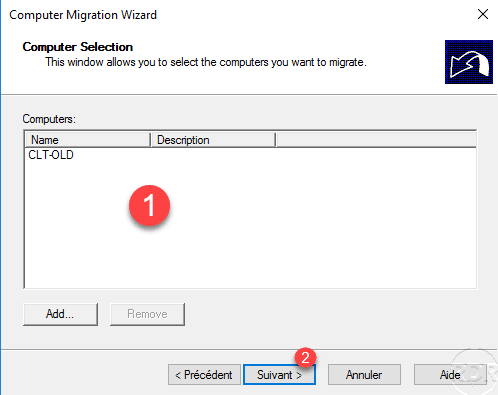
Choose the computer to migrate 1 and click Next 2 .
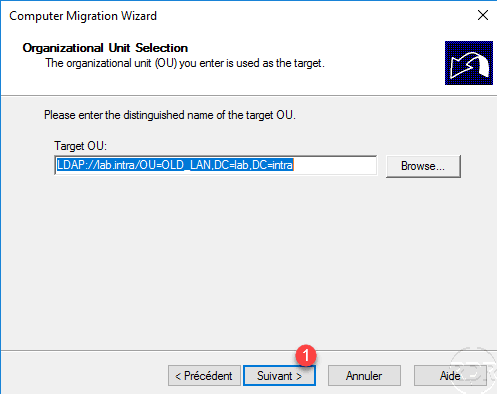
Validate the destination OU by clicking Next 1 .
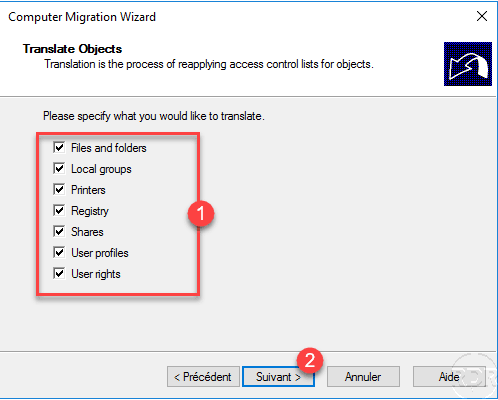
Select the objects to be transferred in the new domain 1 and click Next 2 .
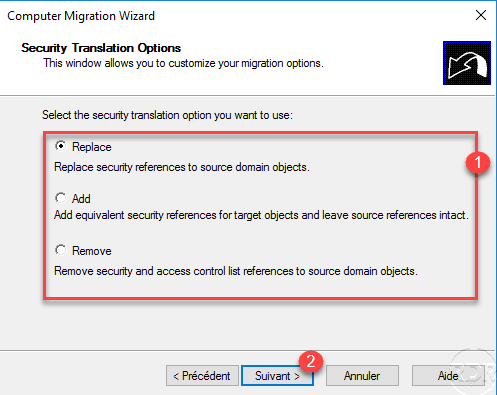
Configure Object Transfer 1 and click Next 2 .
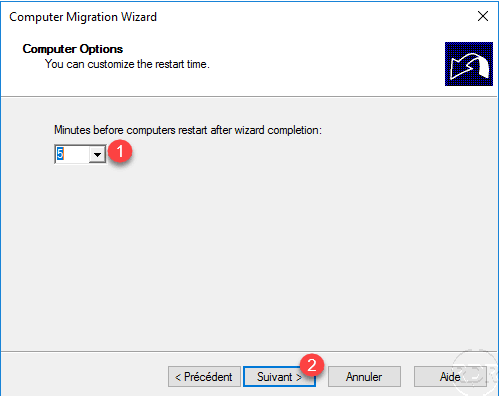
During the migration the computer will be restarted, set the 1 delay and click Next 2 .
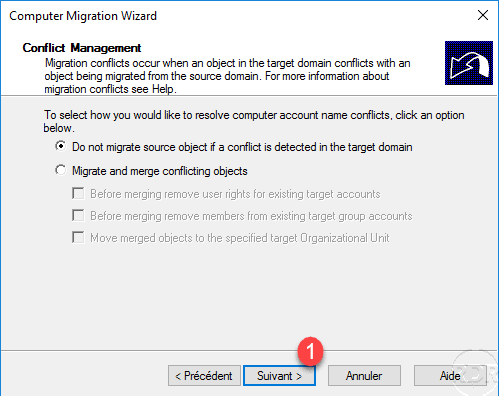
On the two windows that follow, click Next 1 .

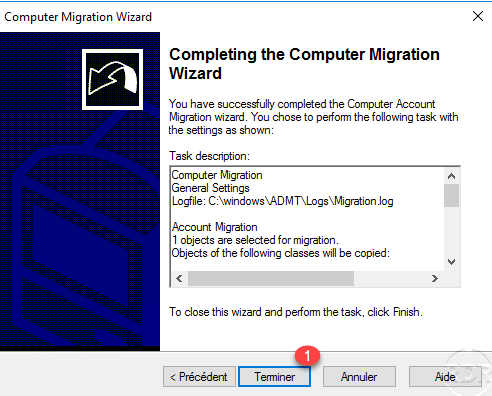
Start the migration by clicking Finish 1 to close the wizard.
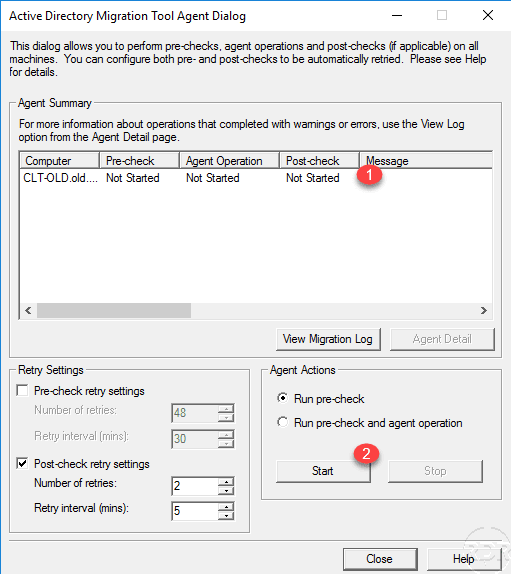
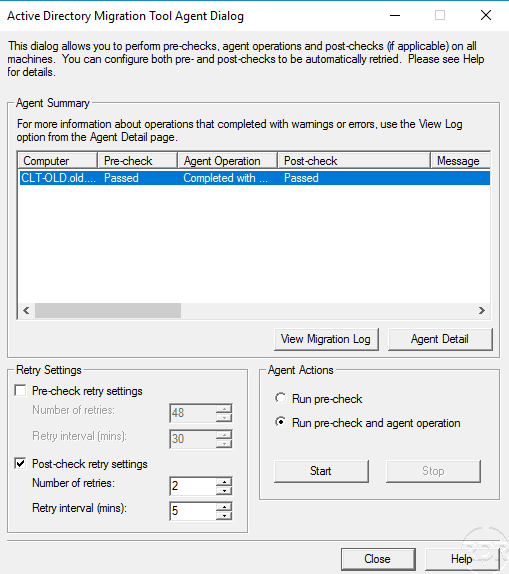
A window opens to control the migration agent, Select Computer 1 and click Start 2 .
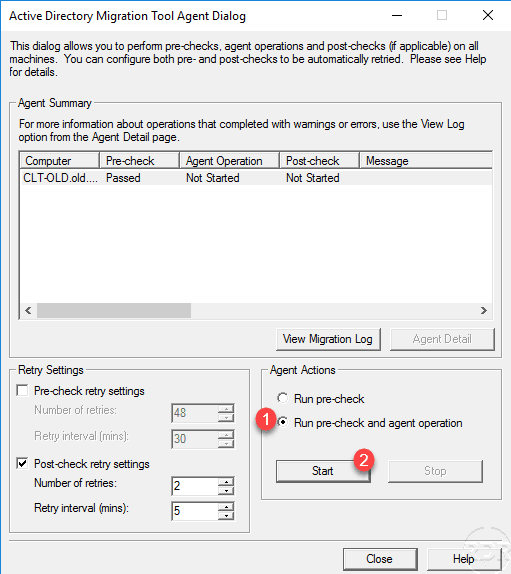
Once the tests are validated, select Run pre-check and agent operation 1 and click Start 2 .
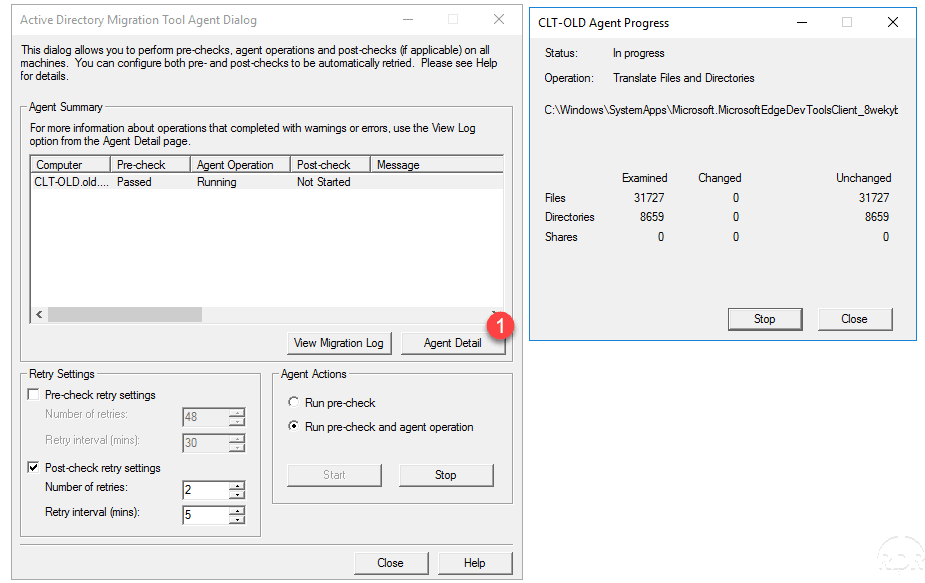
Waiting during migration … You can follow the migration in detail by clicking on Agent Detail 1 .
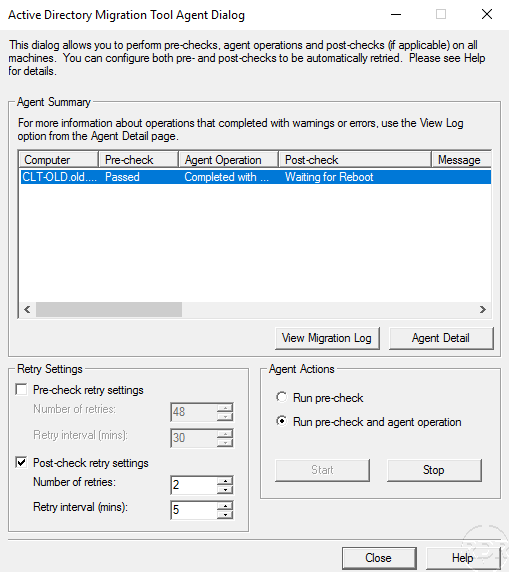
Once the migration is complete, we see that the computer is waiting to restart.
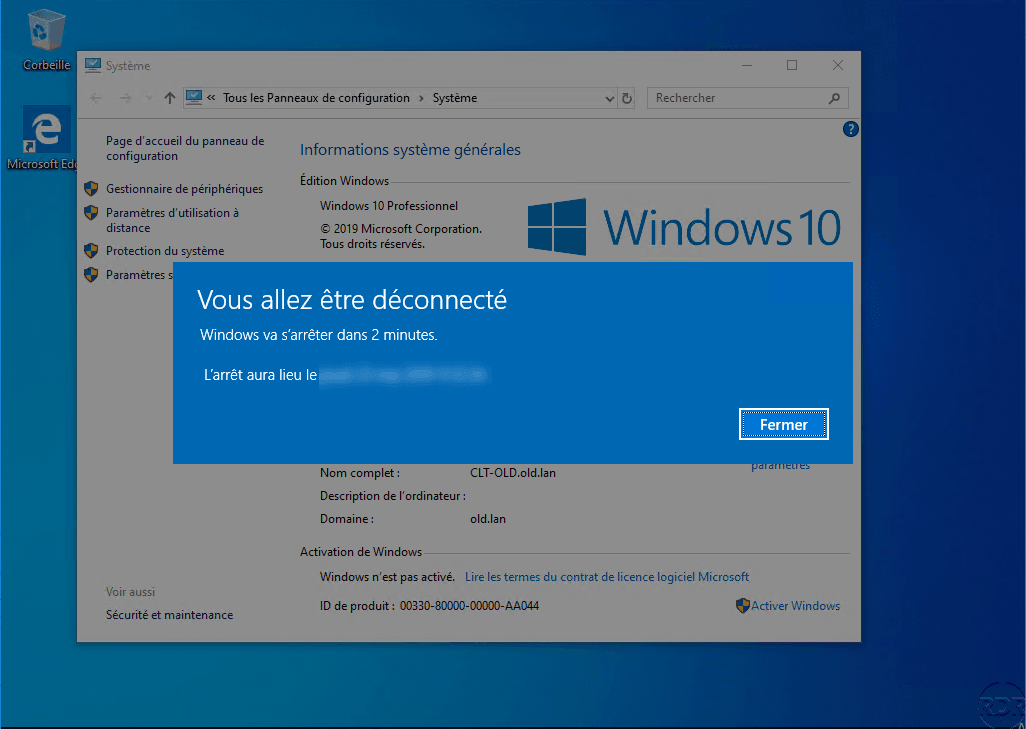
On the computer a message indicating that it will restart.
On the destination domain, we see that the computer is present in the migration OU.
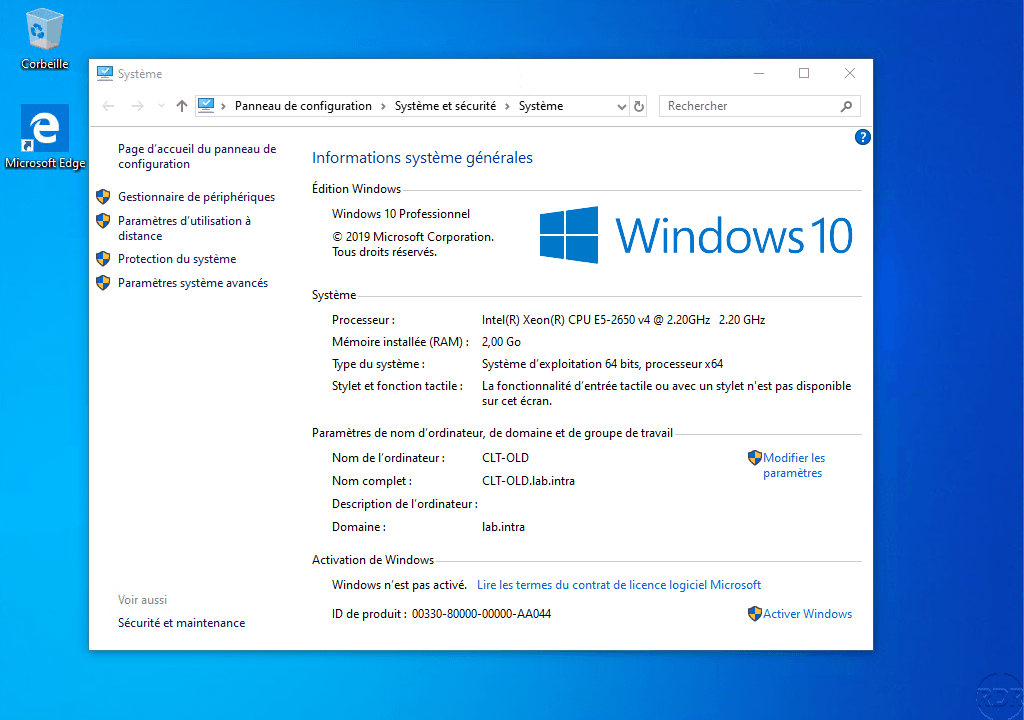
Once the post redemarred, we can see that it has been changed domain.
On the agent tracking window, we also see that the migration is complete.
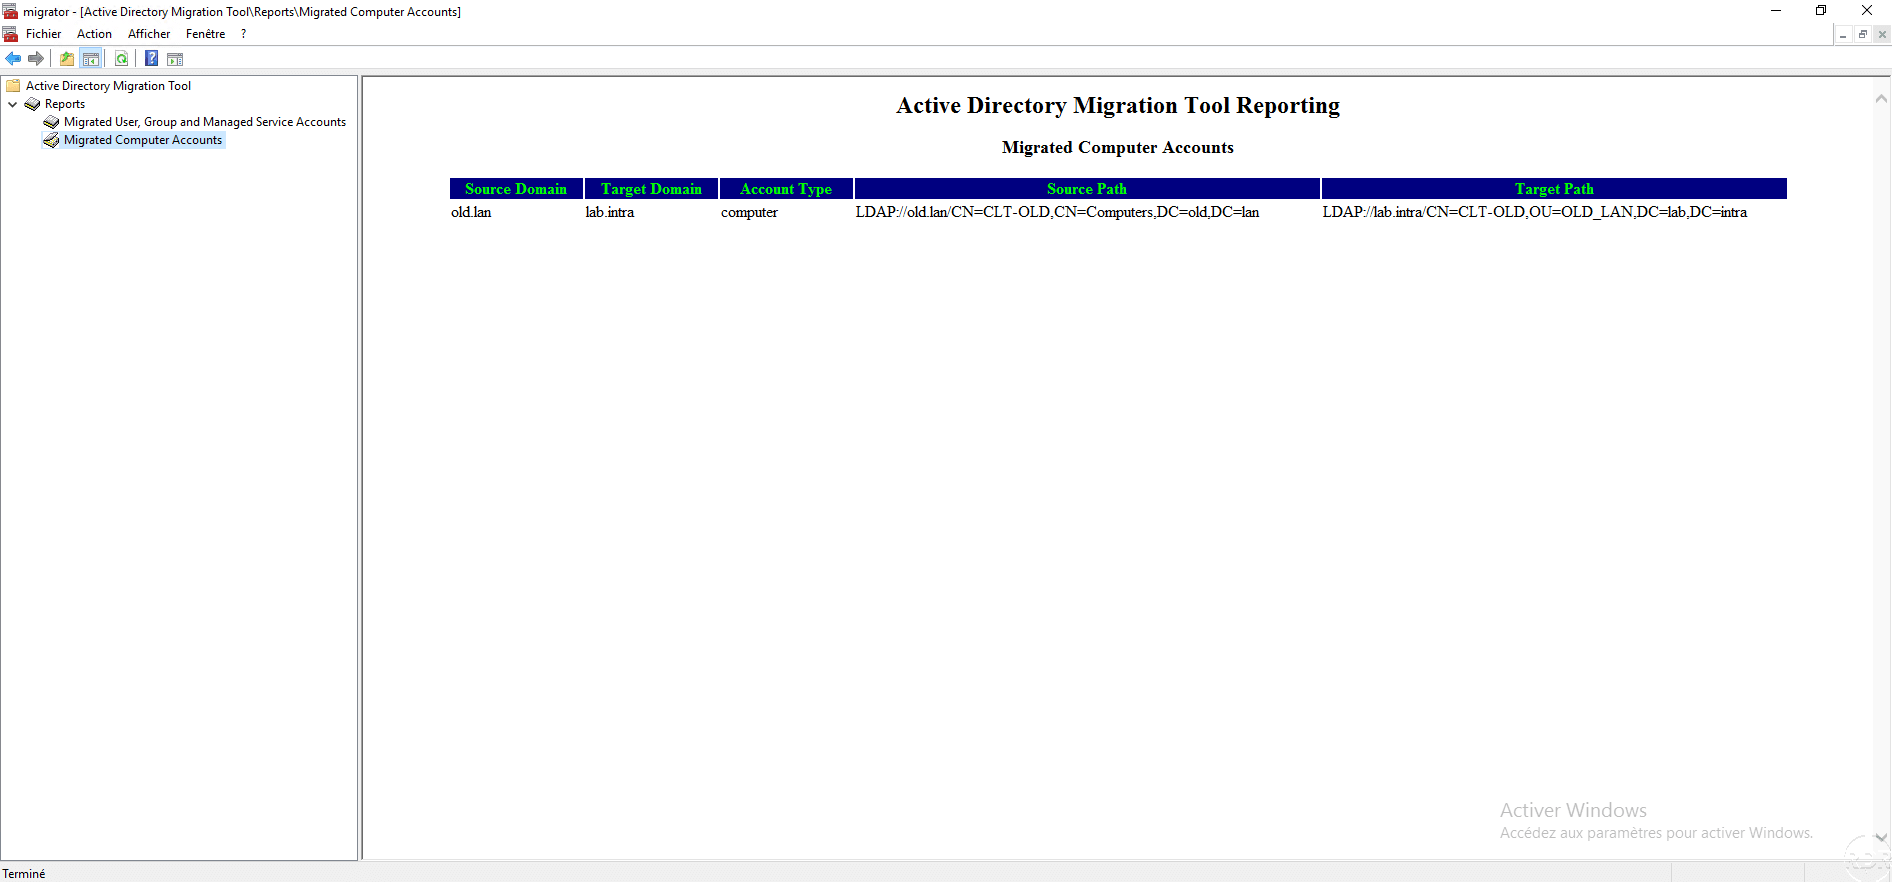
ADMT: report generation
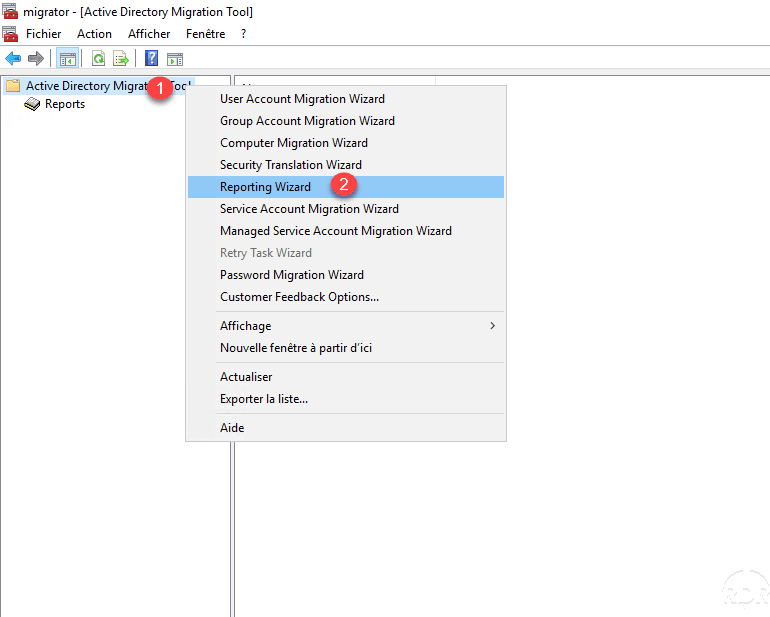
ADMT provides report generation to track migrated items. From the console, right-click on Active Directory Migration Tool 1 and click Report Wizard 2 .
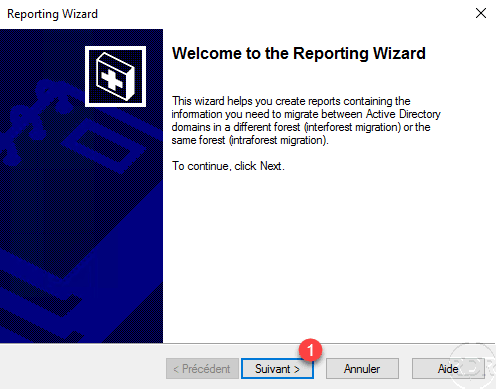
When launching the wizard, click Next 1 .
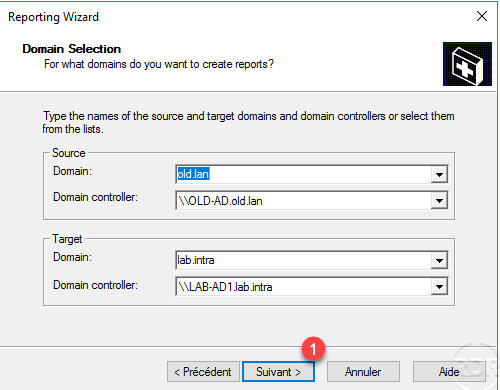
Select the source and destination domains for report generation and click Next 1 .
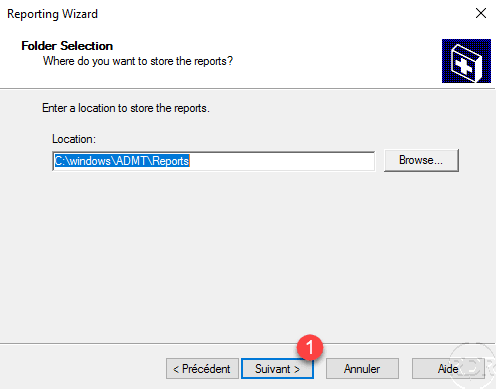
Select the location of the reports and click Next 1 .
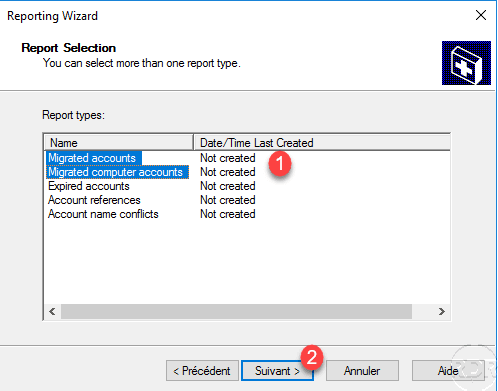
Choose the reports to generate 1 then click Next 2 .
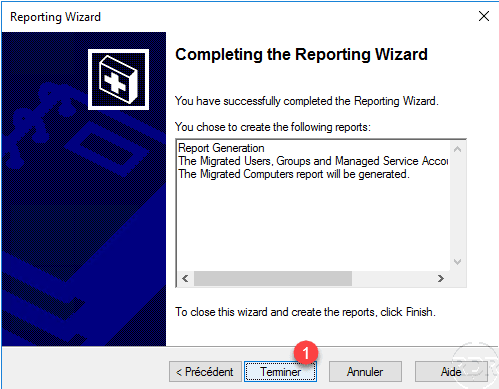
Click Finish 1 to start generating reports.
They are accessible from the console by clicking on Reports 1 .
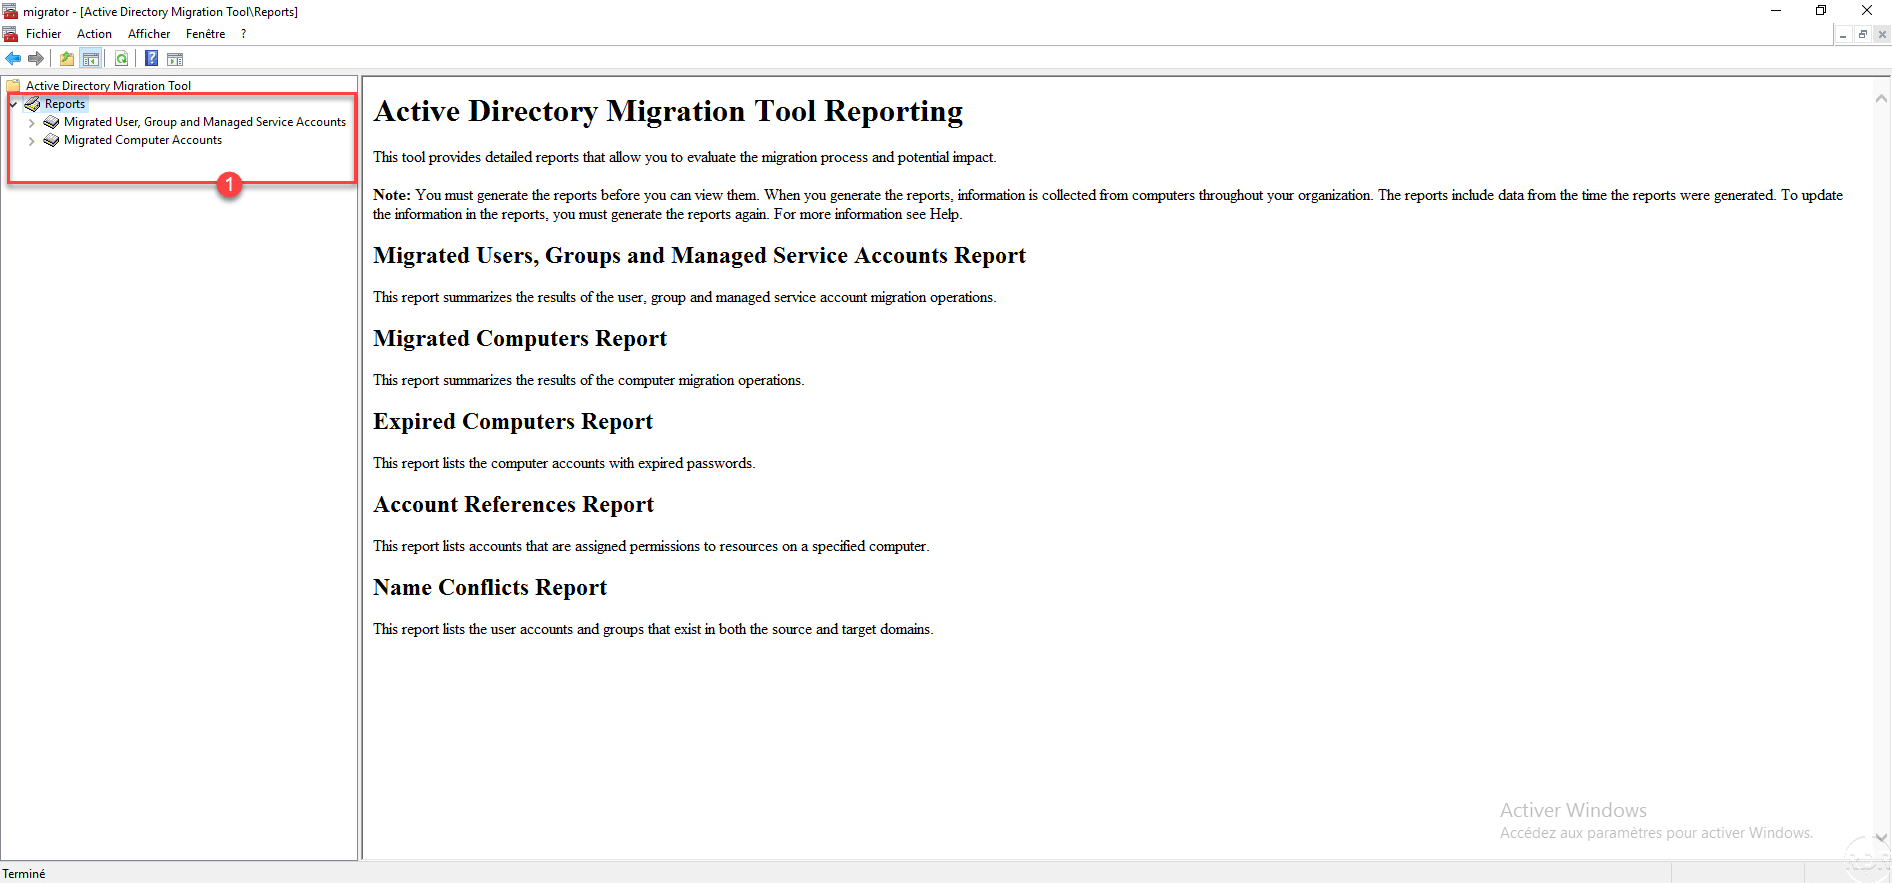
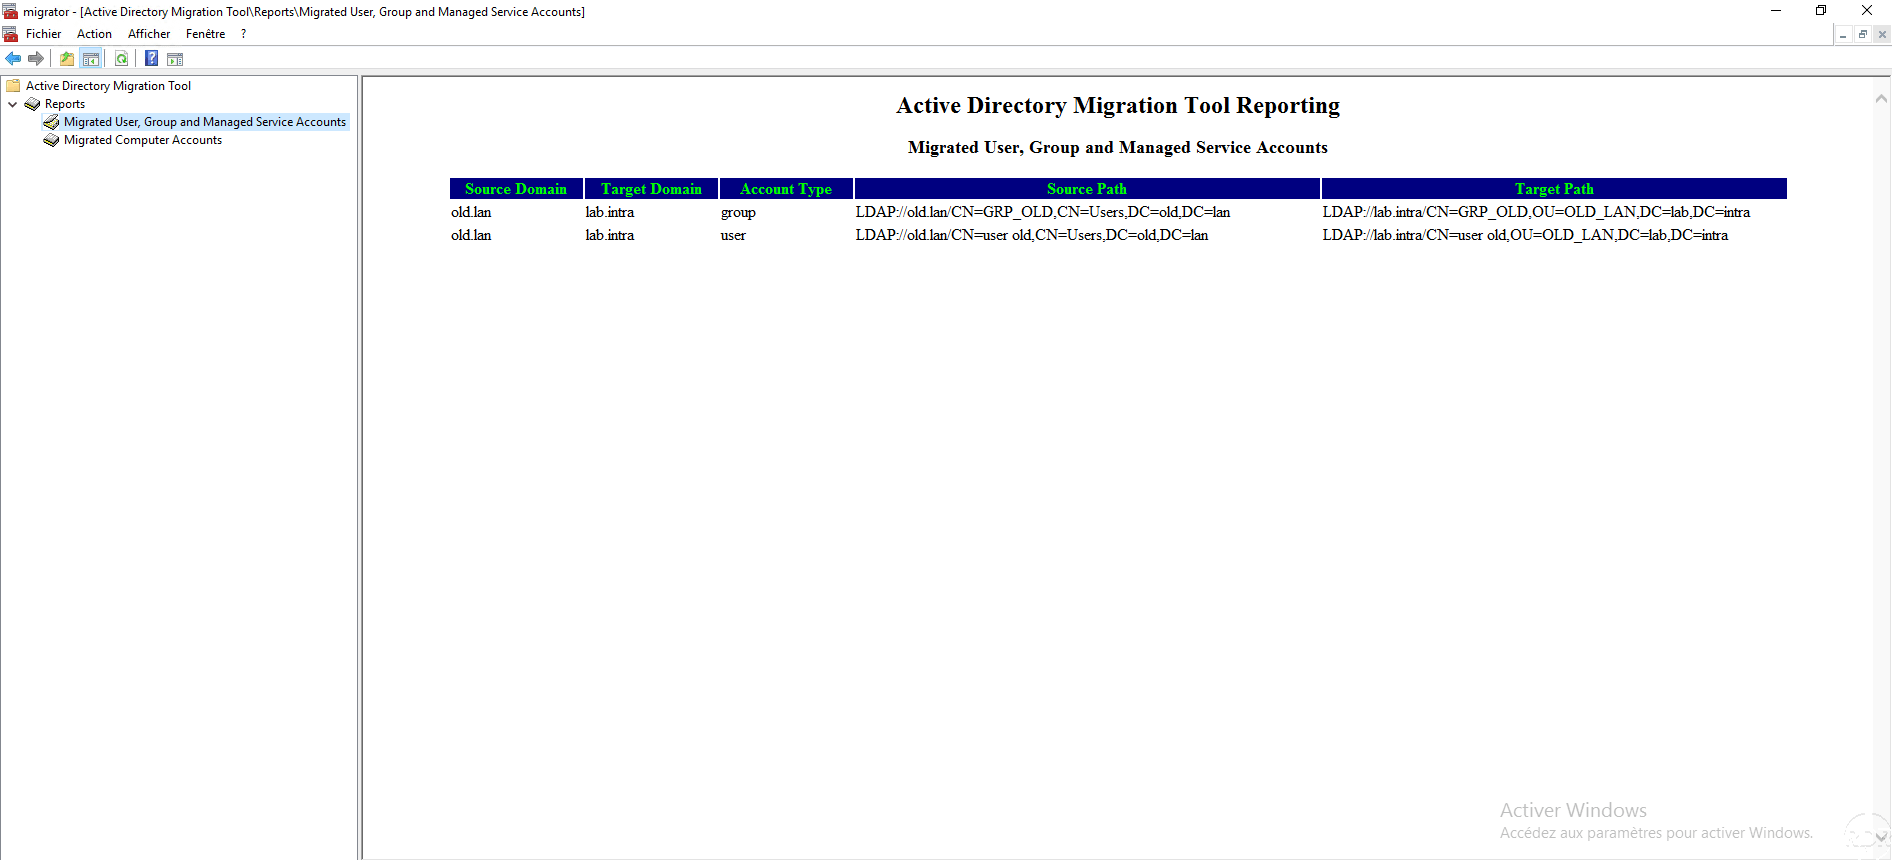
Sample reports:
Conclusion
ADMT is a convenient tool for environments where multiple domains coexist to either merge domains or to move objects from one domain to another in the event of a change of assignment for example.
Personally, I also use ADMT to migrate the objects of a corrumped forest to a new forest, this saved me from having to recreate all the objects (groups, computers and users) by hand.